
Search results for "Quick thinking" in Home Design Ideas

 Southwest Boulder & Stone
Karen transformed her front yard with 100% drought-tolerant landscaping, using water-wise plants and a wide variety of natural stone materials. Cobble, rubble, pebble, flagstone and crushed rock were combined to create a dry streambed that adds a fluid movement to the yard. A basalt fountain water feature was positioned near the entry.
Since Karen’s home is part of a Homeowner’s Association, speed was essential to the project. She hired Laura Eubanks of Design for Serenity to facilitate the quick turnaround, completing the project in just 5 days. Design for Serenity designed and installed the beautiful landscaping and succulent tapestries, while Karen herself selected the stone.
Karen thinks of landscape rock as a form of art, considering it to be one of the most important elements in her project. She spent several hours with Laura’s team selecting the perfect boulders and materials from our Fallbrook yard. Her hard work paid off: Karen’s guests and HOA neighbors all raved about the impact of natural stone in this total yard transformation.
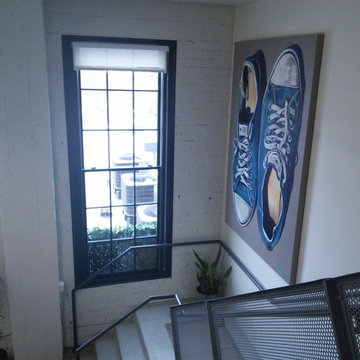
 by Design Furniture and Interior Design
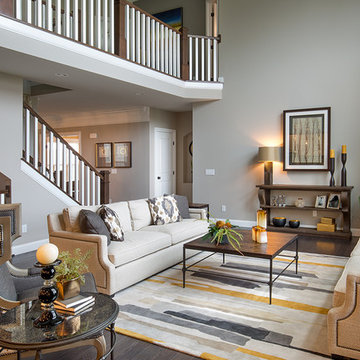
Laura Beeler: I recently took a call from a customer looking for a designer. The mission was to help him create a wonderful, new living space in his downtown Des Moines loft. Matt & I had an instant connection. Since he had been in by Design before, we quickly set up a house call. An additional challenge was time — he was hosting a big party in 4 weeks! We chose the Tristan sofa for it’s retro look. We love how it appears to “float” over the stainless sleigh base. (Light & airy pieces were important as we didn’t want to overpower the intimate space). We anchored the room with a deep pile, chunky shag rug and topped it with a large storage ottoman. The two George chairs can span the decades and certainly have a personality all their own. The repetition of the metal and tufting in all of the pieces gives continuity to the design – an important consideration when designing a space this eclectic. The open shelving offered more storage as well as giving a great silhouette against the original white brick wall. I think the end result suits him to a tee, whether he is relaxing or entertaining. The best part was that we had it all in place in the allotted time frame.
 Alisberg Parker
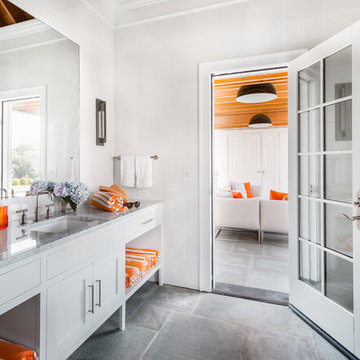
Bathroom - coastal gray floor bathroom idea in New York with shaker cabinets, white cabinets, white walls, an undermount sink, gray countertops and marble countertops
Find the right local pro for your project
 by Design Furniture and Interior Design
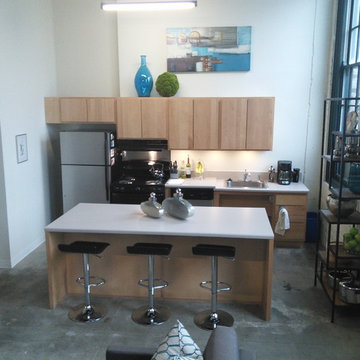
Laura Beeler: I recently took a call from a customer looking for a designer. The mission was to help him create a wonderful, new living space in his downtown Des Moines loft. Matt & I had an instant connection. Since he had been in by Design before, we quickly set up a house call. An additional challenge was time — he was hosting a big party in 4 weeks! We chose the Tristan sofa for it’s retro look. We love how it appears to “float” over the stainless sleigh base. (Light & airy pieces were important as we didn’t want to overpower the intimate space). We anchored the room with a deep pile, chunky shag rug and topped it with a large storage ottoman. The two George chairs can span the decades and certainly have a personality all their own. The repetition of the metal and tufting in all of the pieces gives continuity to the design – an important consideration when designing a space this eclectic. The open shelving offered more storage as well as giving a great silhouette against the original white brick wall. I think the end result suits him to a tee, whether he is relaxing or entertaining. The best part was that we had it all in place in the allotted time frame.
 by Design Furniture and Interior Design
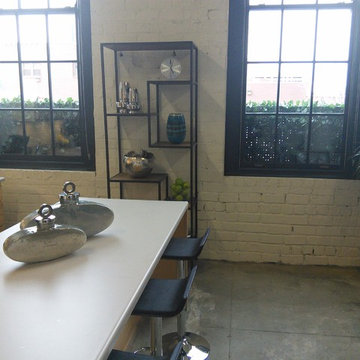
Laura Beeler: I recently took a call from a customer looking for a designer. The mission was to help him create a wonderful, new living space in his downtown Des Moines loft. Matt & I had an instant connection. Since he had been in by Design before, we quickly set up a house call. An additional challenge was time — he was hosting a big party in 4 weeks! We chose the Tristan sofa for it’s retro look. We love how it appears to “float” over the stainless sleigh base. (Light & airy pieces were important as we didn’t want to overpower the intimate space). We anchored the room with a deep pile, chunky shag rug and topped it with a large storage ottoman. The two George chairs can span the decades and certainly have a personality all their own. The repetition of the metal and tufting in all of the pieces gives continuity to the design – an important consideration when designing a space this eclectic. The open shelving offered more storage as well as giving a great silhouette against the original white brick wall. I think the end result suits him to a tee, whether he is relaxing or entertaining. The best part was that we had it all in place in the allotted time frame.
 Indian Story
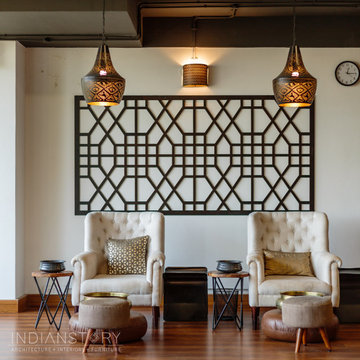
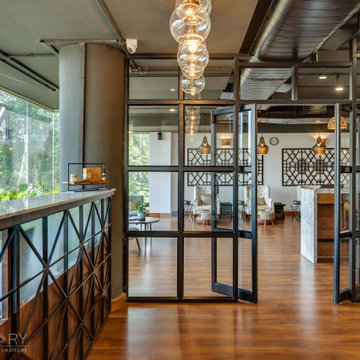
When people think of a salon, we visualize a quick paced space, full of bustle. This salon is designed to be a refuge for one, in oneself. The colours are warm and earthy, the light is functional yet soothing. The natural light is also welcomed in, with a beautiful tree as the backdrop. The Material palette is carefully composed together with shades of Walnut wood complemented by Matte Black paint and Off-White Paint. The warm tones in fabric, and the brass accents add a layer of comfort along with the placement of natural plants.
The reception area and lounge is designed to give the customers a peek of the space and the luxurious experience that awaits them. The salon space itself is spread out, and minimal; fabric chairs also designed and manufactured by us, to sink into. The space is designed to connect people visually to the surrounding and to other people should they choose to be, and to the staff, that they always feel like they’re being taken care of, but also zoned such that one can choose to be reclusive and enjoy the company of oneself.
The warmth we were able to achieve with the space was a result of well curated fabric, the right furniture type. with the pop of brass accents and the lighting. It is a perfect marriage of function and aesthetic in our clients’ eyes.
 Indian Story
When people think of a salon, we visualize a quick paced space, full of bustle. This salon is designed to be a refuge for one, in oneself. The colours are warm and earthy, the light is functional yet soothing. The natural light is also welcomed in, with a beautiful tree as the backdrop. The Material palette is carefully composed together with shades of Walnut wood complemented by Matte Black paint and Off-White Paint. The warm tones in fabric, and the brass accents add a layer of comfort along with the placement of natural plants.
The reception area and lounge is designed to give the customers a peek of the space and the luxurious experience that awaits them. The salon space itself is spread out, and minimal; fabric chairs also designed and manufactured by us, to sink into. The space is designed to connect people visually to the surrounding and to other people should they choose to be, and to the staff, that they always feel like they’re being taken care of, but also zoned such that one can choose to be reclusive and enjoy the company of oneself.
The warmth we were able to achieve with the space was a result of well curated fabric, the right furniture type. with the pop of brass accents and the lighting. It is a perfect marriage of function and aesthetic in our clients’ eyes.
Sponsored
Sunbury, OH

J.Holderby - Renovations
Franklin County's Leading General Contractors - 2X Best of Houzz!
 Kathleen Jennison
An Arts & Crafts Bungalow is one of my favorite styles of homes. We have quite a few of them in our Stockton Mid-Town area. And when C&L called us to help them remodel their 1923 American Bungalow, I was beyond thrilled.
As per usual, when we get a new inquiry, we quickly Google the project location while we are talking to you on the phone. My excitement escalated when I saw the Google Earth Image of the sweet Sage Green bungalow in Mid-Town Stockton. "Yes, we would be interested in working with you," I said trying to keep my cool.
But what made it even better was meeting C&L and touring their home, because they are the nicest young couple, eager to make their home period perfect. Unfortunately, it had been slightly molested by some bad house-flippers, and we needed to bring the bathroom back to it "roots."
We knew we had to banish the hideous brown tile and cheap vanity quickly. But C&L complained about the condensation problems and the constant fight with mold. This immediately told me that improper remodeling had occurred and we needed to remedy that right away.
The Before: Frustrations with a Botched Remodel
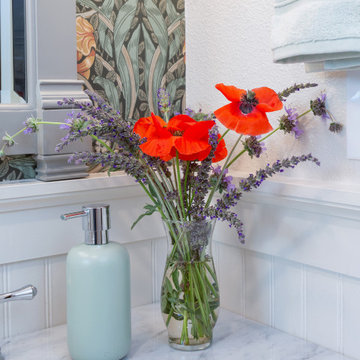
The bathroom needed to be brought back to period appropriate design with all the functionality of a modern bathroom. We thought of things like marble countertop, white mosaic floor tiles, white subway tile, board and batten molding, and of course a fabulous wallpaper.
This small (and only) bathroom on a tight budget required a little bit of design sleuthing to figure out how we could get the proper look and feel. Our goal was to determine where to splurge and where to economize and how to complete the remodel as quickly as possible because C&L would have to move out while construction was going on.
The Process: Hard Work to Remedy Design and Function
During our initial design study, (which included 2 hours in the owners’ home), we noticed framed images of William Morris Arts and Crafts textile patterns and knew this would be our design inspiration. We presented C&L with three options and they quickly selected the Pimpernel Design Concept.
We had originally selected the Black and Olive colors with a black vanity, mirror, and black and white floor tile. C&L liked it but weren’t quite sure about the black, We went back to the drawing board and decided the William & Co Pimpernel Wallpaper in Bayleaf and Manilla color with a softer gray painted vanity and mirror and white floor tile was more to their liking.
After the Design Concept was approved, we went to work securing the building permit, procuring all the elements, and scheduling our trusted tradesmen to perform the work.
We did uncover some shoddy work by the flippers such as live electrical wires hidden behind the wall, plumbing venting cut-off and buried in the walls (hence the constant dampness), the tub barely balancing on two fence boards across the floor joist, and no insulation on the exterior wall.
All of the previous blunders were fixed and the bathroom put back to its previous glory. We could feel the house thanking us for making it pretty again.
The After Reveal: Cohesive Design Decisions
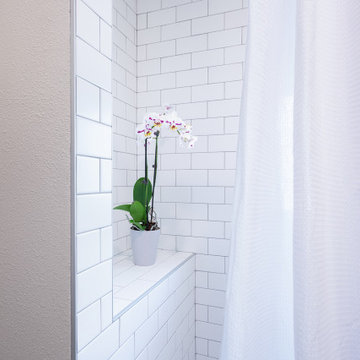
We selected a simple white subway tile for the tub/shower. This is always classic and in keeping with the style of the house.
We selected a pre-fab vanity and mirror, but they look rich with the quartz countertop. There is much more storage in this small vanity than you would think.
The Transformation: A Period Perfect Refresh
We began the remodel just as the pandemic reared and stay-in-place orders went into effect. As C&L were already moved out and living with relatives, we got the go-ahead from city officials to get the work done (after all, how can you shelter in place without a bathroom?).
All our tradesmen were scheduled to work so that only one crew was on the job site at a time. We stayed on the original schedule with only a one week delay.
The end result is the sweetest little bathroom I've ever seen (and I can't wait to start work on C&L's kitchen next).
Thank you for joining me in this project transformation. I hope this inspired you to think about being creative with your design projects, determining what works best in keeping with the architecture of your space, and carefully assessing how you can have the best life in your home.



 Dlaguna LLC
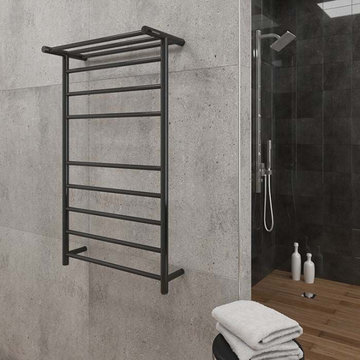
Turn Your Bathroom into a Mini Spa With These Must-Have Towel Warmers.
Towel warmers, also called heated towel rails, are great for warming your towels and helping towels dry quickly post-shower.
Shop at DLaguna Heated Towel Warmer Design. Best in Modern Furniture and Lighting. Paris Mirror Rep and Worldwide Delivery. Get it now!
https://www.dlaguna.com/bath/bath-accessories/heated-towel-warmers.html
 Kathleen Jennison
An Arts & Crafts Bungalow is one of my favorite styles of homes. We have quite a few of them in our Stockton Mid-Town area. And when C&L called us to help them remodel their 1923 American Bungalow, I was beyond thrilled.
As per usual, when we get a new inquiry, we quickly Google the project location while we are talking to you on the phone. My excitement escalated when I saw the Google Earth Image of the sweet Sage Green bungalow in Mid-Town Stockton. "Yes, we would be interested in working with you," I said trying to keep my cool.
But what made it even better was meeting C&L and touring their home, because they are the nicest young couple, eager to make their home period perfect. Unfortunately, it had been slightly molested by some bad house-flippers, and we needed to bring the bathroom back to it "roots."
We knew we had to banish the hideous brown tile and cheap vanity quickly. But C&L complained about the condensation problems and the constant fight with mold. This immediately told me that improper remodeling had occurred and we needed to remedy that right away.
The Before: Frustrations with a Botched Remodel
The bathroom needed to be brought back to period appropriate design with all the functionality of a modern bathroom. We thought of things like marble countertop, white mosaic floor tiles, white subway tile, board and batten molding, and of course a fabulous wallpaper.
This small (and only) bathroom on a tight budget required a little bit of design sleuthing to figure out how we could get the proper look and feel. Our goal was to determine where to splurge and where to economize and how to complete the remodel as quickly as possible because C&L would have to move out while construction was going on.
The Process: Hard Work to Remedy Design and Function
During our initial design study, (which included 2 hours in the owners’ home), we noticed framed images of William Morris Arts and Crafts textile patterns and knew this would be our design inspiration. We presented C&L with three options and they quickly selected the Pimpernel Design Concept.
We had originally selected the Black and Olive colors with a black vanity, mirror, and black and white floor tile. C&L liked it but weren’t quite sure about the black, We went back to the drawing board and decided the William & Co Pimpernel Wallpaper in Bayleaf and Manilla color with a softer gray painted vanity and mirror and white floor tile was more to their liking.
After the Design Concept was approved, we went to work securing the building permit, procuring all the elements, and scheduling our trusted tradesmen to perform the work.
We did uncover some shoddy work by the flippers such as live electrical wires hidden behind the wall, plumbing venting cut-off and buried in the walls (hence the constant dampness), the tub barely balancing on two fence boards across the floor joist, and no insulation on the exterior wall.
All of the previous blunders were fixed and the bathroom put back to its previous glory. We could feel the house thanking us for making it pretty again.
The After Reveal: Cohesive Design Decisions
We selected a simple white subway tile for the tub/shower. This is always classic and in keeping with the style of the house.
We selected a pre-fab vanity and mirror, but they look rich with the quartz countertop. There is much more storage in this small vanity than you would think.
The Transformation: A Period Perfect Refresh
We began the remodel just as the pandemic reared and stay-in-place orders went into effect. As C&L were already moved out and living with relatives, we got the go-ahead from city officials to get the work done (after all, how can you shelter in place without a bathroom?).
All our tradesmen were scheduled to work so that only one crew was on the job site at a time. We stayed on the original schedule with only a one week delay.
The end result is the sweetest little bathroom I've ever seen (and I can't wait to start work on C&L's kitchen next).
Thank you for joining me in this project transformation. I hope this inspired you to think about being creative with your design projects, determining what works best in keeping with the architecture of your space, and carefully assessing how you can have the best life in your home.


 Organized Living
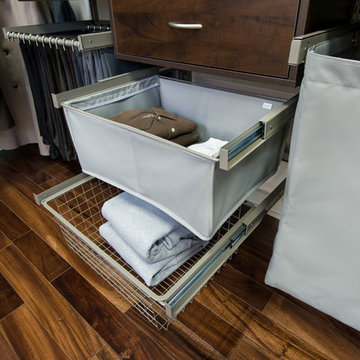
freedeomRail Reveal products are designed to adjust to changing storage needs. Extends fully from freedomRail uprights to give you complete visibility to your belongings.
 Southwest Boulder & Stone
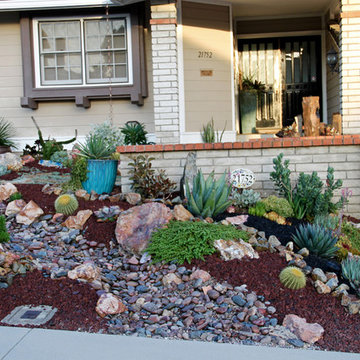
Karen transformed her front yard with 100% drought-tolerant landscaping, using water-wise plants and a wide variety of natural stone materials. Cobble, rubble, pebble, flagstone and crushed rock were combined to create a dry streambed that adds a fluid movement to the yard. A basalt fountain water feature was positioned near the entry.
Since Karen’s home is part of a Homeowner’s Association, speed was essential to the project. She hired Laura Eubanks of Design for Serenity to facilitate the quick turnaround, completing the project in just 5 days. Design for Serenity designed and installed the beautiful landscaping and succulent tapestries, while Karen herself selected the stone.
Karen thinks of landscape rock as a form of art, considering it to be one of the most important elements in her project. She spent several hours with Laura’s team selecting the perfect boulders and materials from our Fallbrook yard. Her hard work paid off: Karen’s guests and HOA neighbors all raved about the impact of natural stone in this total yard transformation.
 Clifton Leung Design Workshop - CLDW.com.hk
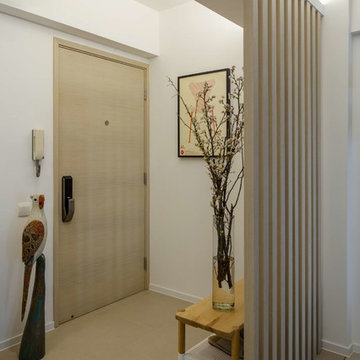
With a thoughtful use of lighting and carefully curated furniture, this 1,000 sq ft Mid-Levels apartment with unsightly columns and beams is transformed into a cosy Scandinavian home with a Japanese touch.
When you think of designing a home, one does not usually put Japanese and Nordic together. But Clifton was inspired by the compatibility of the two cultures, which both emphasise minimalism, to bring out this eye-catching fusion project.
Earth tones reminiscent of Scandinavian design are used throughout the apartment, allowing it to look more spacious and comfortable.
Upon entering the apartment, one is quickly greeted by the Japanese style living room, which oozes Zen with a faux fur carpet and flatter furniture pieces including a Fritz Hansen sofa in pink, side table from Habitat, dining table from HAY and pendent lamps from Louis Poulsen.
The apartment is blessed with a high ceiling, but nonetheless, its columns and beams originally made it appear smaller. But with a clever use of lighting, such as indirect lighting on top of the beams and strategic placement of lamps on the columns, the flaws are concealed and the unit appears taller, bigger and more comfortable.
Similarly, the kitchen is transformed into an open one with an island, so the owners, both social butterflies, can invite their friends over for gatherings.
Besides catering to the two adult owners, Clifton did not forget about their fur friend Buddy, a Bichon Frise. To ensure that Buddy does not feel left out at night, while ensuring the couple can have some privacy in their bedroom, a small square hole was made in the door for him to freely move in and out.
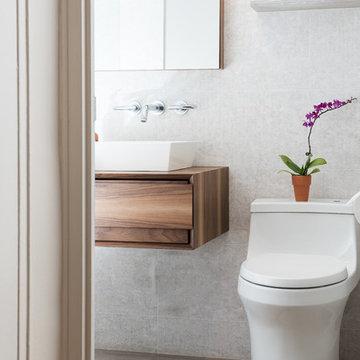
 Cabinet Plant
See what our client say about working with us:
I started my search for a contractor about a year before I hired Paul to do a kitchen and bathroom renovation. This was my first time at the bat, and I really had no idea what to expect. I had many contractor proposals that swung wildly in price but for some reason I never felt inclined to hire any of the guys I met with. I happened to be looking at Houzz one day and came across Paul’s company and he had very good reviews. I gave him a call and he came to my apartment quickly. I liked him immediately when we met. I thought it was strange that he asked me for my budget and how much I wanted to spend but in hindsight, providing that information allowed Paul to come back to me with a very detailed proposal based on my budget. I soon realized that the lower proposals I had did not include many of the budget items that would be necessary to complete the job. Paul laid out the pricing and provided a very reasonable “allowance” based on your measurements for tile, toilet, sinks, etc. It is up to you to stay within that allowance.
Another reason I hired Paul was because of his design skills. Paul met me in the at tile stores several times and helped guide me in choosing tile and a style for the bathroom that really looks beautiful. I fought him a little but in the end, was glad I went with his recommendations. He also uses a kitchen cabinet maker so all the cabinets are custom to what you want. Paul also has a great customer website that allows you to see all the expenses, make choices, and easily communicate with him.
If you are planning to do a renovation, I think it helps to plan for the worst and hope for the best. I live in a co-op and we had a couple of little glitches and Paul was always quick to resolve issues as they arose. He was extremely responsive and really cared about the work and doing a good job. I would definitely hire Paul again if I needed a contractor.

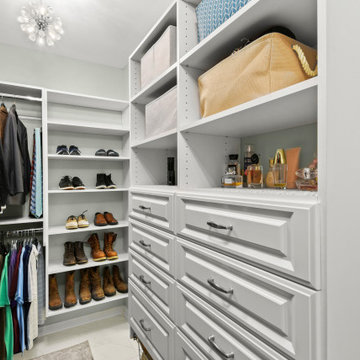
 Inspired Closets Baton Rouge
Do you ever think about DIYing your closet renovation, but you’re just not sure it’ll turn out the way you want?
This is where we found our recent client, Amanda, and her husband, Terry.
DIY Dreamers
The couple was in the middle of renovating their master bath when Amanda went down a Pinterest ‘rabbit hole.’
There in her endless scrolling, she was mesmerized by photos of beautiful master closets…efficient master closets…organized master closets…inspired master closets.
Amanda began thinking…If she and Terry were already redoing their master bath, it only made sense to renovate their ensuite closet at the same time.
They could even DIY it and save a little bit of money, too. Right?
Amanda took measurements, researched closet organization systems online, and prepared to become a closet DIY warrior.
But a little thought was holding her back.
It wasn’t that she didn’t think they could do it themselves.
Could they survive the stress of the renovation process?
What if they ended up hating the result?
What if they ended up hating each other in the process?
That’s when Amanda found us and decided to explore a different option.
A Professional Job – At the Same Price
Our Designer Felicity arrived for a consultation, worked up a complete closet renovation plan, explained our signature stress-free installation process, and gave the couple a price.
The number ended up rivaling the final DIY cost.
Amanda and Terry were sold (and relieved).
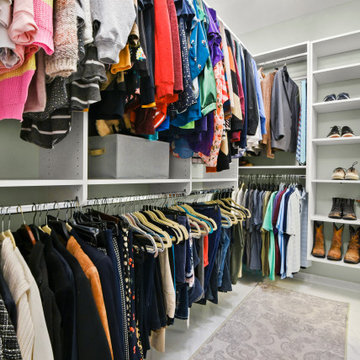
The couple’s professional closet renovation & end-to-end installation took place over just 2 days last summer.
They now have custom floor-to-ceiling closet organization – and new weight off of their shoulders that only comes with a clean, organized space.
We later returned to revamp their daughter Savannah’s closet a few weeks later.
Before you DIY your closet revamp, give us a quick call. We’d love to show you what we can do.
Request a free consultation to get started on your dream closet here: https://www.inspiredclosets.com/locations/baton-rouge/contact/

 Inspired Closets Baton Rouge
Do you ever think about DIYing your closet renovation, but you’re just not sure it’ll turn out the way you want?
This is where we found our recent client, Amanda, and her husband, Terry.
DIY Dreamers
The couple was in the middle of renovating their master bath when Amanda went down a Pinterest ‘rabbit hole.’
There in her endless scrolling, she was mesmerized by photos of beautiful master closets…efficient master closets…organized master closets…inspired master closets.
Amanda began thinking…If she and Terry were already redoing their master bath, it only made sense to renovate their ensuite closet at the same time.
They could even DIY it and save a little bit of money, too. Right?
Amanda took measurements, researched closet organization systems online, and prepared to become a closet DIY warrior.
But a little thought was holding her back.
It wasn’t that she didn’t think they could do it themselves.
Could they survive the stress of the renovation process?
What if they ended up hating the result?
What if they ended up hating each other in the process?
That’s when Amanda found us and decided to explore a different option.
A Professional Job – At the Same Price
Our Designer Felicity arrived for a consultation, worked up a complete closet renovation plan, explained our signature stress-free installation process, and gave the couple a price.
The number ended up rivaling the final DIY cost.
Amanda and Terry were sold (and relieved).
The couple’s professional closet renovation & end-to-end installation took place over just 2 days last summer.
They now have custom floor-to-ceiling closet organization – and new weight off of their shoulders that only comes with a clean, organized space.
We later returned to revamp their daughter Savannah’s closet a few weeks later.
Before you DIY your closet revamp, give us a quick call. We’d love to show you what we can do.
Request a free consultation to get started on your dream closet here: https://www.inspiredclosets.com/locations/baton-rouge/contact/
37