
Search results for "Quick time period" in Home Design Ideas

 Deck and Patio Company "Outdoor Living Experts"
Second Project
Here, the landscape design was by Bill Renter, Deck and Patio’s Outdoor Living Expert and Marc Wiener. Their achievement garnered us a gold medal from the Association of Pool and Spa Professionals (APSP).
In addition to professional recognition, our work also amazed the clients, because their yard’s beautiful and nature-friendly transformation had been accomplished so quickly.
“I have lived here over 40 years,” says the wife. “Our property had become overgrown. It wasn’t messy but it wasn’t well done anymore. I have always loved birds and flowers and a very natural setting. And we hadn’t seen birds in a long time.
“A full-time bloom was important, as I wanted to attract, in addition to birds, lots of butterflies,” she says. “I also looked at many ponds that other landscapers had done elsewhere. In the end, I felt Deck and Patio’s work looked the most natural, which was extremely important to me.”
Renter says he also considered how our work would fit with the additional elements the homeowners had hired other companies to do, such as a conservatory and a small bridge -- while always taking into account how everything would appear in nature.
www.deckandpatio.com
 Tile Doctor Ltd
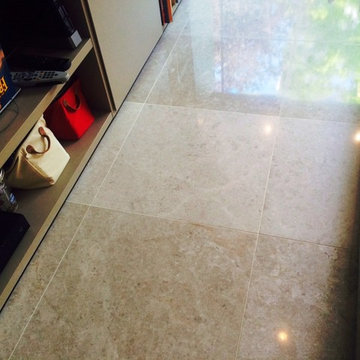
I was recently engaged to refresh the Limestone tiled floor at a house in St. John’s Wood, which is a very affluent area and apparently has the 5th most expensive postcode in London so as you can imagine this was a very expensive floor. The client had requested an improvement condition of the Limestone tiles in the living room and a thorough clean, polishing and seal was required. Over time, the floor in this busy living room – which was also used as a play area for young children – had become dirty and certainly worse for wear with all the use it had been getting. So, I set about my work to get this floor back to looking its best.
Cleaning and burnishing a Limestone floor
My initial task before beginning the cleaning process was to remove any furniture (as well as toys) from the room so I would have a clear area to work in. I then applied a layer of Tile Doctor Pro-Clean cleaner, diluted with water, to the floor. Pro-Clean is also suitable for use on other natural stone floors such as Slate, Granite and Travertine.
After leaving the solution to dwell for a period of a few minutes, I began to scrub the floor with a stiff hand brush. Whilst helping to remove a lot of the built up dirt on the surface of the tiles, the product also stripped off the old sealer and polish. Following this, I paid special attention to the dirty grout lines, cleaning them with Tile Doctor Oxy-Pro, a powerful, high-alkaline cleaner.
After completing the cleaning, I rinsed the floor with clean water to remove any excess cleaning products. I then began to burnish the floor using Tile Doctor Diamond encrusted burnishing pads. This was done in four steps, as I used four different pads (coarse, medium, fine and very fine) rinsing the floor with water between each pad. I would recommend using this setup of four pads for restoring the appearance of polished stone floors; you starting with a coarse pad and the gradually work your way up to the very fine pad achieving a high polish finish in the process. I finished of the process with a quick rinse and a buffing pad to give the floor a final polish before I commenced the sealing.
Sealing a Limestone floor
My choice of sealer was Tile Doctor Colour Grow, which is specifically designed to not only provide durable surface protection, but also to intensify the colour of the tiles. The sealer penetrates deep into the pores of the stone, providing water resistance and long-term protection from ingrained dirt and stains. As you can see from the photos, the sealer really helped to accentuate the fantastic natural colours in the Limestone.
My client was very pleased with the final result, and was amazed by how quickly I had been able to improve the state of her floor which, with a colourful and shiny finish, has really brightened up the living room.
 Tile Doctor Ltd
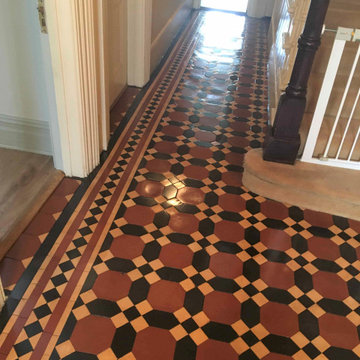
This Victorian tiled hallway floor at a property in Twickenham was in great physical condition considering its age but just hadn’t been cleaned or sealed in quite a few years. Over the years the protective sealer has worn away and dirt tracked in from outside had sunk deep into the pores of the tile. The floor looked dull, and my customer was finding it hard to clean and maintain effectively.
To remove the ground in dirt from within the pores of the tile I needed to apply a strong cleaning product that would breakdown the dirt and deal with any remaining sealer left on the floor. Usually, I find the sealer down the center of the hallway is worn away with use, but you still find traces towards the wall. To do the renovation effectively I would need to remove all the sealer during cleaning otherwise you risk an uneven appearance.
The best sealer stripper and cleaner for the job is a product called Tile Doctor Remove and Go so I mopped a strong dilution onto the floor and then left it to soak in for around fifteen minutes. To get the best from this product it’s advised to give it a long dwell time thereby allowing it to break down old sealer and dissolve the dirt and contaminants.
The floor was then scrubbed with a rotary floor machine to work the product into the pores of the tile and release the trapped dirt. After the first pass the floor was rinsed with a little water and the soil extracted using a machine. After inspecting the floor some areas were re-treated using the same process to ensure all the sealer and dirt had been removed.
After a final inspection I left the tiles to dry off overnight.
The following day I returned and started by taking moisture readings from different parts of the floor. Its not a good idea to apply a sealer to a damp tile and damp areas should be dried out with a heat gun first.
My client was keen to have a classic shiny appearance, so I chose Tile Doctor Seal and Go to add protection to the tiles. The sealer will prevent dirt becoming ingrained in the tile and protect the floor from staining caused by spillages whilst making it very easy for our customer to maintain in the future. As you can see from the pictures, it also gives a nice sheen finish to add lustre to the floor as requested by my customer.
Before leaving we had a quick chat about maintaining the floor and a warning about the use of strong floor cleaning products which can be over strong and prematurely strip the sealer away over time. For this floor I recommend Tile Doctor Neutral cleaner which is an effective cleaner but as its name suggests is pH neutral and mild enough not to harm the sealer.
Jonathan Oldham
South Middlesex Tile Doctor
Find the right local pro for your project
 Electronic Design & Consulting, Inc.
This article is posted here with the consent of the author. The views and opinions expressed in this article are those of the author and do not necessarily reflect the official policy, position, view, or opinion of Crestron Electronics, Inc., or of any of its employees. Crestron Electronics is not responsible for, and does not verify the accuracy of, any of the information contained in this article.
By Jeff Singer
The “smart” revolution began several years ago with smartphones (a.k.a phones) and has extended in recent years to thermostats, doorbells, alarm systems, and kitchen appliances. Smart devices are so ubiquitous that the term “smart” is overused to the point that it is almost meaningless. Companies are eager to jump on the bandwagon and claim their products are “smart,” and consumers proudly claim they have a smart home because they have lighting control. Misconceptions about smart homes are prevalent and create confusion in the marketplace. This can have deleterious effects on businesses and underserve consumers. Here are seven of the most popular misconceptions about smart homes:
1. Apps are smart
Apps are convenient and easy to use. Yes, it seems there’s an app for everything. People expect to be able to download an app and do just about anything. App developers and many companies do not disavow consumers of this myth. On the contrary, they promote this idea with carefully worded descriptions. The promise of having the world at your fingertips for $1.99 is very enticing. Although it sounds too good to be true, it is also too good to pass up for many people. This leads to undervaluing home control and disappointment when the apps don’t work, which undermines confidence in our industry. The fact is that apps are not smart. They do not control anything. They must connect to and communicate with a control system or cloud service that processes, prioritizes, and executes commands. That’s the real magic and what most people do not understand.
2. Smart devices work together
With so many smart appliances and devices on the market today, it’s understandable that the average consumer might think that they actually communicate and work together. This is simply not the case. Smart devices are not that smart. They are designed and manufactured by different, often competing, companies. There are no national or industry standards governing these products. Even if they all operate using Wi-Fi® communications, that doesn’t mean they work together. Some companies promote a home control platform, which unites different devices from different companies – in theory. The platform is yet another third-party software totally dependent on other companies developing APIs and writing control modules for their hardware to run on that piece of software. The devices are not independently compatible. Also, when updates are made to either the hardware or the software, functionality may be affected for some period. That’s a nice way of saying the device or system won’t work and there’s no way of knowing for how long.
3. It’s a DIY project
Which brings us to the next myth, which is that the average person can do it themselves. Unless you are a skilled professional, I would not advise taking on a smart home project. You want to make a light turn on and off with your Alexa® or Google Assistant™ virtual assistant software, go for it. A smart home takes much more planning and expertise. I have no problem changing a light bulb or hanging a light fixture in my dining room; however, I am not going to rewire my house. I may change the flush valve in my toilet, but I’m not going to replace the pipes in my house. You get it. Integrating devices and systems, establishing different zones, creating scenes, designing the UI with a balance between control, feedback, and simplicity – all takes experience and skill.
4. Need a programmer to make changes
Early adopters may have experienced the pain of trying to make a simple change or update to their home control system. Years ago, if the cable provider changed the channel line-up, the homeowner would have to call the dealer or programmer to make an appointment for them to come out to the house to reprogram the system. The system wouldn’t work as expected until it was updated, which often took several days and beaucoup bucks. Not anymore. Technology has evolved so now it’s easy for system owners to change favorite channels, create scenes, rename buttons, update images, and more. While a professional is needed for the initial installation and setup, the system is easy to manage once it’s up and running. This makes life so much easier for both dealer and customer.
5. Tech becomes obsolete quickly
Similar to updating the UI, updating firmware or hardware used to be a stressful process. A smart home should be intelligent enough to update itself. Apps don’t become obsolete. Updates are constantly pushed out from the cloud, making them better all the time. The same is true for a good smart home system. New features, functions, and device support gets added in the background consistently, so the system you installed (or purchased) yesterday gets better over time. Swapping out decorative elements, such as keypads, dimmers, and touch screens is also seamless. When a new device is added, all the settings are pulled down from the cloud and it just works. No system interruptions. No sunk costs. No imposing house calls. No surprise bills.
6. Lighting control saves energy and money
Lighting control is one of the most popular smart systems, but it takes more than just one system to make a home smart. On the surface, it makes sense that if you dim the lights ten percent, then you save ten percent of energy costs. If the shades are raised during the day to take advantage of sunlight so the lights don’t need to be on (or at least not 100%), but that causes the room temperature to rise a few degrees, which triggers the air conditioner to run longer and more often, was energy usage (or cost) reduced? A smart home integrates all the various systems and technology to optimize comfort, convenience, safety, and sometimes energy.
7. Home technology is easy to hack
Security is at the forefront of people’s minds these days. Personal identities are stolen; email accounts hacked; private photos publicized; and more. A smart home must outsmart those who don’t respect privacy. Crestron control systems adhere to the strictest security standards. The same Crestron control system that goes into a home is also installed in secure government and military facilities, global banking institutions, hospitals, and other mission critical applications. When installed correctly by a trained professional, a Crestron smart home is the gold standard for security, comfort, and convenience.
 Tile Doctor Ltd
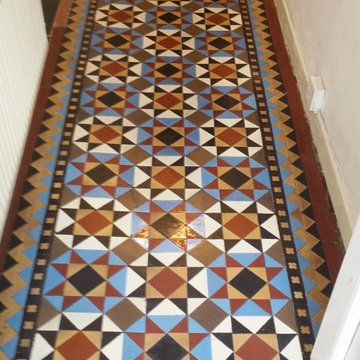
When you uncover a tiled floor after it has been covered by carpet for many years, it’s almost a given that it will be in a bad state. However, my customer, who lives in the town of Lymm, wasn’t expecting the Victorian tiled hallway they had recently uncovered to be in quite so terrible a state. As you can see from the photograph, it has been completely devastated by paint plaster and a big pool of cement floor leveller. Understandably, the formerly colourful appearance of the tiles had completely drained and it would require a through restoration to get them back into a usable condition.
To begin the restoration, I mixed a strong cleaning solution which consisted of Tile Doctor Remove & Go combined 50/50 with Tile Doctor Pro Clean. Remove & Go is a heavy duty remover that breaks down old sealers, along with adhesives, paint stains and other tough soil build up where as Pro-Clean is a versatile alkaline-based cleaner that reliably eradicates dirt on a wide variety of natural stone floors.
The solution was applied liberally across the floor, and left to dwell for a short period, allowing time for it to soften up the paint plaster. Next, I fitted a coarse scrubbing pad to my rotary cleaning machine and began to scrub the solution into the tiles, with a big difference to the appearance of the tiles being made quite quickly. The resulting cleaning slurry was promptly removed using a wet-vac machine.
I repeated the process two times to provide an extra thorough clean and then give the floor a thorough rinse. Some particularly stubborn marks remained on the floor which I was able to remove using Tile a Doctor Acid Gel, a blend of phosphoric and hydrochloric acids in gel form that’s easy to control. The floor was then left to dry fully overnight.
The next morning, I returned to the property and ran some damp tests. This is incredibly important to do before sealing any tiled floor because any excess moisture can cloud the sealer and prevent it from doing its job properly.
Once satisfied that the floor could be sealed, I applied several coats of Tile Doctor Seal and Go, our topical sealer which provides both a robust surface seal and a long-lasting low sheen finish in one and ideal for Victorian tiles.
It would be an understatement to say that this Victorian tiled floor was transformed. The customer was amazed at the results considering how bad a state the tiles had been in just a day earlier. When you have a situation like this, it’s hard to believe the tiles could ever be fully restored. Nonetheless, we could now see them in their full and original glory, and needless to say, the customer was very, very pleased with the result.
Alastair Robb
West Cheshire Tile Doctor
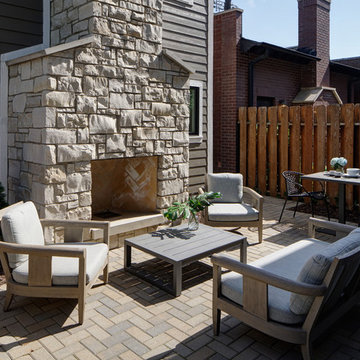
 Dan Rak Design
Our clients came to us while they were in the process of purchasing a new construction single family home in Chicago's Lakeview neighborhood. In addition to moving, they were also expecting their first child within a period of three months. Our mission was to create a chic, tailored home worthy of our stylish clients, but that would also function as a comfortable family home. It also needed to be complete before the new baby arrived. We went to work selecting furnishings, fixtures and finishes from a mix of quick-ship and custom sources. We completed the project on time and on budget and our clients were able to bring their first born home to a warm and welcoming space that is, at the same time, cool and sophisticated.

 Stretch Ceiling Miami
Advantages:
– Never, ever, have to paint your ceiling again
– No more peels, flakes or cracks
– No more stains on the ceiling or color fading overtime
.
The Stretch Ceiling products can usually be installed in just a single day, thus avoiding all the inconveniences of a ceiling renovation (furniture moving, mandatory paint dry time, odor, sanding and dust, etc.). This is especially interesting for any type of business that cannot stop their operations for an extended period of time.
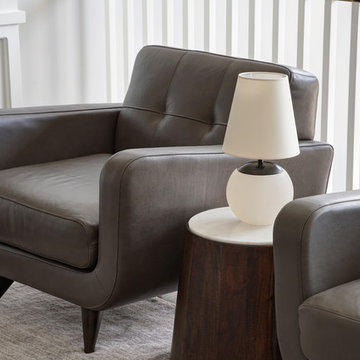 Dan Rak Design
Our clients came to us while they were in the process of purchasing a new construction single family home in Chicago's Lakeview neighborhood. In addition to moving, they were also expecting their first child within a period of three months. Our mission was to create a chic, tailored home worthy of our stylish clients, but that would also function as a comfortable family home. It also needed to be complete before the new baby arrived. We went to work selecting furnishings, fixtures and finishes from a mix of quick-ship and custom sources. We completed the project on time and on budget and our clients were able to bring their first born home to a warm and welcoming space that is, at the same time, cool and sophisticated.
 Tile Doctor Ltd
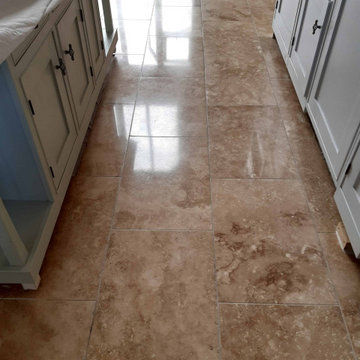
Located in Burgh Castle West of Great Yarmouth, this Travertine stone floor was a classic example of an incomplete installation. By incomplete I mean the tiler had done a fine job of laying and grouting the tiles but had left it at that and not sealed the stone. Natural stone like Travertine is porous and needs a sealer to stop dirt becoming ingrained in its pores, a sealer will also improve its appearance.
Without a sealer this floor now looked very dull, pale, rather damaged with pitting and heavily soiled with ingrained dirt. Pitting in stone like this is a natural feature of Travertine however it can be exacerbated with the use of acid cleaning products. This was a floor in urgent need of a face lift, and I was confident it could be transformed into a very beautiful floor.
I think it is true to say that most tilers will skilfully lay a floor for you but usually don’t have the knowledge, experience or equipment to finish the surface properly and when it comes to sealing many will recommend a product and suggest you take care of it yourself. Naturally if your find yourself in that position don’t insist the tiler does it, better to give us a call and have it done properly.
Our first job was to backfill the larger pits in the stone which as I mentioned are a natural feature of travertine material, but they can trap dirt and so its best if they are plugged with a suitably rigid filler. Also, if left alone the larger holes can quickly become larger as their edges crumble and break up leading to the entire tile becoming unstable. Replacing a tile in a floor like this is possible however its an extremely awkward job to do and it can be difficult to find an exact match for replacement.
Filling was done using a two-part, neutral cream-coloured polyester compound which gels in about fifteen minutes after addition of the catalyst. After this initial period, the excess product is trimmed off level with the surface of the tile before it sets harder than the stone itself in around sixty minutes. The fully cured compound can then be cut and machined as though it were part of the stone structure.
Our second job was to remove deep scratches caused by the unprotected feet of workmen’s ladders. This was done using Tile Doctor 50-grit and 100-grit diamond hand burnishing pads with a little water as a cutting medium. Shallower scratching present across the rest of the floor was removed using a Tile Doctor 200-grit soft milling pad driven by our Klindex 17″ rotary machine.
This abrasive action produces a fine slurry which was then rinsed with water and extracted using our 400psi Ninja machine in preparation for the next stage of the refinishing process. These machines were an expensive investment for our business however they are very robust and effective producing a good result that saves time.
Next task was to restore the polished appearance of the Travertine which was done using the application of a set of Tile Doctor burnishing pads. The process starts by applying a coarse 400-grit diamond pad, again fitted to the Klindex rotary machine. This cleans the tile and improves the matt finish left by the milling pad; again, the slurry was rinse-extracted before moving on to the next pad in the set. Next came the finer diamond polishing stages of 800 grit and 1500 grit, slurry being removed as before between the grades. By this time, all the scratches had been removed and the Travertine floor had visually pleasing even sheen across the whole surface. The last pad in the set is applied dry with a little water sprayed onto the tile so we left the area to dry out thoroughly overnight with the assistance of our large capacity dehumidifier.
Returning the following morning, we found that the floor had dried out perfectly and was ready to be vacuumed and spray burnished with the last pad in the set which is a 3000-grit very fine pad applied using a small amount of water sprayed from a trigger bottle resulting in a deep, rich shine across the floor surface.
Last step in the face lift was to seal the floor with a generous coat of Tile Doctor Ultra-Seal, a premium grade penetrating sealer recommended for use in Kitchens and food preparation areas. Having left the floor to soak up as much of the Tile Doctor Ultra-Seal as it could, the excess product was removed and the whole area allowed to dry completely with the assistance of our industrial air moving fan. Finally, the floor was spray buffed to a deep shine using a white maintenance pad.
The client was extremely pleased with our results and was amazed at the variation of colours within the stone which had never been visible previously.
Nick White
Norfolk Tile Doctor
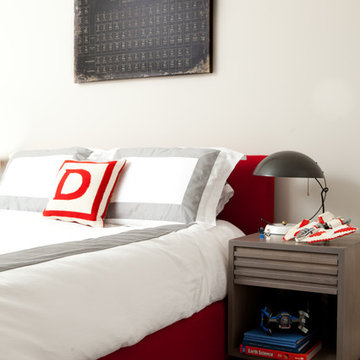
 Jessica Gersten Interiors
Inspiration for a contemporary boy carpeted kids' room remodel in New York with white walls
 Hearthstone Inc
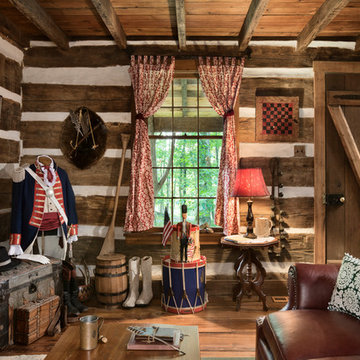
Maintaining the cabin’s 19th-century charm was the easy part for the Donelsons, who are Lewis and Clark period re-enactors. Jan Paul often plays Captain Meriwether Lewis with a group called the Discovery Expedition of St. Charles. The Donelsons brought their furniture from their previous home in St. Louis to the cabin. “It seems like everything we had prior to moving here fits, as if we’d been collecting things all those years just to put it in this cabin,” Jan Paul says. In the living room, he displays a replica of Lewis’s captain’s uniform, which he wears during re-enactments. There’s also a hand-carved paddle he uses on the Missouri and Columbia Rivers and a feather quill used for journal writing during the re-enactments. “Each item has a story of its own and a memory to go with it,” Jan Paul says. The items look perfectly at home in the cabin.
The Donelsons are passionate about their cabin and about its importance as a living piece of history. “This place whispers to me every day, of where we have come from,” Jan Paul says. “Not everyone who crosses our threshold feels the connection, but for those who appreciate the sense of place, time and heritage our forefathers gave us, they find the cabin a comfort. They feel that warm embrace of romance from our heritage.”
 Advance Design Studio, Ltd.
After six years of living in their Huntley IL home, Chris and Meghan were tired of their dark, dingy, outdated kitchen and it was finally time for a long-anticipated change. “The kitchen is the place where we live, it’s where we do everything,” Meghan said. “It was important that it be a space where we wanted to be.” Meghan loves cooking and enjoys including their girls in healthy meal prepping, this led them to want a brighter, more enjoyable kitchen with increased functionality and improved storage.
For Chris especially, the laundry room was an entirely dysfunctional eyesore. “We had a washer and a dryer, but it was all kind-of cobbled together!” Chris said. “There were always laundry piles everywhere, we weren’t really sure what we wanted to do in there, but it was time for us to make a change.” The mess of the space was stressful every time they walked in the door from the garage each day. Kids’ backpacks and shoes piled up haphazardly in the makeshift boot-bench closet left the family feeling disorganized and stressed. They needed space for folding clothes and locker cubbies to help keep the family organized.
Having known Christine and Todd in the Huntley community for years, Chris and Meghan were familiar with their work. “We already trusted them personally and having seen their projects for years we knew they did top notch work. After we reviewed the initial round of designs, we knew that hiring them was definitely the right choice,” Meghan and Chris said. Although Chris had done a lot of work in their home himself, the kitchen and laundry room renovation was such a large undertaking that he didn’t want to steal time away from his family to spend what would surely be many long weekends doing the job himself. “That would not have been a wise choice for us,” Chris laughed.
“Our designer, Michelle was very, very, easy to work with; anything we wanted to see or weren’t sure about, she went above and beyond to make this easy for us. She was easy to get hold of and always quick to respond,” the couple said. Michelle pulled ideas that mirrored the couple’s taste and style and was adept at directing the couple to limited choices that didn’t overwhelm them and kept the process moving. “I have a hard time making decisions. Michelle made the decision-making process so easy. I loved how she listened to what I liked and then presented three great options for me to choose from,” Meghan said.
The main objectives for the kitchen were better storage solutions, they wanted the space to reflect their lifestyle and taste, and they wanted it to last for years with low maintenance. One of the first steps in creating a more functional kitchen was relocating the refrigerator, creating an improved workflow for the busy family.
“We didn’t know that we could even move the refrigerator to a new location where it is now, that was something that we never would have thought of,” Chris said. “The new refrigerator location makes the kitchen feel so much bigger. We didn’t add any space, but our whole kitchen with the new design just seems like it’s so much larger than before!” Meghan said.
The perimeter mist colored cabinets helped warm and brighten the entire room, while the graphite colored cabinets on the island added contrast. Using this fresh, clean color palette satisfied the couple’s desire for a bright space that was the exact opposite of what they had before. Organization accessories were also added to the cabinets such as a spice drawer tray and roll outs to create hidden convenience.
“I absolutely love the hidden spices – it makes cooking so much more enjoyable!” Chris said. “And all the pull outs, and the double trash bin, who would think you could get so excited about organization!” the couple said in unison.
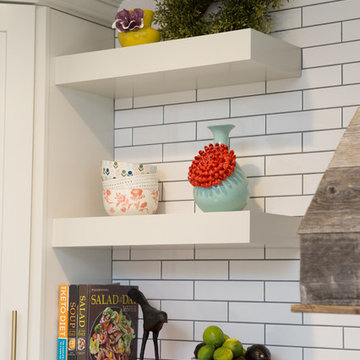
One thing they hated in their original kitchen was how dark the space felt. Added lighting on the ceiling with the new light fixtures combined with the lighter cabinetry colors throughout solved this problem. “Our new kitchen has this warm, almost cozy feeling that our old kitchen never had, it’s just a space that I love spending my time in now,” Meghan said. The light airy feeling was accentuated with the use of floating white shelves on either side of the decorative range hood. “We have so much cabinetry space, the new design is amazing we actually have more storage space than we will ever need,” Meghan said.
The island was extended to create more work surface and added space for stool seating. “The new island changes how we live. Now the kids can be in the kitchen with us, doing homework, eating breakfast, and the three of us have special dinners there when Chris is working late,” Meghan said.
The Carrara Marmi Quartz countertops were chosen because they are, not only beautiful, but are made from hard-working material that doesn’t require maintenance. The white subway tile backsplash that wraps to the ceiling behind the focal point cooktop range/hood compliments the crisp white countertops perfectly, while brushed brass hardware and light fixtures keep the design fresh and new.
The couple had a few fears at the beginning of the project, as most homeowners do. Their biggest fear was being out of their kitchen and laundry room for an extended time. The crew made it very easy for the family to work in a limited space keeping the washer and dryer hooked up the majority of the time, and also getting appliances working with minimal downtime.
“They above and beyond accommodated us to get us through the process,” Meghan said. “They did a great job making sure we were as comfortable as possible throughout the process,” Chris added.
“Our project manager DJ did a great job. He was very good at updating us on schedule changes, getting guys in as quickly as possible. Everyone that stepped in the house was nice and did great work,” said Chris. They thought Advance’s carpenter was phenomenal and were impressed when he took a conceptual idea from a photograph and worked with designer Michelle to create a one of a kind range/hood that has become the topic of conversation with friends and family who visit the new kitchen. “He was in our house literally every day for several weeks. He was easy to work with and good at what he did,” Meghan and Chris said.
The focal point of the kitchen; a hand-crafted, custom-built ventilation hood was clad with handpicked reclaimed barnwood. Advance Design’s carpenter built the framework and the cladding to create a one-of-a-kind design element that the couple loves.
“I think it was especially fun for him to create something unique from scratch, showcasing his talent in this area,” Meghan said. “I love that my kitchen is not like everyone else’s. I got to pick out the wood on my hood and watch it being built and was able to choose what pieces of wood went where on it. It’s totally unique.”
Red Oak flooring was toothed-in throughout the kitchen and the rest of the first floor anywhere changes were made. Then the whole floor was refinished to tone down the orange undertones in the existing floor stain, ultimately changing the color complexion of the entire first floor. The result is a completely new feeling to the entire home.
Renovating the laundry room was extremely important to Meghan and Chris, but they had trouble visualizing what the possibilities were for the seemingly small space. Michelle produced beautiful 3D illustrations that helped them envision the space in a whole new way.
“I must have told Michelle 100 times that I am a visual person, seeing the designs in 3D made it so easy to make decisions and see what we could really do with our space,” Meghan said.
A dividing wall and doorway were removed between the existing laundry room and hallway formerly containing a coat closet, providing space to design specialized graphite colored cabinetry matching the kitchen island to house custom storage cubbies for each family member. Adding the tall utility cabinetry in the new laundry area helped solve the storage issue, tucking away cleaning supplies, household items, and even the cat got its own cubby.
“I love how everything is now hidden in its own space. I can’t tell you how much I hated coming home and seeing everything sitting around on counters,” Chris said.
Electrical outlets were planned for the inside of utility cabinets, so devices could charge in hidden locations. Stacking the washer and dryer allowed for wider countertop space to provide a folding area and a special space for clothes to hang. “The way I do laundry has been completely transformed! I can actually fold clothes and hang them now right out of the washer and dryer,” Meghan said.
“The end result in the kitchen and the laundry/mud room was an updated light and bright space, with a smarter work flow that better meets the needs of this family,” Michelle said.
“I would totally recommend Advance Design,” Meghan said. “Sometimes I sit and just look at my kitchen and laundry room and think ‘Wow, I can’t believe I get to live here!’ It’s an understatement to say we love our new space.”

 transFORM Home
When you first walk into this dressing room, it’s the lighting that jumps out at you first. Each shelf is illuminated to show the brilliant colors and texture of the clothing. Light even pours through the big windows and draws your eye across the rooftops of Brooklyn to see the NYC skyline. It creates a feeling of brightness and positivity that energizes and enlivens. It’s a dressing room where you can look and feel your best as you begin your day.
Featured in a modern Italian Melamine and tastefully accented with complementing Matte Nickel hardware and Clear Acrylic handle pulls, this Chic Brooklyn Dressing Room proves to be not only stylish, but functional too.
This custom closet combines both high and low hanging sections, which afford you enough room to organize items based on size. This type of mechanism offers more depth than a standard hanging system.
The open shelving offers a substantial amount of depth, so you have plenty of space to personalize your room with mementos, collectibles and home decor. Adjustable shelves also give you the freedom to store items of all sizes from large shoe and boot boxes to smaller collectibles and scarves.
A functional key to closet design is being able to visualize and conveniently access items. There’s also something very appealing about having your items neatly displayed - especially when it comes to shoes. Our wide shoe shelves were purposely installed on a slant for easy access, allowing you to identify and grab your favorite footwear quickly and easily.
A spacious center island provides a place to relax while spreading out accessories and visualizing more possibilities. This center island was designed with extra drawer storage that includes a velvet lined jewelry drawer. Double jewelry drawers can add a sleek and useful dimension to any dressing room. An organized system will prevent tarnishing and with a designated spot for every piece, your jewelry stays organized and in perfect condition.
The space is maximized with smart storage features like an Elite Belt Rack and hook as well as Elite Valet Rods and a pull-out mirror. The unit also includes a Deluxe Pant Rack in a Matte Nickel finish. Thanks to the full-extension ball-bearing slides, everything is in complete view. This means you no longer have to waste time desperately hunting for something you know is hiding somewhere in your closet.
Lighting played a huge role in the design of this dressing room. In order to make the contents of the closet fully visible, we integrated a combination of energy efficient lighting options, including LED strip lights and touch dimmers as well as under-mounted shelf lights and sensor activated drawer lights. Efficient lighting options will put your wardrobe in full view early in the mornings and in the evenings when dressing rooms are used most.
Dressing rooms act as a personal sanctuary for mixing and matching the perfect ensemble. Your closet should cater to your personal needs, whether it’s top shelving or extra boot and hat storage. A well designed space can make dressing much easier - even on rushed mornings.
 transFORM Home
When you first walk into this dressing room, it’s the lighting that jumps out at you first. Each shelf is illuminated to show the brilliant colors and texture of the clothing. Light even pours through the big windows and draws your eye across the rooftops of Brooklyn to see the NYC skyline. It creates a feeling of brightness and positivity that energizes and enlivens. It’s a dressing room where you can look and feel your best as you begin your day.
Featured in a modern Italian Melamine and tastefully accented with complementing Matte Nickel hardware and Clear Acrylic handle pulls, this Chic Brooklyn Dressing Room proves to be not only stylish, but functional too.
This custom closet combines both high and low hanging sections, which afford you enough room to organize items based on size. This type of mechanism offers more depth than a standard hanging system.
The open shelving offers a substantial amount of depth, so you have plenty of space to personalize your room with mementos, collectibles and home decor. Adjustable shelves also give you the freedom to store items of all sizes from large shoe and boot boxes to smaller collectibles and scarves.
A functional key to closet design is being able to visualize and conveniently access items. There’s also something very appealing about having your items neatly displayed - especially when it comes to shoes. Our wide shoe shelves were purposely installed on a slant for easy access, allowing you to identify and grab your favorite footwear quickly and easily.
A spacious center island provides a place to relax while spreading out accessories and visualizing more possibilities. This center island was designed with extra drawer storage that includes a velvet lined jewelry drawer. Double jewelry drawers can add a sleek and useful dimension to any dressing room. An organized system will prevent tarnishing and with a designated spot for every piece, your jewelry stays organized and in perfect condition.
The space is maximized with smart storage features like an Elite Belt Rack and hook as well as Elite Valet Rods and a pull-out mirror. The unit also includes a Deluxe Pant Rack in a Matte Nickel finish. Thanks to the full-extension ball-bearing slides, everything is in complete view. This means you no longer have to waste time desperately hunting for something you know is hiding somewhere in your closet.
Lighting played a huge role in the design of this dressing room. In order to make the contents of the closet fully visible, we integrated a combination of energy efficient lighting options, including LED strip lights and touch dimmers as well as under-mounted shelf lights and sensor activated drawer lights. Efficient lighting options will put your wardrobe in full view early in the mornings and in the evenings when dressing rooms are used most.
Dressing rooms act as a personal sanctuary for mixing and matching the perfect ensemble. Your closet should cater to your personal needs, whether it’s top shelving or extra boot and hat storage. A well designed space can make dressing much easier - even on rushed mornings.
 DSHOP
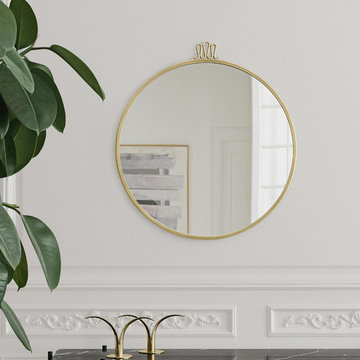
DSHOPOne of Gio Ponti's signature designs is the Randaccio mirror from 1925. Designed for his own home on Via Randaccio in Milano, his very first architectural project, the Randaccio mirror decorated the walls in his bedroom on the 3rd floor together with other furniture designed especially for the apartment. The Randaccio mirror unites elegance with simplicity and is characterized by its atypical crown-like detailing on the top, a detail used by Ponti in several of his works of design and art. The mirror has references to its original time period but is able to add personality to every contemporary setting and enrich the decoration, whether it is a bedroom, bathroom, hallway or a dressing room.
SIZES: Small - Ø16.5", Medium - Ø23.5", Large - Ø27.5"
MATERIAL: Mirorr and brass frame
LEAD TIME: Approx 2 Weeks
 Finn-Martens Design
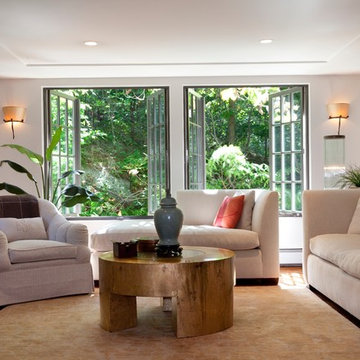
Built in 1768 for a Revolutionary War sea captain, this home’s storybook charm and history were preserved in 1991 when North Shore Boston interior designer Pat Finn-Marten’s brothers, Finn Brothers Construction were planning a subdivision in Beverly Farms, MA. At that time, the house stood right where they needed to build a road for their cul-de-sac development. So, they moved it up the hill about 300 feet. When Pat stopped by to see how things were progressing with the development she saw it as the perfect future home for her and Martens. They were married in a nearby church and had the wedding reception at their house. Over a period of time, Pat took on the task, which was really a labor of love, renovating the house and fitting it with modern day amenities including a gut renovation and new kitchen. Finn-Martens is a master interior designer at blending the old with the new and the home portrays unique details that give it a fresh, modern appeal while acknowledging its history and grace.
Photo by Jamie Cobeldick
 Envision Web
Becky Hulsey, Envision Virtual Tours
The Lodge at Gold Mine Falls
A Once in a Lifetime Opportunity Awaits….
Have you dreamed of owning your own spectacular waterfall, a serene trout pond, or a one of a kind mountain lodge filled with high end touches, all near Lake Burton? If the answer is yes…..then “The Lodge at Gold Mine Falls” is for you!
Located just off HW 76 .3 miles to Anchorage Marina, this unique 2.8 acre property borders the National Forest, boasts a fully remodeled 3 bedroom, 3 bath, 2000+ square foot rock lodge that is adjacent to its own private, spectacular 60 foot waterfall all surrounded by native landscape such as rhododendron and mountain laurel. Tumbling under the 40 foot suspension bridge, the pristine, crystal clear water continues to ramble on its way to large pond ready to be stocked with trout. Picture yourself fly fishing for a trout dinner right at your front door, or delight your friends or family while entertaining on your new porch or extensive, multi-level deck that connects your new home to your own waterfall. The kids or grandkids will be entertained for hours wading in the pool at the base of the waterfall, exploring the crooks and crannies among the stream’s boulders while looking for salamanders, or panning for “fool’s gold” in the stream. Just imagine….The Lodge at Gold Mine Falls has all this and more!
As you walk up the front steps to The Lodge at Gold Mine Falls, you will notice the craftsmanship of this uniquely one of a kind home made from local stone and granite from a period gone by. If you look closely at some of the stones, you will find raw garnets, some the size of a nail head. Upon opening the front door constructed of solid oak and a tasteful piece of leaded glass, you will be amazed at the spaciousness of the lodge room. Once upon a time, the 20 x 30 foot room with 10 foot ceilings was the entire home. The focal piece of the room is the new floor to ceiling field stone fireplace, hand honed solid maple mantel, rounded hearth, accentuated by a hand-cut keystone, and flanked by raw cedar columns. The new gas logs can be remotely controlled with programmable heat. A built-in floor to ceiling cherry wood wall unit, with granite serving surface, highlights a side wall and is topped off with a large piece of stained glass from an English pub. The mood lighting behind the stained glass and the antique library ladder really highlights this unique bookcase. Distinctive lighting fixtures and fans provide dining area lighting and circulation from the cool breezes off of Lake Burton. On the bottom, the solid oak 1.5 inch flooring is a remnant of the past on the top, the height of the ceilings is enhanced by double crown moldings throughout and a touch of the outdoors is brought indoors by the three new skylights. Surrounded by rustic cedar window boxes, additional ambient light streams through the four windows facing south, and the new French doors.
As you open the French doors to the new porch, you are immediately struck by the sights and sound produced by the rushing water as it cascades over the spectacular multilevel waterfall. You will also notice that the mountain has literally been carved away as you view the layers and striations in the granite that surround the back of the porch. The peaked cathedral ceiling sports a glass apex and the bead board on the ceiling accentuated by the raw cedar plank framing and the five cedar trees used as cornerstones all bring the outdoors within your reach. The addition of “E-Z Breeze” vinyl windows along with the cast iron gas stove will allow you and your family to enjoy the beauty and continually changing scenery at The Lodge at Gold Mine Fall during all four seasons.
Opening the Adirondack style door on the other side of the lodge room allows you to step into the Lodge’s addition built at a later date. The four foot wide hallway boasts stained glass light fixtures and an architectural feature from the new stairwell that divides the living and the bedroom spaces. Knowing that the east wall in the kitchen and study were once on the home’s exterior allowed us to investigate and reveal the true character of these walls by removing the two layers of drywall and 4 inches of plaster exposing a striking addition to both rooms…… beautiful granite rock walls. The hallway flows into the granite breakfast bar which fully complements the newly exposed granite wall. From the Viking SS refrigerator to gas Jenn Air ceramic cooktop and microwave the appliances are a chef’s delight. Lighting is a critical component in a gourmet kitchen and the light from the double window is enhanced by two spotlights over the cooking area, LED task lighting under the cabinets, mood lighting over the top cabinets, and four “Murano” hand blown glass pendant lights over the sink and bar area. Scoring points in the design category, the full wood “Thomasville” two tone glazed cabinets that are country white and palomino scream style and sophistication, and are accentuated by the cool copper glass backsplash and refined stainless steel hardware. The porcelain, two bowl farmhouse sink is large enough for your biggest pots while the stainless steel sink guards will protect it from scratches. The SS faucet is professional quality and the Insinkerator will help the chef in the house save time with instant 190 degree water. An eight foot long exposed cedar tree trunk hangs over the cooking area allowing the chef to hang his/her favorite utensils and pots or pans in full lodge style. And who wouldn’t crave a large walk in pantry with commercial grade slides that will up to 120 pounds. With all these features, the cook/cooks in the family will love spending time in this room.
Across from the kitchen is a study/office area which can be closed off from the hallway by a double barn door. Except for the remarkable exposed granite rock wall mentioned earlier, the entire room has been paneled with raw cedar boards treated with Australian Tree Oil for true lodge feel. The triple crank out window provides a superb view of the pond and blazing Japanese maple trees in the fall. Outside, the hallway leads to the utility room which has been fully upgraded with all the modern amenities. The oak cabinetry with granite tops also has an extra deep sink with commercial kitchen sprayer. The sink area is surrounded by white subway tile while slate and green glass mini tile accents bring the outdoor colors inside. The doggy door, new exterior door and crank out window provide access to the back yard and additional light. From the new “Rinnai” point of use, gas hot water heater to the new “LG” full size, stackable washer and dryer, this utility room delivers.
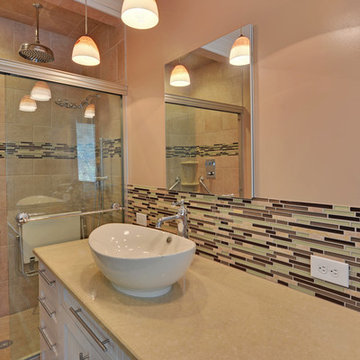
The master bedroom has four windows which provide outstanding light and air circulation. To take the chill off of nippy evenings, this bedroom also has its own romantic fireplace with travertine marble surround, remote controlled gas logs, and a beautiful antique oak and mirror mantle. To top it off, the en-suite bath contains high end fixtures, a spacious vanity, and floor to ceiling rain shower with independent valves allowing you to turn on the shower and not get wet. Multiple safety handrails and a fold down shower seat give bathers assurance and provide an additional measure of safety. The earthy color tiles, glass tile accents and hand blown light fixtures continue the lodge theme in this end of the house. Located across the hall, the guest bedroom is light and airy with its white window boxes and double crown molding, and also has an attached bathroom. This bathroom also has an entrance door leading to the hallway and doubles as the guest bathroom for the house. Its antique oak vanity and mirror, stained glass lights and wrought iron accents remind me of a past era while the vessel sink, modern fixtures, and floor to ceiling travertine and glass tile rain shower all bring the bathroom up to modern standards.
Located at the end of the hallway, and next to the guest bathroom, is the handcrafted stairwell leading to the sleeping loft. The distinctive maple stair treads with their grain and raw edge being displayed, were milled locally in Clayton and then installed from underneath so that no screw or nail heads are visible. The staircase was completed with wrought iron spindles, raw cedar handrail and floor to ceiling end post. Upon your entry into the sleeping loft, you will notice the amount of light that enters through the two skylights and large window facing the pond. The sound of water rushing over the pond’s spillway is a delightful addition to this large sleeping loft. Finished with engineered hardwood flooring and two built in double beds with tree trunks for legs, the room can accommodate four additional twin beds. The sleeping loft is also equipped with a kitchenette and a distinctive cedar and rock walled bathroom. The bath features an antique dresser vanity with marble vessel sink, distinctive fixtures and a floor to ceiling polished travertine marble shower with rain head. This bathroom also has an exterior door leading to a secondary upstairs staircase in the back yard. Just envision the great sleepovers the kids or grandkids will have here or how your out of town friends or family will just love this special area designed with their comfort and needs in mind.
Originally constructed in 1925 by “off Broadway” star Rose Grant, this property is rich in history. In the early years, this home was one of the first in Rabun County to generate its own electric from the waterfall. Several small cabins were also built on the property and rented out to guests who came for the waterfall, swim in the pond and connect with nature. Other notable residents were Mrs. and Doctor Fowler who was a local pediatrician. According to an aged newspaper article, Mrs. Fowler was very interested in the indigenous flora and fauna and grew a variety of native plants on the property including some that were rare or endangered. Many metal name tags still remain along the various paths on the property thus reminding you of times gone by and the true beauty of property.
Lastly, this solidly built home has just been structurally solidified, become more energy efficient, and reconfigured to further usable space all while retaining the Lodge’s original charm. After removing the flooring in the kitchen, hall and both bathrooms, the home’s structure and roof were fortified with numerous concrete footers to support both bathrooms, kitchen, and stairwell walls that extend from floor to roof. To make this home more comfortable, energy efficient, and bring it up to modern standards, the electrical system was upgraded to 220 service with the wiring, outlets, electrical panels and fixtures replaced throughout the entire home. A whole house surge protector was also installed to protect against damage that may occur with lightning strikes. Speaking of electric…..the pond’s newly poured formed concrete wall contains a pipe enabling you to install your own hydro-electric system. And whether you might decide to tie into the grid or store you energy in a battery system, you could generate your own electric 24/7. The homes plumbing was also replaced with new pipes, energy/water efficient fixtures in each bathroom (including three Toto toilets), and a new cistern was installed behind the garage with a laboratory grade water filtration system. The task of water heating was completed by a gas Rinnai point of use hot water heater in the utility room and all windows were replaced with Anderson thermal pane and 6 Velux skylights were mounted to bring the outdoors inside. The home’s HVAC system was top of the line several years ago and both sets of new gas logs are controlled with remotes. Formerly a summer home, all exterior walls were studded out with insulation added, and whole house fans were installed in the attic and upstairs bathroom. Although many of these upgrades may not be visible, they allow the home to be more energy efficient and more comfortable……allowing The Lodge at Gold Mine Falls to become your four season retreat.
 Envision Web
Stuart Wade, Envision Virtual Tours
The second-largest and most developed of Georgia's barrier islands, St. Simons is approximately twelve miles long and nearly three miles wide at its widest stretch (roughly the size of Manhattan Island in New York). The island is located in Glynn County on Georgia's coast and lies east of Brunswick (the seat of Glynn County), south of Little St. Simons Island and the Hampton River, and north of Jekyll Island. The resort community of Sea Island is separated from St. Simons on the east by the Black Banks River. Known for its oak tree canopies and historic landmarks, St. Simons is both a tourist destination and, according to the 2010 U.S. census, home to 12,743 residents.
Early History
The earliest
St. Simons Island Village
record of human habitation on the island dates to the Late Archaic Period, about 5,000 to 3,000 years ago. Remnants of shell rings left behind by Native Americans from this era survive on many of the barrier islands, including St. Simons. Centuries later, during the period known by historians as the chiefdom era, the Guale Indians established a chiefdom centered on St. Catherines Island and used St. Simons as their hunting and fishing grounds. By 1500 the Guale had established a permanent village of about 200 people on St. Simons, which they called Guadalquini.
Beginning in 1568, the Spanish attempted to create missions along the Georgia coast. Catholic missions were the primary means by which Georgia's indigenous Native American chiefdoms were assimilated into the Spanish colonial system along the northern frontier of greater Spanish Florida. In the 1600s St. Simons became home to two Spanish missions: San Buenaventura de Guadalquini, on the southern tip of the island, and Santo Domingo de Asao (or Asajo), on the northern tip. Located on the inland side of the island were the pagan refugee villages of San Simón, the island's namesake, and Ocotonico. In 1684 pirate raids left the missions and villages largely abandoned.
Colonial History
As
Fort Frederica
early as 1670, with Great Britain's establishment of the colony of Carolina and its expansion into Georgia territory, Spanish rule was threatened by the English. The Georgia coast was considered "debatable land" by England and Spain, even though Spain had fully retreated from St. Simons by 1702. Thirty-one years later General James Edward Oglethorpe founded the English settlement of Savannah. In 1736 he established Fort Frederica, named after the heir to the British throne, Frederick Louis, prince of Wales, on the west side of St. Simons Island to protect Savannah and the Carolinas from the Spanish threat.
Between 1736 and 1749 Fort Frederica was the hub of British military operations along the Georgia frontier. A town of the same name grew up around the fort and was of great importance to the new colony. By 1740 Frederica's population was 1,000. In 1736 the congregation of what would become Christ Church was organized within Fort Frederica as a mission of the Church of England. Charles Wesley led the first services. In 1742 Britain's decisive victory over Spain in the Battle of Bloody Marsh, during the War of Jenkins' Ear, ended the Spanish threat to the Georgia coast. When the British regimen disbanded in 1749, most of the townspeople relocated to the mainland. Fort Frederica went into decline and, except for a short time of prosperity during the 1760s and 1770s under the leadership of merchant James Spalding, never fully recovered. Today the historic citadel's tabby ruins are maintained by the National Park Service.
Plantation Era
By the start of the American Revolution (1775-83), Fort Frederica was obsolete, and St. Simons was left largely uninhabited as most of its residents joined the patriot army. Besides hosting a small Georgia naval victory on the Fort Frederica River, providing guns from its famous fort for use at Fort Morris in Sunbury, and serving as an arena for pillaging by privateers and British soldiers, the island played almost no role in the war.
Following the war, many of the townspeople, their businesses destroyed, turned to agriculture. The island was transformed into fourteen cotton plantations after acres of live oak trees were cleared for farm land and used for building American warships, including the famous USS Constitution, or "Old Ironsides." Although rice was the predominant crop along the neighboring Altamaha River, St. Simons was known for its production of long-staple cotton, which soon came to be known as Sea Island cotton.
Between
Ebos Landing
the 1780s and the outbreak of the Civil War (1861-65), St. Simons's plantation culture flourished. The saline atmosphere and the availability of cheap slave labor proved an ideal combination for the cultivation of Sea Island cotton. In 1803 a group of Ebo slaves who survived the Middle Passage and arrived on the west side of St. Simons staged a rebellion and drowned themselves. The sacred site is known today as Ebos Landing.
One of the largest owners of land and slaves on St. Simons was Pierce Butler, master of Hampton Point Plantation, located on the northern end of the island. By 1793 Butler owned more than 500 slaves, who cultivated 800 acres of cotton on St. Simons and 300 acres of rice on Butler's Island in the Altamaha River delta. Butler's grandson, Pierce Mease Butler, who at the age of sixteen inherited a share of his grandfather's estate in 1826, was responsible for the largest sale of human beings in the history of the United States: in 1859, to restore his squandered fortune, he sold 429 slaves in Savannah for more than $300,000. The British actress and writer Fanny Kemble, whose tumultuous marriage to Pierce ended in divorce in 1849, published an eyewitness account of the evils of slavery on St. Simons in her book Journal of a Residence on a Georgian Plantation in 1838-1839 (1863).
Another
Retreat Plantation
large owner of land and slaves on St. Simons was Major William Page, a friend and employee of Pierce Butler Sr. Before purchasing Retreat Plantation on the southwestern tip of the island in 1804, Page managed the Hampton plantation and Butler's Island. Upon Page's death in 1827, Thomas Butler King inherited the land together with his wife, Page's daughter, Anna Matilda Page King. King expanded his father-in-law's planting empire on St. Simons as well as on the mainland, and by 1835 Retreat Plantation alone was home to as many as 355 slaves.
The center of life during the island's plantation era was Christ Church, Frederica. Organized in 1807 by a group of island planters, the Episcopal church is the second oldest in the Diocese of Georgia. Embargoes imposed by the War of 1812 (1812-15) prevented the parishioners from building a church structure, so they worshiped in the home of John Beck, which stood on the site of Oglethorpe's only St. Simons residence, Orange Hall.
The first Christ Church building, finished on the present site in 1820, was ruined by occupying Union troops during the Civil War. In 1884 the Reverend Anson Dodge Jr. rebuilt the church as a memorial to his first wife, Ellen. The cruciform building with a trussed gothic roof and stained-glass windows remains active today as Christ Church.
Civil War and Beyond
The
St. Simons Island Lighthouse
outbreak of the Civil War in 1861 put a sudden end to St. Simons's lucrative plantation era. In January of that year, Confederate troops were stationed at the south end of the island to guard the entrance to Brunswick Harbor. Slaves from Retreat Plantation, owned by Thomas Butler King, built earthworks and batteries. Plantation residents were scattered—the men joined the Confederate army and their families moved to the mainland. Cannon fire was heard on the island in December 1861, and Confederate troops retreated in February 1862, after dynamiting the lighthouse to keep its beacon from aiding Union troops. Soon thereafter, Union troops occupied the island, which was used as a camp for freed slaves. By August 1862 more than 500 former slaves lived on St. Simons, including Susie King Taylor, who organized a school for freed slave children. But in November the ex-slaves were taken to Hilton Head, South Carolina, and Fernandina, Florida, leaving the island abandoned.
After the Civil War the island never returned to its status as an agricultural community. The plantations lay dormant because there were no slaves to work the fields. After Union general William T. Sherman's January 1865 Special Field Order No. 15 —a demand that former plantations be divided and distributed to former slaves—was overturned by U.S. president Andrew Johnson less than a year later, freedmen and women were forced to work as sharecroppers on the small farms that dotted the land previously occupied by the sprawling plantations.
By
St. Simons Lumber Mills
1870 real economic recovery began with the reestablishment of the timber industry. Norman Dodge and Titus G. Meigs of New York set up lumber mill operations at Gascoigne Bluff, formerly Hamilton Plantation. The lumber mills provided welcome employment for both blacks and whites and also provided mail and passenger boats to the mainland. Such water traffic, together with the construction of a new lighthouse in 1872, designed by architect Charles B. Cluskey, marked the beginning of St. Simons's tourism industry. The keeper of the lighthouse created a small amusement park, which drew many visitors, as did the seemingly miraculous light that traveled from the top of the lighthouse tower to the bottom. The island became a summer retreat for families from the mainland, particularly from Baxley, Brunswick, and Waycross.
The island's resort industry was thriving by the 1880s. Beachfront structures, such as a new pier and grand hotel, were built on the southeastern end of the island and could be accessed by ferry. Around this time wealthy northerners began vacationing on the island.
Twentieth Century
The
St. Simons Island Pier and Village
opening in 1924 of the Brunswick–St. Simons Highway, today known as the Torras Causeway, was a milestone in the development of resorts in the area. St. Simons's beaches were now easily accessible to locals and tourists alike. More than 5,000 automobiles took the short drive from Brunswick to St. Simons via the causeway on its opening day, paving the way for convenient residential and resort development.
In 1926 automotive pioneer Howard Coffin of Detroit, Michigan, bought large tracts of land on St. Simons, including the former Retreat Plantation, and constructed a golf course, yacht club, paved roads, and a residential subdivision. Although the causeway had brought large numbers of summer people to the island, St. Simons remained a small community with only a few hundred permanent residents until the 1940s.
The
St. Simons Island
outbreak of World War II (1941-45) brought more visitors and residents to St. Simons. Troops stationed at Jacksonville, Florida; Savannah; and nearby Camp Stewart took weekend vacations on the island, and a new naval air base and radar school became home to even more officers and soldiers. The increased wartime population brought the island its first public school. With a major shipyard for the production of Liberty ships in nearby Brunswick, the waters of St. Simons became active with German U-boats. In April 1942, just off the coast, the Texas Company oil tanker S. S. Oklahoma and the S. S. Esso Baton Rouge were torpedoed by the Germans, bringing the war very close to home for island residents.
Due in large part to the military's improvement of the island's infrastructure during the war, development on the island boomed in the 1950s and 1960s. More permanent homes and subdivisions were built, and the island was no longer just a summer resort but also a thriving community. In 1950 the Methodist conference and retreat center Epworth by the Sea opened on Gascoigne Bluff. In 1961 novelist Eugenia Price visited St. Simons and began work on her first works of fiction, known as the St. Simons Trilogy. Inspired by real events on the island, Price's trilogy renewed interest in the history of Georgia's coast, and the novelist herself relocated to the island in 1965 and lived there for thirty-one years. St. Simons is also home to contemporary Georgia writer Tina McElroy Ansa.
Since
Epworth by the Sea
1980 St. Simons's population has doubled. The island's continued status as a vacation destination and its ongoing development boom have put historic landmarks and natural areas at risk. While such landmarks as the Fort Frederica ruins and the Battle of Bloody Marsh site are preserved and maintained by the National Park Service, and while the historic lighthouse is maintained by the Coastal Georgia Historical Society, historic Ebos Landing has been taken over by a sewage treatment plant.
Several coastal organizations have formed in recent years to save natural areas on the island. The St. Simons Land Trust, for example, has received donations of large tracts of land and plans to protect property in the island's three traditional African American neighborhoods. Despite its rapid growth and development, St. Simons remains one of the most beautiful and important islands on the Georgia coast.
 Progressive Design Build
The Challenge
This beautiful waterfront home was begging for an update. Our clients wanted a contemporary design with modern finishes. They craved improved functionality in the kitchen, hardwood flooring in the living areas, and a spacious walk-in closet in the master bathroom. With two children in school, our clients also needed the project completed during their summer vacation – leaving a slim 90 days for the entire remodel. Could we do it? …Challenge accepted!
Our Solution
With their active summer travel schedule, our clients elected to vacate their home for the duration of the project. This was ideal for the intrusive nature of the scope of work.
In preparation, our design team created a project plan to suit our client’s needs. With such a clear timeline, we were able to select and order long-lead items in plenty of time for the project start date.
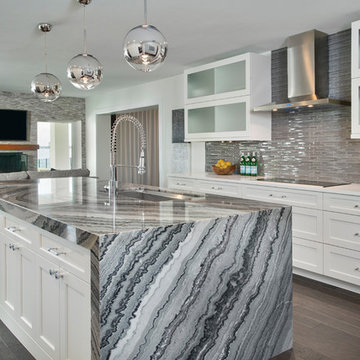
In the kitchen, we rearranged the layout to provide superior ventilation for the cooktop on the exterior wall. We added two large storage cabinets with glass doors, accented by a sleek mosaic backsplash of glass tile. We also incorporated a large contemporary waterfall island into the room. With seating at one end, the island provides both increased functionality and an eye-catching focal point for the center of the room. On the interior wall of the kitchen, we maximized storage with a wall of built-in cabinetry – complete with pullout pantry cabinets, a double oven, and a large stainless refrigerator.
Our clients wisely chose rich, dark-colored wood flooring to add warmth to the contemporary design. After installing the flooring in the kitchen, we brought it into the main living areas as well. In the great room, we wrapped the existing gas fireplace in a neutral stack stone. The effect of the stone on the media and window wall is breathtaking.
In the master bathroom, we expanded the closet by pushing the wall back into the adjacent pass-through hallway. The new walk-in closet now includes an impressive closet organization system.
Returning to the master bathroom, we removed the single vanity and repositioned the toilet, allowing for a new, curb-less glass shower and a his-and-hers vanity. The entire vanity and shower wall is finished in white 12×24 porcelain tile. The vertical glass mosaic accent band and backlit floating mirrors add to the clean, modern style. To the left of the master bathroom entry, we even added a matching make-up area.
Finally, we installed a number of elegant enhancements in the remaining rooms. The clients chose a bronze metal relief accent wall as well as some colorful finishes and artwork for the entry and hallway.
Exceptional Results
Our clients were simply thrilled with the final product! Not only did they return from their summer vacation to a gorgeous home remodel, but we concluded the project a full week ahead of schedule. As a result, the family was able to move in sooner than planned, giving them plenty of time to acclimate to the renovated space before their kids returned to school. Ultimately, we provided the outstanding results and customer experience that our clients had been searching for.
“We met with many other contractors leading up to signing with Progressive Design Build. When we met Mike, we finally felt safe. We had heard so many horror stories about contractors! Progressive was the best move we could have made. They made our dream house become a reality. Vernon was in charge of our project and everything went better than we expected. Our project was completed earlier than expected, too. Our questions and concerns were dealt with quickly and professionally, the job site was always clean, and all subs were friendly and professional. We had a wonderful experience with Progressive Design Build. We’re so grateful we found them.” – The Mader Family
 transFORM Home
When you first walk into this dressing room, it’s the lighting that jumps out at you first. Each shelf is illuminated to show the brilliant colors and texture of the clothing. Light even pours through the big windows and draws your eye across the rooftops of Brooklyn to see the NYC skyline. It creates a feeling of brightness and positivity that energizes and enlivens. It’s a dressing room where you can look and feel your best as you begin your day.
Featured in a modern Italian Melamine and tastefully accented with complementing Matte Nickel hardware and Clear Acrylic handle pulls, this Chic Brooklyn Dressing Room proves to be not only stylish, but functional too.
This custom closet combines both high and low hanging sections, which afford you enough room to organize items based on size. This type of mechanism offers more depth than a standard hanging system.
The open shelving offers a substantial amount of depth, so you have plenty of space to personalize your room with mementos, collectibles and home decor. Adjustable shelves also give you the freedom to store items of all sizes from large shoe and boot boxes to smaller collectibles and scarves.
A functional key to closet design is being able to visualize and conveniently access items. There’s also something very appealing about having your items neatly displayed - especially when it comes to shoes. Our wide shoe shelves were purposely installed on a slant for easy access, allowing you to identify and grab your favorite footwear quickly and easily.
A spacious center island provides a place to relax while spreading out accessories and visualizing more possibilities. This center island was designed with extra drawer storage that includes a velvet lined jewelry drawer. Double jewelry drawers can add a sleek and useful dimension to any dressing room. An organized system will prevent tarnishing and with a designated spot for every piece, your jewelry stays organized and in perfect condition.
The space is maximized with smart storage features like an Elite Belt Rack and hook as well as Elite Valet Rods and a pull-out mirror. The unit also includes a Deluxe Pant Rack in a Matte Nickel finish. Thanks to the full-extension ball-bearing slides, everything is in complete view. This means you no longer have to waste time desperately hunting for something you know is hiding somewhere in your closet.
Lighting played a huge role in the design of this dressing room. In order to make the contents of the closet fully visible, we integrated a combination of energy efficient lighting options, including LED strip lights and touch dimmers as well as under-mounted shelf lights and sensor activated drawer lights. Efficient lighting options will put your wardrobe in full view early in the mornings and in the evenings when dressing rooms are used most.
Dressing rooms act as a personal sanctuary for mixing and matching the perfect ensemble. Your closet should cater to your personal needs, whether it’s top shelving or extra boot and hat storage. A well designed space can make dressing much easier - even on rushed mornings.
14