
Search results for "Receive document" in Home Design Ideas
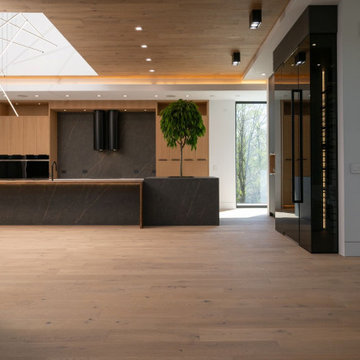
 KC Architects, Inc
KC Architects: European Design Meets Chicago ExpertiseLed by licensed architect Katarzyna Cimoch, our firm delivers premium residential design solutions tailored to the modern homeowner. Whether you are building a custom dream home or reimagining your current space with a renovation or addition, we bridge the gap between timeless European sensibility and local American craftsmanship.Our Core ServicesCustom Home Design: Tailor-made residences from the ground up.Renovations & Additions: Seamlessly integrating new life into existing structures.Permit Management: Navigating the complex Chicago approval process for you.Construction Supervision: On-site oversight to ensure your vision is built to spec.Frequently Asked QuestionsQuestionAnswerHow long does the design process take?Typically 4-8 weeks, depending on the complexity of the project.Do you handle permits?Yes, we manage the entire permitting and approval process with local authorities.What is your design style?We are versatile; we adapt to your preferences while maintaining timeless architectural principles.Do you work with contractors?We can recommend our trusted partners or collaborate with a contractor of your choice.Where do you offer services?We serve the entire Chicago area and the surrounding suburbs.Are initial consultations free?Yes, we offer complimentary initial consultations to discuss your vision.What is included in the plans?You receive complete construction documents and detailed specifications.How much do services cost?Fees are calculated based on the specific scope and complexity of your project.

 The Cultural Landscape Foundation
Sunday July 19, 3:00 to 4:30pm | Falls Village
Pittman Residence by Designed by A.E. Bye, Dialogue led by Kimberly Mercurio of Kimberly Mercurio Landscape Architecture
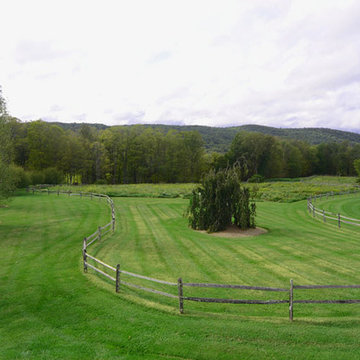
Designed by twentieth-century landscape architect A.E. Bye, the Pittman Residence in Falls Village, Connecticut features an artistic landscape design both inspired by and accentuating the area’s natural ecological character. Embodying the architect’s own creative aesthetic, the property incorporates various undulating landforms that draw on the presence of natural shadows to create a memorable landscape that lingers in the minds of visitors long after they bid the property ado. This season, join landscape architect and scholar Kimberly Mercurio as she leads an engaging dialogue on the design history of the Pittman Residence and the significance of Bye’s play on shadows in landscape architecture. With her immense knowledge of A.E. Bye’s work, having recently completed the A.E. Bye/Landscape Architecture Archives Research Fellowship at Penn State University and received a grant from Dumbarton Oaks to further study and document his achievements, Mercurio’s presentation promises to be both educational and inspiring. Photo courtesy Kimberly Mercurio
 The Cultural Landscape Foundation
Sunday July 19, 3:00 to 4:30pm | Falls Village
Pittman Residence by Designed by A.E. Bye, Dialogue led by Kimberly Mercurio of Kimberly Mercurio Landscape Architecture
Designed by twentieth-century landscape architect A.E. Bye, the Pittman Residence in Falls Village, Connecticut features an artistic landscape design both inspired by and accentuating the area’s natural ecological character. Embodying the architect’s own creative aesthetic, the property incorporates various undulating landforms that draw on the presence of natural shadows to create a memorable landscape that lingers in the minds of visitors long after they bid the property ado. This season, join landscape architect and scholar Kimberly Mercurio as she leads an engaging dialogue on the design history of the Pittman Residence and the significance of Bye’s play on shadows in landscape architecture. With her immense knowledge of A.E. Bye’s work, having recently completed the A.E. Bye/Landscape Architecture Archives Research Fellowship at Penn State University and received a grant from Dumbarton Oaks to further study and document his achievements, Mercurio’s presentation promises to be both educational and inspiring. Photo courtesy Kimberly Mercurio
Find the right local pro for your project
 The Cultural Landscape Foundation
Sunday July 19, 3:00 to 4:30pm | Falls Village
Pittman Residence by Designed by A.E. Bye, Dialogue led by Kimberly Mercurio of Kimberly Mercurio Landscape Architecture
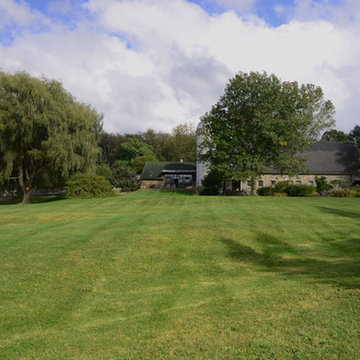
Designed by twentieth-century landscape architect A.E. Bye, the Pittman Residence in Falls Village, Connecticut features an artistic landscape design both inspired by and accentuating the area’s natural ecological character. Embodying the architect’s own creative aesthetic, the property incorporates various undulating landforms that draw on the presence of natural shadows to create a memorable landscape that lingers in the minds of visitors long after they bid the property ado. This season, join landscape architect and scholar Kimberly Mercurio as she leads an engaging dialogue on the design history of the Pittman Residence and the significance of Bye’s play on shadows in landscape architecture. With her immense knowledge of A.E. Bye’s work, having recently completed the A.E. Bye/Landscape Architecture Archives Research Fellowship at Penn State University and received a grant from Dumbarton Oaks to further study and document his achievements, Mercurio’s presentation promises to be both educational and inspiring. Photo courtesy Kimberly Mercurio
 The Cultural Landscape Foundation
Sunday July 19, 3:00 to 4:30pm | Falls Village
Pittman Residence by Designed by A.E. Bye, Dialogue led by Kimberly Mercurio of Kimberly Mercurio Landscape Architecture
Designed by twentieth-century landscape architect A.E. Bye, the Pittman Residence in Falls Village, Connecticut features an artistic landscape design both inspired by and accentuating the area’s natural ecological character. Embodying the architect’s own creative aesthetic, the property incorporates various undulating landforms that draw on the presence of natural shadows to create a memorable landscape that lingers in the minds of visitors long after they bid the property ado. This season, join landscape architect and scholar Kimberly Mercurio as she leads an engaging dialogue on the design history of the Pittman Residence and the significance of Bye’s play on shadows in landscape architecture. With her immense knowledge of A.E. Bye’s work, having recently completed the A.E. Bye/Landscape Architecture Archives Research Fellowship at Penn State University and received a grant from Dumbarton Oaks to further study and document his achievements, Mercurio’s presentation promises to be both educational and inspiring. Photo courtesy Kimberly Mercurio

 Moss Yaw Design studio
Engineered cedar siding creates beautiful gray-blue tones at the exterior of the home, while adding a textural element to activate the simple exterior design.
 Regan Baker Design Inc.
Stylish brewery owners with airline miles that match George Clooney’s decided to hire Regan Baker Design to transform their beloved Duboce Park second home into an organic modern oasis reflecting their modern aesthetic and sustainable, green conscience lifestyle. From hops to floors, we worked extensively with our design savvy clients to provide a new footprint for their kitchen, dining and living room area, redesigned three bathrooms, reconfigured and designed the master suite, and replaced an existing spiral staircase with a new modern, steel staircase. We collaborated with an architect to expedite the permit process, as well as hired a structural engineer to help with the new loads from removing the stairs and load bearing walls in the kitchen and Master bedroom. We also used LED light fixtures, FSC certified cabinetry and low VOC paint finishes.
Regan Baker Design was responsible for the overall schematics, design development, construction documentation, construction administration, as well as the selection and procurement of all fixtures, cabinets, equipment, furniture,and accessories.
Key Contributors: Green Home Construction; Photography: Sarah Hebenstreit / Modern Kids Co.
In this photo:
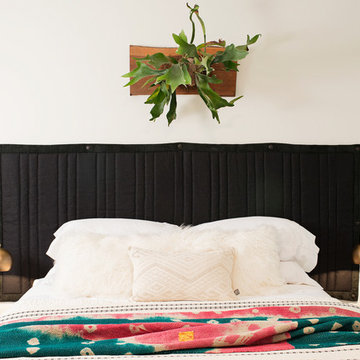
A canvas-like linen was used as a headboard in the guest bedroom. It has a leather trim and is hung with oversized iron nails. And a spiffy hanging plant about the faux headboard completes the look.
 The Cultural Landscape Foundation
Sunday July 19, 3:00 to 4:30pm | Falls Village
Pittman Residence by Designed by A.E. Bye, Dialogue led by Kimberly Mercurio of Kimberly Mercurio Landscape Architecture
Designed by twentieth-century landscape architect A.E. Bye, the Pittman Residence in Falls Village, Connecticut features an artistic landscape design both inspired by and accentuating the area’s natural ecological character. Embodying the architect’s own creative aesthetic, the property incorporates various undulating landforms that draw on the presence of natural shadows to create a memorable landscape that lingers in the minds of visitors long after they bid the property ado. This season, join landscape architect and scholar Kimberly Mercurio as she leads an engaging dialogue on the design history of the Pittman Residence and the significance of Bye’s play on shadows in landscape architecture. With her immense knowledge of A.E. Bye’s work, having recently completed the A.E. Bye/Landscape Architecture Archives Research Fellowship at Penn State University and received a grant from Dumbarton Oaks to further study and document his achievements, Mercurio’s presentation promises to be both educational and inspiring. Photo courtesy Kimberly Mercurio

 Talon Construction Inc.
Designing and building a kitchen addition is a complex process that involves multiple steps and considerations. Here is a general outline to help you get started on your kitchen addition project:
Define Your Goals and Budget:
• Determine the purpose of the kitchen addition. Is it for more cooking space, a dining area, or a combination of both?
• Establish a realistic budget for your project. Consider all costs, including construction, permits, materials, and furnishings.
Hire a Design Professional:
• Seek the services of a design build company who specializes in kitchen additions.
• Discuss your vision, needs, and budget with the design professional to create a design concept.
Site Evaluation:
• Assess the existing space and structural condition of your home to ensure it can support the addition.
• Consider factors like zoning regulations, setbacks, and building codes.
Design Development:
• Collaborate with your design professional to refine the concept, including the layout, size, and architectural style.
• Choose materials, finishes, and fixtures that fit your design and budget.
Obtain Permits:
• Consult with your local design build contractor to determine the necessary permits and approvals.
• Prepare and submit all required documents, including architectural drawings and engineering plans.
Create Construction Documents:
• Work with your design build professional to develop detailed construction drawings and specifications.
• These documents will serve as a guide for contractors during construction.
Hire a design build contractor:
• Check references, credentials, and licenses before selecting a contractor.
• Sign a detailed contract that outlines the scope of work, timeline, and payment schedule.
Construction Phase:
• Demolition: If needed, remove any existing structures or walls.
• Foundation: Construct the foundation for the addition.
• Framing: Build the structural framework of the addition.
• Plumbing, Electrical, and HVAC: Install or update utilities as required.
• Insulation: Ensure proper insulation for energy efficiency.
• Drywall and Finish Work: Complete the walls and ceilings.
• Flooring and Cabinetry: Install flooring and kitchen cabinets.
• Appliances and Fixtures: Add appliances, plumbing fixtures, and lighting.
• Paint and Finish: Apply paint and finishes to achieve the desired look.
• Final Inspection: Schedule inspections to ensure compliance with building codes.
Final Inspections and Approvals:
• Arrange for final inspections to ensure the addition meets all safety and code requirements.
• Obtain any necessary certificates of occupancy or compliance.
Move In and Enjoy:
• Once all inspections and approvals are received, you can move into your new kitchen addition and start enjoying it.
Remember that every kitchen addition project is unique, so adapt this outline to your specific needs and circumstances. Consulting with professionals and obtaining the required permits and inspections is crucial to a successful and safe project.
 Talon Construction Inc.
Designing and building a kitchen addition is a complex process that involves multiple steps and considerations. Here is a general outline to help you get started on your kitchen addition project:
Define Your Goals and Budget:
• Determine the purpose of the kitchen addition. Is it for more cooking space, a dining area, or a combination of both?
• Establish a realistic budget for your project. Consider all costs, including construction, permits, materials, and furnishings.
Hire a Design Professional:
• Seek the services of a design build company who specializes in kitchen additions.
• Discuss your vision, needs, and budget with the design professional to create a design concept.
Site Evaluation:
• Assess the existing space and structural condition of your home to ensure it can support the addition.
• Consider factors like zoning regulations, setbacks, and building codes.
Design Development:
• Collaborate with your design professional to refine the concept, including the layout, size, and architectural style.
• Choose materials, finishes, and fixtures that fit your design and budget.
Obtain Permits:
• Consult with your local design build contractor to determine the necessary permits and approvals.
• Prepare and submit all required documents, including architectural drawings and engineering plans.
Create Construction Documents:
• Work with your design build professional to develop detailed construction drawings and specifications.
• These documents will serve as a guide for contractors during construction.
Hire a design build contractor:
• Check references, credentials, and licenses before selecting a contractor.
• Sign a detailed contract that outlines the scope of work, timeline, and payment schedule.
Construction Phase:
• Demolition: If needed, remove any existing structures or walls.
• Foundation: Construct the foundation for the addition.
• Framing: Build the structural framework of the addition.
• Plumbing, Electrical, and HVAC: Install or update utilities as required.
• Insulation: Ensure proper insulation for energy efficiency.
• Drywall and Finish Work: Complete the walls and ceilings.
• Flooring and Cabinetry: Install flooring and kitchen cabinets.
• Appliances and Fixtures: Add appliances, plumbing fixtures, and lighting.
• Paint and Finish: Apply paint and finishes to achieve the desired look.
• Final Inspection: Schedule inspections to ensure compliance with building codes.
Final Inspections and Approvals:
• Arrange for final inspections to ensure the addition meets all safety and code requirements.
• Obtain any necessary certificates of occupancy or compliance.
Move In and Enjoy:
• Once all inspections and approvals are received, you can move into your new kitchen addition and start enjoying it.
Remember that every kitchen addition project is unique, so adapt this outline to your specific needs and circumstances. Consulting with professionals and obtaining the required permits and inspections is crucial to a successful and safe project.
 Talon Construction Inc.
Designing and building a kitchen addition is a complex process that involves multiple steps and considerations. Here is a general outline to help you get started on your kitchen addition project:
Define Your Goals and Budget:
• Determine the purpose of the kitchen addition. Is it for more cooking space, a dining area, or a combination of both?
• Establish a realistic budget for your project. Consider all costs, including construction, permits, materials, and furnishings.
Hire a Design Professional:
• Seek the services of a design build company who specializes in kitchen additions.
• Discuss your vision, needs, and budget with the design professional to create a design concept.
Site Evaluation:
• Assess the existing space and structural condition of your home to ensure it can support the addition.
• Consider factors like zoning regulations, setbacks, and building codes.
Design Development:
• Collaborate with your design professional to refine the concept, including the layout, size, and architectural style.
• Choose materials, finishes, and fixtures that fit your design and budget.
Obtain Permits:
• Consult with your local design build contractor to determine the necessary permits and approvals.
• Prepare and submit all required documents, including architectural drawings and engineering plans.
Create Construction Documents:
• Work with your design build professional to develop detailed construction drawings and specifications.
• These documents will serve as a guide for contractors during construction.
Hire a design build contractor:
• Check references, credentials, and licenses before selecting a contractor.
• Sign a detailed contract that outlines the scope of work, timeline, and payment schedule.
Construction Phase:
• Demolition: If needed, remove any existing structures or walls.
• Foundation: Construct the foundation for the addition.
• Framing: Build the structural framework of the addition.
• Plumbing, Electrical, and HVAC: Install or update utilities as required.
• Insulation: Ensure proper insulation for energy efficiency.
• Drywall and Finish Work: Complete the walls and ceilings.
• Flooring and Cabinetry: Install flooring and kitchen cabinets.
• Appliances and Fixtures: Add appliances, plumbing fixtures, and lighting.
• Paint and Finish: Apply paint and finishes to achieve the desired look.
• Final Inspection: Schedule inspections to ensure compliance with building codes.
Final Inspections and Approvals:
• Arrange for final inspections to ensure the addition meets all safety and code requirements.
• Obtain any necessary certificates of occupancy or compliance.
Move In and Enjoy:
• Once all inspections and approvals are received, you can move into your new kitchen addition and start enjoying it.
Remember that every kitchen addition project is unique, so adapt this outline to your specific needs and circumstances. Consulting with professionals and obtaining the required permits and inspections is crucial to a successful and safe project.
 Talon Construction Inc.
Designing and building a kitchen addition is a complex process that involves multiple steps and considerations. Here is a general outline to help you get started on your kitchen addition project:
Define Your Goals and Budget:
• Determine the purpose of the kitchen addition. Is it for more cooking space, a dining area, or a combination of both?
• Establish a realistic budget for your project. Consider all costs, including construction, permits, materials, and furnishings.
Hire a Design Professional:
• Seek the services of a design build company who specializes in kitchen additions.
• Discuss your vision, needs, and budget with the design professional to create a design concept.
Site Evaluation:
• Assess the existing space and structural condition of your home to ensure it can support the addition.
• Consider factors like zoning regulations, setbacks, and building codes.
Design Development:
• Collaborate with your design professional to refine the concept, including the layout, size, and architectural style.
• Choose materials, finishes, and fixtures that fit your design and budget.
Obtain Permits:
• Consult with your local design build contractor to determine the necessary permits and approvals.
• Prepare and submit all required documents, including architectural drawings and engineering plans.
Create Construction Documents:
• Work with your design build professional to develop detailed construction drawings and specifications.
• These documents will serve as a guide for contractors during construction.
Hire a design build contractor:
• Check references, credentials, and licenses before selecting a contractor.
• Sign a detailed contract that outlines the scope of work, timeline, and payment schedule.
Construction Phase:
• Demolition: If needed, remove any existing structures or walls.
• Foundation: Construct the foundation for the addition.
• Framing: Build the structural framework of the addition.
• Plumbing, Electrical, and HVAC: Install or update utilities as required.
• Insulation: Ensure proper insulation for energy efficiency.
• Drywall and Finish Work: Complete the walls and ceilings.
• Flooring and Cabinetry: Install flooring and kitchen cabinets.
• Appliances and Fixtures: Add appliances, plumbing fixtures, and lighting.
• Paint and Finish: Apply paint and finishes to achieve the desired look.
• Final Inspection: Schedule inspections to ensure compliance with building codes.
Final Inspections and Approvals:
• Arrange for final inspections to ensure the addition meets all safety and code requirements.
• Obtain any necessary certificates of occupancy or compliance.
Move In and Enjoy:
• Once all inspections and approvals are received, you can move into your new kitchen addition and start enjoying it.
Remember that every kitchen addition project is unique, so adapt this outline to your specific needs and circumstances. Consulting with professionals and obtaining the required permits and inspections is crucial to a successful and safe project.
 Talon Construction Inc.
Designing and building a kitchen addition is a complex process that involves multiple steps and considerations. Here is a general outline to help you get started on your kitchen addition project:
Define Your Goals and Budget:
• Determine the purpose of the kitchen addition. Is it for more cooking space, a dining area, or a combination of both?
• Establish a realistic budget for your project. Consider all costs, including construction, permits, materials, and furnishings.
Hire a Design Professional:
• Seek the services of a design build company who specializes in kitchen additions.
• Discuss your vision, needs, and budget with the design professional to create a design concept.
Site Evaluation:
• Assess the existing space and structural condition of your home to ensure it can support the addition.
• Consider factors like zoning regulations, setbacks, and building codes.
Design Development:
• Collaborate with your design professional to refine the concept, including the layout, size, and architectural style.
• Choose materials, finishes, and fixtures that fit your design and budget.
Obtain Permits:
• Consult with your local design build contractor to determine the necessary permits and approvals.
• Prepare and submit all required documents, including architectural drawings and engineering plans.
Create Construction Documents:
• Work with your design build professional to develop detailed construction drawings and specifications.
• These documents will serve as a guide for contractors during construction.
Hire a design build contractor:
• Check references, credentials, and licenses before selecting a contractor.
• Sign a detailed contract that outlines the scope of work, timeline, and payment schedule.
Construction Phase:
• Demolition: If needed, remove any existing structures or walls.
• Foundation: Construct the foundation for the addition.
• Framing: Build the structural framework of the addition.
• Plumbing, Electrical, and HVAC: Install or update utilities as required.
• Insulation: Ensure proper insulation for energy efficiency.
• Drywall and Finish Work: Complete the walls and ceilings.
• Flooring and Cabinetry: Install flooring and kitchen cabinets.
• Appliances and Fixtures: Add appliances, plumbing fixtures, and lighting.
• Paint and Finish: Apply paint and finishes to achieve the desired look.
• Final Inspection: Schedule inspections to ensure compliance with building codes.
Final Inspections and Approvals:
• Arrange for final inspections to ensure the addition meets all safety and code requirements.
• Obtain any necessary certificates of occupancy or compliance.
Move In and Enjoy:
• Once all inspections and approvals are received, you can move into your new kitchen addition and start enjoying it.
Remember that every kitchen addition project is unique, so adapt this outline to your specific needs and circumstances. Consulting with professionals and obtaining the required permits and inspections is crucial to a successful and safe project.
 Talon Construction Inc.
Designing and building a kitchen addition is a complex process that involves multiple steps and considerations. Here is a general outline to help you get started on your kitchen addition project:
Define Your Goals and Budget:
• Determine the purpose of the kitchen addition. Is it for more cooking space, a dining area, or a combination of both?
• Establish a realistic budget for your project. Consider all costs, including construction, permits, materials, and furnishings.
Hire a Design Professional:
• Seek the services of a design build company who specializes in kitchen additions.
• Discuss your vision, needs, and budget with the design professional to create a design concept.
Site Evaluation:
• Assess the existing space and structural condition of your home to ensure it can support the addition.
• Consider factors like zoning regulations, setbacks, and building codes.
Design Development:
• Collaborate with your design professional to refine the concept, including the layout, size, and architectural style.
• Choose materials, finishes, and fixtures that fit your design and budget.
Obtain Permits:
• Consult with your local design build contractor to determine the necessary permits and approvals.
• Prepare and submit all required documents, including architectural drawings and engineering plans.
Create Construction Documents:
• Work with your design build professional to develop detailed construction drawings and specifications.
• These documents will serve as a guide for contractors during construction.
Hire a design build contractor:
• Check references, credentials, and licenses before selecting a contractor.
• Sign a detailed contract that outlines the scope of work, timeline, and payment schedule.
Construction Phase:
• Demolition: If needed, remove any existing structures or walls.
• Foundation: Construct the foundation for the addition.
• Framing: Build the structural framework of the addition.
• Plumbing, Electrical, and HVAC: Install or update utilities as required.
• Insulation: Ensure proper insulation for energy efficiency.
• Drywall and Finish Work: Complete the walls and ceilings.
• Flooring and Cabinetry: Install flooring and kitchen cabinets.
• Appliances and Fixtures: Add appliances, plumbing fixtures, and lighting.
• Paint and Finish: Apply paint and finishes to achieve the desired look.
• Final Inspection: Schedule inspections to ensure compliance with building codes.
Final Inspections and Approvals:
• Arrange for final inspections to ensure the addition meets all safety and code requirements.
• Obtain any necessary certificates of occupancy or compliance.
Move In and Enjoy:
• Once all inspections and approvals are received, you can move into your new kitchen addition and start enjoying it.
Remember that every kitchen addition project is unique, so adapt this outline to your specific needs and circumstances. Consulting with professionals and obtaining the required permits and inspections is crucial to a successful and safe project.
 Talon Construction Inc.
Designing and building a kitchen addition is a complex process that involves multiple steps and considerations. Here is a general outline to help you get started on your kitchen addition project:
Define Your Goals and Budget:
• Determine the purpose of the kitchen addition. Is it for more cooking space, a dining area, or a combination of both?
• Establish a realistic budget for your project. Consider all costs, including construction, permits, materials, and furnishings.
Hire a Design Professional:
• Seek the services of a design build company who specializes in kitchen additions.
• Discuss your vision, needs, and budget with the design professional to create a design concept.
Site Evaluation:
• Assess the existing space and structural condition of your home to ensure it can support the addition.
• Consider factors like zoning regulations, setbacks, and building codes.
Design Development:
• Collaborate with your design professional to refine the concept, including the layout, size, and architectural style.
• Choose materials, finishes, and fixtures that fit your design and budget.
Obtain Permits:
• Consult with your local design build contractor to determine the necessary permits and approvals.
• Prepare and submit all required documents, including architectural drawings and engineering plans.
Create Construction Documents:
• Work with your design build professional to develop detailed construction drawings and specifications.
• These documents will serve as a guide for contractors during construction.
Hire a design build contractor:
• Check references, credentials, and licenses before selecting a contractor.
• Sign a detailed contract that outlines the scope of work, timeline, and payment schedule.
Construction Phase:
• Demolition: If needed, remove any existing structures or walls.
• Foundation: Construct the foundation for the addition.
• Framing: Build the structural framework of the addition.
• Plumbing, Electrical, and HVAC: Install or update utilities as required.
• Insulation: Ensure proper insulation for energy efficiency.
• Drywall and Finish Work: Complete the walls and ceilings.
• Flooring and Cabinetry: Install flooring and kitchen cabinets.
• Appliances and Fixtures: Add appliances, plumbing fixtures, and lighting.
• Paint and Finish: Apply paint and finishes to achieve the desired look.
• Final Inspection: Schedule inspections to ensure compliance with building codes.
Final Inspections and Approvals:
• Arrange for final inspections to ensure the addition meets all safety and code requirements.
• Obtain any necessary certificates of occupancy or compliance.
Move In and Enjoy:
• Once all inspections and approvals are received, you can move into your new kitchen addition and start enjoying it.
Remember that every kitchen addition project is unique, so adapt this outline to your specific needs and circumstances. Consulting with professionals and obtaining the required permits and inspections is crucial to a successful and safe project.

 KINGDOM WOODWORKS
Collaboration with Canonbury Homes and Frank Neely Design Associates.
Inspiration for a timeless open concept kitchen remodel in Atlanta with beaded inset cabinets and two islands
Inspiration for a timeless open concept kitchen remodel in Atlanta with beaded inset cabinets and two islands


 McCullough's Flooring
Gorgeous master bath finished with Dal-Tile's Fabrique porcelain tile in the color Noir Linen polished. Tile size is 12"x24" installed in a brick joint pattern. The floor boasts underfloor heating on a timed thermostat.



 TKSL Construction
Patio - small traditional backyard stamped concrete patio idea in Denver with no cover
2