
Search results for "Rectangular floor tile" in Home Design Ideas


 Celtic Custom Homes
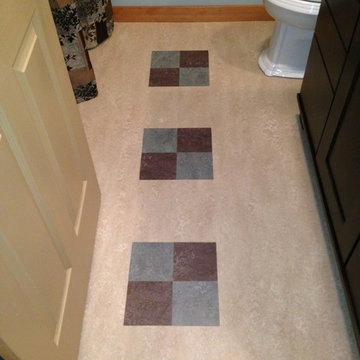
Freestanding bathtub - large craftsman master white tile and porcelain tile ceramic tile and beige floor freestanding bathtub idea with raised-panel cabinets, white cabinets, a two-piece toilet, white walls, an undermount sink, quartz countertops, a hinged shower door and white countertops

Find the right local pro for your project
 Tile Doctor Ltd
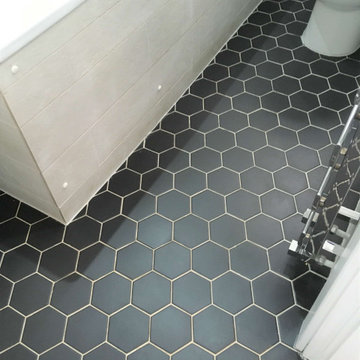
The pictures showed are of an Encaustic Cement tiled floor that had been installed in the bathroom of a property in Twickenham. At the time the tiles were installed, they did not seal them and had since accumulated dirt, especially in the grout lines.
Encaustic cement tiles have become extremely popular in the last few years with many beautiful artistic often geometric patterns available to choose from. The very nature of the cement-based tile however does make it slightly porous, and if left unsealed dirt will become ingrained in the tile making it difficult to remove and keep clean. Like grout they do therefore need to be sealed in order to keep them looking at their best for longer.
Now we normally recommend using diamond encrusted burnishing pads when renovating Encaustic Cement tiles however in this case the face of the tiles were not too bad and it was really the grout that needed the most attention. So, to cut the cost for customer, I advised a straightforward alkaline scrub clean and seal.
To clean the tile and grout I sprayed the floor with a strong dilution of Tile Doctor Pro-Clean and left it to soak into the dirt for ten minutes. Space in the bathroom was quite tight so instead of using a mechanical floor scrubber I scrubbed the tile and grout by hand working the alkaline cleaning solution into the pores to release the grout in dirt.
After scrubbing the floor was rinsed with a little water and the soil removed with a wet vacuum. Afterwards the floor was inspected, and any stubborn areas retreated with repeat of the process. After a final rinse, the floor was dried as much as possible with the wet vacuum.
Fortunately, the weather has been amazing of late and so it did not take long for the floor to dry, being a small space and a little encouragement from a heat gun always helps. Removing excess moisture before sealing is essential as even a small amount can cloud the sealer resulting in an uneven appearance.
Once satisfied that the floor was dry, I proceeded to seal it by applying a couple two coats of Tile Doctor Colour Grow across the Encaustic tile and grout. As an impregnating sealer Colour Grow penetrates the pores of the cement occupying the space and thus prevent any dirt from becoming ingrained there. Colour Grow’s colour intensifying properties also helped to deepen the black colour of the tile enhancing the contrast between the tiles and grout.
Now the floor has been properly sealed it will be far easier for the customer to keep them clean in future. For maximum longevity of the sealer I recommend maintenance cleaning with Tile Doctor Neutral Cleaner. Don’t be tempted to use supermarket cleaning products without reading the label first, many are simply too strong for cleaning sealed surfaces and will strip off the sealer prematurely leaving the tiles unprotected.
Jonathan Oldham
South Middlesex Tile Doctor

 Colorado Custom Floors
Reclaimed Hardwood Floor
Small mountain style enclosed dark wood floor living room photo in Denver
Small mountain style enclosed dark wood floor living room photo in Denver




 User
http://mollywinnphotography.com
Inspiration for a mid-sized farmhouse medium tone wood floor kitchen remodel in Austin with a farmhouse sink, concrete countertops, white backsplash, subway tile backsplash, stainless steel appliances, white walls and an island
Inspiration for a mid-sized farmhouse medium tone wood floor kitchen remodel in Austin with a farmhouse sink, concrete countertops, white backsplash, subway tile backsplash, stainless steel appliances, white walls and an island

 Morse Custom Homes and Remodeling
Bathroom - small traditional kids' gray tile and stone tile marble floor bathroom idea in Sacramento with beaded inset cabinets, gray cabinets and gray walls

 Bellweather Design-Build
Ronnie Bruce Photography
Bellweather Construction, LLC is a trained and certified remodeling and home improvement general contractor that specializes in period-appropriate renovations and energy efficiency improvements. Bellweather's managing partner, William Giesey, has over 20 years of experience providing construction management and design services for high-quality home renovations in Philadelphia and its Main Line suburbs. Will is a BPI-certified building analyst, NARI-certified kitchen and bath remodeler, and active member of his local NARI chapter. He is the acting chairman of a local historical commission and has participated in award-winning restoration and historic preservation projects. His work has been showcased on home tours and featured in magazines.
 Steveson Remodeling
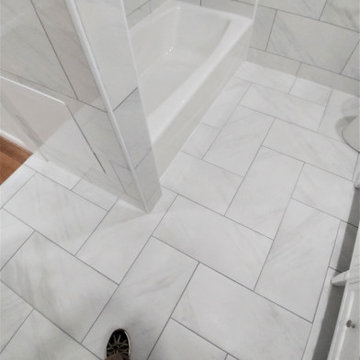
Example of a mid-sized trendy master white tile and porcelain tile porcelain tile, white floor and double-sink alcove bathtub design in Dallas with recessed-panel cabinets, white cabinets, a two-piece toilet, white walls, an undermount sink, quartz countertops, white countertops, a niche and a freestanding vanity

 WINN Design+Build
Alcove shower - mid-sized transitional master beige tile and ceramic tile ceramic tile and white floor alcove shower idea in DC Metro with shaker cabinets, light wood cabinets, a one-piece toilet, beige walls, an undermount sink and quartz countertops


 Lincorp / Borchert
Drop-in bathtub - transitional white tile white floor drop-in bathtub idea in Detroit with gray walls and a hinged shower door


 Art | Harrison Interiors & Collection
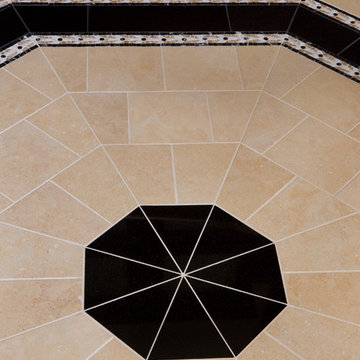
This turret master bathroom is part of a beautiful Tudor-style home. The octagonal room's geometric symmetry creates natural borders that segregate the distinct area of the bathroom. A tower storage area, separating the his-and-her vanities, holds a medicine cabinet and multiple cubbies for ample storage. The opposite hemisphere of the space features a half-wall, glass shower and a separate built-in tub, which are illuminated beautifully by natural light permeating the stained-glass windows. Beth Singer Photographer, Inc.
 Tile Doctor Ltd
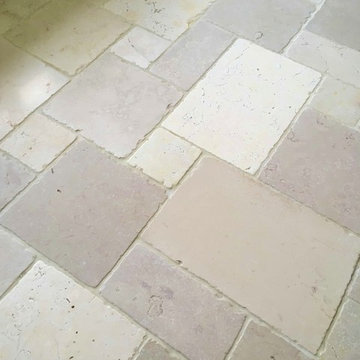
This Limestone tiled floor had been installed in the kitchen of a property in Teddington three years before and due to the use of the wrong cleaning product was now stripped of its protective sealer. Limestone like any natural stone is porous and without a sealer in place dirt becomes trapped in the stone making it very difficult to keep clean. The property was close to Bushy Park situated in South West London on the North bank of the Thames which is only about seven miles from my base in Shepperton.
I discovered all of this after visiting the property to quote for deep cleaning and resealing the floor. It turns out they have been using Flash multi-surface & floor cleaner which has an acidic pH of 10.3, compare this to Tile Doctor Remove and Go which we use to strip sealers off floors and has a pH of 12. Needless to say, this was not the right product to use and the old sealer had been completely stripped off the floor and probably within the first few months.
On top of this our customer had 3 children and a dog running in and out of the garden and was therefore transferring quite a lot of dirt into the stone. After surveying the floor, I discussed the renovation process with the customer which would take two days and include a deep clean of the Limestone followed by the application of a sealer to ensure it did not hold onto the dirt. They were after a sheen finish for the floor and were keen to have natural brown and cream variations in the stone highlighted. We agreed a price for the work and booked a date for the work to start.
To start with, we machine scrubbed the floor with Tile Doctor Pro-Clean to break down the dirt and release it from the stone. We find the best process is to spray the Pro-Clean onto the floor first and then leave to dwell for ten minutes before scrubbing. It’s not long before the cleaning solution turns dark with the dirt released from the pores of the stone and this soil is then rinsed with water and vacuumed off the floor with a low-pressure hard floor cleaning machine.
Following the cleaning, we honed the Limestone using a sequence of 800, 1500 and finally 3000-grit Tile Doctor Burnishing Pads. The pads are applied with water to lubricate and the slurry generated is rinsed off the floor as before. This burnishing process brings up the natural sheen of the stone and tightens up its pores prior to sealing. I left the floor overnight to allow it to dry out.
The next day I returned to the property and checked the floor for moisture using a damp meter. The readings were fine, so I proceeded with the application of the sealer for which I used two coats of Tile Doctor Colour Grow. This is an impregnating sealer that enhances the colours and contrast on the stone while protecting it against future soiling and spillages. It gave a lovely sheen finish to the floor as requested by the customer.
As you can see from the pictures the process made a huge difference to the floor which now looks lighter and brighter, certainly the customer was more than happy. Before leaving I recommended, they should clean the floor using Tile Doctor Stone Soap, this is a pH neutral product that will ensure the seal does not get broken down like it previously had using the household cleaners. It is gentle enough to use every day if you wish is designed to help maintain the patina of the burnished stone.
Jonathan Oldham
South Middlesex Tile Doctor


 Lucy and Company
design by beth keim owner lucy and company, photo by mekenzie france
Transitional bedroom photo in Charlotte
Transitional bedroom photo in Charlotte

 Arrowhead Remodeling & Design, Inc.
This elegant bathroom is a combination of modern design and pure lines. The use of white emphasizes the interplay of the forms. Although is a small bathroom, the layout and design of the volumes create a sensation of lightness and luminosity.
Photo: Viviana Cardozo

 Showpiece Kitchen & Bath
Stunning antique brass plumbing fixtures. Beautiful terra cotta tile on walls in light gray. Calacatta gold marble vanity. Gorgeous ceramic floor tile in hexagon shape. Curbless shower.
244