
Search results for "Removable" in Home Design Ideas
 Tile Doctor Ltd
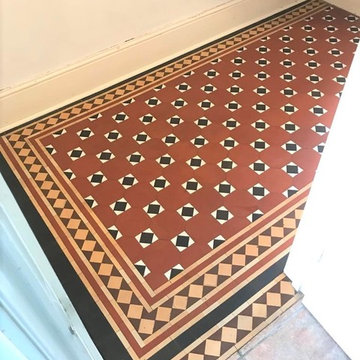
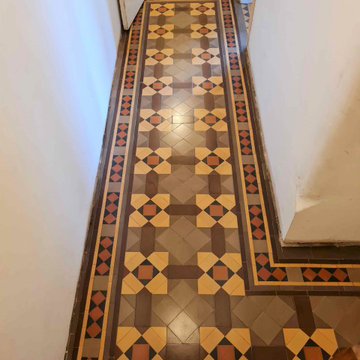
Our client had recently moved to a property in Newport, Gwent and when removing the carpet in the hallway she discovered this beautiful Victorian Tiled floor. The property had numerous period features and realising the value that the floor could add to the property she was keen to have it restored and so contacted Tile Doctor for help.
We popped round to survey the floor and except for a couple of broken tiles it had preserved well under the carpet. It was a shame the previous owner had covered the floor over but I was confident we could source some matching tiles to replace the broken ones and then restore the overall appearance. We gave the client a quote for the work which would take a couple of days. Pleased to hear that the floor could be restored and that it could soon be on show the quote was accepted and a date set to do the work.
We returned later the same month to renovate the floor and started by removing the broken tiles, cleaning out the old grout and adhesive and then relaying matching replacements. There are several specialist suppliers that can supply Victorian tiles so we can usually source reclaimed or reproduction tiles.
Some of the grout lines had dropped so as well as grouting around the replacement tiles more renovation work was needed to ensure the grout was level. We used quick setting products for this work, so I was able to move on to cleaning the floor later that afternoon.
To restore the appearance of the Victorian Tiles I used a strong dilution of Tile Doctor Pro-Clean combined with Tile Doctor Remove and Go which was left to soak in for ten minutes before being scrubbed into the tiles. This created a powerful cleaner/stripper cocktail which gets to work at removing dirt, grime and breaking down old sealers paint splashes.
After extracting the soil using a wet vacuum the floor was inspected. There were a few stubborn areas which were treated to a repeat clean and a wire brush to get the floor as clean as possible.
The floor was rinsed with water to remove any trace of cleaning products and then as much moisture as possible was extracted using a wet vacuum. The floor was left to dry off overnight and we arranged to return the next day to apply a sealer.
The following morning, we checked the floor was dry using a damp meter and this confirmed we were good to apply the sealer. The floor was sealed with Tile Doctor Colour Grow which is an impregnating sealer that protects the floor and enhances the beautiful colours in the tile. Three coats of the sealer were applied allowing each coat to dry before applying the next.
The client was very happy with the result and how beautiful the floor looked as you can see from the picture.
Paul Wales
Monmouthshire Tile Doctor
 EMBASSY CONSTRUCTION, LLC
MAJOR REPAIRS AND EXTERIOR MAKEOVER
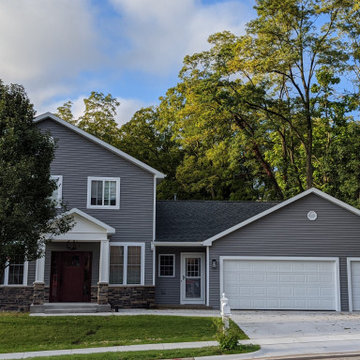
This classic colonial was constructed in 1990 and purchased by our customer in 2014. We were retained to restore, repair, and update the exterior of this property, with all parties anticipating that we were likely to uncover a variety of hidden issues. During the course of this undertaking, we replaced 17 windows. In a number of cases, we rebuilt sills and frames to the floor. All window replacements required new drywall and/or patching with new trim and painting.
Additional work was required to replace the sill across the front of the house and utilize jack studs to support the upper level while working.
The original plan included stripping off the old siding and installing new vinyl siding. We discovered that most exterior walls had never been sheathed with plywood. We sheathed all exterior walls and wrapped them with Tyvek.
As per the plan, we removed the door from the smaller upper deck above the primary deck, replaced rotted rim board and sill, and installed a new 48x48’ window to replace the doorway after resizing the former doorway. Insulating, patching of drywall, and the addition of new trim followed.
Reframed the opening from the kitchen to deck to receive a new 8’ x 6.75’ door and finished the jambs and casing to match existing trim in the rest of the house.
Removed and reconstructed front entry portico and replaced front entry door with sidelights and finished interior jambs and casing to match.
Removed garage door and framed in the opening with plywood and installed new siding over to match. Removed soffit and facia and replaced with new white vented panels and white facia—added stone to front portico with custom columns.
Removed old roof shingles and re-shingle all roofing on the garage and home with 30-year architectural shingles. Added ridge vent to allow the roof to breath better, replaced all flashing, and added lateral bracing to gable ends not previously tied in.
Installed new seamless gutters @ 6 inches (with covers over top) and 5 INCH downspouts to address water drainage. Extended all gable ends to standard 12-inch overhang.
The result is a beautifully restored and properly constructed 4 bedroom/4 bathroom home with an attached car garage.
 Five Star Tree Care
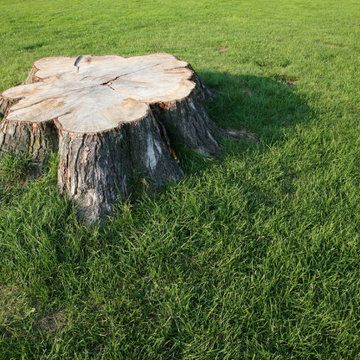
Tree stumps can make your property look unkempt and uncared for. Abandoned stumps can also become a breeding ground for pests and weeds. In some cases, they can even present a health hazard if you have children or pets that may stumble over them. Here at Five Star Tree Services we suggest stump grinding as the best way to handle rouge stumps if removal is not an option. Here are five of the main reasons we suggest grinding your tree stumps instead of leaving them unattended.
Read More: https://www.fivestartreecare.ca/blog/5-reasons-to-grind-your-tree-stumps/
Find the right local pro for your project
 Tile Doctor Ltd
Roundhay is an affluent area of North Leeds which is well-known for the fantastic Roundhay Park. The park is large enough to contain two lakes, extensive woodland, formal gardens and even golf courses! It’s the premier attraction for anyone fortunate enough to live in the area, or anyone visiting from nearby.
I recently visited a customer who lives in Roundhay and was looking for help in restoring the small Victorian tiled entranceway at the front of her house. The tiles were in a shocking state, but it’s not hard to imagine why – the entrance to a house receives a lot of foot traffic and is not typically taken care of regularly. These tiles were also marked with paint splashes left over from decoration work, making them look even worse.
The appearance of the entranceway did not set the right standard for the rest of the house, so the property owner was keen to have it restored professionally.
The appearance of the entranceway did not set the right standard for the rest of the house, so the property owner was keen to have it restored professionally.
The appearance of the entranceway did not set the right standard for the rest of the house, so the property owner was keen to have it restored professionally.
The appearance of the entranceway did not set the right standard for the rest of the house, so the property owner was keen to have it restored professionally.
I informed the customer that I could have the tiles rejuvenated within a day’s work. To begin, I used a scrapper and wire wool brush to manually remove some of the most stubborn paint marks.
Following this, I applied a strong solution of Tile Doctor Remove and Go, before leaving the product to dwell for about an hour. Remove and Go is multi-purpose stripping agent that can remove any adhesive and paint deposits, as well as many types of old coatings and sealers.
To work the product deep into the tiles, I agitated with an abrasive cleaning pad and then rinsed the area with fresh water. This had the desired affect and all the unsightly paint marks were removed.
Next, I gave the floor another thorough clean to remove any general muck and ingrained dirt. This was done using our high-alkaline cleaner, which we typically use on Victorian tiles, known as Tile Doctor Pro-Clean. In fact, Pro-Clean is a very reliable cleaner for all types of tile and grout including natural stone, Limestone, Slate and Travertine, amongst others.
Since I told the customer I would able to finish the job within a day, I dried the floor quickly using a heat gun so it could be sealed there and then. To seal the floor, I applied four coats of Tile Doctor Seal and Go, which is a topical sealer formulated to provide maximum protection along with a high-quality, low sheen finish.
As you can see from the photos above, the entranceway was absolutely transformed. These tiles are now a true asset to the rest of the property, rather than looking out of place! I’m please to say my customer was amazed by how quickly such a big difference could be made and left the following glowing feedback.
I can’t believe the before and after pictures. The restoration of the tiles is top quality, they are so much brighter and richer in colour – especially without the garage paint hiding the detail! Nigel did an amazing job, even better than I could have hoped for, and is a lovely guy as well. Would definitely recommend.
Nigel Stoker
North West Yorkshire Tile Doctor
 Tile Doctor Ltd
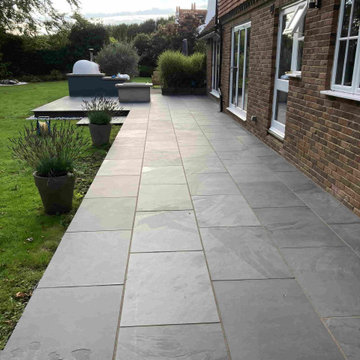
Our client in the villager of Pembury was feeling really deflated after having a Slate Patio laid adjacent to the full length of her house, however the builder had not applied the sealer correctly creating a mess which ruined the appearance of the stone.
Unfortunately, it is not that unusual to be contacted about this sort of situation, applying a sealer is not as easy as manufactures make out. There are lots of factors to consider, choosing the right sealer, is the stone damp, how do you know if you have applied too much, and it often catches tradesmen out. I was able to reassure them that with the right combination of products and equipment the problem could be rectified.
The first job was to strip off the old sealer which was done using a product called Tile Doctor Remove and Go. The name of this product pretty much says it all and once applied to the stone it is left to soak in for ten to twenty minutes before being scrubbed in with a rotary machine fitted with an abrasive burnishing pad.
Tile Doctor Remove and Go is a multi-purpose stripper which will remove most coatings and sealers, including epoxy grout haze which is another common problem we encounter when tradesmen have not cleaned up properly after grouting. It is also good for removing heavy build ups of grease. I used several burnishing pads of different grits going from coarse to smooth on this patio, rinsing and extracting the soil after each pad.
It was a large area, so this process took up most of the day on its own, fortunately I use a van mounted high pressure cleaning and extraction system to remove the soil which is very efficient and leaves the stone bright clean and reasonably dry afterwards. This ensures the process can be carried out with minimal mess.
It was a nice warm summers day and although cloudy we didn’t get any rain overnight, so after checking the forecast I was able to return the next day and apply a fresh sealer to the Slate.
My client wanted a natural look, so I used Tile Doctor Ultra Seal. This product is a no-sheen, natural-look, impregnating sealer which is formulated to provide maximum stain protection. These impregnating sealers work by penetrating the stone, occupying its pores, and thus preventing dirt from residing there.
The client was so happy and relieved to see the results on what a very expensive patio and commented she was eager to get the first barbecue of the season underway.
We recommended that a regular with the jet wash should keep the patio in good condition and in a few years time we could return to reapply the sealer for them.
Michael Conlon
South Kent Tile Doctor
 Tracstar Tree Experts
24/7 EMERGENCY STORM DAMAGE VIRGINIA BEACH
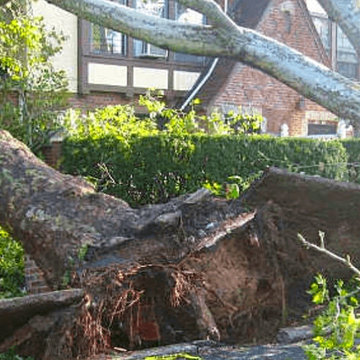
When you do you’ll be connected with the most highly skilled and promptly responsive arborists on the market today who are available 24/7 to provide emergency tree services in Virginia Beach, such as emergency tree removal in Virginia Beach. Experts quickly, affordably, and safely for all the people and property in the affected area.
Here at Tracstar Tree Experts, our tree service Virginia Beach professionals are serious about making your trees and your home safe no matter what emergency situations arise. It’s why our professionals are trained in quick responses and quick solutions to reduce the damage which can be inflicted by a diseased, fallen, or otherwise severely compromised tree and get you back to a state of safety and satisfaction with your home. If you find yourself with a sudden need for emergency tree services in Virginia Beach then you should absolutely not hesitate to contact the reliable and knowledgeable tree care Virginia Beach specialists at Tracstar Tree Experts. Call (757) 515-6933 as soon as you have a need for emergency tree services in Virginia Beach to receive a free estimate and the Virginia Beach tree care solutions you need to return to your life.
 Tracstar Tree Experts
24/7 EMERGENCY STORM DAMAGE VIRGINIA BEACH
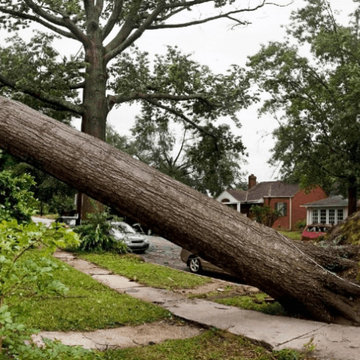
When you do you’ll be connected with the most highly skilled and promptly responsive arborists on the market today who are available 24/7 to provide emergency tree services in Virginia Beach, such as emergency tree removal in Virginia Beach. Experts quickly, affordably, and safely for all the people and property in the affected area.
Here at Tracstar Tree Experts, our tree service Virginia Beach professionals are serious about making your trees and your home safe no matter what emergency situations arise. It’s why our professionals are trained in quick responses and quick solutions to reduce the damage which can be inflicted by a diseased, fallen, or otherwise severely compromised tree and get you back to a state of safety and satisfaction with your home. If you find yourself with a sudden need for emergency tree services in Virginia Beach then you should absolutely not hesitate to contact the reliable and knowledgeable tree care Virginia Beach specialists at Tracstar Tree Experts. Call (757) 515-6933 as soon as you have a need for emergency tree services in Virginia Beach to receive a free estimate and the Virginia Beach tree care solutions you need to return to your life.


 Tile Doctor Ltd
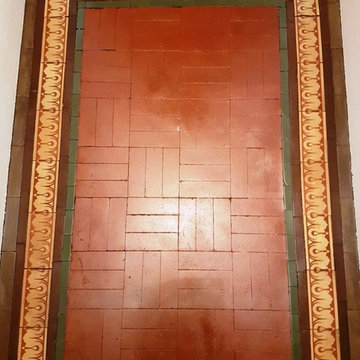
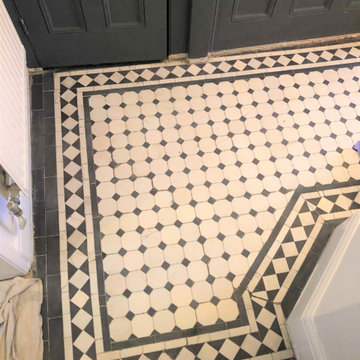
The owners of this Edwardian property in Finchley had purchased it a couple of years prior and since then had slowly been renovating it to restore its original character. The project was almost complete and now attention had turned to the tiled floor. The tiles were in quite a state and I was asked to work our Tile Doctor magic and bring it back to its original condition.
When they moved in the hallway had been covered with carpet which gave the tiles underneath some protection. Unfortunately, however the carpet has been secured with carpet grippers that had been glued to the tiles around the edges. There were also paint splashes on the surface that would need dealing with. On top of that the floor had a few missing tiles that had been back filled by cement to provide a level base for the carpet, the client wanted like them replaced if possible.
After surveying the floor, I explained what could be done and ever completed a small test clean to demonstrate how the tiles would look once deep cleaned. I was confident on being able to source very similar reclaimed tiles so replacing the missing should not be a problem. The client was very happy with the initial test result and my quotation so booked me in to restore the floor.
On my return I started by applying Tile Doctor Remove and Go to soften up the glue which allowed it to be carefully peeled off the tiles with scrappers. Once all the carpet adhesive was gone, I worked a strong dilution of Tile Doctor Remove and Go into the tiles using a black pad to work the cleaning solution deeper into the tiles. A wet vacuum was used to remove the slurry created, and I followed this by giving the tiles an extra clean using a 200-grit diamond burnishing pad lubricated with water.
The last step in the cleaning process was to give the floor an acid rinse using Tile Doctor Grout Clean-up, I did this for several reasons, first it removes old grout smears from the surface of the tile and second it neutralised any efflorescent salts lying dormant in the floor. This can be quite a problem for old floors which don’t have the benefit of a protective damp proof membrane under the floor. The floor was given a final rinse with water which was again extracted with a wet vacuum.
I then set about lifting all the loose tiles (approximately ten) and carefully removing the concrete infills. I had previously managed to source replacements for these holes from original features. Unfortunately, they didn’t sell the correct sized octagon tiles, so I had bought 150mm square tiles and then needed to cut them on site to get the right size.
After cutting and fixing the tiles I fixed them in place and regrouted the rest of the floor.
I then left the floor to dry out overnight and returned in the morning. Before applying a sealer, I took several moisture readings with the damp meter to make sure the tiles were dry enough to take the sealer.
I was able to confirm the floor was dry, so went ahead and applied three coats of Tile Doctor Colour Grow sealant. Colour Grow is an impregnating sealer that is fully breathable sealer which is important when it comes to old floors like these that don’t have a damp proof membrane installed.
My client was very happy with the renovated floor and for aftercare I left them with a bottle of Tile Doctor Neutral Tile Cleaner and gave advice on how best to clean the floor going forward.
Andrew Newstead
North London Tile Doctor
 Tile Doctor Ltd
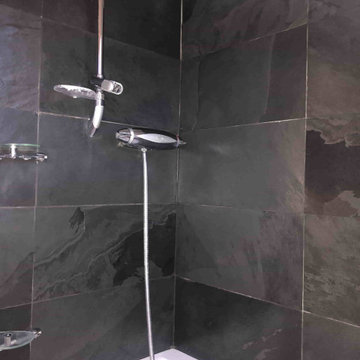
The photographs below are from a bathroom in Maida Vale W9 which had a lovely Slate tiled wall over a bath with shower. Unfortunately, the Slate tiles had been ruined by the use of harsh cleaning chemicals in an attempt to remove the limescale caused by hard water. The slate had now lost all its natural colour and looked completely washed out. The property had recently changed hands and the new owner was keen to have it renovated.
I went over to take a look and work out a solution, this in itself is a lot trickier these days with all the COVID precautions we need to take when working in someone’s house. It was clear that a strong acidic limescale remover had been used on the slate and this had etched the stone, leached all the natural oils away and generally ruined its appearance.
Fortunately, we have a solution for this (see below) and after conducting a small test I was able to confirm the problem could be resolved and gave them a quote which included a day’s labour, abrasive pads, stone oil and sealer. Our quote was gratefully accepted, and we booked a time in to carry out the work.
I returned to the property and I set about burnishing the slate wall tiles using a very coarse 200-grit six-inch burnishing pad fitted to a handheld buffing machine. This process resurfaces the stone slightly to remove the etching caused by the limescale remover. I used a medium dilution of Tile Doctor Grout Clean-up to lubricate the process and to remove the remaining limescale. Once done the slurry that is generated is rinsed off with more water. In a bathroom, it is easy the slurry can just be drained away. In other areas we would use a wet vacuum.
After the 200-grit pad the surface of the Slate was further refined using a 400-grit pad and then an 800-grit pad, this time only using water and giving the stone a thorough rinse after each pad to remove the soil.
The slate was then left to dry off over lunch and given more encouragement with a heat gun afterwards so I could move onto the next step. This involved applying a coat of Tile Doctor Stone Oil which puts back the natural oils back into the stone improving its appearance.
Once the Stone Oil had fully dried, I moved onto sealing for which I applied two coats of Tile Doctor Ultra-Seal; this is penetrating sealer that soaks into the stone to provide maximum stain protection without changing the colour of the stone. It is also an excellent grout sealer which is a bonus.
Before leaving I talked the client about how best to maintain the Slate and left them a complimentary bottle of Tile Doctor Aqua Pro tile cleaner which will help keep the limescale at bay. It is gentle enough to use every day but will help prevent the previous build-up and unlike the previous products used will not damage the newly applied sealer.
Jackson Davis
Central London Tile Cleaning
 LA Home Contractor
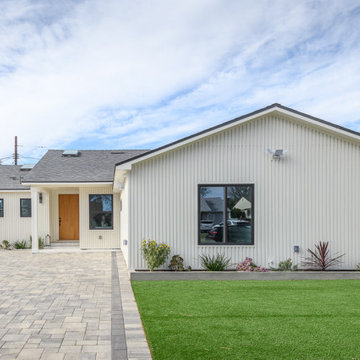
FULL HOUSE REMODEL – COMPLETE SCOPE OF WORK
1. Pre-Construction Phase
• Initial site inspection and measurements
• Architectural design and layout planning (if required)
• Structural engineering (if load-bearing walls are modified)
• Preparation of plans for city approval
• Permit application and plan check
• Obtain required building permits
• Scheduling of inspections
• Homeowner responsible for permit fees unless otherwise stated.
2. Site Preparation & Protection
• Protect flooring and non-work areas
• Install plastic dust barriers with zipper access
• Cover windows and furniture as needed
• Temporary utility setup if required
• Daily job site cleanup
• Final professional cleaning upon completion
3. Demolition
• Remove existing flooring (tile, wood, carpet, etc.)
• Remove cabinets, countertops, vanities
• Remove interior walls per plans
• Remove drywall where required
• Remove plumbing fixtures
• Remove electrical fixtures
• Haul away all debris
4. Structural & Framing
• Install structural beams if required
• Reframe modified walls
• Install new partitions per approved plans
• Repair or replace damaged framing
• Subfloor repair or replacement as needed
• Install blocking for cabinets and accessories
5. Plumbing (Up to Code)
• Replace old water supply lines (Copper Type L or PEX)
• Replace or modify drain lines (ABS)
• Relocate plumbing fixtures as needed
• Install new shut-off valves and cleanouts
• Water heater replacement if included
• Call for rough and final plumbing inspections
6. Electrical (Up to Code)
• Upgrade electrical panel if required
• Rewire entire house as needed
• Install new outlets and switches
• Install GFCI/AFCI protection per code
• Install recessed lighting and fixtures
• Install smoke and carbon monoxide detectors
• Dedicated circuits for appliances
• Call for rough and final electrical inspections
7. HVAC
• Replace or upgrade HVAC system if included
• Install new ducting and registers
• Install thermostat or mini-split system if applicable
8. Insulation
• Install wall insulation per code requirements
• Install ceiling insulation per code requirements
9. Drywall & Plaster
• Install new drywall
• Tape and mud (Level 4 or 5 finish)
• Texture to match existing or smooth finish
• Patch all affected areas
10. Flooring
• Install tile flooring
• Install engineered wood / hardwood / laminate / vinyl
• Install baseboards
• Floor leveling if required
11. Kitchen Remodel
• Install new cabinets
• Install countertops
• Install backsplash
• Install sink and faucet
• Install appliances (owner supplied unless specified)
12. Bathroom Remodel(s)
• Install new tub or shower system
• Waterproofing system installation
• Install tile on floors and walls
• Install vanity and toilet
• Install shower valve and fixtures
• Install shower glass if included
13. Doors & Windows
• Replace interior and entry doors
• Replace windows if included
• Install hardware
14. Interior & Exterior Paint
• Surface preparation
• Prime and paint walls, ceilings, and trim
• Exterior painting if included
15. Exterior Work (If Included)
• Stucco repair
• Roofing repair or replacement
• Concrete work or pavers
• Drainage improvements
16. Final Phase
• Final inspections
• Punch list completion
• Final cleaning
• Final walk-through with homeowner
Standard California Contract Terms (Summary)
• All work performed in compliance with California Building Code.
• Change orders must be approved in writing.
• Unforeseen conditions may require additional cost.
• One-year labor warranty unless otherwise stated.
• Progress payments per agreed payment schedule.
• Contractor is licensed and insured.
 Tracstar Tree Experts
24/7 EMERGENCY STORM DAMAGE VIRGINIA BEACH
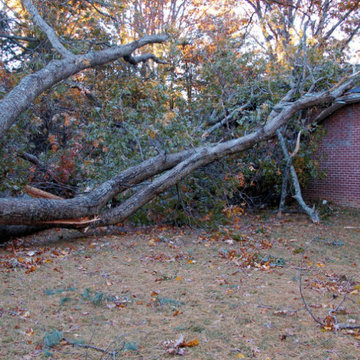
When you do you’ll be connected with the most highly skilled and promptly responsive arborists on the market today who are available 24/7 to provide emergency tree services in Virginia Beach, such as emergency tree removal in Virginia Beach. Experts quickly, affordably, and safely for all the people and property in the affected area.
Here at Tracstar Tree Experts, our tree service Virginia Beach professionals are serious about making your trees and your home safe no matter what emergency situations arise. It’s why our professionals are trained in quick responses and quick solutions to reduce the damage which can be inflicted by a diseased, fallen, or otherwise severely compromised tree and get you back to a state of safety and satisfaction with your home. If you find yourself with a sudden need for emergency tree services in Virginia Beach then you should absolutely not hesitate to contact the reliable and knowledgeable tree care Virginia Beach specialists at Tracstar Tree Experts. Call (757) 515-6933 as soon as you have a need for emergency tree services in Virginia Beach to receive a free estimate and the Virginia Beach tree care solutions you need to return to your life.
 Tracstar Tree Experts
24/7 EMERGENCY STORM DAMAGE VIRGINIA BEACH
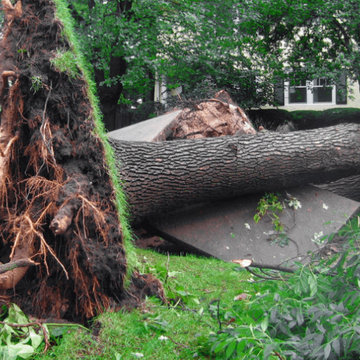
When you do you’ll be connected with the most highly skilled and promptly responsive arborists on the market today who are available 24/7 to provide emergency tree services in Virginia Beach, such as emergency tree removal in Virginia Beach. Experts quickly, affordably, and safely for all the people and property in the affected area.
Here at Tracstar Tree Experts, our tree service Virginia Beach professionals are serious about making your trees and your home safe no matter what emergency situations arise. It’s why our professionals are trained in quick responses and quick solutions to reduce the damage which can be inflicted by a diseased, fallen, or otherwise severely compromised tree and get you back to a state of safety and satisfaction with your home. If you find yourself with a sudden need for emergency tree services in Virginia Beach then you should absolutely not hesitate to contact the reliable and knowledgeable tree care Virginia Beach specialists at Tracstar Tree Experts. Call (757) 515-6933 as soon as you have a need for emergency tree services in Virginia Beach to receive a free estimate and the Virginia Beach tree care solutions you need to return to your life.
 Tile Doctor Ltd
We were contacted by a customer in West Kirby who needed help renovating a Victorian tiled hallway in a house they had just purchased. Kirby is a desirable seaside location North of Heswall that expanded with the arrival of the railway in 1848. The railway brought a demand for property and so it’s not unusual to find housing stock in this area dating back to the Victorian era.
The Victorian tiles at this property appear to have been neglected by the previous owner and were now looking very dull and marked by paint from decorating; all the colours looked washed out and the floor was now looking very unappealing.
The good news however is that this problem is not uncommon and with a deep clean and a fresh sealer applied it can be transformed. I gave the owner a quote which was accepted a date agreed for my return to do the work.
On the first day the floor was sprayed with a neat solution of Tile Doctor Remove and Go which is a powerful alkaline cleaning and stripping agent used to remove old seals and paint. The solution was left to dwell for about twenty minutes so it could soak in and get to work. It was then scrubbed into the tiles using a coarse 200-grit pad fitted to a heavy buffing machine. Water was then added to the floor for lubrication and the soils released from the pores of the tile during scrubbing was removed by with a wet vacuum.
To treat the stubborn paint stains and remains of what I suspect was carpet adhesive a hand scraper and wire brush was used, this was made easier by the Remove and Go which had softened the paint etc.
The next stage was to give the Victorian tiles a mild acid wash using Acid Gel which is applied to the floor, scrubbed in, and rinsed off with a little water then extracted using the wet vacuum. We always recommend an acid wash for old floors like these as it will counter any efflorescent salts resident in the tiles and helps to remove other mineral contaminates and old grout that can mask the true beauty of the tiles.
I left the tiles to dry out for two days before returning to apply the sealer, first checking it was dry by testing for moisture in various places with an electronic damp tester. It’s not a good idea to apply a sealer to a damp floor so we always check first.
Satisfied the floor was dry, I started applying a coat of Tile Doctor Colour Grow which is a colour enhancing impregnating sealer that helps to bring out the true colours in the tile. This was allowed to dry for thirty minutes and then followed up five coats of Tile Doctor Seal and Go Extra which is a breathable sealer that leaves a lovely satin finish and builds on the protection.
Once done the Victorian hallway tiles looked so much cleaner and healthier. It was quite a transformation and the new sealer had given the floor a nice low sheen shine which the customer was very happy with.
For aftercare cleaning I left them with a bottle of Tile Doctor Neutral Cleaner which is specially formulated for cleaning sealed tiles. We don’t recommend tile cleaning products you find on supermarket shelves as the are usually too strong and can strip a sealer off the floor prematurely. If your choosing another product to clean your floor always read the label to make sure its compatible.
Andrew Robb
Merseyside Tile Doctor


 Tile Doctor Ltd
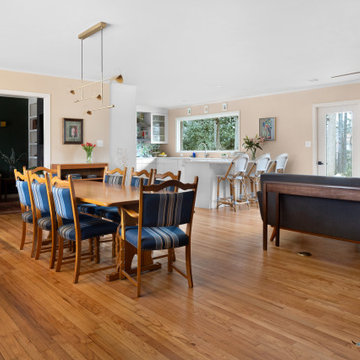
This is a large 17.2 m2 Sandstone Floor installed throughout the living and kitchen areas of a property in the beautiful village of Disley close to Lyme Park which is run by the National Trust. The floor had been installed four years ago and my client was unhappy with the original sealer which hadn’t lasted very long. Without the protection of a sealer dirt had become ingrained in the pores of the stone which was now difficult to clean. Another issue was the rough nature of the Sandstone meant it was impossible to mop as it shreds the mop! As a result, the floor was mainly cleaned with a hoover which was not ideal, especially in a kitchen.
I went over to survey the floor and before quoting I ran a small test clean in the kitchen which took the floor back to its natural pale colour and really showed how dirty the floor had become. Test cleans are great as it helps me to formulate an effective cleaning plan and provide an accurate quote. My client was impressed with the result and so I was booked to come back and deep clean and then reseal the whole floor. Due to its size I estimated the floor would take two days to deep clean and a further day to apply a new sealer, so three days in total.
Working in large sections I started by cleaning the floor and stripping off the old sealer with a strong dilution of Tile Doctor Remove and Go which is a coatings remover that is safe to use on stone. The solution was left to soak into the pores of the Sandstone for ten minutes before being worked in with a 200-grit diamond pad fitted to a rotary floor machine. This action not only removed the old sealer and cleaned the floor but the 200-grit pad being vey coarse removed a lot of the roughness from the surface of the Sandstone so it shouldn’t shred any more mops.
After rinsing the floor with water and removing the slurry with a wet vacuum I set about cleaning the grout with Tile Doctor Pro-Clean worked into the grout line with a stiff brush and assisted with steam from a professional steam cleaner with a grout attachment. Once done the floor was rinsed and extracted again to remove the soil from the grouting. There was also an area near one of the doors where the grout had become loose and needed replacing so I made up a batch of matching grout and filled this in. The floor was then left overnight to dry with assistance from a couple of air movers.
I returned the next day to finish the floor by applying a sealer. First, I double checked the floor was dry with the damp meter. The readings confirmed the air movers had done a good job and that the floor was within the accepted parameters, so I was ready to seal. The sealer I chose was Tile Doctor Seal and Go which being water based doesn’t leave a smell as it dries, it really works well on Sandstone and adds a nice subtle sheen to the stone.
Once finished the floor looked much cleaner, lighter in colour overall more inviting, you could even see the fossils in some of the tiles.
The surface was also smoother so the customer should find cleaning with a mop much easier in future. On that subject its worth pointing out that owners of sealed floors should always use a neutral pH tile cleaner on their floors as most supermarket products are simply too strong and will prematurely strip the sealer off a tile if used repeatedly. Tile Doctor sell a product called Tile Doctor Neutral Cleaner which is ideal for cleaning sealed Sandstone floors like this one.
My client was really happy with the results and sent me a message later saying: “the floor looks amazing!”
Kamila Logonzy
East Cheshire Tile Doctor
 Tile Doctor Ltd
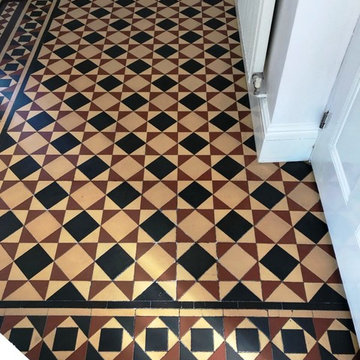
I was recently contacted by the owner of this Minton Victorian tiled floor in Kidderminster. The tiles had been covered over with carpet which I suspect was due to some the tiles being missing. Now uncovered it was stained with glue and carpet underlay was still stuck to the tiles in places. The owner was keen to have the floor fully restored including replacing damaged and missing tiles. We can replace missing or damaged tiles however the problem with old Victorian floors is finding matching replacements due to the unique patterns that many have. Fortunately, due to the popularity of Victorian tiles there are several suppliers who sell reproductions and occasionally you can find originals on ebay.
I went over to survey the floor an could see the tiles were certainly in need of some love and care. As part of the visit I carried out a test clean on a patch of the floor and the results were very satisfactory, so the owner asked me to go ahead.
On the day of arrival my first job was to spray the floor with neat Tile Doctor Remove and Go, this is a powerful cleaner/stripper which set to work on removing the glue and carpet underlay, this product will also remove any old sealer. I then left the solution to dwell and worked the chemical in with my buffer and a black pad removing the slurry with a wet and dry vacuum.
The tiles were then treated to an acid wash using Tile Doctor Acid Gel to further clean them and counter any potential efflorescence problem which is a problem with floors of this age that were installed without a damp-proof membrane. The product was scrubbed into the tile and grout, rinsed off with water and then extracted with the wet vacuum.
Once the floor was clean, I checked the colour of the tiles so I could cut and replace the missing section. I had managed to source some tiles that were a close match and set about cutting all the tiles to size and then fitted them using a flexible rapid set adhesive. The newly laid tiles needed to set, and the floor needed to dry out before we could apply the sealer.
The floor was left to dry overnight, on my return in the morning I tested the floor with a damp meter to check the moisture levels and ensure it was dry enough for sealing. I was satisfied it was dry so was able to proceed and seal the floor. Five coats of Tile Doctor Seal and Go Extra were applied which takes a lot of time as you need to wait for the previous coat to dry before applying the next. This product is a semi-gloss breathable sealer which gives a nice sheen to the tiles and fully protects them. It really allowed the colours and detail of the pattern to shine through and being breathable it will cope with any moisture rising though the floor.
The client was very happy with the overall finish and was really pleased that the Victorian tiles were now restored to their original appearance. It a fact that original features like these are in demand and add a lot of value to a property.
Mark Conway
Worcestershire Tile Doctor
 Tile Doctor Ltd
Recently I was called to a house in the very small town of Marton in Warwickshire which is known for its proximity to the medieval “Marton Bridge”, which lies just to the north, crossing the River Leam.
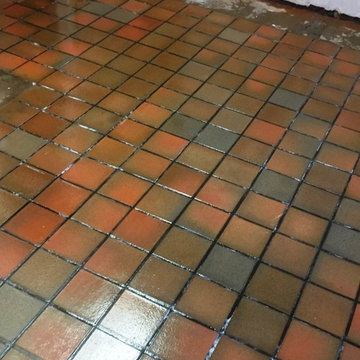
The entire downstairs flooring of my client’s house consisted of Quarry tiles apart from one room where the tiles had been covered by screed and then linoleum. Quarry tiles are a classic hard wearing tile used for both internal and external commercial and residential flooring due to its ability to withstand heavy usage. Reception areas, outdoor patios and porches, for example, are commonly tiled using Quarry.
My client wanted to restore the covered floor back to its original state so that it would match the rest of the downstairs. Realising that this would be a complex and physically demanding task, my client decided to call in Tile Doctor to carry out the restoration.
Removing the Linoleum covering was a relatively straightforward process, so I was able to do this relatively quickly. The main issue concerned removing the screed, which is far more difficult to remove, requiring a lot of physical scraping. Thus I opted to call in some extra manpower in the form of the Nottinghamshire Tile Doctor, Steve Carpenter. With the two of us armed with scrapers we set about removing the screed, taking extra care not to damage the Quarry tile underneath.
Once Steve and I had scraped off as much of the screed as physically possible, I applied a strong dilution of Tile Doctor Remove & Go, a stripper with cleaning properties that is particularly effective at breaking down coatings such as adhesives, plasters and sealers. The product was left to dwell for ten minutes before I worked it into the stone with a scrubbing pad.
After cleaning the tiles, I noticed a layer of grout haze on the surface of the exposed Quarry tiles, so I applied Tile Doctor Grout Clean-Up to remove it. Once the cleaning process was complete I gave the floor a thorough rinse with clean water, before soaking up the resulting residue with a wet-vac machine. The first day of work was a gruelling 12 hours long, but I was very pleased with the results and left the floor to dry overnight.
On day two I returned to finish the job by sealing the newly uncovered Quarry tiles, but not before using a damp meter to check that they were completely dry. Any excess moisture left on unsealed tiles can potentially effect the performance of any sealers that are applied. I sealed the tiles using Tile Doctor Colour Grow, an impregnating, colour-enhancing sealer which gave the surface an aesthetically pleasing shine, as well as durable protection against dirt and wear for the future.
After two long days of work the job was done and the transformation was fantastic and highly rewarding to see, the house now has a fantastic looking Quarry tiled floor running throughout the entirety of the lower level.
Mick Gayton
Warwickshire Tile Doctor
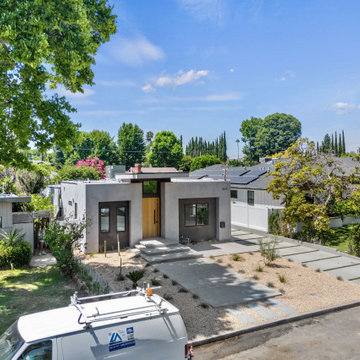 LA Home Contractor
FULL HOUSE REMODEL – COMPLETE SCOPE OF WORK
1. Pre-Construction Phase
• Initial site inspection and measurements
• Architectural design and layout planning (if required)
• Structural engineering (if load-bearing walls are modified)
• Preparation of plans for city approval
• Permit application and plan check
• Obtain required building permits
• Scheduling of inspections
• Homeowner responsible for permit fees unless otherwise stated.
2. Site Preparation & Protection
• Protect flooring and non-work areas
• Install plastic dust barriers with zipper access
• Cover windows and furniture as needed
• Temporary utility setup if required
• Daily job site cleanup
• Final professional cleaning upon completion
3. Demolition
• Remove existing flooring (tile, wood, carpet, etc.)
• Remove cabinets, countertops, vanities
• Remove interior walls per plans
• Remove drywall where required
• Remove plumbing fixtures
• Remove electrical fixtures
• Haul away all debris
4. Structural & Framing
• Install structural beams if required
• Reframe modified walls
• Install new partitions per approved plans
• Repair or replace damaged framing
• Subfloor repair or replacement as needed
• Install blocking for cabinets and accessories
5. Plumbing (Up to Code)
• Replace old water supply lines (Copper Type L or PEX)
• Replace or modify drain lines (ABS)
• Relocate plumbing fixtures as needed
• Install new shut-off valves and cleanouts
• Water heater replacement if included
• Call for rough and final plumbing inspections
6. Electrical (Up to Code)
• Upgrade electrical panel if required
• Rewire entire house as needed
• Install new outlets and switches
• Install GFCI/AFCI protection per code
• Install recessed lighting and fixtures
• Install smoke and carbon monoxide detectors
• Dedicated circuits for appliances
• Call for rough and final electrical inspections
7. HVAC
• Replace or upgrade HVAC system if included
• Install new ducting and registers
• Install thermostat or mini-split system if applicable
8. Insulation
• Install wall insulation per code requirements
• Install ceiling insulation per code requirements
9. Drywall & Plaster
• Install new drywall
• Tape and mud (Level 4 or 5 finish)
• Texture to match existing or smooth finish
• Patch all affected areas
10. Flooring
• Install tile flooring
• Install engineered wood / hardwood / laminate / vinyl
• Install baseboards
• Floor leveling if required
11. Kitchen Remodel
• Install new cabinets
• Install countertops
• Install backsplash
• Install sink and faucet
• Install appliances (owner supplied unless specified)
12. Bathroom Remodel(s)
• Install new tub or shower system
• Waterproofing system installation
• Install tile on floors and walls
• Install vanity and toilet
• Install shower valve and fixtures
• Install shower glass if included
13. Doors & Windows
• Replace interior and entry doors
• Replace windows if included
• Install hardware
14. Interior & Exterior Paint
• Surface preparation
• Prime and paint walls, ceilings, and trim
• Exterior painting if included
15. Exterior Work (If Included)
• Stucco repair
• Roofing repair or replacement
• Concrete work or pavers
• Drainage improvements
16. Final Phase
• Final inspections
• Punch list completion
• Final cleaning
• Final walk-through with homeowner
Standard California Contract Terms (Summary)
• All work performed in compliance with California Building Code.
• Change orders must be approved in writing.
• Unforeseen conditions may require additional cost.
• One-year labor warranty unless otherwise stated.
• Progress payments per agreed payment schedule.
• Contractor is licensed and insured.
 Five Star Tree Care
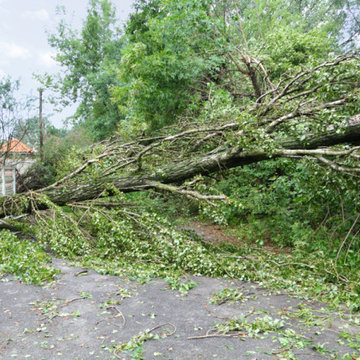
Storms are nature’s way of cleaning out the atmosphere and showing off her awesome power. As essential as this process may be, it can also cause tree damage. If your trees suffer damage during a storm, there are a few things you should do to set things back to their proper order, such as hire a tree removal service. Before you start cleaning up the mess, however, take a look at our suggestions to ensure you are doing what’s best for your trees and your property.
Check the Damage
Before you do anything, you should take the time to check the damage on your property and to the trees themselves. Sometimes broken branches and fallen leaves can hide serious damage that may require special attention. Check to ensure that there is no damage to your property, home, cars, and electrical lines. Next, after you confirm that there is no immediate danger, you can start assessing the tree itself. If you find serious damage to your trees such as splitting, leaning, or even burns from a lightning strike, it is best to call in professionals for help. If the tree is leaning on your home or vehicle, it is also a good idea to have a professional tree care service move forward with the cleanup.
Clean Up Minor Damage and Debris
After the storm has calmed down, and you have assessed the fallout, you can start your yard cleanup. Stick to cleaning up small branches and twigs in addition to leaves and other debris. Avoid large branches, any trees that may be leaning or heavily damaged. Even if your tree is upright, but showing signs of damage you should steer clear until the professionals can assess the situation. Pay close attention to any branches or trees that may be leaning near overhead power lines and also avoid damaged trees that are planted near underground utilities such as gas or power mains.
Call the Professionals at Five Star Tree Services
Anytime a storm damages your landscape, plants, or trees, a professional team of arborists can help. Not only are they trained in the proper methods of cleaning up storm debris in a safe manner, but they can also help decide the best course of action to save or remove your damaged trees. As tree care professionals, every team from Five Star Tree Services will arrive with the proper equipment needed to get the job done safely.
Five Star is fully certified and will also work with your insurance company to assess the damage and coordinate extended cleanup services if needed. For trees that are damaged but still have a chance of surviving, our experienced arborists will create a customized treatment plant and pruning plant to give your tree the best chance of survival. If other treatments are needed, we will also support your tree during its recovery until it is back to its healthy state. For more information regarding our storm tree services in Richmond Hill or our regular tree care services, give us a call at (416) 990-3355 today.
48