
Search results for "Remove lines" in Home Design Ideas
 Dynamic Garage Door
Getting your homeowner's association board to approve your new custom garage doors can seem daunting. Dynamic Garage Door as a custom design and manufacturing firm has come across this situation quite frequently with a phenomenal success approval rate!
In order to get approval for your custom garage door approval there are a few basic points you must understand. First off, your HOA is committed to preserving the neighborhood's curb appeal integrity by focusing on the impact your new custom garage doors might have on your house and the houses of your neighbors. It is important to understand that your curb appeal decisions will impact your home and neighborhood alike. Too many companies offer semi-custom wood doors without the true understanding of the client's need and the essence of their home's architectural style. The garage door design you choose needs to comply with neighborhood regulations while complement your home's architecture. At Dynamic Garage Door, our designers are well-rounded in the garage door industry and so we can suggest or develop designs that will reinforce the natural appearance of your home's style. If you can prove to your HOA that you've done your homework and that the garage door design you chose will complement not only your home but the neighborhood you'll be surprised when your proposal is marked with the approval stamp!
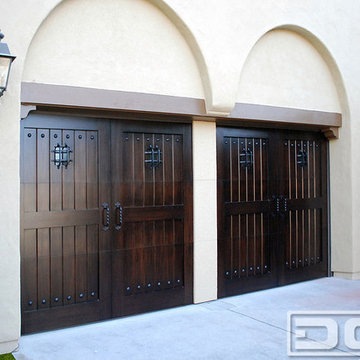
This garage door is actually a single double-car door not two as it appears. The reason is that this garage used to have two separate doors with a post in the middle. The post in the middle made it difficult to use the garage on a daily basis so the post was removed to facilitate the use of the garage. The HOA wasn't too happy about the removal of the post as it was an essential part of the arches located right above the garage doors. You can clearly see how that would have been disruptive if the homeowner went with a regular wood door and not one custom designed and manufactured by Dynamic Garage Door.
This garage door was specifically designed to address the HOA's concern about the center post removal and the effect it would have on the curb appeal of the home with the incomplete double arch look. So we addressed this by crafting the door with a false center post in the middle that was textured and painted the same color of the house to give off that illusion that the post is still there. Overall, it gives the home a complete finished appearance with two independent-looking doors and original post. The homeowner got the entire width of the opening to use at the push of a button so having a larger car won't be a problem anymore. The neighbors are all happy and no one seems to notice the center post is actually fake!
Got an interesting garage door project you want our designers to review and price out for you? Give us a call at (855) 343-DOOR
 BLAINE architects
Jean Bai, Konstrukt Photo
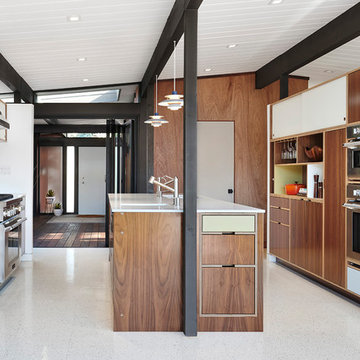
Example of a 1960s vinyl floor and white floor kitchen design in San Francisco with an undermount sink, flat-panel cabinets, medium tone wood cabinets, quartz countertops, stainless steel appliances, an island and white countertops
Example of a 1960s vinyl floor and white floor kitchen design in San Francisco with an undermount sink, flat-panel cabinets, medium tone wood cabinets, quartz countertops, stainless steel appliances, an island and white countertops
 Fox Interiors
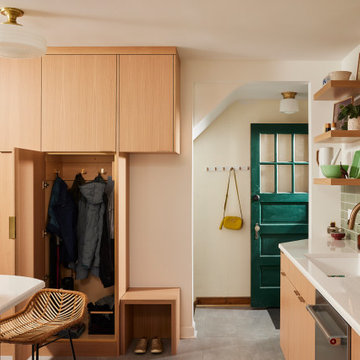
Inspired by their years in Japan and California and their Scandinavian heritage, we updated this 1938 home with a earthy palette and clean lines.
Rift-cut white oak cabinetry, white quartz counters and a soft green tile backsplash are balanced with details that reference the home's history.
Classic light fixtures soften the modern elements.
We created a new arched opening to the living room and removed the trim around other doorways to enlarge them and mimic original arched openings.
Removing an entry closet and breakfast nook opened up the overall footprint and allowed for a functional work zone that includes great counter space on either side of the range, when they had none before.
The new pantry wall incorporates storage for the microwave, coat storage, and a bench for shoe removal.
Find the right local pro for your project
 Greenberg Construction
Greenberg Construction
Location: Mountain View, CA, United States
Our clients wanted to create a beautiful and open concept living space for entertaining while maximized the natural lighting throughout their midcentury modern Mackay home. Light silvery gray and bright white tones create a contemporary and sophisticated space; combined with elegant rich, dark woods throughout.
Removing the center wall and brick fireplace between the kitchen and dining areas allowed for a large seven by four foot island and abundance of light coming through the floor to ceiling windows and addition of skylights. The custom low sheen white and navy blue kitchen cabinets were designed by Segale Bros, with the goal of adding as much organization and access as possible with the island storage, drawers, and roll-outs.
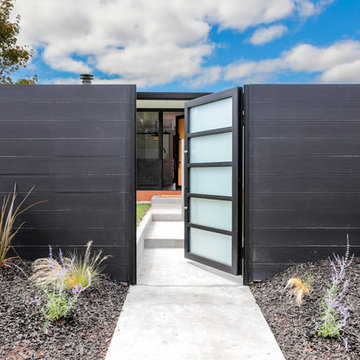
Black finishings are used throughout with custom black aluminum windows and 3 panel sliding door by CBW Windows and Doors. The clients designed their custom vertical white oak front door with CBW Windows and Doors as well.
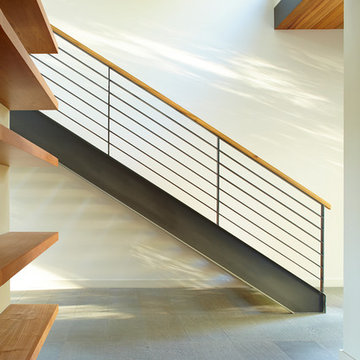
 ODS Architecture
Located in Menlo Park, California, this 3,000 sf. remodel was carefully crafted to generate excitement and make maximum use of the owner’s strict budget and comply with the city’s stringent planning code. It was understood that not everything was to be redone from a prior owner’s quirky remodel which included odd inward angled walls, circular windows and cedar shingles.
Remedial work to remove and prevent dry rot ate into the budget as well. Studied alterations to the exterior include a new trellis over the garage door, pushing the entry out to create a new soaring stair hall and stripping the exterior down to simplify its appearance. The new steel entry stair leads to a floating bookcase that pivots to the family room. For budget reasons, it was decided to keep the existing cedar shingles.
Upstairs, a large oak multi-level staircase was replaced with the new simple run of stairs. The impact of angled bedroom walls and circular window in the bathroom were calmed with new clean white walls and tile.
Photo Credit: John Sutton Photography.
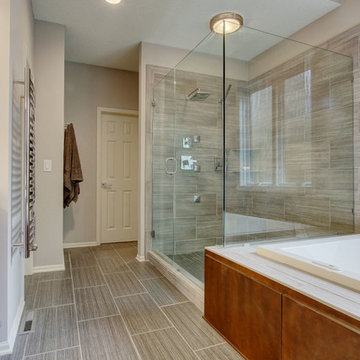
 User
UserWayne Sclesky
In this beautiful modern master suite, the previous traditional style bathroom was removed and a new clean, modern space was added using a neutral palette of light and dark grays in the porcelain tiles and wall colors. Counter tops were a crisp white quartz with white under mount sinks, and clean lines were used in the cabinet design. The fireplace was totally redesigned removing the old hearth and mantel and tiling flat against the fireplace wall to open the space.
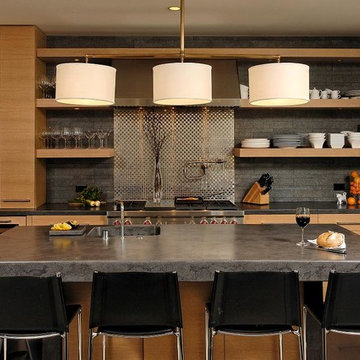
 Jennifer Gilmer Kitchen & Bath
McLean, Virginia Modern Kitchen design by #JenniferGilmer
See more designs on www.gilmerkitchens.com
Example of a mid-sized trendy galley dark wood floor eat-in kitchen design in DC Metro with flat-panel cabinets, light wood cabinets, granite countertops, stainless steel appliances, an island, an integrated sink, metal backsplash and metallic backsplash
Example of a mid-sized trendy galley dark wood floor eat-in kitchen design in DC Metro with flat-panel cabinets, light wood cabinets, granite countertops, stainless steel appliances, an island, an integrated sink, metal backsplash and metallic backsplash
Sponsored
Sunbury, OH

J.Holderby - Renovations
Franklin County's Leading General Contractors - 2X Best of Houzz!
 User
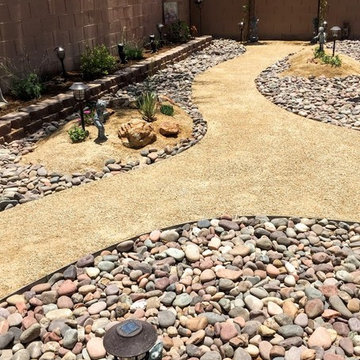
UserThis yard started with dead grass, no irrigation to the back planter, water seeping through the block wall and the yard felt small.
We removed all grass, removed the dirt in the planter, tar backed the wall and added a valve and PVC line for irrigation. We then started the new design incorporating small moundings with a natural path and low water use plantings. Deana M. Chiavola
 Clark Richardson Architects
Photos: Paul Finkel, Piston Design
GC: Hudson Design Development, Inc.
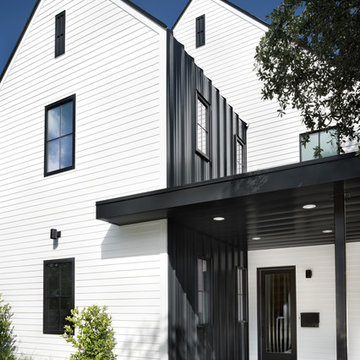
Large farmhouse white two-story wood exterior home photo in Austin with a mixed material roof
Large farmhouse white two-story wood exterior home photo in Austin with a mixed material roof

 ScavulloDesign Interiors
Inspiration for a large timeless enclosed medium tone wood floor living room library remodel in San Francisco with a standard fireplace, brown walls, a metal fireplace and no tv

 Five Star Tree Care
Trees at your home and trees on a commercial lot both need proper care in order to thrive. In some instances, a tree may need to be removed for any number of reasons. Be it a change in landscape, weather or disease, understanding when to uproot a tree can be tricky. Knowing when to remove a tree from a commercial location requires careful consideration. There are a few things Five Star Tree Services suggest that you keep in mind when thinking about uprooting a tree from a commercial location.
The size and placement of the tree play a big role in how complex the tree removal project will be. You will need to know about the location of the utility lines, possible hazards, and any construction in the area just to name a few concerns.
 Tile Doctor Ltd
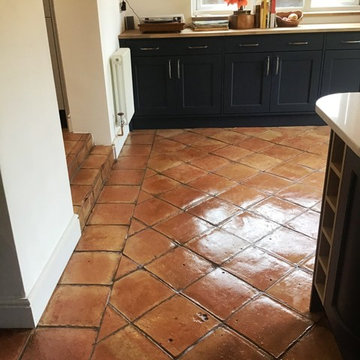
We were contacted by the owner of a property in Moulton with a problematic Terracotta tiled kitchen floor. She was seriously considering ripping up the entire area of tiling and replacing it as she was having a new kitchen installed. Both her and her husband were concerned that unless I could restore this floor to somewhere near to its original condition, they would need to replace it.
I went over to inspect the Terracotta tiles and could see the entire surface was deeply ingrained with soiling and the grout lines were filthy. After carrying out a test it became obvious that the previous sealer had been applied very sparingly and had mostly worn away, leaving the stone prone to staining. Terracotta is a very porous tile and dirt had become ingrained in the pores leaving it looking very dull and difficult to clean.
I completed the test on a small part of the floor and the customer could see the results which could be achieved. Happy with the result they agreed my quote and we set a date for my return to complete the floor.
The tiles turned out to be made of a fairly soft Terracotta which meant that we were able to deep clean them extremely effectively using a strong dilution of Tile Doctor Pro-Clean. We used Tile Doctor Remove and Go in particularly stubborn areas.
The process I use is to spray the Pro-Clean onto the floor and leave it to soak in for about ten minutes before being worked in using a heavy rotary machine fitted with a black scrubbing pad. The resulting slurry is removed using a wet pick up vacuum. All the dirt and virtually all of the old sealer was removed at this stage; the remaining patches around the edges of the area being finished by hand with a 200-grit burnishing block. The grout lines were then cleaned by hand with an angled grout brush.
Finally, the deep-seated oil stains in front of the cooker were brought out using Tile Doctor Oxy-Gel which was left to dwell on the marks for an hour before being agitated with a diamond burnishing pad and rinsed away with a wet pick up machine. The floor was rinsed with water and allowed to dry off overnight.
The following day I inspected the floor and checked it was ready to be sealed. All was well so I applied an initial coat of Tile Doctor Colour Grow which is an impregnating sealer that occupies the pores in the tile enhancing the natural colours of the Terracotta and provide a base layer of protection from staining.
I returned at a convenient time once the kitchen was completely installed to finish the job. This involves carrying out a light maintenance clean with Tile Doctor Neutral Cleaner and once the floor was dry, I applied 5 further coats of Tile Doctor Seal and Go which provides a pleasing satin finish which is really suited to this type of floor.
The customer was very happy with the results and has left the following feedback.
“We were really pleased with the results, thank you!”
Phil Vissian
Northamptonshire Tile Doctor
 Clark Richardson Architects
Photos: Paul Finkel, Piston Design
GC: Hudson Design Development, Inc.
Example of a large country white two-story wood exterior home design in Austin with a mixed material roof
Example of a large country white two-story wood exterior home design in Austin with a mixed material roof


 Main Line Kitchen Design
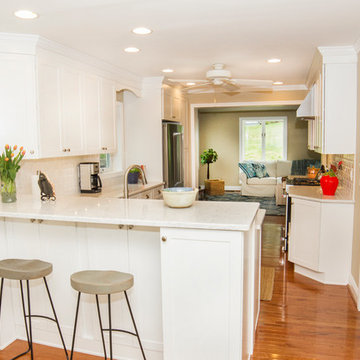
Main Line Kitchen Design is a brand new business model! We are a group of skilled Kitchen Designers each with many years of experience planning kitchens around the Delaware Valley. And we are cabinet dealers for 6 nationally distributed cabinet lines like traditional showrooms. At Main Line Kitchen Design instead of a full showroom we use a small office and selection center, and 100’s of sample doorstyles, finish and sample kitchen cabinets, as well as photo design books and CAD on laptops to display your kitchen. This way we eliminate the need and the cost associated with a showroom business model. This makes the design process more convenient for our customers, and we pass the significant savings on to them as well.
We believe that since a web site like Houzz.com has over half a million kitchen photos any advantage to going to a full kitchen showroom with full kitchen displays has been lost. Almost no customer today will ever get to see a display kitchen in their door style and finish there are just too many possibilities. And of course the design of each kitchen is unique anyway.
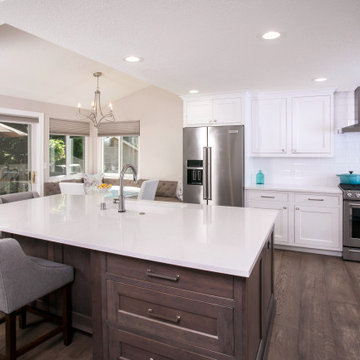
 Community Builders, LLC
Inspiration for a large transitional l-shaped dark wood floor, brown floor and vaulted ceiling eat-in kitchen remodel in Seattle with an undermount sink, beaded inset cabinets, white cabinets, quartz countertops, white backsplash, cement tile backsplash, stainless steel appliances, an island and white countertops

 Hyde's Lawn Care
Realtor required a clean-up and removal of limbs from a property that is starting renovations. We trimmed back and removed the extra debris.
Inspiration for a mid-sized exterior home remodel in Charlotte
Inspiration for a mid-sized exterior home remodel in Charlotte
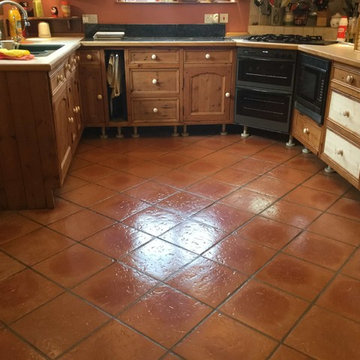 Tile Doctor Ltd
This Terracotta tiled floor was installed in the kitchen of a cottage in the small village of Maidford near Towcester. The tiles were not looking their best and the owner of the property realised it was time to do something about it and contacted Tile Doctor to have the floor stripped and resealed. Stripping and Sealing tile and stone floors is our bread and butter so I was more than happy to pop round and survey the floor which was approximately 9m2.
The grout had darkened with dirt and the previous tile sealer was failing so dirt was now getting ingrained in the Terracotta making it difficult to clean in places and leading to a patchy appearance. We discussed the work involved, my quote was accepted, and a date agreed for me to return and complete the work which would take two days, one to clean and one to seal.
After tidying up the Kitchen and removing the kickboards from underneath the kitchen units I set about working on cleaning and stripping the Terracotta floor of old sealers. To start I tested a small area with a strong dilution of Tile Doctor Wax Away. Wax was quite often used on Terracotta so I figured this product would be a good place to start. My suspicions were proved correct, and I found this to be the best product for removing the many layers of sealant on the floor. Wax Away is a new alkaline product by Tile Doctor and ideal for cleaning clay-based tiles such as Terracotta.
With my sights set on the rest of the floor Wax Away was scrubbed into the tile using a 17” rotary floor scrubbing machine and a black scrubbing pad running on a slow speed which helps to reduce splashing. This activity soon brought the dirt off the floor and the soiled cleaning solution was removed using a wet vacuum and the floor was rinsed down with clean water. The cleaning process was repeated a couple of times until I was happy with the floor, a stiff hand brush was then used along the grout lines with a dilution of Tile Doctor Pro-Clean to clean up the grout.
After rinsing and extracting the floor again the floor was inspected, and I noticed there were a few stubborn paint splashes on the tiles. I managed to remove these and these by spot treating the affected area with Tile Doctor Remove and Go and a steamer to lift the stain out of the clay tile. Once happy the floor was clean it was given a thorough rinse to neutralise it and remove any trace of cleaning products and then left it to dry.
I allowed the floor to dry for several days before returning to seal the Terracotta using numerous coats of Tile Doctor Seal and Go which is an ideal sealer for Terracotta and provides durable stain protection together with a low sheen finish. Terracotta is by its nature very porous and so it’s not unknown for it to take up to nine coats of sealer, which can take some time to apply as like paint you have to wait until it’s dry before it will take the next coat.
The customer was so impressed by the results I achieved in their kitchen they decided to go ahead and book me in to carry out this process throughout the whole of the ground floor which included lounge, study and hallway.
Phil Vissian
Northamptonshire Tile Doctor

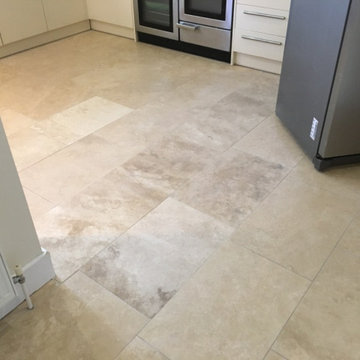 Tile Doctor Ltd
This client from Cobham contacted me in despair, she was quite concerned about her Travertine tiled floor which was cracking. She had the Kitchen and Dining room tiled with Travertine six years ago and recently several cracks had begun to appear in a long line crossing five tiles.
Several holes had also begun to appear and across the threshold to the kitchen from the dining area a serious lip had formed where a tile had risen above its neighbour causing a trip hazard.
After removing a tile from an unobtrusive area, I began to see where the issues lay. The tiler had dabbed the adhesive. This mean that instead of spreading the adhesive equally across the tile and floor they had splurged four lumps in each corner then set the tile down. This is poor working practice that will sooner or later become apparent. It means the areas were no adhesive was applied are eventually compromised resulting in cracking. This could take years or weeks to surface.
After some discussion we decided that I would remove and replace six tiles in total. The client was happy for me to go ahead and agreed a cost for the works to be done.
Returning the following week, firstly I had to remove the grout. This was done with a handheld Fein tool fitted with an oscillating blade. I thought this would be good experience from my son during the holidays, so I took him along and whilst I was working on the grout, he was able to gather the dust in a vacuum cleaner.
Next, I started to remove the cracked tiles with a chisel, starting from the cracks where the tiles would be weakest. This was noisy and messy work which required ear defenders and safety goggles. The process took several hours with the help of my son on general assistance duties. Once the tiles were removed this just left the remaining adhesive attached to the floor to get removed. This was the hardest part of the job, a lot of hammer and chisel work with as much dust gathered as possible to try and contain the mess. I had warned the customer that a considerable amount of mess would be produced and request that she should remove as much items as possible and to tape up her cupboards. Finally, I filled several holes in the sub floor so I would have a flat surface to lay the new tiles on. I left it there for the night to solidify.
Returning the next day, I began laying the replacement tiles down. Colour matching replacement tiles is a difficult task as Travertine is a natural product and colours vary greatly so these were a pretty good match.
Once the adhesive had set, I grouted in the newly laid tiles and once that was dry set about applying a sealer. For this I used two coats of Tile Doctor Ultra Seal which is an impregnating sealer that doesn’t alter the colour of the stone. This would ensure they were nicely protected and hopefully the client will not experience any further issues.
She was very happy with the result and was pleased the floor no long looked unsightly or posed a tripping hazard.
Rupert Mcleod
West Surrey Tile Doctor
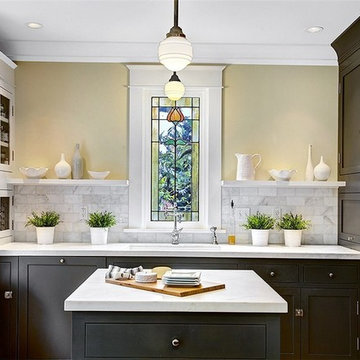
 JM Bogan Remodeling
Eat-in kitchen - mid-sized craftsman u-shaped light wood floor and beige floor eat-in kitchen idea in Seattle with an undermount sink, shaker cabinets, black cabinets, marble countertops, gray backsplash, marble backsplash, stainless steel appliances, an island and white countertops
 Hyde's Lawn Care
Realtor required a clean-up and removal of limbs from a property that is starting renovations. We trimmed back and removed the extra debris.
Example of a mid-sized exterior home design in Charlotte
Example of a mid-sized exterior home design in Charlotte
22