
Search results for "Remove lines" in Home Design Ideas
 Colorworks Design & Build, Inc
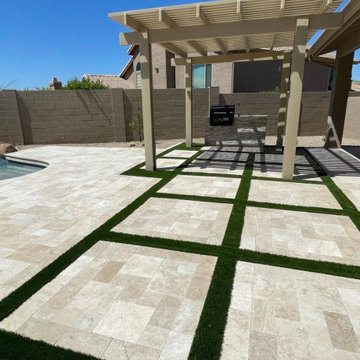
Demo & removal of existing landscape, laid necessary utility lines (gas, electric, & water lines), installed alumawood shade structure, new BBQ island with bullnosed travertine counter, new irrigation, travertine border for turf, new plants, granite, & boulders, installed new low voltage LED lighting, premium artificial turf
 Custom Gardens, LLC
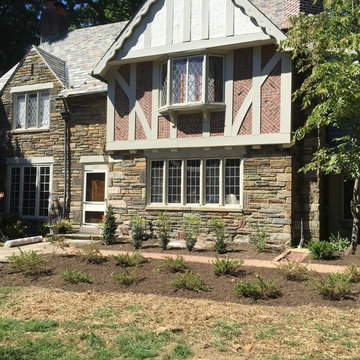
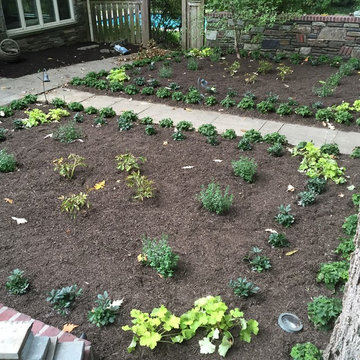
This is a lovely old home that experienced major renovations last year. We
were very fortunate to be requested by the owners to update their
landscaping upon completion of the renovations. The project relied heavily
on collaboration with the owners who made the key decisions in choosing the
plants that I suggested and deciding upon concepts. We decided to re-create
the formal garden by using informal plants. We also decided that the flower
color should be white throughout the formal garden. We spent time deciding
upon color preferences, plants they like (such as lilac), and the "look" of
the plants. We wanted them to fit the architecture of the house. The goal
was to come up with interesting and unusual plants that provided lots of
year round color and did not require lots of maintenance. The landscape
will require periodic maintenance to monitor the plants and keep everything
looking good. We used lots of Native plants where appropriate and re-used
many of the plants on site. For example, we removed the cranesbill geranium
from the old formal garden but discarded the dead and dying boxwood. We
used the cranesbill geranium in beds against the back of the house. The
plants will form a low carpet that flowers and reduces weed growth. We moved
a very large pink flowering crape myrtle that was blocking the view to a
corner of the house where it brackets the corner with another large pink
crape myrtle on the other side of the corner.
 Custom Gardens, LLC
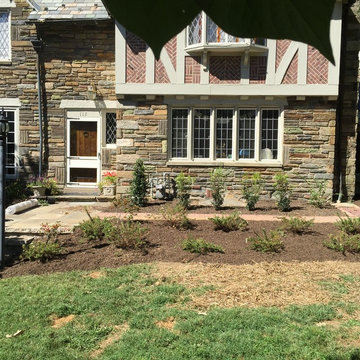
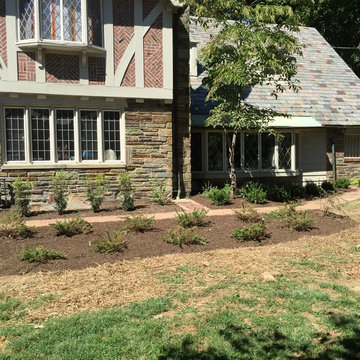
Our client had not done anything with their landscaping for many years. Tin
the front of their house they had a few tired berberris (barberry) shrubs in
the front, creeping blue junipers, some large evergreens, and lots of empty
spaces. They liked reds, greens, yellows, and blues (the junipers). We
removed the berberris and other shrubs that had to go, but kept the larger
evergreens and blue junipers. We installed plants approved by our client:
Nandina domestica, red twig dogwoods (a Native plant), and Acorus Oborozuki.
All plants are evergreen which they wanted. In the process, we re-shaped
the beds a little and seeded an area that we returned to lawn.
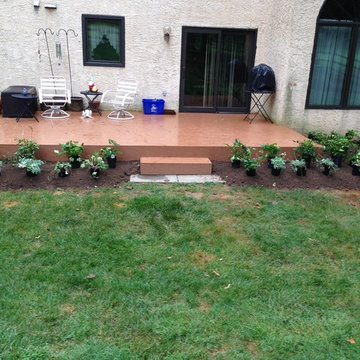
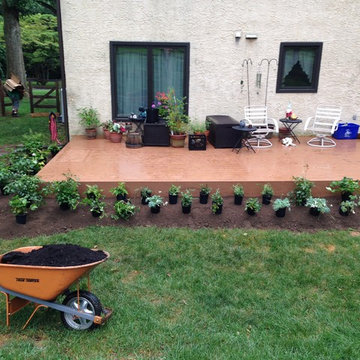
In the back of the house, the client had a beautiful deck with a lovely
view. However, the area around the deck was totally bare. They wanted
colorful perennials that were low maintenance. Since they do not spend time
on the deck in the winter, we concentrated on plants in their color palette
that flower in late spring, summer, and early fall. The plants will grow
together to minimize weeds and maintenance.
The shade perennials we planted are: Tricyrtis Samurai (Toad Lily), Ghost Fern, Male Fern (Native), Japanese Holly Fern, Autumn Fern, Astilbe Peach Blossom
Dicentra, Ivory Hearts, Geranium Rozanne, Anemone Honorine Jobert
Find the right local pro for your project
 Colorworks Design & Build, Inc
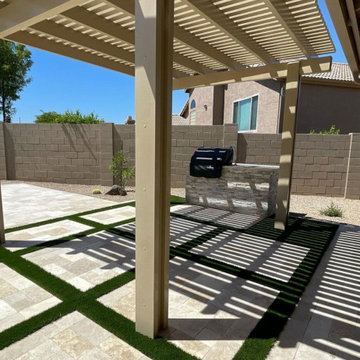
Demo & removal of existing landscape, laid necessary utility lines (gas, electric, & water lines), installed alumawood shade structure, new BBQ island with bullnosed travertine counter, new irrigation, travertine border for turf, new plants, granite, & boulders, installed new low voltage LED lighting, premium artificial turf
 Custom Gardens, LLC
This is a lovely old home that experienced major renovations last year. We
were very fortunate to be requested by the owners to update their
landscaping upon completion of the renovations. The project relied heavily
on collaboration with the owners who made the key decisions in choosing the
plants that I suggested and deciding upon concepts. We decided to re-create
the formal garden by using informal plants. We also decided that the flower
color should be white throughout the formal garden. We spent time deciding
upon color preferences, plants they like (such as lilac), and the "look" of
the plants. We wanted them to fit the architecture of the house. The goal
was to come up with interesting and unusual plants that provided lots of
year round color and did not require lots of maintenance. The landscape
will require periodic maintenance to monitor the plants and keep everything
looking good. We used lots of Native plants where appropriate and re-used
many of the plants on site. For example, we removed the cranesbill geranium
from the old formal garden but discarded the dead and dying boxwood. We
used the cranesbill geranium in beds against the back of the house. The
plants will form a low carpet that flowers and reduces weed growth. We moved
a very large pink flowering crape myrtle that was blocking the view to a
corner of the house where it brackets the corner with another large pink
crape myrtle on the other side of the corner.
 Custom Gardens, LLC
Our client had not done anything with their landscaping for many years. Tin
the front of their house they had a few tired berberris (barberry) shrubs in
the front, creeping blue junipers, some large evergreens, and lots of empty
spaces. They liked reds, greens, yellows, and blues (the junipers). We
removed the berberris and other shrubs that had to go, but kept the larger
evergreens and blue junipers. We installed plants approved by our client:
Nandina domestica, red twig dogwoods (a Native plant), and Acorus Oborozuki.
All plants are evergreen which they wanted. In the process, we re-shaped
the beds a little and seeded an area that we returned to lawn.
In the back of the house, the client had a beautiful deck with a lovely
view. However, the area around the deck was totally bare. They wanted
colorful perennials that were low maintenance. Since they do not spend time
on the deck in the winter, we concentrated on plants in their color palette
that flower in late spring, summer, and early fall. The plants will grow
together to minimize weeds and maintenance.
The shade perennials we planted are: Tricyrtis Samurai (Toad Lily), Ghost Fern, Male Fern (Native), Japanese Holly Fern, Autumn Fern, Astilbe Peach Blossom
Dicentra, Ivory Hearts, Geranium Rozanne, Anemone Honorine Jobert
 Custom Gardens, LLC
This is a lovely old home that experienced major renovations last year. We
were very fortunate to be requested by the owners to update their
landscaping upon completion of the renovations. The project relied heavily
on collaboration with the owners who made the key decisions in choosing the
plants that I suggested and deciding upon concepts. We decided to re-create
the formal garden by using informal plants. We also decided that the flower
color should be white throughout the formal garden. We spent time deciding
upon color preferences, plants they like (such as lilac), and the "look" of
the plants. We wanted them to fit the architecture of the house. The goal
was to come up with interesting and unusual plants that provided lots of
year round color and did not require lots of maintenance. The landscape
will require periodic maintenance to monitor the plants and keep everything
looking good. We used lots of Native plants where appropriate and re-used
many of the plants on site. For example, we removed the cranesbill geranium
from the old formal garden but discarded the dead and dying boxwood. We
used the cranesbill geranium in beds against the back of the house. The
plants will form a low carpet that flowers and reduces weed growth. We moved
a very large pink flowering crape myrtle that was blocking the view to a
corner of the house where it brackets the corner with another large pink
crape myrtle on the other side of the corner.


 Custom Gardens, LLC
This is a lovely old home that experienced major renovations last year. We
were very fortunate to be requested by the owners to update their
landscaping upon completion of the renovations. The project relied heavily
on collaboration with the owners who made the key decisions in choosing the
plants that I suggested and deciding upon concepts. We decided to re-create
the formal garden by using informal plants. We also decided that the flower
color should be white throughout the formal garden. We spent time deciding
upon color preferences, plants they like (such as lilac), and the "look" of
the plants. We wanted them to fit the architecture of the house. The goal
was to come up with interesting and unusual plants that provided lots of
year round color and did not require lots of maintenance. The landscape
will require periodic maintenance to monitor the plants and keep everything
looking good. We used lots of Native plants where appropriate and re-used
many of the plants on site. For example, we removed the cranesbill geranium
from the old formal garden but discarded the dead and dying boxwood. We
used the cranesbill geranium in beds against the back of the house. The
plants will form a low carpet that flowers and reduces weed growth. We moved
a very large pink flowering crape myrtle that was blocking the view to a
corner of the house where it brackets the corner with another large pink
crape myrtle on the other side of the corner.
 Custom Gardens, LLC
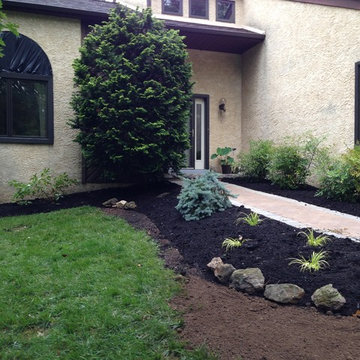
Our client had not done anything with their landscaping for many years. Tin
the front of their house they had a few tired berberris (barberry) shrubs in
the front, creeping blue junipers, some large evergreens, and lots of empty
spaces. They liked reds, greens, yellows, and blues (the junipers). We
removed the berberris and other shrubs that had to go, but kept the larger
evergreens and blue junipers. We installed plants approved by our client:
Nandina domestica, red twig dogwoods (a Native plant), and Acorus Oborozuki.
All plants are evergreen which they wanted. In the process, we re-shaped
the beds a little and seeded an area that we returned to lawn.
In the back of the house, the client had a beautiful deck with a lovely
view. However, the area around the deck was totally bare. They wanted
colorful perennials that were low maintenance. Since they do not spend time
on the deck in the winter, we concentrated on plants in their color palette
that flower in late spring, summer, and early fall. The plants will grow
together to minimize weeds and maintenance.
The shade perennials we planted are: Tricyrtis Samurai (Toad Lily), Ghost Fern, Male Fern (Native), Japanese Holly Fern, Autumn Fern, Astilbe Peach Blossom
Dicentra, Ivory Hearts, Geranium Rozanne, Anemone Honorine Jobert
 Tile Doctor Ltd
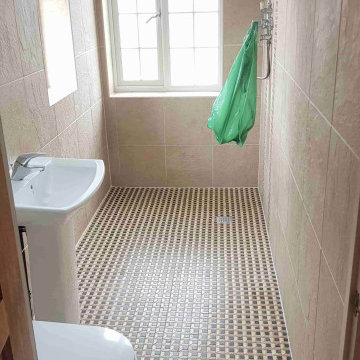
This wet room in Doncaster had become so mouldy and dirty the owners didn’t know what to do with it. The Limestone and Marble Mosaics on the floor and the Ceramic wall tile and Grout throughout the bathroom had become so badly affected with mould, nothing they could buy from could resolve it.
Following my site visit I was confident the room could be cleaned up (in-fact I have seen worse), I explained what we could do to restore and revamp the wet room and they were happy to go ahead with my quote.
First, I opened windows to maximise ventilation and then working top down I set about tackling the Ceramic wall tile and grout by spraying on a strong dilution of Tile Doctor Pro-Clean. Spraying on the solution mixes it with air making it lighter and easier to stick to the wall where it can soak in and get to work breaking down the mould.
After about fifteen minutes it was scrubbed into the tile and specifically the grout joints where it was needed most. This action releases grime and other contamination from the grout. The room needed a series of different treatments due to the different tiles and areas of mould, so I followed that up with Tile Doctor Duo Clean. This is a bleach-based cleaner which is brilliant at tackling mould and getting the grout back to its original colour.
The Ceramic tile in this bathroom has a textured surface which traps dirt so to get them clean I also used Tile Doctor Oxy-Gel. Being a Gel is easily sticks to the vertical surface allowing for longer dwell times which allows the product to dissolve the dirt and make it easier to remove.
With the walls looking much clear for my efforts I turned my attention to the Mosaic floor tiles. For these I went straight in with a cocktail combination of Tile Doctor Pro-Clean and Duo Clean cleaners which I knew from cleaning the wall tiles would have the right impact.
I was also able to use a buffing machine fitted with a poly brush attachment and running at medium speed to do most of the scrubbing. The grout lines were green with mould, and I was able to get this process to return the Mosaics and grout lines back to their original state.
The slurry was removed with a wet vacuum and rinsed thoroughly with water. It took many hours and repeated scrubbing to get the room looking like it should. I was then able to finally leave for the day and allow the wet room to dry out overnight.
I returned the following morning and started by removing all the old silicone from the corners of the room, much of it had become stained and difficult to get clean so replacement was the best option. The waste was removed and replaced with a new bead of mould resistant silicone colour matched to suit the tiles.
The Mosaics has fully dried by this point, so I was then able to apply a sealer to floor to seal in the Marble and Limestone floor Mosaics and grout. I used a couple of coats of Tile Doctor Colour Grow for this, it’s a breathable impregnating sealer that’s suitable for wet rooms. For the wall tile and grout, I used an aerosol sealer which will help protect the walls from getting mouldy and dirty again.
Once I had finished, I educated the owners on how to keep up the cleaning of the room supplying them with a complimentary bottle of Tile Doctor Aqua-Pro shower tile Cleaner. This is much better than any supermarket cleaner as it is pH neutral and will ensure that the newly applied sealant will not be prematurely affected. Hopefully, this will ensure it never gets quite so bad in the future however improved ventilation is the real key to solving that problem. They were very satisfied with the work we carried out and as you can see from the photographs on this page, the wet room has been transformed.
Matthew Lovett
South Yorkshire Tile Doctor
 Colorworks Design & Build, Inc
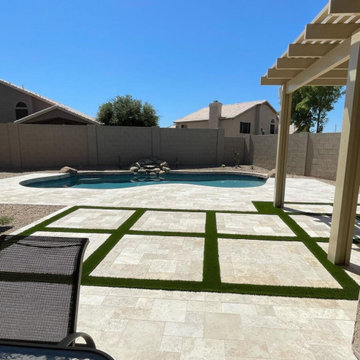
Demo & removal of existing landscape, laid necessary utility lines (gas, electric, & water lines), installed alumawood shade structure, new BBQ island with bullnosed travertine counter, new irrigation, travertine border for turf, new plants, granite, & boulders, installed new low voltage LED lighting, premium artificial turf
 Bonaventura Architect
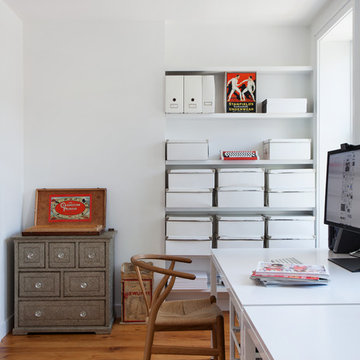
Please see this Award Winning project in the October 2014 issue of New York Cottages & Gardens Magazine: NYC&G
http://www.cottages-gardens.com/New-York-Cottages-Gardens/October-2014/NYCG-Innovation-in-Design-Winners-Kitchen-Design/
It was also featured in a Houzz Tour:
Houzz Tour: Loving the Old and New in an 1880s Brooklyn Row House
http://www.houzz.com/ideabooks/29691278/list/houzz-tour-loving-the-old-and-new-in-an-1880s-brooklyn-row-house
Photo Credit: Hulya Kolabas
 AB Design Elements, LLC
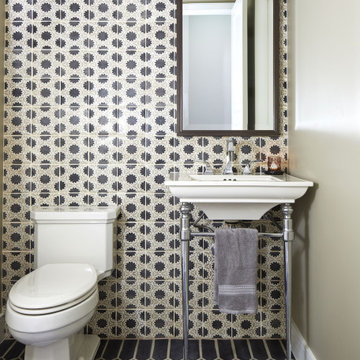
Paradise Ranch Powder Room
Example of a transitional black and white tile black floor powder room design in Phoenix with gray walls and a console sink
Example of a transitional black and white tile black floor powder room design in Phoenix with gray walls and a console sink

 J Design Group - Interior Designers Miami - Modern
Home and Living Examiner said:
Modern renovation by J Design Group is stunning
J Design Group, an expert in luxury design, completed a new project in Tamarac, Florida, which involved the total interior remodeling of this home. We were so intrigued by the photos and design ideas, we decided to talk to J Design Group CEO, Jennifer Corredor. The concept behind the redesign was inspired by the client’s relocation.
Andrea Campbell: How did you get a feel for the client's aesthetic?
Jennifer Corredor: After a one-on-one with the Client, I could get a real sense of her aesthetics for this home and the type of furnishings she gravitated towards.
The redesign included a total interior remodeling of the client's home. All of this was done with the client's personal style in mind. Certain walls were removed to maximize the openness of the area and bathrooms were also demolished and reconstructed for a new layout. This included removing the old tiles and replacing with white 40” x 40” glass tiles for the main open living area which optimized the space immediately. Bedroom floors were dressed with exotic African Teak to introduce warmth to the space.
We also removed and replaced the outdated kitchen with a modern look and streamlined, state-of-the-art kitchen appliances. To introduce some color for the backsplash and match the client's taste, we introduced a splash of plum-colored glass behind the stove and kept the remaining backsplash with frosted glass. We then removed all the doors throughout the home and replaced with custom-made doors which were a combination of cherry with insert of frosted glass and stainless steel handles.
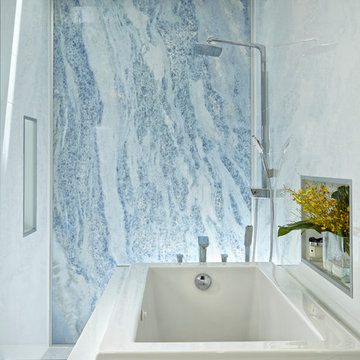
All interior lights were replaced with LED bulbs and stainless steel trims, including unique pendant and wall sconces that were also added. All bathrooms were totally gutted and remodeled with unique wall finishes, including an entire marble slab utilized in the master bath shower stall.
Once renovation of the home was completed, we proceeded to install beautiful high-end modern furniture for interior and exterior, from lines such as B&B Italia to complete a masterful design. One-of-a-kind and limited edition accessories and vases complimented the look with original art, most of which was custom-made for the home.
To complete the home, state of the art A/V system was introduced. The idea is always to enhance and amplify spaces in a way that is unique to the client and exceeds his/her expectations.
To see complete J Design Group featured article, go to: http://www.examiner.com/article/modern-renovation-by-j-design-group-is-stunning
Living Room,
Dining room,
Master Bedroom,
Master Bathroom,
Powder Bathroom,
Miami Interior Designers,
Miami Interior Designer,
Interior Designers Miami,
Interior Designer Miami,
Modern Interior Designers,
Modern Interior Designer,
Modern interior decorators,
Modern interior decorator,
Miami,
Contemporary Interior Designers,
Contemporary Interior Designer,
Interior design decorators,
Interior design decorator,
Interior Decoration and Design,
Black Interior Designers,
Black Interior Designer,
Interior designer,
Interior designers,
Home interior designers,
Home interior designer,
Daniel Newcomb
 WallsNeedLove
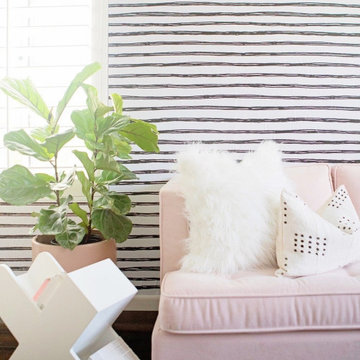
Reasonably priced, premium quality wallpaper. Self-adhesive for fast, clean peel and stick application. No messy paste to deal with. Rugged enough to last for years. You can even remove and re-use it on another wall, or in a new house or apartment if you move. Walls Need Love wallpaper applies quickly, removes clean, and can be used on backsplashes, stair risers, cabinets, tables, shelving and doors. And of course, walls. It's fantastic for rental apartments and houses, house staging, and office accent walls.
 JWH Design and Cabinetry LLC
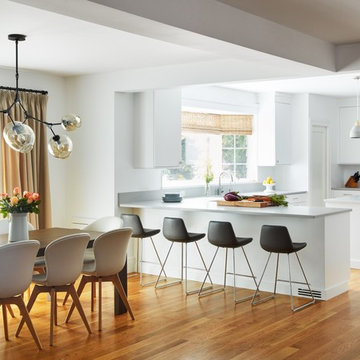
Removing the walls around the Kitchen and DR (and the Living Room!) created an open concept for easy flow. The warmth is maintained with the hardwood floors, natural textures and soothing colors.
 Hurst Design Build Remodel
Photo: Amy Rizer Photography © 2018 Houzz
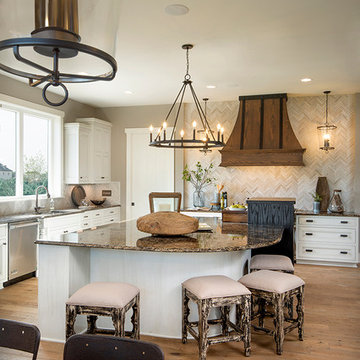
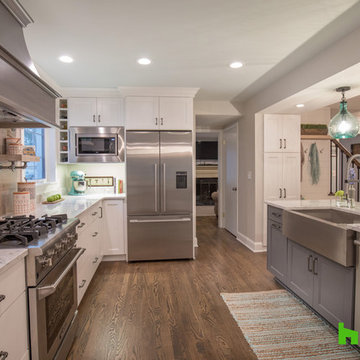
Transitional u-shaped dark wood floor and brown floor open concept kitchen photo with a farmhouse sink, shaker cabinets, white cabinets, brown backsplash, wood backsplash, stainless steel appliances, an island and white countertops
Transitional u-shaped dark wood floor and brown floor open concept kitchen photo with a farmhouse sink, shaker cabinets, white cabinets, brown backsplash, wood backsplash, stainless steel appliances, an island and white countertops
Sponsored
Sunbury, OH

J.Holderby - Renovations
Franklin County's Leading General Contractors - 2X Best of Houzz!
 Florida Designer Cabinetry
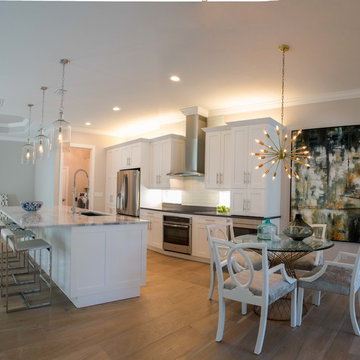
A beautiful transitional design was created by removing the range and microwave and adding a cooktop, under counter oven and hood. The microwave was relocated and an under counter microwave was incorporated into the design. These appliances were moved to balance the design and create a perfect symmetry. Additionally the small appliances, coffee maker, blender and toaster were incorporated into the pantries to keep them hidden and the tops clean. The walls were removed to create a great room concept that not only makes the kitchen a larger area but also transmits an inviting design appeal.
The master bath room had walls removed to accommodate a large double vanity. Toilet and shower was relocated to recreate a better design flow.
Products used were Miralis matte shaker white cabinetry. An exotic jumbo marble was used on the island and quartz tops throughout to keep the clean look.
The Final results of a gorgeous kitchen and bath
 Greenberg Construction
Greenberg Construction
Location: Mountain View, CA, United States
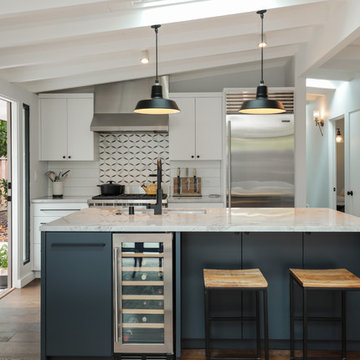
Our clients wanted to create a beautiful and open concept living space for entertaining while maximized the natural lighting throughout their midcentury modern Mackay home. Light silvery gray and bright white tones create a contemporary and sophisticated space; combined with elegant rich, dark woods throughout.
Removing the center wall and brick fireplace between the kitchen and dining areas allowed for a large seven by four foot island and abundance of light coming through the floor to ceiling windows and addition of skylights. The custom low sheen white and navy blue kitchen cabinets were designed by Segale Bros, with the goal of adding as much organization and access as possible with the island storage, drawers, and roll-outs.
Black finishings are used throughout with custom black aluminum windows and 3 panel sliding door by CBW Windows and Doors. The clients designed their custom vertical white oak front door with CBW Windows and Doors as well.
 Ellsworth Design Build
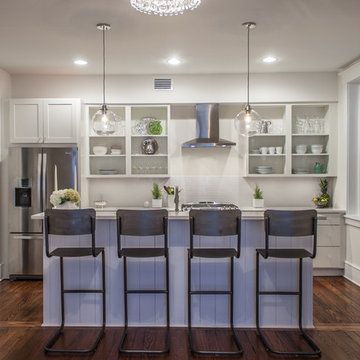
The kitchen area was originally two spaces. The area in the foreground was a butlers pantry/ breakfast room that had been converted to a laundry room. The Kitchen was the area by the window, roughly 8' x 8' and completely cut off from the rest of the house. The island sits on what had been the dividing line between the kitchen and the dining room. We discovered some salvageable hardwood flooring under the linoleum, we brought in salvaged hardwood to match. All the floors were then stained English Chestnut. All the woodwork was removed for construction, then carefully re installed and stripped once the work was complete. The kitchen has a mix of 6" recessed cans, under cabinet lighting, and island pendants. The soffit over the cabinets conceals the HVAC ducting as well as the hood ducting.
20