
Search results for "Remove lines" in Home Design Ideas
 A036 Architecture, Design NYC and Chicago
White Box – Kitchen and Living spaces
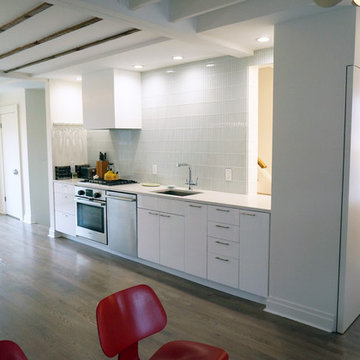
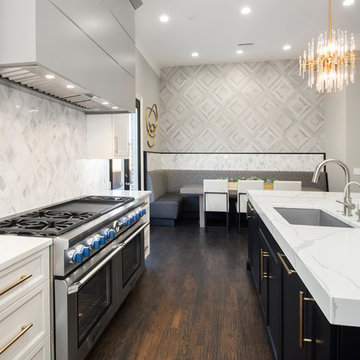
We were asked by our client to remove two walls in order to open the small space that measures 17’ wide by 31’ long. Two simple ideas drove the design; Light and duality of space. Guided by both we started with what we believe is critical to every project – process of discovery.
The proposed design uses white and dominating color for walls, cabinets and the built in bench. Light colored wood floor will add to the light appearance of space shell. As all dividing walls were removed, perimeter walls were charged with functions; linear kitchen, bench next to dining table, and pantry closet. Avoiding upper cabinets allow the design to be open and make use of the wall as a dynamic element –otherwise a monochromatic space. The newly created functional void connects both ends of space and creates what appears to be a larger and brighter spatial experience.
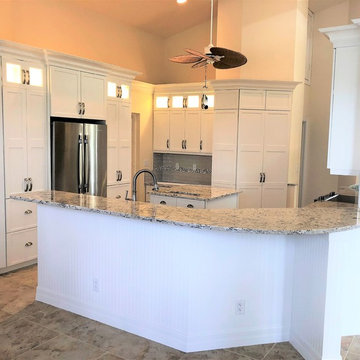
 David Bauer, Cornerstone Builders of SW Fl
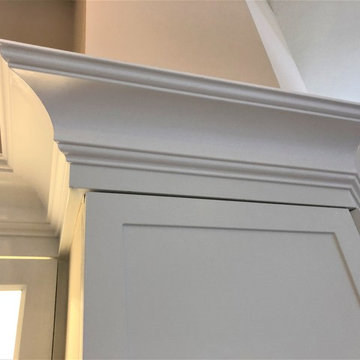
This project was a challenge as we had to keep the flooring AS-IS but yet remove many walls. The client wanted to open the kitchen up on a tight budget, so we mixed reface with some new cabinets. We removed the low soffits and replaced them with new upper-upper cabinets with LED lighting. We used the cut down walls to support the granite resulting in a large island seating space. We changed the pantry doors out with cabinet doors and covered the space between with Deco panels to allow the lines of the cabinets to flow over to each wall. | crown molding wrapping around the kitchen. Design by David Bauer
 David Bauer, Cornerstone Builders of SW Fl
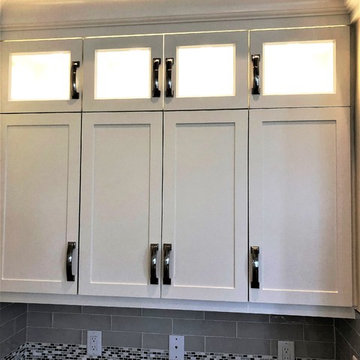
This project was a challenge as we had to keep the flooring AS-IS but yet remove many walls. The client wanted to open the kitchen up on a tight budget, so we mixed reface with some new cabinets. We removed the low soffits and replaced them with new upper-upper cabinets with LED lighting. We used the cut down walls to support the granite resulting in a large island seating space. We changed the pantry doors out with cabinet doors and covered the space between with Deco panels to allow the lines of the cabinets to flow over to each wall. This is a picture of the upper upper shaker cabinets. Design by David Bauer
Find the right local pro for your project
 David Bauer, Cornerstone Builders of SW Fl
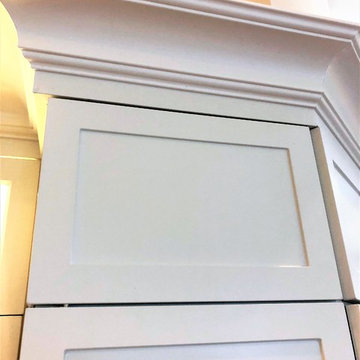
This project was a challenge as we had to keep the flooring AS-IS but yet remove many walls. The client wanted to open the kitchen up on a tight budget, so we mixed reface with some new cabinets. We removed the low soffits and replaced them with new upper-upper cabinets with LED lighting. We used the cut down walls to support the granite resulting in a large island seating space. We changed the pantry doors out with cabinet doors and covered the space between with Deco panels to allow the lines of the cabinets to flow over to each wall. | Crown molding and Deco panels to wrap the room across to all the walls. Design by David Bauer
 David Bauer, Cornerstone Builders of SW Fl
This project was a challenge as we had to keep the flooring AS-IS but yet remove many walls. The client wanted to open the kitchen up on a tight budget, so we mixed reface with some new cabinets. We removed the low soffits and replaced them with new upper-upper cabinets with LED lighting. We used the cut down walls to support the granite resulting in a large island seating space. We changed the pantry doors out with cabinet doors and covered the space between with Deco panels to allow the lines of the cabinets to flow over to each wall. Design by David Bauer
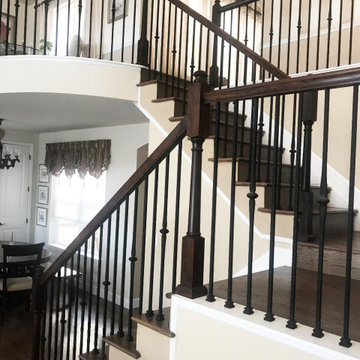
 Apex Welding and Fabrication
The client had their floors redone in hardwood and wanted to save the newel posts and balusters. We carefully removed each baluster so the new treads and wallcap could be replaced, then carefully reinstalled the balusters using existing holes in the railing and lining up each new hole in the floor and wallcap.
 Tile Doctor Ltd
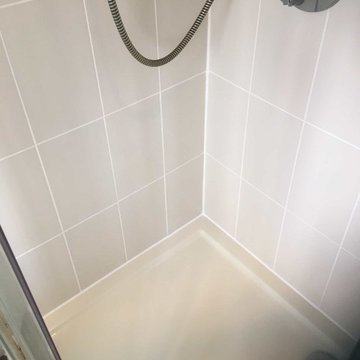
I was asked by a Chelford homeowner (near Alderley Edge) to renovate their Ceramic Tiled Shower Cubicle which had an unsightly mould problem. They say pictures speak louder than words, so I’ve added some photos on this page which show how the grout and silicone sealant had become discoloured with mould over the ten years since it was installed.
Mould likes damp warm areas and shower cubicles make a perfect habitat for it, grout especially can be a problem due to its cementitious rough surface that mould can get a grip on. In this case the ventilation in the ensuite was inadequate and ideally there should have been an extraction vent over the cubicle itself. My advice in these situations is to leave doors and windows open after showering and to run the cold water afterwards.
To renovate the Tile and Grout I sprayed on Tile Doctor Duo-Clean which was left to soak into the grout line for ten minutes before being scrubbed in by hand. The Ceramic tiles cleaned quite easily but the grout had to be scrubbed hard and needed several applications before I was satisfied.
The whole shower needed treating in this fashion and once rinsed and dried I set about stripping out all the old silicone sealant that had also been badly affected by mould. This is done carefully using a sharp knife. I removed the debris and moved onto applying a fresh mould resistant silicone sealant.
Last step before leaving was to spray the Ceramic tile and especially the Grout and Silicone with a can of Tile Doctor Aerosol Grout Sealer. This doesn’t last as long as other sealants in the Tile Doctor range but its quick to apply, especially on wall tiles. The sealer ensures water will run straight off the walls into the shower tray and it also makes the shower easier to clean later.
The shower looked like a new installation by the time I had finished, and my client was delighted with the transformation. He was also thankful that I had replaced the silicone, this was something he had considered doing himself but applying it does take practice and you can get yourself into a mess.
Kamila Logonzy
East Cheshire Tile Doctor
Sponsored
Sunbury, OH

J.Holderby - Renovations
Franklin County's Leading General Contractors - 2X Best of Houzz!
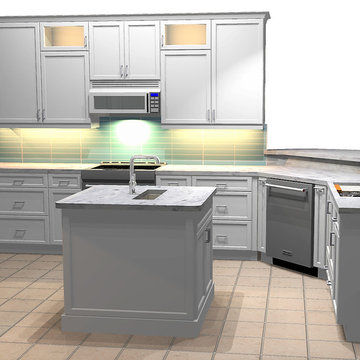 David Bauer, Cornerstone Builders of SW Fl
This project was a challenge as we had to keep the flooring AS-IS but yet remove many walls. The client wanted to open the kitchen up on a tight budget, so we mixed reface with some new cabinets. We removed the low soffits and replaced them with new upper-upper cabinets with LED lighting. We used the cut down walls to support the granite resulting in a large island seating space. We changed the pantry doors out with cabinet doors and covered the space between with Deco panels to allow the lines of the cabinets to flow over to each wall. Design by David Bauer
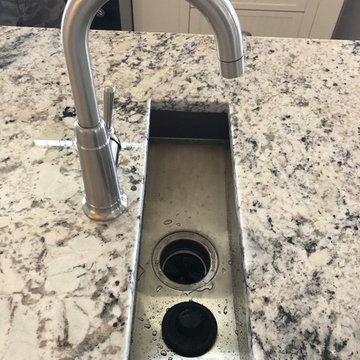 David Bauer, Cornerstone Builders of SW Fl
This project was a challenge as we had to keep the flooring AS-IS but yet remove many walls. The client wanted to open the kitchen up on a tight budget, so we mixed reface with some new cabinets. We removed the low soffits and replaced them with new upper-upper cabinets with LED lighting. We used the cut down walls to support the granite resulting in a large island seating space. We changed the pantry doors out with cabinet doors and covered the space between with Deco panels to allow the lines of the cabinets to flow over to each wall. | Vegetable sink in the center island. Design by David Bauer
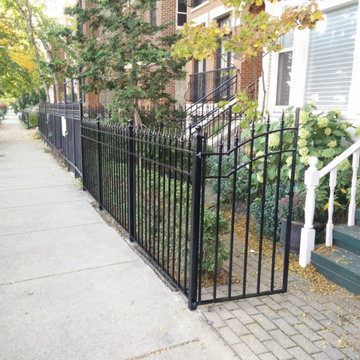
 Windy City Painters
Iron Fence Painting Wicker Park Homeowners Can Trust: A Windy City Painters Case Study
Wicker Park is full of architectural character — ornate 1890s greystone two-flats, vintage brick facades, and wrought iron fencing that has framed these streets for well over a century. However, what iron fence painting Wicker Park properties require is not a simple weekend job. Winters here are brutal on metal, and consequently Windy City Painters has spent years perfecting the restoration process that keeps these fences standing strong. In particular, this case study walks through a recent project completed for a classic Wicker Park property.
Project Overview
The property featured a full wrought iron perimeter fence that had suffered years of freeze-thaw cycling and road salt exposure. Paint had failed across most of the pickets, and oxidation had progressed into active rust at several base rails. Consequently, the homeowners needed more than a fresh coat of paint. They needed a genuine metal restoration, and that is precisely what Windy City Painters delivered.
Materials Used
Windy City Painters selected products specifically rated for Chicago's climate extremes:
Rust-Oleum Professional Rust Inhibitor Primer
Sherwin-Williams DTM Acrylic Enamel (two finish coats)
3M rust converter gel for active oxidation zones
Wire brushes, angle grinders, and detail brushes for precision work
The Process: How Windy City Painters Restores Rusted Iron
Every iron fence painting Wicker Park project follows a disciplined, multi-stage process:
Preparation. Wire brushing and angle grinding remove all loose, flaking, and compromised material. Rust converter gel is applied directly to active oxidation zones, chemically stabilizing the metal underneath.
Repairs. Pitted sections and structurally weak joints are addressed before any coating touches the surface. Notably, skipping this step is the most common reason fence paint fails prematurely.
Priming. A full rust-inhibiting primer coat seals every bare metal surface, preventing moisture from reaching the iron beneath.
Application. Two finish coats of direct-to-metal enamel are applied by hand for even coverage across pickets, finials, and rail joints.
Finishing. A final inspection confirms full coverage, sharp lines, and a smooth, uniform sheen from every angle.
Furthermore, this same process protects the ornate details so common on Wicker Park fencing — decorative finials, scrollwork, and gate hardware — without losing the historic character that makes these properties special.
Advice for Wicker Park Homeowners
Before starting a similar project, homeowners in this neighborhood should keep a few things in mind:
Never paint over active rust. Untreated oxidation will continue spreading beneath the new coating, and the paint will fail within a season or two.
Always prime bare metal before applying a finish coat. Skipping primer is the single fastest path to peeling.
Choose coatings rated for temperature extremes, since Chicago's freeze-thaw cycles are harder on metal than most climates.
Inspect ground-contact areas each spring, as base rails typically rust fastest due to snow melt and road salt runoff.
Budget for prep time. In fact, most of the labor in a quality iron fence painting Wicker Park project happens before a single coat of paint is applied.
Similarly, ask whether the contractor uses rust converter on active oxidation, since skipping this step often shortens the life of the finish considerably.
Moreover, historic greystone properties often have decorative ironwork that requires extra care during grinding and priming so the original detailing is preserved rather than sanded away.
What to Expect: Timeline and Investment
Homeowners often ask how long an iron fence painting Wicker Park project takes from start to finish. In general, prep work — wire brushing, grinding, rust conversion, and repairs — takes up the largest share of the schedule, while primer and enamel application move relatively quickly once the surface is properly stabilized. Cure time between coats also affects the overall timeline, since rushing this stage undermines durability. Consequently, Windy City Painters builds a realistic schedule around weather conditions rather than forcing the job into a tight window. In addition, investment varies based on fence length, the amount of active rust present, and whether ornate detailing requires extra hand-finishing. Homeowners considering this project should request a full on-site walkthrough rather than a rough phone estimate, since rust severity is difficult to judge accurately without seeing the fence in person.
Why Wicker Park Homeowners Choose Windy City Painters
Windy City Painters has become the trusted painting contractor for Chicago's North Side and Near West Side, and iron fence painting Wicker Park residents request most often reflects that reputation directly. In contrast to quick-fix contractors who paint straight over rust, Windy City Painters treats every project as a full restoration. As a result, clients get a finish that holds up through multiple Chicago winters rather than one.
In addition, for related projects, Windy City Painters also offers interior painting, cabinet painting, drywall and plaster repair, and full metal refinishing services for fences, gates, and porches throughout the neighborhood. Ultimately, that range of services is what makes us a true one-stop contractor for Wicker Park homeowners.
See more of our work and request a free estimate at www.windypainters.com.
Ready to transform your Wicker Park home? Contact Windy City Painters for a free estimate — visit www.windypainters.com today. Proudly serving Wicker Park, West Town, Lincoln Park, Roscoe Village, Lakeview, Ukrainian Village, River North, and all of Chicago.
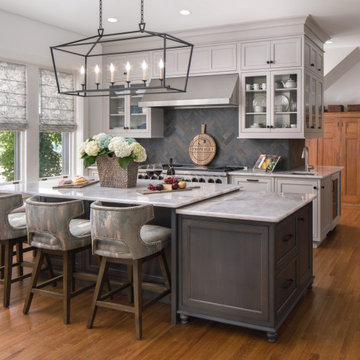
 Sub-Zero, Wolf, and Cove Showroom Philadelphia
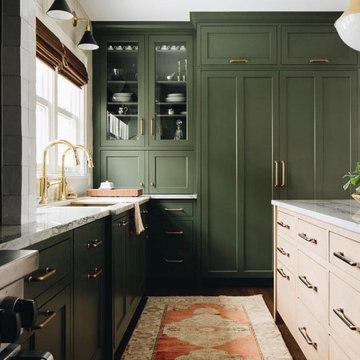
Built in 1903, the kitchen in this stone estate has transitioned to fit the needs of many different owners. In 2017, the challenge was to transform it from an eclectic mix of minimal functionality to a kitchen the new homeowners wanted to love for the "next 30 years." It was important in the overall kitchen design to give a nod to the stately manner of the home, yet have the styling reflect a more contemporary color palette and finishes.
 Alair Homes Plano
Our clients came to us wanting to update and open up their kitchen, breakfast nook, wet bar, and den. They wanted a cleaner look without clutter but didn’t want to go with an all-white kitchen, fearing it’s too trendy. Their kitchen was not utilized well and was not aesthetically appealing; it was very ornate and dark. The cooktop was too far back in the kitchen towards the butler’s pantry, making it awkward when cooking, so they knew they wanted that moved. The rest was left up to our designer to overcome these obstacles and give them their dream kitchen.
We gutted the kitchen cabinets, including the built-in china cabinet and all finishes. The pony wall that once separated the kitchen from the den (and also housed the sink, dishwasher, and ice maker) was removed, and those appliances were relocated to the new large island, which had a ton of storage and a 15” overhang for bar seating. Beautiful aged brass Quebec 6-light pendants were hung above the island.
All cabinets were replaced and drawers were designed to maximize storage. The Eclipse “Greensboro” cabinetry was painted gray with satin brass Emtek Mod Hex “Urban Modern” pulls. A large banquet seating area was added where the stand-alone kitchen table once sat. The main wall was covered with 20x20 white Golwoo tile. The backsplash in the kitchen and the banquette accent tile was a contemporary coordinating Tempesta Neve polished Wheaton mosaic marble.
In the wet bar, they wanted to completely gut and replace everything! The overhang was useless and it was closed off with a large bar that they wanted to be opened up, so we leveled out the ceilings and filled in the original doorway into the bar in order for the flow into the kitchen and living room more natural. We gutted all cabinets, plumbing, appliances, light fixtures, and the pass-through pony wall. A beautiful backsplash was installed using Nova Hex Graphite ceramic mosaic 5x5 tile. A 15” overhang was added at the counter for bar seating.
In the den, they hated the brick fireplace and wanted a less rustic look. The original mantel was very bulky and dark, whereas they preferred a more rectangular firebox opening, if possible. We removed the fireplace and surrounding hearth, brick, and trim, as well as the built-in cabinets. The new fireplace was flush with the wall and surrounded with Tempesta Neve Polished Marble 8x20 installed in a Herringbone pattern. The TV was hung above the fireplace and floating shelves were added to the surrounding walls for photographs and artwork.
They wanted to completely gut and replace everything in the powder bath, so we started by adding blocking in the wall for the new floating cabinet and a white vessel sink. Black Boardwalk Charcoal Hex Porcelain mosaic 2x2 tile was used on the bathroom floor; coordinating with a contemporary “Cleopatra Silver Amalfi” black glass 2x4 mosaic wall tile. Two Schoolhouse Electric “Isaac” short arm brass sconces were added above the aged brass metal framed hexagon mirror. The countertops used in here, as well as the kitchen and bar, were Elements quartz “White Lightning.” We refinished all existing wood floors downstairs with hand scraped with the grain. Our clients absolutely love their new space with its ease of organization and functionality.

 Proven Winners
Close up of 'Amy Cotta' flowers. In cool weather, leaf color is dark purple.
Inspiration for a mid-sized traditional partial sun landscaping in Chicago for spring.
Inspiration for a mid-sized traditional partial sun landscaping in Chicago for spring.

 SINKOLOGY
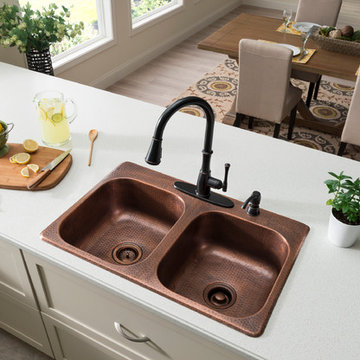
The Raphael drop-in kitchen sink is designed to make an impact in any kitchen. The Raphael copper sink by Sinkology is a standard drop-in that makes replacing your old boring kitchen sink easy. A beautiful and luxurious kitchen is only a few steps away, just pull out your old, boring kitchen sink and drop in this beauty. Featuring 4 faucet holes and mounting clip hardware makes this Sinkology copper sink an easy DIY project. Maintenance is also easy with our copper sinks, simply wash with soap and water. Sinkology sinks are designed to make an impact and be a point of pride for your home, we also protect your investment with a lifetime warranty.
 JRP Design & Remodel
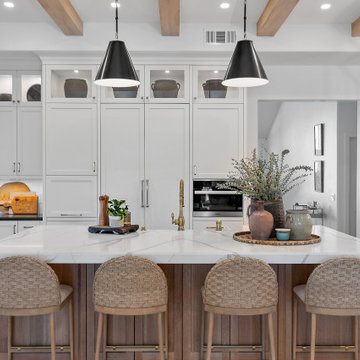
This modern farmhouse chic kitchen remodel features clean lines of alabaster cabinets and white gloss ceramic square tiles layered with natural wood tones. Removing the wall between the kitchen and family room allowed for a generous new island with a quartz countertop and farmhouse sink and plenty of below-counter storage space while creating a large open living space.
Adding faux ceiling beams helps to transition the space into the modern farmhouse style. The raised upper cabinets provide extended storage space and the lighted top cabinets add beautiful display or functional space.
Black quartz flanks the stove and provides plenty of countertop space for cooking tools and kitchen necessities. The dark bronzed and brass detailed hood and matching island lighting complement the kitchen’s neutral colors.
The dining nook features a linear aged-iron lighting fixture and under-seating drawers. White shiplap surrounds the cozy seating that invites you to stay a while for relaxed dining or conversation in this comfortable farmhouse chic remodel.
Photographer: Andrew Orozco
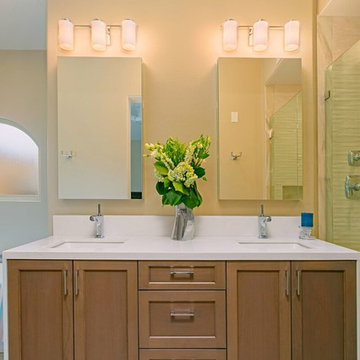
 Lori Ramsay Design
Robern M Series medicine cabinets provide storage for small electrical items like razors and tooth brushes keeping the countertops clutter free! They also create a spacious feeling entry into a narrow bath.
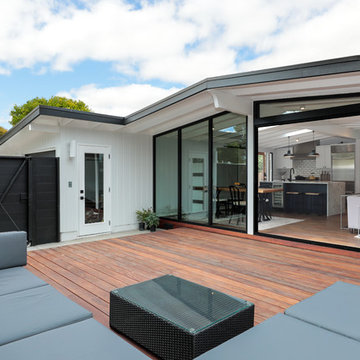
 Greenberg Construction
Greenberg Construction
Location: Mountain View, CA, United States
Our clients wanted to create a beautiful and open concept living space for entertaining while maximized the natural lighting throughout their midcentury modern Mackay home. Light silvery gray and bright white tones create a contemporary and sophisticated space; combined with elegant rich, dark woods throughout.
Removing the center wall and brick fireplace between the kitchen and dining areas allowed for a large seven by four foot island and abundance of light coming through the floor to ceiling windows and addition of skylights. The custom low sheen white and navy blue kitchen cabinets were designed by Segale Bros, with the goal of adding as much organization and access as possible with the island storage, drawers, and roll-outs.
Black finishings are used throughout with custom black aluminum windows and 3 panel sliding door by CBW Windows and Doors. The clients designed their custom vertical white oak front door with CBW Windows and Doors as well.
Sponsored
Fredericksburg, OH

High Point Cabinets
Columbus' Experienced Custom Cabinet Builder | 4x Best of Houzz Winner
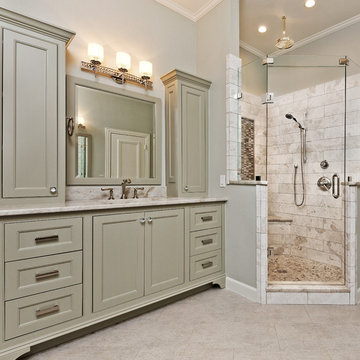
 MHM LIVING
Our client on this project requested a spa-like feel where they could rejuvenate after a hard day at work.
The big change that made all the difference was removing the walled-off shower. This change greatly opened up the space, although in removing the wall we had to reroute electrical and plumbing lines. The work was well worth the effect. By installing a freestanding tub in the corner, we further opened up the space. The accenting tiles behind the tub and in the shower, very nicely connected the space. Plus, the shower floor is a natural pebble stone that lightly massages your feet.
The His and Her vanities were truly customized to their specific needs. For example, we built plenty of storage on the Her side for her personal needs. The cabinets were custom built including hand mixing the paint color.
The Taj Mahal countertops and marble shower along with the polished nickel fixtures provide a luxurious and elegant feel.
This was a fun project that rejuvenated our client's bathroom and is now allowing them to rejuvenate after a long day.
 FA Design Build
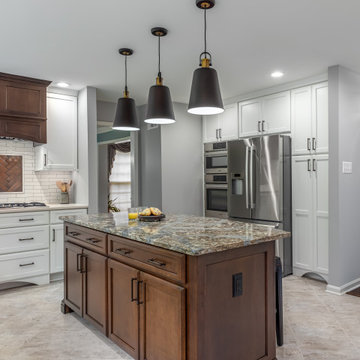
Our clients had enjoyed their home for more than 25 years, but little had changed during that time. They were ready for a full main level renovation. We started by working collaboratively to re-envision the kitchen space to ensure we achieved key goals: open sight lines to the eating area and family room; space for an island with seating; new locations for the range and refrigerator; and removal of an awkward pantry and unused desk. The redesigned space called for removing a load bearing wall to allow space for the island and to repurpose the pantry and desk square footage for wall ovens, refrigerator, and pantry. The clients selected a warm white paint for the perimeter cabinetry (Medallion Cabinetry, White Icing) and balanced the design with a stained cherry island and hood (Medallion Cabinetry, French Roast). The dramatic Cambria Helmsley was chosen for the island countertop, with the serene Silestone Eternal Marfil for the perimeter. The simple subway backsplash ensures the bronze metal tile, laid in a herringbone pattern over the range, is the focal point on the perimeter walls. Bronze accents with the sink (Elkay, Mocha), lighting, cabinetry hardware, and furniture reinforce the warm atmosphere. Our clients chose beautiful, yet durable, Armstrong Alterna luxury vinyl tile in Artisan Forge for the kitchen. For the other spaces — living room, dining room, foyer, family room, office, and powder room — we laid Armstrong Paragon Oak hardwood in Countryside Brown. Final touches included a buffet in the eating area, new hardwood staircase with iron balusters, wool stair runner, two custom area rugs, and new powder room vanity and accessories.
 Shuster Design Associates
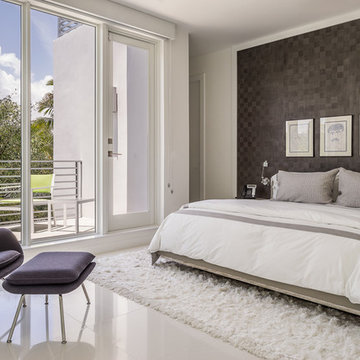
This Second Floor Guest Bedroom is Luxuriously Furnished and Features a Private Balcony.
Large trendy guest porcelain tile bedroom photo in Miami with white walls and no fireplace
Large trendy guest porcelain tile bedroom photo in Miami with white walls and no fireplace
66