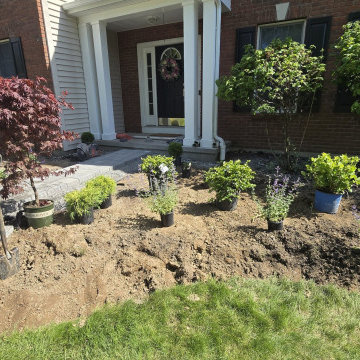
Search results for "Remove soil" in Home Design Ideas
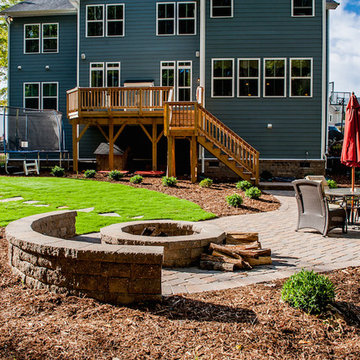
A retired client wanted to jazz up the entrance to her home but leave the orchard, veggie beds and hardscape the way it was. Since she does all the maintenance herself, I wanted to make sure she wouldn't have too many weeds so we used the winter months to sheet mulch the area, killing the massive amount of existing weeds & enriching the hard soil. This worked beautifully.
We added a flagstone pathway with Dymondia between the stones and a small area for her new bench to sit and enjoy the garden. She didn't want plants under her messy tree, so we decorated that area with pots. She has a huge deer & gopher problem which is why she hangs the white ribbons to scare away the deer from her fruit trees.

Terren Landscapes http://www.terrenlandscapes.com
2014 PLNA Awards for Landscape Excellence Winner
Category: Residential $60,000-$120,000
Award Level: Silver
Project Description:
We were contracted by the family to create a master plan for the property. They
were experiencing extreme drainage and erosion problems due to the surrounding properties’
drastic grade changes. Erosion had caused the rear lawn to sink in various areas and the existing
rear patio spaces were failing. The client wanted to rebuild their patios and walkways, repave
their driveway and give their home more visual appeal. Most importantly, they wanted an
environmentally friendly solution.
Our design solution was to create a rain garden that would slow storm water runoff, allow
for percolation, and promote infiltration, while permitting excess clean water to enter the storm
drain at the street with slower velocity. The rain garden acts as a temporary holding space that
allows the earth to slowly absorb water, rather than overwhelm the nearby storm drain. Our first
objective was to conduct a percolation test to determine the amount of clay soil that needed to be
removed before reaching the sandy loam layer. A percolation test and storm water calculations
were generated to accommodate a 1” rain event. Based on our calculations and the small size of
the property, we determined a depth of 18” was necessary for optimal holding capacity. We
removed 18” of clay soil until a layer of sandy loam was encountered. Next, the soil was amended
with compost and sand to create a highly porous planting media for the basin of the garden. We
piped the three existing rear downspouts to the rain garden area to capture for infiltration and
alleviate runoff throughout the rear lawn and patio space. We installed an 18” wide over-flow
standpipe at a 24” depth into the ground that outlets to a stone swale that carries the water to the
property edge. As an added means of holding the maximum amount of water, we designed the
standpipe to sit 14” above grade. The height of this standpipe allows this rain garden to capture
14” of water before reaching the overflow capacity. We placed geotextile fabric to help reduce
migration of the stones into the soil and aid in the prevention of weeds and erosion. We heavily
planted the rain garden to further aid in absorption and to attract local wildlife. A native plant
palette of butterfly weed, Panicum, Joe-Pye weed, and asters form a colorful backdrop while the
basin was filled with obligate wetland plants such as royal ferns, irises and cardinal flowers. The
upper edges in the foreground are planted with Echinacea, Rudbeckia and Monarda, satisfying
the local bird community and adding bright seasonal colors. This garden effectively collects and
cleanses rainwater while creating a habitat for birds, frogs, and butterflies.
Our next challenge was to redesign the existing patios and walkways without increasing
impervious surfaces. According to township regulations this property was currently at its
maximum capacity, therefore we designed the front and rear patios with a slightly smaller
footprint to decrease their existing impervious surfaces.
New planting beds were designed throughout the entire property. Plants were chosen that
were tolerant of specific site conditions. For the rear yard, we choose a backdrop of witch hazel
and hollies to provide an evergreen screen as well as early spring color. We placed hydrangea
throughout to add summer color. We planted ostrich fern under the existing spruce tree to create
a lush floor. This area became an additional backdrop for the rain garden as well as a screen for
the neighboring property. We choose a combination of ‘Blue Star’ juniper and creeping jenny to
soften the existing rear wall with creepers. Around the rear patio areas we choose a combination
of Liatris, Rudbeckia and ‘Lo and Behold’ butterfly bush. This combination of plants works in
harmony with the rain garden and attracts additional butterflies.
For the front of the property we worked with an existing Japanese maple that provided
dense shade. We choose a shade-tolerant combination of Heuchera, Astilbe, ferns and hostas for
this area. We added more hydrangeas to the front foundation of the house to provide lush
layering of plant material and visual interest with additional summer blooms.
Overall, we were able to exceed the client’s needs and expectations in transforming their
property into a colorful paradise that attracts wildlife from season to season. The plant palette
provides seasonal interest and the rain garden has successfully decreased storm water runoff.
The new hardscape surfaces were designed and built with a slightly smaller footprint to decrease
impervious surfaces. This project is a positive example of how all properties, regardless of size,
can make an ecological difference by decreasing impervious surfaces and maintaining proper
storm water management.
Photo Credit:
Terren Landscapes
Find the right local pro for your project
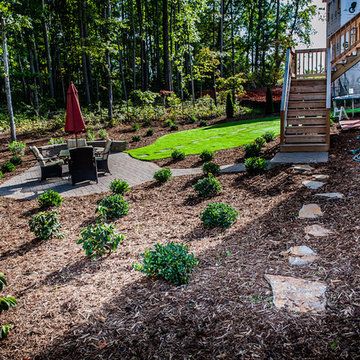
Vetiver grass is used world-wide for soil and water conservation and many other environmental protection applications. This is due to its strong and deep root system, a high tolerance to most heavy metals and an ability to remove from soil and water large quantities of excess nitrates, phosphates and farm chemicals.

Terren Landscapes http://www.terrenlandscapes.com
2014 PLNA Awards for Landscape Excellence Winner
Category: Residential $60,000-$120,000
Award Level: Silver
Project Description:
We were contracted by the family to create a master plan for the property. They
were experiencing extreme drainage and erosion problems due to the surrounding properties’
drastic grade changes. Erosion had caused the rear lawn to sink in various areas and the existing
rear patio spaces were failing. The client wanted to rebuild their patios and walkways, repave
their driveway and give their home more visual appeal. Most importantly, they wanted an
environmentally friendly solution.
Our design solution was to create a rain garden that would slow storm water runoff, allow
for percolation, and promote infiltration, while permitting excess clean water to enter the storm
drain at the street with slower velocity. The rain garden acts as a temporary holding space that
allows the earth to slowly absorb water, rather than overwhelm the nearby storm drain. Our first
objective was to conduct a percolation test to determine the amount of clay soil that needed to be
removed before reaching the sandy loam layer. A percolation test and storm water calculations
were generated to accommodate a 1” rain event. Based on our calculations and the small size of
the property, we determined a depth of 18” was necessary for optimal holding capacity. We
removed 18” of clay soil until a layer of sandy loam was encountered. Next, the soil was amended
with compost and sand to create a highly porous planting media for the basin of the garden. We
piped the three existing rear downspouts to the rain garden area to capture for infiltration and
alleviate runoff throughout the rear lawn and patio space. We installed an 18” wide over-flow
standpipe at a 24” depth into the ground that outlets to a stone swale that carries the water to the
property edge. As an added means of holding the maximum amount of water, we designed the
standpipe to sit 14” above grade. The height of this standpipe allows this rain garden to capture
14” of water before reaching the overflow capacity. We placed geotextile fabric to help reduce
migration of the stones into the soil and aid in the prevention of weeds and erosion. We heavily
planted the rain garden to further aid in absorption and to attract local wildlife. A native plant
palette of butterfly weed, Panicum, Joe-Pye weed, and asters form a colorful backdrop while the
basin was filled with obligate wetland plants such as royal ferns, irises and cardinal flowers. The
upper edges in the foreground are planted with Echinacea, Rudbeckia and Monarda, satisfying
the local bird community and adding bright seasonal colors. This garden effectively collects and
cleanses rainwater while creating a habitat for birds, frogs, and butterflies.
Our next challenge was to redesign the existing patios and walkways without increasing
impervious surfaces. According to township regulations this property was currently at its
maximum capacity, therefore we designed the front and rear patios with a slightly smaller
footprint to decrease their existing impervious surfaces.
New planting beds were designed throughout the entire property. Plants were chosen that
were tolerant of specific site conditions. For the rear yard, we choose a backdrop of witch hazel
and hollies to provide an evergreen screen as well as early spring color. We placed hydrangea
throughout to add summer color. We planted ostrich fern under the existing spruce tree to create
a lush floor. This area became an additional backdrop for the rain garden as well as a screen for
the neighboring property. We choose a combination of ‘Blue Star’ juniper and creeping jenny to
soften the existing rear wall with creepers. Around the rear patio areas we choose a combination
of Liatris, Rudbeckia and ‘Lo and Behold’ butterfly bush. This combination of plants works in
harmony with the rain garden and attracts additional butterflies.
For the front of the property we worked with an existing Japanese maple that provided
dense shade. We choose a shade-tolerant combination of Heuchera, Astilbe, ferns and hostas for
this area. We added more hydrangeas to the front foundation of the house to provide lush
layering of plant material and visual interest with additional summer blooms.
Overall, we were able to exceed the client’s needs and expectations in transforming their
property into a colorful paradise that attracts wildlife from season to season. The plant palette
provides seasonal interest and the rain garden has successfully decreased storm water runoff.
The new hardscape surfaces were designed and built with a slightly smaller footprint to decrease
impervious surfaces. This project is a positive example of how all properties, regardless of size,
can make an ecological difference by decreasing impervious surfaces and maintaining proper
storm water management.
Photo Credit:
Terren Landscapes

The "secret ingredient" in organic container gardens: worm castings with live worms. Red compost worms convert organic nutrients in potting soils into plant-available form, and the last chamber of the worm gut is loaded with beneficial bacteria and fungi that boost plant immunity, cycle nutrients, and increase the water-holding capacity of the potting soil. Photo by Steve Masley.

What You Should Know About Fuel Tanks
Home heating solutions can encompass electrical, gas, solar and oil based systems. When one talks about oil tanks that are used as home heating systems, there are a few important things to keep in mind.
Start with the installer
A high-quality, professional and expert installer of oil or fuel tanks can certainly help you make the decision on which type of tank is the best for your property. When you decide on underground fuel tanks, you should make sure that they are:
• Compliant with all statutory requirements.
• Made of steel and polyurethane.
• Covered by guarantee.
• Supported by backfill material, leak detection systems and tank supports.
Aboveground fuel tanks are easier to maintain simply because they are more accessible. Even the smallest of oil or fuel leaks can be detected almost immediately. But even here, an installer should give you premium quality tanks. These tanks:
• Should have secondary containment.
• Should be corrosion resistant.
• Should have proper support as well.
Installation
Installation for both – underground and above ground tanks is a technical and complex process. The installation process for both will start with a technician visiting your home and making an assessment of aspects such as:
• Measuring the space.
• Taking stock of the distance from your home to the tank, pipes and so on.
• The supports needed for the tank and so on.
If it is an above ground tank, then it may also need bollards to protect it from vehicles. An underground tank will need containment sumps and drop tubes and so on.
The combination of components will be decided by the installer and you can certainly ask for a complete breakup of the same and get the costs for the same as well.
Remediation
Repair and remediation of above and underground tanks is a critical task. In fact, many problems associated with underground fuel storage tanks can be eliminated if the home owner invests time and resources into periodic analysis and examination of the same.
A fuel tank that has been installed above the ground will be easier to access but repair and remediation of both types of tanks will entail:
• Soil sampling.
• Extent of oil contamination.
• Assessment of leaks and the extent and number of the same.
• Drawing up a plan for dealing with all problem areas.
Removal
Every fuel tank has a shelf life. At some point of time or the other, the fuel tank will need to be removed. When it comes to above ground installations, the removal company will need to assess the type of fuel and the knowhow on emptying the tank completely.
The tank will also need to be cleaned completely before being loaded on to a vehicle that can take it away to a recycling unit or disposal unit. Underground tanks can be removed or closed or treated as abandoned depending on the condition of the tank and official licenses. For instance, a tank can be treated as closure in place if the removal of the same is going to compromise the safety of structures above the ground.

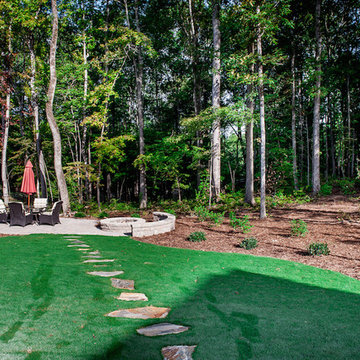
Replanted with new trees and shrubs for a more colorful arrangement that won't overgrow the space.

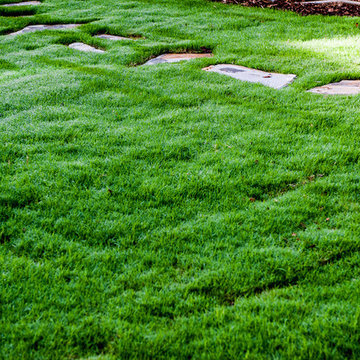
Old weedy yard was removed, soil was tilled and graded. Topsoil was added and 3500 square feet of Tall Fescue Sod was installed to instantly make over this yard.

I recently worked on the restoration of a Victorian tiled hallway in Cwmbran Wales which is six miles North of Newport. As you can see from the photographs the floor was in quite a neglected dirty state and many of the the black and white border tiles needed removing and replacing. The worst part was the area by the front door where most of the tiles had been removed and then backfilled with concrete. I can only assume at some point in the past it was deemed to difficult or expensive to restore the floor, so they simply covered it up.
After visiting to survey the floor I did offer to source replacements for the concreted section and restore that as part of the work however my client’s budget would not stretch to that at the time. My quote was therefore focused on the main section of flooring and included replacing border tiles, deep cleaning the whole floor and then sealing the tiles to add protection. Although I did need to check that I could indeed source the replacement tiles before being able to provide the quote which as it turned out would not be an issue.
They were happy to go ahead and we arranged a suitable time to carry out the work which would enable me to work in the property whilst minimising contact with the owners due to the Covid-19 situation.
I spend the first day sorting out the black and white border tiles which needed to be gently prised out of position without upsetting the main part of the floor. The exposed subfloor was then cleaned up to remove old adhesive and replacements were fitted where required and secured into place. The floor would need to be solid before cleaning so that was left for day two so the new adhesive could go off overnight.
On day two I gave the floor an initial clean using a combination of Tile Doctor Pro-Clean and Remove and Go diluted with water. This produces a strong cleaner/stripper that will tackle dirt and remove coatings such as previous sealers. The old tiles had accumulated years of ingrained dirt, so I needed this extra power to remove the years of dirt and contaminates from the tile. It was sprayed onto the tiles and then left to soak in for ten minutes before being actively scrubbed into the tile using a rotary machine fitted with a black scrubbing pad. The soil was then rinsed off with water and extracted with a wet vacuum. The floor was inspected, and the process repeated on the tough stains until I was satisfied all the dirt had been removed.
Next the floor was treated to an acid wash using Tile Doctor Acid Gel using a similar method as before. This is an important treatment for these old Victorian floors that have no damp proof course as it neutralises efflorescent salts trapped in the tile which can appear as white salt deposits later. Once I was happy with the condition of the floor it was given a final rinse and left to dry off. I use a wet vacuum to remove liquids from the floor and on this last extraction I spent extra time to remove as much moisture from the tiles as possible.
I came back a few days later and after checking the tiles were dry using a damp meter, I started the application of the sealer. For this floor I applied seven coats of Tile Doctor Seal and Go for a satin finish. Tile Doctor Seal and Go is a specially formulated water-based sealer that provides both stain resistance and a durable low-sheen finish. It is perfect on a floor of this age where it leaves a lovely finish and will remain durable in what is a essentially a high traffic area.
Although we didn’t manage to sort out the area by the front door the client managed to fit a made to measure coir door mat along with carpet bar which was quite practical and looked fine so they were able to resolve that problem without blowing their budget.
The client was over the moon with results, the floor had a lovely pattern and the colours now shone through. I suggested the use of Tile Doctor Neutral Tile Cleaner to keep the floor clean and in good condition. It is neutral in pH so will ensure that the newly applied sealer stays in place and will ensure maintenance is nice and easy for them.
Paul Wales
Monmouthshire Tile Doctor

This ground floor flat in the City of Oxford had been converted from a shop which as you can imagine, was quite complex. One significant element involved in the conversation was the restoration of an old Quarry tiled floor which ran through the main hallway and had for many years been covered in a commercial linoleum covering.
When the linoleum covering was removed, the sheer amount of glue which had been used to affix it had completely ruined the appearance and condition of the Quarry tiles. There was also a lot of concrete in the bathroom, and our client was keen to have this removed in the hope that the tiles beneath were salvageable.
My first task at the property was to deal with the adhesive. I covered the entire floor area with Tile Doctor Remove and Go and then covered it with a plastic sheet and leaving it to soak into the glue and break it down overnight. Remove and Go is powerful stripper with a long-dwell time, formulated to break down adhesives and paint stains, amongst other coatings.
I returned the next day and, removing the plastic sheeting, I scrubbed the floor with a carbon brush attached to a rotary floor scrubber to remove the huge glue deposits. I worked in sections, rinsing each area of the floor with water after it had been scrubbed. Once I had finished the entire floor there was still some glue remaining, so I covered it again with a solution of Remove and Go combined with Tile Doctor HBU Nanotech, which utilises nano-sized particles to get underneath tough stains, dissolve them, and lift them out. I left this solution on the floor for about two hours to dwell and scrubbed it again.
During the next day of work, I used a very coarse 100 grit diamond burnishing pad to manually grind away the remaining stubborn bits of glue. Paying attention to the bathroom, I used a 50-grit coarse milling pad followed up with a 100-grit diamond burnishing pad to do the same to the area of concrete.
The next part of the process was to use Tile Doctor Grout Clean Up to acid wash the floor. This was successful in removing the last bits of cement and the remaining residue of the glue. To complete the cleaning process, I then rinsed the floor with plenty of water and vacuumed up any soiled solution.
I opted to leave the floor alone for a couple of days to fully dry off so that it could be sealed upon my return. This is crucial as any moisture or damp issues can damage the performance of the sealer and expose the floor to further ingrained dirt and staining.
To seal the floor, I used Tile Doctor Colour Grow. This is an impregnating sealer that also enhances the natural reddish shades in the Quarry. I applied two coats of the sealer, giving the floor the natural look matte finish the customer desired.
The customer was very impressed with the results of this thorough restoration. She even left the following feedback:
“I cannot recommend this service enough. The Oxford Tile Doctor (Barry) was a superstar: he cleaned up the tiles in my hallway, which were covered in a very thick layer of glue, and removed concrete from the tiles. They now look superb and I’m really happy with the outcome. Barry was always on time, considerate, and kept me up to date. The quote for the job was exactly right. I would not hesitate to recommend him.”

Along with internal tiled floors at residential and commercial properties, we also specialise in the cleaning, restoration and sealing of all types of external tiled floors, including patios.
This customer, who lives in the small town of Brackley in Northamptonshire, had made the unfortunate mistake of sealing a brand new Slate tiled patio without removing the layer of grout haze smeared across the surface of the tile first. With the grout trapped between the tile and the new sealant the sealer was unable to fulfil its potential and the entire floor appeared really dull and patchy. The customer contacted me about setting the situation right.
My initial course of action was to remove the new sealer using Tile Doctor Remove & Go, which is specially designed to strip away sealant, as well as adhesives and paints in cases where building and decorating works have left the tiles stained. The product was applied liberally across the surface area of the patio and agitated using a rotary machine fitted with a special stripping pad. Of course, this was necessary because the grout haze could not be treated without removing the sealant first. The soiled cleaning solution was promptly soaked up using a wet-vac machine.
Once the tiles were exposed I applied Tile Doctor Acid Gel, which is a blend of phosphoric and hydrochloric acids in more manageable gel form, all over the patio and allowed it to dwell for ten minutes to begin neutralising the grout haze. I then added a little water and worked the product into the patio with a stiff scrubbing brush and a rotary machine to ensure all grout haze was removed from the surface of the tiles. The remaining slurry was then removed using the wet vacuum, and I rinsed the area twice with plain water to ensure all cleaning products had been removed. It was them left to dry completely.
I returned to the property several days later to give the patio a fresh seal now that it was free from grout haze. First, I gave the patio a vacuum and light mop to remove any dust and debris. The customer wanted the tiles as dark as possible, therefore I suggested we use Tile Doctor Stone Oil before sealing, as this would darken the Slate significantly.
Once this was agreed, I applied one coat of Stone Oil, allowed an hour for the product to dry, and then followed this applying two coats of Tile Doctor Colour Grow sealer. This is our impregnating, colour enhancing sealant which provides maximum protection against ingrained dirt and stains, as well as a durable no-sheen finish.
As you can see from the photographs, the Slate tiles experienced an impressive transformation. The fresh sealant, combined with the Stone Oil, really took the appearance of the tiles to a new level and, what’s more, it will be easier for the happy customer to keep it clean in the future.
Phil Vissian
Northamptonshire Tile Doctor

During an inspection for alteration work, this customer from Cheshunt discovered what appeared to be an original encaustic tiled floor under the hallway carpet. Keen to work out what it was, and have it restored, I was asked to pop round and look.
I went over as requested to survey the hallway floor and confirm their suspicions. The carpet had been secured with gripper rods glued onto the floor and that came away easily enough. Underneath, the tiles had been covered with self-levelling cement which had to be carefully scraped away to reveal the tiles.
I ran a test to see if the cement leveller could be easily removed and using a combination of a scraper with Tile Doctor Pro-Clean, I was able to confirm the tiled floor was indeed salvageable. The house was Edwardian, and the tiles had been laid in a classic black and white geometric pattern typical of the period so I suspect the floor was indeed original.
I worked out a quote to restore the whole floor including the removal of the cement, deep cleaning and then sealing the tiles. Without removing all the cement, it would be difficult to price for replacing broken tiles, but I suspected there may be a few as its quite usual for a floor of this age. Keen to have the floor restored we were given the go-ahead and a date scheduled for the work to start.
The first step was to remove all the carpet and gripper rod so we could see the full extent of the self-levelling screed. Once done it was a case of carefully chipping and scraping away to break up the cement until the tiled floor had been fully revealed. Its slow and detailed work but quite rewarding when the tiled floor is finally revealed. The tiles had survived well under the carpet and cement but as suspected a few repairs and replacement would be needed.
With all the cement brushed away work moved onto cleaning which started with a strong dilution of Tile Doctor Pro-Clean applied to the floor and left to soak in for fifteen minutes the scrubbed in with a rotary machine fitted with a Black pad. A lot of soiling is generated from this which is rinsed off with water and extracted with a wet vacuum. The floor was then inspected and the process repeated where required.
The next step was to treat the tiles to an acid wash using Tile Doctor Grout Clean-up. This is applied as before and has several benefits including dissolving the remaining cement residue and neutralising the pH of the floor after the use of Tile Doctor Pro-Clean which is a strong alkaline.
The floor was then inspected and the broken tiles carefully removed so they could be replaced. This is delicate work as lifting a tile can sometimes upset its neighbour and before you know it the size of the work has tripled. Replacement tiles were then cut to fit the existing geometric pattern and secured into place with a rapid set adhesive and grouted in.
Once the replacement tile and grout had set, the floor was given a light clean using Tile Doctor Neutral Tile Cleaner and then left to dry out overnight.
The next day the tiles were sealed using a single coat of Tile Doctor Colour Grow and the followed up with give coats of Tile Doctor Seal & Go. Colour Grow is an impregnator that soaks into the pores of the tile protecting it from within and improving colour, where as Seal and Go adds a nice subtle sheen to the tiles. Both products are breathable which is an important feature with old floors that don’t have a damp proof membrane.
For aftercare I recommended Neutral Tile Cleaner which is a gentle but effective tile cleaning product that won’t damage the sealer.
Robert Voyce
Hertfordshire TIle Doctor

It’s always a great surprise to find old tiled flooring hidden underneath carpet or linoleum which appears especially common with 19th century properties where it’s not unusual for the owners to uncover fantastically patterned, original Victorian tiled floors and, naturally, they want to restore them to their former glory. If you have a property of this type you might want to look under the carpets.
The majority of the time, however, these tiles have been covered up for decades, allowing for thick layers of muck to build-up and are invariably damaged carpet grippers, surface glue and adhesive tape.
This was pretty much the case with this customer who lives in the town of Warminster and was keen to have her own newly discovered Victorian hallway brought back to life, and called me down to see what could be done. Upon arrival at the property, I determined that the tiles would definitely require a very deep clean, including the remove of numerous glue stains, followed by the application of a new seal.
Before I could begin the deep cleaning process, I needed to remove the carpet grippers and surface glue, attempting to remove as much as possible by hand using a scraper.
For the particularly stubborn areas, I applied Tile Doctor Remove & Go, a powerful stripper specially designed to break down adhesives and solvents, and left it to dwell for 20 minutes to eat through the glue deposits. I then attached a black pad to a rotary machine and scrubbed the area thoroughly to clean the affected areas, before removing the resulting slurry using a wet vacuum and rinsed with clean water.
Once I was satisfied that all of the glue had been removed, I proceeded to soak the floor using a solution of the high alkaline cleaner known as Tile Doctor Pro Clean. This is a versatile product that can be used on a wide range of natural stone floors to deal with heavy soil build-up.
I left the Pro-Clean to dwell for ten minutes, and then scrubbed it into the tiles to remove the ingrained dirt and also to break down any old and ineffectual seals. The floor was then once again rinsed thoroughly with clean water which was then extracted using a wet vacuum before being left to dry for a couple of days.
Upon our return to the property I immediately tested the floor for damp using a damp meter. This is an extremely important test to carry out before sealing any kind of tiled flooring, due to the fact that excess moisture left over from cleaning can cloud the sealer and damage its ability to protect against dirt and stains.
Thankfully, the damp test revealed no excess moisture, and I was able to proceed with sealing the tiles. My choice of sealer was Tile Doctor Seal and Go, a water-based topical sealer that simultaneously provides both a stain resistant surface seal and a durable and aesthetically pleasing low sheen finish, also being water based it doesn’t give off a smell as it dries.
This is a very cost effective product that is highly suitable for use on Victorian and Quarry tiles, I applied five costs to achieve the desired finish.
The customer was very pleased with the final results. It’s always satisfying to restore original Victorian tiled floors to looking their best once again – and this one was no exception.
Stuart Ford
Wiltshire Tile Doctor

This Terracotta tiled floor was installed in the kitchen of a cottage in the small village of Maidford near Towcester. The tiles were not looking their best and the owner of the property realised it was time to do something about it and contacted Tile Doctor to have the floor stripped and resealed. Stripping and Sealing tile and stone floors is our bread and butter so I was more than happy to pop round and survey the floor which was approximately 9m2.
The grout had darkened with dirt and the previous tile sealer was failing so dirt was now getting ingrained in the Terracotta making it difficult to clean in places and leading to a patchy appearance. We discussed the work involved, my quote was accepted, and a date agreed for me to return and complete the work which would take two days, one to clean and one to seal.
After tidying up the Kitchen and removing the kickboards from underneath the kitchen units I set about working on cleaning and stripping the Terracotta floor of old sealers. To start I tested a small area with a strong dilution of Tile Doctor Wax Away. Wax was quite often used on Terracotta so I figured this product would be a good place to start. My suspicions were proved correct, and I found this to be the best product for removing the many layers of sealant on the floor. Wax Away is a new alkaline product by Tile Doctor and ideal for cleaning clay-based tiles such as Terracotta.
With my sights set on the rest of the floor Wax Away was scrubbed into the tile using a 17” rotary floor scrubbing machine and a black scrubbing pad running on a slow speed which helps to reduce splashing. This activity soon brought the dirt off the floor and the soiled cleaning solution was removed using a wet vacuum and the floor was rinsed down with clean water. The cleaning process was repeated a couple of times until I was happy with the floor, a stiff hand brush was then used along the grout lines with a dilution of Tile Doctor Pro-Clean to clean up the grout.
After rinsing and extracting the floor again the floor was inspected, and I noticed there were a few stubborn paint splashes on the tiles. I managed to remove these and these by spot treating the affected area with Tile Doctor Remove and Go and a steamer to lift the stain out of the clay tile. Once happy the floor was clean it was given a thorough rinse to neutralise it and remove any trace of cleaning products and then left it to dry.
I allowed the floor to dry for several days before returning to seal the Terracotta using numerous coats of Tile Doctor Seal and Go which is an ideal sealer for Terracotta and provides durable stain protection together with a low sheen finish. Terracotta is by its nature very porous and so it’s not unknown for it to take up to nine coats of sealer, which can take some time to apply as like paint you have to wait until it’s dry before it will take the next coat.
The customer was so impressed by the results I achieved in their kitchen they decided to go ahead and book me in to carry out this process throughout the whole of the ground floor which included lounge, study and hallway.
Phil Vissian
Northamptonshire Tile Doctor
5