
Search results for "Repeated short" in Home Design Ideas
 THE Remodel Group
A luxurious en suite bath was created within this classic 1925 Portland bungalow by reconfiguring the second story’s original small bedrooms and tiny half bath. In this welcoming new urban boho space, eclectic finishes mingle harmoniously, integrated through subtle repetition of shapes and materials.
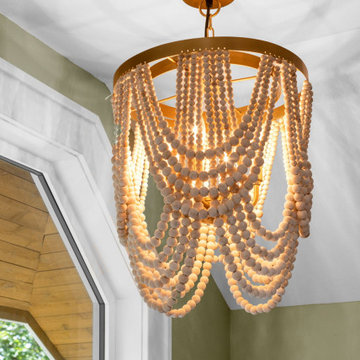
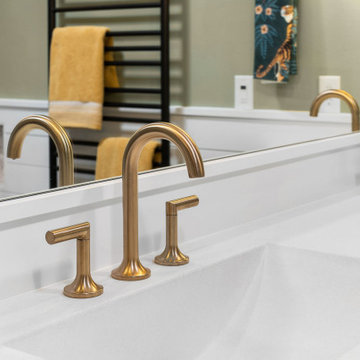
A furniture-style vanity sets the tone for this luxurious space, introducing materials, colors, shapes, and textures that repeat throughout. Individual walnut hexagons join to create distinctive vanity doors, offset beautifully by horizontal-grain drawers. Topping the cabinetry is a simple concrete countertop with integral sinks. An expansive framed mirror above enlarges and brightens the room. Within the mirror, sconces float, their globes a nod to the hexagons below. Champagne bronze fixtures reflect the warm walnut glow. Nestled into the back corner, a stunning shower features waterjet tiles in a double herringbone pattern, each precisely cut and laid to maintain design integrity at every surface transition. Teak floor tiles and a pebbled niche hint at the classic spa experience. Across from the shower, a large hexagonal window provides a treetop view from the free-standing tub below. The gentle oval of the tub and the beaded chandelier above provide a pleasing contrast to the strong lines surrounding it, as do the softly-shaded pebbles in the full-length niche. Shiplap wainscotting wraps the room, creating an illusion of height in the compact space. Subtle flooring and soft green walls create an understated backdrop for the bold mix of materials, unifying them into a serene oasis.
Asking a century-old home to accommodate a modern luxury bath is a tall order. Asbestos-laden plaster and flooring had to be abated. The subfloor had to be leveled and reinforced to increase strength and prevent deflection. Water lines and multiple electrical circuits had to be brought across and up without disturbing a beautifully-paneled ceiling, something we accomplished by firring out stair walls to hide the chases. Our client had visions of a leafy view from her tub, but the new layout eliminated existing windows. Placing a new window was complicated by deep eaves and flat soffits. By pushing the header into the roofline, however, we were able to accommodate a picture window. The flat soffit was replaced by an inverse hip lined with stained tongue and groove cedar, tying it to the bathroom finishes. Bringing materials up a narrow staircase became truly challenging when it was time to install the big items. However, strategic removal of drywall around the landing got the job done. Our attention to detail is showcased in the shower tile, where precise cuts were required at surface transitions to maintain the integrity of a complex double herringbone lay. The project was delivered on time.
Savvy layout choices minimized spending on structural changes. Because we were dealing with dormer space, head height was an issue. Raising the ceiling would have been complex and expensive so our design accommodated the constraints – tub on the low outside wall, shower on the full-height interior wall. The vanity spanned the spread, accommodating our petite client on the exterior side and her taller husband on the interior side. An under-eave closet was closed off to create room for both a freestanding tub and a separate shower. Rather than building replacement storage elsewhere, we simply added a new door into the closet from the primary bedroom. This was made possible by absorbing the short hallway separating the existing bed and bathroom into the primary bedroom. This new layout also created an en suite relationship between the primary bedroom and the new bath. We saved additional dollars by selecting a furniture-style vanity rather than using custom cabinetry, and the countertop with integral sinks provided a cost savings over a more traditional quartz countertop with undermount sinks. Affordable shower tiles allowed us to put more money into a dynamic tile layout. The project was delivered within budget.
 Marie Hebson's interiorsBYDESIGN Inc.
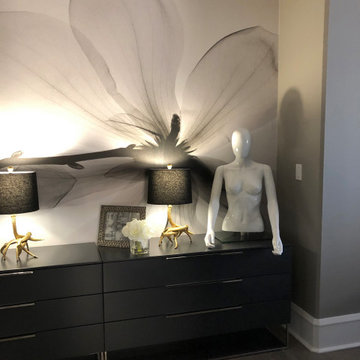
WE installed a black and white X-Ray of Magnolias in this master suites hallway, then repeated the same mural in reverse behind the headboard. The affect is nothing short of spectacular!
 Tile Doctor Ltd
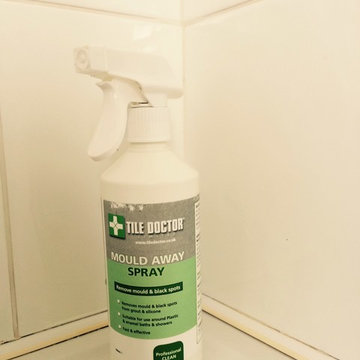
If you have a tiled shower area in your home, it’s very likely you’ve experienced problems with the grout becoming excessively dirty and ridden with displeasing black spots of mould. The underlying issue is due to inadequate ventilation which can be a real problem in modern insulated houses and occasionally the grout can get so imbued with contamination that the problem needs to be resolved professionally.
In the case of this Ceramic tiled shower area, located at a property in Galgate, Lancashire, mould had turned the grout black and had got into the sealant strip around the base. The property owner had tried using the run-of-the-mill cleaning products you can buy in superstores, but they simply couldn’t get the job done. So, she contacted me to see what could be done.
At Tile Doctor, we come across the problem of mouldy shower tiles very often. Excess soaps and shampoos – many of which contain chemicals that harmful to the grout – can quickly build-up if not removed, causing mould and soap scum to emerge quickly, and before you know it, you have a problem like this one.
Thankfully, with the right strength product and cleaning methods, mould can be removed quite easily. The cleaning product used here was Tile Doctor Mould Away, which does what it says on the bottle and can quickly remove mould and black spots from grout and silicone. I applied Mould Away to the grout and surrounding Ceramic tiles and left it to dwell for a short period, before starting to clean the affected areas carefully using soft nail brushes and a small amount of water.
Sometimes it is necessary to repeat this process several times to achieve the best possible results, but in this case two attempts was all it took to get the grout looking like new once again.
Following the cleaning, the area was rinsed thoroughly with water, before bring dried off quickly with a heat gun on a low setting. I then sealed the grout with a single coat of Tile Doctor Wall Grout Sealer, which is a water-based sealer designed to protect against water, oil and acid-based contaminants, and stop them from spoiling the appearance of the grout. It also provides a transparent finish that does not diminish the original colouring of the grout. To add the finishing touches, I polished off the Ceramic tiles as these were already fully glazed and did not require any extra sealer.
The before and after photos are a testament to how significantly the condition and appearance of the grout was quickly improved and needless to say, the customer was very satisfied with the result.
Russell Taylor
Lancashire Tile Doctor
Find the right local pro for your project
 Tile Doctor Ltd
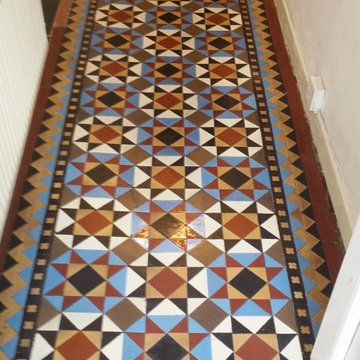
I was recently contacted by a client who had just moved into a large Victorian property in the West Cheshire village of Tarvin about renovating their Victorian tiled hallway. Apparently, the floor was in good condition, and it would just be a case of removing what was left of the old sealer, deep cleaning the tiles and then applying a fresh seal. Unless the floor has been regularly maintained with the same sealer it’s important to remove all traces of old sealers before applying fresh.
Victorian Hallway Before Cleaning Tarvin Cheshire
A lot of the work we do at Tile Doctor can be a lot more involved, often requiring the sourcing of matching replacement tiles and rebuilding large sections of tiled flooring so straight forward clean and seal job is always welcome.
To remove what was left of the sealer and the ingrained dirt from the pores of the Victorian tile I dressed the floor with a strong dilution of Tile Doctor Pro-Clean. On this occasion I used a 1:3 dilution with water and applied it to the floor with a mop. I left it to soak into the tile for fifteen minutes before scrubbing so it could get to work breaking down the old sealer.
During this time, I set up a weighted floor buffer and fitted a black buffing pad, these pads are designed for scrubbing hard floors and lifting out the dirt. I applied a little water as required during this process to ensure the pad was lubricated. Shortly the cleaning solution darkened as the old sealer and dirt was released from the tile.
The soil was rinsed away with water and then removed using a wet vacuum. Once clear the floor was inspected and the process repeated until I was satisfied it was as clean as it could be and free of sealer.
I left the floor to dry off overnight and returned the next day to apply a new sealer. Before doing so however I like to use a damp meter to take moisture readings from the floor. This is needed to ensure it is dry enough to seal which is important as any moisture in the tile can affect the sealer and lead to an inconsistent finish.
To seal I started with the application of a single coat of Tile Doctor Colour Grow which is a colour intensifying breathable impregnator that soaks into the tile improving appearance and adding protection from within. Any excess sealant was removed by wiping the floor with a microfibre cloth and then it was left to dry for an hour.
This was followed with four coats of Tile Doctor Seal and Go Extra which is an acrylic breathable sealer which adds a pleasing subtle shine to the tile. This is an important feature when choosing a sealer for old floors where moisture needs to be allowed to rise through the tile, otherwise it can become trapped under the floor and reach out to the walls causing rising damp.
The customer was very happy with the revamped hallway which made the house a lot brighter and welcoming. Before closing I should mention that for aftercare cleaning I recommend Tile Doctor Neutral cleaner which is designed for the daily cleaning for sealed tiles, this is important as most domestic supermarket cleaners are simply too strong and can prematurely erode the sealer.
Alastair Robb
West Cheshire Tile Doctor
 Tile Doctor Ltd
When you uncover a tiled floor after it has been covered by carpet for many years, it’s almost a given that it will be in a bad state. However, my customer, who lives in the town of Lymm, wasn’t expecting the Victorian tiled hallway they had recently uncovered to be in quite so terrible a state. As you can see from the photograph, it has been completely devastated by paint plaster and a big pool of cement floor leveller. Understandably, the formerly colourful appearance of the tiles had completely drained and it would require a through restoration to get them back into a usable condition.
To begin the restoration, I mixed a strong cleaning solution which consisted of Tile Doctor Remove & Go combined 50/50 with Tile Doctor Pro Clean. Remove & Go is a heavy duty remover that breaks down old sealers, along with adhesives, paint stains and other tough soil build up where as Pro-Clean is a versatile alkaline-based cleaner that reliably eradicates dirt on a wide variety of natural stone floors.
The solution was applied liberally across the floor, and left to dwell for a short period, allowing time for it to soften up the paint plaster. Next, I fitted a coarse scrubbing pad to my rotary cleaning machine and began to scrub the solution into the tiles, with a big difference to the appearance of the tiles being made quite quickly. The resulting cleaning slurry was promptly removed using a wet-vac machine.
I repeated the process two times to provide an extra thorough clean and then give the floor a thorough rinse. Some particularly stubborn marks remained on the floor which I was able to remove using Tile a Doctor Acid Gel, a blend of phosphoric and hydrochloric acids in gel form that’s easy to control. The floor was then left to dry fully overnight.
The next morning, I returned to the property and ran some damp tests. This is incredibly important to do before sealing any tiled floor because any excess moisture can cloud the sealer and prevent it from doing its job properly.
Once satisfied that the floor could be sealed, I applied several coats of Tile Doctor Seal and Go, our topical sealer which provides both a robust surface seal and a long-lasting low sheen finish in one and ideal for Victorian tiles.
It would be an understatement to say that this Victorian tiled floor was transformed. The customer was amazed at the results considering how bad a state the tiles had been in just a day earlier. When you have a situation like this, it’s hard to believe the tiles could ever be fully restored. Nonetheless, we could now see them in their full and original glory, and needless to say, the customer was very, very pleased with the result.
Alastair Robb
West Cheshire Tile Doctor
 Tile Doctor Ltd
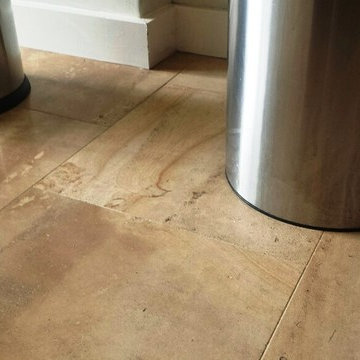
The following post is follows on from the Limestone tiled kitchen floor restoration I recently completed in Cardiff. You may recall that the floor had not been maintained properly since it was first installed in 2008 and one of the key problems I had to deal with during that particular restoration was a number of dark stains left on the tiles by the kitchen dustbin. Here’s a detailed account of how I tacked the staining.
To deal with the stains, I suggested to the client that I experiment with a Tile Doctor product called Reduxa, which is formulated to remove certain stains, including red wine stains, from natural stone. It is suitable on Limestone, Marble and Travertine tiles, amongst others. Nonetheless, I did have to advise the client that unfortunately some stains are unavoidably permanent and that there was no guarantee that the product would be able to remove these particular stains. Had the sealer been maintained on this floor, then the problem would have been much easier to tackle. However, in this case the sealer had worn off over the years.
I began treating the problem area by applying the Reduxa solution, before heating up the tile with a heat gun to lift out the stains. This process of spraying and heating was repeated around eight times.
To cut a long story short, the process worked very well, and both myself and the client were amazed at the results the Reduxa stain removal solution had on the floor. This product really does what it says on the label!
If you would like more information on the product, check out the video on the Reduxa page on the Tile Doctor website.
Julian Iancono
SE Wales Tile Doctor
 Tile Doctor Ltd
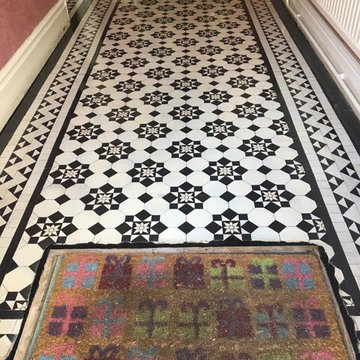
I was contacted by a professional couple who were despairing over the state of their Victorian tiled hallway floor which was dull and uninviting. The property was in Newport which is on the south east side of Wales around twelve miles east of the bustling city of Cardiff.
I went over to visit the property which was a beautiful Victorian period terrace house nestled amongst other properties of a similar age properties. The couple wanted their Victorian hallway floor to be brought back to life, so I demonstrated the cleaning process I intended to use on a small part of the floor. Immediately it had the desired effect and the floor looked much cleaner. I could see that there were no structural issues with the floor and the test clean proved it was just ingrained dirt that was the problem. The clients were happy with the result of the demonstration and subsequent quote, so we arranged a suitable date to come back and complete the work.
When I arrived, I started by protecting the skirting boards with tape and then set about giving the Victorian tiles a deep clean. I applied a combination of Tile Doctor Pro-Clean and Remove and Go leaving it to dwell for a short time to allow the products to soak into the pores of the tiles and start breaking down the ingrained dirt. After about ten minutes I scrubbed the floor with black scrubbing pad attached to a rotary floor buffer which released the years of grime and dirt. The floor was then rinsed with water and the soil removed using a wet vacuum. I repeated the process to ensure the floor was as clean as possible.
A further inspection of the Victorian tiles revealed a few stubborn marks which were dealt with using handheld diamond burnishing blocks. These are also handy for getting into the corners of the floor which were difficult to reach with the rotary machine. The floor was then left overnight to dry out.
The following day I returned, and I checked the floor was dry using a moisture meter to ensure it was dry. Once I was happy, I started to seal the floor with Tile Doctor Seal & Go which is a water-based sealer that works well on Victorian tiles. Several coats were applied building up layers to produce a stunning satin finish.
Once I had finished the floor was looking so much cleaner and brighter and the addition of the sealer will protect the floor from dirt and keep it looking good for some time to come. My clients were over the moon with the floor!
For aftercare I recommend Tile Doctor Neutral Tile Cleaner, which unlike the stronger products you find in supermarkets is ideal for cleaning sealed floors and will ensure the sealer stays in good condition.
Paul Wales
Monmouthshire Tile Doctor
Sponsored
Columbus, OH

Hope Restoration & General Contracting
Columbus Design-Build, Kitchen & Bath Remodeling, Historic Renovations
 Tile Doctor Ltd
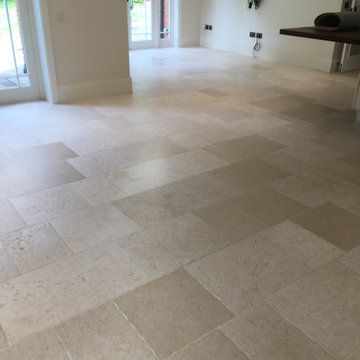
Our client had inherited this Travertine floor when purchasing in a lovely street in Walton-On-Thames, close by was the River Thames which runs all the way into London. The new owners were unhappy with the floor in that it did not look very clean, and they were keen to get this rectified. I arranged a site visit to survey the floor and see what could be done to restore its appearance.
The floor itself was in good physical condition, however, it was apparent from the level of dirt ingrained in the stone that it had not been maintained very well by the previous owner. I carried out a small test clean which came out well and they could see straight away what the floor should look really like! They were happy with my renovation quote and we agreed a mutually convenient time where I could work in relation to the COVID guidelines.
The Travertine floor was scrubbed using a mixture of Tile Doctor Pro Clean and Remove and Go. These are heavy duty cleaning products designed for use on tile and stone can be combined to form a powerful cleaning/stripping solution which is left to dwell on the floor surface. After a short while the solution was worked into the stone using a rotary machine fitted with a black scrubbing pad.
This cleaning recipe works extremely well breaking down dirt, stains, and grease in the stone. Following a machine scrub and a more manual hand scrub of the grout lines, we then pressure rinsed the soil away and then it was extracted using an industrial wet vacuum. In a couple of areas, it was necessary to repeat the process to ensure it was completely clean. Once we were satisfied that the stone was fresh and clean, the floor was left to dry off overnight, so it would be ready for sealing the following day.
After drying overnight, the floor was checked with a damp meter to make sure it was dry. Once reassured I started with the application of the fresh sealer to the floor using Tile Doctor Colour Grow Sealer which is a colour enhancing sealer that works from within by soaking into the pores of the stone. Several coats were applied allowing each one to dry before applying the next. This sealer does not provide a glossy finish, just a nice natural sheen. This brought back the contrast and natural colours in the stone, whilst adding protection to stone for many years to come.
The client was very happy with the work we carried out, the floor had come up much better than they had expected, and it really made a difference to the lovely kitchen space. The floor looked like new. I recommended the regular use of Tile Doctor Stone Soap for future cleaning which will keep the floor in great condition and ensure the longevity of the newly applied sealant.
Jonathan Oldham
South Middlesex Tile Doctor
 Tile Doctor Ltd
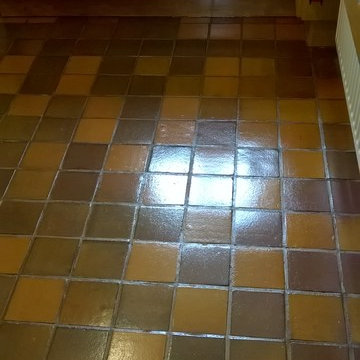
This Quarry tiled kitchen floor was in very good condition, with no cracked or broken tiles. However, my customer, who lives in the town of Tutbury, near Burton-on-Trent, was keen to boost the condition of the tiles further through professional maintenance, including a deep clean and a fresh seal to restore the sheen to the Quarry. NB, did you know it’s estimated that Tutbury has actually been inhabited for 3000 years, having once been the site of an Iron Age hill fort, this house of course was a lot more recent.
To clean the tiles, I chose to use our tried and trusted alkaline cleaner, Tile Doctor Pro Clean. We use Pro Clean on most types of natural stone floor, including Quarry, Slate, and Victorian. I applied Pro Clean liberally across the floor and left it to dwell for a short period, giving it time to seep into the tile to get underneath and lift out any ingrained dirt. The cleaner was then agitated using a scrubbing pad fitted to a rotary machine to remove the dirt and other general muck.
I then rinsed the floor with cold water and soaked up the resulting slurry with a wet-vac machine. Some areas of the floor proved to be quite stubborn to clean, so in these areas the cleaning process was repeated until satisfactory results were achieved. Finally, the floor was given another rinse and left to dry off overnight.
The next day I returned to the property and checked that the floor was ready to seal by running several damp tests, with the results indicating that was no excess moisture remaining on the tiles. We carry out these tests before sealing because moisture can cloud the sealer and prevent it from properly protecting the tiles.
My choice of sealer was Tile Doctor Seal & Go, a cost effective topical sealer that builds up a robust layer of protection on the surface of the floor and provides a durable sheen finish that, as you can see from the photographs, really lifts the appearance of the tiles.
It’s a fact that any sealed tiled floor will need to be regularly maintained as sealers do wear off over time, especially in the high traffic areas, and this is when the floor starts to lose its appearance as dirt becomes trapped in the pores of the stone. The life of the sealer can be extended however by ensuring you only clean the floor with a PH Neutral cleaner.
Trevor Preeece
 Tile Doctor Ltd
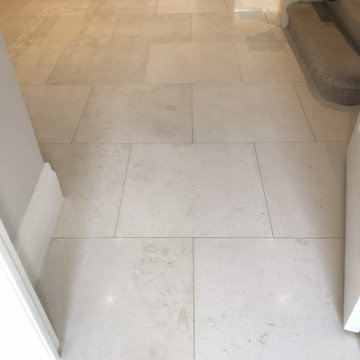
This client from Highgate in North London, N6 contacted us about their large honed Limestone tiled floor that was installed throughout the ground floor. It had been laid seven years prior and was now grubby and in need of a deep clean and seal including the grout which had turned black with dirt.
I visited the property to survey and assess what was required and provided the owner with a quotation for the renovation. The hallway pictured was in the worst condition, it was a busy house with young children and dogs and over the years the sealer had worn down leaving it vulnerable to ingrained dirt. Without a sealer to protect the stone it had become heavily soiled and lost its original polished appearance.
Happy with the quote we scheduled a date for the work to go ahead. The quote included deep cleaning and burnishing the stone to bring back the polish, grout cleaning and re-sealing the Limestone to protect it.
We arrived on the first day and prepared the area by taping up the skirting and woodwork to protect them from potential splashing. Next step was to burnish the floor using a set of Tile Doctor Diamond Burnishing Pads, specifically the 400, 800 and 1500 grit pads fitted to a rotary machine, these were used in sequence running each pad over the tiles several times with water to lubricate the process. The water turns into a fine slurry as pores in the stone are opened and the dirt is released, the slurry is rinsed off with more water and extracted using an industrial wet vacuum after each pad. The finer 800 and 1500-grit pads slowly close the pores and refine the appearance of the stone building up the polish in the process.
A strong dilution of Tile Doctor Pro-Clean was then applied to the grout lines, leaving it for a short while to soak in and then hand scrubbing with a grout brush. The dirty cleaning solution and were then removed from the floor with the wet vacuum.
This process was repeated across the different sections of the Limestone floor until I was satisfied with its appearance. Before leaving for the day, I rinsed the floor again using a buffing machine fitted with a brush fitted to give it a final clean. The floor was dried as much as possible using the wet vacuum and then allowed it to dry off fully overnight.
The following day the final 3000-grit pad in the four-pad set was applied to the floor to bring up the polish even further. The pad is applied dry with only a little water sprayed onto the tile. We call this process a “Spray Burnish” and as well as leaving the floor nice and dry ready for sealing it adds a nice subtle shine to the stone.
The floor was then sealed with two coats of Tile Doctor Colour Grow sealer. This is a colour intensifying impregnating sealer that works by occupying the pores in the stone so dirt cannot become ingrained there. It will provide durable protection and make the floor much easier to keep clean. It worked well on the pale Limestone and beautifully enhanced the colour and features in stone. Once complete the floor looked brand new again.
I left a complimentary bottle of Tile Doctor Stone Soap with the client and gave them some information about how best to maintain the floor. This product is pH neutral and cleans whilst maintaining the patina on the stone helping to keep the floor in great condition.
The client was delighted with the result and left us a great review.
“Andrew is excellent and gets on with the job and we got a fantastic result. Highly recommend. By Aaron S, Highgate, 15 March 2021”
Andrew Newstead
North London Tile Doctor
 Mosley Design Build
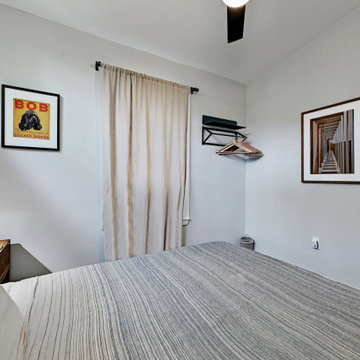
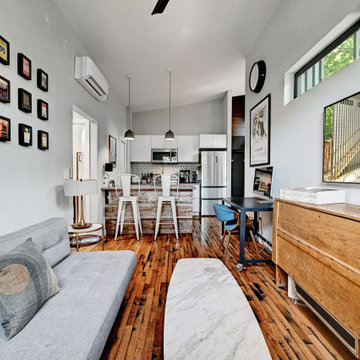
Working with another repeat client, we designed and built this one bedroom apartment above their existing alleyway garage. This space, which currently functions as a short term rental, was designed to feel tucked away and elevated. The view out every window is of tree canopy, even though it is just a few blocks from downtown.

 highland
Norfolk is one of the UK's most charming destinations, known for its peaceful coastlines, historic towns, and beautiful countryside. Every year, thousands of visitors choose to stay in travel lodges across the region — and it's easy to understand why. These accommodations offer convenience, comfort, and value, making them a favourite among solo travellers, couples, and families exploring Eastern England.
In this article, we look at the main reasons travellers love staying in travel lodges in Norfolk, and what makes the region such a welcoming place for a relaxing break.
1. Prime Locations Close to Popular Attractions
Travel lodges in Norfolk are often located near the region's top sights, making it easy for visitors to explore without long travel times. Some of the most popular spots nearby include:
Being close to these attractions means travellers save time and enjoy more of their holiday without worrying about complicated transport.
2. Comfortable Rooms at Affordable Prices
One of the biggest reasons travellers love travel lodges is the balance of comfort and affordability. The rooms are clean, modern, and designed for a relaxing stay without the high cost of luxury hotels. This makes them ideal for:
Visitors know they will get a good night's sleep without overspending, which is especially helpful for longer stays when exploring Norfolk's many villages and landmarks.
3. Perfect for Road Trips Around Norfolk
Norfolk is a great destination for road trips thanks to its open landscapes and scenic coastal routes. Travel lodges often have:
For travellers driving across the region, staying in a lodge makes the journey simple and stress-free.
4. Family-Friendly and Flexible for All Types of Guests
Many travel lodges in Norfolk are designed to welcome families and groups. They offer:
This flexibility is one of the reasons parents choose travel lodges — they are comfortable, predictable, and suitable for all ages.
5. Consistent Quality Across Locations
Whether a traveller stays in Norwich, King's Lynn, Great Yarmouth, or the Norfolk Broads area, the experience is usually consistent. People appreciate knowing what to expect:
This consistency builds trust and encourages repeat stays, both within Norfolk and across the UK.
6. Great Base for Exploring Nature and the Coast
Many travellers come to Norfolk for nature. From bird-watching at Cley Marshes to long walks along the coast, the region offers endless opportunities for outdoor activities. Travel lodges make the perfect base for:
Visitors can enjoy full days out in nature and return to a comfortable, quiet room.
7. Modern Amenities Without Extra Hassle
Travel lodges typically include practical amenities that travellers appreciate, such as:
These small but important details make short stays more convenient and enjoyable.
Conclusion
Travellers love travel lodges in Norfolk because they offer everything people need for an enjoyable stay: excellent locations, affordable comfort, family-friendly features, and easy access to the region's beautiful landscapes. Whether someone is exploring historic Norwich, relaxing on the coast, or discovering the Norfolk Broads, travel lodges provide a simple and reliable place to unwind.
This combination of convenience, quality, and budget-friendly pricing makes travel lodges one of the most popular accommodation choices in Norfolk, UK.
In this article, we look at the main reasons travellers love staying in travel lodges in Norfolk, and what makes the region such a welcoming place for a relaxing break.
1. Prime Locations Close to Popular Attractions
Travel lodges in Norfolk are often located near the region's top sights, making it easy for visitors to explore without long travel times. Some of the most popular spots nearby include:
- The Norfolk Broads National Park
- Great Yarmouth's sandy beaches
- Norwich Cathedral and historic streets
- Cromer and Sheringham coastal towns
- Holkham and Wells-next-the-Sea
Being close to these attractions means travellers save time and enjoy more of their holiday without worrying about complicated transport.
2. Comfortable Rooms at Affordable Prices
One of the biggest reasons travellers love travel lodges is the balance of comfort and affordability. The rooms are clean, modern, and designed for a relaxing stay without the high cost of luxury hotels. This makes them ideal for:
- Weekend trips
- Family holidays
- Road trips
- Business stays
Visitors know they will get a good night's sleep without overspending, which is especially helpful for longer stays when exploring Norfolk's many villages and landmarks.
3. Perfect for Road Trips Around Norfolk
Norfolk is a great destination for road trips thanks to its open landscapes and scenic coastal routes. Travel lodges often have:
- Free or affordable parking
- Easy access to major roads
- Nearby restaurants and services
For travellers driving across the region, staying in a lodge makes the journey simple and stress-free.
4. Family-Friendly and Flexible for All Types of Guests
Many travel lodges in Norfolk are designed to welcome families and groups. They offer:
- Spacious family rooms
- Extra beds when needed
- Nearby food outlets and supermarkets
- Quiet environments for restful nights
This flexibility is one of the reasons parents choose travel lodges — they are comfortable, predictable, and suitable for all ages.
5. Consistent Quality Across Locations
Whether a traveller stays in Norwich, King's Lynn, Great Yarmouth, or the Norfolk Broads area, the experience is usually consistent. People appreciate knowing what to expect:
- Clean rooms
- Reliable service
- Comfortable bedding
- Practical amenities
This consistency builds trust and encourages repeat stays, both within Norfolk and across the UK.
6. Great Base for Exploring Nature and the Coast
Many travellers come to Norfolk for nature. From bird-watching at Cley Marshes to long walks along the coast, the region offers endless opportunities for outdoor activities. Travel lodges make the perfect base for:
- Wildlife trips
- Coastal hikes
- Boat rides on the Broads
- Countryside cycling routes
Visitors can enjoy full days out in nature and return to a comfortable, quiet room.
7. Modern Amenities Without Extra Hassle
Travel lodges typically include practical amenities that travellers appreciate, such as:
- Free Wi-Fi
- Comfortable workspaces
- Hot showers
- Tea and coffee facilities
These small but important details make short stays more convenient and enjoyable.
Conclusion
Travellers love travel lodges in Norfolk because they offer everything people need for an enjoyable stay: excellent locations, affordable comfort, family-friendly features, and easy access to the region's beautiful landscapes. Whether someone is exploring historic Norwich, relaxing on the coast, or discovering the Norfolk Broads, travel lodges provide a simple and reliable place to unwind.
This combination of convenience, quality, and budget-friendly pricing makes travel lodges one of the most popular accommodation choices in Norfolk, UK.
 THE Remodel Group
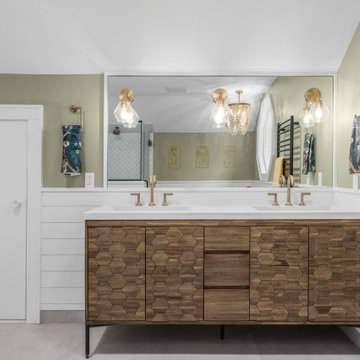
A luxurious en suite bath was created within this classic 1925 Portland bungalow by reconfiguring the second story’s original small bedrooms and tiny half bath. In this welcoming new urban boho space, eclectic finishes mingle harmoniously, integrated through subtle repetition of shapes and materials.
A furniture-style vanity sets the tone for this luxurious space, introducing materials, colors, shapes, and textures that repeat throughout. Individual walnut hexagons join to create distinctive vanity doors, offset beautifully by horizontal-grain drawers. Topping the cabinetry is a simple concrete countertop with integral sinks. An expansive framed mirror above enlarges and brightens the room. Within the mirror, sconces float, their globes a nod to the hexagons below. Champagne bronze fixtures reflect the warm walnut glow. Nestled into the back corner, a stunning shower features waterjet tiles in a double herringbone pattern, each precisely cut and laid to maintain design integrity at every surface transition. Teak floor tiles and a pebbled niche hint at the classic spa experience. Across from the shower, a large hexagonal window provides a treetop view from the free-standing tub below. The gentle oval of the tub and the beaded chandelier above provide a pleasing contrast to the strong lines surrounding it, as do the softly-shaded pebbles in the full-length niche. Shiplap wainscotting wraps the room, creating an illusion of height in the compact space. Subtle flooring and soft green walls create an understated backdrop for the bold mix of materials, unifying them into a serene oasis.
Asking a century-old home to accommodate a modern luxury bath is a tall order. Asbestos-laden plaster and flooring had to be abated. The subfloor had to be leveled and reinforced to increase strength and prevent deflection. Water lines and multiple electrical circuits had to be brought across and up without disturbing a beautifully-paneled ceiling, something we accomplished by firring out stair walls to hide the chases. Our client had visions of a leafy view from her tub, but the new layout eliminated existing windows. Placing a new window was complicated by deep eaves and flat soffits. By pushing the header into the roofline, however, we were able to accommodate a picture window. The flat soffit was replaced by an inverse hip lined with stained tongue and groove cedar, tying it to the bathroom finishes. Bringing materials up a narrow staircase became truly challenging when it was time to install the big items. However, strategic removal of drywall around the landing got the job done. Our attention to detail is showcased in the shower tile, where precise cuts were required at surface transitions to maintain the integrity of a complex double herringbone lay. The project was delivered on time.
Savvy layout choices minimized spending on structural changes. Because we were dealing with dormer space, head height was an issue. Raising the ceiling would have been complex and expensive so our design accommodated the constraints – tub on the low outside wall, shower on the full-height interior wall. The vanity spanned the spread, accommodating our petite client on the exterior side and her taller husband on the interior side. An under-eave closet was closed off to create room for both a freestanding tub and a separate shower. Rather than building replacement storage elsewhere, we simply added a new door into the closet from the primary bedroom. This was made possible by absorbing the short hallway separating the existing bed and bathroom into the primary bedroom. This new layout also created an en suite relationship between the primary bedroom and the new bath. We saved additional dollars by selecting a furniture-style vanity rather than using custom cabinetry, and the countertop with integral sinks provided a cost savings over a more traditional quartz countertop with undermount sinks. Affordable shower tiles allowed us to put more money into a dynamic tile layout. The project was delivered within budget.

 Mosley Design Build
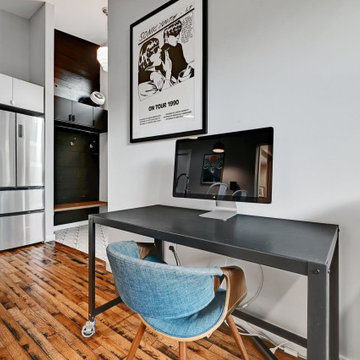
Working with another repeat client, we designed and built this one bedroom apartment above their existing alleyway garage. This space, which currently functions as a short term rental, was designed to feel tucked away and elevated. The view out every window is of tree canopy, even though it is just a few blocks from downtown.
 Mosley Design Build
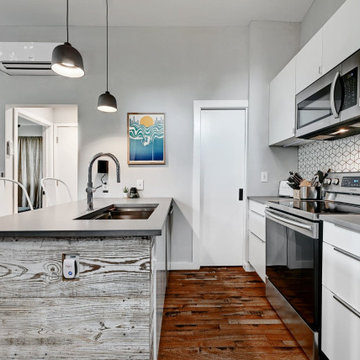
Working with another repeat client, we designed and built this one bedroom apartment above their existing alleyway garage. This space, which currently functions as a short term rental, was designed to feel tucked away and elevated. The view out every window is of tree canopy, even though it is just a few blocks from downtown.
 SGDI - Sarah Gallop Design Inc.
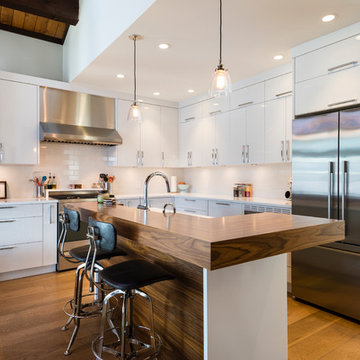
This house overlooking the Burrard inlet in Port Moody was re-created for homeowners who wished to stay for their love of the Cliffside location. The space is full of intrigue and inspiration for its artistic owners, with yet another piece of oceanic whimsy around each turn. Natural light floods the sitting area and dining room, spilling up into the kitchen of the split level greatroom space. A towering stone fireplace offsets the warm wood floor and white high gloss kitchen cabinets. The circular windows repeated throughout the home bring balance and a softened touch to the marine industry expression of the dark wooden post and beam structure. Downstairs media and games rooms provide space in this family home for everyone to find solace for something they enjoy… when they are not taking in the spectacular views from the home’s ocean facing patio.
 THE Remodel Group
A luxurious en suite bath was created within this classic 1925 Portland bungalow by reconfiguring the second story’s original small bedrooms and tiny half bath. In this welcoming new urban boho space, eclectic finishes mingle harmoniously, integrated through subtle repetition of shapes and materials.
A furniture-style vanity sets the tone for this luxurious space, introducing materials, colors, shapes, and textures that repeat throughout. Individual walnut hexagons join to create distinctive vanity doors, offset beautifully by horizontal-grain drawers. Topping the cabinetry is a simple concrete countertop with integral sinks. An expansive framed mirror above enlarges and brightens the room. Within the mirror, sconces float, their globes a nod to the hexagons below. Champagne bronze fixtures reflect the warm walnut glow. Nestled into the back corner, a stunning shower features waterjet tiles in a double herringbone pattern, each precisely cut and laid to maintain design integrity at every surface transition. Teak floor tiles and a pebbled niche hint at the classic spa experience. Across from the shower, a large hexagonal window provides a treetop view from the free-standing tub below. The gentle oval of the tub and the beaded chandelier above provide a pleasing contrast to the strong lines surrounding it, as do the softly-shaded pebbles in the full-length niche. Shiplap wainscotting wraps the room, creating an illusion of height in the compact space. Subtle flooring and soft green walls create an understated backdrop for the bold mix of materials, unifying them into a serene oasis.
Asking a century-old home to accommodate a modern luxury bath is a tall order. Asbestos-laden plaster and flooring had to be abated. The subfloor had to be leveled and reinforced to increase strength and prevent deflection. Water lines and multiple electrical circuits had to be brought across and up without disturbing a beautifully-paneled ceiling, something we accomplished by firring out stair walls to hide the chases. Our client had visions of a leafy view from her tub, but the new layout eliminated existing windows. Placing a new window was complicated by deep eaves and flat soffits. By pushing the header into the roofline, however, we were able to accommodate a picture window. The flat soffit was replaced by an inverse hip lined with stained tongue and groove cedar, tying it to the bathroom finishes. Bringing materials up a narrow staircase became truly challenging when it was time to install the big items. However, strategic removal of drywall around the landing got the job done. Our attention to detail is showcased in the shower tile, where precise cuts were required at surface transitions to maintain the integrity of a complex double herringbone lay. The project was delivered on time.
Savvy layout choices minimized spending on structural changes. Because we were dealing with dormer space, head height was an issue. Raising the ceiling would have been complex and expensive so our design accommodated the constraints – tub on the low outside wall, shower on the full-height interior wall. The vanity spanned the spread, accommodating our petite client on the exterior side and her taller husband on the interior side. An under-eave closet was closed off to create room for both a freestanding tub and a separate shower. Rather than building replacement storage elsewhere, we simply added a new door into the closet from the primary bedroom. This was made possible by absorbing the short hallway separating the existing bed and bathroom into the primary bedroom. This new layout also created an en suite relationship between the primary bedroom and the new bath. We saved additional dollars by selecting a furniture-style vanity rather than using custom cabinetry, and the countertop with integral sinks provided a cost savings over a more traditional quartz countertop with undermount sinks. Affordable shower tiles allowed us to put more money into a dynamic tile layout. The project was delivered within budget.
Sponsored
Delaware, OH

Buckeye Basements, Inc.
Central Ohio's Basement Finishing ExpertsBest Of Houzz '13-'21
 THE Remodel Group
A luxurious en suite bath was created within this classic 1925 Portland bungalow by reconfiguring the second story’s original small bedrooms and tiny half bath. In this welcoming new urban boho space, eclectic finishes mingle harmoniously, integrated through subtle repetition of shapes and materials.
A furniture-style vanity sets the tone for this luxurious space, introducing materials, colors, shapes, and textures that repeat throughout. Individual walnut hexagons join to create distinctive vanity doors, offset beautifully by horizontal-grain drawers. Topping the cabinetry is a simple concrete countertop with integral sinks. An expansive framed mirror above enlarges and brightens the room. Within the mirror, sconces float, their globes a nod to the hexagons below. Champagne bronze fixtures reflect the warm walnut glow. Nestled into the back corner, a stunning shower features waterjet tiles in a double herringbone pattern, each precisely cut and laid to maintain design integrity at every surface transition. Teak floor tiles and a pebbled niche hint at the classic spa experience. Across from the shower, a large hexagonal window provides a treetop view from the free-standing tub below. The gentle oval of the tub and the beaded chandelier above provide a pleasing contrast to the strong lines surrounding it, as do the softly-shaded pebbles in the full-length niche. Shiplap wainscotting wraps the room, creating an illusion of height in the compact space. Subtle flooring and soft green walls create an understated backdrop for the bold mix of materials, unifying them into a serene oasis.
Asking a century-old home to accommodate a modern luxury bath is a tall order. Asbestos-laden plaster and flooring had to be abated. The subfloor had to be leveled and reinforced to increase strength and prevent deflection. Water lines and multiple electrical circuits had to be brought across and up without disturbing a beautifully-paneled ceiling, something we accomplished by firring out stair walls to hide the chases. Our client had visions of a leafy view from her tub, but the new layout eliminated existing windows. Placing a new window was complicated by deep eaves and flat soffits. By pushing the header into the roofline, however, we were able to accommodate a picture window. The flat soffit was replaced by an inverse hip lined with stained tongue and groove cedar, tying it to the bathroom finishes. Bringing materials up a narrow staircase became truly challenging when it was time to install the big items. However, strategic removal of drywall around the landing got the job done. Our attention to detail is showcased in the shower tile, where precise cuts were required at surface transitions to maintain the integrity of a complex double herringbone lay. The project was delivered on time.
Savvy layout choices minimized spending on structural changes. Because we were dealing with dormer space, head height was an issue. Raising the ceiling would have been complex and expensive so our design accommodated the constraints – tub on the low outside wall, shower on the full-height interior wall. The vanity spanned the spread, accommodating our petite client on the exterior side and her taller husband on the interior side. An under-eave closet was closed off to create room for both a freestanding tub and a separate shower. Rather than building replacement storage elsewhere, we simply added a new door into the closet from the primary bedroom. This was made possible by absorbing the short hallway separating the existing bed and bathroom into the primary bedroom. This new layout also created an en suite relationship between the primary bedroom and the new bath. We saved additional dollars by selecting a furniture-style vanity rather than using custom cabinetry, and the countertop with integral sinks provided a cost savings over a more traditional quartz countertop with undermount sinks. Affordable shower tiles allowed us to put more money into a dynamic tile layout. The project was delivered within budget.
 Mosley Design Build
Working with another repeat client, we designed and built this one bedroom apartment above their existing alleyway garage. This space, which currently functions as a short term rental, was designed to feel tucked away and elevated. The view out every window is of tree canopy, even though it is just a few blocks from downtown.
 THE Remodel Group
A luxurious en suite bath was created within this classic 1925 Portland bungalow by reconfiguring the second story’s original small bedrooms and tiny half bath. In this welcoming new urban boho space, eclectic finishes mingle harmoniously, integrated through subtle repetition of shapes and materials.
A furniture-style vanity sets the tone for this luxurious space, introducing materials, colors, shapes, and textures that repeat throughout. Individual walnut hexagons join to create distinctive vanity doors, offset beautifully by horizontal-grain drawers. Topping the cabinetry is a simple concrete countertop with integral sinks. An expansive framed mirror above enlarges and brightens the room. Within the mirror, sconces float, their globes a nod to the hexagons below. Champagne bronze fixtures reflect the warm walnut glow. Nestled into the back corner, a stunning shower features waterjet tiles in a double herringbone pattern, each precisely cut and laid to maintain design integrity at every surface transition. Teak floor tiles and a pebbled niche hint at the classic spa experience. Across from the shower, a large hexagonal window provides a treetop view from the free-standing tub below. The gentle oval of the tub and the beaded chandelier above provide a pleasing contrast to the strong lines surrounding it, as do the softly-shaded pebbles in the full-length niche. Shiplap wainscotting wraps the room, creating an illusion of height in the compact space. Subtle flooring and soft green walls create an understated backdrop for the bold mix of materials, unifying them into a serene oasis.
Asking a century-old home to accommodate a modern luxury bath is a tall order. Asbestos-laden plaster and flooring had to be abated. The subfloor had to be leveled and reinforced to increase strength and prevent deflection. Water lines and multiple electrical circuits had to be brought across and up without disturbing a beautifully-paneled ceiling, something we accomplished by firring out stair walls to hide the chases. Our client had visions of a leafy view from her tub, but the new layout eliminated existing windows. Placing a new window was complicated by deep eaves and flat soffits. By pushing the header into the roofline, however, we were able to accommodate a picture window. The flat soffit was replaced by an inverse hip lined with stained tongue and groove cedar, tying it to the bathroom finishes. Bringing materials up a narrow staircase became truly challenging when it was time to install the big items. However, strategic removal of drywall around the landing got the job done. Our attention to detail is showcased in the shower tile, where precise cuts were required at surface transitions to maintain the integrity of a complex double herringbone lay. The project was delivered on time.
Savvy layout choices minimized spending on structural changes. Because we were dealing with dormer space, head height was an issue. Raising the ceiling would have been complex and expensive so our design accommodated the constraints – tub on the low outside wall, shower on the full-height interior wall. The vanity spanned the spread, accommodating our petite client on the exterior side and her taller husband on the interior side. An under-eave closet was closed off to create room for both a freestanding tub and a separate shower. Rather than building replacement storage elsewhere, we simply added a new door into the closet from the primary bedroom. This was made possible by absorbing the short hallway separating the existing bed and bathroom into the primary bedroom. This new layout also created an en suite relationship between the primary bedroom and the new bath. We saved additional dollars by selecting a furniture-style vanity rather than using custom cabinetry, and the countertop with integral sinks provided a cost savings over a more traditional quartz countertop with undermount sinks. Affordable shower tiles allowed us to put more money into a dynamic tile layout. The project was delivered within budget.
9