
Search results for "Reposition" in Home Design Ideas
 Birdseye Cabinetry
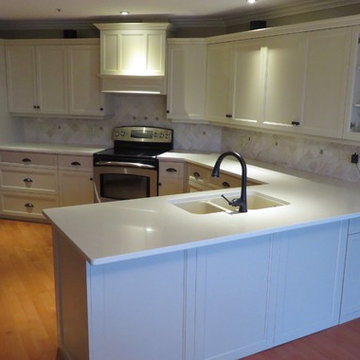
This Cabinet Refacing project transformed this kitchen from dark to light. The refrigerator was repositioned and a few new cabinets were added to provide a much better layout for the clients. A new ornamental hood fan provides a nice detail to this renovated space.
A majority of the cabinet boxes shown are the client's pre-existing cabinets which kept the costs much lower than if they replaced the entire kitchen.
 Armitage Interiors - Home Design & Renovation
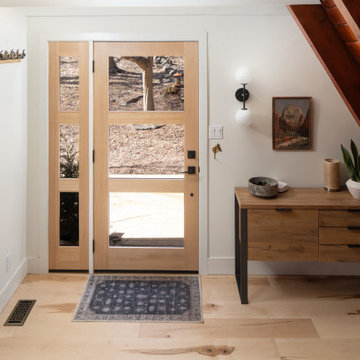
We transformed an A-Frame home for a couple seeking more light and openness. By removing walls and repositioning the counter, we improved headspace and flow. Track lighting, sconces, and modern appliances added brightness, while maple flooring created warmth. We also installed a window-paneled door and custom slat walls to let natural light pour in, blending the indoors with nature and making the space feel airy and welcoming.
 Michael Nash Design, Build & Homes
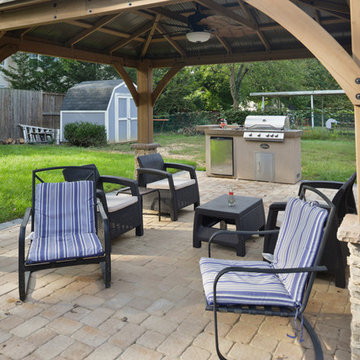
Overhaul Converts Classic Rambler to A Modern Yet Classic Family Home in Fairfax
This 1970 rambler in middle of old town in Fairfax City has been home to a growing family of five.
Ready for a massive overhaul, the family reached out to Michael Nash Design Build & Homes for assistance. Eligible for a special Fairfax City Renaissance program, this project was awarded special attention and favorable financing.
We removed the entire roof and added a bump up, second story three-bedroom, two bathroom and loft addition.
The main level was reformatted to eliminate the smallest bedroom and split the space among adjacent bedroom and the main living room. The partition walls between the living room and dining room and the partition wall between dining room and kitchen were eliminated, making space for a new enlarged kitchen.
The outside brick chimney was rebuilt and extended to pass into the new second floor roof lines. Flu lines for heater and furnace were eliminated. A furnace was added in the new attic space for second floor heating and cooling, while a new hot water heater and furnace was re-positioned and installed in the basement.
Second floor was furnished with its own laundry room.
A new stairway to the second floor was designed and built were furnace chase used to be, opening up into a loft area for a kids study or gaming area.
The master bedroom suite includes a large walk-in closet, large stoned shower, slip-free standing tub, separate commode area, double vanities and more amenities.
A kid’s bathroom was built in the middle of upstairs hallway.
The exterior of this home was wrapped around with cement board siding, maintenance free trims and gutters, and life time architectural shingles.
Added to a new front porch were Trex boards and stone and tapered style columns. Double staircase entrance from front and side yard made this residence a stand out home of the community.
This remodeled two-story colonial home with its country style front porch, five bedrooms, four and half bathrooms and second floor laundry room, will be this family’s home for many years to come.
Happier than before, this family moved back into this Extreme Makeover Home to love every inch of their new home.
Find the right local pro for your project
 Jerry Schuster - Remodeling Specialist
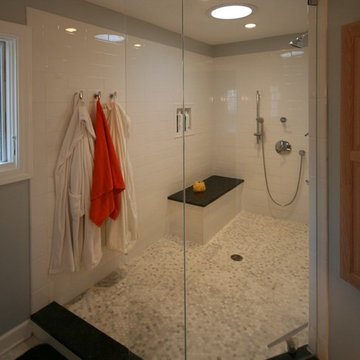
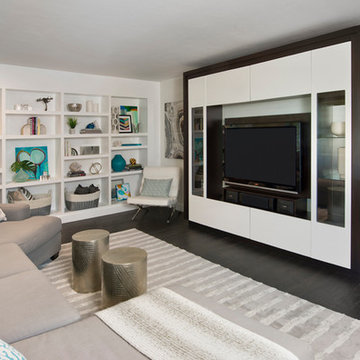
The vanity, commode, and shower spaces in this master bath were cramped and uncomfortable. We expanded this bath within the existing square footage by using part of an exceptionally large bedroom. The window was originally in the commode compartment added to the overall dreariness of it. Walls were removed and repositioned to create a far more open feel. The vanities now provide far more storage and efficiency, not to mention beauty. And the really spectacular element we a huge shower area with 3 positions for bathing. It works well for mom and dad and their 3 teenage boys use it, as well.
 Progressive Design Build
The Challenge
This beautiful waterfront home was begging for an update. Our clients wanted a contemporary design with modern finishes. They craved improved functionality in the kitchen, hardwood flooring in the living areas, and a spacious walk-in closet in the master bathroom. With two children in school, our clients also needed the project completed during their summer vacation – leaving a slim 90 days for the entire remodel. Could we do it? …Challenge accepted!
Our Solution
With their active summer travel schedule, our clients elected to vacate their home for the duration of the project. This was ideal for the intrusive nature of the scope of work.
In preparation, our design team created a project plan to suit our client’s needs. With such a clear timeline, we were able to select and order long-lead items in plenty of time for the project start date.
In the kitchen, we rearranged the layout to provide superior ventilation for the cooktop on the exterior wall. We added two large storage cabinets with glass doors, accented by a sleek mosaic backsplash of glass tile. We also incorporated a large contemporary waterfall island into the room. With seating at one end, the island provides both increased functionality and an eye-catching focal point for the center of the room. On the interior wall of the kitchen, we maximized storage with a wall of built-in cabinetry – complete with pullout pantry cabinets, a double oven, and a large stainless refrigerator.
Our clients wisely chose rich, dark-colored wood flooring to add warmth to the contemporary design. After installing the flooring in the kitchen, we brought it into the main living areas as well. In the great room, we wrapped the existing gas fireplace in a neutral stack stone. The effect of the stone on the media and window wall is breathtaking.
In the master bathroom, we expanded the closet by pushing the wall back into the adjacent pass-through hallway. The new walk-in closet now includes an impressive closet organization system.
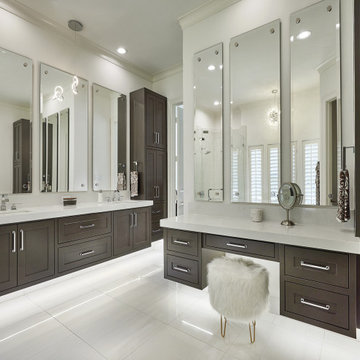
Returning to the master bathroom, we removed the single vanity and repositioned the toilet, allowing for a new, curb-less glass shower and a his-and-hers vanity. The entire vanity and shower wall is finished in white 12×24 porcelain tile. The vertical glass mosaic accent band and backlit floating mirrors add to the clean, modern style. To the left of the master bathroom entry, we even added a matching make-up area.
Finally, we installed a number of elegant enhancements in the remaining rooms. The clients chose a bronze metal relief accent wall as well as some colorful finishes and artwork for the entry and hallway.
Exceptional Results
Our clients were simply thrilled with the final product! Not only did they return from their summer vacation to a gorgeous home remodel, but we concluded the project a full week ahead of schedule. As a result, the family was able to move in sooner than planned, giving them plenty of time to acclimate to the renovated space before their kids returned to school. Ultimately, we provided the outstanding results and customer experience that our clients had been searching for.
“We met with many other contractors leading up to signing with Progressive Design Build. When we met Mike, we finally felt safe. We had heard so many horror stories about contractors! Progressive was the best move we could have made. They made our dream house become a reality. Vernon was in charge of our project and everything went better than we expected. Our project was completed earlier than expected, too. Our questions and concerns were dealt with quickly and professionally, the job site was always clean, and all subs were friendly and professional. We had a wonderful experience with Progressive Design Build. We’re so grateful we found them.” – The Mader Family
 EA Home Design
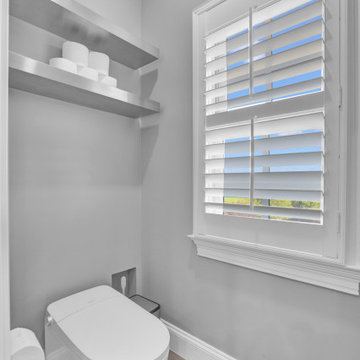
We are thrilled to unveil our latest bathroom remodeling project, a seamless blend of modern design and functional elegance. Here's a glimpse into the transformation:
1. Contemporary Palette: The choice of a grey color tile sets a sophisticated and neutral backdrop, allowing the features of the bathroom to shine. This hue not only exudes a sense of calm but also complements the contemporary design elements we've incorporated.
2. Warmth Underfoot: One of the standout features of this remodel is the heated flooring that runs under all the tiled areas. This luxurious addition ensures that even on the coldest mornings, your feet are greeted with a warm embrace, elevating the comfort level of the bathroom.
3. Enhanced Layout: Recognizing the need for more convenience, we repositioned the shower and introduced a second toilet room. This not only maximizes the use of space but also ensures that the bathroom can cater to multiple users without any hassle.
4. Dual Shower Spaces: By eliminating two angles in the bathroom's corner, we've carved out space for two distinct shower areas. This design choice not only adds a touch of luxury but also offers a versatile bathing experience tailored to individual preferences.
5. Wet Room Wonder: The shower and tub area now reside within a waterproof wet room. This innovative design ensures that water stays where it's supposed to, eliminating the need for a curb and offering a sleek, uninterrupted flow to the space.
6. Floating Vanities: Our floating vanities are more than just a design statement. They create an illusion of space, making the bathroom appear larger and more open. Paired with a stunning stone backsplash, they offer a perfect blend of style and functionality.
7. Illuminated Elegance: The mirrors, with their integrated lights, are the pièce de résistance. They not only enhance the aesthetic appeal of the bathroom but also ensure optimal lighting, making daily grooming tasks a breeze.
This bathroom remodel is a testament to our commitment to marrying design with functionality. Every element, from the choice of tiles to the heated floors, has been thoughtfully chosen to create a space that is not just visually appealing but also supremely functional and comfortable. We invite you to step in and experience this modern oasis for yourself.
 Rayna Vogel
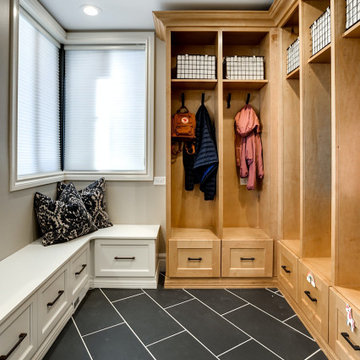
Complete gut for this kitchen. Repositioned and enlarged the island. Furniture like cabinetry with three color tones, white, maple, and espresso. Chevron backsplash with it's own unique layout.
 Teoria Interiors
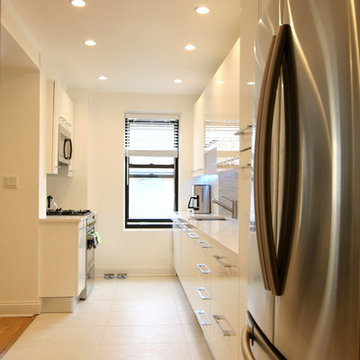
One of our Italian white lacquer modern kitchen projects in NYC's Upper West Side.
Enclosed kitchen - small modern single-wall ceramic tile and beige floor enclosed kitchen idea in New York with a drop-in sink, flat-panel cabinets, white cabinets, quartz countertops, blue backsplash, ceramic backsplash, stainless steel appliances and no island
Enclosed kitchen - small modern single-wall ceramic tile and beige floor enclosed kitchen idea in New York with a drop-in sink, flat-panel cabinets, white cabinets, quartz countertops, blue backsplash, ceramic backsplash, stainless steel appliances and no island
 RAJ Kitchen and Bath, LLC
**Check out the video of this transformation on our website**
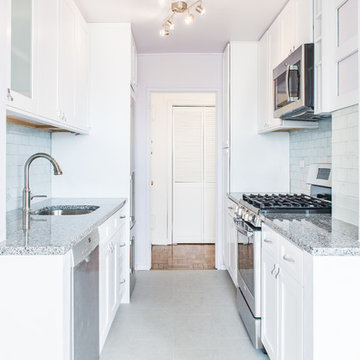
This small kitchen was way too small for this 2 bedrooms, 2 bathrooms apartment. Not only was it a very small kitchen, but the physical location of it made it very difficult to make it any bigger. There wasn't much that could have been done without incurring astronomical cost, which would get little or no return on the investment. The client wanted a kitchen that can be optimized in its current location to add a ton of value for resale.
This was difficult to do, because there was no moving of any mechanical around in the kitchen and even if we wanted to, the management of the building would not allow. For those of you who live in condos, co-ops or apartment building, you know how difficult it is to rework these foot prints. When we showed up, we saw the problems, but we also saw a huge opportunity where we can achieve those goals in the small space. This was accomplished by making some key changes and to incorporate some new things that was not possible when this kitchen was built years ago.
The crucial part of the design that would drive the entire new layout, was selecting the only appliance; that was the Refrigerator. Once we nailed down that refrigerator, we then proceeded to design the kitchen around it. We moved it to the other side of the wall where the sink was so that we can tap into the water line from the sink plumbing. It was crucial that it stays exactly 24" deep, not an inch more because we had to keep the entry as open as possible. Also, it was going to be directly in front of another big storage unit - The pantry. It is not ideal in most cases, but we needed the rest of the space to ramp up the design and open feel towards the side where all of the activities would take place, which happend to be the dining room and the view.
Once all that was figured out, we re-positioned the sink, dishwasher and the range and proceeded to wrap the cabinets around the columns to integrate them into the space. Thirty- six inches cabinets height was used so that they can be installed higher towards the ceiling height to give more room rather than the standard 18" required height between the counter tops. This was done to make the room feel a lot bigger than it really was. Not to mention, we also didn't want the faucet to be buried under the cabinets so that was also a necessary design detail for the space.
We then lowered both knee walls so that the counter top can sit on top of them, by removing that stop point that would have otherwise defined the kitchen area. This allowed us to pick up that extra footprint into the room for added prep space and enabled us to create the illusion of a kitchen that is looking longer than it really is. Every inch mattered when designing this kitchen and we made a conscious decision to use every one of that inch.
White cabinets were selected to do just what white cabinets are design to do; make a small or dark room appear bigger, brighter and more open. In this kitchen, this was amplified the more because of the kitchen location. It was perfect! We knew we did justice to the space because while we were there taking some photos, a few potential buyers walked in and went straight for the kitchen! They said its design just to fit the apartment.
Pantry roll out shelving, Double recycle bin, fancy handles, LED lighting, Quartz counter top, beautiful backslash tiles and grey linen floors finished off the kitchen which looked over a beautiful view of the George Washington Bridge from the top of this lovely 4th floor apartment.
Credit to Masterpiece Tile and Marble (Annmarie on the selection of Tiles and countertop and Val on the Construction to complete this project).
Davor Kokic Photography
 Susan Clouse Interior Solutions
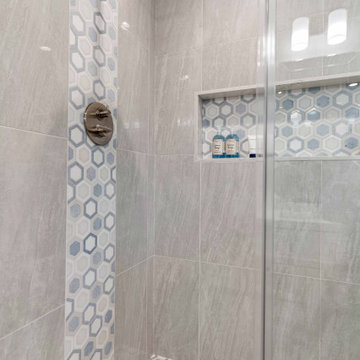
reconfigure a bath space for a larger shower (remove bathtub) and reposition a toilet in a less visible spot. organized the vanity area for a better function and more storage.
 USI Design & Remodeling
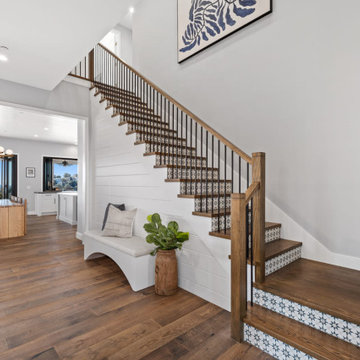
Before and after pictures properly gauge how far a remodel traveled relative to its pre-construction state.
This post details walls that were repositioned, and just how important nuance is to a result. Design by Chris Chumbley.
 JRP Design & Remodel
Every remodeling project presents its own unique challenges. This client’s original remodel vision was to replace an outdated kitchen, optimize ocean views with new decking and windows, updated the mother-in-law’s suite, and add a new loft. But all this changed one historic day when the Woolsey Fire swept through Malibu in November 2018 and leveled this neighborhood, including our remodel, which was underway.
Shifting to a ground-up design-build project, the JRP team worked closely with the homeowners through every step of designing, permitting, and building their new home. As avid horse owners, the redesign inspiration started with their love of rustic farmhouses and through the design process, turned into a more refined modern farmhouse reflected in the clean lines of white batten siding, and dark bronze metal roofing.
Starting from scratch, the interior spaces were repositioned to take advantage of the ocean views from all the bedrooms, kitchen, and open living spaces. The kitchen features a stacked chiseled edge granite island with cement pendant fixtures and rugged concrete-look perimeter countertops. The tongue and groove ceiling is repeated on the stove hood for a perfectly coordinated style. A herringbone tile pattern lends visual contrast to the cooking area. The generous double-section kitchen sink features side-by-side faucets.
Bi-fold doors and windows provide unobstructed sweeping views of the natural mountainside and ocean views. Opening the windows creates a perfect pass-through from the kitchen to outdoor entertaining. The expansive wrap-around decking creates the ideal space to gather for conversation and outdoor dining or soak in the California sunshine and the remarkable Pacific Ocean views.
 Green Mountain Builders
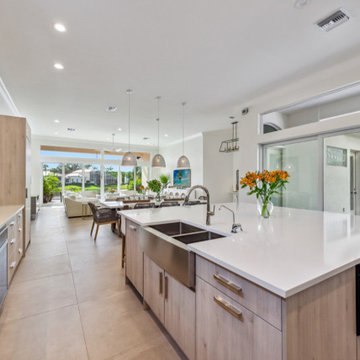
This Bonita Bay remodel involved a transformative process in the kitchen, dining, and living room areas. Walls were taken down to reposition the space, creating an open and more interconnected layout. This redesign enhances the flow of natural light, promotes a more spacious atmosphere, and fosters a cohesive and modern living experience.
 InVision Architecture
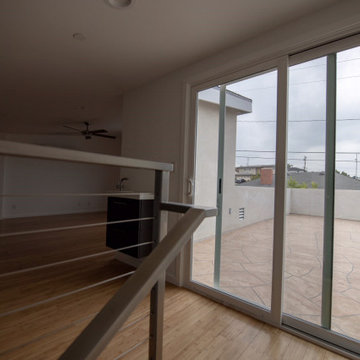
Located in Monterey Park, CA, the project included complete renovation and addition of a 2nd floor loft and deck. The previous house was a traditional style and was converted into an Art Moderne house with shed roofs. The 2,312 square foot house features 3 bedrooms, 3.5 baths, and upstairs loft. The 400 square foot garage was increased and repositioned for the renovation.
 Bennett Contracting, Inc.
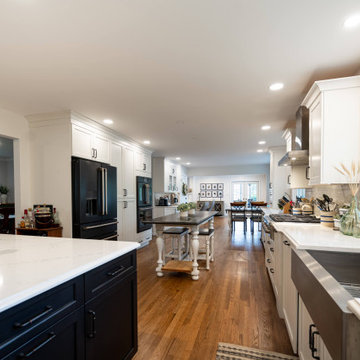
A bold plan to reconfigure the downstairs layout of this beautiful home in Schenectady brought the homeowners to Bennett to collaborate with Designer, Sarah McDonald, and Project Manager, George Griffin. Removing walls between the family room, kitchen and dining room, the new kitchen was repositioned into the old dining area, with an added wet bar and coordinating dark stained island, this long run of cabinets in a warm, creamy, classic palette created a bonus entertaining zone to free up the work zone for our foodie husband. Maxed out with organizational features, this new layout transformed how the generations of this family lived. The overlarge pot-belly stove was replaced with a sleek fireplace and enlarged openings and new storage closet ensured everything had a home.
 Denver Design Group
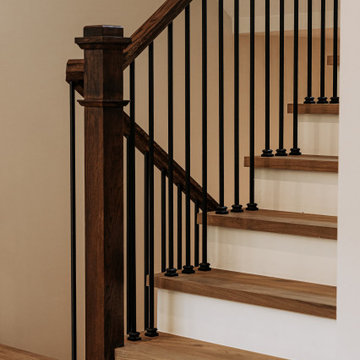
The main floor was completely reimagined. The staircase was repositioned to the middle of the home adding a beautiful architectural feature.
Example of a staircase design in Denver
Example of a staircase design in Denver
 Talon Construction Inc.
An open floor plan kitchen renovation essentially merges your kitchen area with another living space, typically the dining room or living room, creating a more spacious and interconnected feel.
Opening Up the Space and Removing walls:
This is the key step, taking down non-load-bearing walls that separate the kitchen from the living or dining area. You'll want to consult a structural engineer to ensure any remaining walls can support the weight of the house.
Considering beams or columns:
Depending on the layout and size of the opening, you might need exposed beams or support columns to maintain structural integrity. These can be incorporated into the design as a stylish feature.
Kitchen Repositioning and Functionality:
Rethinking the work triangle: The work triangle refers to the refrigerator, sink, and stove - the most used areas in a kitchen. In an open plan, you'll want to ensure these elements remain close together for an efficient workflow. This might involve rearranging cabinetry or appliances.
Creating a focal point: An island is a popular choice in open concept kitchens. It can house the sink, cooktop, provide additional storage and counter space, and even offer seating for guests to chat while you cook. Peninsula counters can also be used for a similar effect.
Unifying Design Elements: Use consistent flooring throughout the open area to create a cohesive flow. You can also extend the same color scheme or material accents (like backsplash tile) from the kitchen into the adjoining space.
Letting in Light: Maximize natural light by incorporating large windows or skylights. This will brighten the entire open area and make it feel even more spacious.
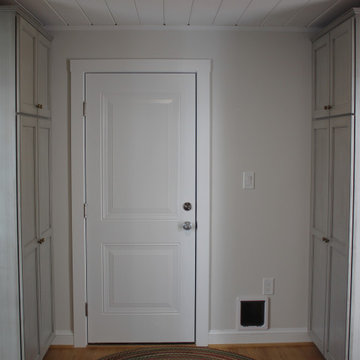
Storage Solutions: With an open plan, you might lose some wall space for cabinets. Consider built-in storage solutions like pantry cabinets or creative mudroom cabinetry to ensure you have enough storage for your kitchenware.
An open floor plan kitchen renovation can be a transformative project, creating a light-filled and social space in your home. By carefully planning the layout, incorporating design elements that unify the space, and addressing practical considerations with lighting and storage, you can achieve a beautiful and functional open concept kitchen.
 Afka Designs Ltd.
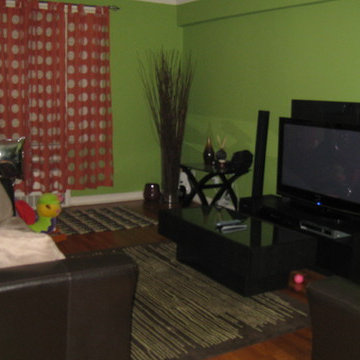
Client already had very bright colors on the wall. Wanted to re-purpose the space by de-cluttering, re-positioning the furniture and let plenty of natural light come in to make it soothing and easy on the eyes.
 EAGLE DESIGN AND CONSTRUCTION LLC
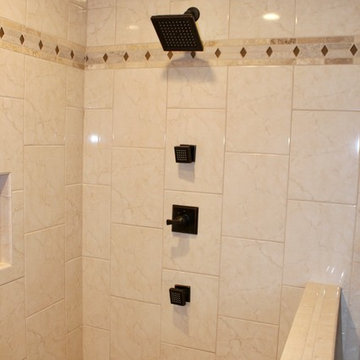
Before this bathroom was built we did a lot of remodel work in order to create the space required for all of the features wanted by our customer. All original work was removed. The remodeling included, removing a closet from the bedroom in order to open up more space, building a half-wall for the shower, removing previous exterior window, and reinstalling exterior window to a different position within the bathroom. As a result of the window repositioning, there was also exterior work done, which included siding. Additionally, new plumbing was put in, the electrical was updated, and an exhaust fan was installed.
Once the space was ready we painted, installed new crown moulding, porcelain tile floor, bathroom vanity counter with undermount sink, pendant light fixtures, and toto toilet.
For the shower, we designed the plan together with our customer and decided on porcelain tile with a mosaic border, and glass half-wall with glass hinged shower door. A floating corner seat was built, along with a malibu shelf. The shower fixtures are from the Moen Dryden Shower collection. The on/off shower knob was custom-installed with plumbing on the half-wall to ensure easy functional access while entering and leaving the shower.
 Organized Living
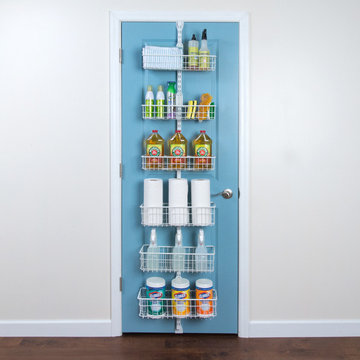
Pantry organization dreams come true with the Over the Door Premium Pantry Kit. Vertical hanging storage maximizes unused space behind your door. Your favorite snacks and kitchen items can now be within quick reach, with the included five Storage Baskets. Simply attach the baskets to the system, and readjust as your needs change. Over the Door accessories fit securely into place with our patented locking system. Re-position accessories and add to this kit at any time!
30