
Search results for "Require additional" in Home Design Ideas

 Peter Q Brown Innovative Design
This kitchen addition project is an expansion of an old story and a half South Bozeman home.
See the video about the finished project here: https://youtu.be/ClH5A3qs6Ik
This old house has been remodeled and added onto many times over. A complete demolition and rebuild of this structure would be the best course of action, but we are in a historic neighborhood and we will be working with it as is. Budget is an issue as well, so in addition to the second story addition, we are limiting our renovation efforts to the kitchen and bathroom areas at the back the house. We are making a concerted effort to not get into too much of the existing front half of this house.
This is precisely the type of remodeling work that requires a very skilled and experienced builder. And I emphasize experienced. We are lucky to be working with Luke Stahlberg of Ibex Builders. Luke is a talented local Bozeman contractor with years of experience in the remodeling industry. Luke is very methodical and well organized. This is a classic remodeling project with enough detail to really test a contractor’s skill and experience.

 Gilley Kitchen + Bath
The challenge here was to marry a closed-in dark kitchen with the adjacent cathedral-ceiling addition. This required a structural beam and adjusting ceiling heights to create a smooth transition between the spaces. Mission accomplished!

 Kraft Custom Construction
For this Victorian-era home in the Albany historic district, it was essential for us to maintain historic design guidelines. This required a historic design review and approval by the Historic Landmarks Commission before we could start the project. Once approved, we replicated the existing porch design while removing the poor framing details supporting the porch. Almost everything out of view was in dangerous disrepair and required complete reconstruction. In addition to restoring the porch in accordance with historic design guidelines, we repaired the wood windows and installed matching storm windows. Our clients now enjoy the stunning curb appeal of their historic home and peace of mind knowing the structure is solid.
Funny Story: Halfway through this project, someone lost control of their vehicle as it headed in the direction of the home. Luckily, they regained control of their vehicle 4 feet from the project, avoiding a huge disaster!
Find the right local pro for your project

 Creative Spaces Interior Design, Inc.
Full Home Renovation and Addition. Industrial Artist Style.
We removed most of the walls in the existing house and create a bridge to the addition over the detached garage. We created an very open floor plan which is industrial and cozy. Both bathrooms and the first floor have cement floors with a specialty stain, and a radiant heat system. We installed a custom kitchen, custom barn doors, custom furniture, all new windows and exterior doors. We loved the rawness of the beams and added corrugated tin in a few areas to the ceiling. We applied American Clay to many walls, and installed metal stairs. This was a fun project and we had a blast!
Tom Queally Photography

 Lighthouse Outdoor Lighting of Indianapolis
This project required a call of attention to the architectural details of the home as the main visual focal point. Additional lighting was added to the trees to visually anchor the home to the landscaping. All of the lights used are low voltage, LED lights.

 Landis Architects | Builders
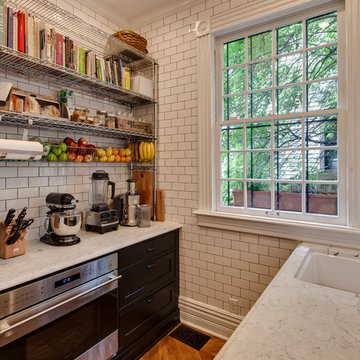
We designed a new kitchen at the rear of the house (it was an existing dining room) and incorporated an odd, narrow enclosure into the space to enlarge it. Making that odd sunroom part of the kitchen allows for an eating area with built-in bench. Incorporating the odd narrow side addition required removing the masonry wall and installing a beam across the opening.
Photographer: Greg Hadley
Interior Designer: Whitney Stewart

 Native Edge Landscape
We had a several challenges to face with this project. Not only did we need to update a dated landscape to accommodate two seemingly different design tastes (modern & minimalistic vs natural english garden), we were tasked with improving the property’s drainage, improving the driveway access, reducing water usage and plant maintenance, and fixing a crumbling wall.
To marry the two design tastes, we started with the more modern elements of metal planters and softened the landscape with mass plantings of ornamental grasses and native sedge. These grasses act as a turf replacement that do not need to be mowed and require less regular watering. On each side of the yard we constructed new cedar fences to provide updated and additional privacy. In addition, we poured a new concrete wall to replace the existing retaining wall and play off the new modern vibe.
Sponsored
Columbus, OH

Structural Remodeling
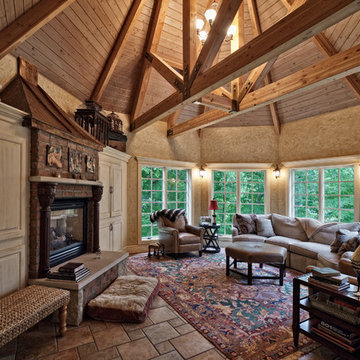
Franklin County's Heavy Timber Specialists | Best of Houzz 2020!

 MG New York Architects
The coffered ceiling was carefully designed to align with the corinthian columns, lining both sides of the pool, creating a beautiful symmetrical space. The ceiling design also hides the required mechanical and avoids interruption of the curved ceiling and mural above the pool.

 Woodling Landscape Design
The beautiful Westside of Santa Cruz is known for surfing, beaches and homes with small lots. Our main project goal was to maximize outdoor space and create additional rooms that would enlarge the overall living space in this cottage just steps from the beach. Large family gatherings, lots of grandkids and a few dogs inspired a walkable groundcover "lawn". We chose a light colored flagstone for the patio to contrast with the blue home. A long wall serves the dual purpose of additional seating and containing tall, thin plants that create privacy and a sense of enclosure. Plantings provide year-round color in primarily blues and yellows, and require very little water. With our perfect climate, nobody wants to stay indoors, and now this family is utilizing their space to the fullest extent!
 Woodling Landscape Design
The beautiful Westside of Santa Cruz is known for surfing, beaches and homes with small lots. Our main project goal was to maximize outdoor space and create additional rooms that would enlarge the overall living space in this cottage just steps from the beach. Large family gatherings, lots of grandkids and a few dogs inspired a walkable groundcover "lawn". We chose a light colored flagstone for the patio to contrast with the blue home. A long wall serves the dual purpose of additional seating and containing tall, thin plants that create privacy and a sense of enclosure. Plantings provide year-round color in primarily blues and yellows, and require very little water. With our perfect climate, nobody wants to stay indoors, and now this family is utilizing their space to the fullest extent!

 Stellar Remodeling & Cabinetry
This 600sf addition in Folsom created much need space for a growing family. In addition to gaining space, functionality and pantry storage were requirements in the design program. We opened up the kitchen and dining area to great room, with a vaulted ceiling, lots of natural light, created a private office, and new flooring throughout. We also designed a warm and cozy sitting area with a new LED fireplace, stacked stacked stone and a rustic mantel. Schrock cabinets provided a lot more storage and functionality. The countertops are a combination of granite and quartz; the backsplash is natural stone. The 'floating' soffit above the island provided an opportunity for more LED up-lights and a great focal point. New concrete walkways, a patio, and an easy-access area for the garbage cans completed the exterior.

 ING Construction
Complete Kitchen Remodel and Living Room Addition to an Existing Home
Installation of flooring, kitchen island, all required plumbing, carpentry per the project and a fresh paint to finish.
 Native Edge Landscape
We had a several challenges to face with this project. Not only did we need to update a dated landscape to accommodate two seemingly different design tastes (modern & minimalistic vs natural english garden), we were tasked with improving the property’s drainage, improving the driveway access, reducing water usage and plant maintenance, and fixing a crumbling wall.
To marry the two design tastes, we started with the more modern elements of metal planters and softened the landscape with mass plantings of ornamental grasses and native sedge. These grasses act as a turf replacement that do not need to be mowed and require less regular watering. On each side of the yard we constructed new cedar fences to provide updated and additional privacy. In addition, we poured a new concrete wall to replace the existing retaining wall and play off the new modern vibe.


 Saikley Architects
This 1907 Brown Shingle Arts & Crafts home had significant dry rot damage and a 1970’s addition that required extensive re-building to repair. We took the opportunity to explore what the owners most wanted for their home and make design changes that would improve their experience of living in the house. The project brought the mismatched previous addition into harmony with the style of the original house, added a deck with good spaces for socializing, and made two home offices fit the needs of the owners. Design sketches and a cardboard study model with removable parts helped the clients visualize ideas and evaluate options.
Photography by Kurt Manley.
https://saikleyarchitects.com/portfolio/arts-crafts-addition/

 Kopp Construction Co
Remodel of Living Room, Kitchen, Entry and Garage with additional square footage added to Kitchen and Garage.
Remodeled Kitchen with 12×14 kitchen addition. Engineered concrete footings to support kitchen addition on slope tying in to 4 foot extension of Garage. Kitchen features Tiger Wood cabinets with Red Trim designed by owner.
Redesign single story entry to two story foyer with large windows and skylights.
Living Room Remodel including 4×16 footprint Expansion. Featuring 16 foot sliding glass doors to capture panoramic views of Portland.
Garage Expansion 4 x24 anchoring deck and kitchen addition on slope.
Build Challenge: Design and build a wrap-around floating fireplace hearth made from granite slab. Special engineering required for living room 16 foot sliding doors.

 TOC design & construction inc.
DESIGNED BY TOC design
CONSTRUCTION BY TOC design & Construction inc.
PHOTOS BY : Tania Scardellato
I was fortunate to have a young family approach me in desperate need to renovate there only 3 piece bathroom. This space was In dire need of a remodel, with old brown wall to wall tiles and a dated bulky yellow brown single sink vanity.
Storage was a must, lighting a necessity, and proper accessibility to the shower bath area.
We had a tight budget to respect, but a full gut of this bathroom was required. And a good thing too, once we started doing the demolition we noticed that mildew and rotting floors and walls had accumulated throughout the years. Doing it right the first time is no joke when dealing with water and electrical issues.
We discarded all reminisce of old and built from scratch, new walls, new plumbing, new electrical ,new insulation and a new window, a new fan that actually exhausted outside ( I say this laughing as you would be amazed at how many fans are installed but don’t exhaust outside, and you the client would never know unless you go inside the attic space.
Once all the hard stuff was done, the rest is just a matter of smart design. If you have a small bathroom here are some tips to guide you.
10 tips for making a small bathroom feel larger
Is your tiny bathroom cramping your functionality and style, leaving you longing for the enormous bathrooms gracing the pages of design magazines? Even if your bathroom is a fraction of the size, all it takes is some design savvy to make the most of the space you have. Consider these 10 smart tips that will help your bathroom look, feel and function like those larger contenders.
1-Get creative with corners
Space is at a premium in small bathrooms, so it's important to maximize every inch. Corners, for example, provide extra space for shelving, storage units and even hooks. Get creative and install unique design solutions that are not only functional, but also eye-catching. If you love the airiness of floating cabinets, add baskets or decorative boxes under for extra storage. If you are installing floating cabinets insure that they are installed securely to studs or plywood at wall.
2- Let solid colors shine
Busy patterns have a shrinking effect and make small bathrooms seem even smaller. Conversely, light natural hues make a space feel more open. If you're itching to get creative with design, experiment with textures but keep overpowering patterns to a minimum. Tone on tone is the best to achieve this.
3 - Maximize your bathtub
A bathtub takes up a significant portion of the room, but modern, compact options with curved basins, can make the tub feel larger when in use, all while conserving space.
4 - Select a smaller faucet
A faucet is jewelry for the bathroom. And just as accessories can overpower an outfit, a big bulky faucet isn't flattering in a small bath. Single-handle designs conserve counter space, while a wall-mount installation frees it up all together and can create quite the wow-factor, if the budget can accommodate the required changes to plumbing behind the wall.
5 - Make vanity storage simple
If you're in a storage war with your small bathroom, you're not alone in the battle. Toiletries and personal supplies without a place to call home only add clutter and chaos. Store smart with a space-saving vanity, the dual sink vanity shown here, looks quite simple, but in reality it has 4 sets of full extension drawers, and the vanity tower adds extra storage without overpowering the use of space.
6 - Show off the shower
Shower curtains may be pretty, but they interrupt the visual flow of a bathing space and make it feel significantly smaller. In bathrooms with small footprints, opt for a clear glass sliding shower door that doesn't require the clearance of one with a hinged design. Or as shown in this design and for fraction less expensive a half hinged panel installed on a fixed tempered glass panel. If you're embarking on a big remodel, create the illusion of more space by using same tile in the shower that's used throughout; instead of seeing them as two separate zones, the eye will read them as one.
7 - Discover the treasure of hidden storage
Work with a contractor, and you just might find some serious storage potential hidden behind your walls. Whether it's utilizing space between the studs for shallow shelving or a creating a small linen closet by annexing space from an adjacent room, even small additions can make a big difference.
8 - Focal Point
Tile is a beautiful, durable addition to any bathroom. For dainty spaces, consider installing tile at a diagonal to accentuate the focal point or as in this bathroom I used an oversized textured pattern to bring depth to the space at the window wall.
9 - Choose the right lights
Strategically install light to reflect and brighten a small bathroom to make it appear larger. Recessed lighting is an affordable solution for tiny rooms, offering ample light while taking up little space. Wall sconces alongside a mirror also reflect off the walls and make a room feel bright and airy. I always recommend going with LED lighting at 2800 to 3000K.
10 – Accessorize
This is your time to shine in your decorating skills, have fun with your towels, you can change the color scheme daily just by adding pops of color in your accessories, make sure to get items that serve a dual purpose, like baskets, boxes they can always be used as hampers, storing of towels and even a nice display for your guest.

 Miller-Roodell Architects Ltd
Located near Ennis, Montana, this cabin captures the essence of rustic style while maintaining modern comforts.
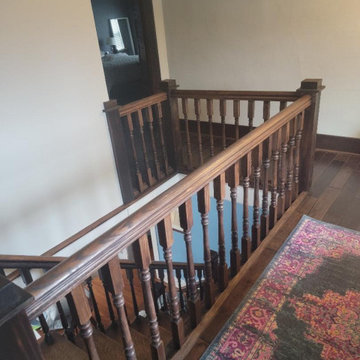
Jack Watkins’ father, the namesake of the creek by which this home is built, was involved in the construction of the Old Faithful Lodge. He originally built the cabin for he and his family in 1917, with small additions and upgrades over the years. The new owners’ desire was to update the home to better facilitate modern living, but without losing the original character. Windows and doors were added, and the kitchen and bathroom were completely remodeled. Well-placed porches were added to further integrate the interior spaces to their adjacent exterior counterparts, as well as a mud room—a practical requirement in rural Montana.
Today, details like the unique juniper handrail leading up to the library, will remind visitors and guests of its historical Western roots.
Sponsored
Columbus, OH

Hope Restoration & General Contracting
Columbus Design-Build, Kitchen & Bath Remodeling, Historic Renovations

 New Pacific Direct Inc.
Galen Low-Back Chair – A fun addition to a Parisian chic décor, the Galen Chair will fit right in. Slivery gray tones deck out the low, curved back and seat and complement the Espresso-finished legs and solid wood frame. Some assembly required, available in Sundried Ikat and Black Herringbone.

 Stellar Remodeling & Cabinetry
This 600sf addition in Folsom created much need space for a growing family. In addition to gaining space, functionality and pantry storage were requirements in the design program. We opened up the kitchen and dining area to great room, with a vaulted ceiling, lots of natural light, created a private office, and new flooring throughout. We also designed a warm and cozy sitting area with a new LED fireplace, stacked stacked stone and a rustic mantel. Schrock cabinets provided a lot more storage and functionality. The countertops are a combination of granite and quartz; the backsplash is natural stone. The 'floating' soffit above the island provided an opportunity for more LED up-lights and a great focal point. New concrete walkways, a patio, and an easy-access area for the garbage cans completed the exterior.
64