
Search results for "Researching" in Home Design Ideas
 Talon Construction Inc.
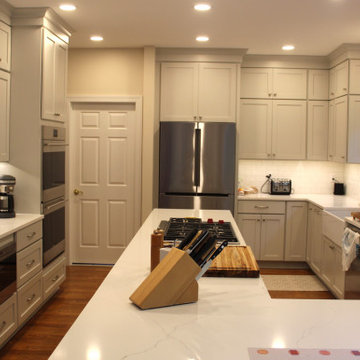
Renovating an open kitchen can be an exciting project that can improve the functionality, aesthetics, and value of your home. Here are some steps to guide you through the process:
Planning and Design:
Define your goals and budget for the renovation.
Determine the layout of your open kitchen. Consider factors like the work triangle (the relationship between the stove, sink, and refrigerator) and the flow of traffic.
Choose a design style and color scheme that suits your preferences and complements the rest of your home.
Research and Inspiration:
Collect inspiration from magazines, websites, and social media platforms to get ideas for your open kitchen design.
Create a mood board or vision board to help you visualize the final look.
Hiring Professionals:
Depending on the scale of your renovation, you may need to hire professionals, such as architects, interior designers, contractors, and electricians. Make sure to check references and get multiple quotes.
Demolition and Structural Work:
If your renovation involves structural changes, like removing walls, this is the time to do it. Ensure that the necessary permits are obtained.
Plumbing and Electrical Work:
Update or reconfigure plumbing and electrical systems as needed. This may include adding or moving outlets, switches, and lighting fixtures.
Cabinetry and Countertops:
Choose and install new kitchen cabinets and countertops. This is a significant part of your renovation and will greatly influence the kitchen's appearance and functionality.
Appliances:
Update or install new kitchen appliances, including the refrigerator, stove, oven, microwave, and dishwasher.
Flooring:
Select and install flooring that is suitable for a kitchen, such as hardwood, tile, laminate, or vinyl. Ensure it complements the overall design.
Backsplash and Wall Finishes:
Install a backsplash that matches your design and protects your walls. Consider materials like tile, glass, or stainless steel.
Lighting:
Choose and install various types of lighting, including ambient, task, and accent lighting. Pendant lights above an island or breakfast bar can add style and functionality.
Paint and Finishing Touches:
Paint the walls and ceiling in the colors you've selected. Add finishing touches like hardware, window treatments, and decorative elements.
Furniture and Accessories:
Bring in furniture, such as a dining table and chairs, barstools, and any other pieces you need to complete the space. Decorate with accessories like artwork, plants, and decorative items.
Final Inspection and Cleanup:
Ensure that all work meets safety and building code requirements. Clean the entire area thoroughly.
Enjoy Your New Kitchen:
Once the renovation is complete and everything is in its place, enjoy your beautiful, functional open kitchen.
Remember that open kitchen renovations can be complex and may require careful planning. It's essential to stay within your budget, communicate with your contractors and designers, and be flexible as unexpected issues may arise during the process. Ultimately, a well-executed open kitchen renovation can enhance the heart of your home and improve your overall living space.
 Talon Construction Inc.
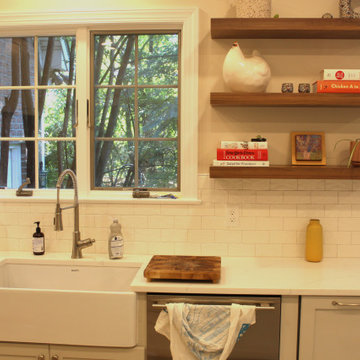
Renovating an open kitchen can be an exciting project that can improve the functionality, aesthetics, and value of your home. Here are some steps to guide you through the process:
Planning and Design:
Define your goals and budget for the renovation.
Determine the layout of your open kitchen. Consider factors like the work triangle (the relationship between the stove, sink, and refrigerator) and the flow of traffic.
Choose a design style and color scheme that suits your preferences and complements the rest of your home.
Research and Inspiration:
Collect inspiration from magazines, websites, and social media platforms to get ideas for your open kitchen design.
Create a mood board or vision board to help you visualize the final look.
Hiring Professionals:
Depending on the scale of your renovation, you may need to hire professionals, such as architects, interior designers, contractors, and electricians. Make sure to check references and get multiple quotes.
Demolition and Structural Work:
If your renovation involves structural changes, like removing walls, this is the time to do it. Ensure that the necessary permits are obtained.
Plumbing and Electrical Work:
Update or reconfigure plumbing and electrical systems as needed. This may include adding or moving outlets, switches, and lighting fixtures.
Cabinetry and Countertops:
Choose and install new kitchen cabinets and countertops. This is a significant part of your renovation and will greatly influence the kitchen's appearance and functionality.
Appliances:
Update or install new kitchen appliances, including the refrigerator, stove, oven, microwave, and dishwasher.
Flooring:
Select and install flooring that is suitable for a kitchen, such as hardwood, tile, laminate, or vinyl. Ensure it complements the overall design.
Backsplash and Wall Finishes:
Install a backsplash that matches your design and protects your walls. Consider materials like tile, glass, or stainless steel.
Lighting:
Choose and install various types of lighting, including ambient, task, and accent lighting. Pendant lights above an island or breakfast bar can add style and functionality.
Paint and Finishing Touches:
Paint the walls and ceiling in the colors you've selected. Add finishing touches like hardware, window treatments, and decorative elements.
Furniture and Accessories:
Bring in furniture, such as a dining table and chairs, barstools, and any other pieces you need to complete the space. Decorate with accessories like artwork, plants, and decorative items.
Final Inspection and Cleanup:
Ensure that all work meets safety and building code requirements. Clean the entire area thoroughly.
Enjoy Your New Kitchen:
Once the renovation is complete and everything is in its place, enjoy your beautiful, functional open kitchen.
Remember that open kitchen renovations can be complex and may require careful planning. It's essential to stay within your budget, communicate with your contractors and designers, and be flexible as unexpected issues may arise during the process. Ultimately, a well-executed open kitchen renovation can enhance the heart of your home and improve your overall living space.

 Innovative Design Build
Five stars isn’t enough! Our project was to reconfigure and update the main floor of a house we recently purchased that was built in 1961. We wanted to maintain some of the unique feeling it originally had but bring it up-to-date and eliminate the closed-in rooms and downright weird layout that was the result of multiple, partial remodeling projects. We began with a long wishlist of changes which also required replacement of very antiquated plumbing, electrical wiring and HVAC. We even found a fireplace that had been walled in and needed major re-construction. Many other aspects and details on this incredible list we made included an all new kitchen layout, converting a bedroom into a master closet, adding new half-bath, completely rebuilding the master bath, and adding stone, tile and custom built cabinetry. Our design plans included many fixtures and details that we specified and required professional installation and careful handling. Innovative helped us make reasonable decisions. Their skilled staff took us through a design process that made sense. There were many questions and all were answered with sincere conversation and positive – innovation – on how we could achieve our goals. Innovative provided us with professional consultants, who listened and were courteous and creative, with solid knowledge and informative judgement. When they didn’t have an answer, they did the research. They developed a comprehensive project plan that exceeded our expectations. Every item on our long list was checked-off. All agreed on work was fulfilled and they completed all this in just under four months. Innovative took care of putting together a team of skilled professional specialists who were all dedicated to make everything right. Engineering, construction, supervision, and I cannot even begin to describe how much thanks we have for the demolition crew! Our multiple, detailed project designs from Raul and professional design advice from Mindy and the connections she recommended are all of the best quality. Diego Jr., Trevor and his team kept everything on track and neat and tidy every single day and Diego Sr., Mark, Ismael, Albert, Santiago and team are true craftsmen who follow-up and make the most minuscule woodworking details perfect. The cabinets by Tim and electrical work and installation of fixtures by Kemchan Harrilal-BB and Navindra Doolratram, and Augustine and his crew on tile and stone work – all perfection. Aisling and the office crew were always responsive to our calls and requests. And of course Clark and Eric who oversaw everything and gave us the best of the best! Apologies if we didn’t get everyone on this list – you’re all great! Thank you for your hard work and dedication. We can’t thank you enough Innovative Construction – we kind of want to do it again!
Dave Hallman & Matt DeGraffenreid
Find the right local pro for your project
 Innovative Design Build
Five stars isn’t enough! Our project was to reconfigure and update the main floor of a house we recently purchased that was built in 1961. We wanted to maintain some of the unique feeling it originally had but bring it up-to-date and eliminate the closed-in rooms and downright weird layout that was the result of multiple, partial remodeling projects. We began with a long wishlist of changes which also required replacement of very antiquated plumbing, electrical wiring and HVAC. We even found a fireplace that had been walled in and needed major re-construction. Many other aspects and details on this incredible list we made included an all new kitchen layout, converting a bedroom into a master closet, adding new half-bath, completely rebuilding the master bath, and adding stone, tile and custom built cabinetry. Our design plans included many fixtures and details that we specified and required professional installation and careful handling. Innovative helped us make reasonable decisions. Their skilled staff took us through a design process that made sense. There were many questions and all were answered with sincere conversation and positive – innovation – on how we could achieve our goals. Innovative provided us with professional consultants, who listened and were courteous and creative, with solid knowledge and informative judgement. When they didn’t have an answer, they did the research. They developed a comprehensive project plan that exceeded our expectations. Every item on our long list was checked-off. All agreed on work was fulfilled and they completed all this in just under four months. Innovative took care of putting together a team of skilled professional specialists who were all dedicated to make everything right. Engineering, construction, supervision, and I cannot even begin to describe how much thanks we have for the demolition crew! Our multiple, detailed project designs from Raul and professional design advice from Mindy and the connections she recommended are all of the best quality. Diego Jr., Trevor and his team kept everything on track and neat and tidy every single day and Diego Sr., Mark, Ismael, Albert, Santiago and team are true craftsmen who follow-up and make the most minuscule woodworking details perfect. The cabinets by Tim and electrical work and installation of fixtures by Kemchan Harrilal-BB and Navindra Doolratram, and Augustine and his crew on tile and stone work – all perfection. Aisling and the office crew were always responsive to our calls and requests. And of course Clark and Eric who oversaw everything and gave us the best of the best! Apologies if we didn’t get everyone on this list – you’re all great! Thank you for your hard work and dedication. We can’t thank you enough Innovative Construction – we kind of want to do it again!
Dave Hallman & Matt DeGraffenreid
 Talon Construction Inc.
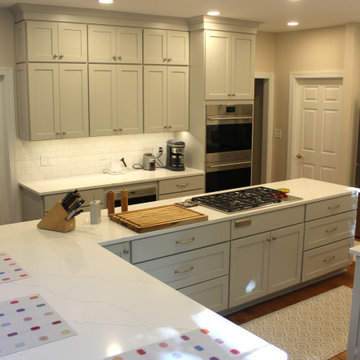
Renovating an open kitchen can be an exciting project that can improve the functionality, aesthetics, and value of your home. Here are some steps to guide you through the process:
Planning and Design:
Define your goals and budget for the renovation.
Determine the layout of your open kitchen. Consider factors like the work triangle (the relationship between the stove, sink, and refrigerator) and the flow of traffic.
Choose a design style and color scheme that suits your preferences and complements the rest of your home.
Research and Inspiration:
Collect inspiration from magazines, websites, and social media platforms to get ideas for your open kitchen design.
Create a mood board or vision board to help you visualize the final look.
Hiring Professionals:
Depending on the scale of your renovation, you may need to hire professionals, such as architects, interior designers, contractors, and electricians. Make sure to check references and get multiple quotes.
Demolition and Structural Work:
If your renovation involves structural changes, like removing walls, this is the time to do it. Ensure that the necessary permits are obtained.
Plumbing and Electrical Work:
Update or reconfigure plumbing and electrical systems as needed. This may include adding or moving outlets, switches, and lighting fixtures.
Cabinetry and Countertops:
Choose and install new kitchen cabinets and countertops. This is a significant part of your renovation and will greatly influence the kitchen's appearance and functionality.
Appliances:
Update or install new kitchen appliances, including the refrigerator, stove, oven, microwave, and dishwasher.
Flooring:
Select and install flooring that is suitable for a kitchen, such as hardwood, tile, laminate, or vinyl. Ensure it complements the overall design.
Backsplash and Wall Finishes:
Install a backsplash that matches your design and protects your walls. Consider materials like tile, glass, or stainless steel.
Lighting:
Choose and install various types of lighting, including ambient, task, and accent lighting. Pendant lights above an island or breakfast bar can add style and functionality.
Paint and Finishing Touches:
Paint the walls and ceiling in the colors you've selected. Add finishing touches like hardware, window treatments, and decorative elements.
Furniture and Accessories:
Bring in furniture, such as a dining table and chairs, barstools, and any other pieces you need to complete the space. Decorate with accessories like artwork, plants, and decorative items.
Final Inspection and Cleanup:
Ensure that all work meets safety and building code requirements. Clean the entire area thoroughly.
Enjoy Your New Kitchen:
Once the renovation is complete and everything is in its place, enjoy your beautiful, functional open kitchen.
Remember that open kitchen renovations can be complex and may require careful planning. It's essential to stay within your budget, communicate with your contractors and designers, and be flexible as unexpected issues may arise during the process. Ultimately, a well-executed open kitchen renovation can enhance the heart of your home and improve your overall living space.
 Innovative Design Build
Five stars isn’t enough! Our project was to reconfigure and update the main floor of a house we recently purchased that was built in 1961. We wanted to maintain some of the unique feeling it originally had but bring it up-to-date and eliminate the closed-in rooms and downright weird layout that was the result of multiple, partial remodeling projects. We began with a long wishlist of changes which also required replacement of very antiquated plumbing, electrical wiring and HVAC. We even found a fireplace that had been walled in and needed major re-construction. Many other aspects and details on this incredible list we made included an all new kitchen layout, converting a bedroom into a master closet, adding new half-bath, completely rebuilding the master bath, and adding stone, tile and custom built cabinetry. Our design plans included many fixtures and details that we specified and required professional installation and careful handling. Innovative helped us make reasonable decisions. Their skilled staff took us through a design process that made sense. There were many questions and all were answered with sincere conversation and positive – innovation – on how we could achieve our goals. Innovative provided us with professional consultants, who listened and were courteous and creative, with solid knowledge and informative judgement. When they didn’t have an answer, they did the research. They developed a comprehensive project plan that exceeded our expectations. Every item on our long list was checked-off. All agreed on work was fulfilled and they completed all this in just under four months. Innovative took care of putting together a team of skilled professional specialists who were all dedicated to make everything right. Engineering, construction, supervision, and I cannot even begin to describe how much thanks we have for the demolition crew! Our multiple, detailed project designs from Raul and professional design advice from Mindy and the connections she recommended are all of the best quality. Diego Jr., Trevor and his team kept everything on track and neat and tidy every single day and Diego Sr., Mark, Ismael, Albert, Santiago and team are true craftsmen who follow-up and make the most minuscule woodworking details perfect. The cabinets by Tim and electrical work and installation of fixtures by Kemchan Harrilal-BB and Navindra Doolratram, and Augustine and his crew on tile and stone work – all perfection. Aisling and the office crew were always responsive to our calls and requests. And of course Clark and Eric who oversaw everything and gave us the best of the best! Apologies if we didn’t get everyone on this list – you’re all great! Thank you for your hard work and dedication. We can’t thank you enough Innovative Construction – we kind of want to do it again!
Dave Hallman & Matt DeGraffenreid
 Talon Construction Inc.
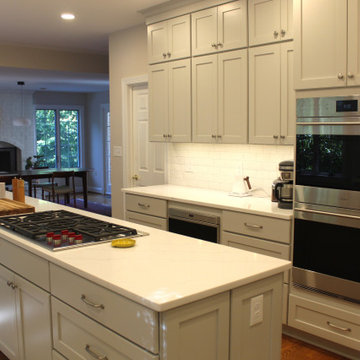
Renovating an open kitchen can be an exciting project that can improve the functionality, aesthetics, and value of your home. Here are some steps to guide you through the process:
Planning and Design:
Define your goals and budget for the renovation.
Determine the layout of your open kitchen. Consider factors like the work triangle (the relationship between the stove, sink, and refrigerator) and the flow of traffic.
Choose a design style and color scheme that suits your preferences and complements the rest of your home.
Research and Inspiration:
Collect inspiration from magazines, websites, and social media platforms to get ideas for your open kitchen design.
Create a mood board or vision board to help you visualize the final look.
Hiring Professionals:
Depending on the scale of your renovation, you may need to hire professionals, such as architects, interior designers, contractors, and electricians. Make sure to check references and get multiple quotes.
Demolition and Structural Work:
If your renovation involves structural changes, like removing walls, this is the time to do it. Ensure that the necessary permits are obtained.
Plumbing and Electrical Work:
Update or reconfigure plumbing and electrical systems as needed. This may include adding or moving outlets, switches, and lighting fixtures.
Cabinetry and Countertops:
Choose and install new kitchen cabinets and countertops. This is a significant part of your renovation and will greatly influence the kitchen's appearance and functionality.
Appliances:
Update or install new kitchen appliances, including the refrigerator, stove, oven, microwave, and dishwasher.
Flooring:
Select and install flooring that is suitable for a kitchen, such as hardwood, tile, laminate, or vinyl. Ensure it complements the overall design.
Backsplash and Wall Finishes:
Install a backsplash that matches your design and protects your walls. Consider materials like tile, glass, or stainless steel.
Lighting:
Choose and install various types of lighting, including ambient, task, and accent lighting. Pendant lights above an island or breakfast bar can add style and functionality.
Paint and Finishing Touches:
Paint the walls and ceiling in the colors you've selected. Add finishing touches like hardware, window treatments, and decorative elements.
Furniture and Accessories:
Bring in furniture, such as a dining table and chairs, barstools, and any other pieces you need to complete the space. Decorate with accessories like artwork, plants, and decorative items.
Final Inspection and Cleanup:
Ensure that all work meets safety and building code requirements. Clean the entire area thoroughly.
Enjoy Your New Kitchen:
Once the renovation is complete and everything is in its place, enjoy your beautiful, functional open kitchen.
Remember that open kitchen renovations can be complex and may require careful planning. It's essential to stay within your budget, communicate with your contractors and designers, and be flexible as unexpected issues may arise during the process. Ultimately, a well-executed open kitchen renovation can enhance the heart of your home and improve your overall living space.
 Innovative Design Build
Five stars isn’t enough! Our project was to reconfigure and update the main floor of a house we recently purchased that was built in 1961. We wanted to maintain some of the unique feeling it originally had but bring it up-to-date and eliminate the closed-in rooms and downright weird layout that was the result of multiple, partial remodeling projects. We began with a long wishlist of changes which also required replacement of very antiquated plumbing, electrical wiring and HVAC. We even found a fireplace that had been walled in and needed major re-construction. Many other aspects and details on this incredible list we made included an all new kitchen layout, converting a bedroom into a master closet, adding new half-bath, completely rebuilding the master bath, and adding stone, tile and custom built cabinetry. Our design plans included many fixtures and details that we specified and required professional installation and careful handling. Innovative helped us make reasonable decisions. Their skilled staff took us through a design process that made sense. There were many questions and all were answered with sincere conversation and positive – innovation – on how we could achieve our goals. Innovative provided us with professional consultants, who listened and were courteous and creative, with solid knowledge and informative judgement. When they didn’t have an answer, they did the research. They developed a comprehensive project plan that exceeded our expectations. Every item on our long list was checked-off. All agreed on work was fulfilled and they completed all this in just under four months. Innovative took care of putting together a team of skilled professional specialists who were all dedicated to make everything right. Engineering, construction, supervision, and I cannot even begin to describe how much thanks we have for the demolition crew! Our multiple, detailed project designs from Raul and professional design advice from Mindy and the connections she recommended are all of the best quality. Diego Jr., Trevor and his team kept everything on track and neat and tidy every single day and Diego Sr., Mark, Ismael, Albert, Santiago and team are true craftsmen who follow-up and make the most minuscule woodworking details perfect. The cabinets by Tim and electrical work and installation of fixtures by Kemchan Harrilal-BB and Navindra Doolratram, and Augustine and his crew on tile and stone work – all perfection. Aisling and the office crew were always responsive to our calls and requests. And of course Clark and Eric who oversaw everything and gave us the best of the best! Apologies if we didn’t get everyone on this list – you’re all great! Thank you for your hard work and dedication. We can’t thank you enough Innovative Construction – we kind of want to do it again!
Dave Hallman & Matt DeGraffenreid
 Innovative Design Build
Five stars isn’t enough! Our project was to reconfigure and update the main floor of a house we recently purchased that was built in 1961. We wanted to maintain some of the unique feeling it originally had but bring it up-to-date and eliminate the closed-in rooms and downright weird layout that was the result of multiple, partial remodeling projects. We began with a long wishlist of changes which also required replacement of very antiquated plumbing, electrical wiring and HVAC. We even found a fireplace that had been walled in and needed major re-construction. Many other aspects and details on this incredible list we made included an all new kitchen layout, converting a bedroom into a master closet, adding new half-bath, completely rebuilding the master bath, and adding stone, tile and custom built cabinetry. Our design plans included many fixtures and details that we specified and required professional installation and careful handling. Innovative helped us make reasonable decisions. Their skilled staff took us through a design process that made sense. There were many questions and all were answered with sincere conversation and positive – innovation – on how we could achieve our goals. Innovative provided us with professional consultants, who listened and were courteous and creative, with solid knowledge and informative judgement. When they didn’t have an answer, they did the research. They developed a comprehensive project plan that exceeded our expectations. Every item on our long list was checked-off. All agreed on work was fulfilled and they completed all this in just under four months. Innovative took care of putting together a team of skilled professional specialists who were all dedicated to make everything right. Engineering, construction, supervision, and I cannot even begin to describe how much thanks we have for the demolition crew! Our multiple, detailed project designs from Raul and professional design advice from Mindy and the connections she recommended are all of the best quality. Diego Jr., Trevor and his team kept everything on track and neat and tidy every single day and Diego Sr., Mark, Ismael, Albert, Santiago and team are true craftsmen who follow-up and make the most minuscule woodworking details perfect. The cabinets by Tim and electrical work and installation of fixtures by Kemchan Harrilal-BB and Navindra Doolratram, and Augustine and his crew on tile and stone work – all perfection. Aisling and the office crew were always responsive to our calls and requests. And of course Clark and Eric who oversaw everything and gave us the best of the best! Apologies if we didn’t get everyone on this list – you’re all great! Thank you for your hard work and dedication. We can’t thank you enough Innovative Construction – we kind of want to do it again!
Dave Hallman & Matt DeGraffenreid
 Tile Doctor Ltd
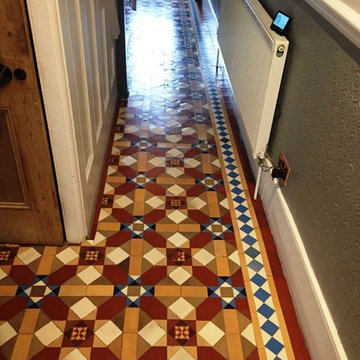
This detailed Victorian tiled hallway at a property in Camden was overdue some much-needed repair and maintenance. The owners of the property appreciated that original period features like this add a lot of value to a property and asked me to visit the property to quote for renovating it. The property was in a terrace of similar properties most of which appeared to have retained their Victorian character.
I inspected the floor and found there were a couple of loose, cracked, worn and broken tiles that needed to be replaced. In addition, the floor tiles needed a deep clean and then seal to bring back the wow factor. I was confident we could renovate the floor but at that point unsure if we would be able to find exact match replacements for the damaged tiles. Fortunately, Victorian tiles are still in demand and I knew of several companies I could check with so I was confident they could be found.
We discussed how long the work would take and assuming I could source the replacements agreed a price for the full restoration of the floor. After doing some research I managed to find suitable replacements with a company called Original Style and the work was scheduled for the following month.
Firstly, we prepared all areas with protective tapes to threshold edges and skirting.
This was followed by spaying the tiles with a strong dilution of Tile Doctor Remove & Go which is product designed to remove old sealers and coatings. After about ten minutes the tiles were scrubbed with black scrubbing pads and scrubbing brushes. Fresh water was used to rinse the floor and the slurry was extracted using a wet vacuum.
The floor was inspected and then a second clean carried out, this time using Tile Doctor Pro-Clean which is a Tile and Grout cleaning agent. The same process of application was used and after rinsing and extracting the dirt the tiles were given a steam clean. This ensured all the dirt was lifted out of the pores of the tile and the floor was now as clean as it possible could be.
The next step was the remove the loose and cracked tiles using the reclaimed tiles we had sourced earlier. Some cuts were necessary to get the replacements to match the originals but overall the plan worked. A quick drying adhesive was used to secure the tiles so we could apply the grout shortly after. The whole floor was then re-grouted and cleaned off to ensure a good match. The floor was left to dry off overnight, and you could already see it was now looking considerably improved.
Returning the next morning we checked the floor was dry using a moisture meter, this is important as to apply a sealer to damp tiles will lead to a patchy experience. All was well so we were ready to apply the sealer.
To start a single base coat of Tile Doctor Colour Grow sealer was applied to the floor and left to dry. This sealer is an impregnator that protects from within by occupying the pores in the clay tile improving colour in the process. This sealer does leave a matt finish however and the client wanted a subtle shine so one dry it was followed by four coats of Tile Doctor Seal & Go. The combination of the two sealers works really well to add long lasting protection to the tiles and provide the desired finish to the floor.
The floor was much improved, and the client was delighted. The detailed pattern and colours were now much more prominent, and the hallway looked much more inviting for both the owner and their guests. For the aftercare of Victorian tiles, I recommended the use of Tile Doctor Neutral Cleaner which is pH neutral and won’t prematurely erode the life of the sealer.
Nigel Voyce
North London Tile Doctor


 Gappsi
Gunite swimming pool was built in Coram, NY by Gappsi.
This gunite swimming pool was built in Coram, NY by Gappsi. The construction design layout, created by Giuseppe Abbrancati, consists of 10 inch walls and an 8 inch floor with 5,000 PSI dry-shot cement mix. The travertine pavers surrounding the pool were installed on 4 inches of poured concrete base and one inch of clean sand. The joints between pavers were filled with polymeric sand.This gunite swimming pool was built to accommodate the clients wishes. It measures over 1,400 sq ft of surface area, and has a depth going from 46 to 50 inches deep. The Fiorito used for the pool coping and surrounding patio is one of the most beautiful travertine patterns selected from the Gappsi Natural Stone Showroom collection. The pool design also incorporates a large sundeck that features a jet bubbler. It is entertaining for the kids and also serves as small water fountain feature in the center of the sundeck.The deep end of the gunite swimming pool contains a free form stairs and bench design. The plaster finish applied on the swimming pool walls is Diamond Brite Tahiti Blue, which is a combination of Tahoe Blue and Super Blue Diamond Brite quartz finishes. 6x6 inch tiles were installed at the water line and 3x3 inch tiles were used as markers at the edges of the steps and benches.The pool has many options starting with 3 large LED lights in the pool, one small light in the sundeck step, and the bubbler used in the sundeck has a light as well. The entire gunite swimming pool has a full automation system that works from a smart phone, allowing the customer to control the gas heater, salt chlorine generator, and Ozone system. On the outside of the pool, a wood-burning fire pit was built with firebricks and veneered with travertine. And at the deep end, a Inter-Fab X-Stream 2 pool slide was installed.
Letter From Customer
Our experience with Gappsi began in August., 2017 and it was purely by chance. My husband found their website, and dropped by their business after setting up an appointment with another pool builder down the block from them. Immediately upon walking into their place of business, he received a hospitable reception which gave him the “warm and fuzzy” feeling he likes to get when doing a business transaction. This is his indication of an honest, trustworthy company. And his intuition proved to be right. Having spent months prior doing research, we knew exactly what we wanted, a gunite pool to fit the existing landscape of our nice sized yard. The owner, Giuseppe Abbrancati, came out, took notes and pictures of our yard, and within a week, had computer generated renderings, which we were able to modify on the spot. Giuseppe and his son, Emanuele, did a phenomenal job at giving us exactly what we wanted, instead of trying to sell us on the expensive add-on features that we didn’t want. And what that enabled us to do was go bigger with our free-form design, one of the largest residential gunite pools they had done and at a very reasonable price. The only major hiccup was when their project manager had to be replaced, but once that hurdle was overcome, the newly assigned project manager, Tosh, made sure getting our pool, the gas lines, the electrical, the masonry, the sodding and landscaping were all completed in time for the opening of our pool in June, 2018. We are delighted and thrilled beyond measure at our resort style backyard. We would recommend Gappsi, a family-run business, to all!! Thanks for making our home the “destination stay-cation” of Coram, NY for our family and friends!! Everyone is in awe when they see it!
 Amile bills
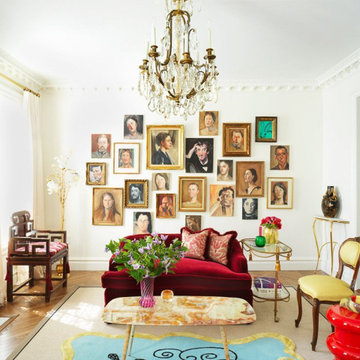
If you are googling about picking wall art for your home, then you probably fall into one of two categories. Either your walls are way too bare, or they're smothered in outdated and generic artwork that doesn't represent you anymore! Don’t worry – neither of these situations have to last forever, and there are plenty of stylish ways to make sure that your personality gets to shine in your room decor as well as in the rest of your life! Just follow these 8 wall art ideas from our bedroom designer below, and get ready to be the star of your own show!
1) Blank Walls can be Fun
If you're online researching how to buy any sort of wall art for your home, then you fall into one of two categories. It seems either your walls are bare, or your art isn't fitting. Either way, it doesn't represent you! But blank walls don’t have to be boring. In fact, they can be a canvas for you to express your unique personality.
2) Create an eye-catching Statement Piece
A big, bold piece of wall art is the perfect way to make a statement in your room. But if you’re not careful, it can also look like you’re trying too hard. The key is to find a piece that reflects your personality and style, without being too over-the-top.
3) Hang something Larger than Life
Go big or go home, right? Especially when it comes to wall art. Hanging a large piece of artwork will make a huge impact in your room. It’ll be the first thing people see when they walk in, and it’ll set the tone for the rest of your decor. Plus, it’s a great way to fill up a large wall space. Just make sure you pick a piece that you really love – you’ll be looking at it every day. For further Inspiration you can check out Wall Art Ideas from Unique-Canvas.com to decorate your Room.
4) Use a Vibrant Focal Point
A focal point is a great way to add drama and interest to a room. It can be anything from a piece of wall art to a piece of furniture. In this case, we’re going to focus on wall art. A vibrant focal point will add color and life to your room. Making a statement and displaying your personality is easy with this.
5) Smaller is Better
People often make the mistake of thinking that they need large, expensive pieces of art to fill up a large, empty wall. But the truth is, sometimes all you need is a small piece of art that packs a big punch. A small piece of art can be more intimate and personal, and it can also be less expensive. So if you’re looking for wall art ideas that are both unique and budget-friendly, try looking for smaller pieces!
6) Get Personal
When it comes to wall art, the most important thing is that it speaks to you on a personal level. You should let your home reflect who you are and what you love!
7) Adorn yourself with Soulful Quotes
A great way to show off your personality is with soulful quotes. Pick out a few of your favourites and have them printed on canvas. You can hang them up in your room or office as a daily reminder of what’s important to you.
8) Add some Colourful Décor Pieces
A blank wall is like a blank canvas—it’s begging to be filled with something colorful and eye-catching! That said, if you're still unsure of where to start, don't worry. We’ve got eight wall art ideas that will help you decorate your room and bring out your personality.
Final Thought
No matter what your style is, you can find wall art that represents you. The key is to take your time searching for the right piece, and don’t be afraid to step outside your comfort zone.
 Modern Citi Group: Renovations & Remodeling
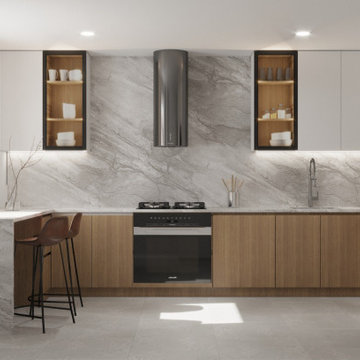
Gorgeous high end Modern kitchen remodel project offered in two color palettes. The kitchen features an open layout, concealed appliances and washer/dryer, additional china cabinets, and island range exhaust hood. Breakfast bar with two bar stools against the window for a great morning coffee routine.


 Thyme & Place Design LLC
At this turn of the 20th century, home badly needed a new kitchen. An old porch had been partially enclosed, and the old kitchen window opened onto that enclosure, a small stretch of hallway 6 feet wide. The room had little in the way of form or function. The appliances all needed to be replaced, the lighting and flooring were in bad repair and the kitchen itself lacked culinary inspiration.
The client requested a kitchen with modern top-of-the-line cooking appliances, a well-thought-out plan which would include an island, a desk, eating for 6, custom storage, a "cat" corner for the family pet’s food and bowls as well as a drop-dead design aesthetic. Welcome to the Central Av Kitchen.
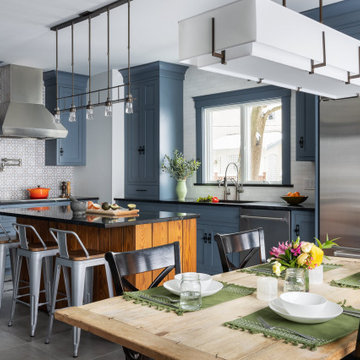
The old exterior wall was removed and the 6’ hallway was incorporated into the kitchen area providing space for both a table as well as a generous island with seating for three. In lieu of pantry cabinets, a pantry closet was framed to the right of the refrigerator to account for a change in ceiling height. The closet conceals the slope of the old exterior wall.
Additional space for the cooktop credenza was found by extending a wall concealing the basement stairs. Custom-screened marble tile covers the wall behind the induction cooktop. A pot filler faucet is an added convenience becoming very popular with clients who cook. The secondary cooking area adjacent to the cooktop has a single convection wall oven and one of my favorite appliances, a steam oven. This is the one appliance no kitchen should be without.
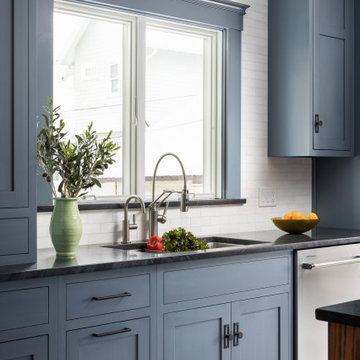
An immovable corner chase became part of the design supporting a full counter-to-ceiling cabinet for glasses and cups. Dish drawer storage is located below this cabinet, perfect when unloading the dishwasher. Once again, my favorite culinary sink (Franke) and a professional-style faucet (Brizo) add to the chef’s table experience of the kitchen. The refrigerator is a gorgeous 42” french door-styled Sub Zero.
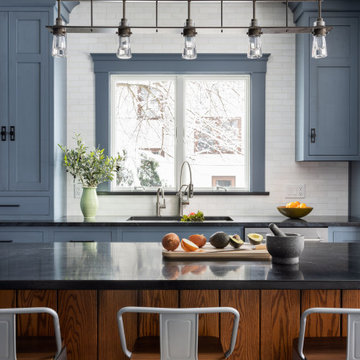
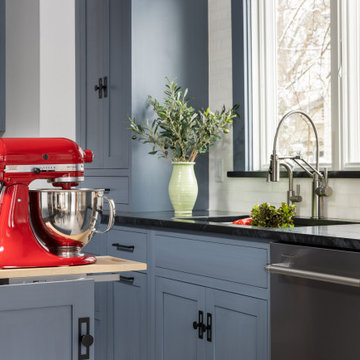
Moving to the island, you will find an under-counter beverage refrigerator, additional storage, and a mixer lift to keep the stand mixer at ready but tucked away. Great for casual dining and ample space for preparing meals, the island is the perfect centerpiece for the kitchen design. A traditional ship lap wood detail was turned on its end to surround the island. The contrasting color and texture of the rustic oak give relief to the smooth painted finish of the kitchen cabinets. The stain color is repeated on the pantry door as well as the family room entrance door to the kitchen.
Near the kitchen table, a desk is located for both recipe research as well as homework. The spare dining chair serves as a desk chair. Open shelves are simultaneously practical and decorative.
Custom storage details include a spice drawer, pull-out pantry, dish drawer, garbage/recycling cabinet, vertical tray storage, utensil, and flatware drawers, and “cat corner” which holds all things kitty related, while keeping the cat dining area out of the main kitchen.
Additional details about the space. The cabinets are a traditional plain inset construction but without visible hinges. Large format “concrete” porcelain floor tiles create a simple canvas for blue-painted cabinets with a black glazed finish. Contemporized matte black hardware provides a beautiful contrast to the cabinet color. The other splash areas are covered in a simple white mottled glazed porcelain subway tile. The “cat corner” which is not visible is realized in distressed black paint with a wood countertop to match the oak on the island.
Another key point is the ceiling height. Taller ceilings allow for taller cabinets but need a strong molding detail to balance the tall cabinet doors. To demonstrate that detail, you will notice a combination of moldings (9” high) and double-paneled doors to overcome a “tower effect” in the space.
 Thyme & Place Design LLC
At this turn of the 20th century, home badly needed a new kitchen. An old porch had been partially enclosed, and the old kitchen window opened onto that enclosure, a small stretch of hallway 6 feet wide. The room had little in the way of form or function. The appliances all needed to be replaced, the lighting and flooring were in bad repair and the kitchen itself lacked culinary inspiration.
The client requested a kitchen with modern top-of-the-line cooking appliances, a well-thought-out plan which would include an island, a desk, eating for 6, custom storage, a "cat" corner for the family pet’s food and bowls as well as a drop-dead design aesthetic. Welcome to the Central Av Kitchen.
The old exterior wall was removed and the 6’ hallway was incorporated into the kitchen area providing space for both a table as well as a generous island with seating for three. In lieu of pantry cabinets, a pantry closet was framed to the right of the refrigerator to account for a change in ceiling height. The closet conceals the slope of the old exterior wall.
Additional space for the cooktop credenza was found by extending a wall concealing the basement stairs. Custom-screened marble tile covers the wall behind the induction cooktop. A pot filler faucet is an added convenience becoming very popular with clients who cook. The secondary cooking area adjacent to the cooktop has a single convection wall oven and one of my favorite appliances, a steam oven. This is the one appliance no kitchen should be without.
An immovable corner chase became part of the design supporting a full counter-to-ceiling cabinet for glasses and cups. Dish drawer storage is located below this cabinet, perfect when unloading the dishwasher. Once again, my favorite culinary sink (Franke) and a professional-style faucet (Brizo) add to the chef’s table experience of the kitchen. The refrigerator is a gorgeous 42” french door-styled Sub Zero.
Moving to the island, you will find an under-counter beverage refrigerator, additional storage, and a mixer lift to keep the stand mixer at ready but tucked away. Great for casual dining and ample space for preparing meals, the island is the perfect centerpiece for the kitchen design. A traditional ship lap wood detail was turned on its end to surround the island. The contrasting color and texture of the rustic oak give relief to the smooth painted finish of the kitchen cabinets. The stain color is repeated on the pantry door as well as the family room entrance door to the kitchen.
Near the kitchen table, a desk is located for both recipe research as well as homework. The spare dining chair serves as a desk chair. Open shelves are simultaneously practical and decorative.
Custom storage details include a spice drawer, pull-out pantry, dish drawer, garbage/recycling cabinet, vertical tray storage, utensil, and flatware drawers, and “cat corner” which holds all things kitty related, while keeping the cat dining area out of the main kitchen.
Additional details about the space. The cabinets are a traditional plain inset construction but without visible hinges. Large format “concrete” porcelain floor tiles create a simple canvas for blue-painted cabinets with a black glazed finish. Contemporized matte black hardware provides a beautiful contrast to the cabinet color. The other splash areas are covered in a simple white mottled glazed porcelain subway tile. The “cat corner” which is not visible is realized in distressed black paint with a wood countertop to match the oak on the island.
Another key point is the ceiling height. Taller ceilings allow for taller cabinets but need a strong molding detail to balance the tall cabinet doors. To demonstrate that detail, you will notice a combination of moldings (9” high) and double-paneled doors to overcome a “tower effect” in the space.

 Fredman Design Group
Designers gave the house a wood-and-steel façade that blends traditional and industrial elements.Photography by Eric Hausman
Designers gave the house a wood-and-steel façade that blends traditional and industrial elements. This home’s noteworthy steel shipping container construction material, offers a streamlined aesthetic and industrial vibe, with sustainable attributes and strength. Recycled shipping containers are fireproof, impervious to water and stronger than traditional building materials. Inside, muscular concrete walls, burnished cedar beams and custom oak cabinetry give the living spaces definition, decorative might, and storage and seating options.
For more than 40 years, Fredman Design Group has been in the business of Interior Design. Throughout the years, we’ve built long-lasting relationships with our clients through our client-centric approach. When creating designs, our decisions depend on the personality of our clients—their dreams and their aspirations. We manifest their lifestyle by incorporating elements of design with those of our clients to create a unique environment, down to the details of the upholstery and accessories. We love it when a home feels finished and lived in, with various layers and textures.
While each of our clients and their stories has varied over the years, they’ve come to trust us with their projects—whether it’s a single room to the larger complete renovation, addition, or new construction.
They value the collaborative team that is behind each project, embracing the diversity that each designer is able to bring to their project through their love of art, travel, fashion, nature, history, architecture or film—ultimately falling in love with the nurturing environments we create for them.
We are grateful for the opportunity to tell each of clients’ stories through design. What story can we help you tell?
Call us today to schedule your complimentary consultation - 312-587-9184
 Thyme & Place Design LLC
At this turn of the 20th century, home badly needed a new kitchen. An old porch had been partially enclosed, and the old kitchen window opened onto that enclosure, a small stretch of hallway 6 feet wide. The room had little in the way of form or function. The appliances all needed to be replaced, the lighting and flooring were in bad repair and the kitchen itself lacked culinary inspiration.
The client requested a kitchen with modern top-of-the-line cooking appliances, a well-thought-out plan which would include an island, a desk, eating for 6, custom storage, a "cat" corner for the family pet’s food and bowls as well as a drop-dead design aesthetic. Welcome to the Central Av Kitchen.
The old exterior wall was removed and the 6’ hallway was incorporated into the kitchen area providing space for both a table as well as a generous island with seating for three. In lieu of pantry cabinets, a pantry closet was framed to the right of the refrigerator to account for a change in ceiling height. The closet conceals the slope of the old exterior wall.
Additional space for the cooktop credenza was found by extending a wall concealing the basement stairs. Custom-screened marble tile covers the wall behind the induction cooktop. A pot filler faucet is an added convenience becoming very popular with clients who cook. The secondary cooking area adjacent to the cooktop has a single convection wall oven and one of my favorite appliances, a steam oven. This is the one appliance no kitchen should be without.
An immovable corner chase became part of the design supporting a full counter-to-ceiling cabinet for glasses and cups. Dish drawer storage is located below this cabinet, perfect when unloading the dishwasher. Once again, my favorite culinary sink (Franke) and a professional-style faucet (Brizo) add to the chef’s table experience of the kitchen. The refrigerator is a gorgeous 42” french door-styled Sub Zero.
Moving to the island, you will find an under-counter beverage refrigerator, additional storage, and a mixer lift to keep the stand mixer at ready but tucked away. Great for casual dining and ample space for preparing meals, the island is the perfect centerpiece for the kitchen design. A traditional ship lap wood detail was turned on its end to surround the island. The contrasting color and texture of the rustic oak give relief to the smooth painted finish of the kitchen cabinets. The stain color is repeated on the pantry door as well as the family room entrance door to the kitchen.
Near the kitchen table, a desk is located for both recipe research as well as homework. The spare dining chair serves as a desk chair. Open shelves are simultaneously practical and decorative.
Custom storage details include a spice drawer, pull-out pantry, dish drawer, garbage/recycling cabinet, vertical tray storage, utensil, and flatware drawers, and “cat corner” which holds all things kitty related, while keeping the cat dining area out of the main kitchen.
Additional details about the space. The cabinets are a traditional plain inset construction but without visible hinges. Large format “concrete” porcelain floor tiles create a simple canvas for blue-painted cabinets with a black glazed finish. Contemporized matte black hardware provides a beautiful contrast to the cabinet color. The other splash areas are covered in a simple white mottled glazed porcelain subway tile. The “cat corner” which is not visible is realized in distressed black paint with a wood countertop to match the oak on the island.
Another key point is the ceiling height. Taller ceilings allow for taller cabinets but need a strong molding detail to balance the tall cabinet doors. To demonstrate that detail, you will notice a combination of moldings (9” high) and double-paneled doors to overcome a “tower effect” in the space.
 Thyme & Place Design LLC
At this turn of the 20th century, home badly needed a new kitchen. An old porch had been partially enclosed, and the old kitchen window opened onto that enclosure, a small stretch of hallway 6 feet wide. The room had little in the way of form or function. The appliances all needed to be replaced, the lighting and flooring were in bad repair and the kitchen itself lacked culinary inspiration.
The client requested a kitchen with modern top-of-the-line cooking appliances, a well-thought-out plan which would include an island, a desk, eating for 6, custom storage, a "cat" corner for the family pet’s food and bowls as well as a drop-dead design aesthetic. Welcome to the Central Av Kitchen.
The old exterior wall was removed and the 6’ hallway was incorporated into the kitchen area providing space for both a table as well as a generous island with seating for three. In lieu of pantry cabinets, a pantry closet was framed to the right of the refrigerator to account for a change in ceiling height. The closet conceals the slope of the old exterior wall.
Additional space for the cooktop credenza was found by extending a wall concealing the basement stairs. Custom-screened marble tile covers the wall behind the induction cooktop. A pot filler faucet is an added convenience becoming very popular with clients who cook. The secondary cooking area adjacent to the cooktop has a single convection wall oven and one of my favorite appliances, a steam oven. This is the one appliance no kitchen should be without.
An immovable corner chase became part of the design supporting a full counter-to-ceiling cabinet for glasses and cups. Dish drawer storage is located below this cabinet, perfect when unloading the dishwasher. Once again, my favorite culinary sink (Franke) and a professional-style faucet (Brizo) add to the chef’s table experience of the kitchen. The refrigerator is a gorgeous 42” french door-styled Sub Zero.
Moving to the island, you will find an under-counter beverage refrigerator, additional storage, and a mixer lift to keep the stand mixer at ready but tucked away. Great for casual dining and ample space for preparing meals, the island is the perfect centerpiece for the kitchen design. A traditional ship lap wood detail was turned on its end to surround the island. The contrasting color and texture of the rustic oak give relief to the smooth painted finish of the kitchen cabinets. The stain color is repeated on the pantry door as well as the family room entrance door to the kitchen.
Near the kitchen table, a desk is located for both recipe research as well as homework. The spare dining chair serves as a desk chair. Open shelves are simultaneously practical and decorative.
Custom storage details include a spice drawer, pull-out pantry, dish drawer, garbage/recycling cabinet, vertical tray storage, utensil, and flatware drawers, and “cat corner” which holds all things kitty related, while keeping the cat dining area out of the main kitchen.
Additional details about the space. The cabinets are a traditional plain inset construction but without visible hinges. Large format “concrete” porcelain floor tiles create a simple canvas for blue-painted cabinets with a black glazed finish. Contemporized matte black hardware provides a beautiful contrast to the cabinet color. The other splash areas are covered in a simple white mottled glazed porcelain subway tile. The “cat corner” which is not visible is realized in distressed black paint with a wood countertop to match the oak on the island.
Another key point is the ceiling height. Taller ceilings allow for taller cabinets but need a strong molding detail to balance the tall cabinet doors. To demonstrate that detail, you will notice a combination of moldings (9” high) and double-paneled doors to overcome a “tower effect” in the space.
176