
Search results for "Restoration process" in Home Design Ideas
 Construction And More Las Vegas
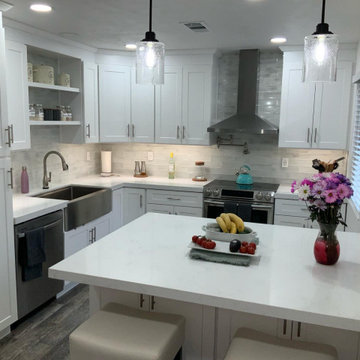
Expert Kitchen Remodel Services by Construction and More Las Vegas
At Construction and More Las Vegas, we know that the kitchen is the heart of your home. It’s where you gather with family, entertain guests, and create delicious meals. That’s why we’re dedicated to providing expert kitchen remodel services that transform your kitchen into a functional, stylish, and inviting space. Serving homeowners throughout Las Vegas and the surrounding areas, including Summerlin, Henderson, Paradise, Spring Valley, and Boulder City, we offer personalized solutions tailored to your unique needs and preferences.
Why Choose Construction and More Las Vegas for Your Kitchen Remodel?
Expertise and Experience
With years of experience in kitchen remodeling, our team possesses the knowledge and skills to handle projects of all sizes and complexities. We stay up-to-date with the latest design trends and technologies to ensure that your kitchen remodel not only meets but exceeds your expectations.
Customized Solutions
Every kitchen remodel is unique. We tailor our services to meet your specific needs and preferences, creating a custom kitchen design that reflects your personal style and complements your home’s aesthetic. From cabinets to countertops, every element is chosen with your vision in mind.
Quality Craftsmanship
Our commitment to quality craftsmanship ensures that your kitchen renovation stands the test of time. We use only the highest quality materials and employ precise techniques to deliver a finished product that is both beautiful and durable.
Comprehensive Services
Our comprehensive kitchen remodeling services cover everything from initial design and planning to final installation and finishing touches. Whether you need a full kitchen renovation or a simple makeover, we provide a seamless and stress-free experience.
Our Kitchen Remodeling Process
Initial Consultation and Planning
The process begins with a detailed consultation to understand your vision, needs, and budget. We provide expert advice on design, layout, and materials to create a plan that enhances both the functionality and aesthetics of your kitchen.
3D Design and Visualization
Using state-of-the-art 3D design software, we create realistic renderings of your proposed kitchen remodel. This allows you to visualize the space and make adjustments before construction begins, ensuring that every detail aligns with your vision.
Custom Cabinets and Storage Solutions
Custom cabinets are a cornerstone of any kitchen remodel. Our skilled craftsmen design and build cabinets that maximize storage and reflect your style. Whether you prefer modern sleek designs or traditional classic looks, we create cabinets that are both functional and beautiful.
Countertops and Backsplashes
The choice of countertops and backsplashes significantly impacts the look and feel of your kitchen. We offer a wide range of materials, including granite, quartz, and marble, to suit your style and budget. Our team helps you select the perfect combination that adds elegance and durability to your kitchen.
Lighting and Fixtures
Proper lighting is essential for both functionality and ambiance in your kitchen. We design and install lighting solutions that highlight key areas, such as task lighting, under-cabinet lighting, and ambient lighting. Our selection of fixtures includes a variety of styles to match your kitchen design.
Appliance Installation
Modern appliances are integral to a functional and efficient kitchen. We guide you in selecting high-quality, stylish options that meet your needs and complement your kitchen design. Our team ensures seamless installation for a cohesive and polished look.
Flooring and Finishes
The right flooring enhances the beauty and practicality of your kitchen. We offer a variety of flooring options, including tile, hardwood, and luxury vinyl, to suit your preferences. Our team ensures professional installation and finishes that withstand the rigors of daily use while adding elegance to your space.
Construction and Project Management
Once the design and materials are finalized, our experienced construction team takes over. We manage the entire remodeling process, from demolition to final touches, with meticulous attention to detail. Our project managers coordinate all aspects of the remodel, ensuring that the work is completed on time and within budget. We keep you informed throughout the process, addressing any concerns and ensuring your satisfaction.
Kitchen Renovation in Las Vegas and Surrounding Areas
If you’re searching for “kitchen renovation in my area,” look no further than Construction and More Las Vegas. We proudly serve Las Vegas and the surrounding communities, including Summerlin, Henderson, Paradise, Spring Valley, and Boulder City. Our local expertise and commitment to customer satisfaction make us the go-to choice for all your kitchen remodeling needs.
Why Kitchen Remodeling Matters
Enhanced Functionality
A well-designed kitchen maximizes space and improves functionality. Whether it’s adding more storage, upgrading appliances, or reconfiguring the layout, our remodels ensure that your kitchen works better for your daily routine and entertaining needs.
Increased Home Value
A kitchen remodel is one of the best investments you can make in your home. An updated, modern kitchen increases your property’s value and appeals to potential buyers if you decide to sell.
Improved Aesthetics
Our remodels transform outdated kitchens into beautiful, contemporary spaces. From luxurious finishes to modern fixtures, we create a kitchen that is both stylish and inviting.
Energy Efficiency
Upgrading to energy-efficient appliances and fixtures can reduce your utility bills and environmental footprint. We offer a range of eco-friendly options that save energy and water without compromising on performance or style.
Our Commitment to Sustainability
At Construction and More Las Vegas, we are committed to sustainable practices in our kitchen remodels. We source eco-friendly materials and prioritize energy-efficient fixtures to reduce environmental impact. Our team is dedicated to creating beautiful, functional kitchens that are also kind to the planet.
Testimonials and Case Studies
Our satisfied clients speak to the quality and reliability of our services. We have successfully completed numerous kitchen remodels, each tailored to meet the unique needs and preferences of our clients. Visit our website to read testimonials and view case studies of our work.
Contact Us Today
Ready to start your kitchen remodel? Contact Construction and More Las Vegas for expert kitchen remodeling services that combine functionality, beauty, and quality. Our experienced team is here to bring your vision to life, creating a kitchen that meets your needs and exceeds your expectations. Call us today for a free consultation and let us help you create the kitchen of your dreams. Whether you need a complete kitchen renovation or a custom kitchen makeover, Construction and More Las Vegas is your trusted partner for exceptional kitchen transformation services.
 Construction And More Las Vegas
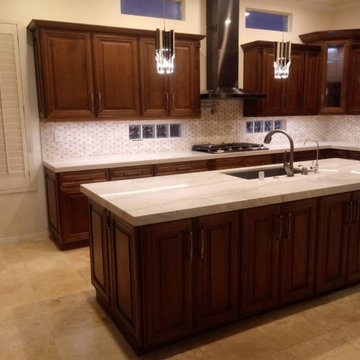
Expert Kitchen Remodel Services by Construction and More Las Vegas
At Construction and More Las Vegas, we know that the kitchen is the heart of your home. It’s where you gather with family, entertain guests, and create delicious meals. That’s why we’re dedicated to providing expert kitchen remodel services that transform your kitchen into a functional, stylish, and inviting space. Serving homeowners throughout Las Vegas and the surrounding areas, including Summerlin, Henderson, Paradise, Spring Valley, and Boulder City, we offer personalized solutions tailored to your unique needs and preferences.
Why Choose Construction and More Las Vegas for Your Kitchen Remodel?
Expertise and Experience
With years of experience in kitchen remodeling, our team possesses the knowledge and skills to handle projects of all sizes and complexities. We stay up-to-date with the latest design trends and technologies to ensure that your kitchen remodel not only meets but exceeds your expectations.
Customized Solutions
Every kitchen remodel is unique. We tailor our services to meet your specific needs and preferences, creating a custom kitchen design that reflects your personal style and complements your home’s aesthetic. From cabinets to countertops, every element is chosen with your vision in mind.
Quality Craftsmanship
Our commitment to quality craftsmanship ensures that your kitchen renovation stands the test of time. We use only the highest quality materials and employ precise techniques to deliver a finished product that is both beautiful and durable.
Comprehensive Services
Our comprehensive kitchen remodeling services cover everything from initial design and planning to final installation and finishing touches. Whether you need a full kitchen renovation or a simple makeover, we provide a seamless and stress-free experience.
Our Kitchen Remodeling Process
Initial Consultation and Planning
The process begins with a detailed consultation to understand your vision, needs, and budget. We provide expert advice on design, layout, and materials to create a plan that enhances both the functionality and aesthetics of your kitchen.
3D Design and Visualization
Using state-of-the-art 3D design software, we create realistic renderings of your proposed kitchen remodel. This allows you to visualize the space and make adjustments before construction begins, ensuring that every detail aligns with your vision.
Custom Cabinets and Storage Solutions
Custom cabinets are a cornerstone of any kitchen remodel. Our skilled craftsmen design and build cabinets that maximize storage and reflect your style. Whether you prefer modern sleek designs or traditional classic looks, we create cabinets that are both functional and beautiful.
Countertops and Backsplashes
The choice of countertops and backsplashes significantly impacts the look and feel of your kitchen. We offer a wide range of materials, including granite, quartz, and marble, to suit your style and budget. Our team helps you select the perfect combination that adds elegance and durability to your kitchen.
Lighting and Fixtures
Proper lighting is essential for both functionality and ambiance in your kitchen. We design and install lighting solutions that highlight key areas, such as task lighting, under-cabinet lighting, and ambient lighting. Our selection of fixtures includes a variety of styles to match your kitchen design.
Appliance Installation
Modern appliances are integral to a functional and efficient kitchen. We guide you in selecting high-quality, stylish options that meet your needs and complement your kitchen design. Our team ensures seamless installation for a cohesive and polished look.
Flooring and Finishes
The right flooring enhances the beauty and practicality of your kitchen. We offer a variety of flooring options, including tile, hardwood, and luxury vinyl, to suit your preferences. Our team ensures professional installation and finishes that withstand the rigors of daily use while adding elegance to your space.
Construction and Project Management
Once the design and materials are finalized, our experienced construction team takes over. We manage the entire remodeling process, from demolition to final touches, with meticulous attention to detail. Our project managers coordinate all aspects of the remodel, ensuring that the work is completed on time and within budget. We keep you informed throughout the process, addressing any concerns and ensuring your satisfaction.
Kitchen Renovation in Las Vegas and Surrounding Areas
If you’re searching for “kitchen renovation in my area,” look no further than Construction and More Las Vegas. We proudly serve Las Vegas and the surrounding communities, including Summerlin, Henderson, Paradise, Spring Valley, and Boulder City. Our local expertise and commitment to customer satisfaction make us the go-to choice for all your kitchen remodeling needs.
Why Kitchen Remodeling Matters
Enhanced Functionality
A well-designed kitchen maximizes space and improves functionality. Whether it’s adding more storage, upgrading appliances, or reconfiguring the layout, our remodels ensure that your kitchen works better for your daily routine and entertaining needs.
Increased Home Value
A kitchen remodel is one of the best investments you can make in your home. An updated, modern kitchen increases your property’s value and appeals to potential buyers if you decide to sell.
Improved Aesthetics
Our remodels transform outdated kitchens into beautiful, contemporary spaces. From luxurious finishes to modern fixtures, we create a kitchen that is both stylish and inviting.
Energy Efficiency
Upgrading to energy-efficient appliances and fixtures can reduce your utility bills and environmental footprint. We offer a range of eco-friendly options that save energy and water without compromising on performance or style.
Our Commitment to Sustainability
At Construction and More Las Vegas, we are committed to sustainable practices in our kitchen remodels. We source eco-friendly materials and prioritize energy-efficient fixtures to reduce environmental impact. Our team is dedicated to creating beautiful, functional kitchens that are also kind to the planet.
Testimonials and Case Studies
Our satisfied clients speak to the quality and reliability of our services. We have successfully completed numerous kitchen remodels, each tailored to meet the unique needs and preferences of our clients. Visit our website to read testimonials and view case studies of our work.
Contact Us Today
Ready to start your kitchen remodel? Contact Construction and More Las Vegas for expert kitchen remodeling services that combine functionality, beauty, and quality. Our experienced team is here to bring your vision to life, creating a kitchen that meets your needs and exceeds your expectations. Call us today for a free consultation and let us help you create the kitchen of your dreams. Whether you need a complete kitchen renovation or a custom kitchen makeover, Construction and More Las Vegas is your trusted partner for exceptional kitchen transformation services.
 All Surface Restoration
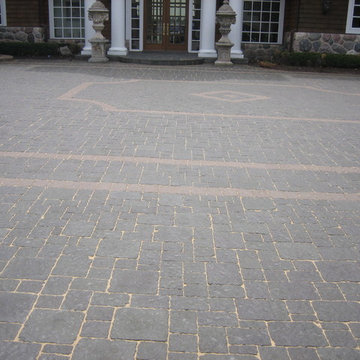
Brick Paver Driveway After Restoration Cleaning, Joint Re Sanding & Sealing With Paver Gloss Sealer. The process will help reduce any future accumulation of moss & weeds.
Find the right local pro for your project
 Construction And More Las Vegas
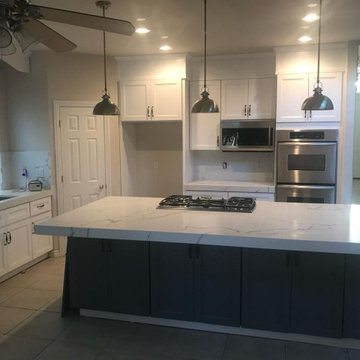
Expert Kitchen Remodel Services by Construction and More Las Vegas
At Construction and More Las Vegas, we know that the kitchen is the heart of your home. It’s where you gather with family, entertain guests, and create delicious meals. That’s why we’re dedicated to providing expert kitchen remodel services that transform your kitchen into a functional, stylish, and inviting space. Serving homeowners throughout Las Vegas and the surrounding areas, including Summerlin, Henderson, Paradise, Spring Valley, and Boulder City, we offer personalized solutions tailored to your unique needs and preferences.
Why Choose Construction and More Las Vegas for Your Kitchen Remodel?
Expertise and Experience
With years of experience in kitchen remodeling, our team possesses the knowledge and skills to handle projects of all sizes and complexities. We stay up-to-date with the latest design trends and technologies to ensure that your kitchen remodel not only meets but exceeds your expectations.
Customized Solutions
Every kitchen remodel is unique. We tailor our services to meet your specific needs and preferences, creating a custom kitchen design that reflects your personal style and complements your home’s aesthetic. From cabinets to countertops, every element is chosen with your vision in mind.
Quality Craftsmanship
Our commitment to quality craftsmanship ensures that your kitchen renovation stands the test of time. We use only the highest quality materials and employ precise techniques to deliver a finished product that is both beautiful and durable.
Comprehensive Services
Our comprehensive kitchen remodeling services cover everything from initial design and planning to final installation and finishing touches. Whether you need a full kitchen renovation or a simple makeover, we provide a seamless and stress-free experience.
Our Kitchen Remodeling Process
Initial Consultation and Planning
The process begins with a detailed consultation to understand your vision, needs, and budget. We provide expert advice on design, layout, and materials to create a plan that enhances both the functionality and aesthetics of your kitchen.
3D Design and Visualization
Using state-of-the-art 3D design software, we create realistic renderings of your proposed kitchen remodel. This allows you to visualize the space and make adjustments before construction begins, ensuring that every detail aligns with your vision.
Custom Cabinets and Storage Solutions
Custom cabinets are a cornerstone of any kitchen remodel. Our skilled craftsmen design and build cabinets that maximize storage and reflect your style. Whether you prefer modern sleek designs or traditional classic looks, we create cabinets that are both functional and beautiful.
Countertops and Backsplashes
The choice of countertops and backsplashes significantly impacts the look and feel of your kitchen. We offer a wide range of materials, including granite, quartz, and marble, to suit your style and budget. Our team helps you select the perfect combination that adds elegance and durability to your kitchen.
Lighting and Fixtures
Proper lighting is essential for both functionality and ambiance in your kitchen. We design and install lighting solutions that highlight key areas, such as task lighting, under-cabinet lighting, and ambient lighting. Our selection of fixtures includes a variety of styles to match your kitchen design.
Appliance Installation
Modern appliances are integral to a functional and efficient kitchen. We guide you in selecting high-quality, stylish options that meet your needs and complement your kitchen design. Our team ensures seamless installation for a cohesive and polished look.
Flooring and Finishes
The right flooring enhances the beauty and practicality of your kitchen. We offer a variety of flooring options, including tile, hardwood, and luxury vinyl, to suit your preferences. Our team ensures professional installation and finishes that withstand the rigors of daily use while adding elegance to your space.
Construction and Project Management
Once the design and materials are finalized, our experienced construction team takes over. We manage the entire remodeling process, from demolition to final touches, with meticulous attention to detail. Our project managers coordinate all aspects of the remodel, ensuring that the work is completed on time and within budget. We keep you informed throughout the process, addressing any concerns and ensuring your satisfaction.
Kitchen Renovation in Las Vegas and Surrounding Areas
If you’re searching for “kitchen renovation in my area,” look no further than Construction and More Las Vegas. We proudly serve Las Vegas and the surrounding communities, including Summerlin, Henderson, Paradise, Spring Valley, and Boulder City. Our local expertise and commitment to customer satisfaction make us the go-to choice for all your kitchen remodeling needs.
Why Kitchen Remodeling Matters
Enhanced Functionality
A well-designed kitchen maximizes space and improves functionality. Whether it’s adding more storage, upgrading appliances, or reconfiguring the layout, our remodels ensure that your kitchen works better for your daily routine and entertaining needs.
Increased Home Value
A kitchen remodel is one of the best investments you can make in your home. An updated, modern kitchen increases your property’s value and appeals to potential buyers if you decide to sell.
Improved Aesthetics
Our remodels transform outdated kitchens into beautiful, contemporary spaces. From luxurious finishes to modern fixtures, we create a kitchen that is both stylish and inviting.
Energy Efficiency
Upgrading to energy-efficient appliances and fixtures can reduce your utility bills and environmental footprint. We offer a range of eco-friendly options that save energy and water without compromising on performance or style.
Our Commitment to Sustainability
At Construction and More Las Vegas, we are committed to sustainable practices in our kitchen remodels. We source eco-friendly materials and prioritize energy-efficient fixtures to reduce environmental impact. Our team is dedicated to creating beautiful, functional kitchens that are also kind to the planet.
Testimonials and Case Studies
Our satisfied clients speak to the quality and reliability of our services. We have successfully completed numerous kitchen remodels, each tailored to meet the unique needs and preferences of our clients. Visit our website to read testimonials and view case studies of our work.
Contact Us Today
Ready to start your kitchen remodel? Contact Construction and More Las Vegas for expert kitchen remodeling services that combine functionality, beauty, and quality. Our experienced team is here to bring your vision to life, creating a kitchen that meets your needs and exceeds your expectations. Call us today for a free consultation and let us help you create the kitchen of your dreams. Whether you need a complete kitchen renovation or a custom kitchen makeover, Construction and More Las Vegas is your trusted partner for exceptional kitchen transformation services.
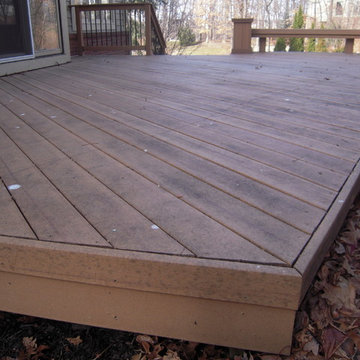 All Surface Restoration
All Surface Restoration specializes in composite deck cleaning, sealing & maintenance. Our eco-friendly "soft wash" process of cleaning restores the like new appearance by safely removing dirt & environmental stains. Metro Detroit, Michigan residents can request a free estimate at: http://surfacerestoration.com/services/composite-deck-restoration/
or call 248-475-0004
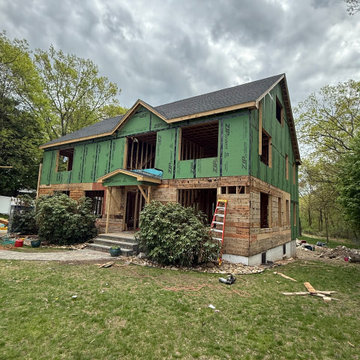
 Maize Restoration and Remodeling inc
Full Home Exterior Transformation | Maize Restoration & Remodeling
This project showcases a complete exterior transformation—from framing to a fully finished, modern home. Our team handled every step of the process, including structural work, siding, stone veneer installation, roofing, and final exterior detailing.
The goal was to create a timeless look with a balance of clean siding lines and a bold stone façade, enhancing both curb appeal and long-term durability. Every detail was carefully planned and executed to bring the homeowner’s vision to life.
At Maize Restoration & Remodeling, we focus on quality craftsmanship, clear communication, and delivering results that stand out.
Thinking about building or transforming your home? Let’s make it happen.
 Triumph Roofing
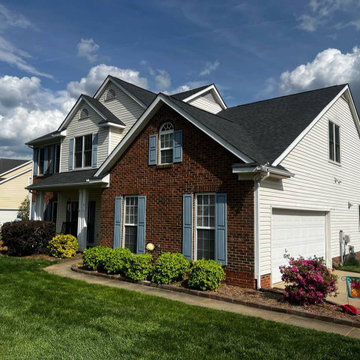
Roof and Gutter Installation in Charlotte
When Joshua Tetner contacted Triumph Roofing, he needed a comprehensive solution for his home in Charlotte. His roof and gutters had sustained significant wear over the years, and it was time for a complete upgrade. Joshua sought a professional team to handle the project efficiently while keeping the process clear and straightforward. The estimated cost for the project was $16,000.
We recommended a full roof and gutter installation to restore the functionality and appearance of his home. Joshua appreciated the detailed project breakdown provided by Yuriy, one of our skilled professionals, who worked closely with him to ensure every aspect of the installation was understood and approved.
Professionalism at Every Step
From the start, Yuriy guided Joshua through the entire process. He walked him step by step through the installation plan, costs, and payments, ensuring there were no surprises along the way. Yuriy also worked directly with Joshua’s insurance company to facilitate claims, saving time and reducing stress for the client. This level of service set the foundation for a seamless project experience.
The Installation Process
On the scheduled day, our team began by removing the old, worn-out roofing and gutter system. We installed a new, durable roofing system designed to withstand Charlotte’s weather conditions and added high-quality gutters to ensure efficient water drainage. Yuriy remained on-site often, inspecting the work and its progress, ensuring every detail met Triumph Roofing’s high standards.
Our expert crew completed the project efficiently, leaving Joshua with a home that was both protected and visually refreshed. The combination of a new roof and a state-of-the-art gutter system enhanced the home’s durability and curb appeal.
Client Feedback
Joshua shared his experience with glowing words:
"Yuriy and Triumph Roofing were awesome to work with. Yuriy was very professional and walked through everything step by step, breaking down installation and cost/payments from both sides. He worked directly with my insurance company to help facilitate the process, which was extremely helpful. The work was excellent, and Yuriy was on-site often, inspecting the work and its progress, making sure it was being done as I expected. Thanks, Yuriy, for a job more than well done!!"
This project highlights Triumph Roofing’s commitment to providing high-quality roof and gutter installation services in Charlotte. From expert craftsmanship to unmatched professionalism, we strive to exceed expectations on every project.

Sponsored
Columbus, OH

Hope Restoration & General Contracting
Columbus Design-Build, Kitchen & Bath Remodeling, Historic Renovations
 Windy City Painters
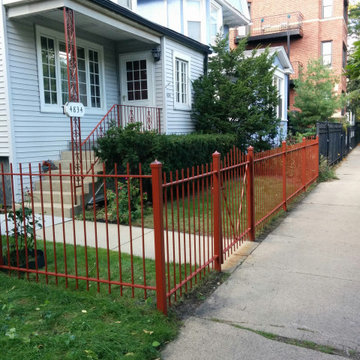
ver look at your iron fence and wonder how rust crept up so fast? For homeowners across Chicago's North Side and Near West Side, that moment of recognition often comes too late. Windy City Painters built this project guide to help you understand exactly what a professional iron fence restoration involves, what products matter, and what Chicago's climate demands from every coat of paint applied to exposed metal.
PROJECT OVERVIEW
This iron fence restoration involved a multi-unit property featuring an ornamental iron perimeter fence typical of Chicago's greystone and courtyard building streetscape. The fence presented moderate-to-severe surface rust, multiple areas of paint delamination, and two sections with deep pitting requiring needle gun descaling before any coating could be applied. The goal was full rust remediation and a durable topcoat finish built for Chicago's demanding climate. Windy City Painters completed the project in two days with zero damage to surrounding hardscape.
MATERIALS AND PRODUCTS
Ospho Rust Converter - A phosphoric acid-based treatment that chemically transforms iron oxide into iron phosphate, halting active corrosion before primer is applied. Essential on Chicago iron exposed to decades of salt air and freeze-thaw cycling.
Corroseal Rust-Inhibitive Primer - A water-based latex primer with built-in rust inhibitors, applied over converted surfaces to seal and prepare metal for topcoating.
Sherwin-Williams DTM Acrylic Coating - Direct-to-Metal formulation delivering exceptional adhesion, flexibility, and corrosion resistance. Available in satin and semi-gloss, ideal for ornamental iron fence painting across Chicago properties.
THE PROCESS
Step 1 - Mechanical Surface Preparation: Wire wheel grinding with angle grinder attachments removed all loose rust scale, failing paint, and surface contamination. Heavily pitted sections received needle gun descaling to expose clean stable metal beneath. This step determines everything. No primer or topcoat performs correctly over compromised metal, regardless of product quality. Windy City Painters treats prep as the primary investment on every iron fence project.
Step 2 - Rust Conversion: Ospho was applied liberally to all areas showing active rust. The phosphoric acid reaction was allowed to complete fully before any priming began. On severely oxidized sections, a second Ospho application ensured complete conversion. This step is non-negotiable in Chicago where freeze-thaw cycles push moisture into every surface irregularity.
Step 3 - Priming with Corroseal: Full coverage Corroseal primer coat sealed the converted surface and established adhesion for the finish coats. Corroseal's rust-inhibitive chemistry adds a secondary barrier against moisture penetration, extending the effective life of the topcoat by years in Chicago's humid lakefront environment.
Step 4 - DTM Topcoat Application: Two coats of Sherwin-Williams DTM acrylic in satin black were applied by brush to ensure full penetration into ornamental detail. DTM's flexibility accommodates the metal expansion and contraction Chicago temperatures demand, from minus-15 winters to 95-degree July afternoons. Final coverage was uniform and true to color.
CHICAGO-SPECIFIC CHALLENGES
Chicago iron faces challenges most other markets do not. Lake Michigan humidity accelerates surface oxidation year-round. Road salt from winter de-icing migrates to fence bases and lower rails. Freeze-thaw cycling cracks poorly adhered coatings within a single winter. Greystones, two-flats, and Victorian brownstones often feature original ornamental ironwork with decades of layered paint that must be assessed before any new coating is added. Windy City Painters factors all of these conditions into every iron fence estimate and material selection.
WHAT TO EXPECT LONG-TERM
A properly prepared and coated iron fence using the Ospho, Corroseal, and Sherwin-Williams DTM system should deliver 5-8 years of performance in Chicago conditions. Annual visual inspection for chips or scratches, followed by prompt spot priming, extends that timeline significantly. Full refinishing cycles become less frequent when the initial prep work is done correctly.
PRO TIPS
Tip 1 - Never skip the rust converter. Painting over active rust with even the best topcoat guarantees early failure. Ospho or a comparable phosphoric acid treatment must precede any primer on iron showing orange or brown oxidation.
Tip 2 - Assess for weld repairs before scheduling painting. If rust has eaten through the metal creating structural voids or broken sections, a welder must address those areas before painting begins. Windy City Painters identifies weld repair needs during the free estimate.
Tip 3 - Choose satin or semi-gloss finish on iron. Flat finishes on metal hold moisture and show wear faster. Satin DTM provides enough sheen to shed water while maintaining the traditional look Chicago ornamental iron demands.
Ready to restore your iron fence the right way? Visit windypainters.com to schedule your free estimate with Windy City Painters.
FAQ
Q: What does iron fence painting cost in Chicago?
A: Most residential iron fence projects range from $500 to $1,800 depending on linear footage, rust severity, and prep requirements. Windy City Painters provides free detailed on-site estimates for accurate iron fence painting cost in Chicago.
Q: How do I know if my fence needs rust conversion or just repainting?
A: Any visible orange or brown rust requires chemical conversion before priming. Windy City Painters evaluates every fence during the estimate to determine whether Ospho, mechanical prep, or weld repair is needed before coating begins.
Q: Can you paint iron in cold Chicago weather?
A: DTM coatings have lower application temperature thresholds than standard exterior paint, but we avoid application below 35 degrees Fahrenheit. Windy City Painters schedules iron fence projects for appropriate weather windows throughout the season.
Q: How long does iron fence paint last in Chicago?
A: With complete rust conversion, Corroseal priming, and Sherwin-Williams DTM topcoat, iron fence painting in Chicago lasts 5-8 years. Annual inspections and prompt touch-ups of chips extend that timeline further.
Q: Do I need a welder before an iron fence can be painted?
A: Only if rust has created structural voids or breaks in the metal. Windy City Painters assesses this during the free estimate and can coordinate with welders when needed before our painting crew begins.
Q: What is the difference between Ospho and Corroseal?
A: Ospho is a rust converter applied directly to active rust to chemically neutralize it. Corroseal is a rust-inhibitive primer applied over converted or clean metal. Windy City Painters often uses both in sequence for maximum protection on Chicago iron.
Q: How often should Chicago iron fences be inspected?
A: Annual inspection is recommended, ideally in early spring after winter salt and freeze-thaw exposure. Catching small chips and bare spots early allows simple touch-up rather than full iron fence repainting, saving significant cost.
 Stone Revivers™
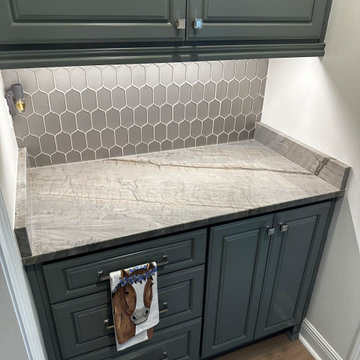
Busy coffee nook restoration, featuring deep sub-surface cleaning, surface etching repair, waterproof seam replacement, & finished with a stain-protective nano sealing process.
 Windy City Painters
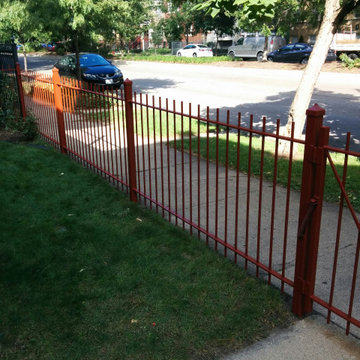
Ever notice how your iron fence looks worse every spring after another Chicago winter? That slow deterioration is not cosmetic - it is active metal failure that compounds every freeze-thaw cycle until replacement becomes the only option. Windy City Painters works with homeowners across the Chicago North Side and Near West Side to restore original iron fencing on greystones, two-flats, Victorian brownstones, and coach houses before that point is reached.
PROJECT OVERVIEW
This iron fence restoration involved a classic Chicago residential property with original wrought iron fencing showing surface rust across the majority of pickets, flaking previous paint coats, and localized deep pitting near the base rails. A structural check identified two loose pickets requiring welding before any surface preparation or coating began. Total linear footage fell in the mid-range for a standard Chicago residential lot.
MATERIALS AND PRODUCTS
Windy City Painters selected Ospho rust converter for chemically neutralizing active iron oxide before priming. Ospho reacts with rust to form a stable phosphate compound that stops corrosion progression rather than simply sealing over it. Sherwin-Williams DTM rust-inhibitive primer was applied to all bare and converted surfaces, followed by two finish coats of Rust-Oleum DTM in satin black. DTM - direct to metal - formulas provide corrosion inhibitors built into the coating matrix, which matters significantly in Chicago's climate.
THE PROCESS
Step 1 - Structural Assessment and Welding Coordination. Before any surface preparation begins, Windy City Painters inspects every picket and rail connection for structural integrity. Loose or cracked iron must be welded before coating. Paint applied over a compromised joint will fail within one season as movement continues to break the bond. On this project, two pickets were tack-welded by a coordinating welder before prep started.
Step 2 - Wire Wheel Grinding and Needle Gun Descaling. All rusted sections were ground to bare or near-bare metal using wire wheel attachments and needle gun descaling tools. This step removes loose scale, flaking previous coatings, and surface contamination that would prevent primer adhesion. Skipping mechanical prep is the single most common reason iron fence paint fails prematurely on Chicago properties.
Step 3 - Ospho Rust Converter Application. Ospho was brushed into all pitted and converted areas and allowed to cure fully. The phosphoric acid chemistry converts iron oxide into iron phosphate, arresting active rust and creating a surface that accepts primer more effectively than bare metal alone. Corroseal is an equivalent alternative used on projects with heavier pitting.
Step 4 - DTM Primer and Finish Coat Application. Sherwin-Williams DTM rust-inhibitive primer was applied across all prepared surfaces. Two topcoats of Rust-Oleum DTM in satin black followed after full primer cure. DTM finish coats add a second corrosion-inhibiting layer and provide the UV and weather resistance needed for Chicago exterior iron work.
CHICAGO-SPECIFIC CHALLENGES
Chicago iron fencing faces conditions that accelerate corrosion faster than most US markets. Lake humidity keeps metal surface moisture elevated through much of the year. Road salt splash from winter maintenance reaches fencing along parkways and sidewalk edges, introducing chlorides that aggressively attack iron. Freeze-thaw cycles expand any rust pocket that has formed under paint, lifting coatings from the inside and creating the classic bubbled-paint appearance homeowners notice every spring.
WHAT TO EXPECT LONG-TERM
With Ospho conversion, DTM primer, and two DTM finish coats properly applied over mechanically prepared surfaces, most Chicago residential iron fences hold 5-8 years before needing significant touch-up. Annual visual inspection for any chips or bare spots, with immediate touch-up using Rust-Oleum DTM, extends that window considerably.
PRO TIPS
Tip 1 - Address any bare metal spot the same season you notice it. A pinhole of exposed iron becomes a rust bubble within one Chicago winter and a flaking section by the following spring.
Tip 2 - Never paint over active rust without a converter step. Ospho or Corroseal is inexpensive insurance against a complete repaint two years early.
Tip 3 - Check picket bases at grade level every spring. Ground contact accelerates corrosion at the base faster than anywhere else on the fence. Catching it early keeps welding out of the equation.
Contact Windy City Painters at windypainters.com for a project estimate.
FAQ
Q: What does iron fence painting cost in Chicago? A: Residential iron fence painting with proper rust prep typically runs $300-$900 for standard lot footage. Windy City Painters provides itemized estimates based on linear footage, rust severity, and whether structural welding is required before surface preparation begins.
Q: Do you paint over rust or remove it first? A: Windy City Painters always addresses active rust before priming. Ospho or Corroseal rust converter chemically neutralizes iron oxide, and wire wheel grinding removes loose scale - coating over unaddressed rust guarantees early failure on Chicago iron fences.
Q: When does an iron fence need welding before painting? A: Loose pickets, cracked rails, or connections with visible movement require welding before any coating work begins. Paint cannot stabilize a structural joint - Windy City Painters coordinates with welders when this condition is identified during initial assessment.
Q: How long does iron fence paint last in Chicago? A: With mechanical prep, Ospho conversion, and Sherwin-Williams or Rust-Oleum DTM coatings, properly restored iron fencing holds 5-8 years in Chicago's freeze-thaw climate before needing significant maintenance.
Q: Is Ospho better than Corroseal for Chicago iron fences? A: Both are effective rust converters. Ospho is a liquid phosphoric acid treatment suited for moderate rust and pitting. Corroseal is a latex-based converter-primer hybrid better suited to heavier rust profiles. Windy City Painters selects based on site conditions.
Q: What finish sheen works best on iron fencing? A: Satin or semi-gloss black is the traditional and most durable choice for Chicago greystone and brownstone properties. Satin hides minor surface imperfections better than gloss while still providing adequate UV and moisture resistance.
Q: Can iron fence painting be done in spring or fall in Chicago? A: Yes. Windy City Painters schedules iron fence work in temperatures above 50 degrees Fahrenheit with low ambient humidity - spring and early fall are often ideal windows that avoid both winter cold and peak summer humidity.
 Maize Restoration and Remodeling inc
Full Home Exterior Transformation | Maize Restoration & Remodeling
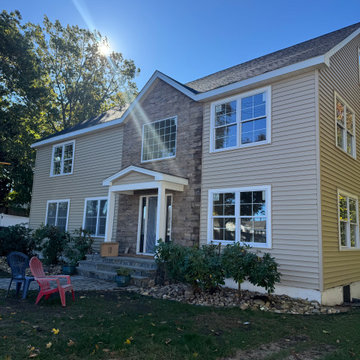
This project showcases a complete exterior transformation—from framing to a fully finished, modern home. Our team handled every step of the process, including structural work, siding, stone veneer installation, roofing, and final exterior detailing.
The goal was to create a timeless look with a balance of clean siding lines and a bold stone façade, enhancing both curb appeal and long-term durability. Every detail was carefully planned and executed to bring the homeowner’s vision to life.
At Maize Restoration & Remodeling, we focus on quality craftsmanship, clear communication, and delivering results that stand out.
Thinking about building or transforming your home? Let’s make it happen.
 CTA Design Builders, Inc.
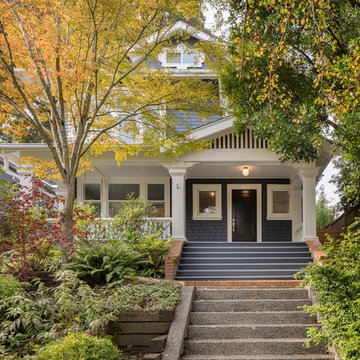
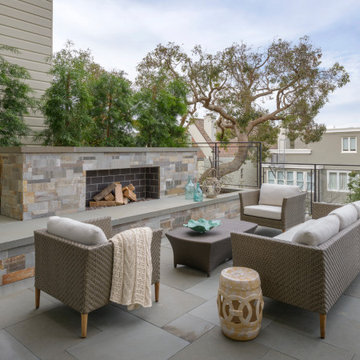
When our clients purchased this gorgeous old rambling home in a leafy Seattle neighbourhood, they knew it would be their “forever” home. However it needed a lot of work! It had been remodeled over the years in ways that were now sadly dated, so our design process began with understanding the value of what was existing and worth keeping.
We knew from the start that it was crucial to restore and respect the historic elements of the house. But the owners also wanted to introduce a very modern, clean element into the mix, creating an edgy blend of old and very new.
Photo: Ed Sozinho
 Matarozzi Pelsinger Builders
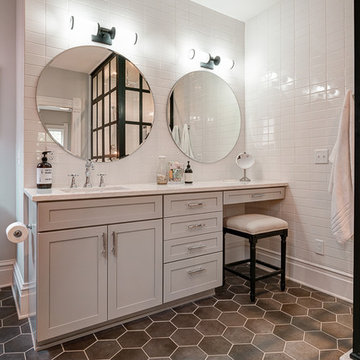
In the process of renovating this house for a multi-generational family, we restored the original Shingle Style façade with a flared lower edge that covers window bays and added a brick cladding to the lower story. On the interior, we introduced a continuous stairway that runs from the first to the fourth floors. The stairs surround a steel and glass elevator that is centered below a skylight and invites natural light down to each level. The home’s traditionally proportioned formal rooms flow naturally into more contemporary adjacent spaces that are unified through consistency of materials and trim details.
Sponsored
Columbus, OH
Hope Restoration & General Contracting
Columbus Design-Build, Kitchen & Bath Remodeling, Historic Renovations
 All Surface Restoration
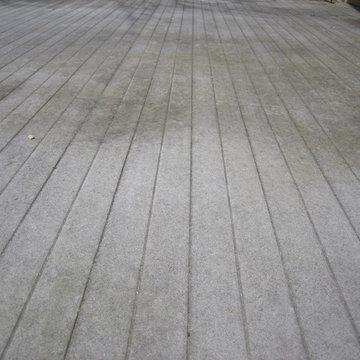
All Surface Restoration specializes in composite deck cleaning, sealing & maintenance. Our eco-friendly "soft wash" process of cleaning restores the like new appearance by safely removing dirt & environmental stains. Metro Detroit, Michigan residents can request a free estimate at: http://surfacerestoration.com/services/composite-deck-restoration/
or call 248-475-0004
 Windy City Painters
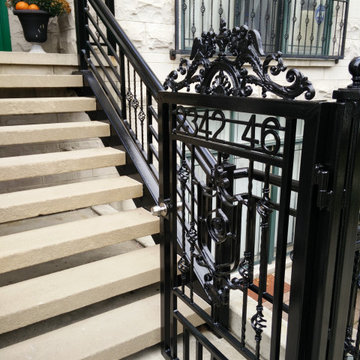
Ever notice how your iron fence looks more rust than paint after another brutal Chicago winter? That is usually the moment homeowners start searching for a painting contractor who actually understands metal - not just someone who will brush a coat of black paint over active corrosion and call it done. At Windy City Painters, iron fence restoration is one of our most requested services on the North Side and Near West Side, and for good reason. These fences are old, they are beautiful, and they deserve a proper finish system.
PROJECT OVERVIEW
This project involved a full ornamental iron fence on a North Side greystone property. The fence was original to the building - likely installed in the 1910s or 1920s - and had gone through multiple paint cycles without any rust conversion work. By the time Windy City Painters arrived, the horizontal rails showed active pitting, the vertical spindles had surface rust under lifting paint, and two corner posts had minor joint separation. The homeowner wanted the fence restored to a sharp satin black finish that would hold through multiple Chicago winters.
MATERIALS AND PRODUCTS
Ospho Rust Converter - phosphoric acid formula that chemically neutralizes iron oxide and converts it to iron phosphate, a stable paintable surface. Used on all pitted and actively corroded areas before primer application.
Rust-Oleum DTM Rust-Inhibitive Primer - direct-to-metal primer that bonds to both converted rust zones and bare metal, blocking moisture intrusion at the substrate level.
Sherwin-Williams DTM Acrylic Topcoat - flexible, moisture-resistant finish formulated to expand and contract with metal through temperature cycling. Applied in two finish coats in satin black.
For cases with deeper rust penetration, Corroseal Water-Based Rust Converter and Metal Primer is an alternative that combines conversion and priming in a single product, useful on complex ornamental profiles where two-product systems are harder to apply.
THE PROCESS
Step 1 - Mechanical Preparation. Windy City Painters wire-wheels all loose rust, flaking paint, and scale using angle grinders fitted with wire wheel attachments. On heavily pitted sections, needle gun descaling is used to reach rust in tight ornamental grooves. This step is non-negotiable. No coating bonds reliably to iron oxide, and skipping this step is the single most common reason iron fence paint fails within a year.
Step 2 - Rust Conversion. Ospho is brushed into all pitted and bare metal areas and allowed to fully react. The surface shifts from orange to a grayish-black iron phosphate layer. This stable base accepts primer without the risk of rust migrating upward through the paint film over time.
Step 3 - Primer Coat. Rust-Oleum DTM rust-inhibitive primer is applied full coverage over the entire fence surface, including areas that appeared clean but showed minor surface oxidation. DTM primer acts as a moisture barrier and mechanical adhesion layer for the finish coats.
Step 4 - Finish Coats. Two coats of Sherwin-Williams DTM acrylic topcoat are applied in satin black, with adequate dry time between coats. The DTM formula remains flexible after cure, allowing the iron to expand and contract through Chicago temperature swings without the topcoat cracking or peeling at joints.
CHICAGO-SPECIFIC CHALLENGES
Ornamental iron on Chicago greystones, two-flats, and Victorian brownstones was almost never hot-dip galvanized. It was painted from installation and has relied on continuous paint maintenance ever since. Chicago winters add specific stress: freeze-thaw cycles force water into any paint film crack, expanding it; road salt spray elevates corrosive chloride exposure; and humidity during spring thaw keeps metal surfaces wet for extended periods. This combination accelerates rust spread beneath paint films that appear intact on the surface.
WHAT TO EXPECT LONG-TERM
A properly prepped and primed iron fence finished with a DTM topcoat system should hold 5-8 years in Chicago conditions before any touch-up is warranted. Annual inspection of joints, welds, and areas near grade level will catch early moisture entry before it becomes a larger rust issue. Windy City Painters recommends scheduling touch-up earlier rather than waiting for full paint failure to protect the prep investment.
PRO TIPS
Tip 1 - Address joint separation before painting. If fence rails have separated at welds or mechanical joints, water will enter and rust will restart from inside the connection point regardless of the exterior coating. Flag any separated joints for welding before any paint system is applied.
Tip 2 - Never use latex house paint on iron fences. Standard exterior latex lacks the adhesion and flexibility for bare metal. Always use a product labeled DTM or specify a rust-inhibitive primer underneath any finish coat applied to iron.
Tip 3 - Paint in late spring or early fall. Iron fences exposed to full sun in peak summer heat can reach surface temperatures that cause solvent-based coatings to blister during application. Ideal application conditions are 50-85 degrees Fahrenheit with low humidity and no direct intense sun on the metal surface.
Learn more about iron fence painting cost in Chicago and schedule your free estimate at windypainters.com
FAQ
Q: What does iron fence painting cost in Chicago?
A: Windy City Painters typically prices residential iron fence painting at $8-$18 per linear foot. Variables include rust severity, spindle density, ornamental profile complexity, and whether rust conversion products like Ospho or Corroseal are required before priming.
Q: Can you paint over rust without grinding it off first?
A: No. Windy City Painters always performs mechanical prep before any coating. Wire wheel grinding removes loose scale and flaking paint. Rust converters handle residual oxidation chemically. Skipping this step means the new paint film will delaminate within one season.
Q: How do I know if my iron fence needs a welder before painting?
A: Windy City Painters inspects all joints and rail connections during the estimate. Rail separation, cracked welds, or sections that flex when pressed indicate structural issues that should be welded before any paint system is applied to avoid reopening at stress points.
Q: What is the difference between Ospho and Corroseal?
A: Both are rust converters. Ospho is a phosphoric acid solution applied as a separate step before priming, giving maximum control over conversion and primer selection. Corroseal combines conversion and primer in one product, which works well on complex ornamental profiles where a two-step system is harder to apply evenly.
Q: How long does the paint last on an iron fence in Chicago?
A: With full mechanical prep, rust conversion, DTM primer, and two DTM topcoats, Windy City Painters clients typically see 5-8 years of performance before touch-up is needed, even through Chicago freeze-thaw cycling and road salt exposure.
Q: Do you paint iron fences that are still structurally sound but heavily rusted on the surface?
A: Yes. Surface rust, even heavy pitting, does not necessarily indicate structural failure. Windy City Painters evaluates each fence individually. As long as the metal is sound under the rust, proper mechanical prep and a rust converter restore the surface to a paintable condition.
 Tile Doctor Ltd
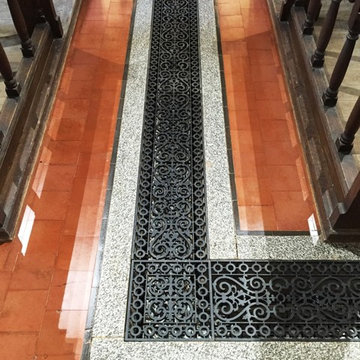
Did you know that Wantage, the town in Oxfordshire where I completed this job, is the birthplace of Alfred the Great? The town is certainly a historic area – in fact, I was contacted by the warden of a church dating back to the 12th century, who asked Tile Doctor Oxfordshire to help restore the building’s flooring, consisting of Quarry and Marble tiles.
This is an interesting mix of hard wearing and high end tiles, and while the floor was in
dire need of a deep clean, it could be restored back to looking fantastic once again.
The church has recently undergone a complete refurbishment with the help of a grant from lottery money. We were called after the builders had finished their work, to restore the floor to the finish required by the church warden.
His specification was to provide the Marble with a Matt finish and the Quarry tiles with a sheen finish. The floor was, at one point in its history, covered in carpet which had been taken up, no doubt exposing many years’ worth of muck.
My first task was to clean the floor with a diluted solution of Tile Doctor Pro-Clean, a high alkaline cleaner safe to use on tile and stone. This was left to dwell for a short period to seep into the tile, before being scrubbed in to remove the initial layers of muck. The resulting residue was promptly vacuumed away.
To tackle the tougher areas of soil buildup, I opted to use Tile Doctor Nanotech HBU which was spread over the floor and left to dwell for about 30 minutes. This product differs from most cleaners in that it uses nano-sized cleaning particles to deal with difficult to reach dirt ingrained in the stone. I then rinsed the area with water and vacuumed this up.
Due to the substantial size of the church floor I had to work in multiple sections, and so the cleaning process took three days to complete. After finishing, I left the church for a few days to allow the floor time to dry.
When I returned to the church I checked the floor with a damp meter and was satisfied that it was dry enough to seal.
First, I sealed the Marble tiles with Tile Doctor Colour Grow, which is a colour enhancing impregnating sealer suitable for use on high end stone such as Marble and Limestone. I applied two coats, leaving a few hours between coats; this brought the colour back without a high shine, as per the church warden’s request.
The next day I returned to seal the Quarry tiles, this time using Tile Doctor Seal & Go Extra which is a topical sealer specially formulated to lea e a nice sheen as requested. I applied several thin coats of the sealer to build up solid protection on the floor.
The warden was extremely pleased with the finished floor, leaving the following feedback:
“We found the Tile Doctor online and watched some of the very helpful slideshows on YouTube. The Victorian Quarry tiles in our 12th century church had been covered with carpet for many years and needed a thorough clean and polish at the end of our major restoration project. Barry was very quick to respond to our enquiry and over the course of a week he did a brilliant job on our tiles. We’re delighted with the results, just in time for our reopening service with our bishop and MP.”
Barry Woodward
Oxfordshire Tile Doctor
 Tile Doctor Ltd
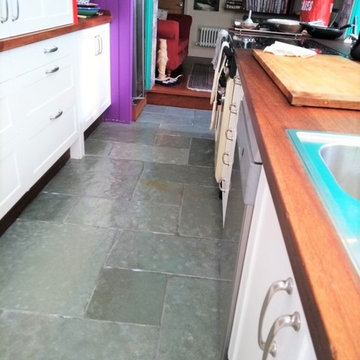
I recently helped a homeowner from my home town of Dursley who got in touch about her kitchen Flagstone floor. The problem revolved around an accident she had with raspberries which had stained the flagstones and the problem became compounded when a house hold clearing product was applied neat to clean up the mess. If you follow any of our Tile Doctor blogs, you will know that using strong household cleaning products can damage the sealer and, in this case, it had left white marks on the floor.
I called round to the property to survey the floor as was surprised to find out that the floor had been cleaned and sealed only four months prior by another company. I don’t like to comment on other people’s work, but I found the grout lines and flagstones were still badly ingrained with dirt, so it wasn’t a through job.
I completed by survey and demonstrated the process I would follow to resolve the issues on one of the flagstone tiles. She could not believe the difference I was able to make and booked me in straight away to restore the entire floor.
My first task was to protect the wooden kitchen units from splashing that can happen when cleaning the floor. Once that was done, I set about stripping the sealer from the floor and deep cleaning the tile and grout with a strong dilution of Tile Doctor Pro-Clean. Pro-Clean is a concentrated, multi-purpose high-alkaline cleaner, stripper and degreaser which is safe to use on all types of tile, stone and grout including natural stone.
Working in sections across the Kitchen and adjacent dining room I diluted one part Pro-Clean to two parts water and mopped it onto the flagstones and grout where I left it to soak in for roughly fifteen minutes. Then using a rotary floor buffer fitted with a black scrubbing pad I scrubbed the solution into the floor into the old sealer and trapped dirt came away turning the cleaning fluid black in the process. The soil was then rinsed off with water and then extracted with a powerful 3,000 watt wet and dry vacuum. This process was repeated until I was satisfied the floor was clean and I ran a stiff grout brush along the grout lines to ensure they also received a good scrub. After I was satisfied the section was clean it was rinsed thoroughly with water to neutralise the floor and remove any trace of product and then dried with the wet and dry vacuum.
The cleaning process took up the whole day, but the flagstones would need to be dry before sealing so after giving the owner an update I left the floor for two days, so it could dry out thoroughly.
On my return I tested the floor was dry in multiple places with a damp meter to ensure it was ready to be sealed. The readings showed that the wet and dry vacuum had done a good job in removing the moisture, so all was well. To seal I applied several coats of Tile Doctor Seal and Go allowing each coat to dry before applying the next however with such a large area to cover I was able to work in sections around the floor.
Seal and Go works really well on Flagstones and leaves a very appealing sheen finish, also being water based it doesn’t leave a smell as it dries.
The results were amazing, and the customer thanked me for making such a massive improvement on her floor. Before leaving I made sure to discuss after-care and to avoid the use of hash cleaning products.
Malcolm Crowther
Gloucester Tile Doctor
Sponsored
Columbus, OH
Hope Restoration & General Contracting
Columbus Design-Build, Kitchen & Bath Remodeling, Historic Renovations
 Tile Doctor Ltd
It’s not often that we get called abroad for a job, but when we do, it’s always a fantastic experience. We have done a few jobs abroad in the past, including the restoration of Terracotta tiled restaurant floor at a hotel in Addis Ababa, Ethiopia. This job was closer to home at a chateau in the town of Arcis-le-Ponsart near Reims, located in the Champagne-Ardenne region of North Eastern France. As its name suggests, the Champagne-Ardenne region is famous for its champagne.
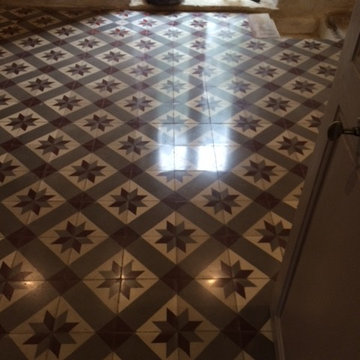
The owner of the chateau was, in fact, an English property developer. He asked us to work on two floors: a Terracotta tiled hallway, and a French Victorian tiled floor. The French style of Victorian tiles are actually made of encaustic cement rather than clay, so we were excited to have the chance to work on something a bit out of the ordinary.
It was going to be a long trip, so after packing the van with the necessary equipment and Tile Doctor products Heidi and I set off to France via the Channel Tunnel. Fortunately, we avoided any disruptions both on the way there and the way back!
On arrival at the chateau, we immediately spent two hours running tests on the two floors to determine the most effective processes. We had four days in which to complete the job, so it was essential to make sure our methods were correct before beginning to avoid any unwelcome surprises later on!
After running the tests, we set about cleaning the Victorian tiles using a combination of clean water and diamond burnishing pads. No damage was done to the tiles, and they polished up well. Following the cleaning process, we began sealing the floor using Tile Doctor Colour Grow, a sealer which helps to bring out the colour in the stone while also providing durable surface protection. We were only able to apply one coat of sealer, however, as the second coat kept smearing, preventing the shine from settling in – this was despite testing the process earlier. Nonetheless, we resolved to polish off the one coat we could apply with a fine burnishing pad. Thankfully, the results were still very good.
The Terracotta tiled hallway had no sealer, and so it had, over time, become very dirty. We cleaned the tiles using a solution of one part Tile Doctor Pro Clean to five parts clean water, in combination with a couple of black burnishing pads.
As you can see from the pictures, the combination really helped to lift out the ingrained dirt, leaving the tiles looking at their best again. The floor took three days to dry completely before we could begin the sealing process. Once the floor was dry enough to seal, we applied eight coats of Tile Doctor Seal & Go, which is suitable for use on a variety of internal, unsealed porous surfaces.
It was a long and exhausting week but the client was delighted with the results on both floors and left the following comments, he also mentioned using Tile Doctor in the future to work on the other properties he is developing.
“Thanks for yours and Heidi’s work in renovating our floors. It was also great to meet you guys and I hope you have enjoyed your visit to champagne and will come back some time. “
 Tile Doctor Ltd
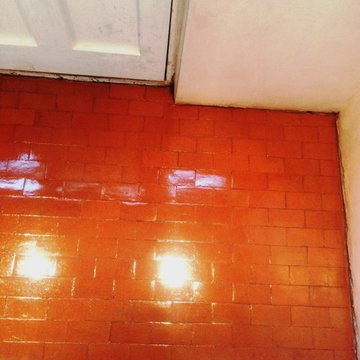
Here’s a quick job I completed in the coastal town of Eastbourne in East Sussex. While more commonly I am asked to work on entire floors, this customer was specifically interested in restoring a small doorway-like area with Quarry tiled flooring, the reason being that it had been covered for a long time by an old wardrobe and dog basket. As a result, the area had not been properly cared for, becoming very dusty and dirty. Also revealed were some unsightly splashes of white paint from previous decoration work.
The customer was keen to finally give this area of the floor the attention it needed, and so asked me to come in to provide a thorough clean and lay down some fresh sealer.
My first task was actually to relocate the old wardrobe and dog basket to the garage to get the area ready for cleaning. Then, to begin the cleaning process, I stripped away any old existing sealer and the white paint splashes by using Tile Doctor Remove & Go stripper in combination with a wire brush. Remove & Go is a versatile product that can also be used to break down glues and other adhesives.
I then washed the area down with water and promptly vacuumed up any moisture, before sitting down with a heat gun for an hour to dry the tiles. Usually a floor should be left for up to 48 hours to dry completely before sealing, but in this case the area was so small that I was able to dry it in the space of an hour.
Nonetheless, I opted to install a fan and leave the floor for an extra hour over lunch to ensure any excess moisture was removed. This is really important to do before sealing, as any remaining moisture can cloud the sealer and damage its performance.
To complete the restoration, I sealed the tiles using nine coats of the topical, water-based sealer Seal & Go, which is suitable for building up surface protection against dirt and stains on internal unsealed porous surfaces such as Victorian, Quarry and Sandstone tiles. The Quarry tiles were quite porous, which is not uncommon for Quarry Tiles and really soaked up the sealer.
As the photographs show, the results of the restoration were very good, with smiles all round – including from the slightly bemused family dog!
Rupert Mcleod
East Sussex Tile Doctor
 Tile Doctor Ltd
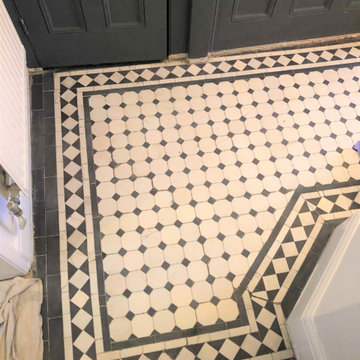
The owners of this Edwardian property in Finchley had purchased it a couple of years prior and since then had slowly been renovating it to restore its original character. The project was almost complete and now attention had turned to the tiled floor. The tiles were in quite a state and I was asked to work our Tile Doctor magic and bring it back to its original condition.
When they moved in the hallway had been covered with carpet which gave the tiles underneath some protection. Unfortunately, however the carpet has been secured with carpet grippers that had been glued to the tiles around the edges. There were also paint splashes on the surface that would need dealing with. On top of that the floor had a few missing tiles that had been back filled by cement to provide a level base for the carpet, the client wanted like them replaced if possible.
After surveying the floor, I explained what could be done and ever completed a small test clean to demonstrate how the tiles would look once deep cleaned. I was confident on being able to source very similar reclaimed tiles so replacing the missing should not be a problem. The client was very happy with the initial test result and my quotation so booked me in to restore the floor.
On my return I started by applying Tile Doctor Remove and Go to soften up the glue which allowed it to be carefully peeled off the tiles with scrappers. Once all the carpet adhesive was gone, I worked a strong dilution of Tile Doctor Remove and Go into the tiles using a black pad to work the cleaning solution deeper into the tiles. A wet vacuum was used to remove the slurry created, and I followed this by giving the tiles an extra clean using a 200-grit diamond burnishing pad lubricated with water.
The last step in the cleaning process was to give the floor an acid rinse using Tile Doctor Grout Clean-up, I did this for several reasons, first it removes old grout smears from the surface of the tile and second it neutralised any efflorescent salts lying dormant in the floor. This can be quite a problem for old floors which don’t have the benefit of a protective damp proof membrane under the floor. The floor was given a final rinse with water which was again extracted with a wet vacuum.
I then set about lifting all the loose tiles (approximately ten) and carefully removing the concrete infills. I had previously managed to source replacements for these holes from original features. Unfortunately, they didn’t sell the correct sized octagon tiles, so I had bought 150mm square tiles and then needed to cut them on site to get the right size.
After cutting and fixing the tiles I fixed them in place and regrouted the rest of the floor.
I then left the floor to dry out overnight and returned in the morning. Before applying a sealer, I took several moisture readings with the damp meter to make sure the tiles were dry enough to take the sealer.
I was able to confirm the floor was dry, so went ahead and applied three coats of Tile Doctor Colour Grow sealant. Colour Grow is an impregnating sealer that is fully breathable sealer which is important when it comes to old floors like these that don’t have a damp proof membrane installed.
My client was very happy with the renovated floor and for aftercare I left them with a bottle of Tile Doctor Neutral Tile Cleaner and gave advice on how best to clean the floor going forward.
Andrew Newstead
North London Tile Doctor
18