
Search results for "Restoration process" in Home Design Ideas
 AHD&Co
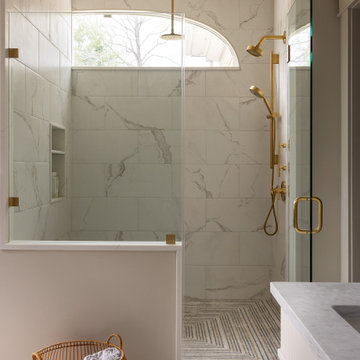
This serene bathroom features a sleek, custom-patterned marble floor that beautifully complements the subtle color palette. The floor's unique design flows gracefully into the marble-tiled shower, creating a cohesive and tranquil space. Gold fixtures add a touch of luxury, enhancing the bathroom's elegant aesthetic. This thoughtfully designed space combines style and function, providing a calm, spa-like atmosphere.

 Matarozzi Pelsinger Builders
In the process of renovating this house for a multi-generational family, we restored the original Shingle Style façade with a flared lower edge that covers window bays and added a brick cladding to the lower story. On the interior, we introduced a continuous stairway that runs from the first to the fourth floors. The stairs surround a steel and glass elevator that is centered below a skylight and invites natural light down to each level. The home’s traditionally proportioned formal rooms flow naturally into more contemporary adjacent spaces that are unified through consistency of materials and trim details.
 Brownsmith Restoration
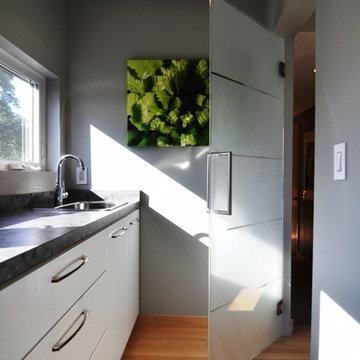
When we were first contacted about doing the addition, our client’s main objective was to add a master suite with sleek design and plenty of storage. Throughout the process the design was refined to include a dramatic two story vaulted great room that floods the home with natural light.This project is a great example of how to incorporate Contemporary Design in a traditional home. Many complex problems were solved, and the end result yielded a beautiful contemporary home that blends into its traditional neighborhood.
Find the right local pro for your project
 Home Restoration Services, Inc.
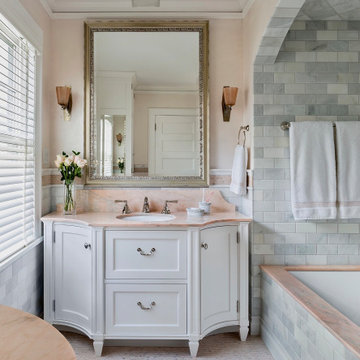
This high-end primary bath remodel incorporated rare pink marble into all aspects of the project. Fixture locations did not change in the design, exterior walls were insulated. Basic architectural components like the shower arch were retained in this superb design by Liz Schupanitz with masterful tile installation by Hohn & Hohn. Cabinets by Frost Cabinets. Photos by Andrea Rugg and Greg Schmidt.
 Hilsinger Woodworking and Design
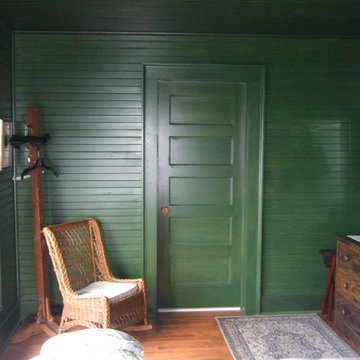
Custom Built Restoration Woodwork
Hilsinger Woodworking and Design
Inspiration for a craftsman bedroom remodel in New York
Inspiration for a craftsman bedroom remodel in New York
 Floor Mania
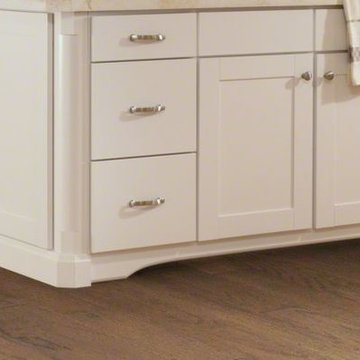
American Restoration combines two of the most expensive and high-end trends in the hardwood flooring industry. We are excited because our product offers these really pricey trends in an affordable floor! Elegantly rustic, reclaimed-wood styling with very distinctive markings. This style, paired with a rich oil-stained finish look, creates a stunningly beautiful floor and is reminiscent of old worn barnwood.
One of the hottest visuals and environmental trends is utilizing reclaimed wood. Much of this wood is resourced from the beautiful old barns you see dotting the rural countryside. These barns are quickly disappearing. To use this product for flooring can cost upward of $50 to $100 per square foot. We have created the look of this authentic reclaimed character in a running line product!
The second hottest trend – an oil-rubbed finish – has been one of the most popular hardwood flooring choices in Europe and has now found its way to the states. An oilrubbed
finish is a more natural way to finish a wood floor, and it creates a very low gloss visual that really accentuates the grain of the wood. This is a sand and finish technique
that is not only a very laborious and time consuming process, but it is not very durable. A traditional oil-rubbed finish requires reapplication several times a year. Thanks to the advantages of Shaw’s hardwood finish – ScufResist Platinum – we can create this elegant look without all the maintenance.
We have combined these two looks to bring you a floor that presents the authentic, skip-sawn look of reclaimed wood – rich with history and human touch, but with a fresh
sophistication for today’s design-aware lifestyles. A floor that expresses a sense of caring and character. A floor with great substance and style. A floor with a vintage look combined with state-of-the-art technology. A floor that can live in any setting! And of course... it is made right here.

 PK Painting and Contracting LLC
Common Mistakes in Exterior Door Refinishing
Refinishing an exterior wood door is an excellent way to prolong it’s lifespan while improving its appearance. However, there are a few common mistakes that can render a refinishing ineffective, or even damage your door. Learn what to avoid while working on your exterior wood door to ensure a successful refinishing.
1. Poor Sanding
Sanding against the grain or leaving power sander marks can leave unsightly marks on the surface that will appear in the finished product. Pay attention to how you’re sanding, and use finer grit sandpaper to eliminate any marks.
2. Scratching the Glass
Leaving glass unprotected during the sanding process can result in accidentally scratching the surface. These marks are difficult to remove, and can be avoided by simply protecting the glass before you sand.
3. Bad Varnish
A varnish could be bad for a variety of reasons; bad prep work, mixing incompatible products, etc. Make sure you know the product you are working with, and do not cut corners.
4. Sanding Through the Veneer
Many exterior doors are constructed from a solid core with a decorative veneer applied on top. Sanding too far into the veneer can show unsightly layers and seriously reduce the lifespan of your door. Know how your door is made, and don’t sand too much.

Sponsored
Columbus, OH

Hope Restoration & General Contracting
Columbus Design-Build, Kitchen & Bath Remodeling, Historic Renovations

 Realty Restoration, LLC
After photo - All surfaces of the back patio were replaced. The covered patio includes an outdoor kitchen, limestone tile, and a stained tongue & groove ceiling. The decking is Azek Vintage Coastline, installed over Dekorator composite sleepers used to create a completely level base that would allow for water flow but also hold up to any moisture. Each deck board
was heated and curved by hand, a three-man process, as the deflection curve of each was slightly different than its adjacent board. Heatcon blankets were used to heat the boards; they had to be custom-made to
fit a full 12’ board

 Pinnacle Windows and Restoration
Energy Efficient Replacement Windows for your Denver area home!
Purchasing replacement windows is a significant investment. At Pinnacle, we offer a huge selection of vinyl windows, wood windows and fiberglass composite windows from some of America’s top manufacturers.
We believe in educating and informing our customers about the different window options available. There are many frame type and window operation choices, colors and glass types for a homeowner to choose from, and we are here to guide you through the process.

 White Oak Construction & Restoration
This photo was taken during the final phases of the construction process for this custom home build.
Inspiration for a craftsman concrete fiberboard house exterior remodel
Inspiration for a craftsman concrete fiberboard house exterior remodel

 Deskins Group LLC
This home originally featured a faux Spanish‑tile metal roof installed over the existing cedar shake roof back in the mid‑1990s — a common shortcut at the time that unfortunately led to leaks in multiple areas. By the time we inspected it, water intrusion had compromised both roof layers and sections of the decking beneath.
At Deskins Siding & Exteriors, we took the home down to the bones and rebuilt it the right way.
We removed both roofs, re‑decked the entire structure, and installed a GAF Timberline HDZ roof in Charcoal, giving the home a clean, modern look with industry‑leading protection against Houston’s heat, humidity, and storms.
During the process, we also repaired rotten siding and fascia, restoring structural integrity and curb appeal. Because the original metal roof had extended up the walls, we finished the project by repainting the entire exterior with Sherwin‑Williams Emerald Rain Refresh, a premium coating designed to resist dirt, mildew, and UV damage — perfect for Houston’s climate.
The result: a watertight, energy‑efficient, and visually striking home that blends timeless design with modern performance.
 Deskins Group LLC
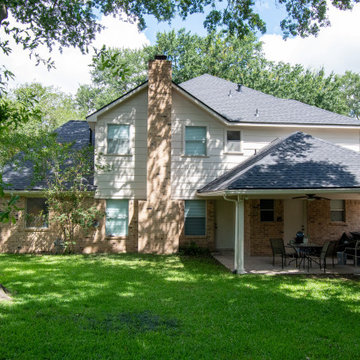
This home originally featured a faux Spanish‑tile metal roof installed over the existing cedar shake roof back in the mid‑1990s — a common shortcut at the time that unfortunately led to leaks in multiple areas. By the time we inspected it, water intrusion had compromised both roof layers and sections of the decking beneath.
At Deskins Siding & Exteriors, we took the home down to the bones and rebuilt it the right way.
We removed both roofs, re‑decked the entire structure, and installed a GAF Timberline HDZ roof in Charcoal, giving the home a clean, modern look with industry‑leading protection against Houston’s heat, humidity, and storms.
During the process, we also repaired rotten siding and fascia, restoring structural integrity and curb appeal. Because the original metal roof had extended up the walls, we finished the project by repainting the entire exterior with Sherwin‑Williams Emerald Rain Refresh, a premium coating designed to resist dirt, mildew, and UV damage — perfect for Houston’s climate.
The result: a watertight, energy‑efficient, and visually striking home that blends timeless design with modern performance.
 Deskins Group LLC
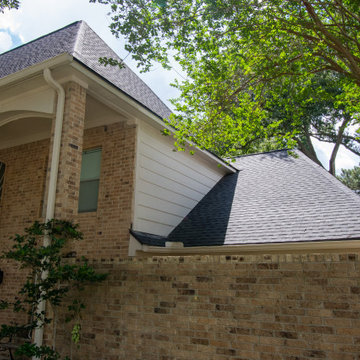
This home originally featured a faux Spanish‑tile metal roof installed over the existing cedar shake roof back in the mid‑1990s — a common shortcut at the time that unfortunately led to leaks in multiple areas. By the time we inspected it, water intrusion had compromised both roof layers and sections of the decking beneath.
At Deskins Siding & Exteriors, we took the home down to the bones and rebuilt it the right way.
We removed both roofs, re‑decked the entire structure, and installed a GAF Timberline HDZ roof in Charcoal, giving the home a clean, modern look with industry‑leading protection against Houston’s heat, humidity, and storms.
During the process, we also repaired rotten siding and fascia, restoring structural integrity and curb appeal. Because the original metal roof had extended up the walls, we finished the project by repainting the entire exterior with Sherwin‑Williams Emerald Rain Refresh, a premium coating designed to resist dirt, mildew, and UV damage — perfect for Houston’s climate.
The result: a watertight, energy‑efficient, and visually striking home that blends timeless design with modern performance.
Sponsored
Galena, OH

Buckeye Restoration & Remodeling Inc.
Central Ohio's Premier Home Remodelers Since 1996
 Blue Mountain Design Build
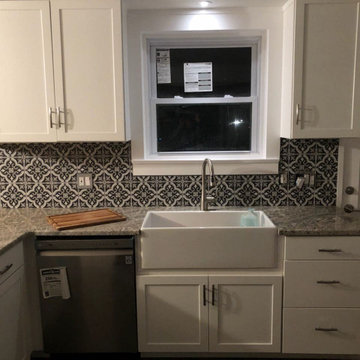
The process of a kitchen going back together , we installed the cabinetry for the sink first and put in a template top ( old door we cut and installed sink in ) so the customer could still use it.
Back wall modern farm kitchen with butcher block. Refinished cast iron radiator with white finished and painted background black
 Tile Doctor Ltd
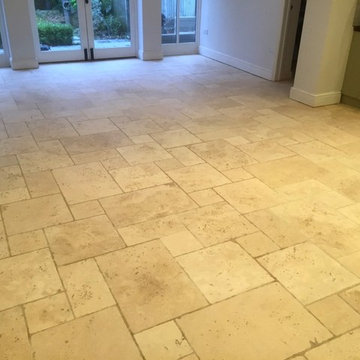
Recently I visited a client in the town of Maidenhead, Berkshire who needed assistance restoring a very dirty pitted Limestone tiled floor which had suffered over the years due to poor maintenance choices. The pressures of a busy family life had, understandably, prevented my client from undertaking regular cleaning and the products and methods used for cleaning were by and large unsuitable for this type of natural stone. In addition, the pits in the tiles had been filled with grout; however, they were not flush to the tile and therefore a large amount of soil had collected in the pockets. The result was a Limestone tiled floor in considerably poor condition that was increasingly difficult to keep clean.
My client had tried and tried to get the floor clean, using methods such as scrubbing with toothbrushes, steam cleaners, and mopping – but they weren’t getting anywhere! I explained to my client that steaming is, in fact, one of the worst cleaning systems to use on natural stone floors. Steam not only damages sealers, it also thins out greasy soils. Some of these soils are absorbed onto the domestic microfiber pads, however a lot of the soil becomes thinner allowing it to penetrate deeper into the pours of the stone and grout. This in itself starts the vicious circle to rapidly soiled and dirty tiles and grout. This happens because the grease soils magnetise dirt!
My first task in the cleaning process was to mix a strong solution of Tile Doctor Pro-Clean, which is a high alkaline cleaner. This solution was applied liberally across the entire Limestone tiled floor and grout. It was allowed to dwell for 30-40 minutes, giving it time to seep into the stone to get underneath and lift the ingrained dirt to the surface. During this time, I scrubbed the grout lines using a specialist stiff grout brush. The Limestone tiles were then scrubbed with heavy mechanical rotary agitation machine.
I then gave the floor a thorough rinse using the latest in cleaning and capture technology, which involves firing hot water at high pressure in a spinning motion across the floor, in effect blasting away the ingrained soils from the grout and pitting in the limestone. The high pressure is delivered from a system mounted inside my van which also contains waste tanks to capture the extracted soiled water.
After being allowed to dry thoroughly for 24 hours, I returned to seal the floor with Tile Doctor Colour Grow which would have brought out the deep colours in the stone, however after discussing the options with the client it became clear that they wanted to keep the floor looking as light as possible so Tile Doctor Ultra Seal was applied. Ultra Seal is a natural look impregnating sealer that soaks into the pores of the stone and protects it from within.
The floor now looks fantastic and the sealer should ensure it remains looking that way for some time to come and before leaving I made sure to provide my client with some professional maintenance advice.
Tim Colenutt
Berkshire Tile Doctor
 Tile Doctor Ltd
I thought I would share this case history of a Yellow and Black Victorian Tiled floor that we worked on at a large house in Lancaster last year. It’s a great example of the typical problems we face with old Victorian floors, especially around door thresholds where the transition between the different foundation invariable cause problems.
I didn’t know the full history of the floor, but it was now in quite a state and recent renovation work had left the floor unstable with loose and cracked tiles. The tiles needed to be removed and then the damaged subfloor carefully scraped out and replaced. Once that was done the floor would need relaying and then cleaned and sealed so everything would blend in.
After visiting the property and providing a quotation we were given the go ahead and agreed a date to do the work.
We returned on the agreed date and set about carefully removing the loose and cracked Victorian tiles and put them aside for later use. Some would need replacing however this would not present a problem and they are still widely available, and I have several contacts I can turn to for this.
Once this was done and the subfloor exposed and cleaned up, I used self-levelling cement to bring the floor level up and in-line with the existing. This now needed to set hard, so the rest of the day was spent cleaning up the tiles we removed earlier with Tile Doctor Grout Clean-up and Pro-clean. Our goal is to reuse as many of the original tiles as possible to preserve the heritage of the floor.
The next day with the new subfloor set it was ready for tiling. This involves laying out the tiles first without adhesive carefully cutting and fitting new tiles as needed to maintain the overall pattern of the floor. Once I was happy the tiles were moved to a board and then fitted with fresh adhesive.
I came back on day three with the aim of cleaning the floor so it could be sealed however whilst inspecting my new tiling I was disappointed to discover some were not as level as I had hoped. I had noticed the replacement tiles were not the same thickness as the originals the previous day but I had worked around this by using different levels of adhesive, clearly this plan was not as effective as I had hoped for.
To counter this problem, I used a set of 50-Grit, 100-grit and then 200-grit diamond pads in sequence to mill the floor flat and remove the lippage between them. This is done with water to lubricate the process and a weighted floor buffer. The pads generate a lot of slurry and so you need to rinse this off with more water and extract all the soil after each pad.
I followed this up with various Diamond burnishing pads of increasingly finer grits across the whole floor until we achieved a consistent finish and had the added benefit of getting the whole floor clean. More water is used to rinse the tiles after burnishing and the soil extracted with a wet vacuum as before. Once done and inspected the floor was left to dry off overnight.
Tile Doctor Colour Grow was applied to enhance the appearance of the tiles and protect them going forward. This product copes well with damp which can always be a problem with old floors like this one with no damp proof membrane present.
The floor looked amazing when finished and our attention to detail had really paid off, in fact you simply could not tell we had done any tiling work or replaced any tiles. For aftercare I recommend the use of Tile Doctor Neutral Cleaner which is designed for the regular cleaning of sealed tiles.
Russell Taylor
Lancashire Tile Doctor
 Tile Doctor Ltd
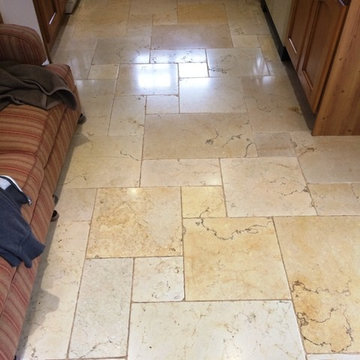
Polished stone floors will lose their shine over time depending on the amount of wear and cleaning products used and this Travertine Tiled Floor in Lower Woodrow had basically experienced this problem. The solution is to burnish the floor with diamond encrusted pads, a process that will remove any dirt and bring back the polish.
We started by smothering the floor is a mild dilution of Tile Doctor Pro-Clean and left it to dwell for ten minutes. We then scrubbed the grout lines using a stiff grout brush to get the grout clean. Next we fitted a course diamond burnishing pad to a rotary machine and slowly burnished each and every tile. We then extracted the slurry using a wet vacuum and rinsed. We continued this procedure with the medium, fine and very fine pads rinsing in-between until the shine had been restored. We then left the floor overnight to dry.
Upon our return we sealed the floor using Tile Doctor Colour Grow which is an impregnating sealer that soaks into he pores of the stone protecting it from within and enhancing the natural colours in the stone. Once the seal had dried I used a white buffing pad attached to the rotary machine and buffed the travertine to a nice shine.
Stuart Ford
Wiltshire Tile Doctor

Sponsored
Columbus, OH
Hope Restoration & General Contracting
Columbus Design-Build, Kitchen & Bath Remodeling, Historic Renovations
 Tile Doctor Ltd
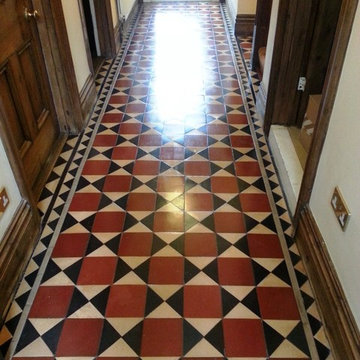
Recently I was contacted by a man in the town of Bedford who was worried that he had damaged his Victorian tiled hallway as a result of dragging a piano across the floor. I went round to the property to get a better look at the problem and, on closer inspection, realised that the tiles were actually fine; however, the piano had torn through the old surface seal.
The 150-year old tiles, dating back – as the name suggests – to the reign of Queen Victoria, had been poorly sealed and additionally had not been maintained correctly with the appropriate cleaning products. I was commissioned to remove the old sealer, clean and re-seal in order to restore this fantastic floor to its former glory.
My first task was to mix a solution of Tile Doctor Pro-Clean and water, which was then spread across the floor. Pro-Clean is a high alkaline cleaner which also contains stripping properties and this helped to break down the old, damaged sealer. The solution was left to dwell for approximately 20 minutes, giving it time to seep into the stone to get underneath, and lift out, any ingrained dirt. Pro-Clean was worked into the tiles using a heavy low speed rotary machine fitted with a black pad.
Once cleaned and stripped, we rinsed the floor using plain, clean water to neutralise the high alkaline Pro-Clean and the removed the resulting slurry using a wet-vac machine.
At this point I noticed that the white/magnolia tiles were particularly well worn and still very dirty and in need of further cleaning. Around this time Tile Doctor had also been discussing the successful use of Burnishing Pads (normally used on polished stone) on Victorian Tiles so I hand burnished the most stained tiles with a small 6 inch diamond encrusted burnishing pad with a little water to help lubricate the process. Following this, I rinsed the entire floor once again.
After leaving the floor to dry for four days, I returned to the house to seal the tiles opting to apply a single coat of Tile Doctor Colour Grow impregnating sealer first followed up with four coats of Tile Doctor Seal & Go. This combination of sealers provides a durable internal and surface stain protection whilst lifting the colours and adding a nice subtle sheen finish.
Once dried and cured, the floor was buffed using micro-fibre clothes to further enhance the appearance of the tiles further. My client was very pleased with the results, and couldn’t believe it was possible to get a floor that was so old appear brand new! The floor will dull with wear so I advised my client on the benefits of a regular maintenance plan going forward to ensure this great flooring feature remains in top condition.
Andrew Evans
Bedfordshire Tile Doctor
 Tile Doctor Ltd
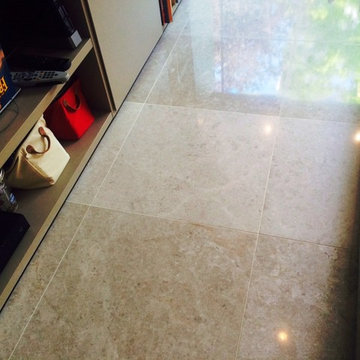
I was recently engaged to refresh the Limestone tiled floor at a house in St. John’s Wood, which is a very affluent area and apparently has the 5th most expensive postcode in London so as you can imagine this was a very expensive floor. The client had requested an improvement condition of the Limestone tiles in the living room and a thorough clean, polishing and seal was required. Over time, the floor in this busy living room – which was also used as a play area for young children – had become dirty and certainly worse for wear with all the use it had been getting. So, I set about my work to get this floor back to looking its best.
Cleaning and burnishing a Limestone floor
My initial task before beginning the cleaning process was to remove any furniture (as well as toys) from the room so I would have a clear area to work in. I then applied a layer of Tile Doctor Pro-Clean cleaner, diluted with water, to the floor. Pro-Clean is also suitable for use on other natural stone floors such as Slate, Granite and Travertine.
After leaving the solution to dwell for a period of a few minutes, I began to scrub the floor with a stiff hand brush. Whilst helping to remove a lot of the built up dirt on the surface of the tiles, the product also stripped off the old sealer and polish. Following this, I paid special attention to the dirty grout lines, cleaning them with Tile Doctor Oxy-Pro, a powerful, high-alkaline cleaner.
After completing the cleaning, I rinsed the floor with clean water to remove any excess cleaning products. I then began to burnish the floor using Tile Doctor Diamond encrusted burnishing pads. This was done in four steps, as I used four different pads (coarse, medium, fine and very fine) rinsing the floor with water between each pad. I would recommend using this setup of four pads for restoring the appearance of polished stone floors; you starting with a coarse pad and the gradually work your way up to the very fine pad achieving a high polish finish in the process. I finished of the process with a quick rinse and a buffing pad to give the floor a final polish before I commenced the sealing.
Sealing a Limestone floor
My choice of sealer was Tile Doctor Colour Grow, which is specifically designed to not only provide durable surface protection, but also to intensify the colour of the tiles. The sealer penetrates deep into the pores of the stone, providing water resistance and long-term protection from ingrained dirt and stains. As you can see from the photos, the sealer really helped to accentuate the fantastic natural colours in the Limestone.
My client was very pleased with the final result, and was amazed by how quickly I had been able to improve the state of her floor which, with a colourful and shiny finish, has really brightened up the living room.
 Tile Doctor Ltd
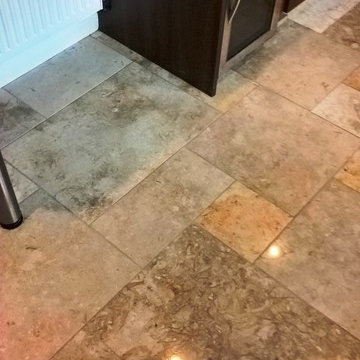
The photographs below are of a Polished limestone floor that had been installed in the Kitchen of a house in Cheltenham approximately eight years prior. The polish and sealer had worn off over that time allowing dirt to become ingrained into the pores of the stone making it difficult to clean.
This is a common problem with all types of porous stone and tile which need to be sealed to maintain their appearance. Sealers do wear down over time with use however and need to be maintained, this is why Tile Doctor have created a maintenance program whereby we pop by every 12 months to give the floor a light clean and top-up the sealer, it only takes a few hours, but it keeps your sealer in good condition.
Cheltenham by the way is a lovely town situated on the edge of the Cotswolds which is an area of Outstanding Natural Beauty. It has a racecourse and is well known for the mineral springs which were discovered here in 1716.
My first job was to protect the wooden kitchen units from any splashes by covering them some cotton sheets. Next, I set about restoring the Limestone’s appearance using a set of Burnishing Pads which is a form of polishing which involves the sequential application of four diamond encrusted pads of different grit levels.
The first pad applied is a Coarse 400 grit pad which is applied to the floor with a buffing machine and lubricated with water. This process grinds away the top layer of dirt and staining from the stone, along with any old sealer, the floor is then rinsed to remove the soil that is generated. I then move through the system, applying the Medium and then Fine pads using less and less water as you go but rinsing in-between and extracting the water with a wet-vac machine.
Once I was happy with the stone I scrubbed the grout lines to remove any soiling that the pads had failed to pick up. The floor was then given a final rinse and the wet vacuum used to extract as much moisture as possible. The floor was then left to dry out completely overnight.
The next day I gave the floor a polish with the Very Fine 3,000 grit diamond burnishing pad, this is applied using a technique we call a “spray burnish” due to the fact that very little water is used during its application.
The next step was to seal the stone using for which I used Tile Doctor Colour Grow which is an impregnating sealer that protects the stone from within by occupying its pores. Colour Grow also has the added benefit of intensifying the natural colours in the stone. The floor was then left to dry for an hour before I gave it one final dry polish using the Very Fine burnishing pad.
My customer was very happy with the final result and made the comment that they thought the floor looked brand new.
Malcolm Crowther
Gloucester Tile Doctor
21