
Search results for "Restoration process" in Home Design Ideas

 All Surface Restoration
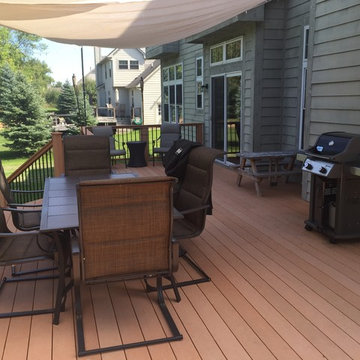
Trex deck after pressure cleaning using a "soft wash" process which eliminates stubborn stains like mold, mildew & dirt from the pores of the trex surface.
 Gables and Pillows
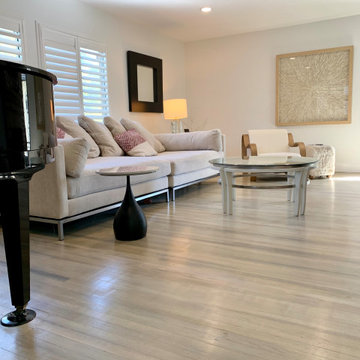
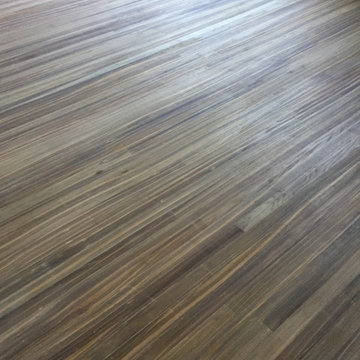
Completed 2" hardwood floor restoration featuring a modern white-wash finish and low-sheen protective topcoat. This project highlights a dramatic transformation of a vintage 2-inch narrow plank hardwood floor. As you can see in the progress photos, the original wood was hidden under decades of wear, heavy pet stains, and stubborn old subfloor adhesive.Many homeowners assume floors in this condition need to be torn out and replaced. Instead, our team completely salvaged the original wood through a meticulous deep-sanding process, specialized stain-remediation techniques, and precision floor leveling.To match the client's bright, modern living room aesthetic, we applied a custom translucent white/gray wash finish that mutes the heavy amber tones while beautifully highlighting the natural grain of the wood. We finished the floor with a premium, high-durability matte protective coat to ensure long-lasting protection against daily traffic.Services Provided: Heavy floor sanding, deep stain removal, adhesive scraping, custom wood staining, and premium matte top-coating.
Find the right local pro for your project
 DiSunno Architecture, P.C.
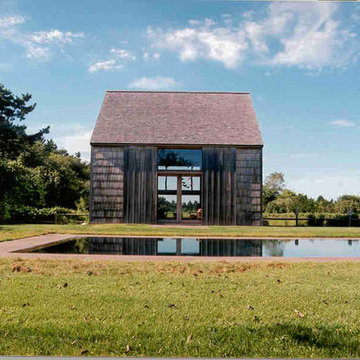
In early 1970's art collector Adelaide de Menil and her anthropologist husband Ted Edmund Carpenter bought a one hundred acre potato farm on the east end of Long Island in East Hampton.
In the years that followed the couple began purchasing historically significant homes and had them moved to their property on Further Lane where they began the process of lovingly restoring them with the help of DiSunno Architecture, P.C. In total they purchased and remodeled 13 buildings. Once barns and farm houses, the buildings were transformed into exquisite homes with a minimalist sensibilities, each connecting in their own way to the magnificent landscape in this seaside community beside the dunes.
When the couple decided to sell the property in 2005 the question on what to do with homes arose as the new owners were not intending on keeping the homes in tact. A perfect solution presented itself and the couple returned the buildings to the community by having them moved to Town land several miles away and are now currently being used as the Town Hall primary offices for the Supervisor as well as providing an appropriately grand space for meetings and gala's of the East Hampton community.
Photographs by Christopher DiSunno.
 Tom McCloskey Painting and Restoration Inc.
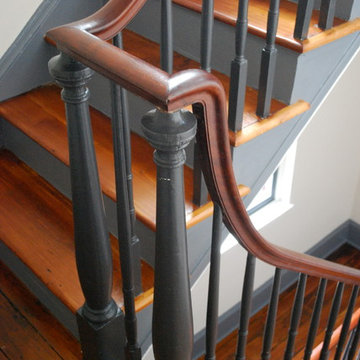
Restored Mahogany handrail
Inspiration for an eclectic staircase remodel in Philadelphia
Inspiration for an eclectic staircase remodel in Philadelphia

 Triumph Roofing
Shingles Roof Repairs in Charlotte
Eternity Matters, a nonprofit organization based in Charlotte, contacted Triumph Roofing with concerns about their roof. Years of wear and tear had caused multiple shingles to crack, curl, and detach, leading to water seepage in certain areas. They needed a reliable roofing solution to protect their building and ensure it remained a safe space for their community activities.
After a thorough inspection, we determined that a comprehensive Shingles Roof Repairs project would address the damage. The estimated cost of $6,500 fit their budget, providing a cost-effective yet high-quality solution. Our team quickly developed a plan to repair the damaged areas and restore the integrity of the roof.
The Repair Process
On the scheduled repair day, our team arrived early to begin the work. First, we carefully removed the damaged shingles, ensuring no debris was left behind. Next, we replaced the underlayment to provide added protection and prevent future leaks. Finally, we installed new, high-quality shingles to match the existing roof, restoring its uniform appearance.
Throughout the process, we kept Eternity Matters informed of each step, answering their questions and ensuring they felt confident in the project’s progress. By the end of the day, their roof was fully repaired, durable, and ready to withstand future weather challenges.
Client Feedback
The team at Eternity Matters shared their gratitude: "Triumph Roofing went above and beyond! They worked efficiently, stayed within our budget, and left our roof looking as good as new. We highly recommend their Shingles Roof Repairs services!"
This project highlights our commitment to delivering reliable and affordable roofing solutions. Whether it's repairing damaged shingles or providing full roof replacements, Triumph Roofing stands ready to protect your property with expert care.
 All Surface Restoration
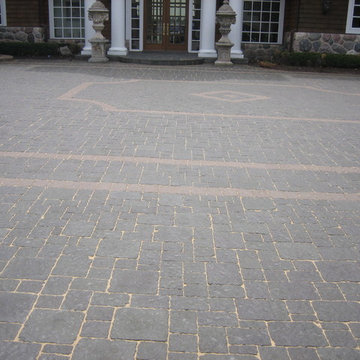
Brick Paver Driveway After Restoration Cleaning, Joint Re Sanding & Sealing With Paver Gloss Sealer. The process will help reduce any future accumulation of moss & weeds.

Sponsored
Columbus, OH

Hope Restoration & General Contracting
Columbus Design-Build, Kitchen & Bath Remodeling, Historic Renovations
 All Surface Restoration
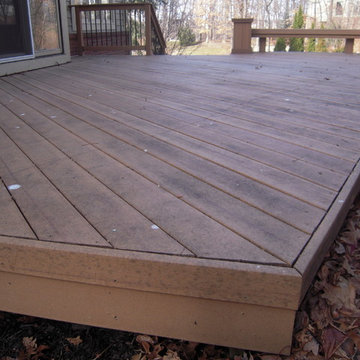
All Surface Restoration specializes in composite deck cleaning, sealing & maintenance. Our eco-friendly "soft wash" process of cleaning restores the like new appearance by safely removing dirt & environmental stains. Metro Detroit, Michigan residents can request a free estimate at: http://surfacerestoration.com/services/composite-deck-restoration/
or call 248-475-0004
 Maize Restoration and Remodeling inc
Full Home Exterior Transformation | Maize Restoration & Remodeling
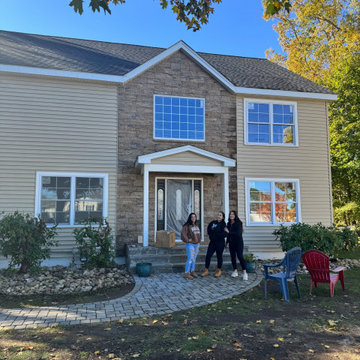
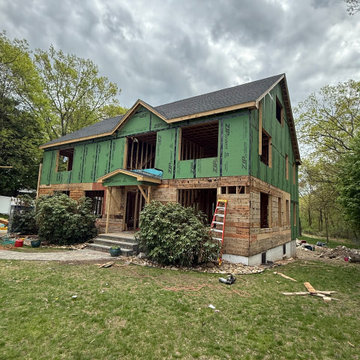
This project showcases a complete exterior transformation—from framing to a fully finished, modern home. Our team handled every step of the process, including structural work, siding, stone veneer installation, roofing, and final exterior detailing.
The goal was to create a timeless look with a balance of clean siding lines and a bold stone façade, enhancing both curb appeal and long-term durability. Every detail was carefully planned and executed to bring the homeowner’s vision to life.
At Maize Restoration & Remodeling, we focus on quality craftsmanship, clear communication, and delivering results that stand out.
Thinking about building or transforming your home? Let’s make it happen.
 Maize Restoration and Remodeling inc
Full Home Exterior Transformation | Maize Restoration & Remodeling
This project showcases a complete exterior transformation—from framing to a fully finished, modern home. Our team handled every step of the process, including structural work, siding, stone veneer installation, roofing, and final exterior detailing.
The goal was to create a timeless look with a balance of clean siding lines and a bold stone façade, enhancing both curb appeal and long-term durability. Every detail was carefully planned and executed to bring the homeowner’s vision to life.
At Maize Restoration & Remodeling, we focus on quality craftsmanship, clear communication, and delivering results that stand out.
Thinking about building or transforming your home? Let’s make it happen.
 Maize Restoration and Remodeling inc
Full Home Exterior Transformation | Maize Restoration & Remodeling
This project showcases a complete exterior transformation—from framing to a fully finished, modern home. Our team handled every step of the process, including structural work, siding, stone veneer installation, roofing, and final exterior detailing.
The goal was to create a timeless look with a balance of clean siding lines and a bold stone façade, enhancing both curb appeal and long-term durability. Every detail was carefully planned and executed to bring the homeowner’s vision to life.
At Maize Restoration & Remodeling, we focus on quality craftsmanship, clear communication, and delivering results that stand out.
Thinking about building or transforming your home? Let’s make it happen.
 All Surface Restoration
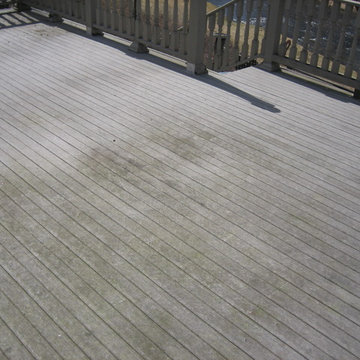
All Surface Restoration specializes in composite deck cleaning, sealing & maintenance. Our eco-friendly "soft wash" process of cleaning restores the like new appearance by safely removing dirt & environmental stains. Metro Detroit, Michigan residents can request a free estimate at: http://surfacerestoration.com/services/composite-deck-restoration/
or call 248-475-0004
 Gables and Pillows
(Ebonizing Process) : A natural chemical process of turning a lighter wood dark brown or jet-black to mimic the look of expensive, natural African Ebony wood.

Sponsored
Columbus, OH
Hope Restoration & General Contracting
Columbus Design-Build, Kitchen & Bath Remodeling, Historic Renovations
 All Surface Restoration
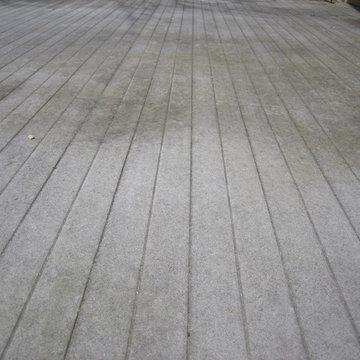
All Surface Restoration specializes in composite deck cleaning, sealing & maintenance. Our eco-friendly "soft wash" process of cleaning restores the like new appearance by safely removing dirt & environmental stains. Metro Detroit, Michigan residents can request a free estimate at: http://surfacerestoration.com/services/composite-deck-restoration/
or call 248-475-0004
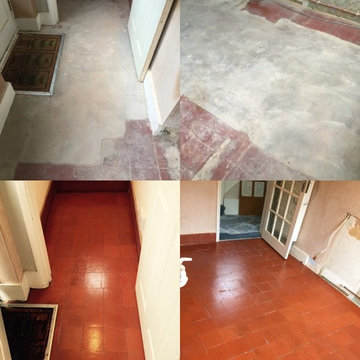
 Tile Doctor Ltd
This customer from Woking had a Quarry tiled kitchen floor that she simply didn’t think could be restored. The floor had been unearthed after many years of being covered by a layer of levelling compound cement and then linoleum. Indeed, the situation certainly looked dire, but I carried out a successful test clean on a patch of the floor where the cement was at its thickest to show that it would be possible to conduct a full restoration. Having seen the results, the customer was more than happy for me to get the work underway.
To begin the restoration, I soaked small sections with water and Tile Doctor Remove and Go our heavy duty coatings remover. The solution was left to dwell for a short period to soften the cement, before I used the heat from a steamer in combination with a hand scraper to begin lifting away the muck. As you can probably imagine, this was an arduous and intensive process which took a full four days to fully complete.
Next, I cleaned the cement-free tiles using our high alkaline tile cleaning product Tile Doctor Pro Clean diluted 1 part cleaner with 3 parts water. This helped to eradicate the leftover muck once I had removed the bulk of the cement. I then sprayed Tile Doctor Grout Clean Up onto the grout lines and tiles to fully neutralise them and also remove any cement residue. Finally, I steamed the floor and left it for a week to dry out completely.
Upon my return to the property I sealed the floor with two coats of Tile Doctor Colour Grow, an impregnating sealer which really enhances the natural colours stone, and four coats of Tile Doctor Seal and Go, a topical sealer which provides a high quality sheen finish and durable protection against stains.
The customer was over the moon with the results and left some great feedback:
“Wayne did a really superb job. It was a very tough task, hot and exhausting, but he was fantastically good-humoured throughout, and kept me really well-informed. He was 100% reliable and very good at communicating between visits. I’m absolutely thrilled with the results! Thank you Wayne and thank you Tile Doctor! Would definitely recommend, and use your services again.”


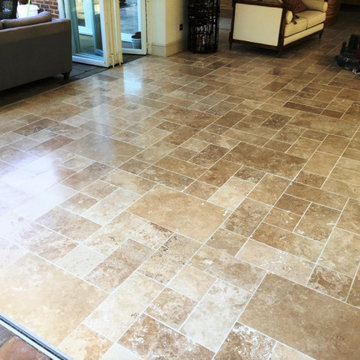 Tile Doctor Ltd
This property in Godalming had the whole downstairs floor tiled with Fired Earth Limestone tiles nine years prior and had never had it cleaned or maintained professionally. The once beautiful stone was now looking dull and the grout had turned black with dirt leaving the floor looking uninviting.
This is quite normal for stone floors as it is the sealer that protects the stone from dirt and enhances its look. Most sealers wear off after three to four years sealer and in this case after nine years it was well overdue a deep clean and reseal.
I visited the property to survey the floor. It was indeed looking in need of some attention and the kitchen was particularly bad. To restore the appearance of the Limestone tile and grout the floor would need to be stripped of what remains of the old sealer, then deep cleaned with attention to the grout, polished with burnishing pads and then finally resealed. I was confident I could get it restored to a nearly new finish and to prove it I completed a small demonstration clean which the homeowner was very happy with. They agreed to my quote and we scheduled in a couple of days to carry out the work.
On day one I started by cleaning the grout using a strong dilution of Tile Doctor Pro-Clean. its run along the grout line and then left to soak in for about ten minutes so it can get to work breaking down dirt and old sealer. The grout is then scrubbed using a grout brush which is then scrubbed backwards and forwards along the grout line until clean. The area is then rinsed with water and all the waste removed with a wet vacuum cleaner.
Next, I turned my attention to the Limestone tiles which needed stripping of any remaining sealer, cleaned and polished. I find the best way to do this is by apply a set of diamond encrusted Burnishing pads in sequence starting with a coarse 400-grit followed by 800, 1500 and finally finishing with an extra fine 3000 grit. Water is used to lubricate the burnishing process and the slurry is rinsed and extracted off the floor between pads. Each pad is run over the tiles three times, and it was a large floor so as you can imagine this process took most of the day.
I left the floor to dry out overnight and returned the next day to seal the Limestone. Before doing that, I reviewed my previous day’s work and I cleaned up any areas that needed further attention. Next step was to ensure the floor was dry as I don’t recommend applying a sealer to damp tile as you won’t get an even appearance, so before sealing a floor I tested for moisture using a damp meter.
To seal the floor, I applied two coats of Tile Doctor Ultra Seal which is an impregnating sealer that works by occupying the small pores in the stone to prevent dirt becoming ingrained there. Limestone is a light stone and most customers like that appearance so I find it best not to use a colour enhancing sealer as it can darken the stone. Ultra-Seal doesn’t contain any colour enhancer and leaves the floor with a natural finish whilst allowing the stone variations and patterns to show through.
Once the sealer was dry, I gave it a further polish with the 3000-grit pad which further brought out the natural beauty of the stone. My client was very happy with the floor, it really lifted the who area and the Kitchen in particular.
Rupert Mcleod
West Surrey Tile Doctor

Sponsored
Columbus, OH
Hope Restoration & General Contracting
Columbus Design-Build, Kitchen & Bath Remodeling, Historic Renovations
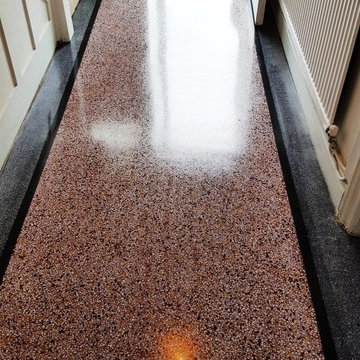 Tile Doctor Ltd
Terrazzo is a quite a bit different from the natural stone floors we most commonly work with. It’s a type of flooring material that was made popular by Venetian builders in Italy in the 1920s, but is ultimately descended from styles of design that date back hundreds of years. A typical Terrazzo floor consists of chips of marble or granite set in concrete and polished to result in a smooth surface.
This Terrazzo floor, installed in the hallway of a property in Bridgend, South Wales, was in relatively good physical condition, but it had clearly lost its shine due to the build-up of dirt and muck over the years. In fact, it was first installed in around 1940! The owner was keen to have it rejuvenated to its best possible condition, so they asked me to come in to see what I could do.
My first course of action was to apply Tile Doctor Pro Clean liberally across the floor and leave it to dwell for a short period. This is a high alkaline cleaner that is designed to deal with light to moderate soil build-up, and to strip away any old sealer remaining on the floor. I scrubbed the product in using a black pad fitted to a rotary machine and vacuumed up the resulting cleaning with a wet-vac machine.
Next, to restore the shine to the floor, I undertook a process known as burnishing, which involves the application of diamond encrusted polishing pads. We will typically start with a Coarse grit pad to level off any uneven areas of the floor and grind down any particularly stubborn marks and stains. Then, we gradually refine the polish on the floor using Medium and Fine grit pads. A small amount of water is used as lubrication with each pad.
After I had finished applying the first three pads in our four-pad system, I gave the floor a thorough rinse and left it to dry overnight.
I returned to the property the next day and immediately ran some damp tests to check for excess moisture issues, which one might expect with an old floor like this one. Thankfully, the floor proved dry – and I could finish the burnishing process with the fourth and final Very Fine diamond encrusted burnishing pad, which achieved a beautiful shine finish.
Finally, I sealed the floor with three coats of Tile Doctor Colour Grow, an impregnating sealer which provides robust protection and enhances the coloured patterns in the Terrazzo.
As you can see from the photos above, the floor is looking so much more colourful and bright after a deep clean, polish and a fresh seal. The customer was over the moon!
Julian Iancono
South East Wales Tile Doctor
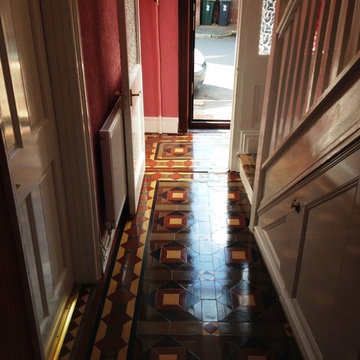 Tile Doctor Ltd
This Victorian tiled hallway at a house in the Forest of Dean had a very interesting pattern, consisting of an array of different colours, including shades of red, yellow and blue. Unfortunately, as you can see from the first photograph below, the tiles had lost all life, with the colours largely masked by months’ – or maybe even years’ – worth of ingrained dirt and muck. The floor as a whole was also suffering from a number of loose tiles that needed to be reset before it could be cleaned.
The property owner was keen to employ some professional assistance to restore the appearance of the floor and prevent it from getting in an even wrote state, and so contacted Tile Doctor who have a lot of experience working with Victorian tiled floors.
As mentioned, the loose tiles had to be repaired before the cleaning process could be started. I removed the tiles and extracted excess grout and old adhesive from the exposed concrete substrate using a vacuum, before putting the original tiles back into place and fixing them back into position carefully using fresh adhesive and matching grout.
Once happy the replaced tiles had set, I started the process of cleaning the entire area of hallway tiles using a combination of Tile Doctor Remove and Go to strip away the old sealer and Tile Doctor NanoTech HBU (formerly Ultra Clean) remover to get the tiles as clean as possible. The latter product contains nano-sized cleaning particles (hence the name) to reach difficult areas of trapped dirt, making it more effective than your run-of-the-mill tile cleaner. These two products were scrubbed into the tiles using a rotary machine fitted with a black scrubbing pad. The floor was then rinsed with water and the soiled residue was extracted with a wet vacuum.
I then paid particular attention to the grout, applying our alkaline-based multi-purpose cleaner Tile Doctor Pro-Clean to the grout lines, before scrubbing them with a narrow grout brush. This quickly had the grout looking clean again: I’d even go as far as to say that it matched it seamlessly with the fresh grout that had just been laid.
With the tile and grout as clean as it was possible to get it, I gave the whole floor a final rinse to neutralise the excess chemicals. I extracted as much water as possible with a wet vacuum and left the floor to dry overnight.
My first task upon returning to the property the next day was to check for any dampness. If you neglect to remove all excess moisture from the surface of the tiles before sealing it is more than likely going to cloud the sealer, rendering it less effective I’m protecting the stone against ingrained dirt and stains.
Once satisfied that the floor was completely dry, I proceeded to seal the tiles using multiple costs of Tile Doctor Seal and Go. Seal and Go is what we would classify as a topical sealer, meaning it rests on the surface of the tiles to act as a durable layer of protection against all kinds of muck. While providing surface protection, Seal and Go also adds a nice subtle sheen to the tiles, as per the customer’s request.
The customer was quite amazed at how quickly the appearance of the tiles had been restored. It was fantastic to see the colours we both knew were hidden in the tiles come to life once again. Another satisfied customer for sure!
Paul Wales
Monmouthshire Tile Doctor
 Tile Doctor Ltd
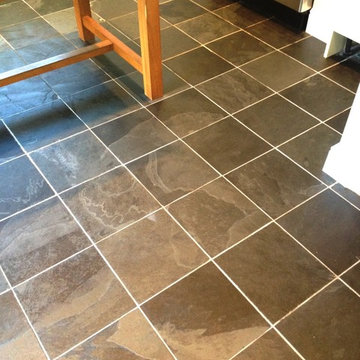
Slate is a popular choice for tiled kitchen floors and when properly maintained looks fantastic, however like all natural stone products without an effective cleaning plan dirt will become ingrained in the stone and will start to lose its appearance.
This was the case with this fantastic Slate tiled kitchen floor in Twickenham which had the potential to look really nice, but hadn’t received the proper maintenance for a long while, leaving it looking very tired. It now needed what was left of its old surface sealer stripped off, followed by a deep cleaning of the tile and grout before having a fresh seal applied.
To begin the restoration, I mixed a 50:50 solution of Tile Doctor Remove and Go and Tile Doctor Pro Clean. This was applied to the floor and allowed to dwell. Remove and Go functions as a stripper that breaks down the old sealer, while Pro Clean is a versatile, high alkaline cleaner that is safe to use on all types of natural stone flooring.
To use it to full effect, I machine scrubbed this solution into the floor to completely remove all dirt, stains, and old sealer. I also ran a stiff brush along the grout lines to remove the particularly stubborn dirt ingrained in the grout. The resulting cleaning slurry was then rinsed with water and extracted using a wet vacuum and the floor checked for stubborn marks which were retreated using the same process.
The floor was left to dry overnight and I came back the next day to apply a new seal. It’s important to leave a tiled floor to dry completely before sealing and at this time of year 24 hours is usually enough. This is necessary to ensures there is no excess moisture in the tile as this has the potential to cloud the sealer and affect its effectiveness.
The customer required a low sheen finish and a floor that was easy to maintain. I opted to use Seal & Go, which provides exactly that. It is a water-based with a high sheen blend of acrylic polymers that offers a both a stain resistant surface seal and a durable low sheen finish, also being water based it doesn’t leave a smell as it dries. Seal and Go is also a breathable sealer that will allow moisture to rise up through the tile and allow the floor to breathe.
As you can see from the pictures, the lustre has been completely restored to the Slate tiles and the sealer will allow for easy maintenance for the customer in the future.
Jonathan Oldham
South Middlesex Tile Doctor
19