
Search results for "Restoration process" in Home Design Ideas
 Renovisions
This North Shore of Boston client wanted to make a change; she decided to purchase a seaside antique home and was up for the challenge to re-design and remodel. Her plan involved re-locating her mother from Florida to the newly added wing of the house when the remodel was in full swing.
We believed that what was standing between our client and the kitchen of her dreams was a well thought out, creative design and a wall or two…
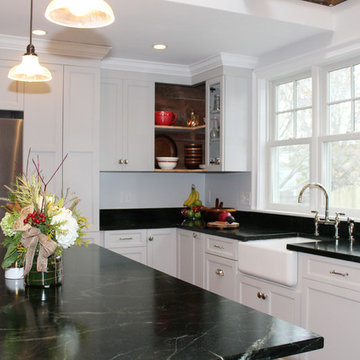
Once outdated and worn, this 1830 antique kitchen was closed off from the family room and dining spaces. The newly re-configured kitchen with re-claimed wide-plank wood floors and restorations to wood cladding on the ceiling, beam and open corner shelving really warmed up the room and welcomes friends, neighbors and relatives. Wood bead board paneling around the island cabinetry along with mixed metals, tie in nicely with the stunning soapstone countertops with distinctive copper-colored veining, creating a beautiful vintage appeal.
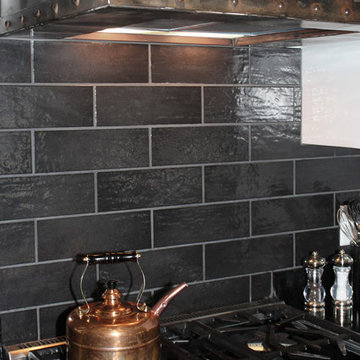
Styled to look like an old-fashioned stove, this steel range boasts modern conveniences such as dual-fuel (gas burners and electric oven) and a convection oven crowned by a custom steel hood adorned with rivets and metal trims.
To enrich the vintage feel, a white farm-style fire clay apron sink was installed that also evokes a classic and time- honored feel.
Although the process was daunting as it presented several challenges, it was a rewarding experience when the project was completed. Our client and her mother were absolutely thrilled with the final results.
“Thank you to Cathy and Ed very much for all your assistance with my kitchen planning! I’m fortunate to have had your input and expertise! It was great seeing you and spending time together and my mom really liked you both. I would welcome you to stop by and say hello when you’re headed to Portsmouth or the north shore. All the best!”
-Jill P.
 Renovisions
This North Shore of Boston client wanted to make a change; she decided to purchase a seaside antique home and was up for the challenge to re-design and remodel. Her plan involved re-locating her mother from Florida to the newly added wing of the house when the remodel was in full swing.
We believed that what was standing between our client and the kitchen of her dreams was a well thought out, creative design and a wall or two…
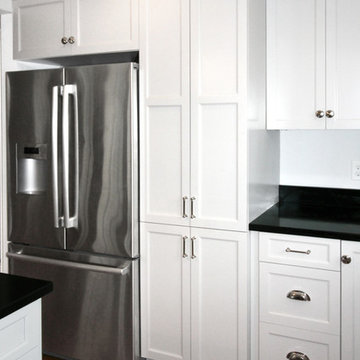
Once outdated and worn, this 1830 antique kitchen was closed off from the family room and dining spaces. The newly re-configured kitchen with re-claimed wide-plank wood floors and restorations to wood cladding on the ceiling, beam and open corner shelving really warmed up the room and welcomes friends, neighbors and relatives. Wood bead board paneling around the island cabinetry along with mixed metals, tie in nicely with the stunning soapstone countertops with distinctive copper-colored veining, creating a beautiful vintage appeal.
Styled to look like an old-fashioned stove, this steel range boasts modern conveniences such as dual-fuel (gas burners and electric oven) and a convection oven crowned by a custom steel hood adorned with rivets and metal trims.
To enrich the vintage feel, a white farm-style fire clay apron sink was installed that also evokes a classic and time- honored feel.
Although the process was daunting as it presented several challenges, it was a rewarding experience when the project was completed. Our client and her mother were absolutely thrilled with the final results.
“Thank you to Cathy and Ed very much for all your assistance with my kitchen planning! I’m fortunate to have had your input and expertise! It was great seeing you and spending time together and my mom really liked you both. I would welcome you to stop by and say hello when you’re headed to Portsmouth or the north shore. All the best!”
-Jill P.
 Renovisions
This North Shore of Boston client wanted to make a change; she decided to purchase a seaside antique home and was up for the challenge to re-design and remodel. Her plan involved re-locating her mother from Florida to the newly added wing of the house when the remodel was in full swing.
We believed that what was standing between our client and the kitchen of her dreams was a well thought out, creative design and a wall or two…
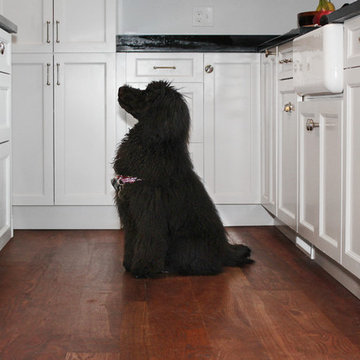
Once outdated and worn, this 1830 antique kitchen was closed off from the family room and dining spaces. The newly re-configured kitchen with re-claimed wide-plank wood floors and restorations to wood cladding on the ceiling, beam and open corner shelving really warmed up the room and welcomes friends, neighbors and relatives. Wood bead board paneling around the island cabinetry along with mixed metals, tie in nicely with the stunning soapstone countertops with distinctive copper-colored veining, creating a beautiful vintage appeal.
Styled to look like an old-fashioned stove, this steel range boasts modern conveniences such as dual-fuel (gas burners and electric oven) and a convection oven crowned by a custom steel hood adorned with rivets and metal trims.
To enrich the vintage feel, a white farm-style fire clay apron sink was installed that also evokes a classic and time- honored feel.
Although the process was daunting as it presented several challenges, it was a rewarding experience when the project was completed. Our client and her mother were absolutely thrilled with the final results.
“Thank you to Cathy and Ed very much for all your assistance with my kitchen planning! I’m fortunate to have had your input and expertise! It was great seeing you and spending time together and my mom really liked you both. I would welcome you to stop by and say hello when you’re headed to Portsmouth or the north shore. All the best!”
-Jill P.
Find the right local pro for your project
 Tile Doctor Ltd
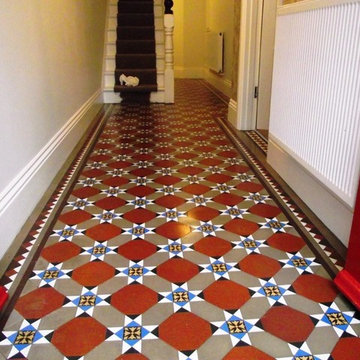
These Victorian hallway tiles were cleaned at a residence in the historic town of Bideford. As you can see from the photograph below the tiles were dull and had lost their vitality due to ingrained dirt, clearly it had been some time since they were given a good deep clean.
Cleaning a Victorian Floor
The first job was to protect the skirting with tape and then vacuum to remove any loose debris and grit. The next step was to cover the entire floor with a strong dilution of Tile Doctor Remove and Go which is a powerful cleaning and coating remover that is safe to use on tile and stone. It was left to dwell on the floor for twenty minutes so it could soak into the tile and make the job of removing any remaining sealer and ingrained dirt easier.
The solution was scrubbed into the tile using a black scrubbing pad fitted to a rotary machine and then the soiled cleaning solution rinsed off using a wet vacuum. This process was repeated a number of times until I was satisfied with the condition of the floor and followed with a final rinse with clean water to remove any trace of cleaning product. The water was extracted with the wet vacuum to get the floor as dry as possible before leaving for the day.
Sealing a Victorian Floor Sealing
The tiles were left to dry for 24 hours and I came back to seal the tiles using eight to nine coats of Tile Doctor Seal and Go which is an ideal sealer for Victorian Tiles as it leaves a nice sheen and provides excellent stain protection.
I think you will agree the hallway floor came up really well and now been given a new lease of life.
 Renovisions
This North Shore of Boston client wanted to make a change; she decided to purchase a seaside antique home and was up for the challenge to re-design and remodel. Her plan involved re-locating her mother from Florida to the newly added wing of the house when the remodel was in full swing.
We believed that what was standing between our client and the kitchen of her dreams was a well thought out, creative design and a wall or two…
Once outdated and worn, this 1830 antique kitchen was closed off from the family room and dining spaces. The newly re-configured kitchen with re-claimed wide-plank wood floors and restorations to wood cladding on the ceiling, beam and open corner shelving really warmed up the room and welcomes friends, neighbors and relatives. Wood bead board paneling around the island cabinetry along with mixed metals, tie in nicely with the stunning soapstone countertops with distinctive copper-colored veining, creating a beautiful vintage appeal.
Styled to look like an old-fashioned stove, this steel range boasts modern conveniences such as dual-fuel (gas burners and electric oven) and a convection oven crowned by a custom steel hood adorned with rivets and metal trims.
To enrich the vintage feel, a white farm-style fire clay apron sink was installed that also evokes a classic and time- honored feel.
Although the process was daunting as it presented several challenges, it was a rewarding experience when the project was completed. Our client and her mother were absolutely thrilled with the final results.
“Thank you to Cathy and Ed very much for all your assistance with my kitchen planning! I’m fortunate to have had your input and expertise! It was great seeing you and spending time together and my mom really liked you both. I would welcome you to stop by and say hello when you’re headed to Portsmouth or the north shore. All the best!”
-Jill P.
 Tile Doctor Ltd
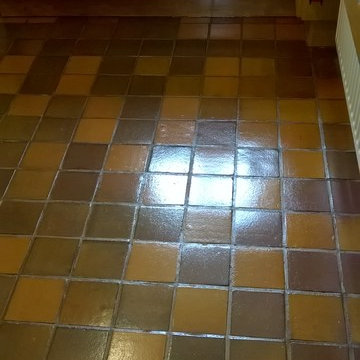
This Quarry tiled kitchen floor was in very good condition, with no cracked or broken tiles. However, my customer, who lives in the town of Tutbury, near Burton-on-Trent, was keen to boost the condition of the tiles further through professional maintenance, including a deep clean and a fresh seal to restore the sheen to the Quarry. NB, did you know it’s estimated that Tutbury has actually been inhabited for 3000 years, having once been the site of an Iron Age hill fort, this house of course was a lot more recent.
To clean the tiles, I chose to use our tried and trusted alkaline cleaner, Tile Doctor Pro Clean. We use Pro Clean on most types of natural stone floor, including Quarry, Slate, and Victorian. I applied Pro Clean liberally across the floor and left it to dwell for a short period, giving it time to seep into the tile to get underneath and lift out any ingrained dirt. The cleaner was then agitated using a scrubbing pad fitted to a rotary machine to remove the dirt and other general muck.
I then rinsed the floor with cold water and soaked up the resulting slurry with a wet-vac machine. Some areas of the floor proved to be quite stubborn to clean, so in these areas the cleaning process was repeated until satisfactory results were achieved. Finally, the floor was given another rinse and left to dry off overnight.
The next day I returned to the property and checked that the floor was ready to seal by running several damp tests, with the results indicating that was no excess moisture remaining on the tiles. We carry out these tests before sealing because moisture can cloud the sealer and prevent it from properly protecting the tiles.
My choice of sealer was Tile Doctor Seal & Go, a cost effective topical sealer that builds up a robust layer of protection on the surface of the floor and provides a durable sheen finish that, as you can see from the photographs, really lifts the appearance of the tiles.
It’s a fact that any sealed tiled floor will need to be regularly maintained as sealers do wear off over time, especially in the high traffic areas, and this is when the floor starts to lose its appearance as dirt becomes trapped in the pores of the stone. The life of the sealer can be extended however by ensuring you only clean the floor with a PH Neutral cleaner.
Trevor Preeece
 Windy City Painters
? Elevate Your Home's Charm with a Front Porch Makeover! ?
✨ Front porch beautifully refinished by the top-notch professionals at Windy City Painters, the best painting company in Chicago! ?
Here's a glimpse of the meticulous process :
? Power Wash Magic:
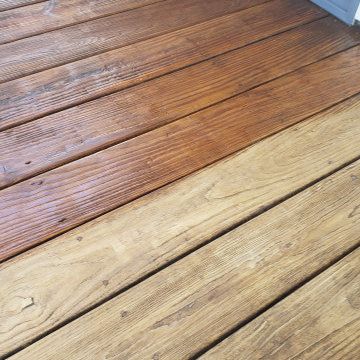
Started with a thorough power wash to bid farewell to dirt, grime, and the remnants of old paint. The porch now sparkles!
? Wood Whispering - Sanding Edition:
Embraced the art of sanding to create a smooth canvas for the upcoming masterpiece. Goodbye rough edges, hello silky surfaces!
? Stairway to Elegance - Staining the Steps:
The step treads and landing got a luxurious makeover with a premium stain, adding warmth and sophistication to the entrance. It's like a red carpet for your doorstep!
⚪ Radiant in White - Railings, Risers, and Sides:
The talented hands at Windy City Painters painted the railings, risers, and step sides in a crisp, classic white. The result? A porch that exudes timeless charm and curb appeal.
?♂️ About Windy City Painters:
? Expertise Beyond Compare: Windy City Painters specializes not only in front porch refinishing but also in wrought iron fences and metal porches. They work their magic with rust removal, treatment, and restoration, ensuring longevity and beauty.
? Drywall Water Damage Repairs: Water damage? Not a problem! They're your go-to for seamless drywall repairs, leaving no traces of past troubles.
?️ Wallpaper Wizards: Transform your interiors with their impeccable wallpaper installation services. From subtle textures to bold patterns, they bring your vision to life.
? Kitchen Cabinets Revival: Give your kitchen a facelift! Windy City Painters excels in painting kitchen cabinets, turning them from outdated to dazzling.
? Contact Windy City Painters:
? WindyCityPainters.com
? WindyPainters.com
☎️ Phone: 773-818-6331
? andy@windypainters.com
✅ Experience the Windy City Painters Difference!
Transforming homes into masterpieces, one stroke at a time. Schedule your consultation today and let the experts work their magic. Your dream home awaits!
#WindyCityPainters #ChicagoPainting #HomeMakeover #FrontPorchRefinishing #PorchPainter #ChicagoWallpaperInstaller #ChicagoCabinetsPainter ✨?️
Sponsored
Columbus, OH

Hope Restoration & General Contracting
Columbus Design-Build, Kitchen & Bath Remodeling, Historic Renovations
 Renovisions
This North Shore of Boston client wanted to make a change; she decided to purchase a seaside antique home and was up for the challenge to re-design and remodel. Her plan involved re-locating her mother from Florida to the newly added wing of the house when the remodel was in full swing.
We believed that what was standing between our client and the kitchen of her dreams was a well thought out, creative design and a wall or two…
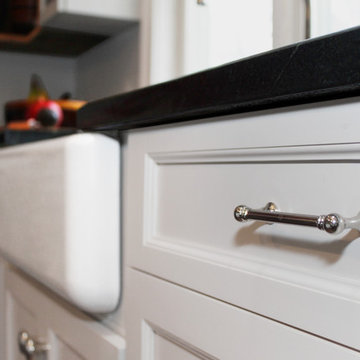
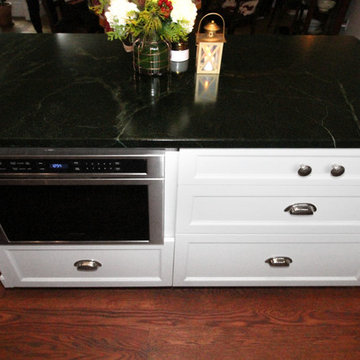
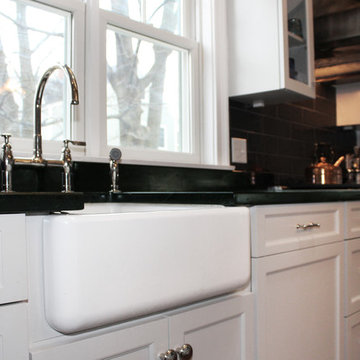
Once outdated and worn, this 1830 antique kitchen was closed off from the family room and dining spaces. The newly re-configured kitchen with re-claimed wide-plank wood floors and restorations to wood cladding on the ceiling, beam and open corner shelving really warmed up the room and welcomes friends, neighbors and relatives. Wood bead board paneling around the island cabinetry along with mixed metals, tie in nicely with the stunning soapstone countertops with distinctive copper-colored veining, creating a beautiful vintage appeal.
Styled to look like an old-fashioned stove, this steel range boasts modern conveniences such as dual-fuel (gas burners and electric oven) and a convection oven crowned by a custom steel hood adorned with rivets and metal trims.
To enrich the vintage feel, a white farm-style fire clay apron sink was installed that also evokes a classic and time- honored feel.
Although the process was daunting as it presented several challenges, it was a rewarding experience when the project was completed. Our client and her mother were absolutely thrilled with the final results.
“Thank you to Cathy and Ed very much for all your assistance with my kitchen planning! I’m fortunate to have had your input and expertise! It was great seeing you and spending time together and my mom really liked you both. I would welcome you to stop by and say hello when you’re headed to Portsmouth or the north shore. All the best!”
-Jill P.
 Windy City Painters
? Elevate Your Home's Charm with a Front Porch Makeover! ?
✨ Front porch beautifully refinished by the top-notch professionals at Windy City Painters, the best painting company in Chicago! ?
Here's a glimpse of the meticulous process :
? Power Wash Magic:
Started with a thorough power wash to bid farewell to dirt, grime, and the remnants of old paint. The porch now sparkles!
? Wood Whispering - Sanding Edition:
Embraced the art of sanding to create a smooth canvas for the upcoming masterpiece. Goodbye rough edges, hello silky surfaces!
? Stairway to Elegance - Staining the Steps:
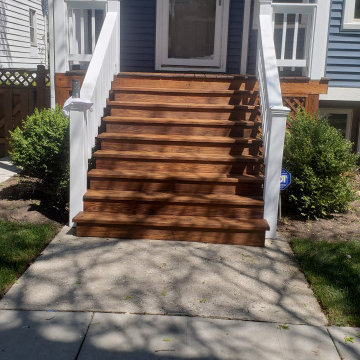
The step treads and landing got a luxurious makeover with a premium stain, adding warmth and sophistication to the entrance. It's like a red carpet for your doorstep!
⚪ Radiant in White - Railings, Risers, and Sides:
The talented hands at Windy City Painters painted the railings, risers, and step sides in a crisp, classic white. The result? A porch that exudes timeless charm and curb appeal.
?♂️ About Windy City Painters:
? Expertise Beyond Compare: Windy City Painters specializes not only in front porch refinishing but also in wrought iron fences and metal porches. They work their magic with rust removal, treatment, and restoration, ensuring longevity and beauty.
? Drywall Water Damage Repairs: Water damage? Not a problem! They're your go-to for seamless drywall repairs, leaving no traces of past troubles.
?️ Wallpaper Wizards: Transform your interiors with their impeccable wallpaper installation services. From subtle textures to bold patterns, they bring your vision to life.
? Kitchen Cabinets Revival: Give your kitchen a facelift! Windy City Painters excels in painting kitchen cabinets, turning them from outdated to dazzling.
? Contact Windy City Painters:
? WindyCityPainters.com
? WindyPainters.com
☎️ Phone: 773-818-6331
? andy@windypainters.com
✅ Experience the Windy City Painters Difference!
Transforming homes into masterpieces, one stroke at a time. Schedule your consultation today and let the experts work their magic. Your dream home awaits!
#WindyCityPainters #ChicagoPainting #HomeMakeover #FrontPorchRefinishing #PorchPainter #ChicagoWallpaperInstaller #ChicagoCabinetsPainter ✨?️
 Renovisions
This North Shore of Boston client wanted to make a change; she decided to purchase a seaside antique home and was up for the challenge to re-design and remodel. Her plan involved re-locating her mother from Florida to the newly added wing of the house when the remodel was in full swing.
We believed that what was standing between our client and the kitchen of her dreams was a well thought out, creative design and a wall or two…
Once outdated and worn, this 1830 antique kitchen was closed off from the family room and dining spaces. The newly re-configured kitchen with re-claimed wide-plank wood floors and restorations to wood cladding on the ceiling, beam and open corner shelving really warmed up the room and welcomes friends, neighbors and relatives. Wood bead board paneling around the island cabinetry along with mixed metals, tie in nicely with the stunning soapstone countertops with distinctive copper-colored veining, creating a beautiful vintage appeal.
Styled to look like an old-fashioned stove, this steel range boasts modern conveniences such as dual-fuel (gas burners and electric oven) and a convection oven crowned by a custom steel hood adorned with rivets and metal trims.
To enrich the vintage feel, a white farm-style fire clay apron sink was installed that also evokes a classic and time- honored feel.
Although the process was daunting as it presented several challenges, it was a rewarding experience when the project was completed. Our client and her mother were absolutely thrilled with the final results.
“Thank you to Cathy and Ed very much for all your assistance with my kitchen planning! I’m fortunate to have had your input and expertise! It was great seeing you and spending time together and my mom really liked you both. I would welcome you to stop by and say hello when you’re headed to Portsmouth or the north shore. All the best!”
-Jill P.
 Renovisions
This North Shore of Boston client wanted to make a change; she decided to purchase a seaside antique home and was up for the challenge to re-design and remodel. Her plan involved re-locating her mother from Florida to the newly added wing of the house when the remodel was in full swing.
We believed that what was standing between our client and the kitchen of her dreams was a well thought out, creative design and a wall or two…
Once outdated and worn, this 1830 antique kitchen was closed off from the family room and dining spaces. The newly re-configured kitchen with re-claimed wide-plank wood floors and restorations to wood cladding on the ceiling, beam and open corner shelving really warmed up the room and welcomes friends, neighbors and relatives. Wood bead board paneling around the island cabinetry along with mixed metals, tie in nicely with the stunning soapstone countertops with distinctive copper-colored veining, creating a beautiful vintage appeal.
Styled to look like an old-fashioned stove, this steel range boasts modern conveniences such as dual-fuel (gas burners and electric oven) and a convection oven crowned by a custom steel hood adorned with rivets and metal trims.
To enrich the vintage feel, a white farm-style fire clay apron sink was installed that also evokes a classic and time- honored feel.
Although the process was daunting as it presented several challenges, it was a rewarding experience when the project was completed. Our client and her mother were absolutely thrilled with the final results.
“Thank you to Cathy and Ed very much for all your assistance with my kitchen planning! I’m fortunate to have had your input and expertise! It was great seeing you and spending time together and my mom really liked you both. I would welcome you to stop by and say hello when you’re headed to Portsmouth or the north shore. All the best!”
-Jill P.
 Tile Doctor Ltd
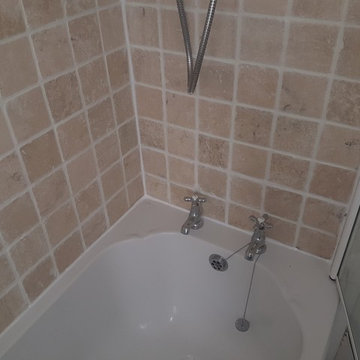
Here’s a quick example of an interesting tiled shower cubicle at a property in Edinburgh that was well overdue for a refresh, including deep cleaning and recolouring do the grout lines that had become stained and mouldy. This is a problem that the majority of property owners experience due to the simple fact that shower cubicles come into contact with damaging acid-based shampoos and soaps on a daily basis.
The short-term solution for this is to wash the shower cubicle down with water after each use, however busy people do not always remember to do so! The prognosis is bad discolouration, mould growth and staining if the problem if proper care isn’t taken. In this case, the problem had worsened to the point that the property owner decided to contact Tile a Doctor to provide a thorough refresh of the tiles.
Our process for refreshing shower cubicles in a similar state to this one is simple, but highly effective. I started by mixing a strong solution of our high alkaline cleaner, known as Tile Doctor Pro Clean (diluted to an appropriate level with water), before applying it directly to the tile and grout.
Next, I worked it in using specialised handheld grout brushes , with the alkaline in the Pro Clean neutralising the acidic staining and mould growth had leaving the area clean and fresh. Pro Clean is suitable for use on all kinds of natural stone, and on both verticals and horizontal surfaces. Once satisfied the grout had been cleaned to the best of my abilities, I quickly dried the entire area using a heat gun.
To restore the appearance of the installation back to it’s optimal appearance I chose to recolour the grout lines with our Light Grey grout colourant, which matched in very nicely. This is just one of ten different colours of grout colourant we offer. The colourant was left to dry for a short period before I cleaned off any excess. The final stage of the refresh involved stripping off the old discoloured silicone from around the bath and replacing it with fresh silicone.
The customer was very impressed by the speed and efficiency of the refresh. With the work completed to a high standard in just a few hours, she now has one less problem to worry about – and a very smart looking shower cubicle! Another satisfied customer.
Thomas Wilson
Edinburgh Tile Doctor
 Renovisions
This North Shore of Boston client wanted to make a change; she decided to purchase a seaside antique home and was up for the challenge to re-design and remodel. Her plan involved re-locating her mother from Florida to the newly added wing of the house when the remodel was in full swing.
We believed that what was standing between our client and the kitchen of her dreams was a well thought out, creative design and a wall or two…
Once outdated and worn, this 1830 antique kitchen was closed off from the family room and dining spaces. The newly re-configured kitchen with re-claimed wide-plank wood floors and restorations to wood cladding on the ceiling, beam and open corner shelving really warmed up the room and welcomes friends, neighbors and relatives. Wood bead board paneling around the island cabinetry along with mixed metals, tie in nicely with the stunning soapstone countertops with distinctive copper-colored veining, creating a beautiful vintage appeal.
Styled to look like an old-fashioned stove, this steel range boasts modern conveniences such as dual-fuel (gas burners and electric oven) and a convection oven crowned by a custom steel hood adorned with rivets and metal trims.
To enrich the vintage feel, a white farm-style fire clay apron sink was installed that also evokes a classic and time- honored feel.
Although the process was daunting as it presented several challenges, it was a rewarding experience when the project was completed. Our client and her mother were absolutely thrilled with the final results.
“Thank you to Cathy and Ed very much for all your assistance with my kitchen planning! I’m fortunate to have had your input and expertise! It was great seeing you and spending time together and my mom really liked you both. I would welcome you to stop by and say hello when you’re headed to Portsmouth or the north shore. All the best!”
-Jill P.

Sponsored
Columbus, OH
Hope Restoration & General Contracting
Columbus Design-Build, Kitchen & Bath Remodeling, Historic Renovations
 Flores Artscape, Inc.
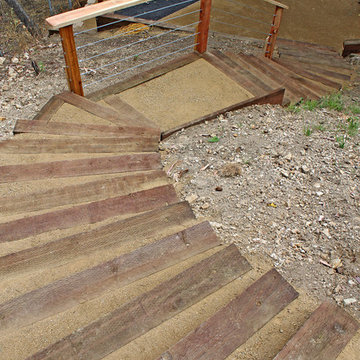
A decomposed granite (DG) & railroad ties stairs with a wood and wire railing at the bottom.
Inspiration for a traditional landscaping in Los Angeles.
Inspiration for a traditional landscaping in Los Angeles.
 Windy City Painters
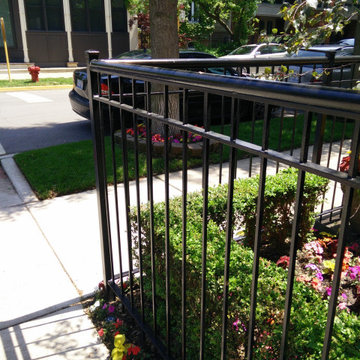
Ever notice how your iron fence looks worse every spring after Chicago winters? That steady seasonal decline is not inevitable - it is a preparation and coating problem that Windy City Painters solves with systematic metal restoration.
PROJECT OVERVIEW
Iron fence painting in Chicago requires more than a fresh coat of paint. Chicago's freeze-thaw cycles, road salt exposure, and high seasonal humidity create conditions that destroy inadequately prepared metal coatings within a year or two. Windy City Painters approaches every iron fence project as a corrosion control job first and a painting job second. The result is a finish that holds up through multiple Chicago winters without peeling, bubbling, or allowing rust to spread beneath the surface.
MAterials AND PRODUCTS
Windy City Painters selects products specifically rated for ferrous metal in high-corrosion environments. For rust conversion, we use Ospho phosphoric acid treatment or Corroseal water-based rust converter, both of which chemically transform active rust into a stable iron phosphate compound. For priming and finish coats, Rust-Oleum DTM and Sherwin-Williams DTM rust-inhibitive direct-to-metal coatings provide excellent adhesion, flexibility, and moisture resistance. These products are formulated to expand and contract with metal through temperature swings without cracking.
THE PROCESS
Step 1 - Mechanical Surface Preparation: Wire wheel grinding and needle gun descaling remove all loose rust, failing paint, and mill scale. This step is non-negotiable. No rust-inhibitive coating performs correctly over contaminated or loosely adhered substrate. Windy City Painters treats this phase as the foundation of the entire project.
Step 2 - Rust Conversion Treatment: Ospho or Corroseal is applied to any remaining rust after mechanical prep. These products do not simply cover rust - they react with iron oxide to create iron phosphate, a chemically stable surface that accepts primer without ongoing corrosion underneath. Contact time and full surface saturation are critical.
Step 3 - Rust-Inhibitive Priming: Rust-Oleum DTM or Sherwin-Williams DTM rust-inhibitive primer is applied by brush to ensure full penetration into ornamental details, crevices, and rail joints where moisture collects. Spray application alone misses critical contact points on older Chicago ironwork.
Step 4 - Finish Coat Application: Two finish coats of Rust-Oleum DTM or Sherwin-Williams DTM topcoat deliver color saturation, UV stability, and a hard film that resists chipping from foot traffic, landscaping equipment, and seasonal debris impact common to Chicago urban properties.
CHICAGO-SPECIFIC CHALLENGES
Chicago iron fences face a combination of stressors that accelerates failure compared to milder climates. Road salt spray migrates well beyond the street surface and deposits chlorides on fence metal throughout winter. Freeze-thaw cycles - sometimes occurring multiple times in a single week - expand and contract metal enough to crack coatings that lack flexibility. Older ornamental iron on greystones, Victorian brownstones, two-flats, and courtyard buildings often has decades of paint buildup that must be addressed before any restoration coating will perform correctly.
WHAT TO EXPECT LONG-TERM
A properly prepared and coated iron fence painted by Windy City Painters typically performs five to seven years before requiring recoating in Chicago conditions. Annual spring inspection for salt residue, minor touch-up of any chips within the first season, and a light rinse to remove winter road chemicals all extend coating life. Structural rust that has compromised rail integrity should be addressed by a welder before painting - Windy City Painters identifies these conditions during initial assessment.
PRO TIPS
Tip 1: Never paint over rust without a conversion treatment first. Paint applied over active rust creates a sealed environment where corrosion accelerates invisibly until the coating fails completely.
Tip 2: Budget for welded repairs on iron fences older than twenty-five years. Ornamental iron on Chicago historic properties often has pitting or section loss that painting alone cannot address structurally.
Tip 3: Time your iron fence painting project for late spring or early fall when temperatures stay consistently above fifty degrees overnight. DTM coatings need adequate cure time before the first freeze to achieve full hardness.
Call Windy City Painters to schedule your iron fence assessment at windypainters.com.
FAQ
Q: What is the cost of iron fence painting in Chicago?
A: Iron fence painting cost in Chicago varies by linear footage, rust severity, and ornamental complexity. Windy City Painters provides free on-site estimates so you receive an accurate number before any commitment is made.
Q: Do you need to remove all old paint before repainting an iron fence?
A: Not always. Windy City Painters assesses existing coating adhesion. Sound paint in good condition can remain. Peeling, bubbling, or paint over active rust must be removed for the new coating to perform correctly.
Q: Can structural rust on an iron fence be repaired without replacing the fence?
A: Depends on severity. Surface and moderate rust responds well to conversion treatment and DTM coatings. If rust has caused section loss or structural weakness, Windy City Painters recommends a welder address those areas before painting.
Q: How long does iron fence painting take?
A: Most residential iron fence projects take one to three days including prep, rust conversion, priming, and two finish coats. Windy City Painters sequences cure time between coats to ensure full adhesion at every stage.
Q: What is the best paint for iron fences in Chicago?
A: Rust-Oleum DTM and Sherwin-Williams DTM rust-inhibitive coatings are among the best options for Chicago iron fences due to their flexibility, moisture resistance, and ability to handle freeze-thaw temperature swings without cracking.
Q: Is it worth painting an old iron fence or should I replace it?
A: Painting is almost always more cost-effective than replacement for structurally sound iron. Windy City Painters assesses every fence honestly and only recommends replacement when restoration would not deliver a durable result.
Q: How do I find a reliable iron fence painting contractor near me in Chicago?
A: Look for contractors who specify rust conversion products by name, explain their mechanical prep process, and provide references from similar Chicago properties. Windy City Painters documents every step and warranties our work.
 e4 Interior Design, LLC
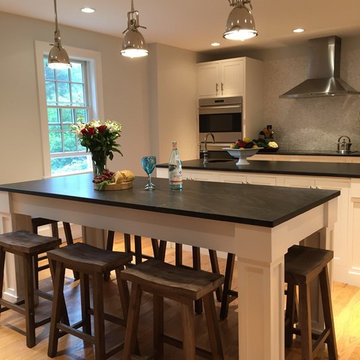
This farmhouse was purchased by the clients in the end of 2015. The timeframe for the renovation was tight, as the home is a hot summer rental in the historic district of Kennebunkport. This antique colonial home had been expanded over the years. The intention behind the renovation was quite simple; to remove wall paper, apply fresh paint, change out some light fixtures and renovate the kitchen. A somewhat small project turned into a massive renovation, with the renovation of 3 bathrooms and a powder room, a kitchen, adding a staircase, plumbing, floors, changing windows, not to mention furnishing the entire house afterwords. The finished product really speaks for itself!
The aesthetic is "coastal farmhouse". We did not want to make it too coastal (as it is not on the water, but rather in a coastal town) or too farmhouse-y (while still trying to maintain some of the character of the house.) Old floors on both the first and second levels were made plumb (reused as vertical supports), and the old wood beams were repurposed as well - both in the floors and in the architectural details. For example - in the fireplace in the kitchen and around the door openings into the dining room you can see the repurposed wood! The newel post and balusters on the mudroom stairs were also from the repurposed lot of wood, but completely refinished for a new use.
The clients were young and savvy, with a very hands on approach to the design and construction process. A very skilled bargain hunter, the client spent much of her free time when she was not working, going to estate sales and outlets to outfit the house. Their builder, as stated earlier, was very savvy in reusing wood where he could as well as salvaging things such as the original doors and door hardware while at the same time bringing the house up to date.
 Tile Doctor Ltd
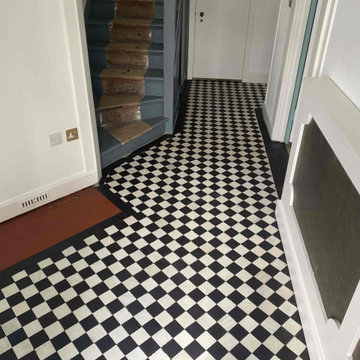
This client from North London had recently bought a property in Highgate N6 and during renovation had discovered an original Victorian tiled floor in the hallway. The floor was laid in a classic black and white diamond pattern but unfortunately a large section was missing and had been filled with concrete. Furthermore, most of the remaining floor had been covered in cement and glue.
I carried out a survey of the floor to determine the main issues and was then able to email over a quote later that day that included rebuilding the missing section of flooring. I suspect the floor had been excavated at some point in the past to install central heating and then rather than have the excavated section restored it was simply back filled and then levelled with a cement screed before finally gluing down a carpet on top.
Once the quote was accepted, I sourced replacement tiles from the Vintage Floor Tile company. Situated in Kent they are a reclamation yard that specialises in supplying original geometric and encaustic tiles including the major historical makers such as Minton and Craven Dunnill.
Armed with replacement tiles I started by removing the concrete that had been used to backfill the missing section and prepare a new surface for tiling with quick drying cement. When ready I was able to carefully build back the original pattern using the replacements. The tiles were secured with tile adhesive and once that had gone off, they were grouted.
The floor was left to set fully overnight and then the next day I was able to return and clean the whole floor using a strong dilution of Tile Doctor Remove and Go. As usual this was left to soak into the tiles for a good ten minutes before being scrubbed into the tiles using a black scrubbing pad. The Tile Doctor Remove and Go did a good job of cleaning the floor and the cleaning solution soon turned black with dirt during the scrubbing. The floor was rinsed with water and the soil extracted with a wet vacuum. After inspecting the floor any areas that needed further work were hand scrubbed and rinsed again until I was happy the floor was clean.
The last part of the cleaning process was to give the tiles an acid wash using Tile Doctor Acid Gel which further cleans the floor by removing old cement residue and grout haze. It also neutralises efflorescent salts in the tiles which are a common issue with floors of this age with no damp proof membrane. After another rinse and extraction, the floor was given a final rinse and then dried as much as possible using the wet vacuum.
I left the floor to dry out for a couple of days before returning to apply a protective sealer. Tile and Stone should be dry before sealing so I use a damp meter first to double check. All was well so to seal the tiles I proceeded to apply the first of what would be three coats of sealer. I used Tile Doctor Colour Grow for this, it works by impregnating the tile occupying the pores and thereby preventing dirt from becoming ingrained there. This product also enhances the black and white colour of the tiles and makes the floor much easier to clean.
Once done the floor was transformed and needless to say my customer was very pleased with the result. For the aftercare of Victorian Tiled floors, I recommend the use of a ph neural tile cleaner such as Tile Doctor Neutral Cleaner; most supermarket tile cleaners are simply too strong for use on sealed floors and can strip off the sealer prematurely.
Andrew Newstead
North London Tile Doctor
Sponsored
Columbus, OH
Hope Restoration & General Contracting
Columbus Design-Build, Kitchen & Bath Remodeling, Historic Renovations
 Tile Doctor Ltd
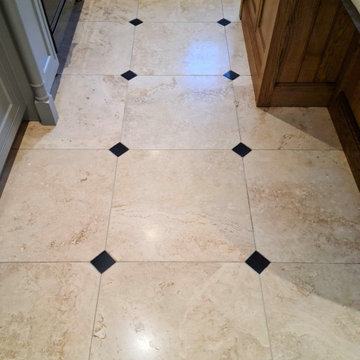
The pictures show a large Limestone floor laid through much of the ground floor of a property situated on the outskirts of York seventeen years prior.
The owners had three dogs that slept in their own doggy room. The floor in this room was in the worst condition of the five rooms as it had been subject to significant wear and tear. The Limestone tiles looked dull with ingrained dirt and the grout was stained and patchy.
The original tiler had laid the floor well, but he had applied a satin topical sealer to the stone most of which had worn off over the years. A floor like this would need a little maintenance and the sealer reapplying from time to time to maintain it.
I completed a test clean for the client to show them what could be achieved which came out well. Happy with the result they accepted my quote for the restoration work, and we booked in a suitable time to complete the work.
The area was quite large, so I separated the job into rooms and started by protecting the skirtings and woodwork from splashing etc. I decided to do a chemical clean first to remove what was left of the old sealer but more importantly to give the grout a thorough clean which was making the floor look scruffy.
For this I opted to apply a strong dilution of Tile Doctor Pro-Clean which was left to dwell for a short while and then worked in with a mechanical rotary cleaner. It gets to work on the ingrained dirt and sealer. It should also help to get rid of the doggy smells. This process turns the cleaning solution black and is then extracted using a wet vacuum keeping the mess to a minimum. I paid particular attention to the grout which was deeply discoloured and found that some areas required going over a couple of times to get them clean. I was only just getting started on the cleaning but immediately the floor was looking so much better.
I then deep cleaned the Limestone with a set of diamond burnishing pads, working in sequence from the 400 grit through to 1500 grit. A small amount of water was used to aid the lubrication and after each pad have been over the entire area few times the solution is rinsed off with more water and extracted with the wet vacuum.
The floor came back to almost new and as the client wanted a satin finish, I ended by applying a 3000-grit pad to add a deeper polish to the Limestone. The floor was then left overnight to dry.
The last step of polishing with the 3000-grit pad already leaves the floor quite dry however I always like to check before sealing so just to be sure I took some reading with a damp meter. The readings were fine, so I started applying the first of two coats of Tile Doctor Ultra Seal to finish the floor. This is an impregnating sealer (as opposed to the previous topical sealer) that soaks into the stone protecting it from within but without affecting its appearance. This product was chosen in consultation with the client who was specific about how they wanted to floor to look.
The floor now looked superb. Both the client and l were very pleased with the finished floor and so where the dogs! For aftercare I recommended Tile Doctor Stone Soap which is designed for cleaning polished stone floors like these, it’s a gentle stone cleaner that helps maintain the patina and ideal for this type of floor.
Nigel Stoker
North West Yorkshire Tile Doctor
 Tile Doctor Ltd
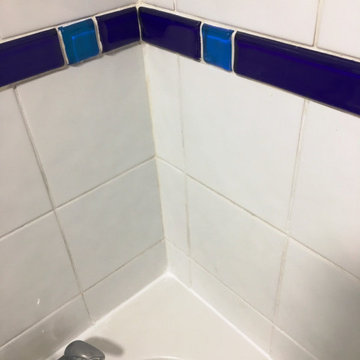
A family living in Guildford were in touch recently about restoring the appearance of their Ceramic tiled shower and bathroom. They were about to put the property up for sale and were concerned the grubby grout might put off potential buyers. First impressions do count so renovating a bathroom or kitchen before selling is a really good idea and will help you achieve a better price.
In this case the Ceramic tiles were dirty and black with mould in places which looked unhygienic and uninviting. Additionally, the mastic sealant between the tile and bath was tired and worn to the extent that water could end up leaking behind the seal. After visiting the property, they were pleased to hear I could help and happily accepted our quote which was based around a days work and some materials.
Firstly, I cleaned the grout using a Tile Doctor product called Duo Clean which is designed to tackle dirty grout and mould. I sprayed the product along all the grout lines and left it to soak in for about fifteen minutes. Once ready I brushed them with a firm wire brush then rinsed off with water. Next, I cleaned the tiles using a strong dilution of Tile Doctor Pro-Clean which was decanted into a spray bottle and sprayed onto the wall tiles. After ten minutes I then used a handheld buffing machine fitted with a small white buffing pad to shift the dirt and buff up the white tiles. After rinsing the slurry off with water you could see a marked improvement.
I hand dried the tile and grout with a cloth and then set about stripping out the old white mastic sealer with a sharp knife. This took some time, as you have to be careful not to scratch the bath or the tile.
By this time the grout had dried off fully and I was able to see if more work was required. To achieve a uniform colour throughout. Mould and some cleaning products can discolour grout permanently and, in this case, there was some grout staining I was unable to remove. We had discussed this possibility earlier and how it would be best resolved using a white grout colourant. So, I carefully applied Tile Doctor Grout Colour which is painted on with a small brush with any excess wiped off the tile before it can set. This resulted in a uniform white grout throughout and really gave the whole bathroom a lift.
With the cleaning process completed I applied a new white mastic between the bath and tile and along the verticals. This is done with the bath filled with water and then left for 24 hours to allow the silicone to fully cure.
After the grout colour had dried, I applied an aerosol Tile and Grout sealer over the whole surface and then lightly polished off any excess with a clean cloth. This does two things; one it adds a further layer of protection to the new grout colour and to the surface of the tiles. Secondly Ceramic tiles are non-porous, but bacterial dirt can still get a grip on the surface, with the sealer in place you will find water quickly runs off without getting a chance to get a hold.
Sealers do wear off, so I recommended re-applying it every year. I had plenty left over and gave it to the customer when I finished using it. For regular cleaning of tiled shower areas, I recommend they use Tile Doctor Aqua-Pro this will neutralise any acid build-up caused by acidic shampoos etc.
West Surrey Tile Doctor
Rupert Mcleod


43