
Search results for "Restoration process" in Home Design Ideas
 Tile Doctor Ltd
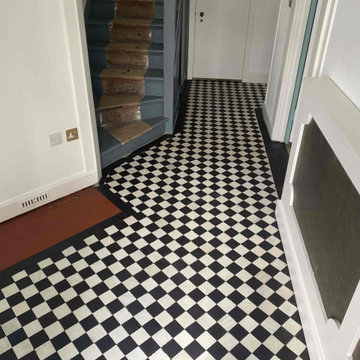
This client from North London had recently bought a property in Highgate N6 and during renovation had discovered an original Victorian tiled floor in the hallway. The floor was laid in a classic black and white diamond pattern but unfortunately a large section was missing and had been filled with concrete. Furthermore, most of the remaining floor had been covered in cement and glue.
I carried out a survey of the floor to determine the main issues and was then able to email over a quote later that day that included rebuilding the missing section of flooring. I suspect the floor had been excavated at some point in the past to install central heating and then rather than have the excavated section restored it was simply back filled and then levelled with a cement screed before finally gluing down a carpet on top.
Once the quote was accepted, I sourced replacement tiles from the Vintage Floor Tile company. Situated in Kent they are a reclamation yard that specialises in supplying original geometric and encaustic tiles including the major historical makers such as Minton and Craven Dunnill.
Armed with replacement tiles I started by removing the concrete that had been used to backfill the missing section and prepare a new surface for tiling with quick drying cement. When ready I was able to carefully build back the original pattern using the replacements. The tiles were secured with tile adhesive and once that had gone off, they were grouted.
The floor was left to set fully overnight and then the next day I was able to return and clean the whole floor using a strong dilution of Tile Doctor Remove and Go. As usual this was left to soak into the tiles for a good ten minutes before being scrubbed into the tiles using a black scrubbing pad. The Tile Doctor Remove and Go did a good job of cleaning the floor and the cleaning solution soon turned black with dirt during the scrubbing. The floor was rinsed with water and the soil extracted with a wet vacuum. After inspecting the floor any areas that needed further work were hand scrubbed and rinsed again until I was happy the floor was clean.
The last part of the cleaning process was to give the tiles an acid wash using Tile Doctor Acid Gel which further cleans the floor by removing old cement residue and grout haze. It also neutralises efflorescent salts in the tiles which are a common issue with floors of this age with no damp proof membrane. After another rinse and extraction, the floor was given a final rinse and then dried as much as possible using the wet vacuum.
I left the floor to dry out for a couple of days before returning to apply a protective sealer. Tile and Stone should be dry before sealing so I use a damp meter first to double check. All was well so to seal the tiles I proceeded to apply the first of what would be three coats of sealer. I used Tile Doctor Colour Grow for this, it works by impregnating the tile occupying the pores and thereby preventing dirt from becoming ingrained there. This product also enhances the black and white colour of the tiles and makes the floor much easier to clean.
Once done the floor was transformed and needless to say my customer was very pleased with the result. For the aftercare of Victorian Tiled floors, I recommend the use of a ph neural tile cleaner such as Tile Doctor Neutral Cleaner; most supermarket tile cleaners are simply too strong for use on sealed floors and can strip off the sealer prematurely.
Andrew Newstead
North London Tile Doctor
 Tile Doctor Ltd
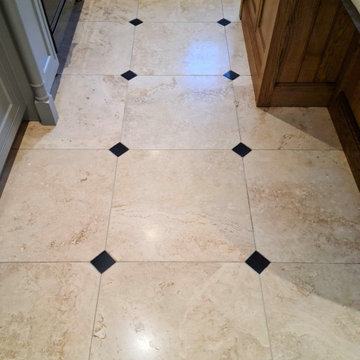
The pictures show a large Limestone floor laid through much of the ground floor of a property situated on the outskirts of York seventeen years prior.
The owners had three dogs that slept in their own doggy room. The floor in this room was in the worst condition of the five rooms as it had been subject to significant wear and tear. The Limestone tiles looked dull with ingrained dirt and the grout was stained and patchy.
The original tiler had laid the floor well, but he had applied a satin topical sealer to the stone most of which had worn off over the years. A floor like this would need a little maintenance and the sealer reapplying from time to time to maintain it.
I completed a test clean for the client to show them what could be achieved which came out well. Happy with the result they accepted my quote for the restoration work, and we booked in a suitable time to complete the work.
The area was quite large, so I separated the job into rooms and started by protecting the skirtings and woodwork from splashing etc. I decided to do a chemical clean first to remove what was left of the old sealer but more importantly to give the grout a thorough clean which was making the floor look scruffy.
For this I opted to apply a strong dilution of Tile Doctor Pro-Clean which was left to dwell for a short while and then worked in with a mechanical rotary cleaner. It gets to work on the ingrained dirt and sealer. It should also help to get rid of the doggy smells. This process turns the cleaning solution black and is then extracted using a wet vacuum keeping the mess to a minimum. I paid particular attention to the grout which was deeply discoloured and found that some areas required going over a couple of times to get them clean. I was only just getting started on the cleaning but immediately the floor was looking so much better.
I then deep cleaned the Limestone with a set of diamond burnishing pads, working in sequence from the 400 grit through to 1500 grit. A small amount of water was used to aid the lubrication and after each pad have been over the entire area few times the solution is rinsed off with more water and extracted with the wet vacuum.
The floor came back to almost new and as the client wanted a satin finish, I ended by applying a 3000-grit pad to add a deeper polish to the Limestone. The floor was then left overnight to dry.
The last step of polishing with the 3000-grit pad already leaves the floor quite dry however I always like to check before sealing so just to be sure I took some reading with a damp meter. The readings were fine, so I started applying the first of two coats of Tile Doctor Ultra Seal to finish the floor. This is an impregnating sealer (as opposed to the previous topical sealer) that soaks into the stone protecting it from within but without affecting its appearance. This product was chosen in consultation with the client who was specific about how they wanted to floor to look.
The floor now looked superb. Both the client and l were very pleased with the finished floor and so where the dogs! For aftercare I recommended Tile Doctor Stone Soap which is designed for cleaning polished stone floors like these, it’s a gentle stone cleaner that helps maintain the patina and ideal for this type of floor.
Nigel Stoker
North West Yorkshire Tile Doctor
 Tile Doctor Ltd
A family living in Guildford were in touch recently about restoring the appearance of their Ceramic tiled shower and bathroom. They were about to put the property up for sale and were concerned the grubby grout might put off potential buyers. First impressions do count so renovating a bathroom or kitchen before selling is a really good idea and will help you achieve a better price.
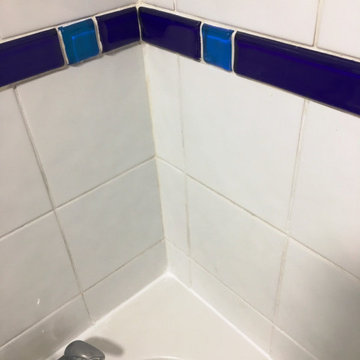
In this case the Ceramic tiles were dirty and black with mould in places which looked unhygienic and uninviting. Additionally, the mastic sealant between the tile and bath was tired and worn to the extent that water could end up leaking behind the seal. After visiting the property, they were pleased to hear I could help and happily accepted our quote which was based around a days work and some materials.
Firstly, I cleaned the grout using a Tile Doctor product called Duo Clean which is designed to tackle dirty grout and mould. I sprayed the product along all the grout lines and left it to soak in for about fifteen minutes. Once ready I brushed them with a firm wire brush then rinsed off with water. Next, I cleaned the tiles using a strong dilution of Tile Doctor Pro-Clean which was decanted into a spray bottle and sprayed onto the wall tiles. After ten minutes I then used a handheld buffing machine fitted with a small white buffing pad to shift the dirt and buff up the white tiles. After rinsing the slurry off with water you could see a marked improvement.
I hand dried the tile and grout with a cloth and then set about stripping out the old white mastic sealer with a sharp knife. This took some time, as you have to be careful not to scratch the bath or the tile.
By this time the grout had dried off fully and I was able to see if more work was required. To achieve a uniform colour throughout. Mould and some cleaning products can discolour grout permanently and, in this case, there was some grout staining I was unable to remove. We had discussed this possibility earlier and how it would be best resolved using a white grout colourant. So, I carefully applied Tile Doctor Grout Colour which is painted on with a small brush with any excess wiped off the tile before it can set. This resulted in a uniform white grout throughout and really gave the whole bathroom a lift.
With the cleaning process completed I applied a new white mastic between the bath and tile and along the verticals. This is done with the bath filled with water and then left for 24 hours to allow the silicone to fully cure.
After the grout colour had dried, I applied an aerosol Tile and Grout sealer over the whole surface and then lightly polished off any excess with a clean cloth. This does two things; one it adds a further layer of protection to the new grout colour and to the surface of the tiles. Secondly Ceramic tiles are non-porous, but bacterial dirt can still get a grip on the surface, with the sealer in place you will find water quickly runs off without getting a chance to get a hold.
Sealers do wear off, so I recommended re-applying it every year. I had plenty left over and gave it to the customer when I finished using it. For regular cleaning of tiled shower areas, I recommend they use Tile Doctor Aqua-Pro this will neutralise any acid build-up caused by acidic shampoos etc.
West Surrey Tile Doctor
Rupert Mcleod
Find the right local pro for your project
 Greensward LLC
Andrew Cutright
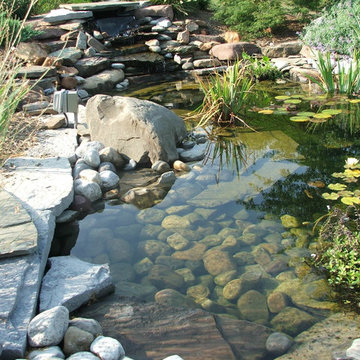
Inspiration for a small traditional full sun backyard concrete paver water fountain landscape in DC Metro.
Inspiration for a small traditional full sun backyard concrete paver water fountain landscape in DC Metro.
 Twelve Stones Designs, LLC
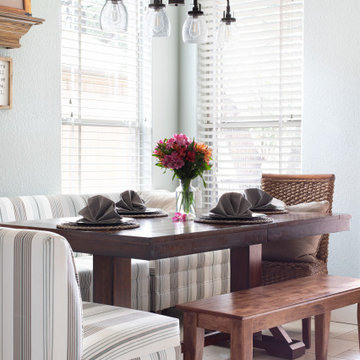
The owners of this kitchen had spent the money to upgrade the finishes in their kitchen upon building the home 12 years ago, but after living in the space for several years they realized how nonfunctional the layout really was. The (then) two preschool aged children had grown into busy, hungry teenagers with many friends who also liked to hang out at the house. So the family needed a more functional kitchen with better traffic flow, space for daily activities revolving around the kitchen at different times of day, and a kitchen that could accommodate cooking for and serving large groups. Furthermore, the dark, traditional finishes no longer reflected the homeowners’ style. They requested a brighter, more relaxed, coastal style that reflected their love of the seaside cities they like to visit.
Originally, the kitchen was U-shaped with a narrow island in the middle. The island created narrow aisles that bottle-necked at the dishwasher, refrigerator, and cooktop areas. There was a pass-through from the foyer into the kitchen, but the owners never liked that the pass-through was also located so close to the powder room. The awkward proximity was unappealing and made guests feel uncomfortable.
The kitchen’s storage was made up of lots of narrow cabinets, apothecary drawers, clipped corner units, and very few drawers. It lacked useful storage for the larger items the family used on a daily basis. And the kitchen’s only pantry was small closet that had only builder-grade, narrow shelving with no illumination to be able to see the contents inside.
Overall, the kitchen’s lighting plan was poorly executed. Only six recessed cans illuminated the entire kitchen and nook areas. The under cabinet lighting was not evenly distributed either. In fact, the builder had mis-placed the under cabinet lighting around the decorative pilasters which made for choppy, dark cubbies. Further, the builder didn’t include any lighting over the sink or the bar area, which meant whoever was doing the dishes was always in their own shadow. That, coupled with the steep overhang of the game room above made the bar area feel like a dim, cavernous space that wasn’t inviting or task oriented. The kitchen looked out into the main living space, but the raised bar and a narrow wall (which held the only large cabinet in the kitchen) created more of a barrier than a relationship to the living room or breakfast nook. In fact, one couldn’t even see the breakfast nook from the cooktop or sink areas due to its orientation. The raised bar top was too narrow to comfortably sit to either dine at or chat from due to the lack of knee space. The the homeowners confided that the kitchen felt more like a dark, dirty prison than place where the family, or their guests, wanted to gather and commune.
The clients' needs and desires were:
➢ to create a kitchen that would be a space the family loved to be in; to relate to the adjacent spaces all around, and to have better flow for entertaining large groups
➢ to remove the walls between the breakfast nook and living area and to be able to utilize the natural light from the windows in both those areas
➢ to incorporate a functional chopping block for prepping fresh food for home cooked meals, an island with a large sink and drain board, 2 pull out trash cans, and seating for at least the 2 teens to eat or do homework
➢ to design a kitchen and breakfast nook with an airy, coastal, relaxed vibe that blended with the rest of the house's coastal theme
➢ to integrate a layered lighting plan which would include ample general illumination, specific task lighting, decorative lighting, and lots of illuminated storage
➢ to design a kitchen with not only more storage for all the husband’s kitchen gadgets and collection of oils and spices, but smart storage, including a coffee/breakfast bar and a place to store and conceal the toaster oven and microwave
➢ to find a way to utilize the large open space between the kitchen, pantry area, and breakfast nook
Twelve Stones Designs achieved the owner's goals by:
➢ removing the walls between the kitchen and living room to allow the natural light to filter in from the adjacent rooms and to create a connection between the kitchen, nook, and living spaces for a sense of unity and communion
➢ removing the existing pantry and designing 3 large pantry style cabinets with LED tape lights and rollout drawers to house lots of kitchen appliances, gadgets, and tons of groceries. We also took the cabinets all the way up to the 9’ ceiling for additional storage for seasonal items and bulk storage.
➢ designing 2 islands - 1 with a gorgeous black walnut chopping block that houses a drawer for chopping and carving knives and a custom double pull out trash unit for point of use utilization - and 1 that houses the dishwasher, a large Blanco Gourmet sink with integrated drain board, woven baskets for fresh root vegetables and kitchen towels, plenty of drawer storage for kitchen items, and bar seating for up to 4 diners.
➢ closing off the space between the kitchen and the powder room to create a beautiful new private alcove for the powder room as well as adding some decorative storage. This also gave us space to include more tall storage near the new range for precision placement of the husband’s extensive oil and spice collection as well as a location for a combo-steam oven the wife wanted for baking and cooking healthy meals.
The project is enhanced functionally by:
➢ incorporated USB and standard receptacles for the kids’ laptops and phone charging in the large island
➢ designing the small island to include additional open shelving for items used on a daily basis such as a variety of bowls, plates, and colanders. This set up also works well for the husband who prefers to “plate” his dinners in restaurant-style fashion before presenting them to the table.
➢ the integration of specific storage units, such as double stacked cutlery drawers, a custom spice pull-out, a Kuerig coffee and tea pod drawer, and custom double stacked utensil drawers
➢ moving the refrigerator to the old oven location - this eliminated the bottle neck as well as created a better relationship to the eating table. It also utilizes the floor space between the pantry, nook, and kitchen
➢ creating a banquet style breakfast nook - this banquette seating not only doubles the amount of seating for large gatherings but it better utilizes the odd space between the kitchen and the previous nook area. It also helps to create a distinct pathway from the mudroom room through the pantry area, kitchen, nook, and living room.
➢ the coffee/breakfast bar area which includes the perfect location for the concealed microwave and toaster oven, convenient storage for the coffee pods and tea accoutrements. Roll-out drawers below also house the smoothie maker, hot water kettle, and a plethora of smoothie-making ingredients such as protein powders, smoothie additives, etc. Furthermore, the drawers below the Keurig house measuring utensil, cutlery, baking supplies and tupperware storage.
➢ incorporating lots of wide drawers and pullouts to accommodate large cookware.
➢ utilizing as much vertical space as possible by building storage to the ceiling which accommodates the family’s abundant amount of serving platters, baking sheets, bakeware, casserole dishes, and additional cutting boards.
The project is enhanced aesthetically by:
➢ new 5-piece Versailles pattern porcelain tile that now seamlessly joins the entire down stairs area together creating a bright, cohesiveness feeling instead of choppy separated spaces - it also adds a coastal feeling
➢ designing a cabinet to conceal the microwave and toaster oven
➢ the coastal influenced light fixtures over the nook table and island
➢ the sandy colors of the Langdon Cambria countertops. The swirling pattern and sparkling quartz pieces remind the homeowner of black-and-tan sandy beaches
➢ the striped banquet seating whose creamy white background and blue-green stripes were the inspiration for the cabinet and wall colors.
➢ All the interior doors were painted black to coordinate with the blacks and grays in the backsplash tile and countertop. This also adds a hint of tailored formality to an otherwise casual space.
➢ the use of WAC's Oculux small aperture LED units for the overhead lighting complimented with Diode LED strips for task lighting under the cabinets and inside the pantry and glass wall cabinets. All of the lighting applications are on separate dimmer switches.
Innovative uses of materials or construction methods by Realty Restoration LLC:
➢ Each 1-1/2” x 3” block of reclaimed end-grain black walnut that makes up the center island chopping block was hand milled and built in the shop. It was designed to look substantial and proportional to the surrounding elements, executed by creating the 4 inch tall top with a solid wood chamfered edge band.
➢ The metal doors on either side of the vent hood were also custom designed for this project and built in the Realty Restoration LLC shop. They are made 1x2, 11-gauge mild steel with ribbed glass. Weighing 60 lbs a piece, heavy duty cabinet hinges were added to support the weight of the door and keep them from sagging.
➢ Under-cabinet receptacles were added along the range wall in order to have a clean, uninterrupted backsplash.
Design obstacles to overcome:
➢ Because we were removing the demising walls between the kitchen and living room, we had to find a way to plumb and vent the new island. We did this by tunneling through the slab (the slab had post tension cables which prevented us from just trenching) to run a new wet vent through a nearby structural wall. We pulled the existing hot and cold lines between upper floor joists and ran them down the structural wall as well and up through a conduit in the tunnel.
➢ Since we were converting from wall overs to a gas range it allowed us to utilize the 220 feed for the wall ovens to provide a new sub panel for all the new kitchen circuits
➢ Due to framing deficiencies inherited from the original build there was a 1-1/2” differential in the floor-to-ceiling height over a 20 foot span; by utilizing the process of cutting and furring coupled with the crown moulding details on the cabinet elevations we were able to mask the problem and provide seamless transitions between the cabinet components.
Evidence of superior craftsmanship:
➢ uniquely designed, one-of-a-kind metal “X” end panels on the large island. The end panels were custom made in the Realty Restoration LLC shop and fitted to the exact dimensions of the island. The welding seams are completely indistinguishable - the posts look like they are cut from a single sheet of metal
➢ square metal posts on the small island were also custom made and designed to compliment and carry through the metal element s throughout the kitchen
➢ the beautiful, oversized end panels on the pantry cabinets which give the breakfast nook a tailored look
➢ integrating a large format 5 piece Versailles tile pattern to seamlessly flow from the existing spaces into the new kitchen space
➢ By constructing a custom cabinet that jogged around a corner we could not remodel (housing the entry way coat closet) we were able to camouflage the adjacent wall offset within the upper and lower cabinets. By designing around the existing jog in the structural walls we accomplished a few things: we were able to find the space to house, and hide, the microwave and toaster oven yet still have a clean cohesive appearance from the kitchen side. Additionally, the owners were able to keep their much needed coat closet and we didn’t have to increase the budget with unnecessary structural work.
 Tile Doctor Ltd
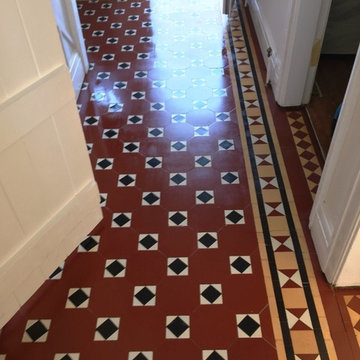
This Victorian tiled hallway was one of the most beautiful Victorian floors I have ever had the pleasure to work on. With the wide range of patterns and colours they are available in, it seems no two Victorian tiled floors are exactly the same, and this uniqueness is part of what makes them so appealing to property owners.
Unfortunately, this floor had been poorly maintained over the years, even suffering from a few loose and missing tiles. There was a thick coating of dust and dirt soiling its appearance, and the property owner was understandably keen to remedy the situation. Having realised that everyday household cleaners are not likely to achieve great results, she asked me to carry out a full professional restoration, including making some repairs where necessary. I was pleasantly surprised to find out that this property was situated in the town of Wyken, which is a few miles outside of Coventry city centre and in fact just down the road from where I live myself!
Before making a start on the cleaning process, it was first necessary to re-fix the small number of loose tiles and replace a single missing tile by the radiator. Fortunately, I’ve been working on these types of floors for some time and have built up a good collection of replacement Victorian tiles so I was able to find one that matched in nicely with the rest of the floor without too much problem.
To clean the tiles, I began by applying a layer of Tile Doctor Oxy-Gel directly into the floor with a small brush. This product is very similar to the popular Tile Doctor Pro Clean: both are strong alkaline cleaners, strippers and degreasers, with the main difference being that Oxy-Clean comes in a gel form, making it easier to control and therefore ideal for precise cleaning, or for application to vertical surfaces. Like Pro Clean and being an alkaline base it is suitable for use on all types of natural stone and tile. The Oxy-Gel was left to soak into the tiles for around ten minutes before being scrubbed in and then rinsed off carefully with water, I then used a wet vacuum to extract the now soiled cleaning solution off the floor.
The next step was to acid wash the floor using Tile Doctor Acid Gel; this served to break down alkaline mineral deposits inherent in the grout along with some excess grout that had been left on the untidily left on tile from installation. It is recommended not to use this product on acid-sensitive soon such as Marble and Limestone as it can cause irreparable etching but its fine on Victorian tiles as long as you don’t leave it on too long.
Finally, the floor was given a rinse with clean water to remove any trace of chemicals from the cleaning and to neutralise the area in preparation for sealing.
I left the floor for 48 hours to dry before returning to the property to seal the tiles. This allowed plenty of time for the floor to dry completely, which is important as any excess moisture can damage the ability of the sealer to protect against dirt and stains.
My choice of sealer for this floor was Tile Doctor High Shine; three coats in total were applied, providing – as the product name suggests – the high shine finish that the customer had requested. The sealer will provide durable surface protection going forward preventing dirt from becoming ingrained into the pores of the tile and ensuring it remains easy to clean and keeping its appearance for some time to come.
As a big fan of Victorian tiles, it was a great pleasure to restore this floor, and my customer was certainly pleased too. It’s amazing how far a little professional maintenance can go to improving the appearance of these fantastic types of floor.
Mick Gayton
Warwickshire Tile Doctor


Sponsored
Columbus, OH

Hope Restoration & General Contracting
Columbus Design-Build, Kitchen & Bath Remodeling, Historic Renovations
 Tile Doctor Ltd
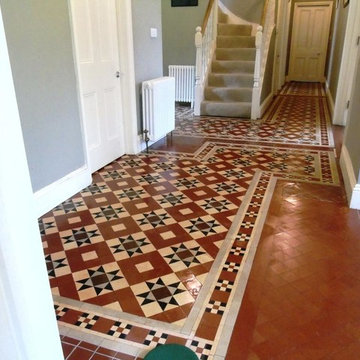
Victorian tiles are very hard-wearing and historically a popular choice for heavy traffic areas such as hallways. Still popular today they are nonetheless like most tiles and can become ingrained with dirt over time.
This particular floor, located in a property in the old market town of Tewkesbury is a good example of a floor that was in good physical condition, but heavily ingrained with dirt due to a lack of regular maintenance. At a loss for how to remedy the situation by themselves, the property owner asked me to pay a visit to restore the tiles back to their best possible condition.
In this particular scenario, I opted to mix and apply a solution of different cleaning products from our professional range, each serving a different purpose. These products were Tile Doctor Pro Clean, Tile Doctor Remove and Go, and Tile Doctor NanoTech HBU. Remove and Go serves the purpose of stripping away any old sealer on the tiles, while Pro Clean is an alkaline cleaner that reliably removes dirt and staining. NanoTech HBU is a particularly powerful cleaner which utilises nano-sized particles to penetrate deep into the pores of the stone, get underneath difficult stains and lift them out.
I spread this potent solution across the length and width of the tiled hallway and left it to soak for approximately 10 minutes, before using a black scrubbing pad fitted to my buffing machine to give the tiles a deep scrub. Next, I rinsed the soiled solution away and neutralised the chemicals with plain water, before extracting any residue using a wet vacuum. I repeated the cleaning process several times to achieve the best results possible, and I also employed the aid of a steam cleaner to spot clean any particularly stubborn marks.
Cleaning the floor took two days in total. At the end of the second day, I gave the floor a thorough and final rinse before leaving it to dry completely overnight. The next day, I returned to the property to seal the floor after checking the floor was dry. Ensuring before sealing that the floor is completely dry is crucial – even the smallest quantity of moisture remaining can potentially cloud the sealer and damage its performance.
My choice of sealer was Tile Doctor Colour Grow, an impregnating sealer that penetrates and fills the pores of the tile to prevent trapped dirt and makes regular cleaning much easier. Colour Grow is a great choice of sealer for Victorian tiles because it really enhances the colourful patterns which are characteristic of this type of tile.
My customer was very impressed with the service and remarked on the huge improvement to the appearance of the floor. You can see this for yourself – just take a look at the before and after photos!
Malcolm Crowther
Gloucester Tile Doctor
 Tile Doctor Ltd
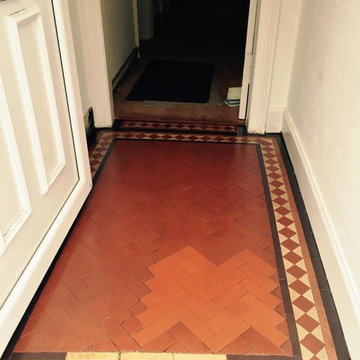
This job was at house in Polwarth, a small parish through which flows the Union Canal, running from Falkirk to Edinburgh. The client had requested a clean for a Victorian tiled hallway set in the narrow reception area of the house.
The tiled floor had been painted over by the previous owners of the house using a thick, red paint. Painting a tile floor in such a way can affect its wash-ability, and the paint can peel off over time especially in a high-traffic area such as a reception area or hallway such as this. The red paint would have to be removed in order to restore the tile underneath and reveal its natural state, as well as provide a thorough and much-needed clean.
The first step in the paint removal process was to spray the floor with a strong solution of Tile Doctor Pro-Clean mixed with Remove & Go. Pro-Clean is a heavy duty cleaner and degreaser, suitable for use on tile, stone and grout. Pro-Clean combines well with Remove and Go, which is a multi-purpose stripper capable of removing most sealers, adhesives and, particularly important for this case, paint. The solution was left to dwell after application to allow it to soak into the tile and soften the paint and dirt.
After 10 to 15 minutes we scrubbed the floor in order to remove as much of the paint as possible. The owner of the house was surprised to see the true colours of the tile appearing, which had been hidden beneath the paint for a significant period of time. As the red paint coating was particularly thick, we had to scrub the floor multiple times. In some areas the paint proved tricky to remove so it was necessary to use a steamer to steam clean the stubborn areas.
Once all of the paint had been successfully removed, the unveiled tile floor was treated to another clean using Pro-Clean, before being given a wash down and neutralised using Concentrated Neutral Tile & Stone Cleaner. It’s important to ensure any trace of strong cleaning products are removed from floor before the next step of sealing as it can impact the sealer leading to un-even results.
The floor was left to dry off overnight and we came back the next day to seal the tiles using four coats of Tile Doctor Seal & Go which is an ideal sealer for Victorian tiles as it provides stain protection whilst also bringing out the colours resulting in a subtle sheen appearance.
You can see from the photos that after a thorough cleaning and sealing the floor was back to looking its best. I do wonder why someone would want to paint over such a fantastic Victorian tiled floor!

 Ehrlich Yanai Rhee Chaney Architects
The ground floor volumes wrapped in an elongated hand-fired brick, emphasizing the horizontality of the architecture that lays solidly on the land.
(Photography by: Matthew Millman)
 Legacy Glass Studios
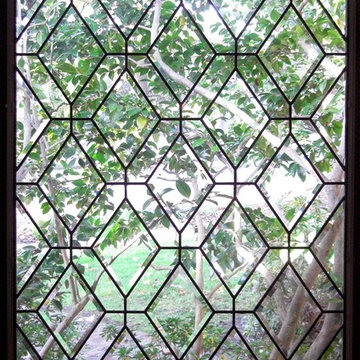
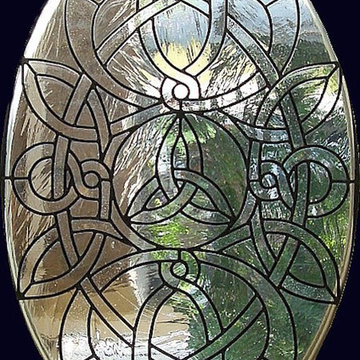
Custom leaded glass panel for bedroom window
Glass: plain clear glass and beveled diamonds
Lead: 3/16" rounded
Size: 1 @ ~18" x 24" x 1/4" thick
*This product was commissioned and made-to-order. If you're interested in this design, let's chat! We can recreate it for you to your specified dimensions, or we can discuss any design changes you'd like, as well as additional options for materials (glass texture, color, lead size, etc.). Reach out to hello@legacyglass.com to get started!
 Tile Doctor Ltd
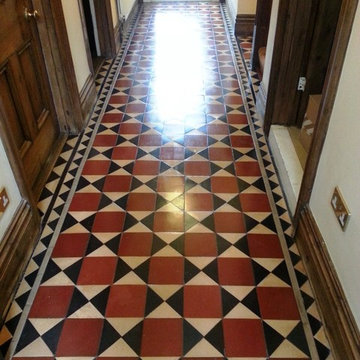
Recently I was contacted by a man in the town of Bedford who was worried that he had damaged his Victorian tiled hallway as a result of dragging a piano across the floor. I went round to the property to get a better look at the problem and, on closer inspection, realised that the tiles were actually fine; however, the piano had torn through the old surface seal.
The 150-year old tiles, dating back – as the name suggests – to the reign of Queen Victoria, had been poorly sealed and additionally had not been maintained correctly with the appropriate cleaning products. I was commissioned to remove the old sealer, clean and re-seal in order to restore this fantastic floor to its former glory.
My first task was to mix a solution of Tile Doctor Pro-Clean and water, which was then spread across the floor. Pro-Clean is a high alkaline cleaner which also contains stripping properties and this helped to break down the old, damaged sealer. The solution was left to dwell for approximately 20 minutes, giving it time to seep into the stone to get underneath, and lift out, any ingrained dirt. Pro-Clean was worked into the tiles using a heavy low speed rotary machine fitted with a black pad.
Once cleaned and stripped, we rinsed the floor using plain, clean water to neutralise the high alkaline Pro-Clean and the removed the resulting slurry using a wet-vac machine.
At this point I noticed that the white/magnolia tiles were particularly well worn and still very dirty and in need of further cleaning. Around this time Tile Doctor had also been discussing the successful use of Burnishing Pads (normally used on polished stone) on Victorian Tiles so I hand burnished the most stained tiles with a small 6 inch diamond encrusted burnishing pad with a little water to help lubricate the process. Following this, I rinsed the entire floor once again.
After leaving the floor to dry for four days, I returned to the house to seal the tiles opting to apply a single coat of Tile Doctor Colour Grow impregnating sealer first followed up with four coats of Tile Doctor Seal & Go. This combination of sealers provides a durable internal and surface stain protection whilst lifting the colours and adding a nice subtle sheen finish.
Once dried and cured, the floor was buffed using micro-fibre clothes to further enhance the appearance of the tiles further. My client was very pleased with the results, and couldn’t believe it was possible to get a floor that was so old appear brand new! The floor will dull with wear so I advised my client on the benefits of a regular maintenance plan going forward to ensure this great flooring feature remains in top condition.
Andrew Evans
Bedfordshire Tile Doctor
 Tile Doctor Ltd
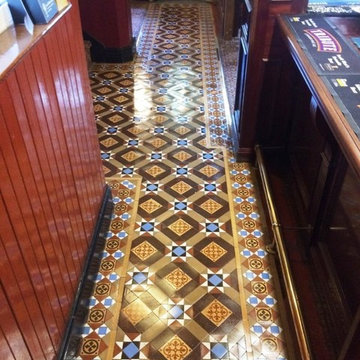
Here’s a really interesting commercial job for you, which I recently completed in the town of Hinckley, Leicestershire. I was asked to take a look at a Victorian Geometric and Encaustic tiled floor in the historic Queen’s Head pub.
This floor is over a century old and although in good condition for its age had suffered significant wear over the years, along with some cracked tiles and slight inherent moisture issues. What the pub landlord requested was a restorative clean to alleviate the aesthetically damaging effect of the wear, and to enhance the natural colours of the stone. I was also asked to seal the floor following the clean to achieve a semi-gloss finish.
The first step in the cleaning process was to mix a strong solution of one part Tile Doctor Pro-Clean to four parts clean water. Pro-Clean is a high alkaline cleaner which also contains stripping properties, allowing it to break down old sealer and tackle heavy soil build-up. The solution was applied to the floor and left to dwell for 15 minutes, giving it times to seep into the stone, get underneath the dirt and lift it to the surface.
I addressed several paint spots and areas suffering from glue contamination by using Tile Doctor Remove & Go, which is specially formulated to break down paint and adhesives on unpolished natural stone floors, amongst others. The entire floor was then scrubbed using a special floor cleaning pad, and the resulting slurry was vacuumed away using a wet-vac machine.
The final issue to deal with was the inherent efflorescence staining. This was treated using Tile Doctor Grout Clean-Up, an acid-based product which removes not just efflorescence but also grout haze, mineral deposits, and rust stains. The solution here was one part Grout Clean-Up diluted with four parts water.
After completing the clean, I thoroughly rinsed the floor with clean water to remove any trace of cleaning product and dried the floor as much as possible with a wet vacuum, then before leaving for the day i installed a couple of air movers to assist with drying overnight.
Upon my return the following day, I checked the floor for any excess moisture before sealing it with our topical, semi-gloss finish sealer, known as Seal & Go Extra which due to its formula is ideal for external or old internal floors where there is unlikely to be damp from membrane.
This unique product provides excellent protection, and allows the tiles to breath where floors are suffering from inherent moisture issues. It is suitable for both internal and external use, on Victorian floor tiles, Sandstone, Flagstones, Terracotta, and rough Slate.
As you can see from the photo, I was able to fulfil my client’s request to a high standard, bringing the pub’s old yet characterful Victorian tiled floor back to life again.
Kay Sylvester
Leicestershire Tile Doctor

Sponsored
Columbus, OH
Hope Restoration & General Contracting
Columbus Design-Build, Kitchen & Bath Remodeling, Historic Renovations
 Tile Doctor Ltd
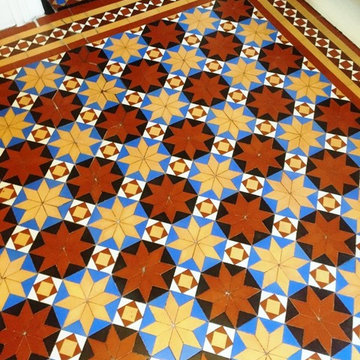
Victorian tiled floors are known for their interesting and unique mosaic patterns – and this one was no different. It was installed at a house in the historic West Midlands town of Stourbridge (famous for its glass industry). Unfortunately it was now looking worse for wear and was in dire need of not just cleaning and sealing, but also some minor repairs and the owner was keen to have it restored back to its former glory.
This particular Victorian tiled floor had been arranged in a fantastic pattern comprising tiles in shades of yellow, blue, red and white. There were, however, some missing tiles but fortunately I know a number of specialist suppliers where I can source replacements. I spent the first day making minor repairs and replacing the missing tiles, including the grouting, and then left the treated areas to set overnight.
On the second day I returned to the house to complete the cleaning process starting with a combination of Tile Doctor Remove & Go – a powerful sealer stripper – and Tile Doctor NanoTech HBU cleaner to lift out ingrained dirt and break down old layers of sealer. NanoTech HBU is particularly effective as it utilises tiny nano sized particles to penetrate deep into the stone and lift out the dirt. The resultant slurry was rinsed off the floor and removed using a wet vacuum.
The next step was to give the floor an acid wash using Tile Doctor Acid Gel, this product can remove old grout haze and other mineral deposits, additionally being in a gel form makes it easy to control and although primarily designed for use on walls it works really well on floors as well. Following this I gave the floor a thorough rinse, dried as much as possible with a wet vacuum and left it to dry overnight, ready to be sealed the next day.
Upon my return to the house on the third day I set about sealing the floor, checking first that the area was completely dried by running damp tests with damp meter, all was well so I able to start applying the sealer. The sealer chosen for this floor was Tile Doctor Seal and Go which is a water based product which is a popular choice as it gives the floor a nice sheen and doesn’t leave the smell that the solvent based sealers do; three thin coats were applied to provide a robust surface seal and to achieve a semi-shine finish, as per the client’s requested.
My client was extremely pleased with the results, with a lot achieved over the space of roughly two and a half days. They left the following feedback:
“Mick did a fantastic job. He was polite and friendly and kept us informed at every stage of the work. He is extremely professional and it is obvious that he takes a great deal of pride in his work. We are thrilled with our ‘new’ floor.”
Michael Leonard
Worcestershire Tile Doctor
 AirField Systems, LLC
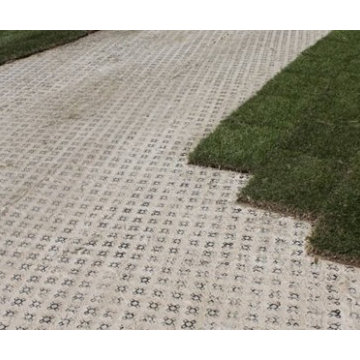
AirField installed an AirPave grass fire lane for their porous flexible paving at Baptist Trinity Residential Hospice, creating a beautiful, functional, ecological friendly solution to facility access.
An installation of an AirField Systems grass fire lane at Baptist Trinity Residential Hospice brings green building benefits and incredible strength to a beautiful new facility. A time lapse photo series highlight the installation process of the 6,747 PSI sand filled 100% recycled geocell technology, providing the strength of asphalt and concrete while relieving some of the burden of costly storm sewers and drainage.
This new installation highlights the benefits of paving with grass, as well as the comparative ease of installation. Concrete and asphalt surfaces occupy twice the area of buildings and are the most detrimental to clean water. Concrete and asphalt surfaces dominate the landscape of our urban environments and prevent rainwater from being filtered naturally. They send harmful polluted water straight into our streams, rivers and lakes. In urban America, concrete and asphalt pavements produce two thirds of our excess water runoff. They are responsible for significant hydrocarbon pollutants on our ground and in our water, causing ground water decline, and resulting in local water shortages. These concrete and asphalt surfaces also create huge increases in temperature known as the urban “heat island effect”.
The pollution caused by impervious surfaces deteriorate the quality of our storm water runoff and create large overflows that our storm sewer systems cannot handle. It is also important to realize that the urban forest force is drastically diminishing, causing CO2 levels to rise, which in turn causes global warming. With all the negative influences of impervious pavements now is the time to turn our attention to alternatives for the benefit of the environment.
From fire lanes, overflow, and event parking, to temporary and stadium parking, reinforced grass parking systems deliver the same strength and durability of asphalt and concrete without the negative affects mentioned above. These incredibly strong geocells reinforce grass parking, prevent rutting from traffic, protect turf roots, and promote beautiful grass. Reinforced grass parking structures, also know as grass pavements, enhance the environment by naturally filtering auto and truck liquids such as oil drippings, antifreeze overflows and many other leaks and spills. They also help with air pollutants after they have been knocked to the ground by rainwater and greatly reduce hot surface temperatures thus fighting global warming and the “heat island effect”. Grass pavements allow our groundwater to be naturally replenished, the roots of trees to breathe, and they help our streams and rivers flow cleanly in dry hot summers. A large part of the solution to urban environmental problems is under our feet. By paying appropriate attention to the everyday materials on which we walk and drive, we can replenish renewable resources, restore the natural regenerative processes, and produce a cleaner, healthier, safer, more sustainable world in which we must live. Porous pavements are potentially the most important development in urban watersheds since the invention of storm sewers. By routing rainwater directly into the earth as nature intended, the need for costly storm water structures can be drastically reduced.
Reinforced grass parking has built in permeable spaces through which water and air can pass. Although some porous paving materials are nearly indistinguishable from nonporous materials in construction and superficial appearance, their environmental effects are qualitatively exponential. They allow air, water and heat to dissipate into the environment naturally helping to save the planet.
AirField reinforced grass parking provides beauty and comfort, and with the unbeatable price and performance of AirDrain you can’t go wrong. AirDrain is the reinforced grass pave system the industry has trusted for years !!!
Airfield Systems, LLC 8028 North May Avenue Oklahoma City, OK 73120 405-359-3775
Installer – GREENPRO Landscapes Kevin James 9847 Stewart Rd Arlington, TN 38002

 Construction And More Las Vegas
Expert Kitchen Remodel Services by Construction and More Las Vegas
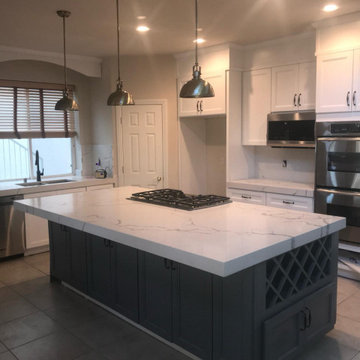
At Construction and More Las Vegas, we know that the kitchen is the heart of your home. It’s where you gather with family, entertain guests, and create delicious meals. That’s why we’re dedicated to providing expert kitchen remodel services that transform your kitchen into a functional, stylish, and inviting space. Serving homeowners throughout Las Vegas and the surrounding areas, including Summerlin, Henderson, Paradise, Spring Valley, and Boulder City, we offer personalized solutions tailored to your unique needs and preferences.
Why Choose Construction and More Las Vegas for Your Kitchen Remodel?
Expertise and Experience
With years of experience in kitchen remodeling, our team possesses the knowledge and skills to handle projects of all sizes and complexities. We stay up-to-date with the latest design trends and technologies to ensure that your kitchen remodel not only meets but exceeds your expectations.
Customized Solutions
Every kitchen remodel is unique. We tailor our services to meet your specific needs and preferences, creating a custom kitchen design that reflects your personal style and complements your home’s aesthetic. From cabinets to countertops, every element is chosen with your vision in mind.
Quality Craftsmanship
Our commitment to quality craftsmanship ensures that your kitchen renovation stands the test of time. We use only the highest quality materials and employ precise techniques to deliver a finished product that is both beautiful and durable.
Comprehensive Services
Our comprehensive kitchen remodeling services cover everything from initial design and planning to final installation and finishing touches. Whether you need a full kitchen renovation or a simple makeover, we provide a seamless and stress-free experience.
Our Kitchen Remodeling Process
Initial Consultation and Planning
The process begins with a detailed consultation to understand your vision, needs, and budget. We provide expert advice on design, layout, and materials to create a plan that enhances both the functionality and aesthetics of your kitchen.
3D Design and Visualization
Using state-of-the-art 3D design software, we create realistic renderings of your proposed kitchen remodel. This allows you to visualize the space and make adjustments before construction begins, ensuring that every detail aligns with your vision.
Custom Cabinets and Storage Solutions
Custom cabinets are a cornerstone of any kitchen remodel. Our skilled craftsmen design and build cabinets that maximize storage and reflect your style. Whether you prefer modern sleek designs or traditional classic looks, we create cabinets that are both functional and beautiful.
Countertops and Backsplashes
The choice of countertops and backsplashes significantly impacts the look and feel of your kitchen. We offer a wide range of materials, including granite, quartz, and marble, to suit your style and budget. Our team helps you select the perfect combination that adds elegance and durability to your kitchen.
Lighting and Fixtures
Proper lighting is essential for both functionality and ambiance in your kitchen. We design and install lighting solutions that highlight key areas, such as task lighting, under-cabinet lighting, and ambient lighting. Our selection of fixtures includes a variety of styles to match your kitchen design.
Appliance Installation
Modern appliances are integral to a functional and efficient kitchen. We guide you in selecting high-quality, stylish options that meet your needs and complement your kitchen design. Our team ensures seamless installation for a cohesive and polished look.
Flooring and Finishes
The right flooring enhances the beauty and practicality of your kitchen. We offer a variety of flooring options, including tile, hardwood, and luxury vinyl, to suit your preferences. Our team ensures professional installation and finishes that withstand the rigors of daily use while adding elegance to your space.
Construction and Project Management
Once the design and materials are finalized, our experienced construction team takes over. We manage the entire remodeling process, from demolition to final touches, with meticulous attention to detail. Our project managers coordinate all aspects of the remodel, ensuring that the work is completed on time and within budget. We keep you informed throughout the process, addressing any concerns and ensuring your satisfaction.
Kitchen Renovation in Las Vegas and Surrounding Areas
If you’re searching for “kitchen renovation in my area,” look no further than Construction and More Las Vegas. We proudly serve Las Vegas and the surrounding communities, including Summerlin, Henderson, Paradise, Spring Valley, and Boulder City. Our local expertise and commitment to customer satisfaction make us the go-to choice for all your kitchen remodeling needs.
Why Kitchen Remodeling Matters
Enhanced Functionality
A well-designed kitchen maximizes space and improves functionality. Whether it’s adding more storage, upgrading appliances, or reconfiguring the layout, our remodels ensure that your kitchen works better for your daily routine and entertaining needs.
Increased Home Value
A kitchen remodel is one of the best investments you can make in your home. An updated, modern kitchen increases your property’s value and appeals to potential buyers if you decide to sell.
Improved Aesthetics
Our remodels transform outdated kitchens into beautiful, contemporary spaces. From luxurious finishes to modern fixtures, we create a kitchen that is both stylish and inviting.
Energy Efficiency
Upgrading to energy-efficient appliances and fixtures can reduce your utility bills and environmental footprint. We offer a range of eco-friendly options that save energy and water without compromising on performance or style.
Our Commitment to Sustainability
At Construction and More Las Vegas, we are committed to sustainable practices in our kitchen remodels. We source eco-friendly materials and prioritize energy-efficient fixtures to reduce environmental impact. Our team is dedicated to creating beautiful, functional kitchens that are also kind to the planet.
Testimonials and Case Studies
Our satisfied clients speak to the quality and reliability of our services. We have successfully completed numerous kitchen remodels, each tailored to meet the unique needs and preferences of our clients. Visit our website to read testimonials and view case studies of our work.
Contact Us Today
Ready to start your kitchen remodel? Contact Construction and More Las Vegas for expert kitchen remodeling services that combine functionality, beauty, and quality. Our experienced team is here to bring your vision to life, creating a kitchen that meets your needs and exceeds your expectations. Call us today for a free consultation and let us help you create the kitchen of your dreams. Whether you need a complete kitchen renovation or a custom kitchen makeover, Construction and More Las Vegas is your trusted partner for exceptional kitchen transformation services.
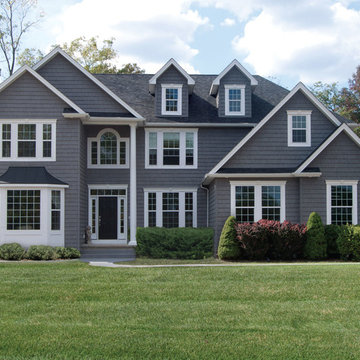
Sponsored
Galena, OH

Buckeye Restoration & Remodeling Inc.
Central Ohio's Premier Home Remodelers Since 1996
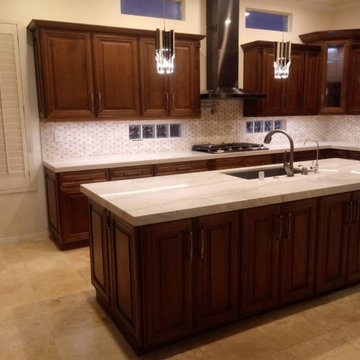 Construction And More Las Vegas
Expert Kitchen Remodel Services by Construction and More Las Vegas
At Construction and More Las Vegas, we know that the kitchen is the heart of your home. It’s where you gather with family, entertain guests, and create delicious meals. That’s why we’re dedicated to providing expert kitchen remodel services that transform your kitchen into a functional, stylish, and inviting space. Serving homeowners throughout Las Vegas and the surrounding areas, including Summerlin, Henderson, Paradise, Spring Valley, and Boulder City, we offer personalized solutions tailored to your unique needs and preferences.
Why Choose Construction and More Las Vegas for Your Kitchen Remodel?
Expertise and Experience
With years of experience in kitchen remodeling, our team possesses the knowledge and skills to handle projects of all sizes and complexities. We stay up-to-date with the latest design trends and technologies to ensure that your kitchen remodel not only meets but exceeds your expectations.
Customized Solutions
Every kitchen remodel is unique. We tailor our services to meet your specific needs and preferences, creating a custom kitchen design that reflects your personal style and complements your home’s aesthetic. From cabinets to countertops, every element is chosen with your vision in mind.
Quality Craftsmanship
Our commitment to quality craftsmanship ensures that your kitchen renovation stands the test of time. We use only the highest quality materials and employ precise techniques to deliver a finished product that is both beautiful and durable.
Comprehensive Services
Our comprehensive kitchen remodeling services cover everything from initial design and planning to final installation and finishing touches. Whether you need a full kitchen renovation or a simple makeover, we provide a seamless and stress-free experience.
Our Kitchen Remodeling Process
Initial Consultation and Planning
The process begins with a detailed consultation to understand your vision, needs, and budget. We provide expert advice on design, layout, and materials to create a plan that enhances both the functionality and aesthetics of your kitchen.
3D Design and Visualization
Using state-of-the-art 3D design software, we create realistic renderings of your proposed kitchen remodel. This allows you to visualize the space and make adjustments before construction begins, ensuring that every detail aligns with your vision.
Custom Cabinets and Storage Solutions
Custom cabinets are a cornerstone of any kitchen remodel. Our skilled craftsmen design and build cabinets that maximize storage and reflect your style. Whether you prefer modern sleek designs or traditional classic looks, we create cabinets that are both functional and beautiful.
Countertops and Backsplashes
The choice of countertops and backsplashes significantly impacts the look and feel of your kitchen. We offer a wide range of materials, including granite, quartz, and marble, to suit your style and budget. Our team helps you select the perfect combination that adds elegance and durability to your kitchen.
Lighting and Fixtures
Proper lighting is essential for both functionality and ambiance in your kitchen. We design and install lighting solutions that highlight key areas, such as task lighting, under-cabinet lighting, and ambient lighting. Our selection of fixtures includes a variety of styles to match your kitchen design.
Appliance Installation
Modern appliances are integral to a functional and efficient kitchen. We guide you in selecting high-quality, stylish options that meet your needs and complement your kitchen design. Our team ensures seamless installation for a cohesive and polished look.
Flooring and Finishes
The right flooring enhances the beauty and practicality of your kitchen. We offer a variety of flooring options, including tile, hardwood, and luxury vinyl, to suit your preferences. Our team ensures professional installation and finishes that withstand the rigors of daily use while adding elegance to your space.
Construction and Project Management
Once the design and materials are finalized, our experienced construction team takes over. We manage the entire remodeling process, from demolition to final touches, with meticulous attention to detail. Our project managers coordinate all aspects of the remodel, ensuring that the work is completed on time and within budget. We keep you informed throughout the process, addressing any concerns and ensuring your satisfaction.
Kitchen Renovation in Las Vegas and Surrounding Areas
If you’re searching for “kitchen renovation in my area,” look no further than Construction and More Las Vegas. We proudly serve Las Vegas and the surrounding communities, including Summerlin, Henderson, Paradise, Spring Valley, and Boulder City. Our local expertise and commitment to customer satisfaction make us the go-to choice for all your kitchen remodeling needs.
Why Kitchen Remodeling Matters
Enhanced Functionality
A well-designed kitchen maximizes space and improves functionality. Whether it’s adding more storage, upgrading appliances, or reconfiguring the layout, our remodels ensure that your kitchen works better for your daily routine and entertaining needs.
Increased Home Value
A kitchen remodel is one of the best investments you can make in your home. An updated, modern kitchen increases your property’s value and appeals to potential buyers if you decide to sell.
Improved Aesthetics
Our remodels transform outdated kitchens into beautiful, contemporary spaces. From luxurious finishes to modern fixtures, we create a kitchen that is both stylish and inviting.
Energy Efficiency
Upgrading to energy-efficient appliances and fixtures can reduce your utility bills and environmental footprint. We offer a range of eco-friendly options that save energy and water without compromising on performance or style.
Our Commitment to Sustainability
At Construction and More Las Vegas, we are committed to sustainable practices in our kitchen remodels. We source eco-friendly materials and prioritize energy-efficient fixtures to reduce environmental impact. Our team is dedicated to creating beautiful, functional kitchens that are also kind to the planet.
Testimonials and Case Studies
Our satisfied clients speak to the quality and reliability of our services. We have successfully completed numerous kitchen remodels, each tailored to meet the unique needs and preferences of our clients. Visit our website to read testimonials and view case studies of our work.
Contact Us Today
Ready to start your kitchen remodel? Contact Construction and More Las Vegas for expert kitchen remodeling services that combine functionality, beauty, and quality. Our experienced team is here to bring your vision to life, creating a kitchen that meets your needs and exceeds your expectations. Call us today for a free consultation and let us help you create the kitchen of your dreams. Whether you need a complete kitchen renovation or a custom kitchen makeover, Construction and More Las Vegas is your trusted partner for exceptional kitchen transformation services.
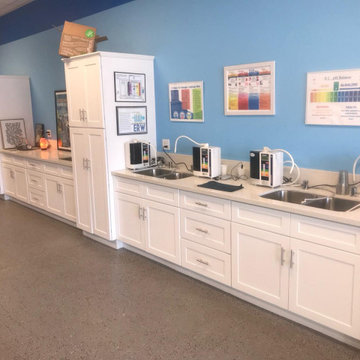 Construction And More Las Vegas
Expert Kitchen Remodel Services by Construction and More Las Vegas
At Construction and More Las Vegas, we know that the kitchen is the heart of your home. It’s where you gather with family, entertain guests, and create delicious meals. That’s why we’re dedicated to providing expert kitchen remodel services that transform your kitchen into a functional, stylish, and inviting space. Serving homeowners throughout Las Vegas and the surrounding areas, including Summerlin, Henderson, Paradise, Spring Valley, and Boulder City, we offer personalized solutions tailored to your unique needs and preferences.
Why Choose Construction and More Las Vegas for Your Kitchen Remodel?
Expertise and Experience
With years of experience in kitchen remodeling, our team possesses the knowledge and skills to handle projects of all sizes and complexities. We stay up-to-date with the latest design trends and technologies to ensure that your kitchen remodel not only meets but exceeds your expectations.
Customized Solutions
Every kitchen remodel is unique. We tailor our services to meet your specific needs and preferences, creating a custom kitchen design that reflects your personal style and complements your home’s aesthetic. From cabinets to countertops, every element is chosen with your vision in mind.
Quality Craftsmanship
Our commitment to quality craftsmanship ensures that your kitchen renovation stands the test of time. We use only the highest quality materials and employ precise techniques to deliver a finished product that is both beautiful and durable.
Comprehensive Services
Our comprehensive kitchen remodeling services cover everything from initial design and planning to final installation and finishing touches. Whether you need a full kitchen renovation or a simple makeover, we provide a seamless and stress-free experience.
Our Kitchen Remodeling Process
Initial Consultation and Planning
The process begins with a detailed consultation to understand your vision, needs, and budget. We provide expert advice on design, layout, and materials to create a plan that enhances both the functionality and aesthetics of your kitchen.
3D Design and Visualization
Using state-of-the-art 3D design software, we create realistic renderings of your proposed kitchen remodel. This allows you to visualize the space and make adjustments before construction begins, ensuring that every detail aligns with your vision.
Custom Cabinets and Storage Solutions
Custom cabinets are a cornerstone of any kitchen remodel. Our skilled craftsmen design and build cabinets that maximize storage and reflect your style. Whether you prefer modern sleek designs or traditional classic looks, we create cabinets that are both functional and beautiful.
Countertops and Backsplashes
The choice of countertops and backsplashes significantly impacts the look and feel of your kitchen. We offer a wide range of materials, including granite, quartz, and marble, to suit your style and budget. Our team helps you select the perfect combination that adds elegance and durability to your kitchen.
Lighting and Fixtures
Proper lighting is essential for both functionality and ambiance in your kitchen. We design and install lighting solutions that highlight key areas, such as task lighting, under-cabinet lighting, and ambient lighting. Our selection of fixtures includes a variety of styles to match your kitchen design.
Appliance Installation
Modern appliances are integral to a functional and efficient kitchen. We guide you in selecting high-quality, stylish options that meet your needs and complement your kitchen design. Our team ensures seamless installation for a cohesive and polished look.
Flooring and Finishes
The right flooring enhances the beauty and practicality of your kitchen. We offer a variety of flooring options, including tile, hardwood, and luxury vinyl, to suit your preferences. Our team ensures professional installation and finishes that withstand the rigors of daily use while adding elegance to your space.
Construction and Project Management
Once the design and materials are finalized, our experienced construction team takes over. We manage the entire remodeling process, from demolition to final touches, with meticulous attention to detail. Our project managers coordinate all aspects of the remodel, ensuring that the work is completed on time and within budget. We keep you informed throughout the process, addressing any concerns and ensuring your satisfaction.
Kitchen Renovation in Las Vegas and Surrounding Areas
If you’re searching for “kitchen renovation in my area,” look no further than Construction and More Las Vegas. We proudly serve Las Vegas and the surrounding communities, including Summerlin, Henderson, Paradise, Spring Valley, and Boulder City. Our local expertise and commitment to customer satisfaction make us the go-to choice for all your kitchen remodeling needs.
Why Kitchen Remodeling Matters
Enhanced Functionality
A well-designed kitchen maximizes space and improves functionality. Whether it’s adding more storage, upgrading appliances, or reconfiguring the layout, our remodels ensure that your kitchen works better for your daily routine and entertaining needs.
Increased Home Value
A kitchen remodel is one of the best investments you can make in your home. An updated, modern kitchen increases your property’s value and appeals to potential buyers if you decide to sell.
Improved Aesthetics
Our remodels transform outdated kitchens into beautiful, contemporary spaces. From luxurious finishes to modern fixtures, we create a kitchen that is both stylish and inviting.
Energy Efficiency
Upgrading to energy-efficient appliances and fixtures can reduce your utility bills and environmental footprint. We offer a range of eco-friendly options that save energy and water without compromising on performance or style.
Our Commitment to Sustainability
At Construction and More Las Vegas, we are committed to sustainable practices in our kitchen remodels. We source eco-friendly materials and prioritize energy-efficient fixtures to reduce environmental impact. Our team is dedicated to creating beautiful, functional kitchens that are also kind to the planet.
Testimonials and Case Studies
Our satisfied clients speak to the quality and reliability of our services. We have successfully completed numerous kitchen remodels, each tailored to meet the unique needs and preferences of our clients. Visit our website to read testimonials and view case studies of our work.
Contact Us Today
Ready to start your kitchen remodel? Contact Construction and More Las Vegas for expert kitchen remodeling services that combine functionality, beauty, and quality. Our experienced team is here to bring your vision to life, creating a kitchen that meets your needs and exceeds your expectations. Call us today for a free consultation and let us help you create the kitchen of your dreams. Whether you need a complete kitchen renovation or a custom kitchen makeover, Construction and More Las Vegas is your trusted partner for exceptional kitchen transformation services.
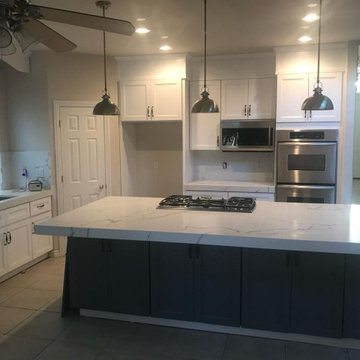 Construction And More Las Vegas
Expert Kitchen Remodel Services by Construction and More Las Vegas
At Construction and More Las Vegas, we know that the kitchen is the heart of your home. It’s where you gather with family, entertain guests, and create delicious meals. That’s why we’re dedicated to providing expert kitchen remodel services that transform your kitchen into a functional, stylish, and inviting space. Serving homeowners throughout Las Vegas and the surrounding areas, including Summerlin, Henderson, Paradise, Spring Valley, and Boulder City, we offer personalized solutions tailored to your unique needs and preferences.
Why Choose Construction and More Las Vegas for Your Kitchen Remodel?
Expertise and Experience
With years of experience in kitchen remodeling, our team possesses the knowledge and skills to handle projects of all sizes and complexities. We stay up-to-date with the latest design trends and technologies to ensure that your kitchen remodel not only meets but exceeds your expectations.
Customized Solutions
Every kitchen remodel is unique. We tailor our services to meet your specific needs and preferences, creating a custom kitchen design that reflects your personal style and complements your home’s aesthetic. From cabinets to countertops, every element is chosen with your vision in mind.
Quality Craftsmanship
Our commitment to quality craftsmanship ensures that your kitchen renovation stands the test of time. We use only the highest quality materials and employ precise techniques to deliver a finished product that is both beautiful and durable.
Comprehensive Services
Our comprehensive kitchen remodeling services cover everything from initial design and planning to final installation and finishing touches. Whether you need a full kitchen renovation or a simple makeover, we provide a seamless and stress-free experience.
Our Kitchen Remodeling Process
Initial Consultation and Planning
The process begins with a detailed consultation to understand your vision, needs, and budget. We provide expert advice on design, layout, and materials to create a plan that enhances both the functionality and aesthetics of your kitchen.
3D Design and Visualization
Using state-of-the-art 3D design software, we create realistic renderings of your proposed kitchen remodel. This allows you to visualize the space and make adjustments before construction begins, ensuring that every detail aligns with your vision.
Custom Cabinets and Storage Solutions
Custom cabinets are a cornerstone of any kitchen remodel. Our skilled craftsmen design and build cabinets that maximize storage and reflect your style. Whether you prefer modern sleek designs or traditional classic looks, we create cabinets that are both functional and beautiful.
Countertops and Backsplashes
The choice of countertops and backsplashes significantly impacts the look and feel of your kitchen. We offer a wide range of materials, including granite, quartz, and marble, to suit your style and budget. Our team helps you select the perfect combination that adds elegance and durability to your kitchen.
Lighting and Fixtures
Proper lighting is essential for both functionality and ambiance in your kitchen. We design and install lighting solutions that highlight key areas, such as task lighting, under-cabinet lighting, and ambient lighting. Our selection of fixtures includes a variety of styles to match your kitchen design.
Appliance Installation
Modern appliances are integral to a functional and efficient kitchen. We guide you in selecting high-quality, stylish options that meet your needs and complement your kitchen design. Our team ensures seamless installation for a cohesive and polished look.
Flooring and Finishes
The right flooring enhances the beauty and practicality of your kitchen. We offer a variety of flooring options, including tile, hardwood, and luxury vinyl, to suit your preferences. Our team ensures professional installation and finishes that withstand the rigors of daily use while adding elegance to your space.
Construction and Project Management
Once the design and materials are finalized, our experienced construction team takes over. We manage the entire remodeling process, from demolition to final touches, with meticulous attention to detail. Our project managers coordinate all aspects of the remodel, ensuring that the work is completed on time and within budget. We keep you informed throughout the process, addressing any concerns and ensuring your satisfaction.
Kitchen Renovation in Las Vegas and Surrounding Areas
If you’re searching for “kitchen renovation in my area,” look no further than Construction and More Las Vegas. We proudly serve Las Vegas and the surrounding communities, including Summerlin, Henderson, Paradise, Spring Valley, and Boulder City. Our local expertise and commitment to customer satisfaction make us the go-to choice for all your kitchen remodeling needs.
Why Kitchen Remodeling Matters
Enhanced Functionality
A well-designed kitchen maximizes space and improves functionality. Whether it’s adding more storage, upgrading appliances, or reconfiguring the layout, our remodels ensure that your kitchen works better for your daily routine and entertaining needs.
Increased Home Value
A kitchen remodel is one of the best investments you can make in your home. An updated, modern kitchen increases your property’s value and appeals to potential buyers if you decide to sell.
Improved Aesthetics
Our remodels transform outdated kitchens into beautiful, contemporary spaces. From luxurious finishes to modern fixtures, we create a kitchen that is both stylish and inviting.
Energy Efficiency
Upgrading to energy-efficient appliances and fixtures can reduce your utility bills and environmental footprint. We offer a range of eco-friendly options that save energy and water without compromising on performance or style.
Our Commitment to Sustainability
At Construction and More Las Vegas, we are committed to sustainable practices in our kitchen remodels. We source eco-friendly materials and prioritize energy-efficient fixtures to reduce environmental impact. Our team is dedicated to creating beautiful, functional kitchens that are also kind to the planet.
Testimonials and Case Studies
Our satisfied clients speak to the quality and reliability of our services. We have successfully completed numerous kitchen remodels, each tailored to meet the unique needs and preferences of our clients. Visit our website to read testimonials and view case studies of our work.
Contact Us Today
Ready to start your kitchen remodel? Contact Construction and More Las Vegas for expert kitchen remodeling services that combine functionality, beauty, and quality. Our experienced team is here to bring your vision to life, creating a kitchen that meets your needs and exceeds your expectations. Call us today for a free consultation and let us help you create the kitchen of your dreams. Whether you need a complete kitchen renovation or a custom kitchen makeover, Construction and More Las Vegas is your trusted partner for exceptional kitchen transformation services.
44