
Search results for "Safe replacement" in Home Design Ideas
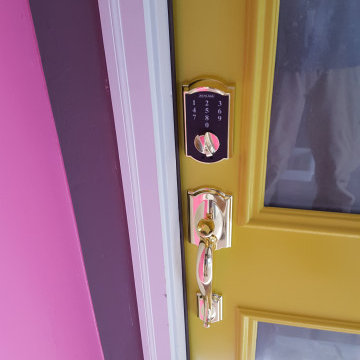
 Rocky Mountain Security Group Locksmith
Installed a new pull handle and push button lock on door to residential location.

 Globe Electric
The original Globe Electric Designer Series 6-ft 6-Outlet Surge Protector Power Strip with 2 USB Ports and a Circuit Breaker Switch was specifically designed to eliminate the unsightly traditional power bar and replace it with one you'll want to show off! The added convenience of the handy space saver right angle plug allows your furniture to sit flush to the wall - creating more space without bent wires. A 6-foot fabric covered cord gives you the added convenience of increased range from power outlets. The six grounded outlets are perfect to use with small appliances and electronics such as lamps, computers, printers, and home theatre systems. The 3.1A combined USB ports ensure a fast charge for your devices. Compatible with smartphones (Android, iPhone), tablets (iPad, Android, Surface), eReaders (Kindle, Kindle Fire), cameras and more. Surge protected to 1200 joules, you can rest assured that your small electronics are safe while plugged in. Plus, the handy circuit breaker switch allows you to easily save power consumption and turn off all electronics with the flick of a switch. Recommended for indoor use. Patent pending.
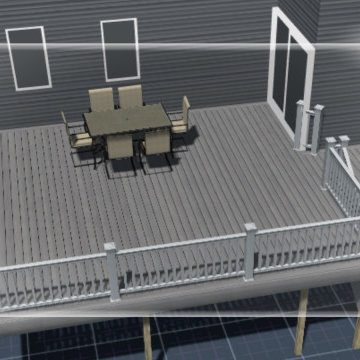
 Stable Works LLC
Stable Works will provide labor, material and equipment for the completion of the scope of work outlined below.
-Current (22'x8') New (22'x20' with 5'x'5 landing for stairs)
-Supply and install deck extension as pictured in rendering
- Remove current facia, soffet and header
- Temporarily support roof while work is being performed
- Move center support beam to against the house (Needed to carry the load of new LVL)
- Install new 5 1/2" x 11 7/8" x 22' LVL header
- Replace all facia and soffet
-All footings will use 4000psi concrete
-6"x6" pressure treated supports
-Decking will be Fiberon Good Life (Cottage) $2.49 per linear foot)
-Railing will be White vinyl "Safe-T-Rail"
-Gate at top of steps to be made same as railing.
-Fascia and risers will be PVC board to color match
-Fix all missing fasteners on current deck
-Relocate electrical under new stairs
-Add LED low voltage lighting to post caps and stair treads
-All trash and debris will be removed from site
-Deck area will be power washed after completion
Find the right local pro for your project
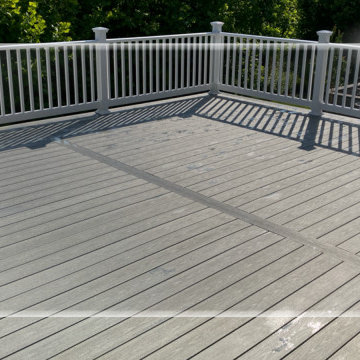 Stable Works LLC
Stable Works will provide labor, material and equipment for the completion of the scope of work outlined below.
-Current (22'x8') New (22'x20' with 5'x'5 landing for stairs)
-Supply and install deck extension as pictured in rendering
- Remove current facia, soffet and header
- Temporarily support roof while work is being performed
- Move center support beam to against the house (Needed to carry the load of new LVL)
- Install new 5 1/2" x 11 7/8" x 22' LVL header
- Replace all facia and soffet
-All footings will use 4000psi concrete
-6"x6" pressure treated supports
-Decking will be Fiberon Good Life (Cottage) $2.49 per linear foot)
-Railing will be White vinyl "Safe-T-Rail"
-Gate at top of steps to be made same as railing.
-Fascia and risers will be PVC board to color match
-Fix all missing fasteners on current deck
-Relocate electrical under new stairs
-Add LED low voltage lighting to post caps and stair treads
-All trash and debris will be removed from site
-Deck area will be power washed after completion
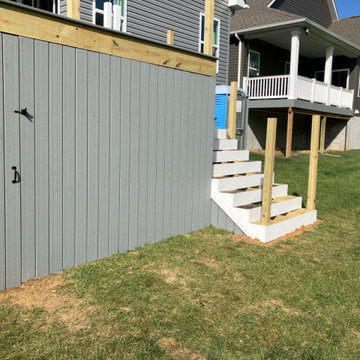 Stable Works LLC
Stable Works will provide labor, material and equipment for the completion of the scope of work outlined below.
-Current (22'x8') New (22'x20' with 5'x'5 landing for stairs)
-Supply and install deck extension as pictured in rendering
- Remove current facia, soffet and header
- Temporarily support roof while work is being performed
- Move center support beam to against the house (Needed to carry the load of new LVL)
- Install new 5 1/2" x 11 7/8" x 22' LVL header
- Replace all facia and soffet
-All footings will use 4000psi concrete
-6"x6" pressure treated supports
-Decking will be Fiberon Good Life (Cottage) $2.49 per linear foot)
-Railing will be White vinyl "Safe-T-Rail"
-Gate at top of steps to be made same as railing.
-Fascia and risers will be PVC board to color match
-Fix all missing fasteners on current deck
-Relocate electrical under new stairs
-Add LED low voltage lighting to post caps and stair treads
-All trash and debris will be removed from site
-Deck area will be power washed after completion
 Stairworks
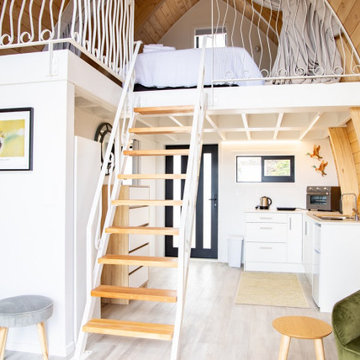
A tiny home on Waiheke Island needed a staircase to access the loft that was not only a space-saving staircase, but also safe for guests to access. Additionally, the owner wanted a balustrade that required craftsmanship with intricate designs and a beach inspired style to match the interior design of this tiny home.
The original design included a wooden staircase, however the owner wanted that replaced with steel stairs to save space. A spiral staircase was considered, but was still too big for what she wanted, which led us to design a ladder.
Because the owner is an artist, she wanted a more unique balustrade design. This was quite a different style from our usual fabrications, but we welcomed the challenge. We then brought all the pieces to Waiheke Island and completed the installation in a day. The owner was thrilled with the end result and is now renting out the tiny home as holiday rentals.
 Stable Works LLC
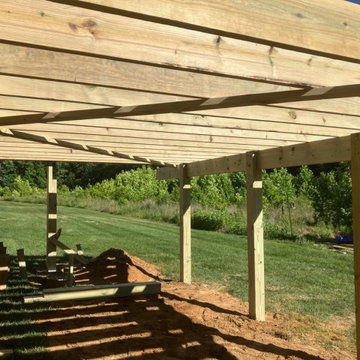
Stable Works will provide labor, material and equipment for the completion of the scope of work outlined below.
-Current (22'x8') New (22'x20' with 5'x'5 landing for stairs)
-Supply and install deck extension as pictured in rendering
- Remove current facia, soffet and header
- Temporarily support roof while work is being performed
- Move center support beam to against the house (Needed to carry the load of new LVL)
- Install new 5 1/2" x 11 7/8" x 22' LVL header
- Replace all facia and soffet
-All footings will use 4000psi concrete
-6"x6" pressure treated supports
-Decking will be Fiberon Good Life (Cottage) $2.49 per linear foot)
-Railing will be White vinyl "Safe-T-Rail"
-Gate at top of steps to be made same as railing.
-Fascia and risers will be PVC board to color match
-Fix all missing fasteners on current deck
-Relocate electrical under new stairs
-Add LED low voltage lighting to post caps and stair treads
-All trash and debris will be removed from site
-Deck area will be power washed after completion

 Skill Construction & Design, LLC
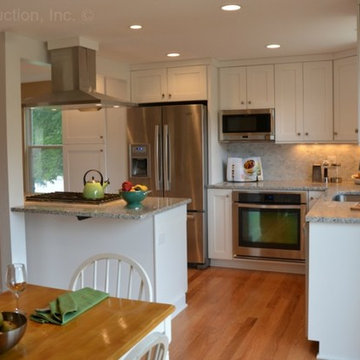
There are so many design elements to this kitchen, I almost don’t know where to start. Bright and airy with crisp clean white cabinets, the kitchen is open and welcoming. Still crisp but gently contrasting, the stainless steel appliance add depth amid the white. To keep this kitchen warm, natural oak covers the floors and a toasted wheat color washes the walls. And then there is the architectural elements. You know. That post and beam in the middle of the room. It’s the center of attention.
When you walk into a room your eyes roam around, establishing the size and shape of the room as your feet take you forward. From the front door of this home straight ahead you encountered this wall. The dining area to the right gives you a glimpse of things to come. Where there is a dining room you will usually find a kitchen.
The architecture of years gone by consistently hides the kitchen, the heart of the home, behind walls. I sympathize with my Mom, and all the other Moms, who have had to spend so much time tucked into a tight kitchen, away from the family. This wall had to go, but it was structural. We needed its support but not its bulk.
So we got rid of the bulk and only the bulk. Instead of a wall we have a post and beam, offering all of the structure we need. We could have installed a huge steel beam and reconfigure the joists to upset the beam, but why? The small beam and post add an incredible architectural element. It’s turning lemons into lemon, we simply made the most of what we had. It may be functional but it’s so fantastic. It looks like we created the effect just for the drama.
The original kitchen may have had a working triangle and some counter space, but it was fairly small, with each area only a step or two away. The dark cabinets made the space feel even smaller and the butcher block patterned laminate counter tops were very dated. The appliances were feeling their age as well, from a coil burner electric stove to a top freezer refrigerator. To keep this kitchen within its space, a half wall separated it from the dining area.
With the wall gone we borrowed some space from the living room and extended what was a U shaped kitchen into an L. At the living room window we start our new kitchen. We kept a small part of the wall to support the other end of our decorative beam. Sandwiched between a large pantry and our new French door refrigerator, the wall disappears. With our new open floor plan a sizable island was in order.
We split our cooking areas and installed a continuous grill gas cooktop into the island. A sleek island hood takes care of exhaust and adds an extra element to our architectural feature. Under the cooktop we added over-sized drawers for pots and pan storage. The frameless cabinets from New River Cabinetry are maple, painted white, with the Herndon door style. With the cooktop safely nestled into our island, we still had to add an oven.
We used the space where the old range sat for a large single oven of stainless steel and glass. If it worked for one, why not two? We created a home for a microwave in the wall cabinets. It’s perfect for heating leftovers so close to the refrigerator.
An important consideration for hot spots in your kitchen is landing zones. Each of our cooking areas have generous landing zones, one on each side of the cooktop and an entire counter area above or below the ovens, depending on which one you’re using.
We wanted to give the sink area more room so the half wall had to come out. We moved the trash and recycle cans into a cabinet, removed the heavy soffits and kept the sink under the window.
With that little bit of extra space we were able to add a larger cabinet above the dishwasher and slide it all down. This used to be where the carpeting met the vinyl floor, but all of it is gone. Long oak planks eliminate that final divide between the kitchen and the dining area, while adding visual length to the area. White wall cabinets on each side of the window reflect the sunlight for a brighter view.
With all of the darker cabinetry the backsplash walls had been painted white. Even still, there was a darkness in the corners and it wasn’t very exciting. We wanted to add visual interest and reflect the new under-cabinet lighting, eliminating the shadows in this corner.
With 1″x 2″ Arabescato Honed marble mosaics and those under-cabinet lights, we achieved the perfect balance. The marble has subtle swirls in gray and beige on a clean white background, but with the honed finish the light is softly reflected instead of glaring. For granite, we chose the soft gray tones of Luna Pearl. The speckles of gray and beige are a gentle contrast to the white cabinets and emulate the color of the stainless steel.
Between the carpet, red half wall, dark railing and dated light fixture, the dining area felt tired. Since the kitchen lacked sufficient storage, a large utility cabinet crowded the table space without adding any decorate elements.
Although it didn’t get any bigger, our dining area feels fresher and more open too. With the oak flooring joining the area to the rest of our space and the toasted wheat on the walls, the white table and chairs compliment the cabinetry while contrasting the warmer colors. We replaced the chandelier with recessed lighting and changed that railing too.
With our new open floor plan, we ended up with a fairly open area in between our foyer closet and the living room window. Not one to miss an opportunity, we filled the space with a multi-functional work space.
With the sunlight streaming in this bright corner works for anything this family needs.
There’s plenty of space for a chair under this large desk drawer. A closed cabinet below, glass doors above and lots of open shelving let you store and or showcase your belongings. We added a lite area at the top to keep away the darker corners.
The transformation is complete. This kitchen and all of its features are truly the center of attention in this home.
http://www.designsbyskill.com/
http://www.rjkconstructioninc.com/
 Villa Landscapes
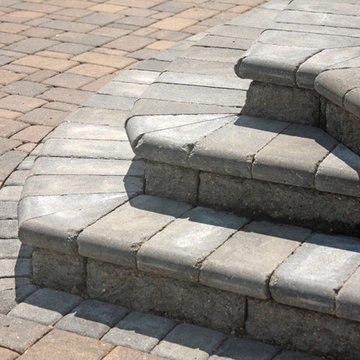
Steps are easily created with retaining wall units and topped with bullnose pavers, creating a low maintenance surface that is safe and beautiful.
Patio - mid-sized traditional backyard concrete paver patio idea in Minneapolis with a fire pit and no cover
Patio - mid-sized traditional backyard concrete paver patio idea in Minneapolis with a fire pit and no cover
 RBD Contracting Inc.
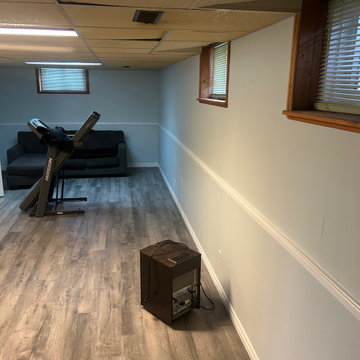
After a client experienced an unfortunate flood in their basement, they contacted us to remediate the space. We began by removing the damaged flooring, baseboards, casings, and drywall. After properly treating and drying the area, we replaced the drywall, flooring, baseboards, and casing with new materials. To complete the transformation, we added a fresh coat of paint and installed new doors, turning the space into a livable and safe environment for the homeowners.
 Sebald Millwork LLC
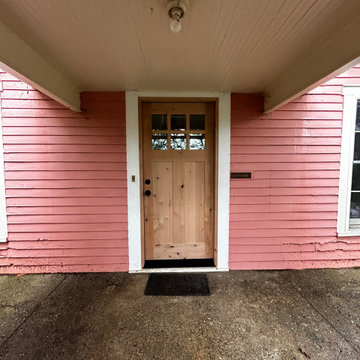
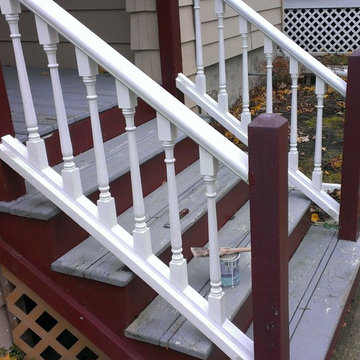
A simple repair/replacement, but very important to the homeowner and guests. makes a safe and secure entry.
Inspiration for a timeless exterior home remodel in Milwaukee
Inspiration for a timeless exterior home remodel in Milwaukee
 Toronto Bath Centre
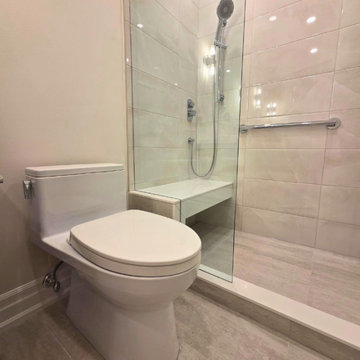
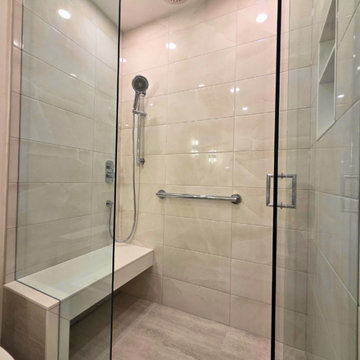
This Bayview and Eglinton condo bathroom renovation included replacing the bathtub with a spacious walk-in shower. Since the drain could not be relocated, we designed a floating shower bench above the Schluter Vario linear drain to keep the shower open, safe and functional.
The space also features Tenzo fixtures, a ceiling-mounted rain shower, handheld shower, custom frameless glass, a 60-inch AHM Designers vanity, custom storage and mirrors, upgraded lighting and a Panasonic exhaust fan. Almost all products used in this renovation were made in Canada.
 Toronto Bath Centre
This Bayview and Eglinton condo bathroom renovation included replacing the bathtub with a spacious walk-in shower. Since the drain could not be relocated, we designed a floating shower bench above the Schluter Vario linear drain to keep the shower open, safe and functional.
The space also features Tenzo fixtures, a ceiling-mounted rain shower, handheld shower, custom frameless glass, a 60-inch AHM Designers vanity, custom storage and mirrors, upgraded lighting and a Panasonic exhaust fan. Almost all products used in this renovation were made in Canada.
Sponsored
Plain City, OH

Kuhns Contracting, Inc.
Central Ohio's Trusted Home Remodeler Specializing in Kitchens & Baths

 Tile Doctor Ltd
This is a large 17.2 m2 Sandstone Floor installed throughout the living and kitchen areas of a property in the beautiful village of Disley close to Lyme Park which is run by the National Trust. The floor had been installed four years ago and my client was unhappy with the original sealer which hadn’t lasted very long. Without the protection of a sealer dirt had become ingrained in the pores of the stone which was now difficult to clean. Another issue was the rough nature of the Sandstone meant it was impossible to mop as it shreds the mop! As a result, the floor was mainly cleaned with a hoover which was not ideal, especially in a kitchen.
I went over to survey the floor and before quoting I ran a small test clean in the kitchen which took the floor back to its natural pale colour and really showed how dirty the floor had become. Test cleans are great as it helps me to formulate an effective cleaning plan and provide an accurate quote. My client was impressed with the result and so I was booked to come back and deep clean and then reseal the whole floor. Due to its size I estimated the floor would take two days to deep clean and a further day to apply a new sealer, so three days in total.
Working in large sections I started by cleaning the floor and stripping off the old sealer with a strong dilution of Tile Doctor Remove and Go which is a coatings remover that is safe to use on stone. The solution was left to soak into the pores of the Sandstone for ten minutes before being worked in with a 200-grit diamond pad fitted to a rotary floor machine. This action not only removed the old sealer and cleaned the floor but the 200-grit pad being vey coarse removed a lot of the roughness from the surface of the Sandstone so it shouldn’t shred any more mops.
After rinsing the floor with water and removing the slurry with a wet vacuum I set about cleaning the grout with Tile Doctor Pro-Clean worked into the grout line with a stiff brush and assisted with steam from a professional steam cleaner with a grout attachment. Once done the floor was rinsed and extracted again to remove the soil from the grouting. There was also an area near one of the doors where the grout had become loose and needed replacing so I made up a batch of matching grout and filled this in. The floor was then left overnight to dry with assistance from a couple of air movers.
I returned the next day to finish the floor by applying a sealer. First, I double checked the floor was dry with the damp meter. The readings confirmed the air movers had done a good job and that the floor was within the accepted parameters, so I was ready to seal. The sealer I chose was Tile Doctor Seal and Go which being water based doesn’t leave a smell as it dries, it really works well on Sandstone and adds a nice subtle sheen to the stone.
Once finished the floor looked much cleaner, lighter in colour overall more inviting, you could even see the fossils in some of the tiles.
The surface was also smoother so the customer should find cleaning with a mop much easier in future. On that subject its worth pointing out that owners of sealed floors should always use a neutral pH tile cleaner on their floors as most supermarket products are simply too strong and will prematurely strip the sealer off a tile if used repeatedly. Tile Doctor sell a product called Tile Doctor Neutral Cleaner which is ideal for cleaning sealed Sandstone floors like this one.
My client was really happy with the results and sent me a message later saying: “the floor looks amazing!”
Kamila Logonzy
East Cheshire Tile Doctor
 N C R
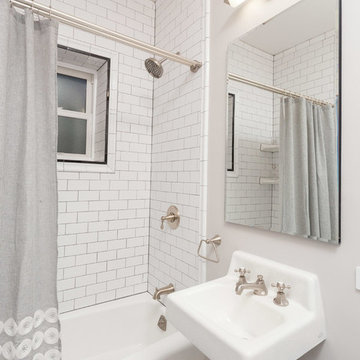
N C RThis bathroom renovation kept the vintage ambiance while incorporating a few contemporary finishes. We replaced the pedestal sink with a contemporary square, wall mounted sink & faucet, repainted the radiator in a glamorous silver color, installed octagon-designed floor tiles, new subway tile, designed a sleek medicine cabinet, and installed two shower shelves that were safe and out of reach from the client’s children.
Designed by Chi Renovation & Design who serve Chicago and it's surrounding suburbs, with an emphasis on the North Side and North Shore. You'll find their work from the Loop through Lincoln Park, Skokie, Wilmette, and all of the way up to Lake Forest.
 United Porte Inc
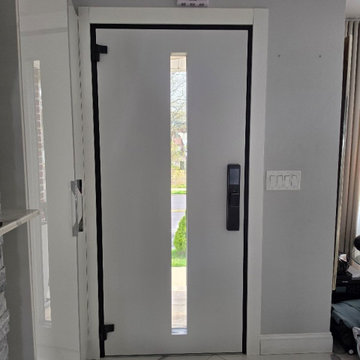
Hidden Handle Entry door - an innovative solution with a modern design to elevate your exterior look. The concealed handle with automatic illumination adds a premium touch and ensures safe, elegant entry even at night. Clean lines, integrated hardware, and smart backlighting - perfect for those who value minimalism and advanced technology.
Special feature is a durable aluminum profiles that enhance both aesthetics and security.
Furthermore, VDom Doors insulate your home from extreme weather conditions, as well as unwanted animals, insects, and dust from entering.
Our doors have several superior features:
- Single sheet of metal is used in construction. No welded seams are best as these can significantly weaken the structural integrity of the entranceway. Our doors are also more resilient to mechanic damage, such as sledgehammer strikes.
- The advantage of a single, non-welded door is that it reduces internal condensation. Over time, condensation can negatively affect the door mechanisms.
- Stiffening Ribs: These non-visible details add to our door's security.
- Quality insulation serves to reduce unwanted external noise, as well as protect against extreme heat, and severe cold.
Introducing our modern exterior entrance door, a stylish addition to any contemporary home or building. Crafted from a single sheet of metal, this door features a sturdy aluminum frame and threshold for added durability and security. The simple yet striking design is perfect for those who prefer a minimalist aesthetic. Upgrade your entrance with our modern exterior entrance door today.
Model - 0155 Hiddex
Color - Noir
Glass - Safety Triplex, with mirrored-clear effect
Handle - Hidden handle with automatic illumination, elegant black lever inside. Door thickness - 3 1/4"
Frame thickness - 4"
Exterior design - Coating of the door - Noir finish.
Interior design - Coating of the door - White Enamel metal.
Hardware included:
- Aluminum frame 4" thick - dimensions of the door 36" x 80" with the frame is 38" x 82".
- Aluminum threshold.
- Plate-type, primary lock for armoured type of steel doors, locked by 3 key turns, doors are captured in 3 places. The lock has replaceable core and 5 keys.
- Cylinder.
- 3D Hinges.
- Turnknob for lock.
- Armor plate for the lock.
- Modern Black Handle
 McCabe By Design LLC
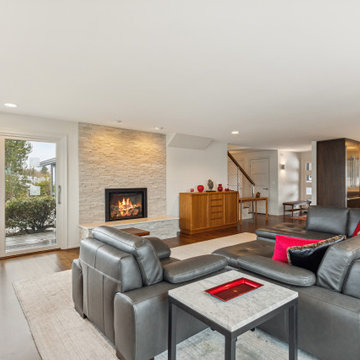
Our client purchased what had been a custom home built in 1973 on a high bank waterfront lot. They did their due diligence with respect to the septic system, well and the existing underground fuel tank but little did they know, they had purchased a house that would fit into the Three Little Pigs Story book.
The original idea was to do a thorough cosmetic remodel to bring the home up to date using all high durability/low maintenance materials and provide the homeowners with a flexible floor plan that would allow them to live in the home for as long as they chose to, not how long the home would allow them to stay safely. However, there was one structure element that had to change, the staircase.
The staircase blocked the beautiful water/mountain few from the kitchen and part of the dining room. It also bisected the second-floor master suite creating a maze of small dysfunctional rooms with a very narrow (and unsafe) top stair landing. In the process of redesigning the stairs and reviewing replacement options for the 1972 custom milled one inch thick cupped and cracked cedar siding, it was discovered that the house had no seismic support and that the dining/family room/hot tub room and been a poorly constructed addition and required significant structural reinforcement. It should be noted that it is not uncommon for this home to be subjected to 60-100 mile an hour winds and that the geographic area is in a known earthquake zone.
Once the structural engineering was complete, the redesign of the home became an open pallet. The homeowners top requests included: no additional square footage, accessibility, high durability/low maintenance materials, high performance mechanicals and appliances, water and energy efficient fixtures and equipment and improved lighting incorporated into: two master suites (one upstairs and one downstairs), a healthy kitchen (appliances that preserve fresh food nutrients and materials that minimize bacterial growth), accessible bathing and toileting, functionally designed closets and storage, a multi-purpose laundry room, an exercise room, a functionally designed home office, a catio (second floor balcony on the front of the home), with an exterior that was not just code compliant but beautiful and easy to maintain.
All of this was achieved and more. The finished project speaks for itself.
Sponsored
Plain City, OH
Kuhns Contracting, Inc.
Central Ohio's Trusted Home Remodeler Specializing in Kitchens & Baths
 Grow Garden & Landscape Design
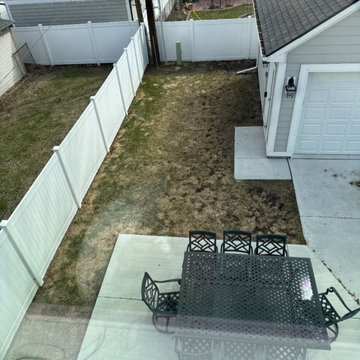
Before: natural grass and uneven terrain in Royal Oak backyard
Example of a minimalist patio design in Detroit
Example of a minimalist patio design in Detroit
 Homecare Remodeling
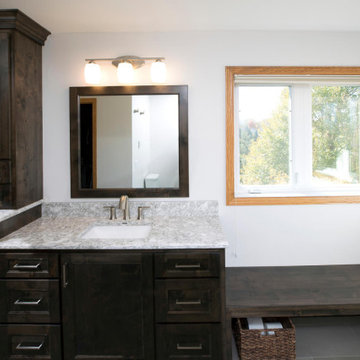
If we were to describe this Savage, Minnesota remodel in just a few words; it would be “relaxing at-home oasis.” While the original bathroom design had its fair share of spa-like qualities, including a corner whirlpool tub, it’s safe to say it needed an update.
Replacing the whirlpool tub with a built-in bench allowed us to expand the walk-in tile shower for a truly luxurious master bathroom. We added a new glass panel to enclose one side of the shower but left the other completely open.
In between the dual sinks is a spacious tower cabinet, perfect for storing toiletries and linens. Topping the vanity is a gorgeous quartz countertop from Cambria. Completing this beautiful master bath transformation is brand-new lighting and tile floors with in-floor heating.
Our team loved helping these homeowners give their space a facelift, and we couldn’t be happier with the result!
 Kitchen, Bath & Home - Texas
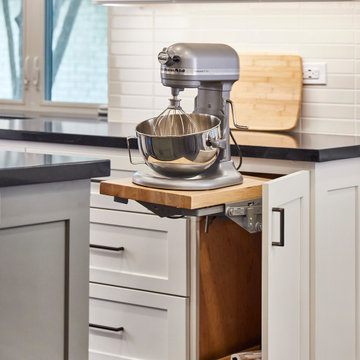
Built in 1995, various rooms in this house not only needed a facelift but required adaptation to the homeowners needs.
An avid at-home chef, the client was looking for a 21st century kitchen ready for their next big meal. Appliances were moved, storage was added, and flow and functionality were enhanced. A Galley Workstation replaced the traditional kitchen sink, and additional hidden features such as a well-organized pantry, pop-up mixer, and tray dividers further the kitchen's functionality. The client even requested spice drawers on either side of the stove to have everything at their finger tips.
The laundry room was redesigned and its door was relocated to make the space an easily accessible extension of the kitchen.
One thing led to another, and since the family room opens up to the kitchen, it was a great opportunity to update the fireplace with paint, a new stone surround and custom-built mantle.
And finally, with aging parents, the homeowner needed a guest bathroom that was safe and easy to use. A low-curb shower and accent lighting under the bathroom cabinet make the space safer and more accessible for everyone.
29