
Search results for "Scheduling" in Home Design Ideas
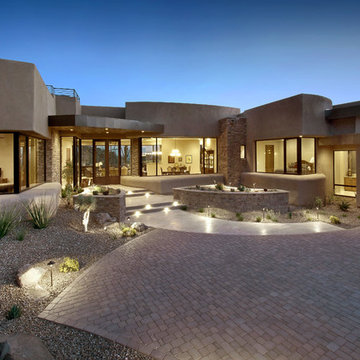
 Krausch Architectural Windows & Doors
Large contemporary beige two-story stucco exterior home idea in Phoenix
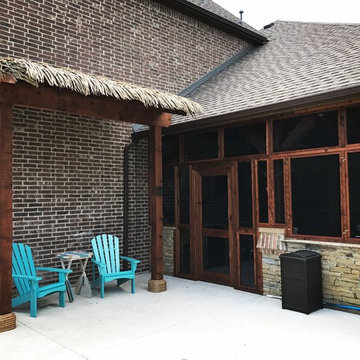
 MTR Contractors | My Thatch Roof
This small shade was only the first step of an enormous project this couple is working on. They are making their backyard an oasis little by little. Next step is the pool, then the thatch cabana, and then a palapa. We always wait on the client and install when it fits best with their schedule. We know creating a backyard paradise is costly, time consuming, and stressful. So we work with YOU and according to your schedule and time line. But this couple knew it was important to add this Shade for Two asap to enjoy the rest of our warm summer days in the shade
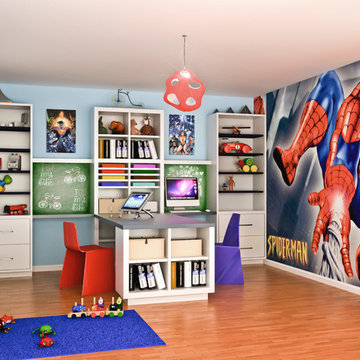
 Closet Factory
A stylish shared boys bedroom with chalkboard inserts, custom built-n wall units, and enough desk space for two working stations.
Inspiration for a boy kids' bedroom remodel in Los Angeles
Inspiration for a boy kids' bedroom remodel in Los Angeles
Find the right local pro for your project
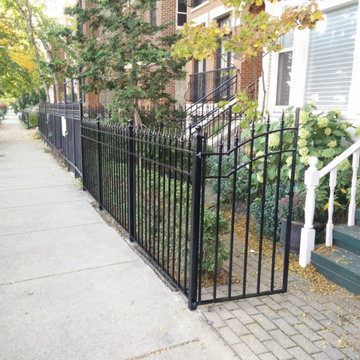
 Windy City Painters
Iron Fence Painting Wicker Park Homeowners Can Trust: A Windy City Painters Case Study
Wicker Park is full of architectural character — ornate 1890s greystone two-flats, vintage brick facades, and wrought iron fencing that has framed these streets for well over a century. However, what iron fence painting Wicker Park properties require is not a simple weekend job. Winters here are brutal on metal, and consequently Windy City Painters has spent years perfecting the restoration process that keeps these fences standing strong. In particular, this case study walks through a recent project completed for a classic Wicker Park property.
Project Overview
The property featured a full wrought iron perimeter fence that had suffered years of freeze-thaw cycling and road salt exposure. Paint had failed across most of the pickets, and oxidation had progressed into active rust at several base rails. Consequently, the homeowners needed more than a fresh coat of paint. They needed a genuine metal restoration, and that is precisely what Windy City Painters delivered.
Materials Used
Windy City Painters selected products specifically rated for Chicago's climate extremes:
Rust-Oleum Professional Rust Inhibitor Primer
Sherwin-Williams DTM Acrylic Enamel (two finish coats)
3M rust converter gel for active oxidation zones
Wire brushes, angle grinders, and detail brushes for precision work
The Process: How Windy City Painters Restores Rusted Iron
Every iron fence painting Wicker Park project follows a disciplined, multi-stage process:
Preparation. Wire brushing and angle grinding remove all loose, flaking, and compromised material. Rust converter gel is applied directly to active oxidation zones, chemically stabilizing the metal underneath.
Repairs. Pitted sections and structurally weak joints are addressed before any coating touches the surface. Notably, skipping this step is the most common reason fence paint fails prematurely.
Priming. A full rust-inhibiting primer coat seals every bare metal surface, preventing moisture from reaching the iron beneath.
Application. Two finish coats of direct-to-metal enamel are applied by hand for even coverage across pickets, finials, and rail joints.
Finishing. A final inspection confirms full coverage, sharp lines, and a smooth, uniform sheen from every angle.
Furthermore, this same process protects the ornate details so common on Wicker Park fencing — decorative finials, scrollwork, and gate hardware — without losing the historic character that makes these properties special.
Advice for Wicker Park Homeowners
Before starting a similar project, homeowners in this neighborhood should keep a few things in mind:
Never paint over active rust. Untreated oxidation will continue spreading beneath the new coating, and the paint will fail within a season or two.
Always prime bare metal before applying a finish coat. Skipping primer is the single fastest path to peeling.
Choose coatings rated for temperature extremes, since Chicago's freeze-thaw cycles are harder on metal than most climates.
Inspect ground-contact areas each spring, as base rails typically rust fastest due to snow melt and road salt runoff.
Budget for prep time. In fact, most of the labor in a quality iron fence painting Wicker Park project happens before a single coat of paint is applied.
Similarly, ask whether the contractor uses rust converter on active oxidation, since skipping this step often shortens the life of the finish considerably.
Moreover, historic greystone properties often have decorative ironwork that requires extra care during grinding and priming so the original detailing is preserved rather than sanded away.
What to Expect: Timeline and Investment
Homeowners often ask how long an iron fence painting Wicker Park project takes from start to finish. In general, prep work — wire brushing, grinding, rust conversion, and repairs — takes up the largest share of the schedule, while primer and enamel application move relatively quickly once the surface is properly stabilized. Cure time between coats also affects the overall timeline, since rushing this stage undermines durability. Consequently, Windy City Painters builds a realistic schedule around weather conditions rather than forcing the job into a tight window. In addition, investment varies based on fence length, the amount of active rust present, and whether ornate detailing requires extra hand-finishing. Homeowners considering this project should request a full on-site walkthrough rather than a rough phone estimate, since rust severity is difficult to judge accurately without seeing the fence in person.
Why Wicker Park Homeowners Choose Windy City Painters
Windy City Painters has become the trusted painting contractor for Chicago's North Side and Near West Side, and iron fence painting Wicker Park residents request most often reflects that reputation directly. In contrast to quick-fix contractors who paint straight over rust, Windy City Painters treats every project as a full restoration. As a result, clients get a finish that holds up through multiple Chicago winters rather than one.
In addition, for related projects, Windy City Painters also offers interior painting, cabinet painting, drywall and plaster repair, and full metal refinishing services for fences, gates, and porches throughout the neighborhood. Ultimately, that range of services is what makes us a true one-stop contractor for Wicker Park homeowners.
See more of our work and request a free estimate at www.windypainters.com.
Ready to transform your Wicker Park home? Contact Windy City Painters for a free estimate — visit www.windypainters.com today. Proudly serving Wicker Park, West Town, Lincoln Park, Roscoe Village, Lakeview, Ukrainian Village, River North, and all of Chicago.
 Titan Hangers Wallpaper
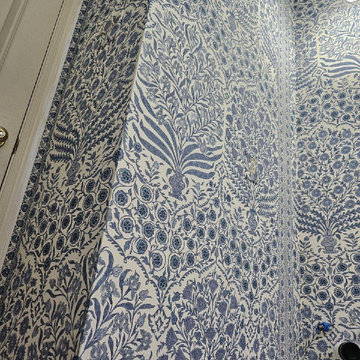
Transform your basement into an elegant extension of your home with our premium wallpaper installation services, designed specifically for Cherry Hills Village residences. Our master wallpaper installers specialize in creating sophisticated, moisture-resistant designs that elevate even the most challenging below-grade spaces.
Basement-Specific Wallpaper Solutions
✔ Humidity-Proof Wallcoverings – Mold/mildew-resistant vinyl and fiberglass options
✔ Light-Enhancing Finishes – Reflective metallics and glossy textures to brighten spaces
✔ Acoustic Wallpapers – Sound-dampening textures for home theaters
✔ Faux Architectural Details – Creates the illusion of windows or paneling
✔ Wine Cellar Elegance – Temperature-stable options for collector spaces
The Cherry Hills Village Standard
✅ Below-Grade Installation Expertise – Specialized techniques for basement conditions
✅ Laser-Level Precision – Perfect alignment in low-ceiling spaces
✅ Concierge Scheduling – Timed around your seasonal use of the space
✅ Historic Home Sensitivity – Preserves original walls in older estates
✅ White Glove Service – No mess left behind
Signature Basement Styles
• Mountain Lodge Luxe – Rich woodgrains and stone textures
• Old World Cellar – European-inspired brick and wine motifs
• Modern Gallery – Neutral backdrops for art displays
• Golf Club Elegance – Subtle grasscloth and leather-look finishes
Serving Cherry Hills Village's Finest Homes – From The Preserve to The Enclave. Schedule your private basement design consultation today.
 Vintage Homes
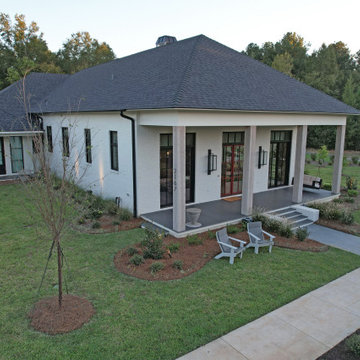
This amazing project was the culmination of triumph after triumph in setup, design, and function. The particular requirements of the Owner started during the contract phase forcing us to create a version of the contract used before. We then spent close to 90 days creating detailed specs, and a “research and development” born out of those specifications. Full automation and “walls as straight as steel” were challenges to address, Control 4 and Boise Cascade engineered lumber checked the boxes on those two items. Possibly the to jump was making the inside of clean, straight modern lines compliment the required traditional symmetry balance of the exterior. The architect masterfully made the blend in style, and then the real work began…that is. The final hurdle was completing this masterpiece in 9 months to meet the Owner’s move schedule, entire staff of 10 all played a part in eliminating several months from the schedule. The overall sense of accomplishment on this project was shared throughout the halls of our office.
 Will Construction, LLC
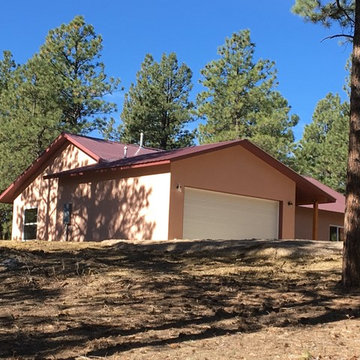
Nice size attached 2 car garage on this custom home completed in March of 2017. Home was finished ahead of schedule and under budget!
Example of a mid-sized classic attached two-car garage design in Albuquerque
Example of a mid-sized classic attached two-car garage design in Albuquerque
 LA Home Contractor
FULL HOUSE REMODEL – COMPLETE SCOPE OF WORK
1. Pre-Construction Phase
• Initial site inspection and measurements
• Architectural design and layout planning (if required)
• Structural engineering (if load-bearing walls are modified)
• Preparation of plans for city approval
• Permit application and plan check
• Obtain required building permits
• Scheduling of inspections
• Homeowner responsible for permit fees unless otherwise stated.
2. Site Preparation & Protection
• Protect flooring and non-work areas
• Install plastic dust barriers with zipper access
• Cover windows and furniture as needed
• Temporary utility setup if required
• Daily job site cleanup
• Final professional cleaning upon completion
3. Demolition
• Remove existing flooring (tile, wood, carpet, etc.)
• Remove cabinets, countertops, vanities
• Remove interior walls per plans
• Remove drywall where required
• Remove plumbing fixtures
• Remove electrical fixtures
• Haul away all debris
4. Structural & Framing
• Install structural beams if required
• Reframe modified walls
• Install new partitions per approved plans
• Repair or replace damaged framing
• Subfloor repair or replacement as needed
• Install blocking for cabinets and accessories
5. Plumbing (Up to Code)
• Replace old water supply lines (Copper Type L or PEX)
• Replace or modify drain lines (ABS)
• Relocate plumbing fixtures as needed
• Install new shut-off valves and cleanouts
• Water heater replacement if included
• Call for rough and final plumbing inspections
6. Electrical (Up to Code)
• Upgrade electrical panel if required
• Rewire entire house as needed
• Install new outlets and switches
• Install GFCI/AFCI protection per code
• Install recessed lighting and fixtures
• Install smoke and carbon monoxide detectors
• Dedicated circuits for appliances
• Call for rough and final electrical inspections
7. HVAC
• Replace or upgrade HVAC system if included
• Install new ducting and registers
• Install thermostat or mini-split system if applicable
8. Insulation
• Install wall insulation per code requirements
• Install ceiling insulation per code requirements
9. Drywall & Plaster
• Install new drywall
• Tape and mud (Level 4 or 5 finish)
• Texture to match existing or smooth finish
• Patch all affected areas
10. Flooring
• Install tile flooring
• Install engineered wood / hardwood / laminate / vinyl
• Install baseboards
• Floor leveling if required
11. Kitchen Remodel
• Install new cabinets
• Install countertops
• Install backsplash
• Install sink and faucet
• Install appliances (owner supplied unless specified)
12. Bathroom Remodel(s)
• Install new tub or shower system
• Waterproofing system installation
• Install tile on floors and walls
• Install vanity and toilet
• Install shower valve and fixtures
• Install shower glass if included
13. Doors & Windows
• Replace interior and entry doors
• Replace windows if included
• Install hardware
14. Interior & Exterior Paint
• Surface preparation
• Prime and paint walls, ceilings, and trim
• Exterior painting if included
15. Exterior Work (If Included)
• Stucco repair
• Roofing repair or replacement
• Concrete work or pavers
• Drainage improvements
16. Final Phase
• Final inspections
• Punch list completion
• Final cleaning
• Final walk-through with homeowner
Standard California Contract Terms (Summary)
• All work performed in compliance with California Building Code.
• Change orders must be approved in writing.
• Unforeseen conditions may require additional cost.
• One-year labor warranty unless otherwise stated.
• Progress payments per agreed payment schedule.
• Contractor is licensed and insured.
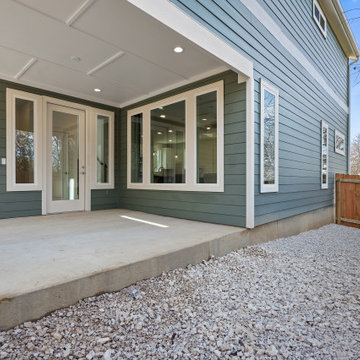
 Rivendale Homes Texas
With over 50 years of combined experience in home-building and real estate, the award-winning Rivendale team brings you the Woodbridge community located at 1900 Bunche Road. Featuring elegant finishes, open floorplans, energy efficient features, and much more. Schedule a Self-guided tour or schedule a tour with us to assist you on finding your next home.
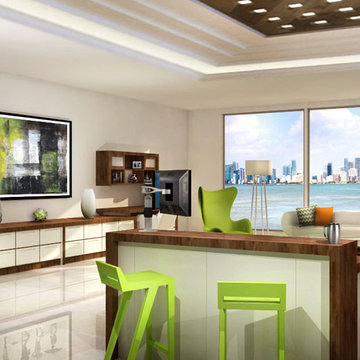 Closet Factory
Extra thick panels in medium stained cherry and almond painted drawer fronts for contrast.
Built-in desk home office photo in Los Angeles
Built-in desk home office photo in Los Angeles
 Closet Factory
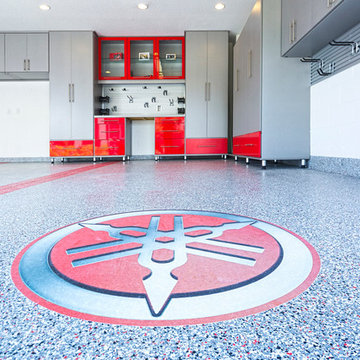
Embarking on a garage remodeling project is a transformative endeavor that can significantly enhance both the functionality and aesthetics of the space.
By investing in tailored storage solutions such as cabinets, wall-mounted organizers, and overhead racks, one can efficiently declutter the area and create a more organized storage system. Flooring upgrades, such as epoxy coatings or durable tiles, not only improve the garage's appearance but also provide a resilient surface.
Adding custom workbenches or tool storage solutions contributes to a more efficient and user-friendly workspace. Additionally, incorporating proper lighting and ventilation ensures a well-lit and comfortable environment.
A remodeled garage not only increases property value but also opens up possibilities for alternative uses, such as a home gym, workshop, or hobby space, making it a worthwhile investment for both practicality and lifestyle improvement.
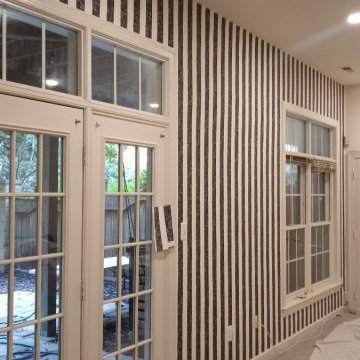
 LA Wallcovering
Elevate your culinary space with exquisite wallpaper installation designed for Santa Barbara’s finest homes. Our master wallpaper installers blend coastal elegance with functional durability to create stunning kitchen backsplashes and accent walls.
Kitchen Wallpaper Specialties
✔ Marine-Grade Vinyls – Humidity-resistant for oceanfront homes
✔ Spanish Tile Effects – Authentic-looking patterns without grout
✔ Peel-and-Stick Backsplashes – Perfect for historic adobe walls
✔ Organic Textures – Woven grasses, cork, and linen-looks
✔ Custom Murals – Vineyard or Channel Islands-inspired scenes
The Santa Barbara Difference
✅ Historic Home Expertise – Gentle on original plaster walls
✅ Coastal Climate Formulas – Mold/mildew-resistant adhesives
✅ Designer Collaboration – Work with your architect or our stylists
✅ Precision Cutouts – Flawless around outlets and switches
✅ White Glove Service – Installation timed around your schedule
Signature Central Coast Styles
• Mission Revival – Traditional florals with wrought iron accents
• Montecito Modern – Clean lines with natural textures
• Coastal Farmhouse – Weathered wood and sea glass tones
• Vineyard Chic – Grapevine motifs in earthy neutrals
Serving Santa Barbara’s Finest – From the Riviera to Hope Ranch. Schedule your design consultation today!

 Talon Construction Inc.
Designing and building a kitchen addition is a complex process that involves multiple steps and considerations. Here is a general outline to help you get started on your kitchen addition project:
Define Your Goals and Budget:
• Determine the purpose of the kitchen addition. Is it for more cooking space, a dining area, or a combination of both?
• Establish a realistic budget for your project. Consider all costs, including construction, permits, materials, and furnishings.
Hire a Design Professional:
• Seek the services of a design build company who specializes in kitchen additions.
• Discuss your vision, needs, and budget with the design professional to create a design concept.
Site Evaluation:
• Assess the existing space and structural condition of your home to ensure it can support the addition.
• Consider factors like zoning regulations, setbacks, and building codes.
Design Development:
• Collaborate with your design professional to refine the concept, including the layout, size, and architectural style.
• Choose materials, finishes, and fixtures that fit your design and budget.
Obtain Permits:
• Consult with your local design build contractor to determine the necessary permits and approvals.
• Prepare and submit all required documents, including architectural drawings and engineering plans.
Create Construction Documents:
• Work with your design build professional to develop detailed construction drawings and specifications.
• These documents will serve as a guide for contractors during construction.
Hire a design build contractor:
• Check references, credentials, and licenses before selecting a contractor.
• Sign a detailed contract that outlines the scope of work, timeline, and payment schedule.
Construction Phase:
• Demolition: If needed, remove any existing structures or walls.
• Foundation: Construct the foundation for the addition.
• Framing: Build the structural framework of the addition.
• Plumbing, Electrical, and HVAC: Install or update utilities as required.
• Insulation: Ensure proper insulation for energy efficiency.
• Drywall and Finish Work: Complete the walls and ceilings.
• Flooring and Cabinetry: Install flooring and kitchen cabinets.
• Appliances and Fixtures: Add appliances, plumbing fixtures, and lighting.
• Paint and Finish: Apply paint and finishes to achieve the desired look.
• Final Inspection: Schedule inspections to ensure compliance with building codes.
Final Inspections and Approvals:
• Arrange for final inspections to ensure the addition meets all safety and code requirements.
• Obtain any necessary certificates of occupancy or compliance.
Move In and Enjoy:
• Once all inspections and approvals are received, you can move into your new kitchen addition and start enjoying it.
Remember that every kitchen addition project is unique, so adapt this outline to your specific needs and circumstances. Consulting with professionals and obtaining the required permits and inspections is crucial to a successful and safe project.
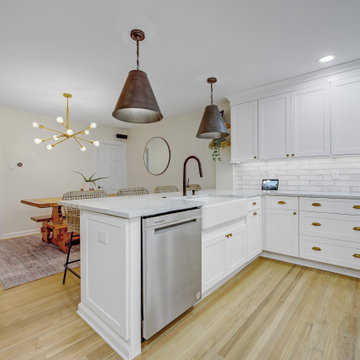
 Main Line Kitchen Design
Main Line Kitchen Design has a different business model than other kitchen showrooms, designers, and cabinetry dealers. The difference helps us to do five important things better than our competitors.
The kitchens we sell are better designed and our designers are more experienced. This is because we insist on showing customers designs we recommend, BEFORE, we do a design they request. This way, final designs tend to be more collaborative and professional. Our designers are more experienced because they are better paid and design with more cabinet brands than at other dealers.
Our pricing for cabinets is less than other cabinet dealers. This is because we do not have a showroom open to the public, and we require a small deposit and a screening before we accept customers. This helps our designers spend their time more effectively. And, it eliminates 80% of the overhead kitchen showrooms spend on staffing, larger displays, and on a curbside location.
We carry more brands of cabinetry than other dealers. This is possible because we display one cabinet for each brand we sell. Through glass countertops clients can examine a brands construction quality, and we display the door styles and finishes of our brands. Instead of the larger displays customers see in traditional showrooms, our customers can view 5 million kitchens on Houzz.com, or the hundreds of our kitchen renovations we show on Houzz, our web site, and in framed photos on the walls of our office building.
Kitchen construction is often better organized and generally costs less. This is because we recommend general contractors free of charge. They supervise construction from scheduling to completion. This eliminates a middleman, reduces delays, and eliminates the fees that almost all showrooms and home centers charge their customers. We are also happy to work with any contractor a customer finds on their own. If we haven’t worked with that contractor before they may need more of our direction, but both companies can benefit from working together and possibly referring each other in the future.
Less problems arise, and if they do, they are handled more quickly. This is because every kitchen we sell is reviewed by at least 3 kitchen designers during the ordering process. Our Operations Manager Ed Sossich checks orders and schedules all warehouse and home deliveries. Our delivery manager Mark Mitten supervises every delivery and checks in each cabinet and part. And our CRM system, Monday, prompts each person responsible for each phase of a customer’s kitchen with automated alerts. This keeps things moving, even during supply chain disruptions, and ensures no step is overlooked.
Main Line Kitchen Design’s company slogan is “The world of kitchen design is changing . . . “. We pride ourselves on being innovative in everything we do. From our web site and how we advertise, to the gift we send each customer upon the completion of their kitchen.
Our business model helps us receive 100’s of 5-star reviews, and makes our kitchen projects more enjoyable for everyone.
We look forward to working with you.
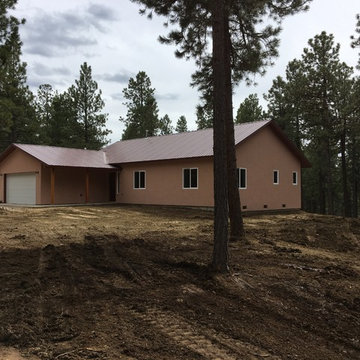 Will Construction, LLC
Custom home just finished in Bayfield. House is compact in size but nicely finished and will require very little maintenance. We finished it ahead of schedule and under budget!
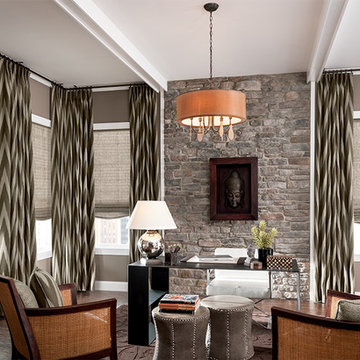
 Budget Blinds of Ft. Lauderdale and Pompano Beach
Study room - mid-sized modern freestanding desk medium tone wood floor and brown floor study room idea in Orange County with gray walls
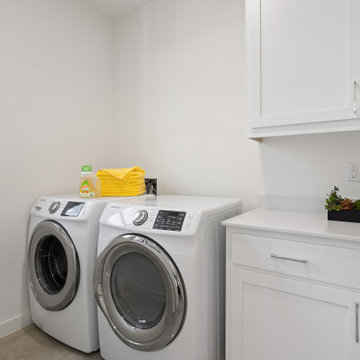 Rivendale Homes Texas
With over 50 years of combined experience in home-building and real estate, the award-winning Rivendale team brings you the Woodbridge community located at 1900 Bunche Road. Featuring elegant finishes, open floorplans, energy efficient features, and much more. Schedule a Self-guided tour or schedule a tour with us to assist you on finding your next home.
 Waves Remodeling
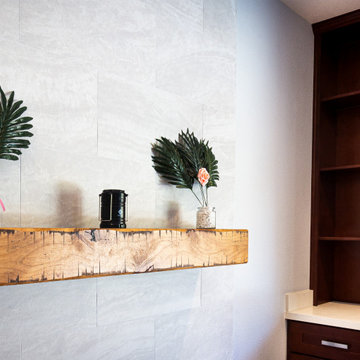
At Waves Remodeling CA, we specialize in full home remodeling and are experts in fireplace remodeling within budget and schedule. Schedule your free consultation now at https://calendly.com/wavesremodelingca!
This is a firehouse remodel. The firehouse has been fully remodeled, seamlessly blending in and achieving a modern and silky look, thanks to marble tile throughout. The wooden shelf allows you to add pieces of art or pictures to make the area even more beautiful and cozy. A firehouse is definitely a central piece in the house, adding warmth and soul to the living room.
 Mom's Design Build
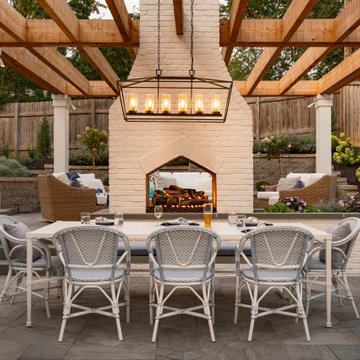
The family has lived across the country on a medical school journey, and this is the first home they owned. They love to be active outdoors so coming to Minnesota from their home in California, they wanted to better utilize their back yard and limited entertainment space. They wanted the design to incorporate a patio, firepit, bistro lights and bar area.
The homeowners love the use of fun tiles and patterns inside and they were curious if this could be extended to their exterior space. They also loved the cozy feeling of being indoors while spending time outside.

44