
Search results for "Sealing" in Home Design Ideas

 Tile Doctor Ltd
This job was for a repeat client in Toft near Cambridge who had aa stunning large hallway that was tiled in beautiful pale Limestone. My client had asked me back to work on the floor having previously completed the deep clean and seal of a Terracotta floor previously.
The Limestone tiling in the entrance hall had years of some type of topical sealer applied to it. This caused the stone to look slightly discoloured and from certain lights showed up hundreds of scratches and smudges embedded in the seal. I’ve tried to capture this problem in the photographs on this page, but it was very difficult.
A topical sealer sits on the surface of the tile where it is vulnerable to scratching, hallways are generally high traffic areas and so more likely to see this sort of problem. Ideally an impregnating sealer should have been applied, impregnators work by occupying the pores in the stone thus preventing soiling from becoming ingrained in the stone.
Before starting we protected the woodwork against splashing with blue film, I don’t usually make a great deal of mess, but you can never be too careful when working in someone’s property especially one as beautiful as this.
To strip off the old sealer I began by applying a strong dilution of Tile Doctor Remove and Go to the Limestone tiles. I split the floor into sections and used a 400-grit diamond burnishing pad to work the Tile Doctor Remove and Go into the tiles. The floor was then rinsed off using our high-pressure cleaning system that applies pressurised hot water to the floor whilst simultaneously extracting the soil with its built-in vacuum. The system is quite heavy, so it is built into my van, and I run a large flexible hose to a spinner tool that does the cleaning. It is an expensive tool, but it saves a lot of time and leaves the floor fairly dry afterwards.
The 400-grit pad had released a lot of the sealer but there were quite a few layers to get through, so I changed the burnishing pad to a coarse 200-grit pad and repeated the process. After another rinse and extract I would see it had the desired effect and I was able to carry on building up the finish on the Limestone by apply the 400-grit followed by the 800, 1500 grit pads. It was a large floor and so this took up much of the day so once complete I left for the day so it could dry off overnight.
The next day I finished the polishing process with the application of a 3000-grit burnishing pad which is applied with a little water sprayed onto the tile and really brings up the polish on the stone. This process has the added advantage of leaving the floor dry so not long afterwards I was able to move on to sealing.
For this floor two coats of Tile Doctor Ultra-Seal were applied, it is an impregnating sealer that won’t alter the colour of the tiles leaving a natural look.
My client was much happier with the new finish and has asked for another quotation on some more Terracotta flooring that needs attention. For aftercare I recommend using Tile Doctor stone soap, it’s a special formula that builds on the patina which will help maintain the polished appearance of the Limestone.
Tom Conlon
Cambridge Tile Doctor
 Tile Doctor Ltd
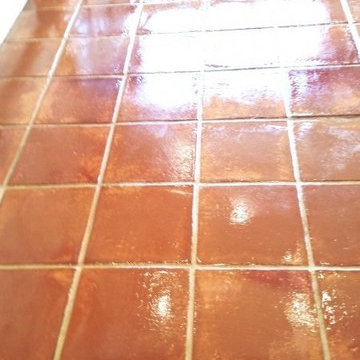
Sealers really do bring out the best in Terracotta tiles, however the catch is they will wear off over time and if you want to maintain that appearance you have to work out a regular maintenance plan. If you don’t maintain the sealer you will find that the sealer near the most heavily used areas such as doors etc. will wear away first and once that happens dirt will become ingrained in the tile and becomes difficult to clean resulting in a patchy appearance.
The remaining sealer on this Terracotta tiled kitchen floor at a house in the town of Wickford, Essex was no longer effective and had worn completely off in places. The solution was to strip off the old sealer, clean the Terracotta tile and gout and then re-seal with a fresh seal.
I started by giving the floor a deep clean with Tile Doctor Pro Clean diluted 2 parts water to 1 part cleaner. This is quite a strong dilution designed to allow the removal of the sealer and was left to dwell on the floor for ten minutes before working it into the floor using a scrubbing machine fitted with a black pad. Surprisingly the sealer was proving difficult to shift in certain areas and I had to repeat the process a few times and made sure to give the grout a good scrubbing as well.
I managed to get rid of most of the sealer using this process and for the remaining stubborn areas I used a stronger product called Tile Doctor Remove and Go which is a very effective coatings remover that is safe to use on tiles. This did the trick and the floor was now free of sealers and the grout was looking much better too, the resultant slurry was removed using a wet vacuum and I then rinsed the floor several times with water before leaving it to dry for weekend.
Tile Doctor Colour Grow which is an impregnating sealer that seeps into the pores of the tile to block them and prevent contaminates becoming ingrained in there and it also enhances the natural colours. Once this was dry I followed up with a number of coats of Tile Doctor Seal and Go which is topical sealer that will protect the surface and adds a nice sheen to the floor and is a popular choice for Terracotta and Quarry tiles.
I’m not sure my photographs do this post any justice however hopefully you can see that floor was quite transformed, the grout is much cleaner and the colours in the Terracotta have really come to life.
Nick Murphy
South Essex Tile Doctor
 Tile Doctor Ltd
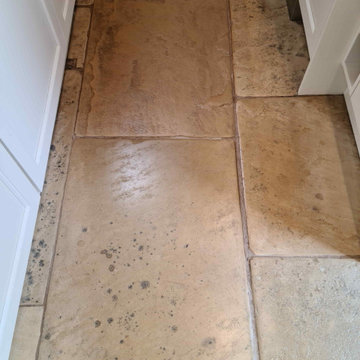
These pictures are of a beautiful Sandstone floor in Ilkley, the tiles were sourced from Lapicida of Harrogate and installed around twelve years prior. If you take a look at their website now you will see they are selling a similar London White Sandstone for nearly £100 per m2. This floor was 35 square metres so clearly this was a significant investment for the owner at the time.
After twelve years of use however the sealer had worn off the floor and dirt had become ingrained in the pores of the stone making it very difficult to keep clean. A good sealer takes a long time to wear off so the change to the appearance of the stone happens so slowly you don’t notice it. The floor was now looking permanently dirty, and the owner of the property had decided it was time to get it renovated.
Before quoting I paid a visit to the property to survey the floor and conduct an initial test clean which came out well. The test cleaning did not go as quickly as I had hoped it might however, due to traces of old satin sealer on some of the stone. It’s important to remove all the old sealer before applying new or you can end up with a patchy appearance. The remnants of old sealer proved challenging to remove as a result I had to try several products and methods before working out the right approach. In the end I resulted to using a product called Tile Doctor Wax Away. I had considered applying diamond burnishing pads which would have been a quicker option, but the flagstones had a riven finish, and the dirt was deeply pitted.
With a successful cleaning plan worked out I provided the client with a which was accepted, and a date agreed for my return.
The cleaning plan I had worked out was to apply a strong dilution of Tile Doctor Wax Away, leave it to soak into the stone for thirty minutes and then scrub it in with a rotary buffer fitted with a black scrubbing pad. The old sealer proved to be tough to remove and in total I used five litres of Tile Doctor Wax Away in the process, as I said it was a big floor!
On day three, I sealed the floor using three coats of Tile Doctor Seal and Go which gave the Sandstone a lovely satin finish that the client liked. This product is also water based so it doesn’t leave a smell as it dries.
Once done the floor was completely transformed, and my client very pleased with the floor which looked so much lighter and cleaner. For aftercare cleaning I recommended the use of Tile Doctor Neutral Tile Cleaner for maintenance, it is pH neutral so will ensure the newly applied seal is protected. It has a nice fresh smell and is gentle enough to use frequently keeping the newly renovated floor looking lovely.
Nigel Stoker
North West Yorkshire Tile Doctor
Find the right local pro for your project
 SurfaceLogix
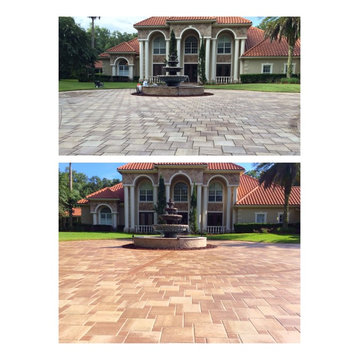
BEFORE AND AFTER - Exterior, concrete paver patio and driveway. Pressure cleaned and sealed with Cobble Loc, water-based paver sealer. Job by PaverPro Restoration & Sealing, Jacksonville.

 Mason Dixon Grout Works, LLC
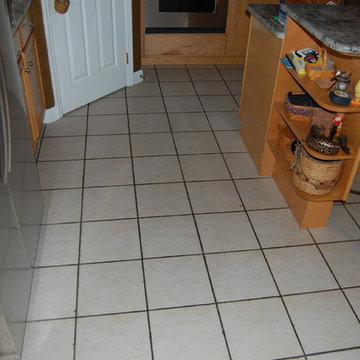
BEFORE PHOTO---Ceramic tile floors - Kitchen, Dining area, Hallway, Foyer & Laundry room
BEFORE---Clean entire area, Specifically clean all grout lines, Color Seal all grout lines with specified color, Final finish to remove any tile haze.
5yr, Written Warranty on all Color Sealed grout lines against Cracking, chipping, peeling or staining.
 Tile Doctor Ltd
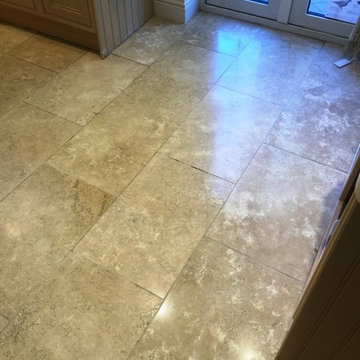
This customer, who lives in East Byfleet had been experiencing difficulties in keeping her fantastic Travertine tiled kitchen floor in good condition. Over the years it had suffered from a heavy build up of dirt and oily stains, not to mentioned a number of cracks and small holes. Needless to say, the customer was keen to restore the Travertine tiles to their former glory.
To begin the restoration, I applied Tile Doctor Remove and Go across the entirety of the large tiled area. This heavy duty remover breaks down any old sealers and other coatings, leaving the area ready to cleaned or, in this case, burnished.
Burnishing is a method for cleaning and polishing certain types of high-end stone, including Travertine, Marble, and Limestone. Our burnishing system involves the application of four diamond encrusted pads of varying grits. Firstly, I applied the Coarse grit pad, which helps to break down any dirt and stains on the surface of the tiles. Then, I worked my way through the Medium, Fine, and Very Fine pads, using a little water as lubricant, to gradually refine the polish on the Travertine. It was then rinsed and left to dry.
To round off the first day of work, I filled any cracks and holes using our two-part resin system which greatly improved the look of the tile.
The following day I returned to the property to seal the tiles checking first that the floor had dried. All was well so I proceeded to seal the floor using our colour intensifying impregnating sealer Tile Doctor Colour Grow. Once that was dry, I added the finishing touches by buffing the floor with a soft white buffing pad. As you can see from the photographs, the combination of a fresh seal and polish worked wonders.
We did such a good job with the floor that the customer asked if we could also improve the appearance of their natural stone fireplace which was suffering from bad rust and oil stains however I do a separate write up on that.
Wayne White
West Surrey Tile Doctor

Sponsored
Delaware, OH

Buckeye Basements, Inc.
Central Ohio's Basement Finishing ExpertsBest Of Houzz '13-'21

 User
UserWindows reaching a grand 12’ in height fully capture the allurement of the area, bringing the outdoors into each space. Furthermore, the large 16’ multi-paneled doors provide the constant awareness of forest life just beyond. The unique roof lines are mimicked throughout the home with trapezoid transom windows, ensuring optimal daylighting and design interest. A standing-seam metal, clads the multi-tiered shed-roof line. The dark aesthetic of the roof anchors the home and brings a cohesion to the exterior design. The contemporary exterior is comprised of cedar shake, horizontal and vertical wood siding, and aluminum clad panels creating dimension while remaining true to the natural environment.
The Glo A5 double pane windows and doors were utilized for their cost-effective durability and efficiency. The A5 Series provides a thermally-broken aluminum frame with multiple air seals, low iron glass, argon filled glazing, and low-e coating. These features create an unparalleled double-pane product equipped for the variant northern temperatures of the region. With u-values as low as 0.280, these windows ensure year-round comfort.
The large Lift and Slide doors placed throughout this modern contemporary home have superior sealing when closed and are easily operated, regardless of size. The “lift” function engages the door onto its rollers for effortless function. A large panel door can then be moved with ease by even a child. With a turn of the handle the door is then lowered off the rollers, locked, and sealed into the frame creating one of the tightest air-seals in the industry.
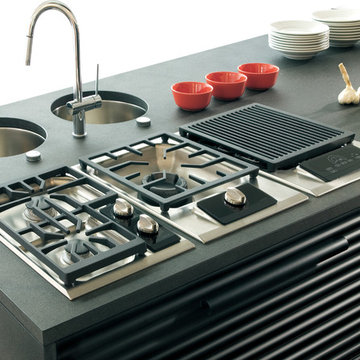
 Universal Appliance and Kitchen Center
2 DUAL STACKED TRUE SIMMER BURNERS
LOW-PROFILE CONTINUOUS GRATES
SEALED BURNERS W/ DEEP DRIP PANS
LIGHTED CONTROL AREA
DISHWASHER SAFE GRATES
ADDITIONAL FEATURES:
Optional-Bracket Supports For Downdraft Modules
Optional-Filler Strip For Multiple Installations
APPEARANCE:
Classical Stainless Steel Exterior Finish
CONTROLS:
Illuminated Control Panel
2-Tiered Control Knobs
Individual Spark Ignition System
COOKTOP FEATURES:
2 Sealed Gas Burners
1- 12,000 BTU Sealed Gas Burner
1- 9,200 BTU Sealed Gas Burner
Low Profile Cast Iron Porcelain Grates
True Simmer Setting On All Burners
Seamless Drawn Burner Pan
ENERGY/POWER:
Optional-High Altitude Conversion Kit
Gas Cooktop
MANUFACTURERS WARRANTY:
2 Year Parts and Labor
5 Year Parts-Gas Burners, Electric Elements
PRODUCT DIMENSIONS:
4" H x 21" D x 15" W
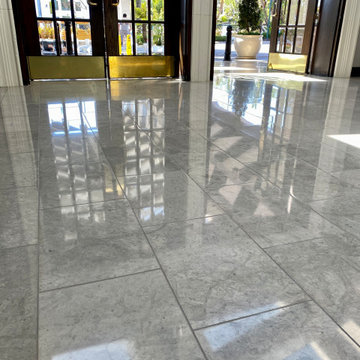
 Marble Restoration Specialist
Protect all sensitive areas:
Cover carpet, baseboards & wood flooring
Grinding
If the marble surface has deep scratches or unevenness, grinding may be employed. This involves using abrasive materials to level the surface and remove imperfections.
Honing:
Honing follows grinding and involves the use of progressively finer abrasives to achieve a smooth and matte finish. This step helps eliminate minor scratches and prepares the surface for polishing.
Polishing:
A multi-stage polishing process is applied to the marble, using polishing compounds and tools to bring out the natural shine. This step enhances the reflective qualities of the marble, giving it a glossy appearance.
Repair:
Any chips, cracks, or damage to the marble are addressed during this phase. Technicians use fillers and adhesives that match the color and composition of the marble to restore its structural integrity.
Sealing:
A high-quality sealant is applied to protect the marble from future stains, spills, and damage. Sealing helps maintain the restored appearance and facilitates easier cleaning.
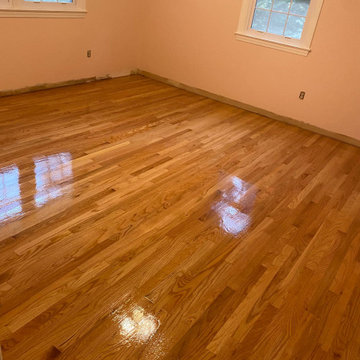
 MD Flooring Solutions, LLC
Natural
1x coat of ZINSSER®SealCoat™ Universal Sanding Sealer.
1x coat of Water-Based Oil-Modified polyurethane.
1x final coat of SamSeal or Masterline Oil-based polyurethane.
---} Finish: Satin.
- To repair water damaged boards in living room in 3 places: 2x2 + 2x2 + 3x2 ~14 boards
- Sand and refinish 2-1/4" red oak Hardwood floors on First floor: front foyer, living room, dining room, hallway, closets, 3 bedrooms - 989.40 sqft
- To install Scotia molding plus 2x boards in 1 area at basement steps
- To install 1x unfinished red oak stair nose 3.5 LFT at basement steps
- NO shoe molding to be installed
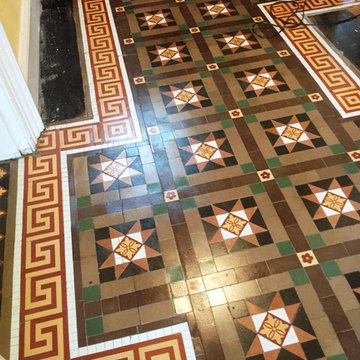 Tile Doctor Ltd
As you can see from the photographs below this Victorian tiled hallway was in quite a state and not only needed a thorough clean and fresh seal but needed to be rebuilt in parts.
Leamington Spa or Royal Leamington Spa to give its full name is one of the original UK Spa towns where people would visit to bathe the waters which are supposed to have medicinal properties, the town has many regency period properties and so Victorian floors
A good 30% of the floor tiles were lose and it took three days to rebuild the screed levelling compound before refitting loose tiles and new ones had to be cut to size, fixed in place and then re-grouted.
On day 4 a 400 grit coarse burnishing pad was applied to clean up the whole floor.
This was followed by scrubbing the tile and grout with Tile Doctor Pro-clean mixed 50/50 with NanoTech HBU remover followed by Remove and Go and finally treated with Acid Gel to remove the grout haze. After that the White tiles were steam cleaned to get them as clean and white as possible.
The floor was thoroughly rinsed after each treatment and the slurry extracted using a wet vacuum.
I left the floor for 5 days so it could thoroughly dry out and settle following the numerous treatments and then came back to seal the tiles, I used a damp test meter first to verify the floor was dry and ready for sealing. Once happy I proceed to apply a couple of coats of Tile Doctor Colour Grow which is a colour enhancing sealer that soaks into the tile protecting it from within and leaves a matt finish.
A lot of work went into restoring this floor but I’m really pleased with the way it came out and as you can imagine the owner was really happy with the transformation that had taken place in their house.
Mick Gayton
Warwickshire Tile Doctor
 MD Flooring Solutions, LLC
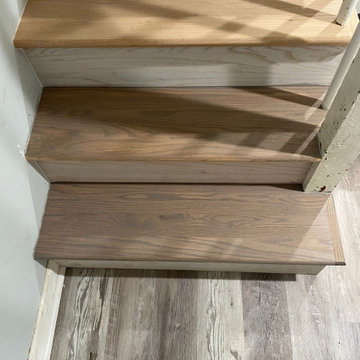
Basement steps project:
1x coat of Minwax or DuraSeal Stain: Stain to best match LVP in basement —1 color included
1x coat of ZINSSER®SealCoat™ Universal Sanding Sealer.
1x coat of Water-Based Oil-Modified polyurethane by default.
1x final coat of SamSeal or Masterline Oil-based polyurethane.
Finish: to best match LVP in basement
- To sand and refinish Unfinished hardwood 11x Treads only
 Tile Doctor Ltd
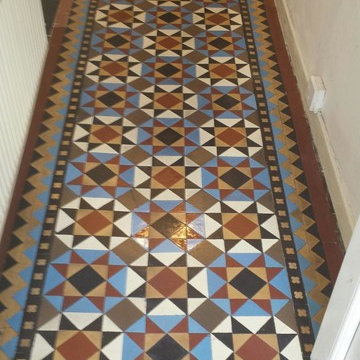
This set of photographs are from a house in the Warrington suburb of Stockton Heath where my client had discovered a Victorian Tiled floor under carpet in the hallway and was keen to have it restored back to its original condition. You can see from the photograph below that it was in quite a state with dirt and paint splashes however I was confident we could manage it.
On arrival I started to protect the skirting boards and entrance carpet to another room. Once that was done i started to strip the paint splashed and any remaining sealer from the floor using Tile Doctor Remove and Go which is an effective coatings and sealer remover that unlike some products is perfect safe to use on Victorian tiles
Working on the floor the product was diluted, scrubbed into the tile and then left to dwell for twenty minutes before being rinsed off with water which was then removed using a wet vacuum. The floor was now looking a lot cleaner, however I could see a number of stubborn areas that were going to need further treatment so I mixed the Remove and Go 50/50 with another Tile Doctor product called NanoTech HBU (Heavy Build-up Remover), which adds abrasive particles to the solution. This solution was scrubbed in and then rinsed off when i was happy with the condition of the floor. This process took much of the day and once done it was left to dry overnight ready for sealing the next day.
On my return the next morning i tested the floor in several places with a damp meter to ensure it was dry. When i was happy the floor was dry i started sealing with thin coats of Tile Doctor Seal and Go leaving thirty minutes between coats to allow it to dry; in total i gave the floor seven coats of sealer which gave the floor a nice shine which the customer was very happy with. As well as enhancing the look of the floor the sealer will provide stain protection going forward.
Alastair Robb
West Cheshire Tile Doctor

 Ogne Remodeling & Roofing
Seal It Green Xtreme Log Cabin Sealer in Cedar Tint
Seal It Green Cedar Clean used to clean wood before stain application
Link for Log Cabin Sealer: http://sealitgreen.com/cid-27-1/info.html
Link for Cedar Clean: http://sealitgreen.com/pid-19/cedar-clean.html
 Tile Doctor Ltd
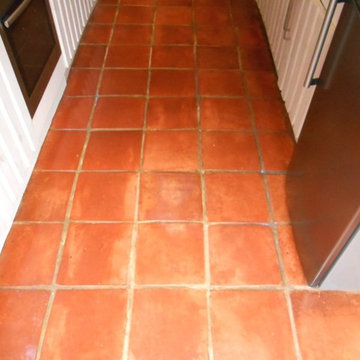
Not too long ago, I visited a house in the town of Fulwood in Preston, Lancashire. My client had a Terracotta tiled floor which had been neglected for many years and in their attempt to improve it had unfortunately been given some very poor advice by tile retailers, all of whom sold him different products, and each of which was unsuitable. Using these different products in succession had resulted in the depreciation of the floor’s texture and smoothness, in turn making the clay difficult to clean and maintain.
As per my usual process I ran a small test clean to demonstrate what could be done to improve the floor and I was commissioned to restore the floor back to its former glory.
I started by mixing a strong cleaning solution consisting of one part Tile Doctor Pro-Clean to three parts water. The solution was applied to the floor and left it to dwell for a short period. The high alkaline cleaner seeps into the pores of the tile getting underneath and lifting out the ingrained dirt and breaking down the old sealers. Then, I agitated the floor using a scrubbing pad fitted to a rotary floor machine before using a wet vacuum to suck up the resulting soiled solution.
There were a few paint marks dotted across the floor, but these were not noticeable until after I had given the Terracotta a deep clean. To remove the paint marks I used Tile Doctor Remove & Go, which is specially formulated to break down paint stains, adhesives and coatings. This product was used in combination with a steamer which, when applied directly to the tiles, helped to lift the paint out. Following this, I rinsed the entire floor a couple of times to remove any trace of cleaning product, and vacuumed up the excess moisture.
It’s always best to let the floor dry completely prior to sealing as applying sealer to a damp floor will affect the sealer. I left the house to allow this to take place overnight returning the next day. To get the best out of the Terracotta I sealed the floor using one coat of Tile Doctor Colour Grow, which is an impregnating sealer that soaks into the pores of the tile and acts as both as a bonding sealer enhancing the natural colours and darkening the clay (as requested by my client).
After the coat of Colour Grow had dried, I applied a further seven coats of Tile Doctor Seal & Go, which achieves a nice, low sheen Satin finish. Before leaving my happy client to enjoy his newly restored Terracotta floor, I made sure to provide some professional cleaning and long-term maintenance advice.
Russell Taylor
Lancashire Tile Doctor
 Ogne Remodeling & Roofing
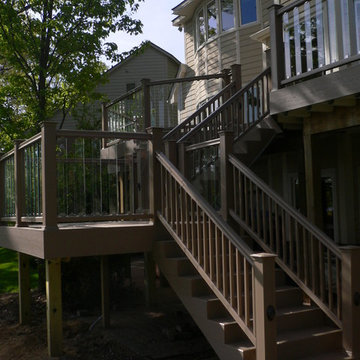
Seal It Green Xtreme Composite Sealer
Seal It Green Composite Deck Clean
Link for Composite Sealer: http://sealitgreen.com/cid-18-1/xtreme-composite-sealants.html
Link for Composite Deck Clean: http://sealitgreen.com/pid-21/composite-deck-clean.html
 SurfaceLogix
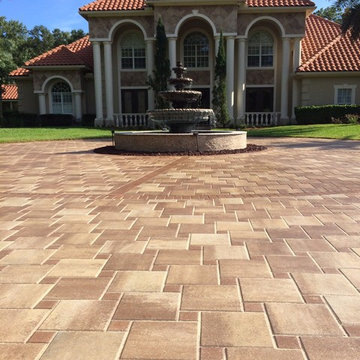
AFTER - Pressure cleaning and sealing with Cobble Loc, water-based paver sealer. Job by PaverPro Restoration & Sealing, Jacksonville.
Home design - huge mediterranean home design idea in Jacksonville
Home design - huge mediterranean home design idea in Jacksonville
39