
Search results for "Sealing" in Home Design Ideas
 Tile Doctor Ltd
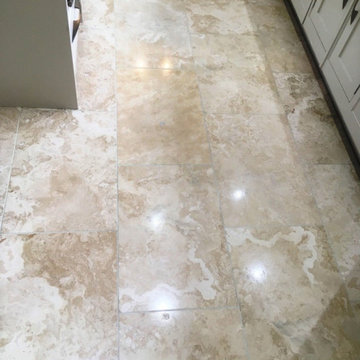
This is a Travertine tiled floor installed at a property in the popular Cheshire town of Wilmslow around 16 years prior. It had previously been maintained by a Tile Doctor colleague about three years ago and the owner was hoping the floor could be given a simple maintenance clean and seal. This is a service we provide as part of an annual maintenance plan, unfortunately after surveying the floor it was clear they had left it far too long, the floor had lost its shine and it would now need to be resurfaced with a set of diamond burnishing pads and then resealed.
Naturally burnishing the floor costs more than a simple seal and polish but if you are going to opt for the quicker maintenance plan route it does need to be done at least annually and possibly more frequently if it’s a floor in frequent use such as a kitchen. We agreed a price for the work, and I arranged a time with them to return and renovate the floor.
To restore the polished appearance of the Travertine I used a set of four burnishing pads which are applied to the floor with a rotary machine. You start with a coarse 400-grit pad using water to lubricate and running it over each tile at least three times. This first pad cleans up the stone and removes old sealers. This is then followed with the finer 800-grit, 1500-grit and finally a 3000-grit pad. Except for the 3000-grit, each pad is applied with water and the floor is rinsed and the soil extracted afterwards with the wet vacuum.
The Grout lines were also deep cleaned with a scrubbing brush and Tile Doctor Pro-Clean tile and grout cleaner. The product really gets to into deep seated dirt and grease which tends to accumulate in the grout. After a final rinse and extraction, the floor was then left to dry off overnight.
I returned on the second day and started by checking the floor was dry by taking several moisture readings with a damp meter. The readings were good, so I proceeded to seal the floor using a couple of coats of Tile Doctor Colour Grow. Colour Grow is an ideal sealer for Travertine as it seeps into the pores of the stone enhancing the natural brown colours in the process. It also offers great protection going forward.
Whilst I was there I had noticed that one of the doors had scratched the floor, fortunately the polishing process had got the scratches out of the stone but to prevent future scratching I helped them remove the door so a carpenter could shave off a few mm’s from the bottom.
My customer left the following feedback:
“Second time had Travertine floor restored, cleaned & sealed, the first time was 3 years ago. Great job done then by Simon Bywater. This time Kamila did a really professional job on the kitchen limestone floor. A bit more expensive this time, but a good job was done. Have left instructions for her to contact me in 12 months time for annual maintenance on the same floor, hopefully to prevent restoration being required! Highly recommend the service.”
The floor looked great and they should now be able to maintain it in between the maintenance visits, with day to day cleaning using Tile Doctor Neutral Tile Cleaner.
Kamila Logonzy
East Cheshire Tile Doctor

 SurfaceLogix
AFTER - Pressure cleaning and sealing with Cobble Loc, water-based paver sealer. Job by PaverPro Restoration & Sealing, Jacksonville.
Example of a huge tuscan beige two-story stone exterior home design in Jacksonville
Example of a huge tuscan beige two-story stone exterior home design in Jacksonville
 Mason Dixon Grout Works, LLC
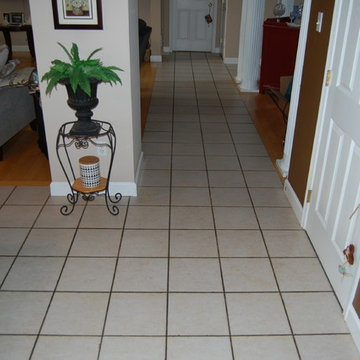
BEFORE PHOTO---Ceramic tile floors - Kitchen, Dining area, Hallway, Foyer & Laundry room
Clean entire area, Specifically clean all grout lines, Color Seal all grout lines with specified color, Final finish to remove any tile haze.
5yr, Written Warranty on all Color Sealed grout lines against Cracking, chipping, peeling or staining.
Find the right local pro for your project
 Tile Doctor Ltd
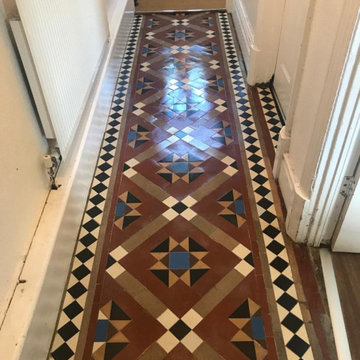
I recently worked on the restoration of a Victorian tiled hallway in Cwmbran Wales which is six miles North of Newport. As you can see from the photographs the floor was in quite a neglected dirty state and many of the the black and white border tiles needed removing and replacing. The worst part was the area by the front door where most of the tiles had been removed and then backfilled with concrete. I can only assume at some point in the past it was deemed to difficult or expensive to restore the floor, so they simply covered it up.
After visiting to survey the floor I did offer to source replacements for the concreted section and restore that as part of the work however my client’s budget would not stretch to that at the time. My quote was therefore focused on the main section of flooring and included replacing border tiles, deep cleaning the whole floor and then sealing the tiles to add protection. Although I did need to check that I could indeed source the replacement tiles before being able to provide the quote which as it turned out would not be an issue.
They were happy to go ahead and we arranged a suitable time to carry out the work which would enable me to work in the property whilst minimising contact with the owners due to the Covid-19 situation.
I spend the first day sorting out the black and white border tiles which needed to be gently prised out of position without upsetting the main part of the floor. The exposed subfloor was then cleaned up to remove old adhesive and replacements were fitted where required and secured into place. The floor would need to be solid before cleaning so that was left for day two so the new adhesive could go off overnight.
On day two I gave the floor an initial clean using a combination of Tile Doctor Pro-Clean and Remove and Go diluted with water. This produces a strong cleaner/stripper that will tackle dirt and remove coatings such as previous sealers. The old tiles had accumulated years of ingrained dirt, so I needed this extra power to remove the years of dirt and contaminates from the tile. It was sprayed onto the tiles and then left to soak in for ten minutes before being actively scrubbed into the tile using a rotary machine fitted with a black scrubbing pad. The soil was then rinsed off with water and extracted with a wet vacuum. The floor was inspected, and the process repeated on the tough stains until I was satisfied all the dirt had been removed.
Next the floor was treated to an acid wash using Tile Doctor Acid Gel using a similar method as before. This is an important treatment for these old Victorian floors that have no damp proof course as it neutralises efflorescent salts trapped in the tile which can appear as white salt deposits later. Once I was happy with the condition of the floor it was given a final rinse and left to dry off. I use a wet vacuum to remove liquids from the floor and on this last extraction I spent extra time to remove as much moisture from the tiles as possible.
I came back a few days later and after checking the tiles were dry using a damp meter, I started the application of the sealer. For this floor I applied seven coats of Tile Doctor Seal and Go for a satin finish. Tile Doctor Seal and Go is a specially formulated water-based sealer that provides both stain resistance and a durable low-sheen finish. It is perfect on a floor of this age where it leaves a lovely finish and will remain durable in what is a essentially a high traffic area.
Although we didn’t manage to sort out the area by the front door the client managed to fit a made to measure coir door mat along with carpet bar which was quite practical and looked fine so they were able to resolve that problem without blowing their budget.
The client was over the moon with results, the floor had a lovely pattern and the colours now shone through. I suggested the use of Tile Doctor Neutral Tile Cleaner to keep the floor clean and in good condition. It is neutral in pH so will ensure that the newly applied sealer stays in place and will ensure maintenance is nice and easy for them.
Paul Wales
Monmouthshire Tile Doctor

 THE SLEEPERS SHOPPE
The classic design features a painted creamy white finish and brushed nickel pulls. With its clean lines and classic look the Kentwood collection is timeless and versatile.
Finish: Creamy white
Materials: Hardwood solids, MDF
Hardware: Brushed nickel
Special Features:
B1475-01
3 drawers with felt lined top drawer.
tinted drawers w/french dovetail in front & english in back.
side mount ball bearing guides.
sealed case piece.
on/off touch lighting control.
B1475-10
5 drawers with felt lined top drawer.
tinted drawers w/french dovetail in front & english in back.
side mount ball bearing guides.
sealed case piece.
B1475-22
7 drawers with 2 felt lined top drawers, 1 drop down drawer front in the center top.
tinted drawers w/french dovetail in front & english in back.
side mount ball bearing guides.
sealed case piece.
wire management.
support leg w/ levelers.
B1475-36
2 wood framed glass drop down drawer fronts.
4 drawers.
tinted drawers w/french dovetail in front & english in back.
side mount ball bearing guides.
sealed case piece.
wire management.
B1475-40
5mm clear glass w/ 1" bevel.
B1475-54
bolt-on rails.
slats with support legs for regular rail.
B1475-55
bolt-on rails.
slat roll for storage rail.
storage rail w/2 drawers.
B1475-64
bolt-on rails.
slats with support legs for regular rail.
B1475-65
bolt-on rails.
slat roll for storage rail.
storage rail w/2 drawers.
B1475-74
bolt-on rails.
slats with support legs for regular rail.
B1475-75
bolt-on rails.
slat roll for storage rail.
storage rail w/2 drawers.
 SurfaceLogix
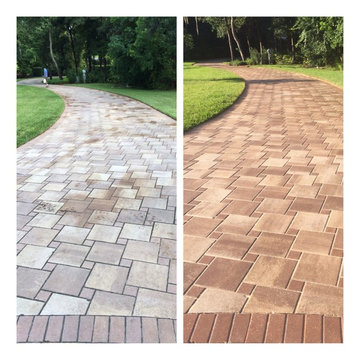
BEFORE AND AFTER - Concrete paver patio and driveway. Pressure cleaned and sealed with Cobble Loc, water-based paver sealer. Job by PaverPro Restoration & Sealing, Jacksonville.

Sponsored
Delaware, OH

Buckeye Basements, Inc.
Central Ohio's Basement Finishing ExpertsBest Of Houzz '13-'21
 Tile Doctor Ltd
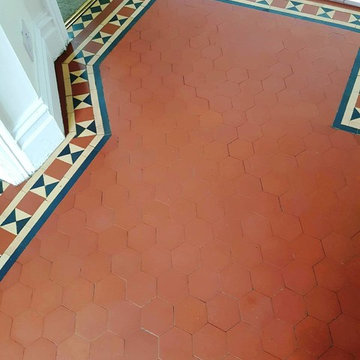
From The 1860s Victorian tiled floors started to appear in public buildings and by the 1890s they had become an essential feature in the most ordinary Victorian terraced houses. Although these floors fell out of fashion during the 1960s and ’70s, when many of them were covered over, they are now being rediscovered by their present owners and this is exactly what happened to my customer in the village of Littleover.
The customer had attempted to clean the floor by themselves but they couldn’t archive the result wanted, fortunately they discovered the Derbyshire Tile Doctor and after their call I went over and did a test for cleaning to make sure I can archive the needed results. They were happy with what they saw, so they booked me in to complete the work.
For cleaning the hallway I used a strong dilution of Tile Doctors Pro Clean which is strong multi-purpose high-alkaline cleaner. I left the Pro Clean to dwell for 10 minutes and then worked it in the tiles by using a strong black scrubbing pad fitted to my rotary machine. After scrubbing I rinsed the floor several times with clean water to remove any trace of cleaning product from the floor.
After successfully cleaning the hall I moved on to the porch which still had some old topical sealer on less walked areas. On these areas I had to use Tile Doctors own very effective stripper Remove and Go. Remove and Go has a long dwell time to remove any given sealer or wax so I left it to soak in for fifteen minutes followed by scrubbing it in with black pad fitted to rotary machine. The next step was to wash off the residue with water which was then removed using a wet vacuum.
Following this the tiles were given a rinse with Tile Doctor Grout Clean-up which is an acid based product that can remove grout smears and mineral deposits. Last step before sealing was to give the floor a thorough wash down with clean water to remove any cleaning product left on the tiles and then I left the floor to dry overnight.
Next day when I returned I used my damp tester to make sure that the floor is completely dry. Luckily for me floor was all dry and I started sealing. For sealing I used Tile Doctors Colour Grow Sealer which is colour enhancing breathable sealer. I applied 2 coats of the sealer and after every coat I polished off the excess with clean cotton cloths.
The result was really good and my customer was very happy with the work and said that now the floor looks transformed.
Tony Olmet
Derbyshire Tile Doctor
 Tile Doctor Ltd
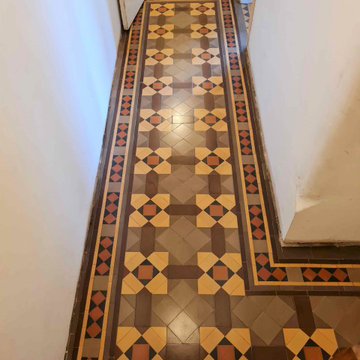
We were contacted by a customer in West Kirby who needed help renovating a Victorian tiled hallway in a house they had just purchased. Kirby is a desirable seaside location North of Heswall that expanded with the arrival of the railway in 1848. The railway brought a demand for property and so it’s not unusual to find housing stock in this area dating back to the Victorian era.
The Victorian tiles at this property appear to have been neglected by the previous owner and were now looking very dull and marked by paint from decorating; all the colours looked washed out and the floor was now looking very unappealing.
The good news however is that this problem is not uncommon and with a deep clean and a fresh sealer applied it can be transformed. I gave the owner a quote which was accepted a date agreed for my return to do the work.
On the first day the floor was sprayed with a neat solution of Tile Doctor Remove and Go which is a powerful alkaline cleaning and stripping agent used to remove old seals and paint. The solution was left to dwell for about twenty minutes so it could soak in and get to work. It was then scrubbed into the tiles using a coarse 200-grit pad fitted to a heavy buffing machine. Water was then added to the floor for lubrication and the soils released from the pores of the tile during scrubbing was removed by with a wet vacuum.
To treat the stubborn paint stains and remains of what I suspect was carpet adhesive a hand scraper and wire brush was used, this was made easier by the Remove and Go which had softened the paint etc.
The next stage was to give the Victorian tiles a mild acid wash using Acid Gel which is applied to the floor, scrubbed in, and rinsed off with a little water then extracted using the wet vacuum. We always recommend an acid wash for old floors like these as it will counter any efflorescent salts resident in the tiles and helps to remove other mineral contaminates and old grout that can mask the true beauty of the tiles.
I left the tiles to dry out for two days before returning to apply the sealer, first checking it was dry by testing for moisture in various places with an electronic damp tester. It’s not a good idea to apply a sealer to a damp floor so we always check first.
Satisfied the floor was dry, I started applying a coat of Tile Doctor Colour Grow which is a colour enhancing impregnating sealer that helps to bring out the true colours in the tile. This was allowed to dry for thirty minutes and then followed up five coats of Tile Doctor Seal and Go Extra which is a breathable sealer that leaves a lovely satin finish and builds on the protection.
Once done the Victorian hallway tiles looked so much cleaner and healthier. It was quite a transformation and the new sealer had given the floor a nice low sheen shine which the customer was very happy with.
For aftercare cleaning I left them with a bottle of Tile Doctor Neutral Cleaner which is specially formulated for cleaning sealed tiles. We don’t recommend tile cleaning products you find on supermarket shelves as the are usually too strong and can strip a sealer off the floor prematurely. If your choosing another product to clean your floor always read the label to make sure its compatible.
Andrew Robb
Merseyside Tile Doctor
 SurfaceLogix
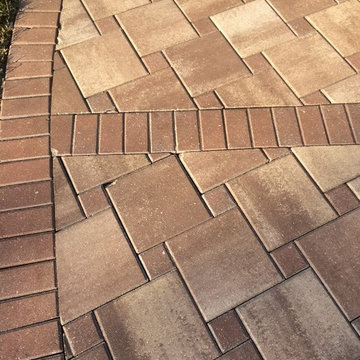
AFTER - Close up of concrete pavers pressure cleaned and sealed with Cobble Loc, water-based paver sealer. Job by PaverPro Restoration & Sealing, Jacksonville.
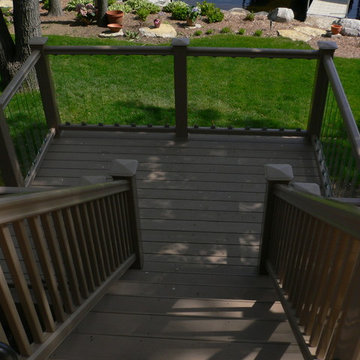
 Ogne Remodeling & Roofing
Seal It Green Xtreme Composite Sealer
Seal It Green Composite Deck Clean
Link for Composite Sealer: http://sealitgreen.com/cid-18-1/xtreme-composite-sealants.html
Link for Composite Deck Clean: http://sealitgreen.com/pid-21/composite-deck-clean.html
 Tile Doctor Ltd
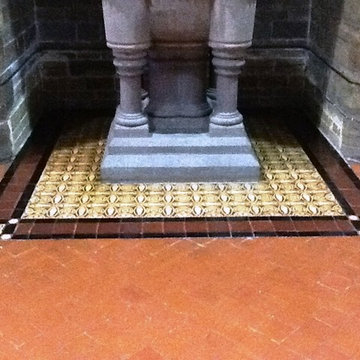
The following job was a bit different from the kitchen and hallway restorations we normally get asked to do, in fact this request came from the vicar of St. Mary’s Church in Far Cotton who wanted us to restore some beautiful old Quarry tiles which lead up to the main aisle. The church dates back to 1885 and given the wear on some of the tiles I can only assume they date back to the same Victorian period; the church is a really welcoming, community-focused place, so it was a pleasure for me to be asked to complete the work.
The vicar’s main concern was the large amount of melted candle wax around the font – so much so that this his normal cleaners had been unable to remove it. He also wanted to know if the floors could be sealed to make ongoing maintenance easier – and this was certainly something we would be able to provide. The following photos show the condition of the floor before we started.
The next photo shows the work in progress from halfway down the aisle. We started by breaking down any old sealer and the troublesome candle wax, using a black stripping pad in combination of Tile Doctor Pro Clean to deep clean the floor. Since Pro Clean, a high alkaline cleaner, is highly versatile and can be used on all kinds of natural stone and tile.
While the church has cleaners that come in regularly to keep the building tidy for the parishioners, the old tiles really benefitted from a deep clean which tackled the stubborn ingrained dirt and staining that had built up over many years.
Once I was satisfied that the tiles had been cleaned to the best of my abilities, they were then left for two weeks to fully dry as it is an old church and, understandably, there were some inherent damp issues. As aforementioned, the vicar was keen to have the tiles sealed to make them easier to keep clean and protect them against ingrained dirt and staining for the future. There are only a few situations in which we wouldn’t recommend sealing tiles, such as if they are patio tiles which will already be under constant exposure to the weather.
The best choice of sealer for this particular situation was Tile Doctor Colour Grow, which is an impregnating, breathable sealer that won’t trap moisture in the floor and will provide great protection against further staining. Additionally, as an impregnating sealer, Colour Grow penetrates into the pores of the tile protecting it from within and with the added benefit of enhancing the natural colours and restoring the life and character back in the old, dull tiles. I applied it using a paint pad, before polishing it off.
I’m pleased to report that the restoration was a great success. The vicar was very impressed with the work, and I’m sure the church community will also be very happy with the new, vibrant tiles.
Phil Vissian
Northamptonshire Tile Doctor
 THE SLEEPERS SHOPPE
Crisp, clean, Kasey features traditional bar columns and relaxed open fretwork which are pleasingly familiar, yet still new. Hardwood solid with a pristine white finish creates a perfect backdrop for the brushed nickel hardware.
Finish: White
Materials: MDF, Hardwood solids
Hardware: Brushed nickel
Special Features:
B2026-01
2 drawers with felt lined top drawer.
drawers w/french dovetail in front & english in back.
side mount ball bearing guides.
sealed case piece.
B2026-05
1 felt lined top drawer.
1 fixed bottom wood shelf.
drawers w/french dovetail in front & english in back.
side mount ball bearing guides.
sealed case piece.
B2026-10
5 drawers with felt lined top drawer.
drawers w/french dovetail in front & english in back.
side mount ball bearing guides.
sealed case piece.
B2026-20
7 drawers with 3 felt lined top drawers.
drawers w/french dovetail in front & english in back.
side mount ball bearing guides.
sealed case piece.
support leg w/ levelers.
B2026-40
5mm clear glass w/ 1" bevel.
B2026-54
bolt-on rails.
slats with support legs.
B2026-64
bolt-on rails.
slats with support legs.
B2026-74
bolt-on rails.
slats with support legs.
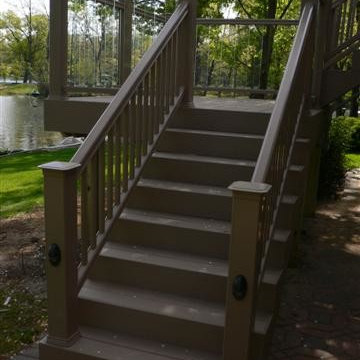 Ogne Remodeling & Roofing
Seal It Green Xtreme Composite Sealer
Seal It Green Composite Deck Clean
Link for Composite Sealer: http://sealitgreen.com/cid-18-1/xtreme-composite-sealants.html
Link for Composite Deck Clean: http://sealitgreen.com/pid-21/composite-deck-clean.html
 Tile Doctor Ltd
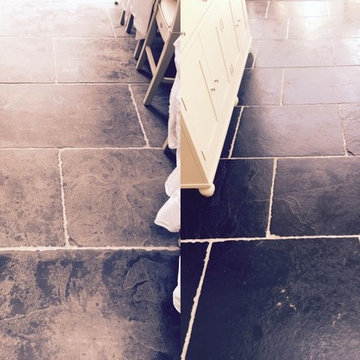
I was recently asked to this property in Wimbledon in to see if there was anything we could do to resolve the problem with a recently laid Black Limestone tiled floor. The builders that had laid the Limestone did not cover or clean the tiles prior to sealing with an impregnating seal thereby trapping in all the dirt from the building works. They then grouted the tiles but didn’t clean the grout off the surface before putting on another two coats of sealer all of which resulted in a very poor finish.
Naturally the customer was not happy so called them back to rectify the problem and so they came back and tried to strip the sealer off with cloths and a chemical stripper. Then without rinsing the stone to remove the chemicals they added another two coats of sealer; in desperation the lady gave up with them and called me in.
To resolve I tried all the sealant strippers available to me but couldn’t budge the mess effectively. The only other option available was to diamond grind the surface so I discussed this with the customer and she agreed to this and left me to carry on.
Initially I started with a coarse 400 grit diamond pad but even that wasn’t having much effect so in the end I had to cut back the surface using a 100 grit pad moving up to 200 grit, then 400 before finally stopping at 800. To lubricate the process you need to use a little water and then rinse away the resultant soil after each pad. If this was a polished stone surface I would have continued with finer and finer grits to restore the surface polish however these tiles were rough limestone and I needed to leave it as near to how it should be.
Once all the Limestone had been stripped back the stone turned an uninviting grey colour, so to bring it back to black I applied two coats of Tile Doctor Stone Oil which enhanced the colour.
I left the floor overnight to allow the Stone Oil to dry out and then returned to seal the Limestone using two coats of Tile Doctor Colour Grow which is an impregnating sealer that enhances the colour in the stone and will protect it from staining going forward.
When the customer saw the final result she was overwhelmed and said she felt like crying with relief, because the floor now looked how she had imagined it to be. It was a great feeling for me to know that I had solved the problems for her.
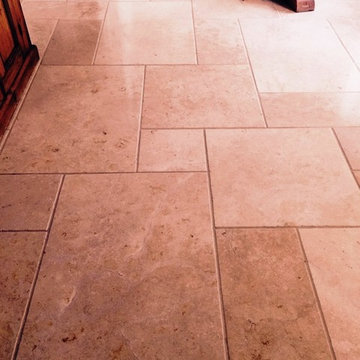 Tile Doctor Ltd
I was asked by a customer in Leatherhead, Surrey to clean the Limestone tiled floors that had been installed throughout the ground floor of his house. I popped round to take a look at the job and could see that the Limestone tile and grout was quite dirty; it was clear that the sealer had broken down and dirt was now becoming ingrained into the stone and grout.
The floor would need to be burnished and re-sealed to get it back to its original condition and so I provided a quote to do the work. The quote was accepted although he did ask if I could provide a couple of references from former clients; there are over 70 testimonials from past customers on my website so this was not a problem and I was happy to do so. Once he had received the references he called to book me in.
Cleaning Limestone Floor Tiles
My first job was to protect the walls and units before scrubbing the first area with a hot solution of Tile Doctor Pro-Clean using a rotary machine fitted with a brush head attachment. This process lifted the dirt out from the grout, the surface and any holes.
The floor was then rinsed thoroughly with clean water to remove any cleaning products and I then proceeded to burnish the Limestone tiles using a set of four burnishing pads system fitted to a rotary machine. You start with a coarse pad lubricated with a little water and this removes any remaining sealers and ingrained dirt from the stone. Any slurry is then rinsed away and you move onto the remaining medium, fine and superfine polishing pads which bring back the polished surface, again each pad needs to be lubricated with a little water which needs to be rinsed away after each pad. It was a large area so as you can imagine this took some time to apply this process to the entire floor so I focused on the Kitchen then first day and came back the second day to work on the hallway and utility room.
Sealing Limestone Floor Tiles
On the third day I came back to seal the floors using two coats of Tile Doctor Colour Grow which is a colour enhancing penetrating sealer that brings out the different shades of colour in Limestone and is designed to provide maximum stain protection on natural stone floors. The last step was to buff the floor to a nice shine with a rotary machine fitted with a white pad.
The grout is now back to its original grey as opposed to black and the Limestone look new again, needless to say the customer was really pleased with the finish and has since recommended my services to other friends.
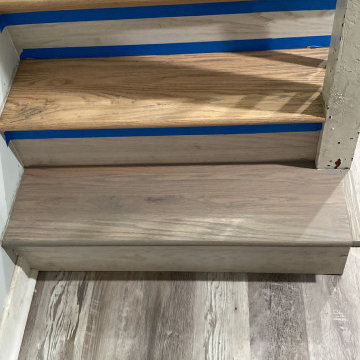
 MD Flooring Solutions, LLC
Basement steps project:
1x coat of Minwax or DuraSeal Stain: Stain to best match LVP in basement —1 color included
1x coat of ZINSSER®SealCoat™ Universal Sanding Sealer.
1x coat of Water-Based Oil-Modified polyurethane by default.
1x final coat of SamSeal or Masterline Oil-based polyurethane.
Finish: to best match LVP in basement
- To sand and refinish Unfinished hardwood 11x Treads only
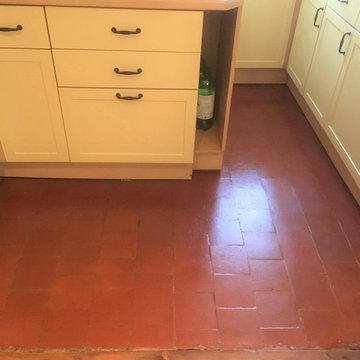 Tile Doctor Ltd
I received a call from this client in Old Marston around two miles north east of the centre of Oxford. They had lifted a lino floor in their kitchen and found an old Quarry Tiled floor underneath and decided to see if they could have it restored.
I went over to survey the floor and could see that the tiles had been covered with a thin layer of levelling screed to ensure the lino didn’t sink into the recesses. I ran some tests to demonstrate how the screed could be removed which worked well and it was apparent that the tiles underneath were intact and could be renovated. I submitted a quotation for removing all the screed, deep cleaning the Quarry tiles and then sealing the tiles to protect them. The client was really pleased that we could restore the floor and the quote was accepted, with a date booked to do the work.
To start the work, I applied undiluted Tile Doctor Grout Clean-up worked in with a small carbide brush attached to a hand-held rotary buffer. The combination of the acid in the Tile Doctor Grout Clean-up combined with the scrubbing action of the brush were effective at removing most of the screed. The small bits of remaining screed were carefully removed by hand, using a floor scraper. The floor was then rinsed with water and the soil removed with a wet vacuum.
For the second phase of the cleaning process I applied Tile Doctor Oxy-Gel which was scrubbed into the floor with a stiff brush rinsing after with water and the soil extracted again using the wet vacuum. After cleaning the floor to remove the dirt I could still see some evidence of the screed on the tiles, so I decided to give the floor an Acid Wash using Tile Doctor Acid Gel which was scrubbed into the floor and rinsed off as before. Tile Doctor Acid Gel is of course an acidic product so once it was removed, I decided to rinse the floor with Tile Doctor Neutral Cleaner to neutralise the pH levels in the floor. The wet vacuum was used again to remove as much moisture from the Quarry tiles as possible before leaving the now clean floor to dry off fully overnight.
I returned to seal this floor the next day. First, I checked the floor was fully dry with the damp meter, it was within the recommended range, so I was ready to complete the sealing process.
The client was not too sure if they wanted a matt or sheen finish, so I first put a coat of Tile Doctor Colour Grow on the floor to show them the matt finish. Colour Grow is an impregnating sealer that enhances natural colour and protects from within by occupying the pores in the tile. After reviewing the floor, they decided it was not for them, so I followed up by applying several coats of Tile Doctor Seal & Go which adds a nice sheen finish and is compatible with Colour Grow.
The combination of sealers worked very well together, and they were very satisfied with the final result and of course that we had been able to restore the Quarry tiles.
Barry Woodward
Oxfordshire Tile Doctor
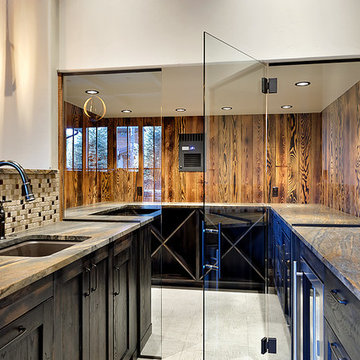
 Montana Timber Products
Creative interior design with the application of Charwood Tiger by Montana Timber Products. Charwood Tiger makes an awe inspiring first impression for this magnificent contemporary pantry by using the time honored Japanese style known as Shou-Sugi-Ban. Montana Timber Products begins with kiln dried rough sawn lumber and through the time tested Shou-Sugi-Ban process creates an aesthetically pleasing wood product that shines in both interior and exterior applications.
Offering uncompromising natural, rustic beauty, Charwood Tiger is a value with strong design features and best of all it is finished with an environmentally conscious production process.
Charwood Tiger is sealed with Seal-Once, a 100% NO VOC waterproofer with a 10 year guarantee. Seal-Once is safe for pets and children and works well in exterior and interior use.Montana Timber Products is a speciality wood products manufacturer of rustic wood siding, interior accents, reclaimed wood, barn wood alternatives with environmentally friendly manufacturing techniques. Visit our website, www.montanatimberproducts.com to learn more about our product lines.
 Armor Exteriors
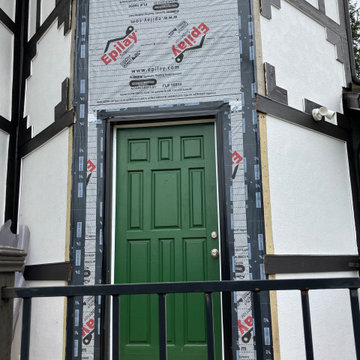
Once the damaged materials were repaired, the wall assembly was sealed with new underlayment and flashing tape to improve moisture protection around the entry opening. A temporary door was then installed and sealed in place so the home remained secure and usable while the new entry door was being prepared for final installation.
37