
Search results for "Sealing" in Home Design Ideas
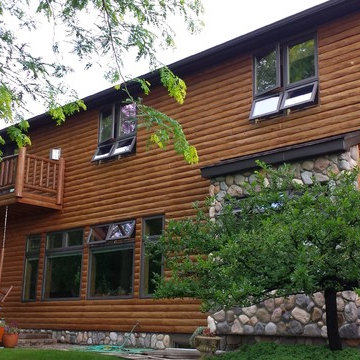
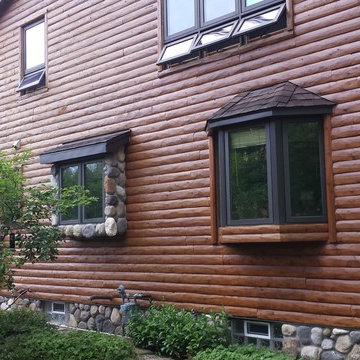
 Ogne Remodeling & Roofing
Seal It Green Xtreme Log Cabin Sealer in Cedar Tint
Seal It Green Cedar Clean used to clean wood before stain application
Link for Log Cabin Sealer: http://sealitgreen.com/cid-27-1/info.html
Link for Cedar Clean: http://sealitgreen.com/pid-19/cedar-clean.html
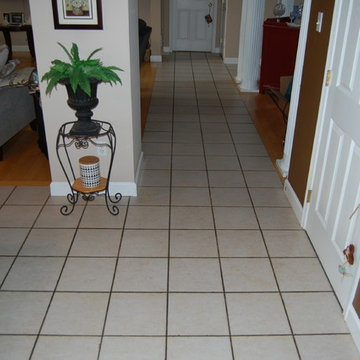
 Mason Dixon Grout Works, LLC
BEFORE PHOTO---Ceramic tile floors - Kitchen, Dining area, Hallway, Foyer & Laundry room
Clean entire area, Specifically clean all grout lines, Color Seal all grout lines with specified color, Final finish to remove any tile haze.
5yr, Written Warranty on all Color Sealed grout lines against Cracking, chipping, peeling or staining.
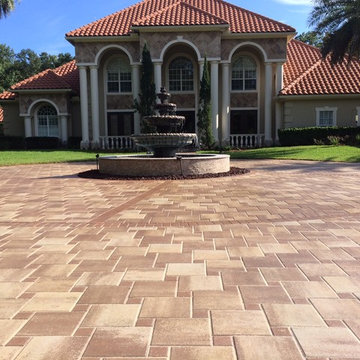
 SurfaceLogix
AFTER - Pressure cleaning and sealing with Cobble Loc, water-based paver sealer. Job by PaverPro Restoration & Sealing, Jacksonville.
Example of a huge tuscan beige two-story stone exterior home design in Jacksonville
Example of a huge tuscan beige two-story stone exterior home design in Jacksonville
Find the right local pro for your project
 Tile Doctor Ltd
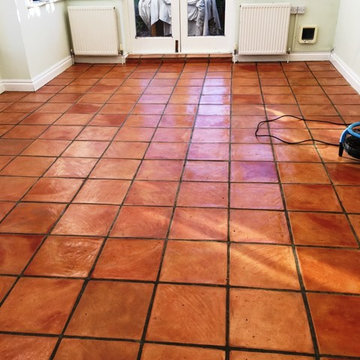
This couple, who live in the seaside resort of Brighton, had purchased their house four months before Christmas and wanted to have the fantastic Terracotta tiled floor in the kitchen and conservatory looking its best before the festive period, since they had family visiting. The floor was looking washed out and it was clear the sealer had failed in the high traffic areas and was now allowing dirt to penetrate into the pores of the tile making it difficult to clean.
We often get calls from new home owners keen to put their own stamp on a property shortly after moving in; stone floors rarely come with cleaning instructions so if you have a stone floor it makes sense to get in touch, so we can advise you on how best to maintain it.
We provided a quote which included stripping the floor of old sealers, cleaning, oiling and then sealing it again to restore cleanliness and character to the Terracotta. There was a lot to do and two areas to clean so I anticipated it would take four days to complete.
Having accepted the quote our first task upon returning to the property was to give the Terracotta tiles a deep clean and remove any remaining sealer present on the tile. This was achieved by applying a strong combination of Tile Doctor Pro-Clean and Tile Doctor NanoTech HBU to the tiles and then covering it in a plastic sheet, so it wouldn’t dry out. This method allows the products to really soak into the pores of the Terracotta and draw out the dirt. I should also mention that Pro-Clean is a very effective Tile and Grout cleaner whilst HBU enhances it by adding nano-sized cleaning particles.
The plastic blanket was left in place for a few hours before being peeled off and then the cleaning products scrubbed into the tile and grout using a black pad fitted to a rotary floor machine and hand brushes. The now soiled product was rinsed off with water which was then extracted using a wet vacuum. The floor was inspected, and stubborn marks spot treated until the floor was clean.
After thoroughly cleaning the Terracotta over two days, we left the floor to completely dry off over the weekend. The tiles would need to be sufficiently dry to receive fresh sealant, as excess moisture can cloud the sealant and prevent it from working correctly.
When we returned to the property, we proceeded to apply Tile Doctor Stone Oil to the tiles. Stone Oil is a sealer which restores the colour and texture of tiled floors, as well as mechanical strength once cured.
We applied a single coat of the Stone Oil before topping it up with multiple coats of Tile Doctor Seal and Go, a topical sealer which provides a high-quality sheen finish to help accentuate the appearance of the Terracotta tiles as well as adding protection.
You can see the results of the restoration below. The couple were so impressed that they have now agreed to have Tile Doctor visit once a year (at a fraction of the cost of the original restoration) to complete a maintenance clean. This will make sure this Terracotta is always looking at its best!
Mick Conlon
East Sussex Tile Doctor
 Tile Doctor Ltd
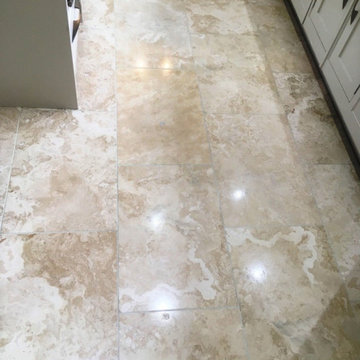
This is a Travertine tiled floor installed at a property in the popular Cheshire town of Wilmslow around 16 years prior. It had previously been maintained by a Tile Doctor colleague about three years ago and the owner was hoping the floor could be given a simple maintenance clean and seal. This is a service we provide as part of an annual maintenance plan, unfortunately after surveying the floor it was clear they had left it far too long, the floor had lost its shine and it would now need to be resurfaced with a set of diamond burnishing pads and then resealed.
Naturally burnishing the floor costs more than a simple seal and polish but if you are going to opt for the quicker maintenance plan route it does need to be done at least annually and possibly more frequently if it’s a floor in frequent use such as a kitchen. We agreed a price for the work, and I arranged a time with them to return and renovate the floor.
To restore the polished appearance of the Travertine I used a set of four burnishing pads which are applied to the floor with a rotary machine. You start with a coarse 400-grit pad using water to lubricate and running it over each tile at least three times. This first pad cleans up the stone and removes old sealers. This is then followed with the finer 800-grit, 1500-grit and finally a 3000-grit pad. Except for the 3000-grit, each pad is applied with water and the floor is rinsed and the soil extracted afterwards with the wet vacuum.
The Grout lines were also deep cleaned with a scrubbing brush and Tile Doctor Pro-Clean tile and grout cleaner. The product really gets to into deep seated dirt and grease which tends to accumulate in the grout. After a final rinse and extraction, the floor was then left to dry off overnight.
I returned on the second day and started by checking the floor was dry by taking several moisture readings with a damp meter. The readings were good, so I proceeded to seal the floor using a couple of coats of Tile Doctor Colour Grow. Colour Grow is an ideal sealer for Travertine as it seeps into the pores of the stone enhancing the natural brown colours in the process. It also offers great protection going forward.
Whilst I was there I had noticed that one of the doors had scratched the floor, fortunately the polishing process had got the scratches out of the stone but to prevent future scratching I helped them remove the door so a carpenter could shave off a few mm’s from the bottom.
My customer left the following feedback:
“Second time had Travertine floor restored, cleaned & sealed, the first time was 3 years ago. Great job done then by Simon Bywater. This time Kamila did a really professional job on the kitchen limestone floor. A bit more expensive this time, but a good job was done. Have left instructions for her to contact me in 12 months time for annual maintenance on the same floor, hopefully to prevent restoration being required! Highly recommend the service.”
The floor looked great and they should now be able to maintain it in between the maintenance visits, with day to day cleaning using Tile Doctor Neutral Tile Cleaner.
Kamila Logonzy
East Cheshire Tile Doctor

 THE SLEEPERS SHOPPE
This classic design is crafted of cherry veneers and features a deep cherry finish. Notice the antique brass pulls off-set by the stunning finish. Refined in form, the Harrison collection will add grace and tradition to your home.
Finish: Cherry
Materials: Cherry veneer, Hardwood solids
Hardware: Antique brass
Special Features:
B1398-01
3 drawers with felt lined top drawer.
tinted drawers w/ french dovetail in front & english in back.
side mount ball bearing guides.
sealed case piece.
on/off touch lighting control.
B1398-10
5 drawers with felt lined top drawer.
tinted drawers w/ french dovetail in front & english in back.
side mount ball bearing guides.
sealed case piece.
B1398-22
7 drawers with 2 felt lined top drawers, 1 drop down drawer front in the center top.
tinted drawers w/ french dovetail in front & english in back.
side mount ball bearing guides.
sealed case piece.
wire management.
support leg w/ levelers.
B1398-36
2 wood framed glass drop down drawer fronts.
4 drawers.
tinted drawers w/ french dovetail in front & english in back.
side mount ball bearing guides.
sealed case piece.
wire management.
B1398-40
5mm clear glass w/ 1" bevel.
B1398-54
bolt-on rails.
slats with support legs for regular rail.
B1398-55
bolt-on rails.
slat roll for storage rail.
storage rail w/2 drawers.
B1398-64
bolt-on rails.
slats with support legs for regular rail.
B1398-65
bolt-on rails.
slat roll for storage rail.
storage rail w/2 drawers.
B1398-74
bolt-on rails.
slats with support legs for regular rail.
B1398-75
bolt-on rails.
slat roll for storage rail.
storage rail w/2 drawers.
 Marble & Stone Life
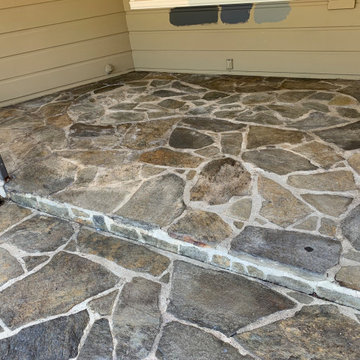
Pressure wash clean and seal treatment. South Pasadena
Inspiration for a small modern slate floor entryway remodel in Los Angeles
Inspiration for a small modern slate floor entryway remodel in Los Angeles

Sponsored
Delaware, OH

Buckeye Basements, Inc.
Central Ohio's Basement Finishing ExpertsBest Of Houzz '13-'21
 Tile Doctor Ltd
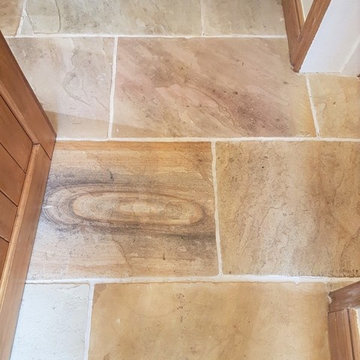
The pictures below are of a multi coloured sandstone floor installed at a property in East Keswick which is a village approximately halfway between Harrogate and Leeds. (Not to be confused with the more famous Keswick in the Lake District)
The stone floor had not been cleaned professionally for ten years and although the grout looked clean It was clear that any sealer that was once present had long since worn off leaving the stone unprotected. The result was dirt had become deeply ingrained in the Sandstone leading causing the stone to darken and hide its true beauty and rich colouring. The client had tried lots of different products to clean the floor but had not had any luck.
I visited the property and carried out a few successful patch tests resulting in the floor becoming much cleaner. They were happy to go ahead with my quote and we arranged a time to return and complete the work.
I prepared the area before starting, taping up the skirting boards and doors to protect them from the splashing that can happen during the intensive cleaning process.
To get the sandstone clean I applied a medium dilution of Tile Doctor Pro-Clean to the floor and allowed it to soak in for ten minutes. The solution was then worked into the Sandstone using a rotary floor machine fitted with a black scrubbing pad. More Pro-Clean was applied with a hand-held scrubbing brush to get deep into the grout lines and to reach into the corners.
Once done the floor was rinsed with water and the soil extracted with a wet vacuum. The floor was inspected, and the process repeated until I was satisfied that the stone and grout had released all the trapped dirt. After a final rinse, the wet vacuum was used to get as much moisture out of the stone as possible and then the floor left to dry out fully overnight.
Returning the following morning, I first checked that the floor was dry using a damp meter. The sealer won’t cure if there is any moisture in the stone and I’ve been known to reschedule sealing a floor if the readings are too high. On this occasion I was satisfied that the floor was within acceptable levels, so I was ready to seal the floor.
I used three coats of Tile Doctor Colour Grow to seal the floor, this is an impregnating sealer which intensifies natural colours whilst providing durable protection against stains, an essential feature in an area such as a hallway which is subject to constant foot traffic.
As you can see from the photos the transformation was quite impressive, the floor became much lighter and almost unrecognisable, the natural colours of the stone were now visible, and the floor looked beautiful. The client was very happy with the end result and has said they would not hesitate to recommend me to others.
Nigel Stoker
North West Yorkshire Tile Doctor
 MD Flooring Solutions, LLC
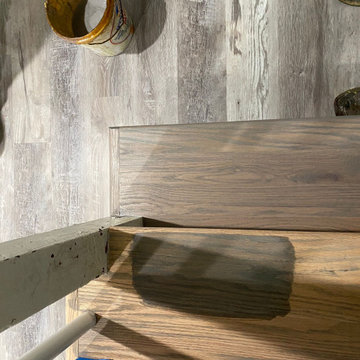
Basement steps project:
1x coat of Minwax or DuraSeal Stain: Stain to best match LVP in basement —1 color included
1x coat of ZINSSER®SealCoat™ Universal Sanding Sealer.
1x coat of Water-Based Oil-Modified polyurethane by default.
1x final coat of SamSeal or Masterline Oil-based polyurethane.
Finish: to best match LVP in basement
- To sand and refinish Unfinished hardwood 11x Treads only
 Tile Doctor Ltd
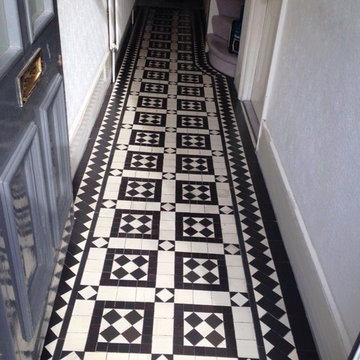
The photographs below are from a Victorian tiled hallway floor at a property in Stoke Newington in London. The floor was in need of repair with a large area very uneven and partly sunk in the middle of the pattern. The repairs were made using as many existing tiles as possible.
The first task was to set about cleaning the tiles using Tile Doctor Pro-Clean and Remove & Go on the stubborn areas. Both products were applied in the same way using black scrubbing pads to work the products into the tile to release the dirt. Hand brushes were used to clean up the grout lines and the floor was rinsed and soil removed using a wet vacuum.
At this point the large loose area of tiles were removed to be cleaned of grout/adhesive for use later and the sunken area that was revealed was levelled in line with the rest of the floor base. Once the new cement base had set and the tiles useable again they were re-laid and set in position to fit the matching pattern of the remaining floor.
Once the tile adhesive had set the last thing to do was to re-grout the repaired area making the hallway whole again and left to go off.
When we returned the whole floor was ready to be sealed and for this we used five coats of Tile Doctor Seal and Go which adds a nice shine to the floor as well as providing a surface seal that will help protect the tiles from stains going forward.
A lot of effort went into the restoration but what a transformation and well worth the work, certainly the customer was pleased and left the following testimonial.
Rob Voyce responded very quickly to my request for a quote, and was able to complete the work to a very good standard in the agreed time. The work caused minimum disruption to the household and everything was left clean and tidy at the end of each day. I would certainly recommend the services of the Tile Doctor and I am very happy with the work that has been done on old tiles in my Victorian hallway.
Nigel Voyce
North London Tile Doctor
 We Make It Our Home
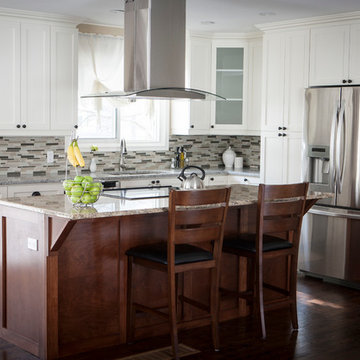
Two tone cabinets:
Main cabinetry: shaker style solid maple painted Benjamin Moore Acadia White
Island cabinetry: Shaker style solid maple stained honey brown (custom stain)
Two Tone Countertops
Island countertop: Venetian Gold granite
Main countertop: White kashmir granite
Door knobs and handles: oil rubbed bronze


 Tile Doctor Ltd
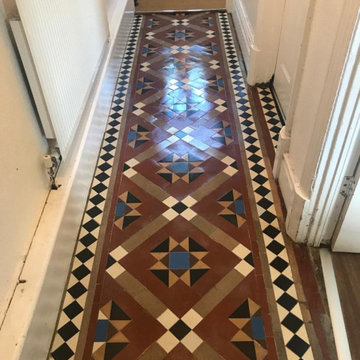
I recently worked on the restoration of a Victorian tiled hallway in Cwmbran Wales which is six miles North of Newport. As you can see from the photographs the floor was in quite a neglected dirty state and many of the the black and white border tiles needed removing and replacing. The worst part was the area by the front door where most of the tiles had been removed and then backfilled with concrete. I can only assume at some point in the past it was deemed to difficult or expensive to restore the floor, so they simply covered it up.
After visiting to survey the floor I did offer to source replacements for the concreted section and restore that as part of the work however my client’s budget would not stretch to that at the time. My quote was therefore focused on the main section of flooring and included replacing border tiles, deep cleaning the whole floor and then sealing the tiles to add protection. Although I did need to check that I could indeed source the replacement tiles before being able to provide the quote which as it turned out would not be an issue.
They were happy to go ahead and we arranged a suitable time to carry out the work which would enable me to work in the property whilst minimising contact with the owners due to the Covid-19 situation.
I spend the first day sorting out the black and white border tiles which needed to be gently prised out of position without upsetting the main part of the floor. The exposed subfloor was then cleaned up to remove old adhesive and replacements were fitted where required and secured into place. The floor would need to be solid before cleaning so that was left for day two so the new adhesive could go off overnight.
On day two I gave the floor an initial clean using a combination of Tile Doctor Pro-Clean and Remove and Go diluted with water. This produces a strong cleaner/stripper that will tackle dirt and remove coatings such as previous sealers. The old tiles had accumulated years of ingrained dirt, so I needed this extra power to remove the years of dirt and contaminates from the tile. It was sprayed onto the tiles and then left to soak in for ten minutes before being actively scrubbed into the tile using a rotary machine fitted with a black scrubbing pad. The soil was then rinsed off with water and extracted with a wet vacuum. The floor was inspected, and the process repeated on the tough stains until I was satisfied all the dirt had been removed.
Next the floor was treated to an acid wash using Tile Doctor Acid Gel using a similar method as before. This is an important treatment for these old Victorian floors that have no damp proof course as it neutralises efflorescent salts trapped in the tile which can appear as white salt deposits later. Once I was happy with the condition of the floor it was given a final rinse and left to dry off. I use a wet vacuum to remove liquids from the floor and on this last extraction I spent extra time to remove as much moisture from the tiles as possible.
I came back a few days later and after checking the tiles were dry using a damp meter, I started the application of the sealer. For this floor I applied seven coats of Tile Doctor Seal and Go for a satin finish. Tile Doctor Seal and Go is a specially formulated water-based sealer that provides both stain resistance and a durable low-sheen finish. It is perfect on a floor of this age where it leaves a lovely finish and will remain durable in what is a essentially a high traffic area.
Although we didn’t manage to sort out the area by the front door the client managed to fit a made to measure coir door mat along with carpet bar which was quite practical and looked fine so they were able to resolve that problem without blowing their budget.
The client was over the moon with results, the floor had a lovely pattern and the colours now shone through. I suggested the use of Tile Doctor Neutral Tile Cleaner to keep the floor clean and in good condition. It is neutral in pH so will ensure that the newly applied sealer stays in place and will ensure maintenance is nice and easy for them.
Paul Wales
Monmouthshire Tile Doctor
 Hill Construction Co
Roger Hill/Hill Construction
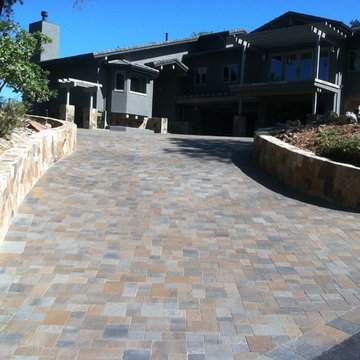
Home design - huge contemporary home design idea in San Francisco
Home design - huge contemporary home design idea in San Francisco
 Ogne Remodeling & Roofing
Seal It Green Xtreme Log Cabin Sealer in Cedar Tint
Seal It Green Cedar Clean used to clean wood before stain application
Link for Log Cabin Sealer: http://sealitgreen.com/cid-27-1/info.html
Link for Cedar Clean: http://sealitgreen.com/pid-19/cedar-clean.html
 Tile Doctor Ltd
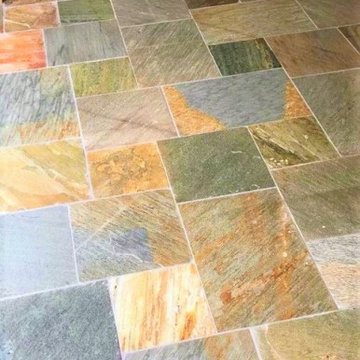
The tiles pictured are Chinese Slate which were laid in the Kitchen of a house in Chepstow around nine years ago. The town of Chepstow is located on the Welsh side of the River Seven and has the River Wye running through it.
The floor had not been professionally cleaned and sealed since installation. During this time the old sealer had mostly worn off allowing dirt to get into the pores of the stone leaving it looking dull, uninviting and dirty. The grout lines had also collected dirt and many of the lines had darkened.
I discussed with the client the process to get the floor cleaned and restored and demonstrated the effectiveness of the process on a small test area. They were impressed and were happy to go ahead with my quote, so we scheduled in the work which would take two days.
To get the floor clean and remove what was left of the old sealer I first made the floor wet and then added a strong dilution of Tile Doctor Pro-Clean mixed with Tile Doctor Remove and Go to give it extra power. This cleaning cocktail was left to soak into the tiles for ten minutes before being scrubbed in with a black scrubbing pad fitted to a rotary machine and by hand where necessary. This combination works well on really dirty floors such as this.
The scrubbing action released the years of dirt from the pores of the Slate and it wasn’t long before the cleaning solution turned black. This was then extracted off the floor using a wet vacuum. We then gave the floor a thorough inspection. There were one or two areas that were particularly stubborn, so these areas were retreated using the same process and the grout scrubbed by hand using more Tile Doctor Pro Clean.
The floor was then given another rinse with water and then dried as much as possible with the wet vacuum. This got the floor dry, but it would need to be completely dry before sealing so it was then left to dry off fully overnight.
I came back the next day to seal the floor first checking the moisture level of the stone by taking readings with a damp meter to ensure it was dry. I chose to use Tile Doctor Colour Grow for the sealer as the colour enhancing formula would be the best product to bring out the natural colours in the Chinese slate. Colour Grow is an impregnating sealer which will provides durable protection as well as allowing the surface to breath. Three coats were applied, allowing each to dry before applying the next one.
The client was so happy, so much that she said it looked better than when first laid!
I discussed aftercare with her and recommended the use of Tile Doctor Neutral Tile Cleaner, it’s pH balanced so it won’t prematurely erode the sealer which can be the problem with stronger products you find in supermarkets. It comes in concentrated form so one bottle lasts a long time.
Paul Wales
Monmouthshire Tile Doctor
 Tile Doctor Ltd
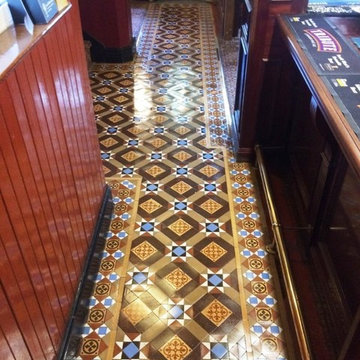
Here’s a really interesting commercial job for you, which I recently completed in the town of Hinckley, Leicestershire. I was asked to take a look at a Victorian Geometric and Encaustic tiled floor in the historic Queen’s Head pub.
This floor is over a century old and although in good condition for its age had suffered significant wear over the years, along with some cracked tiles and slight inherent moisture issues. What the pub landlord requested was a restorative clean to alleviate the aesthetically damaging effect of the wear, and to enhance the natural colours of the stone. I was also asked to seal the floor following the clean to achieve a semi-gloss finish.
The first step in the cleaning process was to mix a strong solution of one part Tile Doctor Pro-Clean to four parts clean water. Pro-Clean is a high alkaline cleaner which also contains stripping properties, allowing it to break down old sealer and tackle heavy soil build-up. The solution was applied to the floor and left to dwell for 15 minutes, giving it times to seep into the stone, get underneath the dirt and lift it to the surface.
I addressed several paint spots and areas suffering from glue contamination by using Tile Doctor Remove & Go, which is specially formulated to break down paint and adhesives on unpolished natural stone floors, amongst others. The entire floor was then scrubbed using a special floor cleaning pad, and the resulting slurry was vacuumed away using a wet-vac machine.
The final issue to deal with was the inherent efflorescence staining. This was treated using Tile Doctor Grout Clean-Up, an acid-based product which removes not just efflorescence but also grout haze, mineral deposits, and rust stains. The solution here was one part Grout Clean-Up diluted with four parts water.
After completing the clean, I thoroughly rinsed the floor with clean water to remove any trace of cleaning product and dried the floor as much as possible with a wet vacuum, then before leaving for the day i installed a couple of air movers to assist with drying overnight.
Upon my return the following day, I checked the floor for any excess moisture before sealing it with our topical, semi-gloss finish sealer, known as Seal & Go Extra which due to its formula is ideal for external or old internal floors where there is unlikely to be damp from membrane.
This unique product provides excellent protection, and allows the tiles to breath where floors are suffering from inherent moisture issues. It is suitable for both internal and external use, on Victorian floor tiles, Sandstone, Flagstones, Terracotta, and rough Slate.
As you can see from the photo, I was able to fulfil my client’s request to a high standard, bringing the pub’s old yet characterful Victorian tiled floor back to life again.
Kay Sylvester
Leicestershire Tile Doctor
 Tile Doctor Ltd
Sealers really do bring out the best in Terracotta tiles, however the catch is they will wear off over time and if you want to maintain that appearance you have to work out a regular maintenance plan. If you don’t maintain the sealer you will find that the sealer near the most heavily used areas such as doors etc. will wear away first and once that happens dirt will become ingrained in the tile and becomes difficult to clean resulting in a patchy appearance.
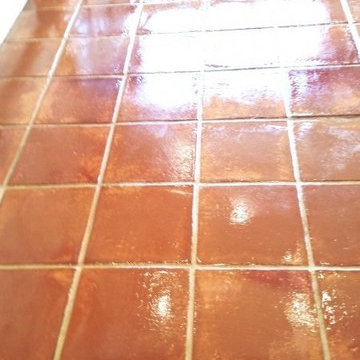
The remaining sealer on this Terracotta tiled kitchen floor at a house in the town of Wickford, Essex was no longer effective and had worn completely off in places. The solution was to strip off the old sealer, clean the Terracotta tile and gout and then re-seal with a fresh seal.
I started by giving the floor a deep clean with Tile Doctor Pro Clean diluted 2 parts water to 1 part cleaner. This is quite a strong dilution designed to allow the removal of the sealer and was left to dwell on the floor for ten minutes before working it into the floor using a scrubbing machine fitted with a black pad. Surprisingly the sealer was proving difficult to shift in certain areas and I had to repeat the process a few times and made sure to give the grout a good scrubbing as well.
I managed to get rid of most of the sealer using this process and for the remaining stubborn areas I used a stronger product called Tile Doctor Remove and Go which is a very effective coatings remover that is safe to use on tiles. This did the trick and the floor was now free of sealers and the grout was looking much better too, the resultant slurry was removed using a wet vacuum and I then rinsed the floor several times with water before leaving it to dry for weekend.
Tile Doctor Colour Grow which is an impregnating sealer that seeps into the pores of the tile to block them and prevent contaminates becoming ingrained in there and it also enhances the natural colours. Once this was dry I followed up with a number of coats of Tile Doctor Seal and Go which is topical sealer that will protect the surface and adds a nice sheen to the floor and is a popular choice for Terracotta and Quarry tiles.
I’m not sure my photographs do this post any justice however hopefully you can see that floor was quite transformed, the grout is much cleaner and the colours in the Terracotta have really come to life.
Nick Murphy
South Essex Tile Doctor
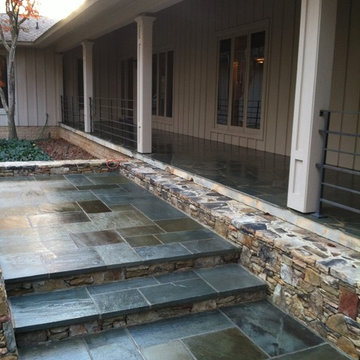
 Paver Restoration
CLEAN AND SEAL STONE to KEEP IT LOOKING NEW
Patio - side yard stone patio idea in Raleigh
Patio - side yard stone patio idea in Raleigh
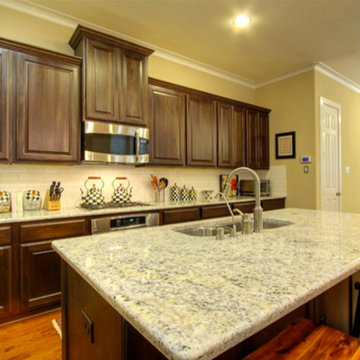
 International Stoneworks, Inc.
Cleaned and sealed granite countertops and island.
Example of an arts and crafts medium tone wood floor eat-in kitchen design in Houston with white backsplash, ceramic backsplash, an undermount sink and stainless steel appliances
Example of an arts and crafts medium tone wood floor eat-in kitchen design in Houston with white backsplash, ceramic backsplash, an undermount sink and stainless steel appliances
38