
Search results for "Seeking additional" in Home Design Ideas
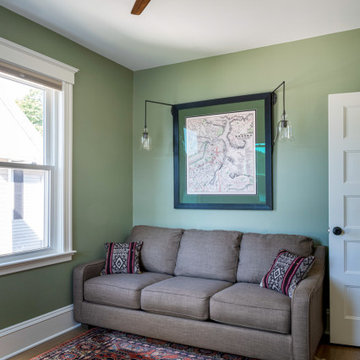
 Walczak Design And Build
THE PROBLEM
Our client had recently purchased a beautiful home on the Merrimack River with breathtaking views. Unfortunately the views did not extend to the primary bedroom which was on the front of the house. In addition, the second floor did not offer a secondary bathroom for guests or other family members.
THE SOLUTION
Relocating the primary bedroom with en suite bath to the front of the home introduced complex framing requirements, however we were able to devise a plan that met all the requirements that our client was seeking.
In addition to a riverfront primary bedroom en suite bathroom, a walk-in closet, and a new full bathroom, a small deck was built off the primary bedroom offering expansive views through the full height windows and doors.
Updates from custom stained hardwood floors, paint throughout, updated lighting and more completed every room of the floor.
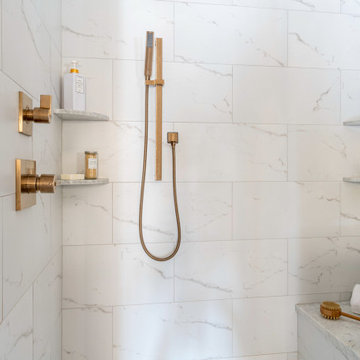 Walczak Design And Build
THE PROBLEM
Our client had recently purchased a beautiful home on the Merrimack River with breathtaking views. Unfortunately the views did not extend to the primary bedroom which was on the front of the house. In addition, the second floor did not offer a secondary bathroom for guests or other family members.
THE SOLUTION
Relocating the primary bedroom with en suite bath to the front of the home introduced complex framing requirements, however we were able to devise a plan that met all the requirements that our client was seeking.
In addition to a riverfront primary bedroom en suite bathroom, a walk-in closet, and a new full bathroom, a small deck was built off the primary bedroom offering expansive views through the full height windows and doors.
Updates from custom stained hardwood floors, paint throughout, updated lighting and more completed every room of the floor.
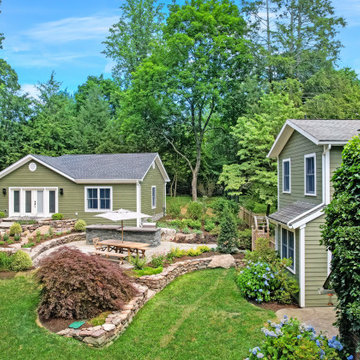
 ROAM Architecture
These clients own a very unique home, originally constructed circa 1760 and extensively renovated in 2008. They were seeking some additional space for home exercise, but didn’t necessarily want to disturb the existing structure, nor did they want to live through construction with a young child. Additionally, they were seeking to create a better area for outdoor entertaining in anticipation of installing an in-ground pool within the next few years.
This new pavilion combines all of the above features, while complementing the materials of the existing home. This modest 1-story structure features an entertaining / kitchenette area and a private and separate space for the homeowner’s home exercise studio.
Find the right local pro for your project
 ROAM Architecture
These clients own a very unique home, originally constructed circa 1760 and extensively renovated in 2008. They were seeking some additional space for home exercise, but didn’t necessarily want to disturb the existing structure, nor did they want to live through construction with a young child. Additionally, they were seeking to create a better area for outdoor entertaining in anticipation of installing an in-ground pool within the next few years.
This new pavilion combines all of the above features, while complementing the materials of the existing home. This modest 1-story structure features an entertaining / kitchenette area and a private and separate space for the homeowner’s home exercise studio.
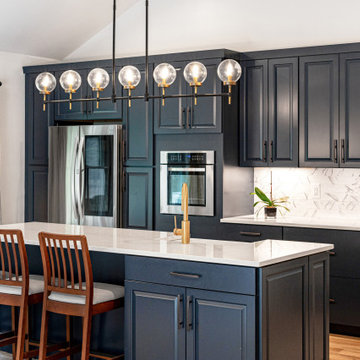
 Walczak Design And Build
THE PROBLEM
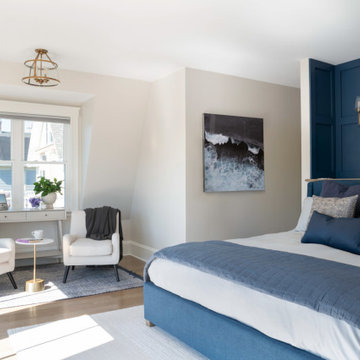
Our client had recently purchased a beautiful home on the Merrimack River with breathtaking views. Unfortunately the views did not extend to the primary bedroom which was on the front of the house. In addition, the second floor did not offer a secondary bathroom for guests or other family members.
THE SOLUTION
Relocating the primary bedroom with en suite bath to the front of the home introduced complex framing requirements, however we were able to devise a plan that met all the requirements that our client was seeking.
In addition to a riverfront primary bedroom en suite bathroom, a walk-in closet, and a new full bathroom, a small deck was built off the primary bedroom offering expansive views through the full height windows and doors.
Updates from custom stained hardwood floors, paint throughout, updated lighting and more completed every room of the floor.
 OC Builders Group
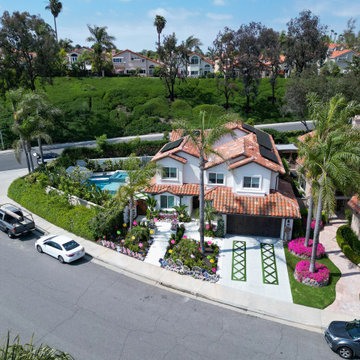
Introducing a Stunning Transformation in Laguna Niguel, CA!
Experience the epitome of luxurious living with our exceptional two-story addition and extensive remodel. Nestled in the picturesque community of Laguna Niguel, this masterfully designed residence showcases a harmonious blend of modern elegance and timeless charm.
Step inside to discover a beautifully reimagined interior, boasting two meticulously crafted bathrooms that exude sophistication and comfort. The spacious kitchen, a culinary haven, has been artfully upgraded with top-of-the-line appliances and impeccable finishes, creating an inviting space for culinary adventures.
The exterior of this remarkable property has undergone a remarkable makeover, featuring a striking pool that beckons you to unwind and bask in the Southern California sun. Immerse yourself in the serene ambiance of the landscaped surroundings, perfectly complementing the coastal lifestyle.
Whether you're entertaining guests or seeking a private sanctuary, this Laguna Niguel gem offers it all. Indulge in the finest details of design and craftsmanship as you revel in the seamless integration of indoor and outdoor living spaces.
Discover a world of comfort, luxury, and leisure in this exquisite residence, where every element has been thoughtfully curated to elevate your lifestyle. Welcome home to your oasis in Laguna Niguel!
 ROAM Architecture
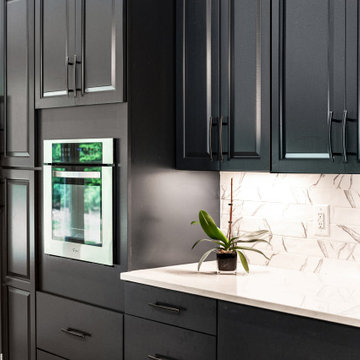
These clients own a very unique home, originally constructed circa 1760 and extensively renovated in 2008. They were seeking some additional space for home exercise, but didn’t necessarily want to disturb the existing structure, nor did they want to live through construction with a young child. Additionally, they were seeking to create a better area for outdoor entertaining in anticipation of installing an in-ground pool within the next few years.
This new pavilion combines all of the above features, while complementing the materials of the existing home. This modest 1-story structure features an entertaining / kitchenette area and a private and separate space for the homeowner’s home exercise studio.
Sponsored
Columbus, OH

Structural Remodeling
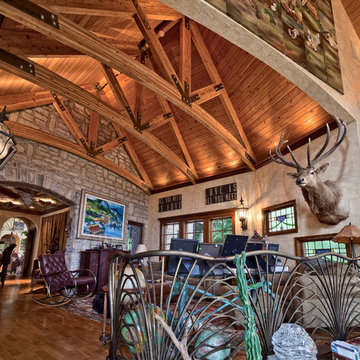
Franklin County's Heavy Timber Specialists | Best of Houzz 2020!
 Forward Design Build Remodel
Goals
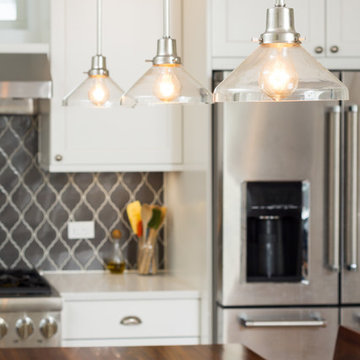
The clients main goal was more space. They desired a new kitchen that was large enough to fit their growing family and to update other rooms in their home to fit their contemporary style.
Our Design Solution
In order to enlarge the kitchen, we had to build a new addition. The original kitchen was just too small and had no where to expand to within the house. With moving the entire kitchen into the addition, there was now room to create a mudroom and a new bathroom. Above the new kitchen, we gave the client a new master suite. We used white cabinets, a custom wood counter, and gray back splash tile, to give the kitchen the contemporary feel the clients were seeking.
C.J South Photography
 Walczak Design And Build
THE PROBLEM
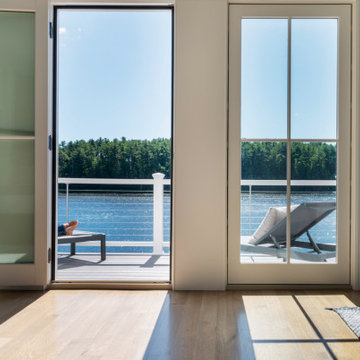
Our client had recently purchased a beautiful home on the Merrimack River with breathtaking views. Unfortunately the views did not extend to the primary bedroom which was on the front of the house. In addition, the second floor did not offer a secondary bathroom for guests or other family members.
THE SOLUTION
Relocating the primary bedroom with en suite bath to the front of the home introduced complex framing requirements, however we were able to devise a plan that met all the requirements that our client was seeking.
In addition to a riverfront primary bedroom en suite bathroom, a walk-in closet, and a new full bathroom, a small deck was built off the primary bedroom offering expansive views through the full height windows and doors.
Updates from custom stained hardwood floors, paint throughout, updated lighting and more completed every room of the floor.
 Michael Nash Design, Build & Homes
2010 NARI CAPITAL COTY GRAND AWARD WINNER
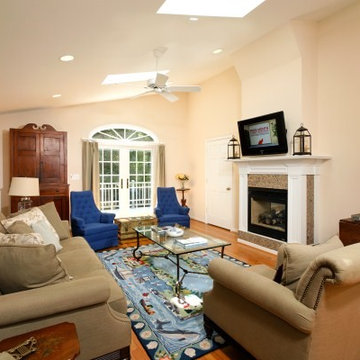
The homeowner wanted to add square footage and implement an aging-in-place strategy that will enable her to live out her days in residence with dignified self-sufficiency. Specifically, she was seeking an updated family room and larger master bedroom suite. Additionally, she wanted to maintain the original intent of the Cape Cod style.
A 28’ x 29’ addition was split between the new family room and the new master suite. First, every doorway into the master suite was redone for better accessibility. The suite itself features a cathedral ceiling, skylights and recessed lighting.
The master suite bathroom has features a whirlpool bath, walk-in shower and double vanity. Grab bars and other handicap-accessible features are incorporated for aging in place living. A double-sided fireplace connects the master suite and the family room.
 Forward Design Build Remodel
Goals
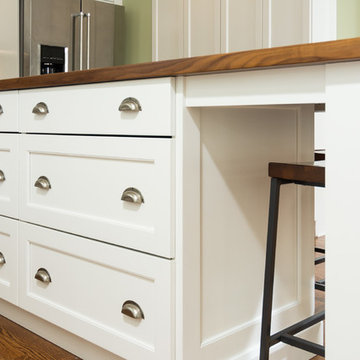
The clients main goal was more space. They desired a new kitchen that was large enough to fit their growing family and to update other rooms in their home to fit their contemporary style.
Our Design Solution
In order to enlarge the kitchen, we had to build a new addition. The original kitchen was just too small and had no where to expand to within the house. With moving the entire kitchen into the addition, there was now room to create a mudroom and a new bathroom. Above the new kitchen, we gave the client a new master suite. We used white cabinets, a custom wood counter, and gray back splash tile, to give the kitchen the contemporary feel the clients were seeking.
C.J South Photography
 Alair Homes Milwaukee
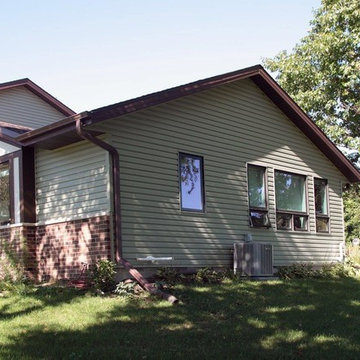
This Master Suite Addition project was initiated by our Clients’ desire to stay in their family home well into their golden years. Their wish list included a master suite and large open space for entertaining. With “Aging in Place” a main objective, our goal was to move all essential tasks to the first floor. Our design created a smooth transition between old house and new by expanding their dining room and adding a vestibule between the two spaces. This resulted in a much larger dining space and the larger entertaining area they were seeking. The master bedroom’s floor to ceiling windows on two of the walls frames picturesque views of their beloved garden outside. Vaulted ceilings, French doors to the bathroom with a transom window above express class and grandeur. Through the French doors the elegant master bathroom shines with reflections from the decorative crystal chandelier, white and grey tile, polished chrome fixtures and lighted glass bowls. A double headed shower, with dual temperature controls, and the air-jetted tub provide a true sanctuary for a relaxed bathing experience. “His and Her” elements are also fulfilled with dual vanities, and dual toilet areas. Upon completion, the homeowners passionately stated that this project turned out even better than they could have imagined. They truly love their new space in their long loved home and look forward to many more years in their new haven.
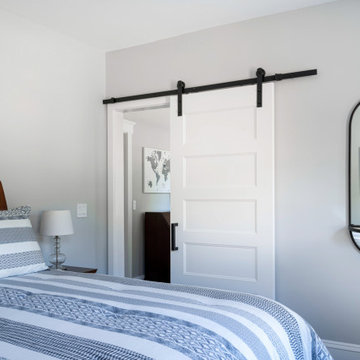 Walczak Design And Build
THE PROBLEM
Our client had recently purchased a beautiful home on the Merrimack River with breathtaking views. Unfortunately the views did not extend to the primary bedroom which was on the front of the house. In addition, the second floor did not offer a secondary bathroom for guests or other family members.
THE SOLUTION
Relocating the primary bedroom with en suite bath to the front of the home introduced complex framing requirements, however we were able to devise a plan that met all the requirements that our client was seeking.
In addition to a riverfront primary bedroom en suite bathroom, a walk-in closet, and a new full bathroom, a small deck was built off the primary bedroom offering expansive views through the full height windows and doors.
Updates from custom stained hardwood floors, paint throughout, updated lighting and more completed every room of the floor.
Sponsored
Columbus, OH
Structural Remodeling
Franklin County's Heavy Timber Specialists | Best of Houzz 2020!
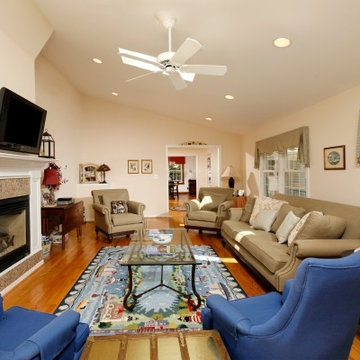 Michael Nash Design, Build & Homes
2010 NARI CAPITAL COTY GRAND AWARD WINNER
The homeowner wanted to add square footage and implement an aging-in-place strategy that will enable her to live out her days in residence with dignified self-sufficiency. Specifically, she was seeking an updated family room and larger master bedroom suite. Additionally, she wanted to maintain the original intent of the Cape Cod style.
A 28’ x 29’ addition was split between the new family room and the new master suite. First, every doorway into the master suite was redone for better accessibility. The suite itself features a cathedral ceiling, skylights and recessed lighting.
The master suite bathroom has features a whirlpool bath, walk-in shower and double vanity. Grab bars and other handicap-accessible features are incorporated for aging in place living. A double-sided fireplace connects the master suite and the family room.
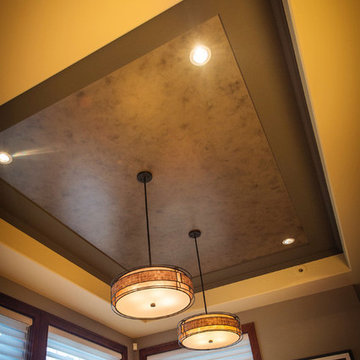
 Quoizel
This mica piece is an addition to the Quoizel Naturals collection and features a mosaic tile stripe which appears to be floating around a taupe mica shade. The tiles have a coppery shimmer for an added touch of elegance. It provides a warm and inviting accent for most any home.
Products that use natural materials are perfect for those seeking the aesthetics of natural variations. Due to its authenticity the material may vary from pictured items. No two pieces are identical.
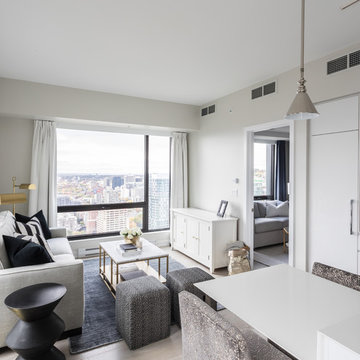

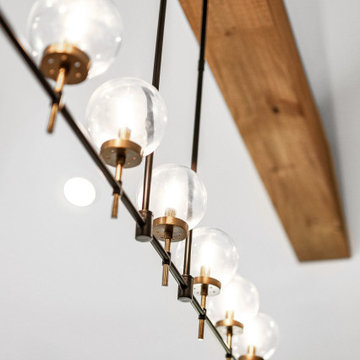 ROAM Architecture
These clients own a very unique home, originally constructed circa 1760 and extensively renovated in 2008. They were seeking some additional space for home exercise, but didn’t necessarily want to disturb the existing structure, nor did they want to live through construction with a young child. Additionally, they were seeking to create a better area for outdoor entertaining in anticipation of installing an in-ground pool within the next few years.
This new pavilion combines all of the above features, while complementing the materials of the existing home. This modest 1-story structure features an entertaining / kitchenette area and a private and separate space for the homeowner’s home exercise studio.
Sponsored
Columbus, OH
Structural Remodeling
Franklin County's Heavy Timber Specialists | Best of Houzz 2020!
 G. Christianson Construction, Inc.
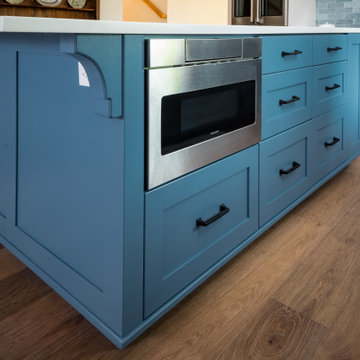
We expanded this 1974 home from 1,200 square feet to 1,600 square feet with a new front addition and large kitchen remodel! This home was in near-original condition, with dark wood doors & trim, carpet, small windows, a cramped entry, and a tiny kitchen and dining space. The homeowners came to our design-build team seeking to increase their kitchen and living space and update the home's style with durable new finishes. "We're hard on our home!", our clients reminded us during the design phase of the project. The highlight of this project is the entirely remodeled kitchen, which rests in the combined footprint of the original small kitchen and the dining room. The crisp blue and white cabinetry is balanced against the warmth of the wide plank hardwood flooring, custom-milled wood trim, and new wood ceiling beam. This family now has space to gather around the large island, designed to have a useful function on each side. The entertaining sides of the island host bar seating and a wine refrigerator and built-in bottle storage. The cooking and prep sides of the island include a bookshelf for cookbooks --perfectly within reach of the gas cooktop and double ovens-- and a microwave drawer across from the refrigerator; only a step away to reheat meals.

 Talon Construction Inc.
Designing and building a kitchen addition is a complex process that involves multiple steps and considerations. Here is a general outline to help you get started on your kitchen addition project:
Define Your Goals and Budget:
• Determine the purpose of the kitchen addition. Is it for more cooking space, a dining area, or a combination of both?
• Establish a realistic budget for your project. Consider all costs, including construction, permits, materials, and furnishings.
Hire a Design Professional:
• Seek the services of a design build company who specializes in kitchen additions.
• Discuss your vision, needs, and budget with the design professional to create a design concept.
Site Evaluation:
• Assess the existing space and structural condition of your home to ensure it can support the addition.
• Consider factors like zoning regulations, setbacks, and building codes.
Design Development:
• Collaborate with your design professional to refine the concept, including the layout, size, and architectural style.
• Choose materials, finishes, and fixtures that fit your design and budget.
Obtain Permits:
• Consult with your local design build contractor to determine the necessary permits and approvals.
• Prepare and submit all required documents, including architectural drawings and engineering plans.
Create Construction Documents:
• Work with your design build professional to develop detailed construction drawings and specifications.
• These documents will serve as a guide for contractors during construction.
Hire a design build contractor:
• Check references, credentials, and licenses before selecting a contractor.
• Sign a detailed contract that outlines the scope of work, timeline, and payment schedule.
Construction Phase:
• Demolition: If needed, remove any existing structures or walls.
• Foundation: Construct the foundation for the addition.
• Framing: Build the structural framework of the addition.
• Plumbing, Electrical, and HVAC: Install or update utilities as required.
• Insulation: Ensure proper insulation for energy efficiency.
• Drywall and Finish Work: Complete the walls and ceilings.
• Flooring and Cabinetry: Install flooring and kitchen cabinets.
• Appliances and Fixtures: Add appliances, plumbing fixtures, and lighting.
• Paint and Finish: Apply paint and finishes to achieve the desired look.
• Final Inspection: Schedule inspections to ensure compliance with building codes.
Final Inspections and Approvals:
• Arrange for final inspections to ensure the addition meets all safety and code requirements.
• Obtain any necessary certificates of occupancy or compliance.
Move In and Enjoy:
• Once all inspections and approvals are received, you can move into your new kitchen addition and start enjoying it.
Remember that every kitchen addition project is unique, so adapt this outline to your specific needs and circumstances. Consulting with professionals and obtaining the required permits and inspections is crucial to a successful and safe project.
 Talon Construction Inc.
Designing and building a kitchen addition is a complex process that involves multiple steps and considerations. Here is a general outline to help you get started on your kitchen addition project:
Define Your Goals and Budget:
• Determine the purpose of the kitchen addition. Is it for more cooking space, a dining area, or a combination of both?
• Establish a realistic budget for your project. Consider all costs, including construction, permits, materials, and furnishings.
Hire a Design Professional:
• Seek the services of a design build company who specializes in kitchen additions.
• Discuss your vision, needs, and budget with the design professional to create a design concept.
Site Evaluation:
• Assess the existing space and structural condition of your home to ensure it can support the addition.
• Consider factors like zoning regulations, setbacks, and building codes.
Design Development:
• Collaborate with your design professional to refine the concept, including the layout, size, and architectural style.
• Choose materials, finishes, and fixtures that fit your design and budget.
Obtain Permits:
• Consult with your local design build contractor to determine the necessary permits and approvals.
• Prepare and submit all required documents, including architectural drawings and engineering plans.
Create Construction Documents:
• Work with your design build professional to develop detailed construction drawings and specifications.
• These documents will serve as a guide for contractors during construction.
Hire a design build contractor:
• Check references, credentials, and licenses before selecting a contractor.
• Sign a detailed contract that outlines the scope of work, timeline, and payment schedule.
Construction Phase:
• Demolition: If needed, remove any existing structures or walls.
• Foundation: Construct the foundation for the addition.
• Framing: Build the structural framework of the addition.
• Plumbing, Electrical, and HVAC: Install or update utilities as required.
• Insulation: Ensure proper insulation for energy efficiency.
• Drywall and Finish Work: Complete the walls and ceilings.
• Flooring and Cabinetry: Install flooring and kitchen cabinets.
• Appliances and Fixtures: Add appliances, plumbing fixtures, and lighting.
• Paint and Finish: Apply paint and finishes to achieve the desired look.
• Final Inspection: Schedule inspections to ensure compliance with building codes.
Final Inspections and Approvals:
• Arrange for final inspections to ensure the addition meets all safety and code requirements.
• Obtain any necessary certificates of occupancy or compliance.
Move In and Enjoy:
• Once all inspections and approvals are received, you can move into your new kitchen addition and start enjoying it.
Remember that every kitchen addition project is unique, so adapt this outline to your specific needs and circumstances. Consulting with professionals and obtaining the required permits and inspections is crucial to a successful and safe project.
7