
Search results for "Slight adjustment" in Home Design Ideas
 Doolittle Design Co.
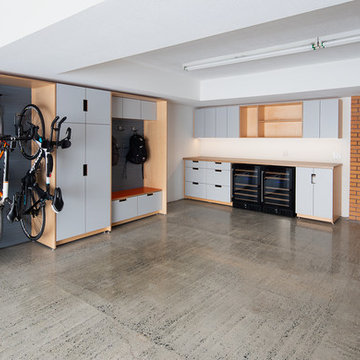
Modern cabinetry for the garage.
Large minimalist attached two-car garage workshop photo in San Francisco
Large minimalist attached two-car garage workshop photo in San Francisco
 Blackband Design
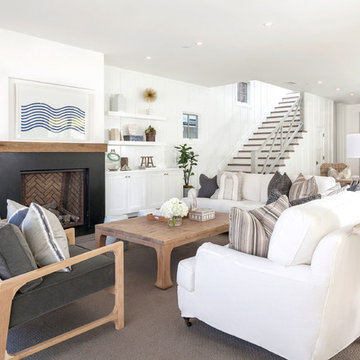
This Coastal Inspired Farmhouse with bay views puts a casual and sophisticated twist on beach living.
Interior Design by Blackband Design and Home Build by Arbor Real Estate.
 alairhomesdecatur
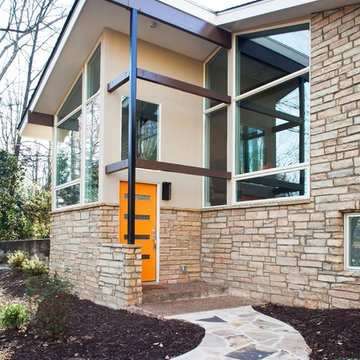
Designed & Built by Renewal Design-Build. RenewalDesignBuild.com
Photography by: Jeff Herr Photography
Mid-century modern beige mixed siding exterior home photo in Atlanta
Mid-century modern beige mixed siding exterior home photo in Atlanta
Find the right local pro for your project
 AHD&Co
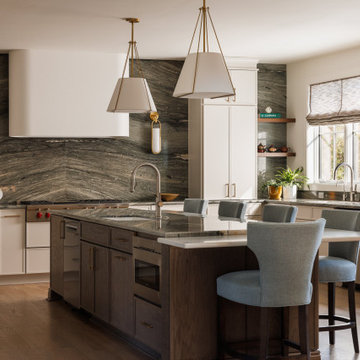
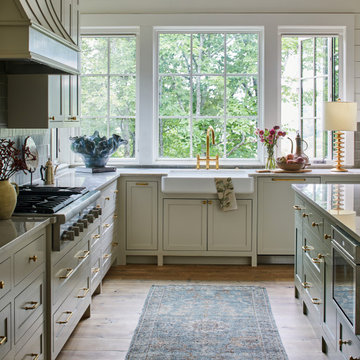
Inspiration for a large transitional u-shaped medium tone wood floor open concept kitchen remodel in New York with an undermount sink, shaker cabinets, beige cabinets, quartzite countertops, green backsplash, stone slab backsplash, stainless steel appliances, an island and green countertops

 Change Your Bathroom©
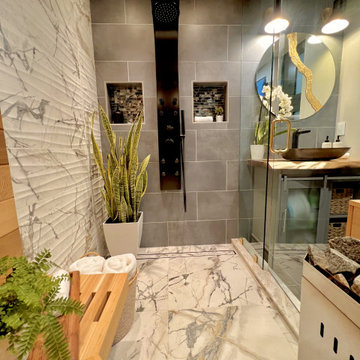
This transformation started with a builder grade bathroom and was expanded into a sauna wet room. With cedar walls and ceiling and a custom cedar bench, the sauna heats the space for a relaxing dry heat experience. The goal of this space was to create a sauna in the secondary bathroom and be as efficient as possible with the space. This bathroom transformed from a standard secondary bathroom to a ergonomic spa without impacting the functionality of the bedroom.
This project was super fun, we were working inside of a guest bedroom, to create a functional, yet expansive bathroom. We started with a standard bathroom layout and by building out into the large guest bedroom that was used as an office, we were able to create enough square footage in the bathroom without detracting from the bedroom aesthetics or function. We worked with the client on her specific requests and put all of the materials into a 3D design to visualize the new space.
Houzz Write Up: https://www.houzz.com/magazine/bathroom-of-the-week-stylish-spa-retreat-with-a-real-sauna-stsetivw-vs~168139419
The layout of the bathroom needed to change to incorporate the larger wet room/sauna. By expanding the room slightly it gave us the needed space to relocate the toilet, the vanity and the entrance to the bathroom allowing for the wet room to have the full length of the new space.
This bathroom includes a cedar sauna room that is incorporated inside of the shower, the custom cedar bench follows the curvature of the room's new layout and a window was added to allow the natural sunlight to come in from the bedroom. The aromatic properties of the cedar are delightful whether it's being used with the dry sauna heat and also when the shower is steaming the space. In the shower are matching porcelain, marble-look tiles, with architectural texture on the shower walls contrasting with the warm, smooth cedar boards. Also, by increasing the depth of the toilet wall, we were able to create useful towel storage without detracting from the room significantly.
This entire project and client was a joy to work with.
 Richard's Total Backyard Solutions
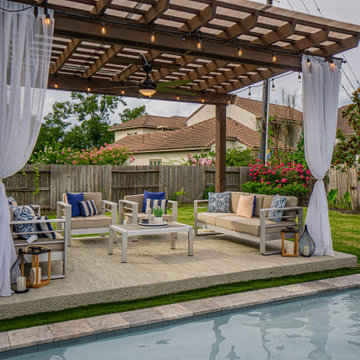
Picture perfect Outdoor Living Space for the family to enjoy and even for the perfect date night under the stars!
100' perimeter geometric style pool & spa combo in Sugar Land. Key features of the project:
- Centered and slightly raised geometric style spa
- Travertine ledger stone and coping throughout the pool & raised wall feature
- "California Smoke" Comfort Decking around the pool and under the pergola
- 15' wide tanning ledge that is incorporated into the pool steps
- Two large fire bowls
- 10 x 16 Pergola with polycarbonate clear cover
- Artificial turf borders most the pool area in
- Plaster color: Marquis Saphire
#HotTubs #SwimSpas #CustomPools #HoustonPoolBuilder #Top50Builder #Top50Service #Outdoorkitchens #Outdoorliving
Sponsored
Columbus, OH

Structural Remodeling
Franklin County's Heavy Timber Specialists | Best of Houzz 2020!
 Jemm Interiors
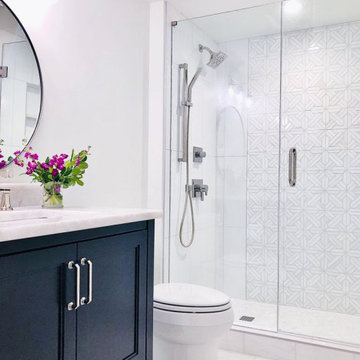
Walk-in shower - small transitional master black and white tile and marble tile marble floor, white floor and single-sink walk-in shower idea in Atlanta with recessed-panel cabinets, black cabinets, a two-piece toilet, white walls, an undermount sink, quartzite countertops, a hinged shower door, white countertops and a freestanding vanity
 TKS Design Group
Download our free ebook, Creating the Ideal Kitchen. DOWNLOAD NOW
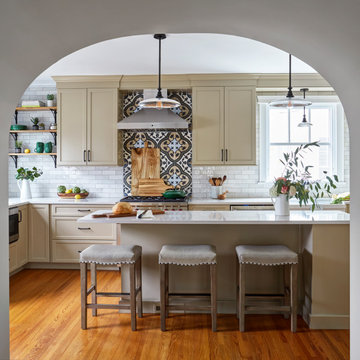
The homeowners came to us looking to update the kitchen in their historic 1897 home. The home had gone through an extensive renovation several years earlier that added a master bedroom suite and updates to the front façade. The kitchen however was not part of that update and a prior 1990’s update had left much to be desired. The client is an avid cook, and it was just not very functional for the family.
The original kitchen was very choppy and included a large eat in area that took up more than its fair share of the space. On the wish list was a place where the family could comfortably congregate, that was easy and to cook in, that feels lived in and in check with the rest of the home’s décor. They also wanted a space that was not cluttered and dark – a happy, light and airy room. A small powder room off the space also needed some attention so we set out to include that in the remodel as well.
See that arch in the neighboring dining room? The homeowner really wanted to make the opening to the dining room an arch to match, so we incorporated that into the design.
Another unfortunate eyesore was the state of the ceiling and soffits. Turns out it was just a series of shortcuts from the prior renovation, and we were surprised and delighted that we were easily able to flatten out almost the entire ceiling with a couple of little reworks.
Other changes we made were to add new windows that were appropriate to the new design, which included moving the sink window over slightly to give the work zone more breathing room. We also adjusted the height of the windows in what was previously the eat-in area that were too low for a countertop to work. We tried to keep an old island in the plan since it was a well-loved vintage find, but the tradeoff for the function of the new island was not worth it in the end. We hope the old found a new home, perhaps as a potting table.
Designed by: Susan Klimala, CKD, CBD
Photography by: Michael Kaskel
For more information on kitchen and bath design ideas go to: www.kitchenstudio-ge.com
 Drawing Dept
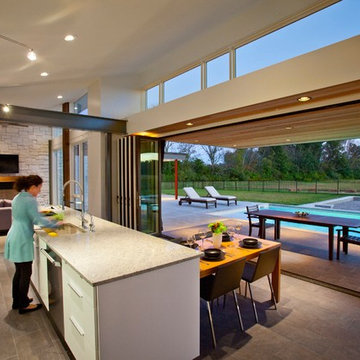
Kitchen with Panda Doors open to exterior dining and pool.
Architect: Drawing Dept
Contractor: Camery Hensley Construction
Photography: Ross Van Pelt
Eat-in kitchen - modern galley eat-in kitchen idea in Cincinnati with an undermount sink, flat-panel cabinets, white cabinets, stainless steel appliances and granite countertops
Eat-in kitchen - modern galley eat-in kitchen idea in Cincinnati with an undermount sink, flat-panel cabinets, white cabinets, stainless steel appliances and granite countertops
 Esslinger Design Company
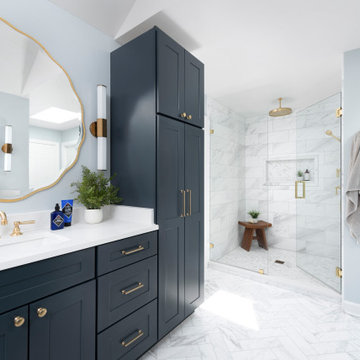
Example of a large transitional master white tile and marble tile marble floor, white floor, single-sink and vaulted ceiling bathroom design in Chicago with shaker cabinets, blue cabinets, blue walls, an undermount sink, quartz countertops, a hinged shower door, white countertops, a niche and a built-in vanity

 SALA Architects
Troy Thies
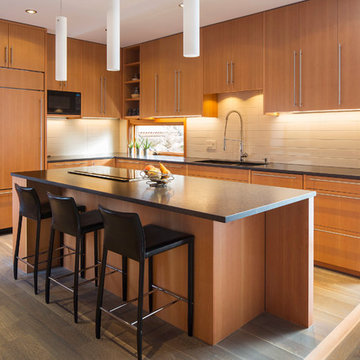
Kitchen - contemporary l-shaped medium tone wood floor kitchen idea in Minneapolis with flat-panel cabinets, medium tone wood cabinets, white backsplash, paneled appliances and an island
Kitchen - contemporary l-shaped medium tone wood floor kitchen idea in Minneapolis with flat-panel cabinets, medium tone wood cabinets, white backsplash, paneled appliances and an island
 CG Allan Interior Architecture + Design LLC
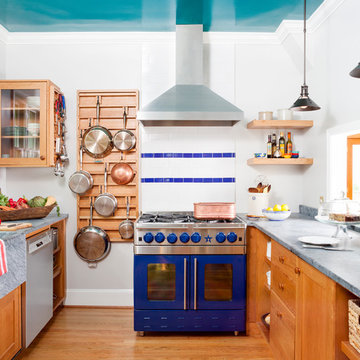
Inspiration for a transitional medium tone wood floor and orange floor kitchen remodel in DC Metro with a farmhouse sink, medium tone wood cabinets, concrete countertops, multicolored backsplash, colored appliances and no island
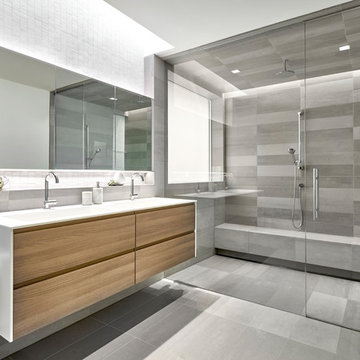
Large trendy master gray tile and porcelain tile porcelain tile and gray floor bathroom photo in Chicago with flat-panel cabinets, light wood cabinets, solid surface countertops and an integrated sink
 Jacksonville Organizer - Organized Home / Office
Kim Lindsey Photography
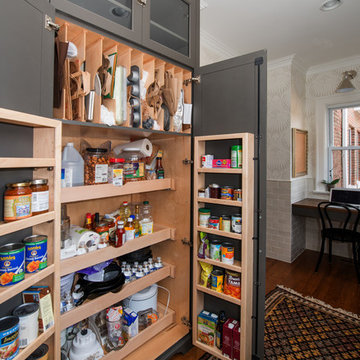
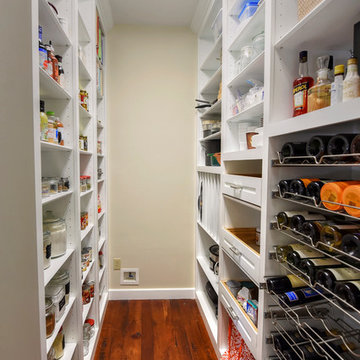
Kitchen pantry - mid-sized traditional galley dark wood floor kitchen pantry idea in Jacksonville with wood countertops and stainless steel appliances
Kitchen pantry - mid-sized traditional galley dark wood floor kitchen pantry idea in Jacksonville with wood countertops and stainless steel appliances

 Tom Bassett-Dilley Architect, Ltd.
Photography by Natalie Marotta
This special project is an extensive renovation of Better Homes And Gardens’ “The House You Asked For” of 1953. While the California Case Study-inspired architecture was an interesting break from 1950’s boxes, its extensive single-pane glass, internal roof drains, and slab construction were leading to structural deterioration through condensation and leaks, and a massive carbon footprint. The renovation took the form of slight plan adjustments–giving the kitchen more space, combining two entry doors into one entry space, adjusting the bedroom-bathroom area–and reworking the roof. We added a raised portion to carry ducts for conditioning and ventilation, which was also an opportunity to create spatial interest and bring in light from above, and we re-sloped the roof to drain to the perimeter instead of the middle of the house. Carbon-sequestering wood fiberboard insulation was added to the walls, and the windows were replaced with triple-glazed units. With new heat pump heating, cooling, and water heating, the operational carbon footprint was reduced by 93%.

 Industrial Projects
Creating a comfortable outdoor living space is a priority for many homeowners and DIY enthusiasts. With rising summer temperatures, installing a shade tarp in your backyard offers an affordable and effective solution for sun protection. We’ve developed this detailed, step-by-step guide to help you confidently install a shade tarp that not only shields you from the sun but also adds aesthetic appeal to your outdoor area.
Benefits of Installing a Backyard Shade Tarp
Before diving into the installation process, let’s explore the key benefits of having a backyard shade tarp:
Provides UV Protection: Keeps your family and guests safe from harmful sun exposure.
Reduces Outdoor Temperatures: Creates a cooler, more enjoyable outdoor space.
Protects Outdoor Furniture: Extends the life of patio furniture by reducing sun damage.
Enhances Outdoor Aesthetics: Adds a modern, stylish look to your yard.
Budget-Friendly: More affordable compared to permanent structures like pergolas.
Materials and Tools You’ll Need
To begin your DIY backyard shade project, gather the following materials and tools:
Materials:
Shade tarp (UV-resistant and breathable)
Sturdy posts or existing structures (trees, fences, walls)
Mounting hardware (eye bolts, D-rings, turnbuckles, snap hooks)
Nylon or polyester rope, or stainless-steel wire
Concrete (if installing new posts)
Tools:
Power drill
Measuring tape
Level
Ladder
Wrench or adjustable spanner
Post hole digger (if installing new posts)
Step 1: Plan Your Shade Tarp Layout
The first step in installing your backyard shade tarp is careful planning. Take time to assess your outdoor area and answer these key questions:
Where is the sun’s path throughout the day?
What size and shape of tarp best suits your space?
Will you anchor the tarp to existing structures or install new posts?
What height do you want the tarp to sit at for maximum shade and airflow?
Pro Tip: Use string or garden hoses to visualize the tarp layout on the ground before making permanent decisions.
Step 2: Measure and Mark Anchor Points
Once you’ve determined the tarp’s location and orientation:
Measure the tarp dimensions.
Mark the exact points where each corner of the tarp will be anchored.
Ensure that the anchor points are at least 5–10% longer than the tarp size to allow for tensioning and slight adjustments.
Consider slope angles for water runoff. Aim for at least a 20-degree angle to prevent water pooling on the tarp.
Step 3: Install Support Posts (If Necessary)
If your backyard lacks existing anchor points like trees or fences, you’ll need to install sturdy support posts:
Dig post holes at least 24 inches deep and 8-12 inches wide for stability.
Set posts in concrete, making sure they remain plumb and level.
Allow the concrete to cure for at least 24–48 hours before applying tension from the tarp.
We recommend using pressure-treated wood, galvanized steel poles, or aluminum posts for longevity and strength.
Step 4: Install Mounting Hardware
With your anchor points ready, it’s time to install the necessary hardware:
Attach eye bolts or pad eyes securely into walls, posts, or other fixed structures.
For added flexibility and adjustability, install turnbuckles or tensioners to fine-tune the tarp’s tightness.
Connect snap hooks, D-rings, or carabiners to make assembly and disassembly easier.
Make sure all hardware is rated for outdoor use to prevent rust and corrosion.
Step 5: Attach and Tension the Shade Tarp
Now it’s time for the most satisfying part—mounting the shade tarp:
Begin by attaching one corner of the tarp to an anchor point.
Gradually attach the remaining corners, moving diagonally for even tension.
Adjust each connection point using your turnbuckles, ropes, or cables.
Pull the tarp tight enough to avoid sagging, but not so tight that it risks tearing.
Check that the tarp maintains the desired slope for rainwater runoff and adjust tension as needed.
Step 6: Final Adjustments and Safety Check
Before enjoying your new shaded area:
Inspect all anchor points and hardware for stability.
Test the tarp’s tension and make adjustments for even distribution.
Ensure that no sharp edges or loose connections remain that could damage the tarp or pose a safety hazard.
Confirm that the tarp is secure in windy conditions by giving it a gentle tug.
If you live in an area with frequent high winds, consider removing the tarp during storms to prevent damage.
Step 7: Enjoy Your Shaded Backyard Oasis
Once installed, your backyard shade tarp provides a comfortable and protective space for outdoor gatherings, relaxation, or family activities. You can decorate underneath with outdoor furniture, string lights, or potted plants to create a personalized outdoor retreat.
Maintenance Tips for Long-Lasting Shade Tarp Performance
To extend the life of your shade tarp, follow these maintenance guidelines:
Regularly check for wear and tear, especially around anchor points and seams.
Clean the tarp periodically with mild soap and water to prevent mildew buildup.
Store the tarp indoors during harsh weather seasons if it's not designed for year-round use.
Tighten hardware as needed to maintain proper tension and avoid sagging.
By following these simple care steps, your shade tarp will continue to deliver years of sun protection and outdoor comfort.
Conclusion: Upgrade Your Outdoor Space with a DIY Shade Tarp
Installing a shade tarp in your backyard is a cost-effective and rewarding DIY project. With careful planning, quality materials, and proper installation techniques, you’ll enjoy cool, shaded outdoor living all season long. This step-by-step guide ensures your project goes smoothly from start to finish.
 Change Your Bathroom©
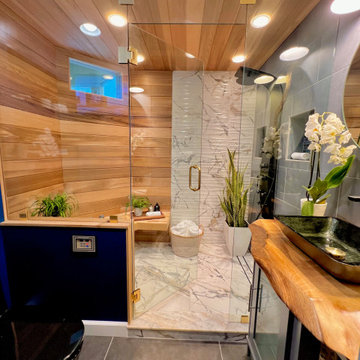
This transformation started with a builder grade bathroom and was expanded into a sauna wet room. With cedar walls and ceiling and a custom cedar bench, the sauna heats the space for a relaxing dry heat experience. The goal of this space was to create a sauna in the secondary bathroom and be as efficient as possible with the space. This bathroom transformed from a standard secondary bathroom to a ergonomic spa without impacting the functionality of the bedroom.
This project was super fun, we were working inside of a guest bedroom, to create a functional, yet expansive bathroom. We started with a standard bathroom layout and by building out into the large guest bedroom that was used as an office, we were able to create enough square footage in the bathroom without detracting from the bedroom aesthetics or function. We worked with the client on her specific requests and put all of the materials into a 3D design to visualize the new space.
Houzz Write Up: https://www.houzz.com/magazine/bathroom-of-the-week-stylish-spa-retreat-with-a-real-sauna-stsetivw-vs~168139419
The layout of the bathroom needed to change to incorporate the larger wet room/sauna. By expanding the room slightly it gave us the needed space to relocate the toilet, the vanity and the entrance to the bathroom allowing for the wet room to have the full length of the new space.
This bathroom includes a cedar sauna room that is incorporated inside of the shower, the custom cedar bench follows the curvature of the room's new layout and a window was added to allow the natural sunlight to come in from the bedroom. The aromatic properties of the cedar are delightful whether it's being used with the dry sauna heat and also when the shower is steaming the space. In the shower are matching porcelain, marble-look tiles, with architectural texture on the shower walls contrasting with the warm, smooth cedar boards. Also, by increasing the depth of the toilet wall, we were able to create useful towel storage without detracting from the room significantly.
This entire project and client was a joy to work with.
 Pennville Custom Cabinetry
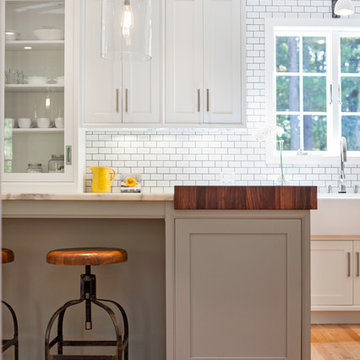
Karen Swanson, owner of New England Design Works in Manchester, MA keeps designing award winning Pennville Custom Cabinetry kitchens. You may remember that earlier this year, Karen won both the regional Sub-Zero Design Contest and the National Kitchen & Bath Association's medium kitchen of the year.
nedesignworks@gmail.com
978.500.1096.
1