
Search results for "Solutions packed" in Home Design Ideas
 Dave Fox Design Build Remodelers
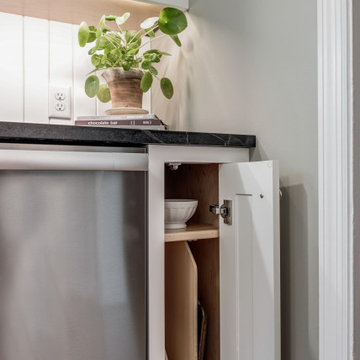
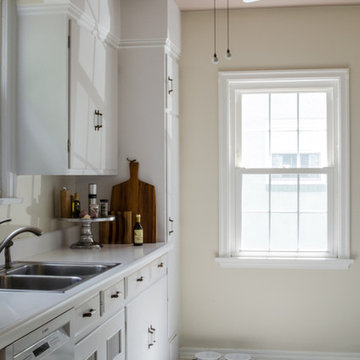
This 1930's charm kitchen is small but packed with hidden storage solutions. The glass front cabinets act as a china cabinet without sacrificing any floor space.
 Donovan Lord Design
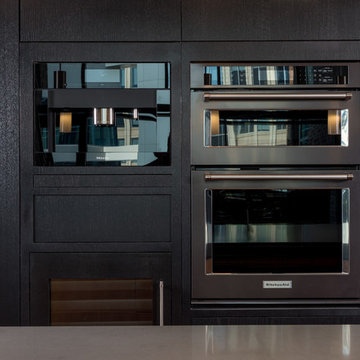
As part of a complete remodel on this McKinney Avenue high rise condo, Edict designed a complete kitchen remodel.
The cabinetry is 100% custom designed, no off the shelf or RTA cabinetry here. Made from rift cut white oak, the lighter cabinets have a clear coat natural finish and the darker cabinets are stained in an ebony finish giving a great sense of contrast and interest to this kitchen. The kitchen is packed with high end appliances including a Miele built in coffee machine, a wine fridge, Miele integrated hood and Miele gas cooktop as well as a deep single stainless steel sink, an integrated trash compactor and new integrated SubZero refrigerator.
The kitchen's lighting has cable lighting for the main source of light which pulls in the industrial feel of the loft's exposed beams and ductwork, a new custom lightbox suspended above the new island with integrated LED cans and 3 pendants to light it. Also, above the ceiling panel, above the cabinets, under the cabinets and the toe kicks all have integrated LED lighting - all lighting is dimmable giving the most diverse options for a lighting solution.
All of the cabinetry doors and drawers have Blum hardware and most are without handles for the most seamless look possible. Instead, one presses the drawers and cabinets and they pop open and close with soft close drawers. There is abundant deep drawer storage for easier access in the new island as well as under the cooktop and sink. The countertops are Quartz.
Donovan Lord: Designer
Michael Hunter: Photographer
 Mottram Architecture
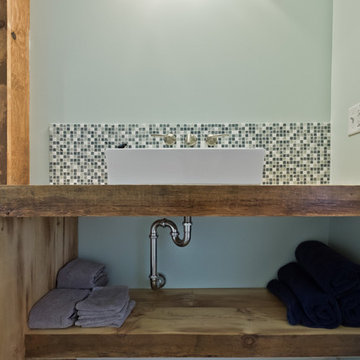
Timber frame homes offer unique challenges during a remodel. What often makes them beautiful and attractive to most homeowners, also makes them challenging for space requirements.
Context: The lovely couple that owned this home were struggling with some interesting floor plan challenges that just didn't work for their family. The loved the beautiful timbers and woodwork of their home, but the dramatically sloping ceilings on the second floor, particularly in the bathroom, just didn't work for this 1 1/2 bath home. Needing to use the skylight to approach the toilet was a less then ideal scenario. Although the bathroom footprint was more then adequate, the sloped ceiling only made half of the space useable. Check out the Before/After post on our blog to see the photos of the house pre-renovation. As much as they loved all the wood features in their home, another challenge they had was light. The wood ceiling made everything inside the house darker, even with a fantastic array of south facing windows, there were spaces in the home that felt dark and small. When they contacted us they wanted to know how could they make their brighter and more inviting, were there solutions to the 2nd floor sloped ceiling issues, and if they were going to do all of this work, how could they make their home more comfortable and efficient. A nagging water leak in the upstairs bathroom spurred them into action and here is how we solved their dilemma.
Conclusion: First, we added a little dormer to the rear of the house so we could get full headroom in nearly all of the upstairs bathroom! Then we decided to extend that dormer one more timber bay over to create a walk in closet with natural light and plenty of space. Since we were contemplating energy efficiency, we resolved a nagging issue that is present in a lot of timber frame construction, air tightness. Commonly found in timber frame construction, fiberglass insulation is installed in the rafter bays and board ceilings are installed over top. Unfortunately, board ceilings are anything but air tight, and fiberglass insulation needs to be in an airtight cavity for maximum effectiveness. So we were able to solve two issues at the same time for this homeowner. We removed the board ceiling and fiberglass insulation, we dense packed the rafter bays with cellulose insulation, and installed sheetrock in place of the boards. The boards were salvaged for re-use by the homeowner, and the space and light quality was dramatically improved. Some may think that losing the board ceiling took something away from the space, but what you'll see in the pictures is that it highly accentuates the heavy timbers and really makes them stand out in a beautiful way. Now with this added airtightness, better insulation, and brighter space, the homeowner hardly runs their wood stove, and it's so quiet in the space, an added bonus from changing the insulation. It became necessary to also add a sheetrock ceiling to the living room to hide the plumbing from the new bathroom layout above. Changing this ceiling gave the homeowner some real quality lighting that was lacking in the living room before. The brighter ceiling and new lighting layout completely transforms the living room into a space you want to hang out, even though the layout didn't change at all. When the homeowner saw the finished spaces she said "I can't believe this is my house, I want to live in this house"
Energy Efficiency: I touched a little on the efficiency above, but like all projects done with Mottram Architecture, we always want to leave you with a little extra. Timber frame construction with board ceilings and fiberglass insulation are notoriously leaky! If you want to know what we think about fiberglass insulation, check our our blog post on Why Fiberglass Insulation Sucks. By installing cellulose insulation and covering it with sheetrock we were able to greatly reduce the heat flowing out of this home. It not only improves cashflow it improves the comfort level in the space. Who wants to sit in their living room and feel a draft? Let us remind you, we are not saying cellulose insulation is an air barrier, we use the sheetrock to help with that, but it does significantly reduce the air flow over fiberglass insulation. And when we reduce the airflow, we reduce the heat flow. And when we reduce the heat flow, we reduce the need to re-heat that drafty air from outside. When it comes to energy efficiency the first and best place to start is air infiltration. We greatly reduced the air infiltration with the new insulation, but we also added a hat and warm boots. What I mean by that is, we improved the insulation in the roof, and we installed insulation in the basement. Maybe it's a silly analogy, but when you think about keeping warm, we always start with the hat and boots! With sustainability in mind, the next project will be to add a deck to the front of this house with rain catchment barrels from the metal roof. They are planning to plant a garden in the spring and the rain catchment system will help to irrigate the new garden.
Builder: East Shore Builders
Photographer: Michael Eric Berube
Find the right local pro for your project
 Mottram Architecture
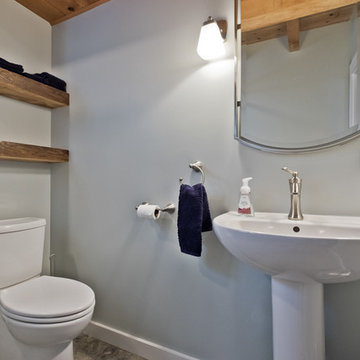
Timber frame homes offer unique challenges during a remodel. What often makes them beautiful and attractive to most homeowners, also makes them challenging for space requirements.
Context: The lovely couple that owned this home were struggling with some interesting floor plan challenges that just didn't work for their family. The loved the beautiful timbers and woodwork of their home, but the dramatically sloping ceilings on the second floor, particularly in the bathroom, just didn't work for this 1 1/2 bath home. Needing to use the skylight to approach the toilet was a less then ideal scenario. Although the bathroom footprint was more then adequate, the sloped ceiling only made half of the space useable. Check out the Before/After post on our blog to see the photos of the house pre-renovation. As much as they loved all the wood features in their home, another challenge they had was light. The wood ceiling made everything inside the house darker, even with a fantastic array of south facing windows, there were spaces in the home that felt dark and small. When they contacted us they wanted to know how could they make their brighter and more inviting, were there solutions to the 2nd floor sloped ceiling issues, and if they were going to do all of this work, how could they make their home more comfortable and efficient. A nagging water leak in the upstairs bathroom spurred them into action and here is how we solved their dilemma.
Conclusion: First, we added a little dormer to the rear of the house so we could get full headroom in nearly all of the upstairs bathroom! Then we decided to extend that dormer one more timber bay over to create a walk in closet with natural light and plenty of space. Since we were contemplating energy efficiency, we resolved a nagging issue that is present in a lot of timber frame construction, air tightness. Commonly found in timber frame construction, fiberglass insulation is installed in the rafter bays and board ceilings are installed over top. Unfortunately, board ceilings are anything but air tight, and fiberglass insulation needs to be in an airtight cavity for maximum effectiveness. So we were able to solve two issues at the same time for this homeowner. We removed the board ceiling and fiberglass insulation, we dense packed the rafter bays with cellulose insulation, and installed sheetrock in place of the boards. The boards were salvaged for re-use by the homeowner, and the space and light quality was dramatically improved. Some may think that losing the board ceiling took something away from the space, but what you'll see in the pictures is that it highly accentuates the heavy timbers and really makes them stand out in a beautiful way. Now with this added airtightness, better insulation, and brighter space, the homeowner hardly runs their wood stove, and it's so quiet in the space, an added bonus from changing the insulation. It became necessary to also add a sheetrock ceiling to the living room to hide the plumbing from the new bathroom layout above. Changing this ceiling gave the homeowner some real quality lighting that was lacking in the living room before. The brighter ceiling and new lighting layout completely transforms the living room into a space you want to hang out, even though the layout didn't change at all. When the homeowner saw the finished spaces she said "I can't believe this is my house, I want to live in this house"
Energy Efficiency: I touched a little on the efficiency above, but like all projects done with Mottram Architecture, we always want to leave you with a little extra. Timber frame construction with board ceilings and fiberglass insulation are notoriously leaky! If you want to know what we think about fiberglass insulation, check our our blog post on Why Fiberglass Insulation Sucks. By installing cellulose insulation and covering it with sheetrock we were able to greatly reduce the heat flowing out of this home. It not only improves cashflow it improves the comfort level in the space. Who wants to sit in their living room and feel a draft? Let us remind you, we are not saying cellulose insulation is an air barrier, we use the sheetrock to help with that, but it does significantly reduce the air flow over fiberglass insulation. And when we reduce the airflow, we reduce the heat flow. And when we reduce the heat flow, we reduce the need to re-heat that drafty air from outside. When it comes to energy efficiency the first and best place to start is air infiltration. We greatly reduced the air infiltration with the new insulation, but we also added a hat and warm boots. What I mean by that is, we improved the insulation in the roof, and we installed insulation in the basement. Maybe it's a silly analogy, but when you think about keeping warm, we always start with the hat and boots! With sustainability in mind, the next project will be to add a deck to the front of this house with rain catchment barrels from the metal roof. They are planning to plant a garden in the spring and the rain catchment system will help to irrigate the new garden.
Builder: East Shore Builders
Photographer: Michael Eric Berube
 Donovan Lord Design
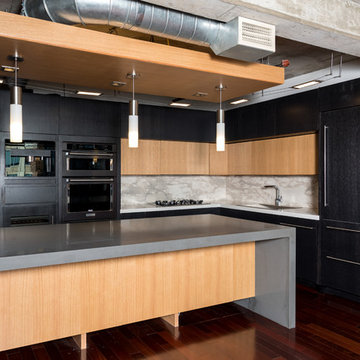
As part of a complete remodel on this McKinney Avenue high rise condo, Edict designed a complete kitchen remodel.
The cabinetry is 100% custom designed, no off the shelf or RTA cabinetry here. Made from rift cut white oak, the lighter cabinets have a clear coat natural finish and the darker cabinets are stained in an ebony finish giving a great sense of contrast and interest to this kitchen. The kitchen is packed with high end appliances including a Miele built in coffee machine, a wine fridge, Miele integrated hood and Miele gas cooktop as well as a deep single stainless steel sink, an integrated trash compactor and new integrated SubZero refrigerator.
The kitchen's lighting has cable lighting for the main source of light which pulls in the industrial feel of the loft's exposed beams and ductwork, a new custom lightbox suspended above the new island with integrated LED cans and 3 pendants to light it. Also, above the ceiling panel, above the cabinets, under the cabinets and the toe kicks all have integrated LED lighting - all lighting is dimmable giving the most diverse options for a lighting solution.
All of the cabinetry doors and drawers have Blum hardware and most are without handles for the most seamless look possible. Instead, one presses the drawers and cabinets and they pop open and close with soft close drawers. There is abundant deep drawer storage for easier access in the new island as well as under the cooktop and sink. The countertops are Quartz.
Donovan Lord: Designer
Michael Hunter: Photographer
 Rainbow Shaker
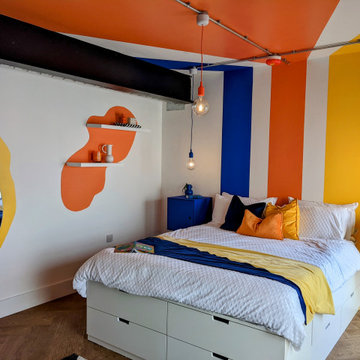
Step inside my vibrant, dopamine-filled transformations from Channel 4’s The Big Interiors Battle! ?✨ From a bold geometric bedroom to a quirky pink & orange bathroom (complete with a dinosaur toilet paper holder!) and a colourful, functional kitchen makeover, each space is packed with playful design, statement colours, and creative storage solutions. These fearless interiors blend maximalist style with practicality, proving that home design should be as fun as it is functional!
 Kitchen Culture Cambridgeshire
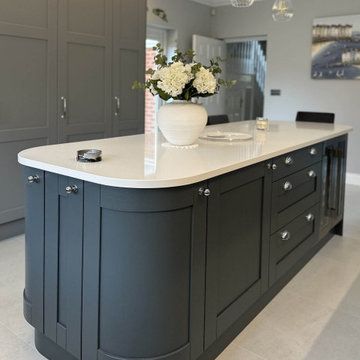
This stunning kitchen transformation in Papworth Everard makes the most of Crown’s latest colours with clever storage and top-spec finishes throughout.
For this project, the goal was a full kitchen refresh – something that felt modern, well-built and practical for everyday use. From layout to colour, every detail was carefully chosen to suit the home and the people living in it.
We used Crown Imperial’s Midsomer range in their newly launched Dove Grey and Mercury colours – likely making these clients the first in the UK to enjoy the updated larder door palette. It’s a soft, timeless combination that gives the kitchen a clean, fresh look with just the right amount of depth.
This kitchen is more than just good looking as it’s packed with clever solutions to keep everything neat and organised. Blum Space Towers and Nuvola corner pullouts help maximise every inch of space, while Cimstone Sierra Quartz worktops, Franke sinks, a Quooker Flex tap, and NEFF appliances bring both durability and everyday ease.
We managed the full installation, bringing in trusted partners to get every part just right. That included plumbing, electrics (with T24 Electrical), plastering, flooring from Mandarin Stone, and worktops by The Marble Group. Everything handled, all the way through.
This kitchen feels special – not just for how it looks, but because of the thought that’s gone into every decision. With the latest Crown colours, quality materials, and a layout that just works, it’s a real upgrade for a beautiful home.
Sponsored
Columbus, OH

Wannemacher Interiors
Customized Award-Winning Interior Design Solutions in Franklin Cnty OH
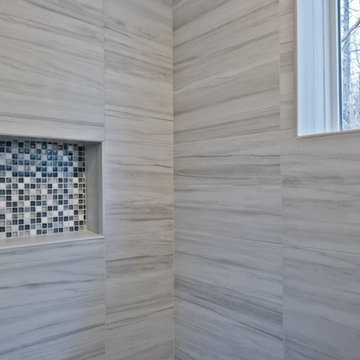 Mottram Architecture
Timber frame homes offer unique challenges during a remodel. What often makes them beautiful and attractive to most homeowners, also makes them challenging for space requirements.
Context: The lovely couple that owned this home were struggling with some interesting floor plan challenges that just didn't work for their family. The loved the beautiful timbers and woodwork of their home, but the dramatically sloping ceilings on the second floor, particularly in the bathroom, just didn't work for this 1 1/2 bath home. Needing to use the skylight to approach the toilet was a less then ideal scenario. Although the bathroom footprint was more then adequate, the sloped ceiling only made half of the space useable. Check out the Before/After post on our blog to see the photos of the house pre-renovation. As much as they loved all the wood features in their home, another challenge they had was light. The wood ceiling made everything inside the house darker, even with a fantastic array of south facing windows, there were spaces in the home that felt dark and small. When they contacted us they wanted to know how could they make their brighter and more inviting, were there solutions to the 2nd floor sloped ceiling issues, and if they were going to do all of this work, how could they make their home more comfortable and efficient. A nagging water leak in the upstairs bathroom spurred them into action and here is how we solved their dilemma.
Conclusion: First, we added a little dormer to the rear of the house so we could get full headroom in nearly all of the upstairs bathroom! Then we decided to extend that dormer one more timber bay over to create a walk in closet with natural light and plenty of space. Since we were contemplating energy efficiency, we resolved a nagging issue that is present in a lot of timber frame construction, air tightness. Commonly found in timber frame construction, fiberglass insulation is installed in the rafter bays and board ceilings are installed over top. Unfortunately, board ceilings are anything but air tight, and fiberglass insulation needs to be in an airtight cavity for maximum effectiveness. So we were able to solve two issues at the same time for this homeowner. We removed the board ceiling and fiberglass insulation, we dense packed the rafter bays with cellulose insulation, and installed sheetrock in place of the boards. The boards were salvaged for re-use by the homeowner, and the space and light quality was dramatically improved. Some may think that losing the board ceiling took something away from the space, but what you'll see in the pictures is that it highly accentuates the heavy timbers and really makes them stand out in a beautiful way. Now with this added airtightness, better insulation, and brighter space, the homeowner hardly runs their wood stove, and it's so quiet in the space, an added bonus from changing the insulation. It became necessary to also add a sheetrock ceiling to the living room to hide the plumbing from the new bathroom layout above. Changing this ceiling gave the homeowner some real quality lighting that was lacking in the living room before. The brighter ceiling and new lighting layout completely transforms the living room into a space you want to hang out, even though the layout didn't change at all. When the homeowner saw the finished spaces she said "I can't believe this is my house, I want to live in this house"
Energy Efficiency: I touched a little on the efficiency above, but like all projects done with Mottram Architecture, we always want to leave you with a little extra. Timber frame construction with board ceilings and fiberglass insulation are notoriously leaky! If you want to know what we think about fiberglass insulation, check our our blog post on Why Fiberglass Insulation Sucks. By installing cellulose insulation and covering it with sheetrock we were able to greatly reduce the heat flowing out of this home. It not only improves cashflow it improves the comfort level in the space. Who wants to sit in their living room and feel a draft? Let us remind you, we are not saying cellulose insulation is an air barrier, we use the sheetrock to help with that, but it does significantly reduce the air flow over fiberglass insulation. And when we reduce the airflow, we reduce the heat flow. And when we reduce the heat flow, we reduce the need to re-heat that drafty air from outside. When it comes to energy efficiency the first and best place to start is air infiltration. We greatly reduced the air infiltration with the new insulation, but we also added a hat and warm boots. What I mean by that is, we improved the insulation in the roof, and we installed insulation in the basement. Maybe it's a silly analogy, but when you think about keeping warm, we always start with the hat and boots! With sustainability in mind, the next project will be to add a deck to the front of this house with rain catchment barrels from the metal roof. They are planning to plant a garden in the spring and the rain catchment system will help to irrigate the new garden.
Builder: East Shore Builders
Photographer: Michael Eric Berube

 Permeable Hardscape North America LLC
Xtreme EASY is the definition of jointing made easy. It's mixed ready to use and vacuum packed.
Individual•Professional•Quick
Work it in - Brush it off - Finished
It quickly and easily fills the joints and is the optimum solution to finish off your paved stone surface.
It can be installed rain or shine... in fact the use of water helps force the XtremeEASY evenly into the joints without labor-intensive compacting saving you both time and money.
• Everlasting
• Powerwasher use
• Frost resitant
• Weed resitant
• Ant resistant
• Water permeable
 MOTIV Interiors
Twins on 12th - HER ROOM - View the complete Photo Gallery and project details at motivinteriors.com/portfolio
Design: MOTIV Interiors LLC
Photography: Sam Angel
Design Challenge: This 8 year-old boy and girl were outgrowing their existing setup and needed to update their rooms with a plan that would carry them forward into middle school and beyond. In addition to gaining storage and study areas, could these twins show off their big personalities? Absolutely, we said! MOTIV Interiors tackled the rooms of these youngsters living in Nashville's 12th South Neighborhood and created an environment where the dynamic duo can learn, create, and grow together for years to come.
Design Solution:
In her room, we wanted to create a fun-filled space that supports softball, sleepovers, science, and anything else a girl might want to get into. The star of the show is a beautiful hand-printed wallpaper by Brooklyn designer Aimee Wilder, whose FSC-certified papers contain no VOC’s (Volatile Organic Compounds). That means that in addition to packing a powerful visual punch, they meet our standard for excellent indoor air quality. We also love this wallpaper because it is composed of so many different neutral colors - this room can organically evolve over time without necessarily replacing the paper (which was installed with a no-VOC adhesive).
We refreshed the remaining walls with a scrubbable no-VOC paint from Sherwin Williams (7008 Alabaster) and gave the carpets in both of the twins’ rooms a good cleaning and simple stretch as opposed to replacing them. In order to provide more functional light in her room, we incorporated a corner floor lamp for reading, a telescoping desk lamp for studying, and an eye-catching LED flower pendant on a dimmer switch sourced from Lightology. Custom window treatments in a linen/cotton blend emphasize the height of the room and bring in a little “bling” with antiqued gold hardware.
Before we even thought about aesthetics, however, MOTIV Interiors got to work right away on increasing functionality. We added a spacious storage unit with plenty of baskets for all of our young client’s animal friends, and we made sure to include ample shelf space for books and hobbies as she finds new passions to explore down the road. We always prefer eco-friendly furnishings that are manufactured responsibly, made with sustainably harvested wood (FSC Certified), and use no glue or non-toxic glues and paints.
The bedding in this project is 100% cotton and contains no synthetic fibers. When purchasing bedding, check for the GOTS Certification (Global Organic Textile Standard). The introduction of a desk and drawer unit created a calming space to study and reflect, or write a letter to a friend. Gold accents add a bit of warmth to the workspace, where she can display her memories, goals, and game plans for a bright future.
We hope you enjoyed this project as much as we did! Each design challenge is an opportunity to push the envelope, by creating a new and exciting aesthetic or finding creative ways to incorporate sustainable design principles.
 Talon Construction Inc.
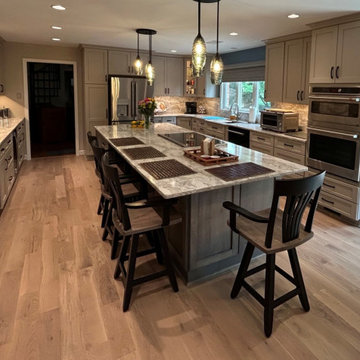
Thinking about a kitchen remodel in the Frederick, MD area? Here’s a closer look at one of our recent projects by Talon Construction Inc. - Q&A style:
Q: What makes this kitchen stand out?
A: The oversized island is the centerpiece designed for cooking, gathering, and entertaining all in one space. It’s both functional and a true focal point.
Q: What materials were used for the countertops and backsplash?
A: Vicostone Moonglade Quartz was selected for both the countertops and full-height backsplash, creating a seamless, high-end look with excellent durability.
Q: How does the cabinetry design enhance the space?
A: The combination of light upper cabinets and contrasting gray base cabinets adds depth while keeping the kitchen bright and open. Clean lines and modern hardware complete the look.
Q: What storage solutions were incorporated?
A: This kitchen is packed with smart storage with deep drawers, pull-out organizers, a custom pantry, and built-in features that keep everything accessible and clutter-free.
Q: Is this kitchen designed for everyday living or entertaining?
A: Both. The layout was intentionally designed to support daily functionality while also making it easy to host family and friends.
Q: What role does lighting play in the design?
A: Layered lighting including pendant lights, recessed lighting, and under-cabinet illumination adds warmth, visibility, and a polished finish.
Q: What’s the overall style of this remodel?
A: A clean, modern look with timeless elements that perfectly balancing style, comfort, and long-term value.
Q: What’s the biggest takeaway from this project?
A: A well-designed kitchen isn’t just about looks it’s about creating a space that works beautifully for how you live.
Thinking about transforming your kitchen? Let’s talk.
 Closet Factory
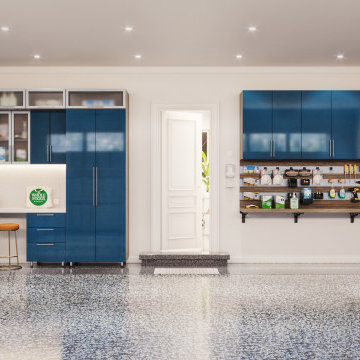
Our modern blue garage is the perfect way to remodel your space. Packed with ample storage solutions such as shelves, cabinets, and drawers all of your tools and things will have a home.
Each portion of the built-in storage is customizable to your exact wants and needs. We can bring your ideas to life. Store your bike out of the way leaving extra room for your car!
 Rutt Quality Cabinetry
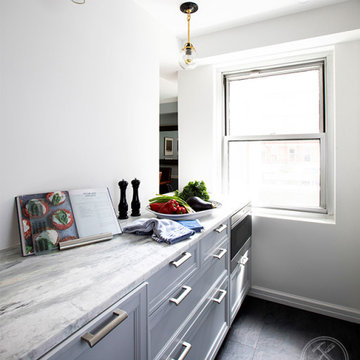
This New York City home makes great use of space with a white kitchen packed with custom storage solutions from Rutt.
DOOR: Exeter
WOOD SPECIES: Paint Grade
FINISH: Custom Paint
design by MCK+B | photos by Costas Picadas
 Lincoln Lighthill Architect
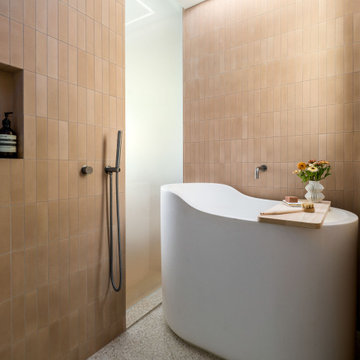
This project is a story of how buildings and relationships evolve over time, and how the two are intertwined in the making of architecture.
The client, a single man, had just purchased a classic Edwardian flat on San Francisco’s Liberty Street, known for its historic homes and famous neighbors like Tracy Chapman, when his realtor connected him with LLA. The initial brief was to integrate a modern, minimalist kitchen and bathroom with the apartment's traditional aesthetic. The existing condition was a series of cramped rooms and a long hallway that divided the apartment into many separate spaces, some without natural light.
The solution was to remove most of the walls in the middle of the flat, with extensive structural work hidden from view. This created an open connection between the living, dining and kitchen areas that flooded the formerly dark core of the apartment with light.
Midway through the design process, the client and his partner, and avid cook, decided it was time to move in together. The project evolved further and LLA found inventive ways to pack more features and amenities into a design that was fundamentally about simplicity.
The result of this creative tension is a large open kitchen with deceptively simple forms- a long back counter with three rows of drawers below, an island with a central cooktop and double cantilevers for seating, and a slightly mysterious wood box at the back. The box conceals the refrigerator, storage, linens, and laundry, and through a secret door, a large walk-in pantry.
The bathroom evolved into a mini-spa, with a walk-through shower and Japanese-style soaking tub. The space shares light with the kitchen through a floor-to-ceiling translucent glass panel. Each client has a large dog, and so a small sliver of space under the upstairs neighbor's stair was turned into the perfect doggie den, complete with period correct doorway.
The newly blended family moved in together when the project was completed. A poignant footnote, Maverick, the blonder, fluffier dog in the photos, was very old and sadly passed away shortly after they moved in. It made the photoshoot feel like a special event that honored and preserved his memory in pictures. Like all families, theirs continues to evolve and change, just as their home has over its 90 year life.
 Visbeen Architects
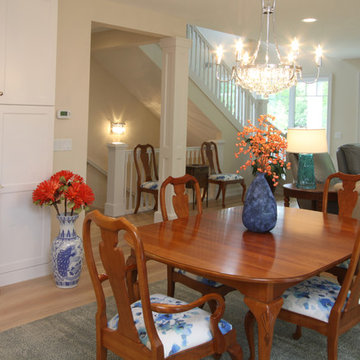
Function meets fashion in this relaxing retreat inspired by turn-of-the-century cottages. Perfect for a lot with limited space or a water view, this delightful design packs ample living into an open floor plan spread out on three levels. Elements of classic farmhouses and Craftsman-style bungalows can be seen in the updated exterior, which boasts shingles, porch columns, and decorative venting and windows. Inside, a covered front porch leads into an entry with a charming window seat and to the centrally located 17 by 12-foot kitchen. Nearby is an 11 by 15-foot dining and a picturesque outdoor patio. On the right side of the more than 1,500-square-foot main level is the 14 by 18-foot living room with a gas fireplace and access to the adjacent covered patio where you can enjoy the changing seasons. Also featured is a convenient mud room and laundry near the 700-square-foot garage, a large master suite and a handy home management center off the dining and living room. Upstairs, another approximately 1,400 square feet include two family bedrooms and baths, a 15 by 14-foot loft dedicated to music, and another area designed for crafts and sewing. Other hobbies and entertaining aren’t excluded in the lower level, where you can enjoy the billiards or games area, a large family room for relaxing, a guest bedroom, exercise area and bath.
Photographers: Ashley Avila Photography
Pat Chambers
Builder: Bouwkamp Builders, Inc.
 Rainbow Shaker
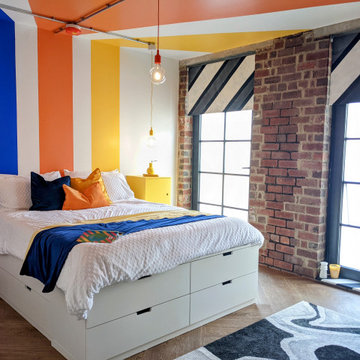
Step inside my vibrant, dopamine-filled transformations from Channel 4’s The Big Interiors Battle! ?✨ From a bold geometric bedroom to a quirky pink & orange bathroom (complete with a dinosaur toilet paper holder!) and a colourful, functional kitchen makeover, each space is packed with playful design, statement colours, and creative storage solutions. These fearless interiors blend maximalist style with practicality, proving that home design should be as fun as it is functional!
 Chicology
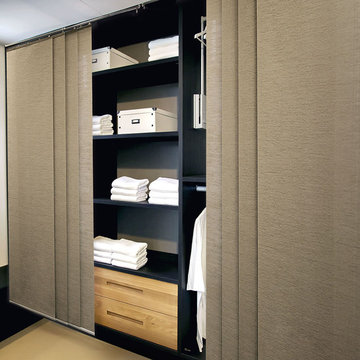
Chicology Adjustable Sliding Panels are optimal for bringing modern style and elegance into any home. Highly versatile, they are perfect for everything from patio and French doors to room dividers and closet doors.
Available in a variety of natural woven materials and fabrics, they are stylish, cost effective solutions. Pick a material rich in texture to inspire a feeling of exploration or opt for a smooth fabric perfect for a minimalist design. They are modern day answer to vertical blinds, with wider fabric panels, free of clacking sounds.
Designed with the customer in mind, we made installation a breeze. Included in the packing is all the hardware for ceiling and wall installation, and inside and outside frame mounts. The telescopic track is adjustable anywhere from 44 to 80-inches wide. For wider needs, two tracks can be installed next to each other for a seamless appearance. Each of the four panels are 22-inches wide and 96 inches tall. Simply trim the panel height to what you need and install the bottom rails for a custom-look finish. Built cordless with a smooth track, these panels can open from right to left, left to right, and right down the center. Our cordless panels are safe for young children and pets.
Measurement: Customizable Size. This product is adjustable in both Width and Height. Width is adjustable from 44" to 80". Height is trimmable up to a maximum of 96".
 Rainbow Shaker
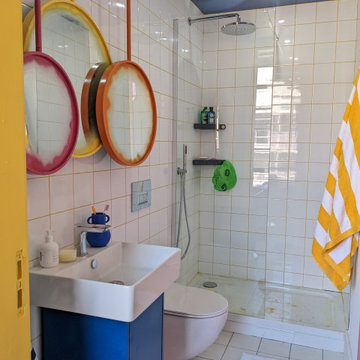
Step inside my vibrant, dopamine-filled transformations from Channel 4’s The Big Interiors Battle! ?✨ From a bold geometric bedroom to a quirky pink & orange bathroom (complete with a dinosaur toilet paper holder! ?) and a colourful, functional kitchen makeover, each space is packed with playful design, statement colours, and creative storage solutions. These fearless interiors blend maximalist style with practicality, proving that home design should be as fun as it is functional!
 Greenington LLC
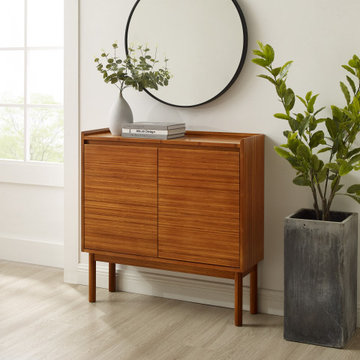
Greenington’s Mira console features clean lines of modern design and highlights the vibrant colors of solid Amber bamboo. Tall slim legs and recessed pulls give a nod to its mid-century inspiration. Mira’s tailored profile and streamlined shape works with any look, and make it an easy storage solution that fits where space is a premium. Environmentally safe, Amber is not a surface stain, the color is the result of an innovative caramelization process using heat, steam, and pressure to transform the solid bamboo material into Amber’s splendid array of colors. Discover the expert craftsmanship packed into each piece of Greenington bamboo furniture, made using a renewable resource harvested from fully sustainable and rapidly growing forests.
 Kitchen Culture Cambridgeshire
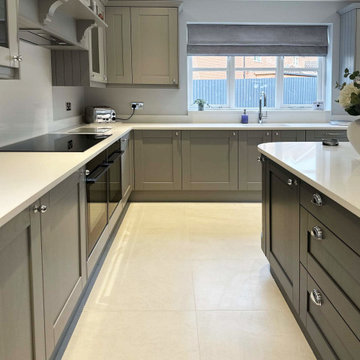
This stunning kitchen transformation in Papworth Everard makes the most of Crown’s latest colours with clever storage and top-spec finishes throughout.
For this project, the goal was a full kitchen refresh – something that felt modern, well-built and practical for everyday use. From layout to colour, every detail was carefully chosen to suit the home and the people living in it.
We used Crown Imperial’s Midsomer range in their newly launched Dove Grey and Mercury colours – likely making these clients the first in the UK to enjoy the updated larder door palette. It’s a soft, timeless combination that gives the kitchen a clean, fresh look with just the right amount of depth.
This kitchen is more than just good looking as it’s packed with clever solutions to keep everything neat and organised. Blum Space Towers and Nuvola corner pullouts help maximise every inch of space, while Cimstone Sierra Quartz worktops, Franke sinks, a Quooker Flex tap, and NEFF appliances bring both durability and everyday ease.
We managed the full installation, bringing in trusted partners to get every part just right. That included plumbing, electrics (with T24 Electrical), plastering, flooring from Mandarin Stone, and worktops by The Marble Group. Everything handled, all the way through.
This kitchen feels special – not just for how it looks, but because of the thought that’s gone into every decision. With the latest Crown colours, quality materials, and a layout that just works, it’s a real upgrade for a beautiful home.
24