
Search results for "Start realizing" in Home Design Ideas
 Inspired Closets Baton Rouge
One morning, you’re starting your day as you normally would. Then you take a look at your closet, and it’s all the same.
There’s not much room for anything, and everything is a mess.
That was the daily routine for Mary, one of our recent Baton Rouge clients, until she decided she had finally had enough.
Little to No Closet Space: The Start of a Solution
Mary and her family moved into their new home in 2020, and they quickly realized they had had little to no closet space. Knowing that she needed that space for herself, she was inspired and wanted to see if she could turn a 10x12 office in her home into a closet.
Mary took charge and found us through an online search for closet installations, and she decided to give us a call. After speaking with our expert designer Felicity and sharing some photos she saw online, she decided to trust us with her closet installation.
“We had an instant connection and relationship,” Mary said. “Felicity was so down-to-earth and personable that a relationship was built immediately.”
Get the Ball Rolling: Designing and Constructing the Closet
Mary thought that the process was beautiful and simple. Felicity provided a 3D interactive design of the project and based it on Mary’s needs.
Mary said, “It felt like she was trying to accommodate my needs by using her knowledge of what I would need in my closet. It felt very natural.”
Felicity had a contractor she worked with closely. Together, they handled the project in two days, even with the crown molding that needed to be removed for the projected closet cabinets to reach the ceiling.
Once we finished, Mary was amazed at how quickly we finished the closet.
The Final Product: When Fashion and Functionality Work Together
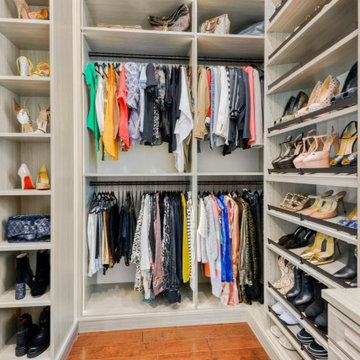
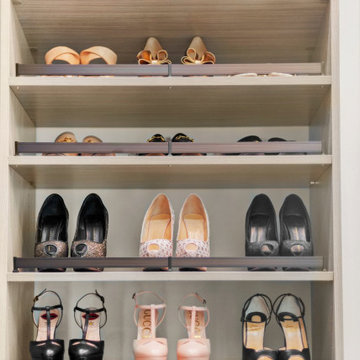
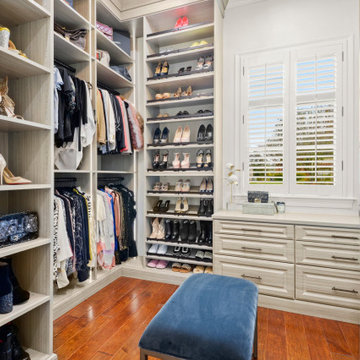
“I love how everything has a place, is very organized, and can all be seen very quickly,” Mary said. Along with the closet’s functionality, Mary loves that her closet looks like a boutique showroom.
We were able to bring fashion and functionality to this closet with:
Showroom lights; makes it look more like a boutique rather than a closet
Hidden hamper
Separate space to see her purses and shoes
Jewelry drawer
Display cabinet for belts and scarves
Small closet for her four-year-old daughter to put her items in
See for yourself!
Saving Time and Stress Through The Day
Now Mary has cut down on both her time and wardrobe. Thanks to her new closet, finding an outfit each day is “quick and easy.”
She even entertains guests in her closet space, thanks to the showroom look we gave her closet.
What makes it better? The small closet inside helps her daughter find her things and keep organized.
Let Us Make Your Dreams Come True
Our work has Mary making plans to work with us for the future. She is already planning to convert another room into a closet, design her pantry, and renovate her garage.
Let us help you achieve your dream pantry, laundry room, or even a closet space like Mary’s!
 Inspired Closets Baton Rouge
One morning, you’re starting your day as you normally would. Then you take a look at your closet, and it’s all the same.
There’s not much room for anything, and everything is a mess.
That was the daily routine for Mary, one of our recent Baton Rouge clients, until she decided she had finally had enough.
Little to No Closet Space: The Start of a Solution
Mary and her family moved into their new home in 2020, and they quickly realized they had had little to no closet space. Knowing that she needed that space for herself, she was inspired and wanted to see if she could turn a 10x12 office in her home into a closet.
Mary took charge and found us through an online search for closet installations, and she decided to give us a call. After speaking with our expert designer Felicity and sharing some photos she saw online, she decided to trust us with her closet installation.
“We had an instant connection and relationship,” Mary said. “Felicity was so down-to-earth and personable that a relationship was built immediately.”
Get the Ball Rolling: Designing and Constructing the Closet
Mary thought that the process was beautiful and simple. Felicity provided a 3D interactive design of the project and based it on Mary’s needs.
Mary said, “It felt like she was trying to accommodate my needs by using her knowledge of what I would need in my closet. It felt very natural.”
Felicity had a contractor she worked with closely. Together, they handled the project in two days, even with the crown molding that needed to be removed for the projected closet cabinets to reach the ceiling.
Once we finished, Mary was amazed at how quickly we finished the closet.
The Final Product: When Fashion and Functionality Work Together
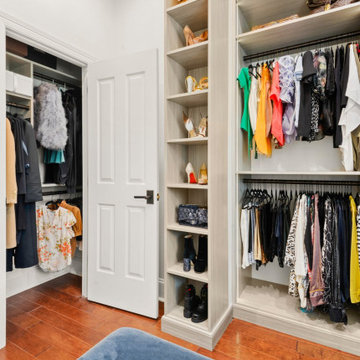
“I love how everything has a place, is very organized, and can all be seen very quickly,” Mary said. Along with the closet’s functionality, Mary loves that her closet looks like a boutique showroom.
We were able to bring fashion and functionality to this closet with:
Showroom lights; makes it look more like a boutique rather than a closet
Hidden hamper
Separate space to see her purses and shoes
Jewelry drawer
Display cabinet for belts and scarves
Small closet for her four-year-old daughter to put her items in
See for yourself!
Saving Time and Stress Through The Day
Now Mary has cut down on both her time and wardrobe. Thanks to her new closet, finding an outfit each day is “quick and easy.”
She even entertains guests in her closet space, thanks to the showroom look we gave her closet.
What makes it better? The small closet inside helps her daughter find her things and keep organized.
Let Us Make Your Dreams Come True
Our work has Mary making plans to work with us for the future. She is already planning to convert another room into a closet, design her pantry, and renovate her garage.
Let us help you achieve your dream pantry, laundry room, or even a closet space like Mary’s!
 User
UserIn the heart of Cottingham Street, a journey began—an endeavor to transform a tired, outdated kitchen into a space of modern charm and functional elegance. It all started with a dream, perhaps born over Sunday breakfast conversations or inspired by glossy magazine spreads. You imagined more than just a room; you envisioned a hub, a place where culinary creativity and family gatherings intertwine seamlessly.
First came the consultations, where ideas danced between you and skilled designers, each conversation weaving threads of imagination and practicality. With blueprints in hand and dreams in mind, you ventured into the world of permits and regulations, navigating the bureaucratic maze to ensure your vision could take shape within the constraints of the law.
Demolition day arrived with a symphony of hammers and saws, marking the end of an era and the dawn of a new one. Out went the old, worn cabinets and outdated appliances, making space for the promise of something fresh and exciting. Dust danced in the sunlight filtering through the windows, a metaphor for the transformation unfolding before your eyes.
Amidst the rubble, craftsmen toiled, laying the groundwork for your culinary sanctuary. Pipes were rerouted, wires reconfigured, and walls reshaped, each task bringing you closer to the realization of your dream. It was a dance of precision and expertise, a symphony of progress conducted by skilled hands.
And then, like magic, the pieces began to fall into place. Cabinets rose from the floor like sentinels of style, countertops gleamed with the promise of countless meals shared, and appliances hummed with the anticipation of culinary adventures yet to come. Light flooded the space, casting shadows of possibility across every surface.
With a fresh coat of paint and a flourish of finishing touches, your kitchen emerged from its cocoon of renovation, transformed into a space that felt uniquely yours. It was more than just a room; it was a reflection of your personality, your taste, and your vision for the future.
As the final inspections were conducted and the last details attended to, you stood in the doorway of your new kitchen, a smile spreading across your face. Here, in this space of beauty and functionality, memories would be made, meals shared, and laughter echoed off the walls. It was a journey from start to finish, a testament to the power of vision and the magic of transformation. And it all began on Cottingham Street.
Find the right local pro for your project
 Inspired Closets Baton Rouge
One morning, you’re starting your day as you normally would. Then you take a look at your closet, and it’s all the same.
There’s not much room for anything, and everything is a mess.
That was the daily routine for Mary, one of our recent Baton Rouge clients, until she decided she had finally had enough.
Little to No Closet Space: The Start of a Solution
Mary and her family moved into their new home in 2020, and they quickly realized they had had little to no closet space. Knowing that she needed that space for herself, she was inspired and wanted to see if she could turn a 10x12 office in her home into a closet.
Mary took charge and found us through an online search for closet installations, and she decided to give us a call. After speaking with our expert designer Felicity and sharing some photos she saw online, she decided to trust us with her closet installation.
“We had an instant connection and relationship,” Mary said. “Felicity was so down-to-earth and personable that a relationship was built immediately.”
Get the Ball Rolling: Designing and Constructing the Closet
Mary thought that the process was beautiful and simple. Felicity provided a 3D interactive design of the project and based it on Mary’s needs.
Mary said, “It felt like she was trying to accommodate my needs by using her knowledge of what I would need in my closet. It felt very natural.”
Felicity had a contractor she worked with closely. Together, they handled the project in two days, even with the crown molding that needed to be removed for the projected closet cabinets to reach the ceiling.
Once we finished, Mary was amazed at how quickly we finished the closet.
The Final Product: When Fashion and Functionality Work Together
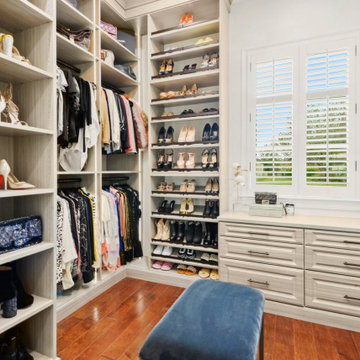
“I love how everything has a place, is very organized, and can all be seen very quickly,” Mary said. Along with the closet’s functionality, Mary loves that her closet looks like a boutique showroom.
We were able to bring fashion and functionality to this closet with:
Showroom lights; makes it look more like a boutique rather than a closet
Hidden hamper
Separate space to see her purses and shoes
Jewelry drawer
Display cabinet for belts and scarves
Small closet for her four-year-old daughter to put her items in
See for yourself!
Saving Time and Stress Through The Day
Now Mary has cut down on both her time and wardrobe. Thanks to her new closet, finding an outfit each day is “quick and easy.”
She even entertains guests in her closet space, thanks to the showroom look we gave her closet.
What makes it better? The small closet inside helps her daughter find her things and keep organized.
Let Us Make Your Dreams Come True
Our work has Mary making plans to work with us for the future. She is already planning to convert another room into a closet, design her pantry, and renovate her garage.
Let us help you achieve your dream pantry, laundry room, or even a closet space like Mary’s!
 Inspired Closets Baton Rouge
One morning, you’re starting your day as you normally would. Then you take a look at your closet, and it’s all the same.
There’s not much room for anything, and everything is a mess.
That was the daily routine for Mary, one of our recent Baton Rouge clients, until she decided she had finally had enough.
Little to No Closet Space: The Start of a Solution
Mary and her family moved into their new home in 2020, and they quickly realized they had had little to no closet space. Knowing that she needed that space for herself, she was inspired and wanted to see if she could turn a 10x12 office in her home into a closet.
Mary took charge and found us through an online search for closet installations, and she decided to give us a call. After speaking with our expert designer Felicity and sharing some photos she saw online, she decided to trust us with her closet installation.
“We had an instant connection and relationship,” Mary said. “Felicity was so down-to-earth and personable that a relationship was built immediately.”
Get the Ball Rolling: Designing and Constructing the Closet
Mary thought that the process was beautiful and simple. Felicity provided a 3D interactive design of the project and based it on Mary’s needs.
Mary said, “It felt like she was trying to accommodate my needs by using her knowledge of what I would need in my closet. It felt very natural.”
Felicity had a contractor she worked with closely. Together, they handled the project in two days, even with the crown molding that needed to be removed for the projected closet cabinets to reach the ceiling.
Once we finished, Mary was amazed at how quickly we finished the closet.
The Final Product: When Fashion and Functionality Work Together
“I love how everything has a place, is very organized, and can all be seen very quickly,” Mary said. Along with the closet’s functionality, Mary loves that her closet looks like a boutique showroom.
We were able to bring fashion and functionality to this closet with:
Showroom lights; makes it look more like a boutique rather than a closet
Hidden hamper
Separate space to see her purses and shoes
Jewelry drawer
Display cabinet for belts and scarves
Small closet for her four-year-old daughter to put her items in
See for yourself!
Saving Time and Stress Through The Day
Now Mary has cut down on both her time and wardrobe. Thanks to her new closet, finding an outfit each day is “quick and easy.”
She even entertains guests in her closet space, thanks to the showroom look we gave her closet.
What makes it better? The small closet inside helps her daughter find her things and keep organized.
Let Us Make Your Dreams Come True
Our work has Mary making plans to work with us for the future. She is already planning to convert another room into a closet, design her pantry, and renovate her garage.
Let us help you achieve your dream pantry, laundry room, or even a closet space like Mary’s!

 Dallas Builders Association
We’re spending more time at home than ever — so shouldn't it be a space that you thrive in? When your home is designed the way you want it, you’ll enjoy a better mood, better relationships, and so much more.
At Urban Loop Studio, we guide you on the journey to your dream home — and have multiple 5-star reviews to prove it. Take the first step now, and schedule a complimentary consultation with us.
This week’s home of the week is seated in one of the most opulent neighborhoods in Dallas, TX. This gem is the epitome of luxury.
This 9,521 sqft home sits on a 16,334 sqft lot with 1,468 sqft of backyard amenities.
It includes a piano room to entertain guests, a luggage room to prepare for packing and unpacking for travels that includes an 8’ long countertop space to place suitcases and one of the largest closets in Texas, if not the largest closet. There is a separate kitchen for baking, where the best mini chocolate chip cookies are baked to one’s delight. This opulent home has ultra luxury kitchen cabinets from Poggen Pohl, and the most beautiful courtyard area with a pool and fountains.
Get jealous or inspired, either way, this home is an obsession. We partnered with DoBa in working on this project and many other experts to bring this home into a reality.
So what are you waiting for?
You can stop the monotony of searching aimlessly on the MLS and avoid bidding wars by getting what you want in the first place. You can realize your DREAM home in as little as 2 months, starting at $300/ sqft for new construction and $295/sqft for remodels.
You deserve a home that is designed as a reflection of your soul.
What’s stopping you?
A family home isn’t just rooms that the family members eat, sleep, and settle in: it’s where the children grow up, and where precious moments of true connection are born and turned into timeless memories, stories that warm the heart.
Our homes are a true reflection of who we are, and a house isn’t a home until it holds a piece of its resident’s desires’ in every corner of every room.
Your home. It’s where you rest, play, and make memories — and for many of us, it’s where we work. We’re spending more time at home than ever — so shouldn't it be a space that you and your loved ones thrive in?
I’m Poonam Patel, and I’m here to tell you that it absolutely can and should be. And when your home is designed the way you want it, you’ll enjoy a better mood, better relationships, and so much more.
At Urban Loop Studio, we guide you on the journey to your dream home. Our goal is simple: to get your home to bring out the best in you — and everyone under your roof.
We’ll assist with your remodel, new construction, or design project. And we have the 5-star reviews to prove that we’re the premium home design studio you’re looking for.
Your dream home is closer than you think. Take the first step now, and schedule a complimentary 15-minute consultation with us, or
Take the first step by Downloading your complimentary project onboarding Start-up kit at https://www.urbanloopstudio.com/dreamhomestartupkit
This Home of the Week is presented by the Dallas Builders Association. For information on the Association please visit www.dallasbuilders.com.
 Inspired Closets Baton Rouge
One morning, you’re starting your day as you normally would. Then you take a look at your closet, and it’s all the same.
There’s not much room for anything, and everything is a mess.
That was the daily routine for Mary, one of our recent Baton Rouge clients, until she decided she had finally had enough.
Little to No Closet Space: The Start of a Solution
Mary and her family moved into their new home in 2020, and they quickly realized they had had little to no closet space. Knowing that she needed that space for herself, she was inspired and wanted to see if she could turn a 10x12 office in her home into a closet.
Mary took charge and found us through an online search for closet installations, and she decided to give us a call. After speaking with our expert designer Felicity and sharing some photos she saw online, she decided to trust us with her closet installation.
“We had an instant connection and relationship,” Mary said. “Felicity was so down-to-earth and personable that a relationship was built immediately.”
Get the Ball Rolling: Designing and Constructing the Closet
Mary thought that the process was beautiful and simple. Felicity provided a 3D interactive design of the project and based it on Mary’s needs.
Mary said, “It felt like she was trying to accommodate my needs by using her knowledge of what I would need in my closet. It felt very natural.”
Felicity had a contractor she worked with closely. Together, they handled the project in two days, even with the crown molding that needed to be removed for the projected closet cabinets to reach the ceiling.
Once we finished, Mary was amazed at how quickly we finished the closet.
The Final Product: When Fashion and Functionality Work Together
“I love how everything has a place, is very organized, and can all be seen very quickly,” Mary said. Along with the closet’s functionality, Mary loves that her closet looks like a boutique showroom.
We were able to bring fashion and functionality to this closet with:
Showroom lights; makes it look more like a boutique rather than a closet
Hidden hamper
Separate space to see her purses and shoes
Jewelry drawer
Display cabinet for belts and scarves
Small closet for her four-year-old daughter to put her items in
See for yourself!
Saving Time and Stress Through The Day
Now Mary has cut down on both her time and wardrobe. Thanks to her new closet, finding an outfit each day is “quick and easy.”
She even entertains guests in her closet space, thanks to the showroom look we gave her closet.
What makes it better? The small closet inside helps her daughter find her things and keep organized.
Let Us Make Your Dreams Come True
Our work has Mary making plans to work with us for the future. She is already planning to convert another room into a closet, design her pantry, and renovate her garage.
Let us help you achieve your dream pantry, laundry room, or even a closet space like Mary’s!
 Urban Treehouse
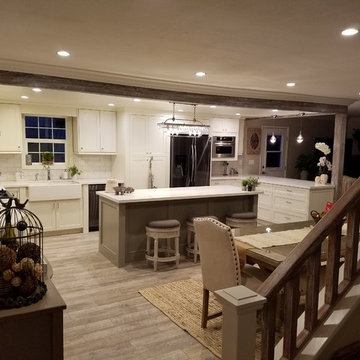
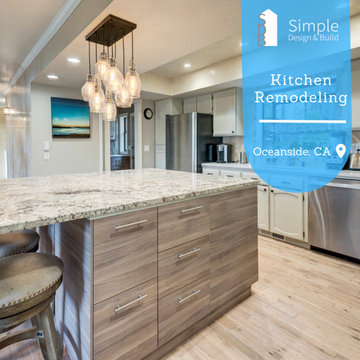
Example of a mid-sized farmhouse l-shaped light wood floor and brown floor enclosed kitchen design in Los Angeles with a farmhouse sink, shaker cabinets, white cabinets, quartz countertops, white backsplash, subway tile backsplash, stainless steel appliances and an island
 Floriana Interiors
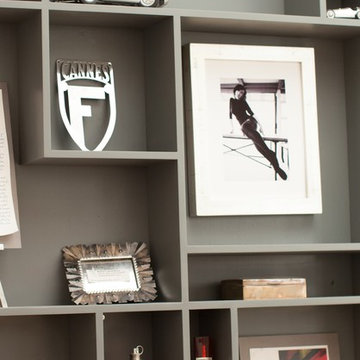
Design : Floriana Petersen, Floriana Interiors,
Photo : Steve Werney
Home office - eclectic home office idea in San Francisco
Home office - eclectic home office idea in San Francisco
 User
UserIn the heart of Cottingham Street, a journey began—an endeavor to transform a tired, outdated kitchen into a space of modern charm and functional elegance. It all started with a dream, perhaps born over Sunday breakfast conversations or inspired by glossy magazine spreads. You imagined more than just a room; you envisioned a hub, a place where culinary creativity and family gatherings intertwine seamlessly.
First came the consultations, where ideas danced between you and skilled designers, each conversation weaving threads of imagination and practicality. With blueprints in hand and dreams in mind, you ventured into the world of permits and regulations, navigating the bureaucratic maze to ensure your vision could take shape within the constraints of the law.
Demolition day arrived with a symphony of hammers and saws, marking the end of an era and the dawn of a new one. Out went the old, worn cabinets and outdated appliances, making space for the promise of something fresh and exciting. Dust danced in the sunlight filtering through the windows, a metaphor for the transformation unfolding before your eyes.
Amidst the rubble, craftsmen toiled, laying the groundwork for your culinary sanctuary. Pipes were rerouted, wires reconfigured, and walls reshaped, each task bringing you closer to the realization of your dream. It was a dance of precision and expertise, a symphony of progress conducted by skilled hands.
And then, like magic, the pieces began to fall into place. Cabinets rose from the floor like sentinels of style, countertops gleamed with the promise of countless meals shared, and appliances hummed with the anticipation of culinary adventures yet to come. Light flooded the space, casting shadows of possibility across every surface.
With a fresh coat of paint and a flourish of finishing touches, your kitchen emerged from its cocoon of renovation, transformed into a space that felt uniquely yours. It was more than just a room; it was a reflection of your personality, your taste, and your vision for the future.
As the final inspections were conducted and the last details attended to, you stood in the doorway of your new kitchen, a smile spreading across your face. Here, in this space of beauty and functionality, memories would be made, meals shared, and laughter echoed off the walls. It was a journey from start to finish, a testament to the power of vision and the magic of transformation. And it all began on Cottingham Street.
 Tile Doctor Ltd
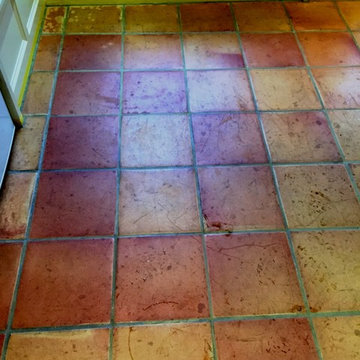
The before picture below was actually taken after another cleaning company had come in to clean these Terracotta floor tiles for a client in the city of Oxford; well what can I say except they then called Tile Doctor.
I started by doing a test on a small area and realised that I could strip the remaining sealer from the floor with a strong dilution of Tile Doctor Pro Clean which is also an effective cleaner and safe to use on stone and tiled floors. So I diluted Pro Clean with warm water and spread this on the floor leaving it to dwell for twenty minutes before scrubbing it in with a black pad fitted to my Rocky floor machine. This worked very well on the floor and the cleaning solution was soon dirty with the released soil which was removed using a wet vacuum and more water to rinse it away and dry the floor as much as possible.
Satisfied that the floor was now as clean as it could be I left for the day and returned the next day to seal the floor, first checking that the tiles were dry and ready to be sealed.
Sealing was done in two stages starting with an initial coat of Tile Doctor Colour Grow which is an impregnating sealer that adds life to the natural colours in the tiles and gives the floor a good base for the next sealer. The second stage was to apply a few coats of Tile Doctor Seal & Go which builds up a surface seal that leaves a nice sheen to the floor as requested by the customer.
 JLK Interiors, Design & Project Management
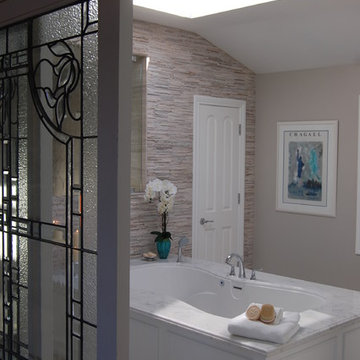
Inspiration for a large transitional master gray tile and stone tile porcelain tile double shower remodel in Los Angeles with raised-panel cabinets, white cabinets, an undermount tub, a one-piece toilet, gray walls, an undermount sink and marble countertops
 Design Vision Studio
Erik Grammer Photography -
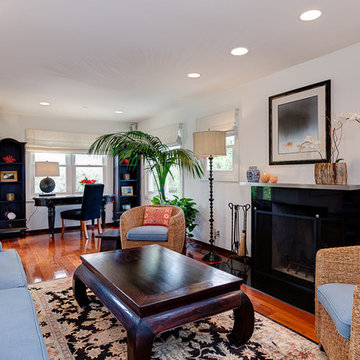
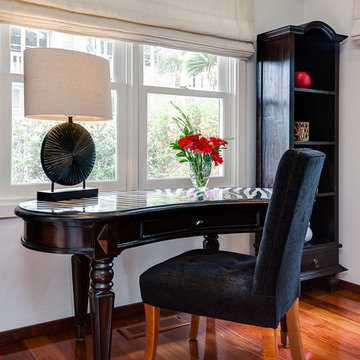
I recently came across a post on Facebook with a photo of an elderly couple with a quote saying "We were born in a time when if something was broken we would fix it, not throw it away..." This quote resonated with me. I found myself thinking of it while working on the same house - for the fourth time. I affectionately call this beautiful Southern California beach house the Humpty Dumpty home.
I started a wonderful business relationship with one of my favorite clients back in 2003. Initially, I was called in to "fix" and finish what another designer started. Once completed and with everything just so, the couple unfortunately divorced and amicably divided the art, rugs and furnishings. I was hired for a second time to recreate each room as close as possible to replace all items that were missing.
The house was happily restored back to the original design and all was well for a few years. My client relocated to the East Coast for a temporary job assignment and the house was rented to a person (whose name I can't say) from a famous all-girl band. During this time there was a problem with the upstairs laundry room and water damage occurred. I was hired for the third time to help repair and update (ever so slightly) some areas in the house. My client requested to keep the design and feeling of the house intact because he loved it so much.
A few years passed before a pipe broke in the master bathroom while the new renter was out of town on vacation. Unfortunately, things like this do happen - and if not attended to quickly, major damage can occur. In this case, nearly the entire house was flooded requiring it to be completely gutted and stripped down to the floorboards and studs. In January of this year, I was hired to help the client, the insurance company, and the contractor put the house back together again. But unlike the Humpty Dumpty story, this house has actually been put back together again - several times over.
Although, this house and client have experienced some challenges, I say this is a perfect example of design success. My client has had many opportunities to change and create something new in his environment with every mis-adventure. Instead, he realizes his home is exactly the way he likes it. It has been such an honor to work with this man who is definitive, trusting, and confident enough to create (or re-create) the perfect home that "fits" his personality and lifestyle.
Although this Humpty Dumpty home has been good for my business, I hope the next project with this client is to decorate another property - perhaps a New York City Apartment!
 Design Vision Studio
Erik Grammer Photography -
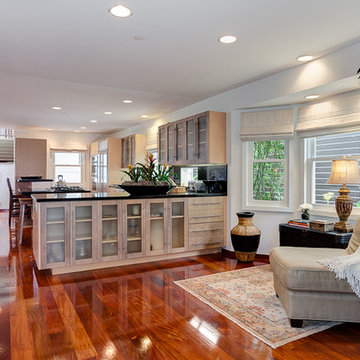
I recently came across a post on Facebook with a photo of an elderly couple with a quote saying "We were born in a time when if something was broken we would fix it, not throw it away..." This quote resonated with me. I found myself thinking of it while working on the same house - for the fourth time. I affectionately call this beautiful Southern California beach house the Humpty Dumpty home.
I started a wonderful business relationship with one of my favorite clients back in 2003. Initially, I was called in to "fix" and finish what another designer started. Once completed and with everything just so, the couple unfortunately divorced and amicably divided the art, rugs and furnishings. I was hired for a second time to recreate each room as close as possible to replace all items that were missing.
The house was happily restored back to the original design and all was well for a few years. My client relocated to the East Coast for a temporary job assignment and the house was rented to a person (whose name I can't say) from a famous all-girl band. During this time there was a problem with the upstairs laundry room and water damage occurred. I was hired for the third time to help repair and update (ever so slightly) some areas in the house. My client requested to keep the design and feeling of the house intact because he loved it so much.
A few years passed before a pipe broke in the master bathroom while the new renter was out of town on vacation. Unfortunately, things like this do happen - and if not attended to quickly, major damage can occur. In this case, nearly the entire house was flooded requiring it to be completely gutted and stripped down to the floorboards and studs. In January of this year, I was hired to help the client, the insurance company, and the contractor put the house back together again. But unlike the Humpty Dumpty story, this house has actually been put back together again - several times over.
Although, this house and client have experienced some challenges, I say this is a perfect example of design success. My client has had many opportunities to change and create something new in his environment with every mis-adventure. Instead, he realizes his home is exactly the way he likes it. It has been such an honor to work with this man who is definitive, trusting, and confident enough to create (or re-create) the perfect home that "fits" his personality and lifestyle.
Although this Humpty Dumpty home has been good for my business, I hope the next project with this client is to decorate another property - perhaps a New York City Apartment!
 Design Vision Studio
Erik Grammer Photography -
I recently came across a post on Facebook with a photo of an elderly couple with a quote saying "We were born in a time when if something was broken we would fix it, not throw it away..." This quote resonated with me. I found myself thinking of it while working on the same house - for the fourth time. I affectionately call this beautiful Southern California beach house the Humpty Dumpty home.
I started a wonderful business relationship with one of my favorite clients back in 2003. Initially, I was called in to "fix" and finish what another designer started. Once completed and with everything just so, the couple unfortunately divorced and amicably divided the art, rugs and furnishings. I was hired for a second time to recreate each room as close as possible to replace all items that were missing.
The house was happily restored back to the original design and all was well for a few years. My client relocated to the East Coast for a temporary job assignment and the house was rented to a person (whose name I can't say) from a famous all-girl band. During this time there was a problem with the upstairs laundry room and water damage occurred. I was hired for the third time to help repair and update (ever so slightly) some areas in the house. My client requested to keep the design and feeling of the house intact because he loved it so much.
A few years passed before a pipe broke in the master bathroom while the new renter was out of town on vacation. Unfortunately, things like this do happen - and if not attended to quickly, major damage can occur. In this case, nearly the entire house was flooded requiring it to be completely gutted and stripped down to the floorboards and studs. In January of this year, I was hired to help the client, the insurance company, and the contractor put the house back together again. But unlike the Humpty Dumpty story, this house has actually been put back together again - several times over.
Although, this house and client have experienced some challenges, I say this is a perfect example of design success. My client has had many opportunities to change and create something new in his environment with every mis-adventure. Instead, he realizes his home is exactly the way he likes it. It has been such an honor to work with this man who is definitive, trusting, and confident enough to create (or re-create) the perfect home that "fits" his personality and lifestyle.
Although this Humpty Dumpty home has been good for my business, I hope the next project with this client is to decorate another property - perhaps a New York City Apartment!

 Bill Fry Construction - Wm. H. Fry Const. Co.
Covid During Construction and Making Face Masks
Dear Houzz Folks,
We've started getting back to work and are educating everyone at our projects on how to be safe during COVID, posting signage, and we've been making masks for our employees, colleagues, friends, family etc... Here's some information on what I've learned so far in sewing the best fitting face mask for COVID.
1. Put in a wire at the nose bridge (about 3.5 inches) - it helps with fit and if you wear glasses, it keeps them from fogging up. I found that doorbell wire, available at the hardware store, seems to work well. It isn't too thin or too fat, bends easily and holds its shape. I attach it by using a zigzag stitch on the interior seam of the outside of the mask (so there's a bit more cushion on the inside).
2. For the shaped masks, I make a pocket in case my friends, family, colleagues, want to insert a filter - it also allows for three layers of fabric in the breathing area and less bulk where the ties go. For patterns that don't offer pockets, I just make my own pattern pocket. I also first baste the two inside pieces first and then sew the front on. This way, there's no worries about slipping. No pins are needed and no pins minimizes the number of extra air holes in the fabric.
3. So that the ties/loops can be replaced or modified, I make a channel for rather than sewing it in permanently. Many videos show using a safety pin to pull the elastic through. If you sew much, you might have a bodkin in your sewing box, but it might be a bit too wide. Instead, I use a long hairpin (you could probably make a long loop with a paper clip). I run the hairpin through the channel, loop the elastic through the end of the pin and pull through. That takes much less time than piercing it with a safety-pin.
4. For the inside of the masks, it is nice to have softer fabric inside, so high-thread-count sheets purchased on sale work great. Then you can easily tell what is inside as well.
5. For surgical-style masks, there's a pattern with a pocket on the inside and a wire. I like the ideas in this video but use 2 fabrics and make them bigger. About a 9x9 inch for the outside and 9x8 inch for the inside. 5/8 seam on the nose and 1/4 seam on the bottom.
6. For the fitted masks, there are two patterns that I like. For this one, https://moinliz.de/mundschutz-naehen-mit-schnittmuster it expects you to print on European-sized paper, so if you want to get the size right, print at 100%
I also really like this pattern and I added a pocket and lengthened the ends to make channels https://intermountainhealthcare.org/covid19-coronavirus/homemade-cloth-face-coverings/ (scroll down to a link to download the pdf) Lots of folks sew craftpassion, but I like the fit of these patterns better. There are still some other patterns I have left to try!
6. After breaking lots of needles, I realized that I really didn't need to topstich the fitted masks over the bridge, so I just started skipping the bridge.
7. If you're going to wear a face-covering for a really long time, you might want to skip the ear hangers and go for ties behind the head. Instead of two ties, I'll use one long one so that the bottom one is a loop and the top one ties. Bungee cord works nice.
Happy Sewing!
: ) Rhoda Fry, Bill Fry Construction
 User
UserIn the heart of Cottingham Street, a journey began—an endeavor to transform a tired, outdated kitchen into a space of modern charm and functional elegance. It all started with a dream, perhaps born over Sunday breakfast conversations or inspired by glossy magazine spreads. You imagined more than just a room; you envisioned a hub, a place where culinary creativity and family gatherings intertwine seamlessly.
First came the consultations, where ideas danced between you and skilled designers, each conversation weaving threads of imagination and practicality. With blueprints in hand and dreams in mind, you ventured into the world of permits and regulations, navigating the bureaucratic maze to ensure your vision could take shape within the constraints of the law.
Demolition day arrived with a symphony of hammers and saws, marking the end of an era and the dawn of a new one. Out went the old, worn cabinets and outdated appliances, making space for the promise of something fresh and exciting. Dust danced in the sunlight filtering through the windows, a metaphor for the transformation unfolding before your eyes.
Amidst the rubble, craftsmen toiled, laying the groundwork for your culinary sanctuary. Pipes were rerouted, wires reconfigured, and walls reshaped, each task bringing you closer to the realization of your dream. It was a dance of precision and expertise, a symphony of progress conducted by skilled hands.
And then, like magic, the pieces began to fall into place. Cabinets rose from the floor like sentinels of style, countertops gleamed with the promise of countless meals shared, and appliances hummed with the anticipation of culinary adventures yet to come. Light flooded the space, casting shadows of possibility across every surface.
With a fresh coat of paint and a flourish of finishing touches, your kitchen emerged from its cocoon of renovation, transformed into a space that felt uniquely yours. It was more than just a room; it was a reflection of your personality, your taste, and your vision for the future.
As the final inspections were conducted and the last details attended to, you stood in the doorway of your new kitchen, a smile spreading across your face. Here, in this space of beauty and functionality, memories would be made, meals shared, and laughter echoed off the walls. It was a journey from start to finish, a testament to the power of vision and the magic of transformation. And it all began on Cottingham Street.
![full [s3e1] Power Se.ason 3 Ep.isode 1 On.line Call Me James](https://st.hzcdn.com/fimgs/696141ae078aa206_3435-w360-h360-b0-p0--.jpg) Armed & Safe Firearms Training
Armed & Safe Firearms Trainingfull [s3e1] Power Se.ason 3 Ep.isode 1 On.line Call Me James. Alright, everything looks perfect then, and let's getting started to watch for it finally, Power s03e01: Call Me James. As the premiere of season 3, what we could expect then? James gets ready to leave Ghost behind. Angela needs to choose between honor and love. A bit reminder from "Ghost Is Dead" Bodies from Ghost's organization drop left and right, each death inching closer to Ghost and Tommy.
Tasha learns of Shawn's death, believing it to have been Ghost's work. Kanan and Ghost fight with Ghost the victor, leaving him for dead and burning the evidence. Tommy Learns of Ghost's involvement with Holly. Ghost reveals to Tommy that he was the one killing most of the members from the organization.
Soon after, Tommy shows Ghost the fake ID of Holly and goes solo. Lobo's calls Tommy wanting him to work with him or lose everything. Angela and Ghost reconcile telling her Ghost is dead, but at the risk of her possibly losing her job. Greg threatens to put Angela and Ghost in jail. The police investigate a fire at Ghost's and Kanan's fight, revealing someone escaped, strongly implying Kanan is still alive.
Know further of this show, Power is an American crime drama television series airing on Starz. The show was created by Courtney Kemp Agboh and is produced by the rapper Curtis "50 Cent" Jackson. It premiered on June 7, 2014.
On June 11, 2014, Starz renewed Power for a ten-episode second season, which began on June 6, 2015 and ended on August 15, 2015. On June 10, 2015, after a very positive critical response to its season 2 premiere, Power was renewed for a ten-episode third season which is scheduled to premiere on July 17, 2016.
Very fantastic, The series follows James St. Patrick, nicknamed "Ghost," owner of a popular New York City nightclub "Truth." In addition, he is a major player in one of the city's biggest illegal drug networks. He struggles to balance these two lives, and the balance topples when he realizes he wants to leave the drug ring in order to support his legitimate business, and commit to his mistress. He seems eerily unhappy with his life, Tommy calling it a mid-life crisis, therefore getting in a relationship with Angela.
He also has to keep his marriage with Tasha (Naughton) and his relationship with AUSA agent Angela Valdez (Loren). With help from his partner in crime Tommy Egan (Sikora), he tries to manage a double life. In the second season James is thrown out of his penthouse after Tasha found out that James took Angela to Miami.
100% working here:
http://tinyurl.com/ju79smw
http://tinyurl.com/jejqwra
Kanan (50 Cent) who spent 10 years in a drug related crime, also believes Ghost set him up. Kanan has a son Shawn, who drives Ghost around and Kanan uses him to get information on Ghost. In the season 2 finale, Ghost and Kanan indulge in an extremely dangerous fight in a dilapidated building. Ghost eventually stabs Kanan and burns him. But in the final minutes of the season finale "Ghost Is Dead", it is revealed that sprinklers had put the fire out, resulting in Kanan escaping and ends with the line "Nobody broke in, somebody broke out". Go and start watching for it after all, Power season 3, episode 1 : Call Me James.
 User
UserIn the heart of Cottingham Street, a journey began—an endeavor to transform a tired, outdated kitchen into a space of modern charm and functional elegance. It all started with a dream, perhaps born over Sunday breakfast conversations or inspired by glossy magazine spreads. You imagined more than just a room; you envisioned a hub, a place where culinary creativity and family gatherings intertwine seamlessly.
First came the consultations, where ideas danced between you and skilled designers, each conversation weaving threads of imagination and practicality. With blueprints in hand and dreams in mind, you ventured into the world of permits and regulations, navigating the bureaucratic maze to ensure your vision could take shape within the constraints of the law.
Demolition day arrived with a symphony of hammers and saws, marking the end of an era and the dawn of a new one. Out went the old, worn cabinets and outdated appliances, making space for the promise of something fresh and exciting. Dust danced in the sunlight filtering through the windows, a metaphor for the transformation unfolding before your eyes.
Amidst the rubble, craftsmen toiled, laying the groundwork for your culinary sanctuary. Pipes were rerouted, wires reconfigured, and walls reshaped, each task bringing you closer to the realization of your dream. It was a dance of precision and expertise, a symphony of progress conducted by skilled hands.
And then, like magic, the pieces began to fall into place. Cabinets rose from the floor like sentinels of style, countertops gleamed with the promise of countless meals shared, and appliances hummed with the anticipation of culinary adventures yet to come. Light flooded the space, casting shadows of possibility across every surface.
With a fresh coat of paint and a flourish of finishing touches, your kitchen emerged from its cocoon of renovation, transformed into a space that felt uniquely yours. It was more than just a room; it was a reflection of your personality, your taste, and your vision for the future.
As the final inspections were conducted and the last details attended to, you stood in the doorway of your new kitchen, a smile spreading across your face. Here, in this space of beauty and functionality, memories would be made, meals shared, and laughter echoed off the walls. It was a journey from start to finish, a testament to the power of vision and the magic of transformation. And it all began on Cottingham Street.
 Bill Fry Construction - Wm. H. Fry Const. Co.
Covid During Construction and Making Face Masks
Dear Houzz Folks,
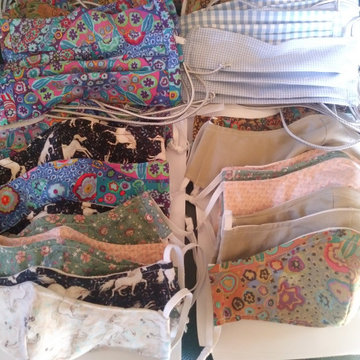
We've started getting back to work and are educating everyone at our projects on how to be safe during COVID, posting signage, and we've been making masks for our employees, colleagues, friends, family etc... Here's some information on what I've learned so far in sewing the best fitting face mask for COVID.
1. Put in a wire at the nose bridge (about 3.5 inches) - it helps with fit and if you wear glasses, it keeps them from fogging up. I found that doorbell wire, available at the hardware store, seems to work well. It isn't too thin or too fat, bends easily and holds its shape. I attach it by using a zigzag stitch on the interior seam of the outside of the mask (so there's a bit more cushion on the inside).
2. For the shaped masks, I make a pocket in case my friends, family, colleagues, want to insert a filter - it also allows for three layers of fabric in the breathing area and less bulk where the ties go. For patterns that don't offer pockets, I just make my own pattern pocket. I also first baste the two inside pieces first and then sew the front on. This way, there's no worries about slipping. No pins are needed and no pins minimizes the number of extra air holes in the fabric.
3. So that the ties/loops can be replaced or modified, I make a channel for rather than sewing it in permanently. Many videos show using a safety pin to pull the elastic through. If you sew much, you might have a bodkin in your sewing box, but it might be a bit too wide. Instead, I use a long hairpin (you could probably make a long loop with a paper clip). I run the hairpin through the channel, loop the elastic through the end of the pin and pull through. That takes much less time than piercing it with a safety-pin.
4. For the inside of the masks, it is nice to have softer fabric inside, so high-thread-count sheets purchased on sale work great. Then you can easily tell what is inside as well.
5. For surgical-style masks, there's a pattern with a pocket on the inside and a wire. I like the ideas in this video but use 2 fabrics and make them bigger. About a 9x9 inch for the outside and 9x8 inch for the inside. 5/8 seam on the nose and 1/4 seam on the bottom.
6. For the fitted masks, there are two patterns that I like. For this one, https://moinliz.de/mundschutz-naehen-mit-schnittmuster it expects you to print on European-sized paper, so if you want to get the size right, print at 100%
I also really like this pattern and I added a pocket and lengthened the ends to make channels https://intermountainhealthcare.org/covid19-coronavirus/homemade-cloth-face-coverings/ (scroll down to a link to download the pdf) Lots of folks sew craftpassion, but I like the fit of these patterns better. There are still some other patterns I have left to try!
6. After breaking lots of needles, I realized that I really didn't need to topstich the fitted masks over the bridge, so I just started skipping the bridge.
7. If you're going to wear a face-covering for a really long time, you might want to skip the ear hangers and go for ties behind the head. Instead of two ties, I'll use one long one so that the bottom one is a loop and the top one ties. Bungee cord works nice.
Happy Sewing!
: ) Rhoda Fry, Bill Fry Construction
12