
Search results for "Start realizing" in Home Design Ideas
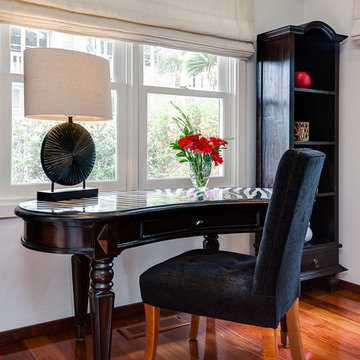
 Design Vision Studio
Erik Grammer Photography -
I recently came across a post on Facebook with a photo of an elderly couple with a quote saying "We were born in a time when if something was broken we would fix it, not throw it away..." This quote resonated with me. I found myself thinking of it while working on the same house - for the fourth time. I affectionately call this beautiful Southern California beach house the Humpty Dumpty home.
I started a wonderful business relationship with one of my favorite clients back in 2003. Initially, I was called in to "fix" and finish what another designer started. Once completed and with everything just so, the couple unfortunately divorced and amicably divided the art, rugs and furnishings. I was hired for a second time to recreate each room as close as possible to replace all items that were missing.
The house was happily restored back to the original design and all was well for a few years. My client relocated to the East Coast for a temporary job assignment and the house was rented to a person (whose name I can't say) from a famous all-girl band. During this time there was a problem with the upstairs laundry room and water damage occurred. I was hired for the third time to help repair and update (ever so slightly) some areas in the house. My client requested to keep the design and feeling of the house intact because he loved it so much.
A few years passed before a pipe broke in the master bathroom while the new renter was out of town on vacation. Unfortunately, things like this do happen - and if not attended to quickly, major damage can occur. In this case, nearly the entire house was flooded requiring it to be completely gutted and stripped down to the floorboards and studs. In January of this year, I was hired to help the client, the insurance company, and the contractor put the house back together again. But unlike the Humpty Dumpty story, this house has actually been put back together again - several times over.
Although, this house and client have experienced some challenges, I say this is a perfect example of design success. My client has had many opportunities to change and create something new in his environment with every mis-adventure. Instead, he realizes his home is exactly the way he likes it. It has been such an honor to work with this man who is definitive, trusting, and confident enough to create (or re-create) the perfect home that "fits" his personality and lifestyle.
Although this Humpty Dumpty home has been good for my business, I hope the next project with this client is to decorate another property - perhaps a New York City Apartment!
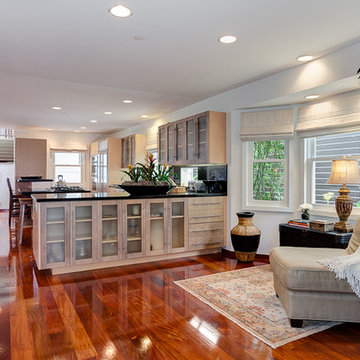 Design Vision Studio
Erik Grammer Photography -
I recently came across a post on Facebook with a photo of an elderly couple with a quote saying "We were born in a time when if something was broken we would fix it, not throw it away..." This quote resonated with me. I found myself thinking of it while working on the same house - for the fourth time. I affectionately call this beautiful Southern California beach house the Humpty Dumpty home.
I started a wonderful business relationship with one of my favorite clients back in 2003. Initially, I was called in to "fix" and finish what another designer started. Once completed and with everything just so, the couple unfortunately divorced and amicably divided the art, rugs and furnishings. I was hired for a second time to recreate each room as close as possible to replace all items that were missing.
The house was happily restored back to the original design and all was well for a few years. My client relocated to the East Coast for a temporary job assignment and the house was rented to a person (whose name I can't say) from a famous all-girl band. During this time there was a problem with the upstairs laundry room and water damage occurred. I was hired for the third time to help repair and update (ever so slightly) some areas in the house. My client requested to keep the design and feeling of the house intact because he loved it so much.
A few years passed before a pipe broke in the master bathroom while the new renter was out of town on vacation. Unfortunately, things like this do happen - and if not attended to quickly, major damage can occur. In this case, nearly the entire house was flooded requiring it to be completely gutted and stripped down to the floorboards and studs. In January of this year, I was hired to help the client, the insurance company, and the contractor put the house back together again. But unlike the Humpty Dumpty story, this house has actually been put back together again - several times over.
Although, this house and client have experienced some challenges, I say this is a perfect example of design success. My client has had many opportunities to change and create something new in his environment with every mis-adventure. Instead, he realizes his home is exactly the way he likes it. It has been such an honor to work with this man who is definitive, trusting, and confident enough to create (or re-create) the perfect home that "fits" his personality and lifestyle.
Although this Humpty Dumpty home has been good for my business, I hope the next project with this client is to decorate another property - perhaps a New York City Apartment!
 Bill Fry Construction - Wm. H. Fry Const. Co.
Covid During Construction and Making Face Masks
Dear Houzz Folks,
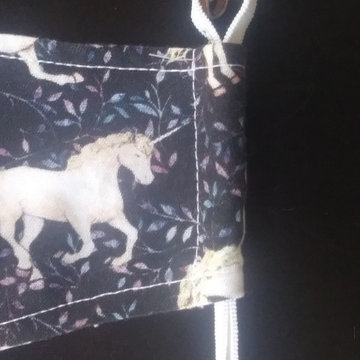
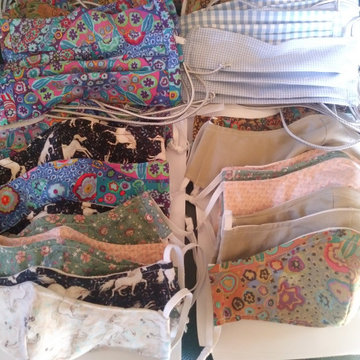
We've started getting back to work and are educating everyone at our projects on how to be safe during COVID, posting signage, and we've been making masks for our employees, colleagues, friends, family etc... Here's some information on what I've learned so far in sewing the best fitting face mask for COVID.
1. Put in a wire at the nose bridge (about 3.5 inches) - it helps with fit and if you wear glasses, it keeps them from fogging up. I found that doorbell wire, available at the hardware store, seems to work well. It isn't too thin or too fat, bends easily and holds its shape. I attach it by using a zigzag stitch on the interior seam of the outside of the mask (so there's a bit more cushion on the inside).
2. For the shaped masks, I make a pocket in case my friends, family, colleagues, want to insert a filter - it also allows for three layers of fabric in the breathing area and less bulk where the ties go. For patterns that don't offer pockets, I just make my own pattern pocket. I also first baste the two inside pieces first and then sew the front on. This way, there's no worries about slipping. No pins are needed and no pins minimizes the number of extra air holes in the fabric.
3. So that the ties/loops can be replaced or modified, I make a channel for rather than sewing it in permanently. Many videos show using a safety pin to pull the elastic through. If you sew much, you might have a bodkin in your sewing box, but it might be a bit too wide. Instead, I use a long hairpin (you could probably make a long loop with a paper clip). I run the hairpin through the channel, loop the elastic through the end of the pin and pull through. That takes much less time than piercing it with a safety-pin.
4. For the inside of the masks, it is nice to have softer fabric inside, so high-thread-count sheets purchased on sale work great. Then you can easily tell what is inside as well.
5. For surgical-style masks, there's a pattern with a pocket on the inside and a wire. I like the ideas in this video but use 2 fabrics and make them bigger. About a 9x9 inch for the outside and 9x8 inch for the inside. 5/8 seam on the nose and 1/4 seam on the bottom.
6. For the fitted masks, there are two patterns that I like. For this one, https://moinliz.de/mundschutz-naehen-mit-schnittmuster it expects you to print on European-sized paper, so if you want to get the size right, print at 100%
I also really like this pattern and I added a pocket and lengthened the ends to make channels https://intermountainhealthcare.org/covid19-coronavirus/homemade-cloth-face-coverings/ (scroll down to a link to download the pdf) Lots of folks sew craftpassion, but I like the fit of these patterns better. There are still some other patterns I have left to try!
6. After breaking lots of needles, I realized that I really didn't need to topstich the fitted masks over the bridge, so I just started skipping the bridge.
7. If you're going to wear a face-covering for a really long time, you might want to skip the ear hangers and go for ties behind the head. Instead of two ties, I'll use one long one so that the bottom one is a loop and the top one ties. Bungee cord works nice.
Happy Sewing!
: ) Rhoda Fry, Bill Fry Construction
Find the right local pro for your project
 JLK Interiors, Design & Project Management
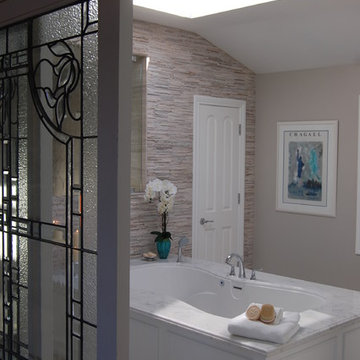
Inspiration for a large transitional master gray tile and stone tile porcelain tile double shower remodel in Los Angeles with raised-panel cabinets, white cabinets, an undermount tub, a one-piece toilet, gray walls, an undermount sink and marble countertops
 Bill Fry Construction - Wm. H. Fry Const. Co.
Covid During Construction and Making Face Masks
Dear Houzz Folks,
We've started getting back to work and are educating everyone at our projects on how to be safe during COVID, posting signage, and we've been making masks for our employees, colleagues, friends, family etc... Here's some information on what I've learned so far in sewing the best fitting face mask for COVID.
1. Put in a wire at the nose bridge (about 3.5 inches) - it helps with fit and if you wear glasses, it keeps them from fogging up. I found that doorbell wire, available at the hardware store, seems to work well. It isn't too thin or too fat, bends easily and holds its shape. I attach it by using a zigzag stitch on the interior seam of the outside of the mask (so there's a bit more cushion on the inside).
2. For the shaped masks, I make a pocket in case my friends, family, colleagues, want to insert a filter - it also allows for three layers of fabric in the breathing area and less bulk where the ties go. For patterns that don't offer pockets, I just make my own pattern pocket. I also first baste the two inside pieces first and then sew the front on. This way, there's no worries about slipping. No pins are needed and no pins minimizes the number of extra air holes in the fabric.
3. So that the ties/loops can be replaced or modified, I make a channel for rather than sewing it in permanently. Many videos show using a safety pin to pull the elastic through. If you sew much, you might have a bodkin in your sewing box, but it might be a bit too wide. Instead, I use a long hairpin (you could probably make a long loop with a paper clip). I run the hairpin through the channel, loop the elastic through the end of the pin and pull through. That takes much less time than piercing it with a safety-pin.
4. For the inside of the masks, it is nice to have softer fabric inside, so high-thread-count sheets purchased on sale work great. Then you can easily tell what is inside as well.
5. For surgical-style masks, there's a pattern with a pocket on the inside and a wire. I like the ideas in this video but use 2 fabrics and make them bigger. About a 9x9 inch for the outside and 9x8 inch for the inside. 5/8 seam on the nose and 1/4 seam on the bottom.
6. For the fitted masks, there are two patterns that I like. For this one, https://moinliz.de/mundschutz-naehen-mit-schnittmuster it expects you to print on European-sized paper, so if you want to get the size right, print at 100%
I also really like this pattern and I added a pocket and lengthened the ends to make channels https://intermountainhealthcare.org/covid19-coronavirus/homemade-cloth-face-coverings/ (scroll down to a link to download the pdf) Lots of folks sew craftpassion, but I like the fit of these patterns better. There are still some other patterns I have left to try!
6. After breaking lots of needles, I realized that I really didn't need to topstich the fitted masks over the bridge, so I just started skipping the bridge.
7. If you're going to wear a face-covering for a really long time, you might want to skip the ear hangers and go for ties behind the head. Instead of two ties, I'll use one long one so that the bottom one is a loop and the top one ties. Bungee cord works nice.
Happy Sewing!
: ) Rhoda Fry, Bill Fry Construction
 User
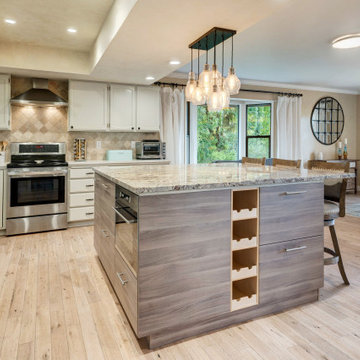
UserIn the heart of Cottingham Street, a journey began—an endeavor to transform a tired, outdated kitchen into a space of modern charm and functional elegance. It all started with a dream, perhaps born over Sunday breakfast conversations or inspired by glossy magazine spreads. You imagined more than just a room; you envisioned a hub, a place where culinary creativity and family gatherings intertwine seamlessly.
First came the consultations, where ideas danced between you and skilled designers, each conversation weaving threads of imagination and practicality. With blueprints in hand and dreams in mind, you ventured into the world of permits and regulations, navigating the bureaucratic maze to ensure your vision could take shape within the constraints of the law.
Demolition day arrived with a symphony of hammers and saws, marking the end of an era and the dawn of a new one. Out went the old, worn cabinets and outdated appliances, making space for the promise of something fresh and exciting. Dust danced in the sunlight filtering through the windows, a metaphor for the transformation unfolding before your eyes.
Amidst the rubble, craftsmen toiled, laying the groundwork for your culinary sanctuary. Pipes were rerouted, wires reconfigured, and walls reshaped, each task bringing you closer to the realization of your dream. It was a dance of precision and expertise, a symphony of progress conducted by skilled hands.
And then, like magic, the pieces began to fall into place. Cabinets rose from the floor like sentinels of style, countertops gleamed with the promise of countless meals shared, and appliances hummed with the anticipation of culinary adventures yet to come. Light flooded the space, casting shadows of possibility across every surface.
With a fresh coat of paint and a flourish of finishing touches, your kitchen emerged from its cocoon of renovation, transformed into a space that felt uniquely yours. It was more than just a room; it was a reflection of your personality, your taste, and your vision for the future.
As the final inspections were conducted and the last details attended to, you stood in the doorway of your new kitchen, a smile spreading across your face. Here, in this space of beauty and functionality, memories would be made, meals shared, and laughter echoed off the walls. It was a journey from start to finish, a testament to the power of vision and the magic of transformation. And it all began on Cottingham Street.
 User
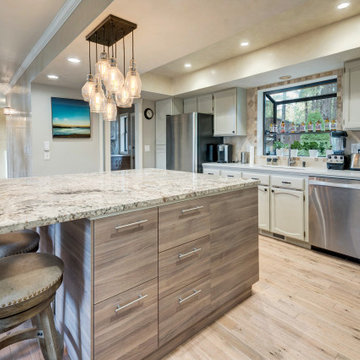
UserIn the heart of Cottingham Street, a journey began—an endeavor to transform a tired, outdated kitchen into a space of modern charm and functional elegance. It all started with a dream, perhaps born over Sunday breakfast conversations or inspired by glossy magazine spreads. You imagined more than just a room; you envisioned a hub, a place where culinary creativity and family gatherings intertwine seamlessly.
First came the consultations, where ideas danced between you and skilled designers, each conversation weaving threads of imagination and practicality. With blueprints in hand and dreams in mind, you ventured into the world of permits and regulations, navigating the bureaucratic maze to ensure your vision could take shape within the constraints of the law.
Demolition day arrived with a symphony of hammers and saws, marking the end of an era and the dawn of a new one. Out went the old, worn cabinets and outdated appliances, making space for the promise of something fresh and exciting. Dust danced in the sunlight filtering through the windows, a metaphor for the transformation unfolding before your eyes.
Amidst the rubble, craftsmen toiled, laying the groundwork for your culinary sanctuary. Pipes were rerouted, wires reconfigured, and walls reshaped, each task bringing you closer to the realization of your dream. It was a dance of precision and expertise, a symphony of progress conducted by skilled hands.
And then, like magic, the pieces began to fall into place. Cabinets rose from the floor like sentinels of style, countertops gleamed with the promise of countless meals shared, and appliances hummed with the anticipation of culinary adventures yet to come. Light flooded the space, casting shadows of possibility across every surface.
With a fresh coat of paint and a flourish of finishing touches, your kitchen emerged from its cocoon of renovation, transformed into a space that felt uniquely yours. It was more than just a room; it was a reflection of your personality, your taste, and your vision for the future.
As the final inspections were conducted and the last details attended to, you stood in the doorway of your new kitchen, a smile spreading across your face. Here, in this space of beauty and functionality, memories would be made, meals shared, and laughter echoed off the walls. It was a journey from start to finish, a testament to the power of vision and the magic of transformation. And it all began on Cottingham Street.
![full [s3e1] Power Se.ason 3 Ep.isode 1 On.line Call Me James](https://st.hzcdn.com/fimgs/696141ae078aa206_3435-w360-h360-b0-p0--.jpg) Armed & Safe Firearms Training
Armed & Safe Firearms Trainingfull [s3e1] Power Se.ason 3 Ep.isode 1 On.line Call Me James. Alright, everything looks perfect then, and let's getting started to watch for it finally, Power s03e01: Call Me James. As the premiere of season 3, what we could expect then? James gets ready to leave Ghost behind. Angela needs to choose between honor and love. A bit reminder from "Ghost Is Dead" Bodies from Ghost's organization drop left and right, each death inching closer to Ghost and Tommy.
Tasha learns of Shawn's death, believing it to have been Ghost's work. Kanan and Ghost fight with Ghost the victor, leaving him for dead and burning the evidence. Tommy Learns of Ghost's involvement with Holly. Ghost reveals to Tommy that he was the one killing most of the members from the organization.
Soon after, Tommy shows Ghost the fake ID of Holly and goes solo. Lobo's calls Tommy wanting him to work with him or lose everything. Angela and Ghost reconcile telling her Ghost is dead, but at the risk of her possibly losing her job. Greg threatens to put Angela and Ghost in jail. The police investigate a fire at Ghost's and Kanan's fight, revealing someone escaped, strongly implying Kanan is still alive.
Know further of this show, Power is an American crime drama television series airing on Starz. The show was created by Courtney Kemp Agboh and is produced by the rapper Curtis "50 Cent" Jackson. It premiered on June 7, 2014.
On June 11, 2014, Starz renewed Power for a ten-episode second season, which began on June 6, 2015 and ended on August 15, 2015. On June 10, 2015, after a very positive critical response to its season 2 premiere, Power was renewed for a ten-episode third season which is scheduled to premiere on July 17, 2016.
Very fantastic, The series follows James St. Patrick, nicknamed "Ghost," owner of a popular New York City nightclub "Truth." In addition, he is a major player in one of the city's biggest illegal drug networks. He struggles to balance these two lives, and the balance topples when he realizes he wants to leave the drug ring in order to support his legitimate business, and commit to his mistress. He seems eerily unhappy with his life, Tommy calling it a mid-life crisis, therefore getting in a relationship with Angela.
He also has to keep his marriage with Tasha (Naughton) and his relationship with AUSA agent Angela Valdez (Loren). With help from his partner in crime Tommy Egan (Sikora), he tries to manage a double life. In the second season James is thrown out of his penthouse after Tasha found out that James took Angela to Miami.
100% working here:
http://tinyurl.com/ju79smw
http://tinyurl.com/jejqwra
Kanan (50 Cent) who spent 10 years in a drug related crime, also believes Ghost set him up. Kanan has a son Shawn, who drives Ghost around and Kanan uses him to get information on Ghost. In the season 2 finale, Ghost and Kanan indulge in an extremely dangerous fight in a dilapidated building. Ghost eventually stabs Kanan and burns him. But in the final minutes of the season finale "Ghost Is Dead", it is revealed that sprinklers had put the fire out, resulting in Kanan escaping and ends with the line "Nobody broke in, somebody broke out". Go and start watching for it after all, Power season 3, episode 1 : Call Me James.
 MIG Furniture Design, Inc.
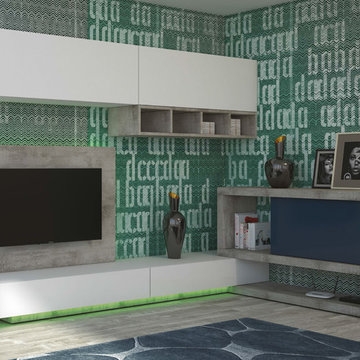
Modern Italian Wall Unit Velvet Composition 106 by Artigian Mobili. Velvet is a new line of italian wall units and entertainment centers that creates flexible living areas taking into account you individual needs. Smart furniture capable of performing different functions. An abundance of units gives limitless opportunities to realize any project design and adapt to any space. Color is not a problem anymore - each unit can be ordered in ANY RAL COLOR you want! You can select from our pre-designed compositions or build your own according to your sketches and interior project.
Wall Unit Composition is shown with RGB Light Kit (on base unit and TV panel) that is not included into the starting price. LED Light Kit is optional and can be added for an extra charge.
Please contact our office regarding customization of this wall unit composition.
MATERIAL/CONSTRUCTION:
18 mm thick wooden particles melamine panels
The lacquered structures and fronts are made of REAL POLISH SCRATCH PROOF LACQUERING, which is non toxic and non allergic products.
The starting price is for the Wall Unit Composition shown in the main picture in Bianco (smooth) finish / Blue Verde Matt lacquer (structure) / Blue Verde Gloss lacquer (front door) / Roccia finish. RGB LED Lights are not included!
Dimensions:
Wall Unit: W(106.3" x 67.3") x D14.6"/19.7" x H77"
TV Panel: W53.2" x H35.4"
 TKS Design Group
Download our free ebook, Creating the Ideal Kitchen. DOWNLOAD NOW
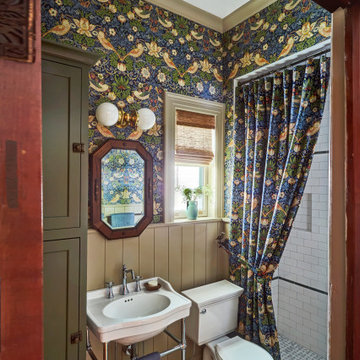
This client came to us in a bit of a panic when she realized that she really wanted her bathroom to be updated by March 1st due to having 2 daughters getting married in the spring and one graduating. We were only about 5 months out from that date, but decided we were up for the challenge.
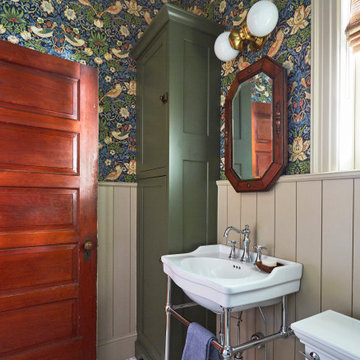
The beautiful historical home was built in 1896 by an ornithologist (bird expert), so we took our cues from that as a starting point. The flooring is a vintage basket weave of marble and limestone, the shower walls of the tub shower conversion are clad in subway tile with a vintage feel. The lighting, mirror and plumbing fixtures all have a vintage vibe that feels both fitting and up to date. To give a little of an eclectic feel, we chose a custom green paint color for the linen cabinet, mushroom paint for the ship lap paneling that clads the walls and selected a vintage mirror that ties in the color from the existing door trim. We utilized some antique trim from the home for the wainscot cap for more vintage flavor.
The drama in the bathroom comes from the wallpaper and custom shower curtain, both in William Morris’s iconic “Strawberry Thief” print that tells the story of thrushes stealing fruit, so fitting for the home’s history. There is a lot of this pattern in a very small space, so we were careful to make sure the pattern on the wallpaper and shower curtain aligned.
A sweet little bird tie back for the shower curtain completes the story...
Designed by: Susan Klimala, CKD, CBD
Photography by: Michael Kaskel
For more information on kitchen and bath design ideas go to: www.kitchenstudio-ge.com
 TKS Design Group
Download our free ebook, Creating the Ideal Kitchen. DOWNLOAD NOW
This client came to us in a bit of a panic when she realized that she really wanted her bathroom to be updated by March 1st due to having 2 daughters getting married in the spring and one graduating. We were only about 5 months out from that date, but decided we were up for the challenge.
The beautiful historical home was built in 1896 by an ornithologist (bird expert), so we took our cues from that as a starting point. The flooring is a vintage basket weave of marble and limestone, the shower walls of the tub shower conversion are clad in subway tile with a vintage feel. The lighting, mirror and plumbing fixtures all have a vintage vibe that feels both fitting and up to date. To give a little of an eclectic feel, we chose a custom green paint color for the linen cabinet, mushroom paint for the ship lap paneling that clads the walls and selected a vintage mirror that ties in the color from the existing door trim. We utilized some antique trim from the home for the wainscot cap for more vintage flavor.
The drama in the bathroom comes from the wallpaper and custom shower curtain, both in William Morris’s iconic “Strawberry Thief” print that tells the story of thrushes stealing fruit, so fitting for the home’s history. There is a lot of this pattern in a very small space, so we were careful to make sure the pattern on the wallpaper and shower curtain aligned.
A sweet little bird tie back for the shower curtain completes the story...
Designed by: Susan Klimala, CKD, CBD
Photography by: Michael Kaskel
For more information on kitchen and bath design ideas go to: www.kitchenstudio-ge.com
 Design Builders & Remodeling Inc.
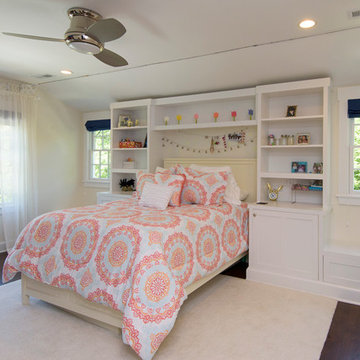
Design Builders & Remodeling is a one stop shop operation. From the start, design solutions are strongly rooted in practical applications and experience. Project planning takes into account the realities of the construction process and mindful of your established budget. All the work is centralized in one firm reducing the chances of costly or time consuming surprises. A solid partnership with solid professionals to help you realize your dreams for a new or improved home.
Hand fabricated barn doors create a clean and modern twist to compliment this homes historic charm
 Design Builders & Remodeling Inc.
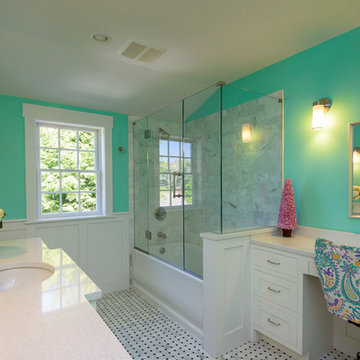
Design Builders & Remodeling is a one stop shop operation. From the start, design solutions are strongly rooted in practical applications and experience. Project planning takes into account the realities of the construction process and mindful of your established budget. All the work is centralized in one firm reducing the chances of costly or time consuming surprises. A solid partnership with solid professionals to help you realize your dreams for a new or improved home.
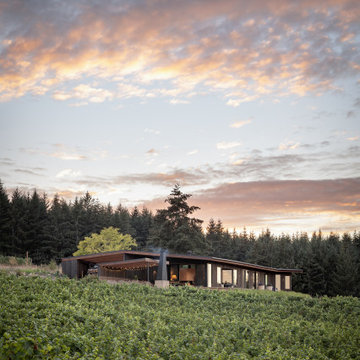
 Prentiss Balance Wickline Architects
A gathering at sunset is the perfect excuse to use the dining pavilion and outdoor fireplace. Photography: Andrew Pogue Photography.
Inspiration for a mid-sized modern brown one-story wood and board and batten house exterior remodel in Portland with a shed roof, a metal roof and a black roof
Inspiration for a mid-sized modern brown one-story wood and board and batten house exterior remodel in Portland with a shed roof, a metal roof and a black roof
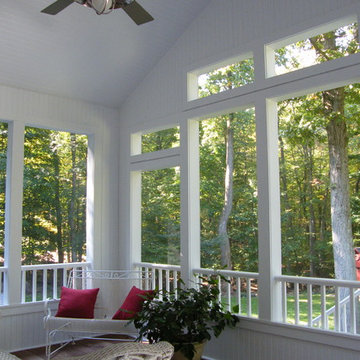 Design Builders & Remodeling Inc.
Design Builders & Remodeling is a one stop shop operation. From the start, design solutions are strongly rooted in practical applications and experience. Project planning takes into account the realities of the construction process and mindful of your established budget. All the work is centralized in one firm reducing the chances of costly or time consuming surprises. A solid partnership with solid professionals to help you realize your dreams for a new or improved home.
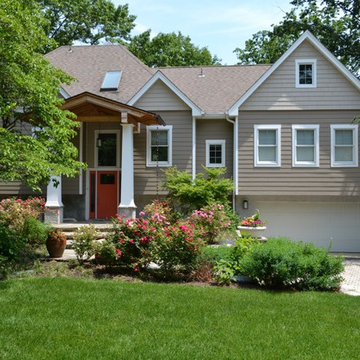
 KB Lueck Building Consultants, LLC.
The existing split foyer had vinyl siding and a tremendous amount of horizontal lines - a new flagstone walk way and steps were being added with a complete exterior makeover in the beginning stages... After meeting with the client and the landscaper - we realized we needed to develop a covered entry that would really invite you into the home and unify the all work that had been started. The new stone entrance helped you locate the front door but, the exterior finishes did not mesh well; they needed updated. The focal point should be the entry. The split foyer entrance and all the gables definitely created a challenge. The solution: We incorporated exposed cedar beams and exposed cedar roof rafters with a mahogany tongue and groove ceiling to give the entry a warm and different feel. A flag stone walk way anchors the entrance, so we chose to use stone piers to match and large square tapered columns that would support the new entry roof, the covered entry takes shape. Many details are needed to create a proper entry, copper half round gutters with square link copper rain chains are the finishing touches to the grand entry for this home. The exterior siding was changed to a wide exposure cement board siding by the James Hardie company. We used cement shake panels to accent the built out gable areas. The transitions between the siding materials were simplified to achieve a cleaner finished look. New window and door trim, 5/4 x 4 and 5/4 x 6 pvc, complete an almost maintenance free exterior.
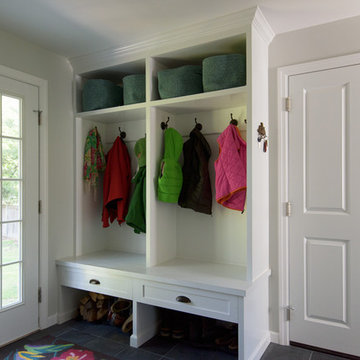 Design Builders & Remodeling Inc.
Design Builders & Remodeling is a one stop shop operation. From the start, design solutions are strongly rooted in practical applications and experience. Project planning takes into account the realities of the construction process and mindful of your established budget. All the work is centralized in one firm reducing the chances of costly or time consuming surprises. A solid partnership with solid professionals to help you realize your dreams for a new or improved home.
This classic Connecticut home was bought by a growing family. The house was in an ideal location but needed to be expanded. Design Builders & Remodeling almost doubled the square footage of the home. Creating a new sunny and spacious master bedroom, new guestroom, laundry room, garage, kids bathroom, expanded and renovated the kitchen, family room, and playroom. The upgrades and addition is seamlessly and thoughtfully integrated to the original footprint.
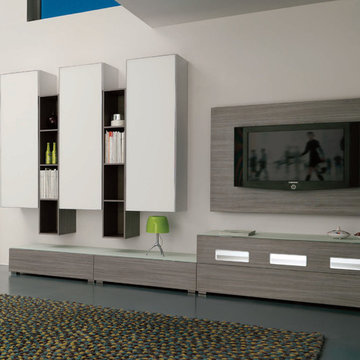 MIG Furniture Design, Inc.
Modern Italian Wall Unit Velvet Composition 911 by Artigian Mobili. Velvet is a new line of italian wall units and entertainment centers that creates flexible living areas taking into account you individual needs. Smart furniture capable of performing different functions. An abundance of units gives limitless opportunities to realize any project design and adapt to any space. Color is not a problem anymore - each unit can be ordered in ANY RAL COLOR you want! You can select from our pre-designed compositions or build your own according to your scratches and interior project.
Base units are covered with extra clear white lacquered glass that can be optionally removed, making the wall unit composition cost less.
Please contact our office regarding customization of this wall unit composition.
MATERIAL/CONSTRUCTION:
18 mm thick wooden particles melamine panels
The lacquered structures and fronts are made of REAL POLISH SCRATCH PROOF LACQUERING, which is non toxic and non allergic products.
The starting price is for the Wall Unit Composition 911 as shown in the main picture in Matt White Lacquer & Gray Oak Finish (Structure) and Extra Clear White Lacquered Glass / Gray Oak Finish (Fronts).
Dimensions:
Wall Unit: W124" x D14.6"/22.3" x H79"
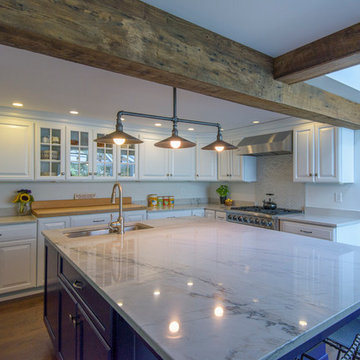 Design Builders & Remodeling Inc.
Design Builders & Remodeling is a one stop shop operation. From the start, design solutions are strongly rooted in practical applications and experience. Project planning takes into account the realities of the construction process and mindful of your established budget. All the work is centralized in one firm reducing the chances of costly or time consuming surprises. A solid partnership with solid professionals to help you realize your dreams for a new or improved home.
A large sunny and workable kitchen for a hungry and busy family .Tons of counters, cabinets and charm
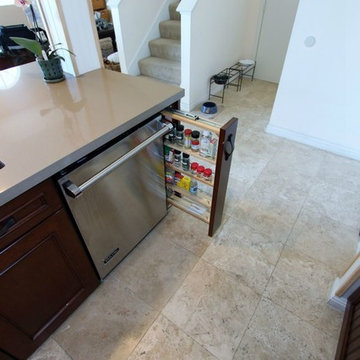
 APlus Interior Design & Remodeling
Peg and Randy had a wonderful experience working with APlus and were impressed with the incredible workmanship that went into the remodel. They started their journey looking at their options with stock cabinets and came to realize it wasn’t the best choice for them. A friend that was very happy with the remodel being completed at her home by APlus recommended they call to set up an appointment to meet with a designer. They met with Alex and loved his design ideas so they decided to hire APlus to remodel their kitchen. Peg and Randy were very pleased with the cost and were very surprised to find that a custom kitchen was well within their budget. When guest ask them how they came up with the design concept of the kitchen they praise Alex for coming up with such a gorgeous design. Many changes were made in the kitchen such as adding wonderful high end appliances and hiding the microwave from view. Prior to remodeling their kitchen they had such limited storage space in the kitchen that they resorted to using their garage to store items. This Lake Forest couple now has an amazing amount of hidden storage space with plenty of new space to spare. Now when they step into their kitchen they are in awe and disbelief that they finally have the kitchen of their dreams. http://www.apluskitchen.com/Orange-County-Lake-Forest-Complete-Kitchen-Remodel-Project76.html
13