
Search results for "Start utilizing" in Home Design Ideas
 Weisz Selection Outdoor Living Specialists
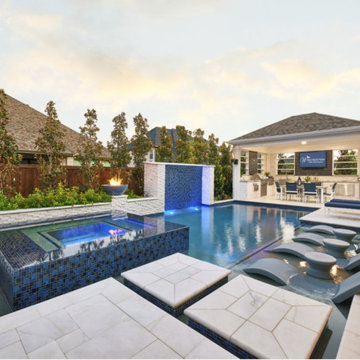
Quintessential Texas blue and white exudes modern luxury in this backyard transformation from ordinary to extraordinary by Weisz Selection! Every angle excites the viewer and beckons them to enjoy what this project has to offer. From gathering around the fire pit, jumping in the pool, soaking in the infinity edge spa framed by mesmerizing twin fire bowls, lounging on the tanning ledge, relaxing pool side on the platinum marble deck, sipping on your favorite beverage while sitting at the swim-up bar stools, savoring some delicious fare prepared in the outdoor kitchen, to watching a favorite event or show on the tv, all while listening to the Zen like trickling of water down the glass tile water feature, this project has it ALL!! One would think they need an expansive space to encompass all those wonderful features; however, our designers accomplished this in a backyard that is less than 90’ X 30’. Showcasing the expertise of our design team, we created a concept for our lucky clients that is an excellent utilization of space and encompasses all the items on their wish list! This gorgeous custom pool, spa, outdoor fire pit, and outdoor kitchen looks more like something you’d find at a luxury hotel instead of in your neighbor’s backyard. Maybe you’d like something similar in your backyard. Don’t let our next project be in your other neighbor’s yard. What is on your wish list? Contact Weisz Selection today to get started building your own dream staycation worthy backyard!
 American Pools & Spas
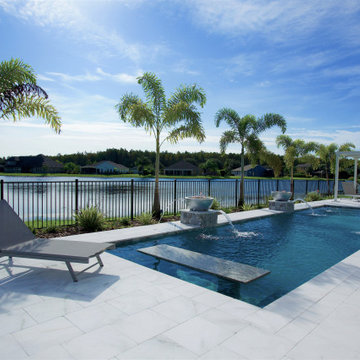
The Marcus family have optimal seating areas in the pool with a granite top table to enjoy drinks during the hot summer days of Florida. Adding on to the lounging area, the homeowners had purchased and installed a pergola, along with patio furniture to go right beneath it. As well as utilizing their existing outdoor kitchen/grill area that they had before we started the project.
As you walk out of their back door step, it leads right into the steps of their pool. The homeowners have opted in marble - in the color 'Snow White', for their deck and coping, which brings a modern and elegant feel to their outdoor living space. For ambiance, the pool lighting was something they wanted to upgrade. Based on their design, they have upgraded to 4 LED Globrites, which are color changing. The lights are directly positioned towards the reverse arcfalls on the pedestals, making it the focal point of their pool and backyard as a whole.
Another addition to the water features are the 4 deck jets. The deck jets are flushed to the deck and shoots out a stream of water into the pool, creating a tranquil environment of sounds. A fire feature was a must have, so the homeowners went the economical route and installed/purchased their fire bowls from an improvement store. It's a great, decorative piece to finalize the project.
American Pools & Spas is one of Orlando's top pool builders. We have been in the pool industry for over 20 years and we also expand our work to outdoor pavers, screen enclosures, outdoor kitchens, and fire pits. Where you dream is our commitment, come see the largest showroom in the state of Florida! We build pools and spas in the Central Florida area.
Website: https://american-pools.com/
 TVL Creative Ltd.
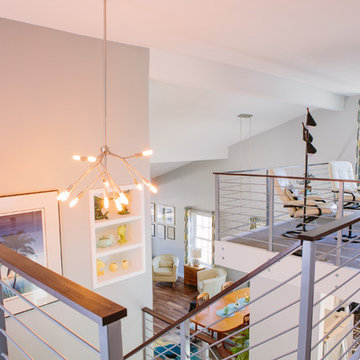
We were excited to take on this full home remodel with our Arvada clients! They have been living in their home for years, and were ready to delve into some major construction to make their home a perfect fit. This home had a lot of its original 1970s features, and we were able to work together to make updates throughout their home to make it fit their more modern tastes. We started by lowering their raised living room to make it level with the rest of their first floor; this not only removed a major tripping hazard, but also gave them a lot more flexibility when it came to placing furniture. To make their newly leveled first floor feel more cohesive we also replaced their mixed flooring with a gorgeous engineered wood flooring throughout the whole first floor. But the second floor wasn’t left out, we also updated their carpet with a subtle patterned grey beauty that tied in with the colors we utilized on the first floor. New taller baseboards throughout their entire home also helped to unify the spaces and brought the update full circle. One of the most dramatic changes we made was to take down all of the original wood railings and replace them custom steel railings. Our goal was to design a staircase that felt lighter and created less of a visual barrier between spaces. We painted the existing stringer a crisp white, and to balance out the cool steel finish, we opted for a wooden handrail. We also replaced the original carpet wrapped steps with dark wooden steps that coordinate with the finish of the handrail. Lighting has a major impact on how we feel about the space we’re in, and we took on this home’s lighting problems head on. By adding recessed lighting to the family room, and replacing all of the light fixtures on the first floor we were able to create more even lighting throughout their home as well as add in a few fun accents in the dining room and stairwell. To update the fireplace in the family room we replaced the original mantel with a dark solid wood beam to clean up the lines of the fireplace. We also replaced the original mirrored gold doors with a more contemporary dark steel finished to help them blend in better. The clients also wanted to tackle their powder room, and already had a beautiful new vanity selected, so we were able to design the rest of the space around it. Our favorite touch was the new accent tile installed from floor to ceiling behind the vanity adding a touch of texture and a clear focal point to the space. Little changes like replacing all of their door hardware, removing the popcorn ceiling, painting the walls, and updating the wet bar by painting the cabinets and installing a new quartz counter went a long way towards making this home a perfect fit for our clients
Find the right local pro for your project
 Prudhomme Design & Interiors
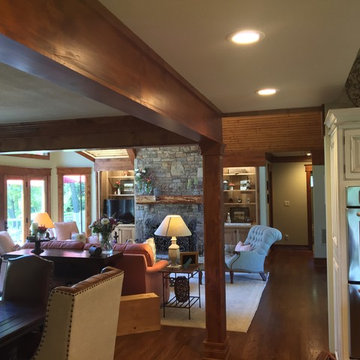
This project started as an outdated, detached condo in Kenmure Country Club. The owners live elsewhere but wanted to renovate in preparation for retirement. The floor plan was opened up so the kitchen, dining and living spaces could be connected for entertaining and family time. Every surface was updated including wire-brushing the oak floors to look hand scraped.
This client utilized all of our services including architecture, interior design and project management.
 Lowden Architecture
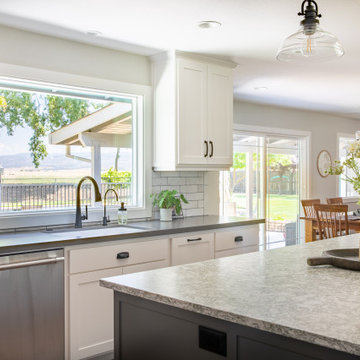
This home sits comfortably next to a creek on the north end of Chico. What started as a simple kitchen remodel turned into a complete home makeover! By capturing under-utilized space in the existing garage, we were able to double the size of the original kitchen! Raising the sunken living area helped round out the expansive great room, and also provides a much safer home for the grandchildren.
Photos by: Lindsey King Photography
 TVL Creative Ltd.
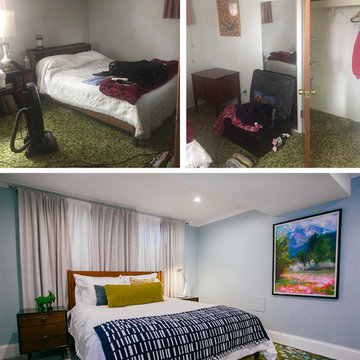
This project was such an incredible design opportunity, and instilled inspiration and excitement at every turn! Our amazing clients came to us with the challenge of converting their beloved family home into a welcoming haven for all members of the family. At the time that we met our clients, they were struggling with the difficult personal decision of the fate of the home. Their father/father-in-law had passed away and their mother/mother-in-law had recently been admitted into a nursing facility and was fighting Alzheimer’s. Resistant to loss of the home now that both parents were out of it, our clients purchased the home to keep in in the family. Despite their permanent home currently being in New Jersey, these clients dedicated themselves to keeping and revitalizing the house. We were moved by the story and became immediately passionate about bringing this dream to life.
The home was built by the parents of our clients and was only ever owned by them, making this a truly special space to the family. Our goal was to revitalize the home and to bring new energy into every room without losing the special characteristics that were original to the home when it was built. In this way, we were able to develop a house that maintains its own unique personality while offering a space of welcoming neutrality for all members of the family to enjoy over time.
The renovation touched every part of the home: the exterior, foyer, kitchen, living room, sun room, garage, six bedrooms, three bathrooms, the laundry room, and everything in between. The focus was to develop a style that carried consistently from space to space, but allowed for unique expression in the small details in every room.
Starting at the entry, we renovated the front door and entry point to offer more presence and to bring more of the mid-century vibe to the home’s exterior. We integrated a new modern front door, cedar shingle accents, new exterior paint, and gorgeous contemporary house numbers that really allow the home to stand out. Just inside the entry, we renovated the foyer to create a playful entry point worthy of attention. Cement look tile adorns the foyer floor, and we’ve added new lighting and upgraded the entry coat storage.
Upon entering the home, one will immediately be captivated by the stunning kitchen just off the entry. We transformed this space in just about every way. While the footprint of the home ultimately remained almost identical, the aesthetics were completely turned on their head. We re-worked the kitchen to maximize storage and to create an informal dining area that is great for casual hosting or morning coffee.
We removed the entry to the garage that was once in the informal dining, and created a peninsula in its place that offers a unique division between the kitchen/informal dining and the formal dining and living areas. The simple light warm light gray cabinetry offers a bit of traditional elegance, along with the marble backsplash and quartz countertops. We extended the original wood flooring into the kitchen and stained all floors to match for a warmth that truly resonates through all spaces. We upgraded appliances, added lighting everywhere, and finished the space with some gorgeous mid century furniture pieces.
In the formal dining and living room, we really focused on maintaining the original marble fireplace as a focal point. We cleaned the marble, repaired the mortar, and refinished the original fireplace screen to give a new sleek look in black. We then integrated a new gas insert for modern heating and painted the upper portion in a rich navy blue; an accent that is carried through the home consistently as a nod to our client’s love of the color.
The former entry into the old covered porch is now an elegant glass door leading to a stunning finished sunroom. This room was completely upgraded as well. We wrapped the entire space in cozy white shiplap to keep a casual feel with brightness. We tiled the floor with large format concrete look tile, and painted the old brick fireplace a bright white. We installed a new gas burning unit, and integrated transitional style lighting to bring warmth and elegance into the space. The new black-frame windows are adorned with decorative shades that feature hand-sketched bird prints, and we’ve created a dedicated garden-ware “nook” for our client who loves to work in the yard. The far end of this space is completed with two oversized chaise loungers and overhead lights…the most perfect little reading nook!
Just off the dining room, we created an entirely new space to the home: a mudroom. The clients lacked this space and desperately needed a landing spot upon entering the home from the garage. We uniquely planned existing space in the garage to utilize for this purpose, and were able to create a small but functional entry point without losing the ability to park cars in the garage. This new space features cement-look tile, gorgeous deep brown cabinetry, and plenty of storage for all the small items one might need to store while moving in and out of the home.
The remainder of the upstairs level includes massive renovations to the guest hall bathroom and guest bedroom, upstairs master bed/bath suite, and a third bedroom that we converted into a home office for the client.
Some of the largest transformations were made in the basement, where unfinished space and lack of light were converted into gloriously lit, cozy, finished spaces. Our first task was to convert the massive basement living room into the new master bedroom for our clients. We removed existing built-ins, created an entirely new walk-in closet, painted the old brick fireplace, installed a new gas unit, added carpet, introduced new lighting, replaced windows, and upgraded every part of the aesthetic appearance. One of the most incredible features of this space is the custom double sliding barn door made by a Denver artisan. This space is truly a retreat for our clients!
We also completely transformed the laundry room, back storage room, basement master bathroom, and two bedrooms.
This home’s massive scope and ever-evolving challenges were thrilling and exciting to work with, and the result is absolutely amazing. At the end of the day, this home offers a look and feel that the clients love. Above all, though, the clients feel the spirit of their family home and have a welcoming environment for all members of the family to enjoy for years to come.

 Talon Construction Inc.
Designing and building a kitchen addition is a complex process that involves multiple steps and considerations. Here is a general outline to help you get started on your kitchen addition project:
Define Your Goals and Budget:
• Determine the purpose of the kitchen addition. Is it for more cooking space, a dining area, or a combination of both?
• Establish a realistic budget for your project. Consider all costs, including construction, permits, materials, and furnishings.
Hire a Design Professional:
• Seek the services of a design build company who specializes in kitchen additions.
• Discuss your vision, needs, and budget with the design professional to create a design concept.
Site Evaluation:
• Assess the existing space and structural condition of your home to ensure it can support the addition.
• Consider factors like zoning regulations, setbacks, and building codes.
Design Development:
• Collaborate with your design professional to refine the concept, including the layout, size, and architectural style.
• Choose materials, finishes, and fixtures that fit your design and budget.
Obtain Permits:
• Consult with your local design build contractor to determine the necessary permits and approvals.
• Prepare and submit all required documents, including architectural drawings and engineering plans.
Create Construction Documents:
• Work with your design build professional to develop detailed construction drawings and specifications.
• These documents will serve as a guide for contractors during construction.
Hire a design build contractor:
• Check references, credentials, and licenses before selecting a contractor.
• Sign a detailed contract that outlines the scope of work, timeline, and payment schedule.
Construction Phase:
• Demolition: If needed, remove any existing structures or walls.
• Foundation: Construct the foundation for the addition.
• Framing: Build the structural framework of the addition.
• Plumbing, Electrical, and HVAC: Install or update utilities as required.
• Insulation: Ensure proper insulation for energy efficiency.
• Drywall and Finish Work: Complete the walls and ceilings.
• Flooring and Cabinetry: Install flooring and kitchen cabinets.
• Appliances and Fixtures: Add appliances, plumbing fixtures, and lighting.
• Paint and Finish: Apply paint and finishes to achieve the desired look.
• Final Inspection: Schedule inspections to ensure compliance with building codes.
Final Inspections and Approvals:
• Arrange for final inspections to ensure the addition meets all safety and code requirements.
• Obtain any necessary certificates of occupancy or compliance.
Move In and Enjoy:
• Once all inspections and approvals are received, you can move into your new kitchen addition and start enjoying it.
Remember that every kitchen addition project is unique, so adapt this outline to your specific needs and circumstances. Consulting with professionals and obtaining the required permits and inspections is crucial to a successful and safe project.
Sponsored
Sunbury, OH

J.Holderby - Renovations
Franklin County's Leading General Contractors - 2X Best of Houzz!
 Aardvark Architecture
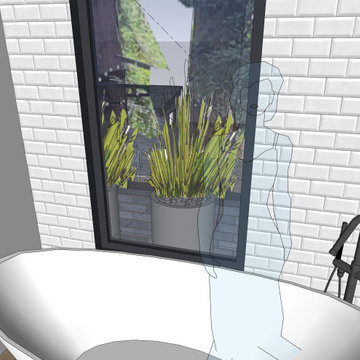
This proposal is for a new two-story home on the vacant heavily wooded lot with an existing 150-foot-long driveway lined by several beautiful oak trees culminating in a behemoth 43-inch oak tree where the driveway meets the main lot. The far end of the driveway terminates in a grove of three 43/40/43-inch redwoods and at the very center of the vacant lot stands a gargantuan V-twin 59-inch redwood tree paired with a “small” 29-inch redwood tree. The owners want to build a beautiful contemporary-styled home for their family that fully enjoys and embraces the mature trees on their cozy 65-foot by 100-foot lot.
As with all small, constrained lots, this project’s site design started first with meeting the relatively large parking and car maneuvering requirements. Menlo Park’s Department of Transportation typically requires side-facing garages to have 24-feet of backup space. So that they could give the largest feature redwood tree on site an added four feet (50%) of clearance outside of its critical root zone, the owners agreed to install a vehicle turntable at the end of their driveway to eliminate the extra four feet of space needed to back up and turnaround. This allowed them to pull their garage forward an additional four feet towards the front property line on the panhandle side, drastically reducing the rest of the home’s impact on the gargantuan V-Twin paired redwood tree at the center of the lot.
One of the owners has mobility issues, and accordingly, they first sought to design a one-story floor plan that incorporated all their family’s needs including plenty of covered patio and deck space to enjoy our fantastic California weather. But that single-story footprint spread too far into the critical root zones of several of the redwood trees on site, even despite the use of the vehicle turntable. During my interview process with the owners, they made it clear to me that one of their primary concerns is ensuring that the largest trees on site would thrive and become features of their new home after construction is complete. The single-story designs that removed the grove of three huge redwood trees were non-starters, as was the skimpy 5x10 master bath I designed when trying to squeeze the whole house program into an overly compromised single-story design. It was therefore deemed necessary to go with a two-story design despite the owner’s mobility issues. This two-story design has a much more compact ground floor footprint and has no bedrooms downstairs, other than the detached ADU. The owners must give up the floor area and incur the costs to install a residential elevator to access their upstairs master suite.
Our ground floor footprint is smaller due to the two-story design decision, and our foundation is pulled away from the trees thanks to the vehicle turntable. Yet, a tiny portion of the home’s ground floor footprint still encroaches into the critical root zones of the largest 59” redwood tree. Therefore, as outlined in the Arborist Report prepared by Aesculus Arboricultural Consulting, the structural engineers are incorporating an array of drilled piers and shallow-grade beams for the main home’s foundation and deck area nearest the redwood’s critical root zone. This drilled piers and grade beam foundation is a type of “bridging” foundation as outlined in Aesculus’ report to preserve the health of these trees that the property was designed around. The rest of the foundation will be constructed as an insulated slab-on-grade foundation to minimize the number of steps and ramps needed for the owners to enjoy their home and patio areas.
Despite the owner’s desire to keep as many trees as possible on site, and despite the smaller ground floor footprint and the advantage of the vehicle turntable, the need for a 20x20-foot garage and 20x20/25-foot guest parking space on our panhandle lot requires the removal of two heritage trees in the required driveway, a 16” coast redwood, and a 17” coast redwood. An alternate design, such as swapping the garage and guest parking locations north-to-south, still requires the removal of these two trees for vehicle maneuvering but has the added disadvantage of cutting off the home’s sightlines to the behemoth 43” oak tree just outside the currently proposed front patio space and living room. Jim Redman of Elements Landscape is proposing 13 new trees be planted on site to replace the lost value of these two heritage coast redwood trees.
This contemporary architectural design features clean lines, and an abundance of full-height windows and large skylights to best take in the immense trees on site. To blend in with the forest-like setting, the home boasts a mix of rich textures and features a color palette of natural wood tones contrasted with dark blue and black. Once through the new steel gate at the street and down the 150-foot tree-lined driveway, a large covered front patio becomes visible past the neighbor’s detached accessory structure. The covered patio is just across the driveway from the beautiful 43” behemoth coast live oak. The single plane of the covered patio roof is delicately supported by a pair of steel posts in a “V-twin” configuration much like the largest redwood trees that tower over the center of the lot and will still be visible above the new two-story home, even from the front yard. The patio is covered in a dark-colored standing seam roof, with steel C-channel fascias, and tongue-and-groove wood ceiling planks on the underside. Generously sized skylights on the patio roof and inside the living area allow for impressive views of the amazing oak canopy as well as precious natural light.
Supporting the sloped covered patio on the other side is the two-car garage with a secondary bedroom suite stacked above the garage. This two-story volume is to be clad in vertical clear-coated redwood siding, to tie in with the grove of three 43-inch redwood trees just beyond. The garage door, and the bank of windows for Bedroom#2 above feature a steel fascia eyebrow header feature to provide shade and overhang protection, as we are not proposing a large overhang at this “redwood trunk”. The garage and bedroom volume are pulled 16 feet away from the side property line, instead of the minimum required setback of 6’-6”, thus leaving plenty of room for the redwood grove and existing mature pear tree to continue to thrive. This existing mature green screen in this 16-foot-wide side yard is a feature worth soaking in, which is why tall windows with low sill heights are proposed for both the stairs and the upstairs hallway. Though it may be infrequent to approve side-facing 2nd floor windows with sill heights as low as what we’re proposing, we are confident that the mature green screen and the over 16-foot-wide side yard are sufficient to provide for the continued privacy of our neighbor’s rear yard space, especially considering theses windows are in walkway zones.
The covered patio at the front entry is also bound by the 10-foot-tall living room. The great room is clad in a dark blue brick veneer, which wraps around all three sides of the living room. Upon entering the home from the covered patio, you are immediately greeted with one of the most impressive features of the home’s design: a 10-foot-tall by 24-foot-wide set of sliding glass doors. From the entry, this huge opening gives merely an initial glimpse of the massive trunks of the gargantuan V-twin redwoods sitting at the center of the lot. All three sliding glass panels open directly out into the smaller partially covered deck in the rear. This roof overhang element matches the design of the front patio with a steel C-channel fascia and a large skylight. But the rear deck’s roof element is set flat at a ten-foot ceiling height so that the living room’s ceiling seems to float above and out beyond the expanse of full-height sliding doors, thus creating an indoor-outdoor living space that will feel much larger than the home’s actual footprint. This rear covered deck is smaller than the patio in the front and also has a mix of solid and open-slatted roofing to allow for more solar access for the relatively small amount of open sky available.
The downstairs living room is open to the dining and kitchen areas, as well as the stair-and-elevator tower beyond. The stair tower is very open and glassy, and the stairs wind up and around the redwood-clad elevator tower. From certain perspectives in the 16-foot-wide side yard, it will almost seem as if the grove of three redwoods has a fourth tree that the house and the stairs were carefully built around. Other than the 3-foot-wide windows, the exterior walls of the stair tower, downstairs utility spaces, and Bedroom#3 above are finished in cement plaster, painted dark blue and black. The sloped roof over the stair-and-elevator tower continues cleanly over the area of upstairs Bedroom#3. This roof level is set by the side daylight plane and only yields an inside wall height of just under 6 feet in height. The owners are satisfied that the rest of this upstairs room has a nice vaulted ceiling to make up for the one short wall under the daylight plane.
The rest of the ground floor adjacent to the stair tower consists of a small utility wing containing a half-bath, laundry, storage area, and an exterior alcove for the electric heat pump HVAC unit. This short wing also gives more accessible access to the rear yard deck, as well as a backdrop for an outdoor kitchen. The bright white stone backsplash for the outdoor kitchen provides contrast to the otherwise consistent use of cement plaster painted dark blue and black for the two-story wing closest to the detached ADU. Though Bedroom#3 is stacked directly above this small wing, it is relatively short to comply with the side daylight plane of this narrow lot. Still, to further help break up the scale of this wall, another steel fascia eyebrow element is set about 8 feet above the rear deck.
The master suite sits centered above the ten-foot-tall great room. The master bedroom and its balcony, as well as the master bathtub area, have a commanding view of the central redwood trees and their impressive canopy, though the balcony is mostly recessed and should pose no privacy concerns to the neighbor’s rear yards. The master balcony parapet is clad in the same brick veneer continuing up from the living room below. A dark-painted metal rail makes up the rest of the open guardrail height. The entire length of the master balcony is comprised of 9-foot-tall sliding glass doors, but the area above the doors, as well as the area below the master bathroom windows, is accented with more redwood siding. The remainder of the master suite bathroom and walk-in closet is finished in cement plaster painted dark blue. The master bathroom has one side yard-facing window but will be frosted glass for both the owner’s and the neighbor’s privacy.
The 2nd floor is capped under a simple gable roof design with one roof ridge and varying eave and rake overhangs depending on the 2nd-floor layout and solar orientation. Since these roof planes are quite difficult to see in the middle of the heavily wooded panhandle lot, we are proposing a white TPO roofing for these two upper roof planes as a more sustainable choice compared to more dark-colored roofing like the covered patios and detached ADU.
The owners also wish to build a detached 292-square-foot Accessory Dwelling Unit (ADU) as an office and guest suite. For the ADU foundation to be situated outside the central redwood tree’s critical root zone, this relatively tiny structure takes advantage of the narrower 4-foot side and rear setbacks allowed for ADUs smaller than 800 square feet. The small L-shaped detached ADU frames a wonderful quasi-courtyard around the gargantuan V-twin redwoods at the center of the lot. The ADU shares a matching material palette consisting of cement plaster painted blue and black, vertical redwood siding and soffits, and thin brick veneer. The ADU also features large full-height windows. The only difference between the main home and the ADU material palette is that the roofing will be a dark composition shingle roofing since it will be quite visible from the master balcony.
 Staging Beautifully
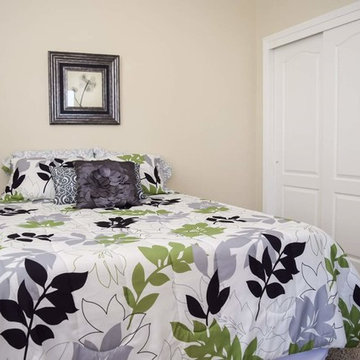
Kim Roberts, owner of Staging Beautifully, has a passion for creating beautiful spaces. From home staging to redecorating, Kim’s relaxed and friendly approach make even the most challenging project fun and enjoyable.
For those interested in refreshing their space, Staging Beautifully can assist a homeowner in decorating their home with the items they already own and love. Like staging, redesign may include color selection, rearranging furniture, hanging art and placing accessories. It is a cost effective design alternative which will give your home a facelift without the cost of an Interior Designer. Utilizing your furnishings and treasures, we will shop your home to find new and creative ways to display your family’s possessions. This will result in a complete interior transformation which will reflect your personality, style, comfort and functionality to your living space without having to buy anything.
Looking to sell your home, consider home staging to target a higher selling price. Home Staging aims to de-personalize your home and make it appealing to virtually all prospective buyers. The way you live in your home and the way you market your home are two very different things. Your home is competing with every other home on the market. A home that looks like it needs work or isn't move-in ready prompts buyers to low-ball their offers, or eliminate your home from consideration all together. Those homes that are staged to reflect current trends attract and appeal to more buyers, resulting in more offers, faster sales, and higher sale prices. Sometimes, an agent may even recommend your price be increased once your home is staged! A well-staged home can even start a bidding war with multiple offers!
 YINWAIAU Architect
Brooklyn brownstone duplex makeover
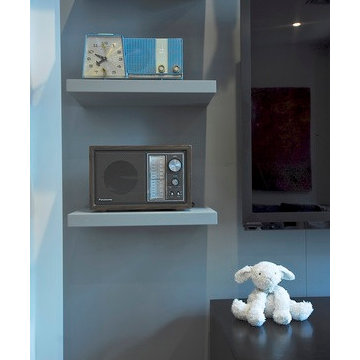
What are the primary needs for a busy young couple starting a brand new family? Simple. Storage! Plenty of storage, where all the accoutrements of a new lifestyle can neatly and easily be stored away, allowing unexpected guest visits to become enjoyable experiences.
Our design renovation makes this into an impressive brownstone with amazing spaces and beautiful, ultra high ceilings. Areas most often neglected and wasted are utilized here for efficient seasonal loft storage with floor to ceiling closets.
 Trim Tech Designs
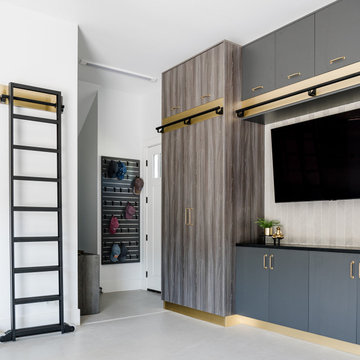
Tall cabinets are ideal for utilizing wasted space, but can be hard to access. Our designers found a creative solution by adding a custom sliding ladder & ladder rail, opening up a world of possibility.
We’re up for a challenge & ready when you are. Submit an inquiry through our info page to start your remodel journey!?
 Babcock Custom Pools & Environments
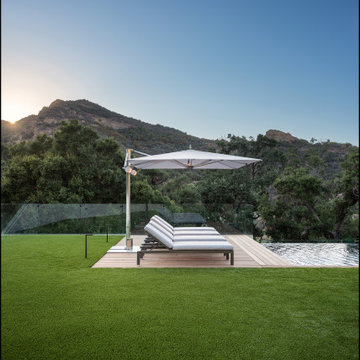
Enhance the Beauty and Functionality of Your Modern Farmhouse with a Custom Pool from Babcock
Are you searching for an exceptional and unique pool design to complete your modern farmhouse aesthetic? Look no further than Babcock Custom Pools, your trusted source for contemporary and rustic pool designs. Our state-of-the-art modern farmhouse pools seamlessly blend sophistication and natural charm, making them the perfect addition to any outdoor living space.
Our expert pool builders craft each design with precision and attention to detail, utilizing only the finest materials for long-lasting durability. From clean lines and minimalistic aesthetics to top-notch weather-resistant construction, you can trust that your Babcock pool will be the epitome of beauty and longevity.
But our commitment to excellence doesn’t end there. Babcock Custom Pools also integrates advanced features to elevate your swimming experience. Energy-efficient pumps, filters, and lighting systems are just some of the cutting-edge features you can expect in your custom pool design.
Don’t settle for just any pool, bring your dream modern farmhouse oasis to life with Babcock Custom Pools. Whether you prefer a simple, elegant design or a more elaborate outdoor haven, our team has the expertise and experience to bring your vision to reality. Get in touch with us today to start planning your stunning modern farmhouse pool!
 Harry Braswell Inc.
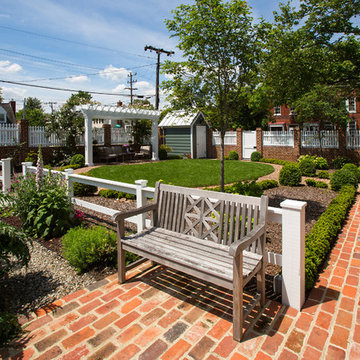
In Old Town Alexandria, homeowners of a beautiful historic home built a colonial garden on an adjacent corner lot. They had vision and patience. The lot was home to a 1920’s stucco-covered storefront with eight garage bays, which included a delicatessen and drycleaners. The process of building the garden took three years from start to finish, including Old and Historic Alexandria Board of Architecture Review approval, re-routing utility lines, a grading plan, and an archaeological dig.
Once a Civil War encampment, the homeowners found two privys; dozens of clay marbles and pipes and whiskey bottles; Union officer jacket buttons; and underwear “presser” buttons during a pre-renovation archaeological dig. Milk glass eggs once used to encourage chickens to lay eggs and barrel chimneys from a meat packing plant on the river were also uncovered.
The homeowners kept the property distinct from their own lot and first added separate electric and water lines underground. Utilities on the side of the house were also brought underground or low-to-ground as the home’s façade could now be made beautiful for public view.
The brick walkway adjacent to the house was re-laid. Inspired by a Mount Vernon barn, the homeowners selected an “old-looking” oversized brick handmade by a Carolina brick company to build the garden paths.
Photography by Greg Hadley
Sponsored
Sunbury, OH
J.Holderby - Renovations
Franklin County's Leading General Contractors - 2X Best of Houzz!
 Michael Nash Design, Build & Homes
2010 NARI CAPITAL COTY FINALIST AWARD WINNER
Project Scope:
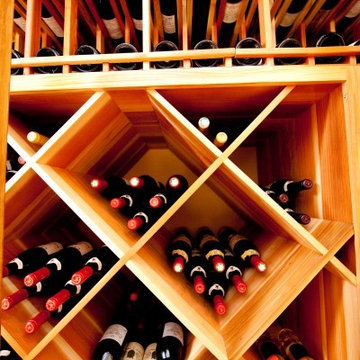
Transform a little-used room in the client’s lower level into an entertainment center, featuring a 1,500-bottle refrigerated wine cabinet, a wet bar, a custom-made bookshelves surround for existing hearth, and television hanging built-ins.
Challenges:
Primary technical challenge was to find a way to unobtrusively install a large “split system” chilling unit to service the wine cooler.
Solutions
The contractor started with a rectangular space that was appreciably stripped down, except for the fireplace at the far end. An adjacent room housed a professional pool table.
The client’s primary concern was how to situate the custom-built wine rack were to specify and fabricate. Although there was plenty of space in niche to the left of the stairway, there was no obvious way to locate the wine rack’s chilling unit for ducting and chiller unit.
Both client and contractor agreed that the logical setting for the rack would be along the short wall adjacent to the room’s entrance. But the short wall afforded no room for the chiller, a “split system” unit that needed adequate “breathing room” to avoid overheating
After many design sketches, the contractor had a tentative solution: house the chilling unit in a utility room behind the stairs leading to the basement. This would keep the unit out of sight and muffle the sound of the compressor.
Then question was how to “circumnavigate” the stairwell and run plumbing lines from the utility room – which was about 20 feet away — to the rack. A floor-level path would be exposed to possible damage and aesthetically unpleasing. Installing the line in the concrete slab flooring would be difficult and expensive – and any repairs to the line would mean tearing up the floor.The only alternative, the contractor suggested, would be to route the lines overhead – run them straight up from the chilling unit, over the joists above, and around the back of the stair case. Once past the staircase, it was straight shot above the joists to the short wall; the lines would then run behind the wall to the wine cooler resting on the floor.
This highly creative solution pleased the client greatly: it not only isolated the chilling unit, but allowed it to be easily serviced; the lines were protected and out of sight; and the wine rack – situated as it was in the room – seemed like it was part of the original house design.
At that point, the contractor needed a wine rack design that seemed equally “original” to the home – and here, too, the challenge was met. Custom-built cabinetry span the length of the wall, with two floor-level cabinets flanking the wine cooler. Above, twin glass-facing walnut displays – lighted and rising nearly to the ceiling – rest on a black marble countertop, showcasing the client’s impressive wine collection.
On the long wall perpendicular to the rack, a widescreen television hangs between two built-in bookcases designed by the contractor. The firm also fabricated the two bookcases now flanking the original fireplace in the far end wall – as well as the glass-faced hanging cabinets which are lighted above the newly installed wet bar.
 Michael Nash Design, Build & Homes
2010 NARI CAPITAL COTY FINALIST AWARD WINNER
Project Scope:
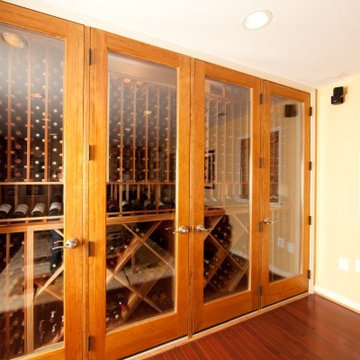
Transform a little-used room in the client’s lower level into an entertainment center, featuring a 1,500-bottle refrigerated wine cabinet, a wet bar, a custom-made bookshelves surround for existing hearth, and television hanging built-ins.
Challenges:
Primary technical challenge was to find a way to unobtrusively install a large “split system” chilling unit to service the wine cooler.
Solutions
The contractor started with a rectangular space that was appreciably stripped down, except for the fireplace at the far end. An adjacent room housed a professional pool table.
The client’s primary concern was how to situate the custom-built wine rack were to specify and fabricate. Although there was plenty of space in niche to the left of the stairway, there was no obvious way to locate the wine rack’s chilling unit for ducting and chiller unit.
Both client and contractor agreed that the logical setting for the rack would be along the short wall adjacent to the room’s entrance. But the short wall afforded no room for the chiller, a “split system” unit that needed adequate “breathing room” to avoid overheating
After many design sketches, the contractor had a tentative solution: house the chilling unit in a utility room behind the stairs leading to the basement. This would keep the unit out of sight and muffle the sound of the compressor.
Then question was how to “circumnavigate” the stairwell and run plumbing lines from the utility room – which was about 20 feet away — to the rack. A floor-level path would be exposed to possible damage and aesthetically unpleasing. Installing the line in the concrete slab flooring would be difficult and expensive – and any repairs to the line would mean tearing up the floor.The only alternative, the contractor suggested, would be to route the lines overhead – run them straight up from the chilling unit, over the joists above, and around the back of the stair case. Once past the staircase, it was straight shot above the joists to the short wall; the lines would then run behind the wall to the wine cooler resting on the floor.
This highly creative solution pleased the client greatly: it not only isolated the chilling unit, but allowed it to be easily serviced; the lines were protected and out of sight; and the wine rack – situated as it was in the room – seemed like it was part of the original house design.
At that point, the contractor needed a wine rack design that seemed equally “original” to the home – and here, too, the challenge was met. Custom-built cabinetry span the length of the wall, with two floor-level cabinets flanking the wine cooler. Above, twin glass-facing walnut displays – lighted and rising nearly to the ceiling – rest on a black marble countertop, showcasing the client’s impressive wine collection.
On the long wall perpendicular to the rack, a widescreen television hangs between two built-in bookcases designed by the contractor. The firm also fabricated the two bookcases now flanking the original fireplace in the far end wall – as well as the glass-faced hanging cabinets which are lighted above the newly installed wet bar.
 Vision Design
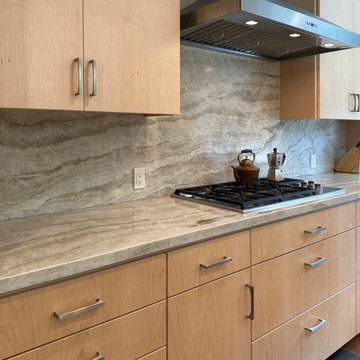
This home started with 2 seating spaces, one of which was barely used and held workout equipment. The kitchen was too small to allow the multi generational family to work together and store their various supplies and equipment. There was very little connection with the big backyard that the homeowners desired. The dining table was rarely used because it was so separated from the other spaces.
We removed walls, opened up the rear wall with a big folding door, switched the positions of the various spaces to enlarge the kitchen, the dining and the single seating space.
Now they have real California indoor/outdoor living that the whole family can fully utilize.
 Advance Design Studio, Ltd.
Curtis and Peggy had been thinking of a kitchen remodel for quite some time, but they knew their house would have a unique set of challenges. Their older Victorian house was built in 1891. The kitchen cabinetry was original, and they wanted to keep the authenticity of their period home while adding modern comforts that would improve their quality of life.
A friend recommended Advance Design Studio for their exceptional experience and quality of work. After meeting with designer Michelle Lecinski at Advance Design, they were confident they could partner with Advance to accomplish the unique kitchen renovation they’d been talking about for years. “We wanted to do the kitchen for a long, long time,” Curtis said. “(We asked ourselves) what are we actually going to do? How are we going to do this? And who are we going to find to do exactly what we want?”
The goal for the project was to keep the home renovation and new kitchen feeling authentic to the time in which it was built. They desperately wanted the modern comforts that come with a larger refrigerator and the dishwasher that they never had! The old home was also a bit drafty so adding a fireplace, wall insulation and new windows became a priority. They very much wanted to create a comfortable hearth room adjacent to the kitchen, complete with old world brick.
The original cabinetry had to go to make way for beautiful new kitchen cabinetry that appears as if it was a hundred years old, but with all the benefits of cutting-edge storage, self-closing drawers, and a brand-new look. “We just wanted to keep it old looking, but with some modern updates,” Peggy said.
Dura Supreme Highland Cabinets with a Heritage Old World Painted Finish replaced the original 1891 cabinets. The hand-applied careful rubbed-off detailing makes these exquisite cabinets look as if they came from a far-gone era. Despite the small size of the kitchen, Peggy, Curtis and Michelle utilized every inch with custom cabinet sizes to increase storage capacity. The custom cabinets allowed for the addition of a 24” Fisher Paykel dishwasher with a concealing Dura Supreme door panel. Michelle was also able to work into the new design a larger 30” Fisher Paykel French refrigerator. “We made every ¼ inch count in this small space,” designer Michelle said. “Having the ability to custom size the cabinetry was the only way to achieve this.”
“The kitchen essentially was designed around the Heartland Vintage range and oven,” says Michelle. A classic appliance that combines nostalgic beauty and craftsmanship for modern cooking, with nickel plated trim and elegantly shaped handles and legs; the not to miss range is a striking focal point of the entire room and an engaging conversation piece.
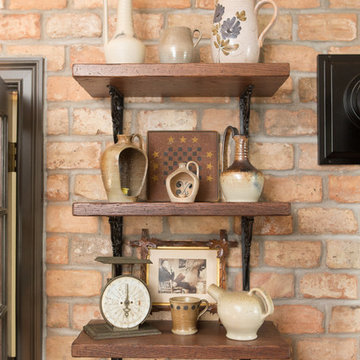
Granite countertops in Kodiak Satin with subtle veining kept with the old-world style. The delicate porcelain La Vie Crackle Sonoma tile kitchen backsplash compliments the home’s style perfectly. A handcrafted passthrough designed to show off Peggy’s fine china was custom built by project carpenters Justin Davis and Jeff Dallain to physically and visually open the space. Additional storage was created in the custom panty room with Latte Edinburg cabinets, hand-made weathered wood shelving with authentic black iron brackets, and an intricate tin copper ceiling.
Peggy and Curtis loved the idea of adding a Vermont stove to make the hearth-room not only functional, but a truly beckoning place to be. A stunning Bordeaux red Vermont Castings Stove with crisp black ventilation was chosen and combined with the authentic reclaimed Chicago brick wall. Advance’s talented carpenters custom-built elegant weathered shelves to house family memorabilia, installed carefully chosen barn sconces, and made the hearth room an inviting place to relax with a cup of coffee and a good book.
“Peggy and Curtis’ project was so much fun to work on. Creating a space that looks and feels like it always belonged in this beautiful old Victorian home is a designer’s dream. To see the delight in their faces when they saw the design details coming together truly made it worth the time and effort that went into making the very compact kitchen space work”, said Michelle. “The result is an amazing custom kitchen, packed with functionality in every inch, nook and cranny!” exclaims Michelle.
The renovation didn’t end with the kitchen. New Pella windows were added to help lessen the drafts. The removal of the original windows and trim necessitated the re-creation of hand-made corbels and trim details no longer available today. The talented carpenter team came to the rescue, crafting new pieces and masterfully finishing them as if they were always there. New custom gutters were formed and installed with a front entry rework necessary to accommodate the changes.
The whole house functions better, but it still feels like the original 1891 home. “From start to finish it’s just a much better space than we used to have,” Peggy said. “Jeff and Justin were amazing.” Curtis added; “We were lucky to find Advance Design, because they really came through for us. I loved that they had everything in house, anything you needed to have done, they could do it”.
 Wood Anchor
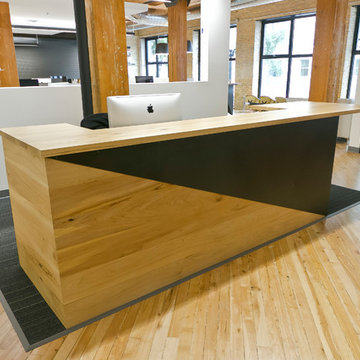
Our design vision for the pieces we designed and built for Prairie Architecture’s new space started with the reception desk.
As the main focal point for their customers and clients when they are greeted we had to design a stately visual piece!
The main feature of the reception desk utilized reclaimed Elm which was specified early on in the project paying homage to Winnipeg’s boulevards.
Part of our overall concept was incorporating angular lines within the designs of the steel work.
The folded steel helped create large flat planes presenting a beautiful contrast to the figured warm character of the Elm.
The use of steel within our designs were to connect to PAI’s existing steel work tables as well as the steel in the heritage building.
Details:
11′-10″ long x 3′ wide with 1-1/2″ solid Elm tops. Main front face and gables cladded in wide lamination Elm veneers on Baltic Birch Ply. Folded raw steel design finished with clear powder coat finish
Photo credits: 2017 © Ray Chan Photo, All Rights Reserved
 Staging Beautifully
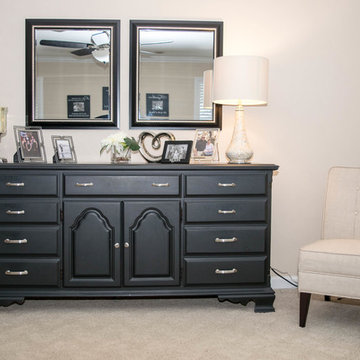
Kim Roberts, owner of Staging Beautifully, has a passion for creating beautiful spaces. From home staging to redecorating, Kim’s relaxed and friendly approach make even the most challenging project fun and enjoyable.
For those interested in refreshing their space, Staging Beautifully can assist a homeowner in decorating their home with the items they already own and love. Like staging, redesign may include color selection, rearranging furniture, hanging art and placing accessories. It is a cost effective design alternative which will give your home a facelift without the cost of an Interior Designer. Utilizing your furnishings and treasures, we will shop your home to find new and creative ways to display your family’s possessions. This will result in a complete interior transformation which will reflect your personality, style, comfort and functionality to your living space without having to buy anything.
Looking to sell your home, consider home staging to target a higher selling price. Home Staging aims to de-personalize your home and make it appealing to virtually all prospective buyers. The way you live in your home and the way you market your home are two very different things. Your home is competing with every other home on the market. A home that looks like it needs work or isn't move-in ready prompts buyers to low-ball their offers, or eliminate your home from consideration all together. Those homes that are staged to reflect current trends attract and appeal to more buyers, resulting in more offers, faster sales, and higher sale prices. Sometimes, an agent may even recommend your price be increased once your home is staged! A well-staged home can even start a bidding war with multiple offers!
 Staging Beautifully
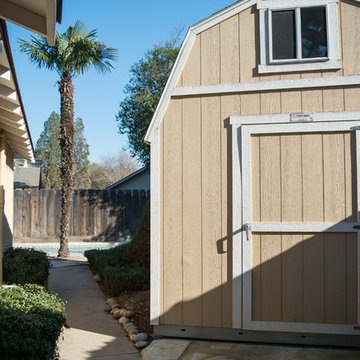
Kim Roberts, owner of Staging Beautifully, has a passion for creating beautiful spaces. From home staging to redecorating, Kim’s relaxed and friendly approach make even the most challenging project fun and enjoyable.
For those interested in refreshing their space, Staging Beautifully can assist a homeowner in decorating their home with the items they already own and love. Like staging, redesign may include color selection, rearranging furniture, hanging art and placing accessories. It is a cost effective design alternative which will give your home a facelift without the cost of an Interior Designer. Utilizing your furnishings and treasures, we will shop your home to find new and creative ways to display your family’s possessions. This will result in a complete interior transformation which will reflect your personality, style, comfort and functionality to your living space without having to buy anything.
Looking to sell your home, consider home staging to target a higher selling price. Home Staging aims to de-personalize your home and make it appealing to virtually all prospective buyers. The way you live in your home and the way you market your home are two very different things. Your home is competing with every other home on the market. A home that looks like it needs work or isn't move-in ready prompts buyers to low-ball their offers, or eliminate your home from consideration all together. Those homes that are staged to reflect current trends attract and appeal to more buyers, resulting in more offers, faster sales, and higher sale prices. Sometimes, an agent may even recommend your price be increased once your home is staged! A well-staged home can even start a bidding war with multiple offers!
61