
Search results for "Starting watering" in Home Design Ideas

 Michelle Berwick Design
The homeowner wanted something really fun. She loves wallpaper and has a very good theory that if you have a fun and interesting wallpaper in a powder room your guests are less likely to go riffling through the cabinets.

 TVL Creative Ltd.
This project included a massive renovation to nearly all spaces in the home: the entry, living room, family room, dining room, kitchen, staircase, and master bathroom. Each space underwent a massive transformation in order to create the elegant & traditional aesthetic that our clients love. On the main level of the home, the original space layout was extremely compartmentalized and dark. Our clients wanted to open up and brighten the space as much as possible. In addition to this, a major goal was to increase function and to create a welcoming environment for guests and the clients alike. We started by opening up the space plan significantly. This allows for flowing space between the kitchen, front living room, and rear family room. Light is better carried through these spaces, and further emphasized with airy colors, light cabinetry, and a better lighting plan overall. We removed the old decorative ceiling beams and reworked closets and hallways to create a more open and functional main level. The kitchen offers a large amount of counter space and storage opportunity, but also welcomes guests at a sizable island and secondary peninsula. Beyond the kitchen, we designed a work nook where display storage and functional workspace are both present. We reworked both fireplaces in the home to create warm nooks for gathering: both fireplaces feature large format stone and are flanked with display shelving. The master bathroom upstairs was completely reworked as well. We eliminated the oversized drop-in tub and in-wall fireplace, and took away the steam shower that had been causing water and mildew issues for years. We relocated the toilet and developed a gorgeous vanity area in the space where the old bathtub and fireplace used to be. We then created a massive shower room in lieu of a tub/shower combination. The bathroom is adorned with warm tones and natural textures: marble subway tile runs up the entire wall behind the vanity, wood-look porcelain covers the floor and back wall of the shower, and simple artisan subway tiles in a creamy vanilla tone cover the shower walls. These spaces completely transformed the look and feel of the house, and we are so happy our amazing clients get to enjoy this home with their family for years to come!
 Landscape Artisan, Inc.
Landscape Artisan
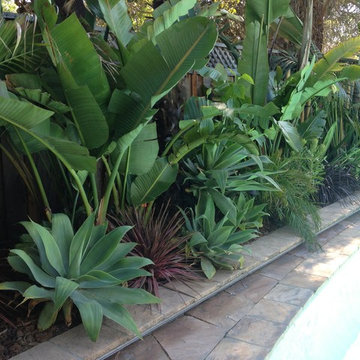
Inspiration for an asian home design remodel in San Francisco
Inspiration for an asian home design remodel in San Francisco
Find the right local pro for your project
 Michael Nash Design, Build & Homes
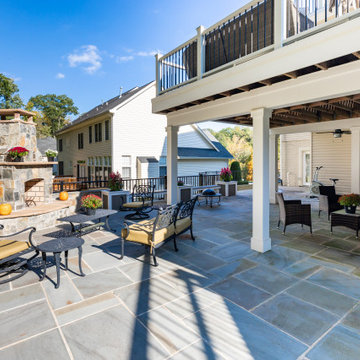
This couple desired to expand their horizon and maximize their outdoor living space. Their back yard was part of a big hill and a major amount of excavation needed to level up the ground for any kind of flat space use
• The homeowner’s goals where to have a big lower level patio to be able to walk out of their basement into stone patio
• Space for outdoor jacuzzi
• Space for outdoor wood burning fireplace and seating wall
• Outdoor lower bar
• Second floor large scale deck with a cooking bar
• A walkway ramp for wheelchair access (covered with roof)
• Lots of seating and entertainment space
Challenges:
The big backyard hill and big ground.
Big stone retaining walls needed.
Major excavation.
Run utilities, such as gas and water and sewer for bar area.
Resolve drainage.
The project started with breaking ground, and haul away major amount of dirt from back yard, implementing over 300 ft of retaining wall covered in stone to sunk in the patio
Cutting concrete walls in basement to create walk out into new patio
New flagstone patio over concrete slab was designed with outer radius to own a wood burning fireplace and seating walls. Right side was covered with tall stone wall and raining to adjacent neighbors
Under the deck area is a covered area for bar with stool seating wrapped with ledger stone and granite top and a secluded area for jacuzzi away from neighbors’ view
A double-sided staircase was built connecting lower patio to wrapped around upper deck,
The new Azak covered deck with listed rail system was equipped with cooking island, natural gas grill, sink and faucet, microwave and outdoor beverage center.
A covered walkway ramp has given an opportunity for elder mother in wheelchair to be able to visit them and spend time outdoor with them.
Beaded ceiling panels and hanging chandeliers has lid up this veranda.
This three-story addition into back of this dwelling stand tall in this community and now more than ever this family get to enjoy their backyard and outdoors with friends and family
The harmonizing choice of decking colors with ledger stone, granite tops, flagstone and veneer wall stones has given this outdoor project a standing ovation.
 Tile Doctor Ltd
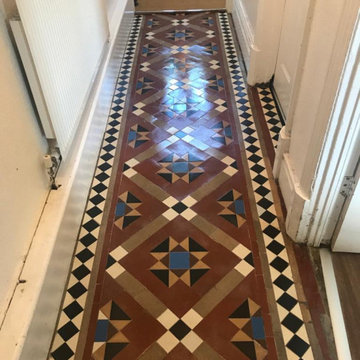
I recently worked on the restoration of a Victorian tiled hallway in Cwmbran Wales which is six miles North of Newport. As you can see from the photographs the floor was in quite a neglected dirty state and many of the the black and white border tiles needed removing and replacing. The worst part was the area by the front door where most of the tiles had been removed and then backfilled with concrete. I can only assume at some point in the past it was deemed to difficult or expensive to restore the floor, so they simply covered it up.
After visiting to survey the floor I did offer to source replacements for the concreted section and restore that as part of the work however my client’s budget would not stretch to that at the time. My quote was therefore focused on the main section of flooring and included replacing border tiles, deep cleaning the whole floor and then sealing the tiles to add protection. Although I did need to check that I could indeed source the replacement tiles before being able to provide the quote which as it turned out would not be an issue.
They were happy to go ahead and we arranged a suitable time to carry out the work which would enable me to work in the property whilst minimising contact with the owners due to the Covid-19 situation.
I spend the first day sorting out the black and white border tiles which needed to be gently prised out of position without upsetting the main part of the floor. The exposed subfloor was then cleaned up to remove old adhesive and replacements were fitted where required and secured into place. The floor would need to be solid before cleaning so that was left for day two so the new adhesive could go off overnight.
On day two I gave the floor an initial clean using a combination of Tile Doctor Pro-Clean and Remove and Go diluted with water. This produces a strong cleaner/stripper that will tackle dirt and remove coatings such as previous sealers. The old tiles had accumulated years of ingrained dirt, so I needed this extra power to remove the years of dirt and contaminates from the tile. It was sprayed onto the tiles and then left to soak in for ten minutes before being actively scrubbed into the tile using a rotary machine fitted with a black scrubbing pad. The soil was then rinsed off with water and extracted with a wet vacuum. The floor was inspected, and the process repeated on the tough stains until I was satisfied all the dirt had been removed.
Next the floor was treated to an acid wash using Tile Doctor Acid Gel using a similar method as before. This is an important treatment for these old Victorian floors that have no damp proof course as it neutralises efflorescent salts trapped in the tile which can appear as white salt deposits later. Once I was happy with the condition of the floor it was given a final rinse and left to dry off. I use a wet vacuum to remove liquids from the floor and on this last extraction I spent extra time to remove as much moisture from the tiles as possible.
I came back a few days later and after checking the tiles were dry using a damp meter, I started the application of the sealer. For this floor I applied seven coats of Tile Doctor Seal and Go for a satin finish. Tile Doctor Seal and Go is a specially formulated water-based sealer that provides both stain resistance and a durable low-sheen finish. It is perfect on a floor of this age where it leaves a lovely finish and will remain durable in what is a essentially a high traffic area.
Although we didn’t manage to sort out the area by the front door the client managed to fit a made to measure coir door mat along with carpet bar which was quite practical and looked fine so they were able to resolve that problem without blowing their budget.
The client was over the moon with results, the floor had a lovely pattern and the colours now shone through. I suggested the use of Tile Doctor Neutral Tile Cleaner to keep the floor clean and in good condition. It is neutral in pH so will ensure that the newly applied sealer stays in place and will ensure maintenance is nice and easy for them.
Paul Wales
Monmouthshire Tile Doctor
 Holiday Maldives
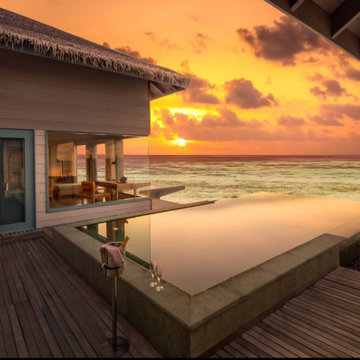
Combine ancient temples with overwater villas for the trip of a lifetime
There's a reason savvy travellers are increasingly looking beyond single-destination holidays. The Sri Lanka Maldives multi-centre trip has emerged as one of the most sought-after combinations in tropical travel—and it's easy to understand why. These two Indian Ocean neighbours couldn't be more different, yet together they create a holiday experience that satisfies every type of wanderlust.
Why Combine Sri Lanka and the Maldives?
Sri Lanka offers what the Maldives doesn't: lush highlands carpeted in tea plantations, ancient cities steeped in 2,500 years of history, wildlife safaris where leopards roam free, and a culinary scene that'll have you dreaming of hoppers and kottu for years to come. The Maldives, meanwhile, delivers what Sri Lanka can't: those iconic overwater bungalows, some of the planet's most pristine coral reefs, and the kind of barefoot luxury where your biggest decision is whether to have your massage on the beach or in your private villa.
A Sri Lanka and Maldives twin centre holiday lets you experience the thrill of exploration followed by pure, unadulterated relaxation. It's the best of both worlds—literally.
The Perfect Itinerary Balance
Most travellers find that spending 7-10 days in Sri Lanka followed by 4-7 days in the Maldives creates the ideal rhythm. Sri Lanka demands more time because there's simply so much ground to cover. You might start in Colombo, travel through the Cultural Triangle to explore Sigiriya's ancient rock fortress and Dambulla's cave temples, wind through the tea country around Ella, and perhaps end with a safari in Yala National Park before catching your flight to Malé.
Then comes the reward: touching down in the Maldives, boarding a speedboat or seaplane, and watching the stress of everyday life disappear as those famous turquoise lagoons come into view. After days of early morning temple visits and winding mountain roads, there's nothing quite like sinking into a lounger with nothing on the agenda but deciding which shade of blue you're looking at.
Logistics Made Simple
One of the best aspects of this combination is how geographically convenient it is. Colombo and Malé are just over an hour apart by air, with multiple daily flights connecting the two capitals. This proximity means minimal travel fatigue and maximum time enjoying your destinations.Find More here https://holiday.com.mv/sri-lanka-and-maldives-twin-centre-holidays/
For those considering expanding their Indian Ocean adventure even further, Maldives multi-centre holidays open up possibilities beyond Sri Lanka. Dubai, Singapore, and various Indian cities all serve as excellent add-on destinations, turning an already incredible trip into a true odyssey.
Planning Considerations for 2026
Timing matters with this combination. The Maldives enjoys fairly consistent weather year-round, but Sri Lanka has two distinct monsoon seasons affecting different coasts at different times. Generally speaking, December through April works beautifully for both destinations, making it the peak season for this twin-centre route.
Budget-wise, expect Sri Lanka to be significantly more affordable than the Maldives. Many travellers use this to their advantage, opting for boutique hotels and authentic local experiences in Sri Lanka, then splurging on a premium resort for their Maldives finale. It's a strategy that delivers exceptional value without sacrificing that once-in-a-lifetime overwater villa experience.
The Verdict
A Sri Lanka Maldives multi-centre holiday isn't just about ticking two countries off a list. It's about crafting a journey with genuine contrast and emotional arc—adventure followed by serenity, cultural immersion followed by indulgent escape. For couples, honeymooners, families, and solo travellers alike, this combination consistently ranks among the most satisfying itineraries the Indian Ocean has to offer.
If you've been dreaming of ancient ruins at sunrise and sunset cocktails on a private deck over crystalline waters, this might just be your year to make it happen.
Ready to start planning your twin-centre adventure? Work with specialists who know both destinations intimately to create an itinerary that matches your travel style and budget.Find More here https://holiday.com.mv/maldives-multi-centre-holidays/
 Holiday Maldives
Combine ancient temples with overwater villas for the trip of a lifetime
There's a reason savvy travellers are increasingly looking beyond single-destination holidays. The Sri Lanka Maldives multi-centre trip has emerged as one of the most sought-after combinations in tropical travel—and it's easy to understand why. These two Indian Ocean neighbours couldn't be more different, yet together they create a holiday experience that satisfies every type of wanderlust.
Why Combine Sri Lanka and the Maldives?
Sri Lanka offers what the Maldives doesn't: lush highlands carpeted in tea plantations, ancient cities steeped in 2,500 years of history, wildlife safaris where leopards roam free, and a culinary scene that'll have you dreaming of hoppers and kottu for years to come. The Maldives, meanwhile, delivers what Sri Lanka can't: those iconic overwater bungalows, some of the planet's most pristine coral reefs, and the kind of barefoot luxury where your biggest decision is whether to have your massage on the beach or in your private villa.
A Sri Lanka and Maldives twin centre holiday lets you experience the thrill of exploration followed by pure, unadulterated relaxation. It's the best of both worlds—literally.
The Perfect Itinerary Balance
Most travellers find that spending 7-10 days in Sri Lanka followed by 4-7 days in the Maldives creates the ideal rhythm. Sri Lanka demands more time because there's simply so much ground to cover. You might start in Colombo, travel through the Cultural Triangle to explore Sigiriya's ancient rock fortress and Dambulla's cave temples, wind through the tea country around Ella, and perhaps end with a safari in Yala National Park before catching your flight to Malé.
Then comes the reward: touching down in the Maldives, boarding a speedboat or seaplane, and watching the stress of everyday life disappear as those famous turquoise lagoons come into view. After days of early morning temple visits and winding mountain roads, there's nothing quite like sinking into a lounger with nothing on the agenda but deciding which shade of blue you're looking at.
Logistics Made Simple
One of the best aspects of this combination is how geographically convenient it is. Colombo and Malé are just over an hour apart by air, with multiple daily flights connecting the two capitals. This proximity means minimal travel fatigue and maximum time enjoying your destinations.
For those considering expanding their Indian Ocean adventure even further, Maldives multi-centre holidays open up possibilities beyond Sri Lanka. Dubai, Singapore, and various Indian cities all serve as excellent add-on destinations, turning an already incredible trip into a true odyssey.
Planning Considerations for 2026
Timing matters with this combination. The Maldives enjoys fairly consistent weather year-round, but Sri Lanka has two distinct monsoon seasons affecting different coasts at different times. Generally speaking, December through April works beautifully for both destinations, making it the peak season for this twin-centre route.
Budget-wise, expect Sri Lanka to be significantly more affordable than the Maldives. Many travellers use this to their advantage, opting for boutique hotels and authentic local experiences in Sri Lanka, then splurging on a premium resort for their Maldives finale. It's a strategy that delivers exceptional value without sacrificing that once-in-a-lifetime overwater villa experience.
The Verdict
A Sri Lanka Maldives multi-centre holiday isn't just about ticking two countries off a list. It's about crafting a journey with genuine contrast and emotional arc—adventure followed by serenity, cultural immersion followed by indulgent escape. For couples, honeymooners, families, and solo travellers alike, this combination consistently ranks among the most satisfying itineraries the Indian Ocean has to offer.
If you've been dreaming of ancient ruins at sunrise and sunset cocktails on a private deck over crystalline waters, this might just be your year to make it happen.
Ready to start planning your twin-centre adventure? Work with specialists who know both destinations intimately to create an itinerary that matches your travel style and budget.Find more https://holiday.com.mv/sri-lanka-and-maldives-twin-centre-holidays/
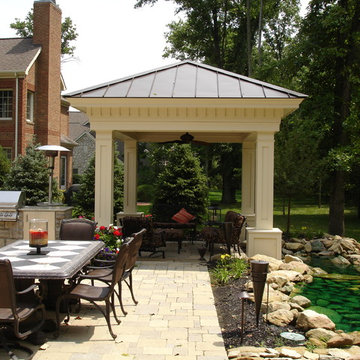
Sponsored
Columbus, OH
Free consultation for landscape design!

Peabody Landscape Group
Columbus' Reliable Landscape Design & Contracting

 Stebnitz Builders, Inc.
This East Troy home on Booth Lake had a few drainage issues that needed to be resolved, but one thing was clear, the homeowners knew with the proper design features, their property had amazing potential to be a fixture on the lake.
Starting with a redesign of the backyard, including retaining walls and other drainage features, the home was then ready for a radical facelift. We redesigned the entry of the home with a timber frame portico/entryway. The entire portico was built with the old-world artistry of a mortise and tenon framing method. We also designed and installed a new deck and patio facing the lake, installed an integrated driveway and sidewalk system throughout the property and added a splash of evening effects with some beautiful architectural lighting around the house.
A Timber Tech deck with Radiance cable rail system was added off the side of the house to increase lake viewing opportunities and a beautiful stamped concrete patio was installed at the lower level of the house for additional lounging.
Lastly, the original detached garage was razed and rebuilt with a new design that not only suits our client’s needs, but is designed to complement the home’s new look. The garage was built with trusses to create the tongue and groove wood cathedral ceiling and the storage area to the front of the garage. The secondary doors on the lakeside of the garage were installed to allow our client to drive his golf cart along the crushed granite pathways and to provide a stunning view of Booth Lake from the multi-purpose garage.
Photos by Beth Welsh, Interior Changes
 Tile Doctor Ltd
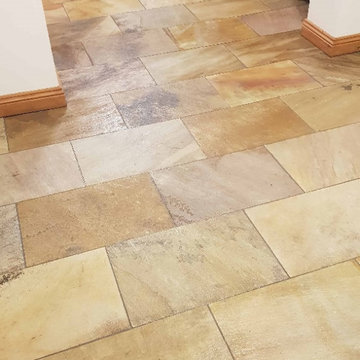
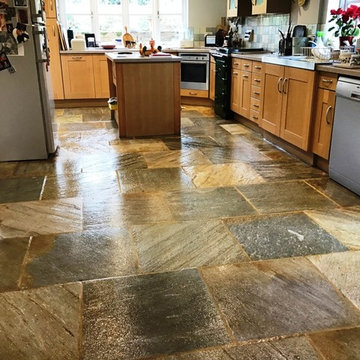
The photos on this page are of a Sandstone Kitchen floor at a house in the High Green suburb of Sheffield. The Sandstone tiles looked grubby and needed some love and attention. Our client was getting fed up trying to keep the stone clean, particularly around the kitchen area where cleaning didn’t seem to make much. You can see how dirty it had become on the before picture below, this is stark contrast to the middle of the of the kitchen where the portable kitchen island normally sits.
I went to the property to get a better look at the problem floor and carried out a small test clean to see which products and methods would have the best impact. The patch came up really clean without much difficulty, so I was confident on being able to restore its appearance.
It was clear to me the original protective sealer had worn off and dirt had become ingrained in the pores of the stone where it was proving difficult to remove. My client was very encouraged by the test clean initial result and agreed to go ahead with the quote. We arranged a suitable time to carry out the work on a day when the family would be out of the way.
I started by taping up the area to make sure the skirting and woodwork were protected from splashing. Once done a strong dilution of Tile Doctor Pro-Clean was sprayed onto Sandstone tile and grout. It was left to dwell for approximately ten minutes to help break down all the grime and dirt and was then worked into the stone using a rotary floor machine fitted with a stiff bristled brush.
This method totally transformed the dull sandstone, the stunning sandstone colours started to leap out and I could see the stone was well on its way to being transformed. The floor was then rinsed several times with water and the now soiled cleaning solution carefully removed with an industrial wet vacuum.
With the floor clean I inspected all the tiles and repeated the process until I was happy the floor was total clean. I should mention It’s not always this easy to clean a stone floor and quite often I find myself having to utilise all sorts of products and methods before I’m totally satisfied it’s as clean as it could possibly be.
With the cleaning done I left the floor to dry out overnight aided with heaters and air blowers.
I returned to seal the floor the next day checking first that the stone was dry with a damp meter. Leaving the blowers on overnight had helped and the readings I took from the floor confirmed it was now ready for sealing.
Earlier I had discussed the different types of sealer available with my clients and they had chosen to have the floor sealed with Tile Doctor Seal & Go. This works really well on Sandstone, enhancing its appearance, improving colour and of course adding protection to the stone to prevent grime and dirt stuck in the pores of the stone. Several coats were applied until I could see if was fully sealed and the right level of finish had been achieved. Sealing a floor can take some time as you need to allow each coat to dry before applying the next.
Once done the floor looked meticulously clean and the new sealer had added a lovely subtle sheen to the stone. My client was very please with the transformation and left the following feedback.
‘Very professional approach, friendly, and offered great advice throughout the job. Very pleased with the finish Cheers Matt we will see you again’
One of the problems we find with many homeowners is that for cleaning they use strong bleach-based cleaning product on their sealed tiles, and this actually strips off the sealer leaving the stone vulnerable to ingrained dirt. As a result, Tile Doctor has developed Tile Doctor Neutral Tile Cleaner, it is pH neutral and gentle enough for everyday use without affecting the sealer.
Matthew Lovett
South Yorkshire Tile Doctor
 Tile Doctor Ltd
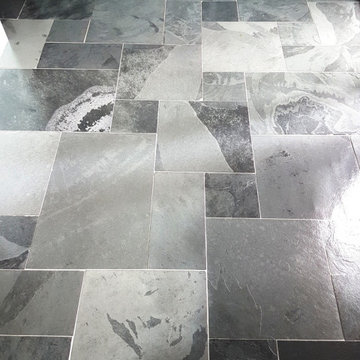
The pictures below are of a Riven Slate floor at a house in in the Leeds suburb of Horsforth which had been laid ten years prior. It’s probably difficult to appreciate from the images but the sealer on this floor was well worn through in the high traffic areas making it patchy in places. Without the protection of the sealer dirt was now ingrained in the pores of the stone leaving it looking dull. Riven slate is always tricky to clean thoroughly due to the rough surface and that combined with the ingrained dirt was making it very difficult to keep clean.
The floor now needed to be stripped of old sealer and then resealed and although I can provide a price for this over the phone my preference is to visit the property and survey the floor. In the case the owner had sent me some photographs via email however they were not too clear and so I felt it would be best if I paid the customer a visit to ensure I could give them an accurate price.
The floor was indeed overdue a clean and seal, as suspected dirt was ingrained into the areas where the seal had worn off. The house was home to a very busy family, so the area was subject to the significant traffic. I carried out a test clean on a small area and they were surprised by the results, when you live with a floor for so long you don’t notice the very slow decline in its appearance. They agreed to my quote and we arranged a time to return and carry the deep clean out.
When I arrived, I started off by protecting the skirting and surrounding woodwork. Given the rough surface of the floor I first applied Tile Doctor Wax Away which is a very effective coatings remover that is designed for removing wax but works very well in these situations. The product was left to dwell for a round ten minutes so it could get to work breaking down the old sealer and then scrubbed in using a black scrubbing pad fitted to a rotary machine.
This process removed most of the dirt and old sealer, but some stubborn patches remained. To treat these, I replaced the black pad with a coarse 200-grit burnishing pad and finally some handheld diamond burnishing blocks for the edges and corners where more intricate work was required, and the circular pads struggle to reach.
I gave the floor a rinse, and extracted the soil with a wet vacuum, the floor was then left to dry off overnight.
The next day I returned, first the slate floor was checked for moisture using the moisture meter. Once I was happy it was within the correct parameters, I then sealed with four coats of Tile Doctor Seal and Go. This is a modern water-based blend of acrylic polymers that provides both a stain resistant surface seal and a durable low-sheen finish also being water based there’s no smell as it dries.
The sealer really brought the stone to back to life and the lovely colours in the natural stones were now evident. The patchy appearance of the floor was gone, and the customer was happy.
I discussed with them how they should maintain the floor and advised them to use Tile Doctor Neutral Tile Cleaner. This is pH neutral cleaner that won’t prematurely erode the new sealer like the stronger products you find in Supermarkets which are only for use on Vinyl and Ceramic floors.
Nigel Stoker
North West Yorkshire Tile Doctor

 Alair Homes Plano
Our clients drastically needed to update this master suite from the original forest green floral wallpaper to something more clean and simple. They wanted to open up the dated cultured marble enclosed tub and shower and remove all soffits and plant ledges above the vanities. They wanted to explore the possibilities of opening up the shower with glass and look at installing a freestanding bathtub and they definitely wanted to keep the double sided fireplace but update the look of it.
First off, we did some minor changes to the bedroom. We replaced the carpet with a beautiful soft multi-color gray low pile carpet and painted the walls a soft white. The fireplace surround was replaced with Carrara 12×12 polished porcelain tile for a more elegant look. Finally, we tore out a corner built in desk and squared off and textured the wall, making it look as though it were never there.
We needed to strip this bathroom down and start from scratch. We demoed the cabinets, counter tops, all plumbing fixtures, ceiling fan, track lighting, tub and tub surround, fireplace surround, shower door, shower walls and ceiling above the shower, all flooring, soffits above vanity areas, saloon doors on the water closet and of course the wallpaper!
We changed the walls around the shower to pony walls with glass on the upper half, opening up the shower. The tile was lined with Premium Antasit 12×24 tile installed vertically in a 50/50 brick pattern. The shower floor and the floor below the tub is Solo River Grey Pebble mosaic tile. A contemporary Jaclo Collection shower system was installed including a contemporary handshower and square shower head. The large freestanding tub is a white Hydro Sytsems “Picasso” with “Steelnox” wall mounted tub filler and hardware from Graff.
All of the cabinets were replaced with Waypoint maple mocha glazed flat front doors and drawers. Quartzmasters Calacatta Grey countertops were installed with 2 Icera “Muse” undermount sinks for a clean modern look. The cabinet hardware the clients chose is ultra modern ”Sutton” from Hardware Resources and the faucet and other hardware is all from the Phylrich “Mix” collection.
Pulling it all together, Premium Antasit 12×14 installed floor tile was installed in a 50/50 brick pattern. The pebble tile that was installed in the shower floor was also installed in an oval shape under the bathtub for a great modern look and to break up the solid gray flooring.
Addison Oak Wood planks were installed vertically behind the bathtub, below the fireplace surround and behind the potty for a modern finished look. The fireplace was surrounded with Carrara 12×12 polished porcelain, as well as the wood planks. Finally, to add the finishing touches, Z-Lite brushed nickel vanity lights were installed above each vanity sink. The clients are so pleased to be able to enjoy and relax in their new contemporary bathroom!
 Tile Doctor Ltd
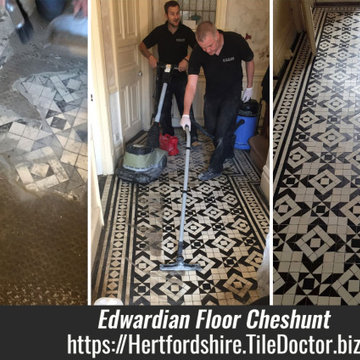
During an inspection for alteration work, this customer from Cheshunt discovered what appeared to be an original encaustic tiled floor under the hallway carpet. Keen to work out what it was, and have it restored, I was asked to pop round and look.
I went over as requested to survey the hallway floor and confirm their suspicions. The carpet had been secured with gripper rods glued onto the floor and that came away easily enough. Underneath, the tiles had been covered with self-levelling cement which had to be carefully scraped away to reveal the tiles.
I ran a test to see if the cement leveller could be easily removed and using a combination of a scraper with Tile Doctor Pro-Clean, I was able to confirm the tiled floor was indeed salvageable. The house was Edwardian, and the tiles had been laid in a classic black and white geometric pattern typical of the period so I suspect the floor was indeed original.
I worked out a quote to restore the whole floor including the removal of the cement, deep cleaning and then sealing the tiles. Without removing all the cement, it would be difficult to price for replacing broken tiles, but I suspected there may be a few as its quite usual for a floor of this age. Keen to have the floor restored we were given the go-ahead and a date scheduled for the work to start.
The first step was to remove all the carpet and gripper rod so we could see the full extent of the self-levelling screed. Once done it was a case of carefully chipping and scraping away to break up the cement until the tiled floor had been fully revealed. Its slow and detailed work but quite rewarding when the tiled floor is finally revealed. The tiles had survived well under the carpet and cement but as suspected a few repairs and replacement would be needed.
With all the cement brushed away work moved onto cleaning which started with a strong dilution of Tile Doctor Pro-Clean applied to the floor and left to soak in for fifteen minutes the scrubbed in with a rotary machine fitted with a Black pad. A lot of soiling is generated from this which is rinsed off with water and extracted with a wet vacuum. The floor was then inspected and the process repeated where required.
The next step was to treat the tiles to an acid wash using Tile Doctor Grout Clean-up. This is applied as before and has several benefits including dissolving the remaining cement residue and neutralising the pH of the floor after the use of Tile Doctor Pro-Clean which is a strong alkaline.
The floor was then inspected and the broken tiles carefully removed so they could be replaced. This is delicate work as lifting a tile can sometimes upset its neighbour and before you know it the size of the work has tripled. Replacement tiles were then cut to fit the existing geometric pattern and secured into place with a rapid set adhesive and grouted in.
Once the replacement tile and grout had set, the floor was given a light clean using Tile Doctor Neutral Tile Cleaner and then left to dry out overnight.
The next day the tiles were sealed using a single coat of Tile Doctor Colour Grow and the followed up with give coats of Tile Doctor Seal & Go. Colour Grow is an impregnator that soaks into the pores of the tile protecting it from within and improving colour, where as Seal and Go adds a nice subtle sheen to the tiles. Both products are breathable which is an important feature with old floors that don’t have a damp proof membrane.
For aftercare I recommended Neutral Tile Cleaner which is a gentle but effective tile cleaning product that won’t damage the sealer.
Robert Voyce
Hertfordshire TIle Doctor
 Tile Doctor Ltd
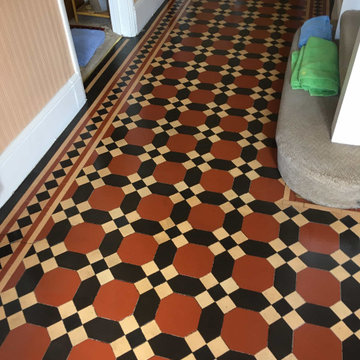
This Victorian floor in Twickenham, Middlesex was in good physical condition for its age but needed a good deep clean. Our customer had informed us that they had never cleaned or sealed the floor in the sixteen years that they had lived there so it was well overdue.
I went over to survey the floor and completed a test clean on a small section of tiling to see which products/techniques would work best. I like to do this as it demonstrates to the client what can be done, and it allows me to come up with an accurate price for doing the work.
As you can see from the pictures, there was quite a difference in the test patch compared to the rest of the floor. Years of foot traffic from the street had taken its’ toll and the floor was very dirty. Luckily, the floor was in very good condition and had not worn too badly.
Once they had seen the test patch, they were confident that it would be worth go ahead with my quote. It would ensure that the period feature was retained for many years to come. The colours on the floor were quite faded so it would be nice to get it restored.
I started the cleaning process by first taping up the surrounding skirting boards and doors to ensure they were protected from potential splashing. Cleaning involved spraying the Victorian tiles with a strong dilution of Tile Doctor Pro-Clean which is a dedicated Tile and Grout cleaning product. This was left to soak in for about ten minutes and then scrubbed in using a black pad fitted to a heavy-duty rotary scrubber.
This gives the floor a good mechanical scrub and works wonders releasing the ground-in dirt and soil from the tiles. The strong dilution of Pro-Clean will also remove any remaining sealers from the tile, however after sixteen years I doubted there would much trace of sealer left. Once done the floor was rinsed with water and all the soils removed with a wet vacuum.
Following the initial clean the colours were already much stronger. Next step however was to improve on that by giving the floor an acid rinse using Tile Doctor Grout Clean-Up. This removes mineral deposits and generally brightens up the appearance of the tile. After another round of scrubbing the floor was rinsed with our high-pressure washer and then vacuumed, extracting all of the dirty water and dirt away in one go. The floor was looking a lot better and was left to dry overnight.
After allowing the floor to dry overnight, we returned the next day to seal the floor. First, checking the floor was dry using the damp meter. Floors of this age can take a little longer to dry as there is no damp-proof membrane so it’s always worth checking as applying a sealer to damp tiles is not a good idea.
Once I was satisfied it was dry eight coats of Tile Doctor Seal and Go sheen finish sealer were applied. This takes a while to do as each coat needs to dry before applying the next. The sealer will protect the Victorian tiles for dirt and stains, it also enhanced the colours in the tile and will make it easier to keep the floor clean going forward.
My client was very pleased with the floor and mentioned that they should have called me in sooner! For aftercare cleaning I recommended Tile Doctor Neutral Clean which is an effective cleaner with a neutral pH, its designed for cleaning tiles without degrading the sealer.
Jonathan Oldham
South Middlesex Tile Doctor

Sponsored
Columbus, OH
Free consultation for landscape design!
Peabody Landscape Group
Columbus' Reliable Landscape Design & Contracting
 TRA studio Architecture PLLC
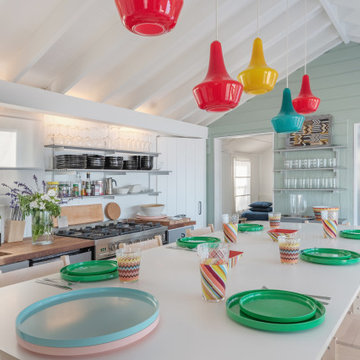
This Atlantic holiday cottage is located in the unique landscape of the creek at Towd Point, in Southampton, one of only 28 Federal Ecological Preserves in the US. Caterina and Bob, a design couple who owns the architecture firm TRA studio in the city, chose the property because of their historic ties to the area and the extraordinary setting and its precise location within it: it is the only house whose site is at the bend of the Towd Point peninsula, right where the views of the protected creek are at the widest and where a little beach naturally occurred.
Although the views are open and vast, the property is minimal, way too small to even consider a small pool or spa: the pristine creek is the house water feature, the recreation expansion of the diminutive back yard. We often joke that at TRA we can make small spaces feel big, which is, exactly what we did.
As often happened with TRA’s renovation projects, as well as with the most recent art pieces by Robert Traboscia, one of the Studio’s founders, the house is an “object trouve’’, originally a modest fishing outpost, that went through many alterations, to finally find a refreshed life as a modern cottage for a New York family. A vintage busted kayak, repurposed as a planter, completes the process.
The cottage is actually a collection of objects: the original Bayman’s cottage now houses two bedrooms, the adjoining deck soon afterwards was enclosed to make space for the kitchen/dining volume and a newer living room addition was later built to complete the compound.’
The compactness of the volumes contributes to the environmental quality of the house, whose
simple natural materials have been carefully restored and insulated, while the simplicity of the volumes, which has been respectfully retained, talks about a nostalgia for the past Long Island seaside retreats. The single level recognizable gabled roof silhouette sits comfortably on the private beach, the greyed cedar deck acting as a platform to connect with the landscape.
The informal weathered materials and the reductive color palette weave effortlessly from the exterior to the interior, creating a serene environment, echoing the coastal landscape, which emphasizes the line where the water meets the sky, the natural beach, tall breezy grasses and the multitude of happy birds who call the creek home.
The restoration process started with the modest goal of cleaning up the walls and replace the worn uneven floor, it soon turned into a forensic research for the original elements, uncovering the historic foam-green siding gabled façade that is now the backdrop of the dining pavilion. The renovation respected the history of the place: everything changed and everything stayed the same.
In an area known for vast, affluent, estates, the house is often the place where friends and family gather: the size of the house, the largeness of the creek, the wild life coexisting in harmony with the visitors, the availability of a swim in the bay or kayak adventure, are all interesting and inviting. We often observed that people do not want to leave our interiors, we love the little house because is a place that you never need to leave, this is definitely a house where there is always something to do. In the Hamptons, the question is often “what you are looking at”, usually the pool or landscaped nature, here it is easy to respond: our private beach and protected nature.
The landscaping simply aims at enhancing the existing: three sculptural and weathered trees were given new life, the natural arch of the Creek, further outlined by the bulkhead, is amplified and repeated, similarly to rock stratifications, to connect to the house and define the different modes of the landscape: native grasses, private beach, gravel lawn, fence and finally Towd Point Road. Towd Point Little Beach is a habitat meant to be shared with birds and animals.
 Ivory and Bone Interiors
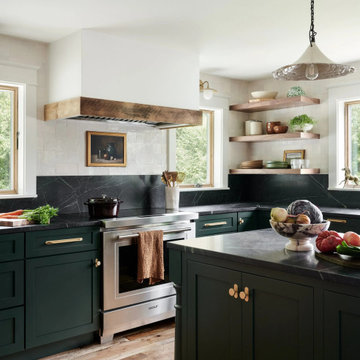
A Groveland, Massachusetts home in forest green, walnut and brass: a classic green kitchen, a jewel-box powder room in rose and aubergine, and a deep green tiled primary bath. Interior design by Ivory & Bone Interiors, a full-service design firm in Newburyport, MA serving Boston, the North Shore, New Hampshire, Maine and Miami.
 Tile Doctor Ltd
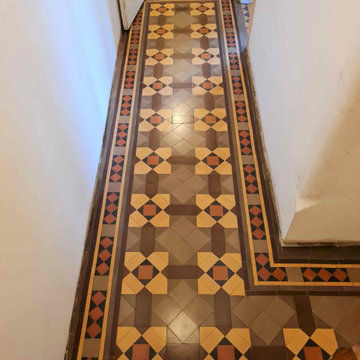
We were contacted by a customer in West Kirby who needed help renovating a Victorian tiled hallway in a house they had just purchased. Kirby is a desirable seaside location North of Heswall that expanded with the arrival of the railway in 1848. The railway brought a demand for property and so it’s not unusual to find housing stock in this area dating back to the Victorian era.
The Victorian tiles at this property appear to have been neglected by the previous owner and were now looking very dull and marked by paint from decorating; all the colours looked washed out and the floor was now looking very unappealing.
The good news however is that this problem is not uncommon and with a deep clean and a fresh sealer applied it can be transformed. I gave the owner a quote which was accepted a date agreed for my return to do the work.
On the first day the floor was sprayed with a neat solution of Tile Doctor Remove and Go which is a powerful alkaline cleaning and stripping agent used to remove old seals and paint. The solution was left to dwell for about twenty minutes so it could soak in and get to work. It was then scrubbed into the tiles using a coarse 200-grit pad fitted to a heavy buffing machine. Water was then added to the floor for lubrication and the soils released from the pores of the tile during scrubbing was removed by with a wet vacuum.
To treat the stubborn paint stains and remains of what I suspect was carpet adhesive a hand scraper and wire brush was used, this was made easier by the Remove and Go which had softened the paint etc.
The next stage was to give the Victorian tiles a mild acid wash using Acid Gel which is applied to the floor, scrubbed in, and rinsed off with a little water then extracted using the wet vacuum. We always recommend an acid wash for old floors like these as it will counter any efflorescent salts resident in the tiles and helps to remove other mineral contaminates and old grout that can mask the true beauty of the tiles.
I left the tiles to dry out for two days before returning to apply the sealer, first checking it was dry by testing for moisture in various places with an electronic damp tester. It’s not a good idea to apply a sealer to a damp floor so we always check first.
Satisfied the floor was dry, I started applying a coat of Tile Doctor Colour Grow which is a colour enhancing impregnating sealer that helps to bring out the true colours in the tile. This was allowed to dry for thirty minutes and then followed up five coats of Tile Doctor Seal and Go Extra which is a breathable sealer that leaves a lovely satin finish and builds on the protection.
Once done the Victorian hallway tiles looked so much cleaner and healthier. It was quite a transformation and the new sealer had given the floor a nice low sheen shine which the customer was very happy with.
For aftercare cleaning I left them with a bottle of Tile Doctor Neutral Cleaner which is specially formulated for cleaning sealed tiles. We don’t recommend tile cleaning products you find on supermarket shelves as the are usually too strong and can strip a sealer off the floor prematurely. If your choosing another product to clean your floor always read the label to make sure its compatible.
Andrew Robb
Merseyside Tile Doctor
 Tile Doctor Ltd
I recently visited a customer living in the village of Ravensthorpe, just outside Northampton to rejuvenate a 15-year-old multi coloured Chinese riven slate floor that needed a deep professional clean. Slate is a hard-wearing tile used for flooring high traffic areas but does need sealing to bring out its best features. In this case the sealer had long since worn off and dirt had become ingrained in the stone making it difficult to clean effectively.
We discussed the client’s requirements and the cleaning process I planned to follow to rejuvenate the floor. I had to check on availability, so I e-mailed over a quote and some dates later that day. They were happy with my proposal and agreed for the work to be done whilst the customers were on holiday.
My first task was to test a small area to determine which products would give the best results. In this case, I decided to start with a strong dilution of Tile Doctor Remove and Go which is a strong alkaline cleaner/coatings remover that’s safe to use on Tile and Stone. I spread this solution across a section of the floor and left it to seep into the pores of the stone and lift out the ingrained dirt.
After allowing the solution adequate time to dwell, I scrubbed the slate with a carbon brush fitted to a rotary machine to gradually reveal the fantastic natural colours of the Slate hidden beneath the dirt. Happy with my choice of cleaning product I repeated this process in sections until it had been carried out throughout the entire area. Following this, I rinsed the entire floor several times with clean water, before soaking up the resulting soiled residue with a wet vacuum.
The next part of the cleaning process entailed paying attention to the grout lines which were scrubbed using Tile Doctor Grout Clean-Up. The resulting residue was promptly extracted with the wet vacuum and I finished by giving the whole floor a rinse with Tile Doctor pH Neutral Tile Cleaner. This is a day to day tile cleaning product which is recommended for stone floors, many supermarket tile cleaning products are only suitable for ceramic tiles due to their acidic formula and can damage a floor over years of use so you should always read the label. However, I always leave my clients with a complimentary bottle of a suitable Tile Doctor product to maintain their floors.
The floor was left to dry off overnight and I returned on the second day to seal the floor. Before starting I checked the floor was dry using a damp meter which confirmed the Slate was dry and ready to seal. The floor must be completely dry before sealing as any excess moisture has the potential to the damage the performance of the sealer. Since my client had specifically requested a silk finish, I opted to use Tile Doctor Seal and Go which dries to leave a lovely subtle sheen that really enhances the look of the stone. Five coats were applied to ensure a good hard-wearing protection.
My client was very pleased with the results, particularly as they hadn’t realised how much colour it had lost over the years and left the following feedback on our website.
”I despaired of having a clean-looking floor again. Phil Vissian assured me that intensive deep cleaning and resealing could restore our fifteen year old, subtly coloured, Chinese riven slate kitchen floor. He has done a fantastic job. Looks like new, and I shall book Phil for an annual professional clean, so that it never gets as bad again.” Sally M, Northampton
Phil Vissian
Northamptonshire Tile Doctor
Sponsored
Columbus, OH
Free consultation for landscape design!
Peabody Landscape Group
Columbus' Reliable Landscape Design & Contracting

 Gappsi
Gunite swimming pool was built in Coram, NY by Gappsi.
This gunite swimming pool was built in Coram, NY by Gappsi. The construction design layout, created by Giuseppe Abbrancati, consists of 10 inch walls and an 8 inch floor with 5,000 PSI dry-shot cement mix. The travertine pavers surrounding the pool were installed on 4 inches of poured concrete base and one inch of clean sand. The joints between pavers were filled with polymeric sand.This gunite swimming pool was built to accommodate the clients wishes. It measures over 1,400 sq ft of surface area, and has a depth going from 46 to 50 inches deep. The Fiorito used for the pool coping and surrounding patio is one of the most beautiful travertine patterns selected from the Gappsi Natural Stone Showroom collection. The pool design also incorporates a large sundeck that features a jet bubbler. It is entertaining for the kids and also serves as small water fountain feature in the center of the sundeck.The deep end of the gunite swimming pool contains a free form stairs and bench design. The plaster finish applied on the swimming pool walls is Diamond Brite Tahiti Blue, which is a combination of Tahoe Blue and Super Blue Diamond Brite quartz finishes. 6x6 inch tiles were installed at the water line and 3x3 inch tiles were used as markers at the edges of the steps and benches.The pool has many options starting with 3 large LED lights in the pool, one small light in the sundeck step, and the bubbler used in the sundeck has a light as well. The entire gunite swimming pool has a full automation system that works from a smart phone, allowing the customer to control the gas heater, salt chlorine generator, and Ozone system. On the outside of the pool, a wood-burning fire pit was built with firebricks and veneered with travertine. And at the deep end, a Inter-Fab X-Stream 2 pool slide was installed.
Letter From Customer
Our experience with Gappsi began in August., 2017 and it was purely by chance. My husband found their website, and dropped by their business after setting up an appointment with another pool builder down the block from them. Immediately upon walking into their place of business, he received a hospitable reception which gave him the “warm and fuzzy” feeling he likes to get when doing a business transaction. This is his indication of an honest, trustworthy company. And his intuition proved to be right. Having spent months prior doing research, we knew exactly what we wanted, a gunite pool to fit the existing landscape of our nice sized yard. The owner, Giuseppe Abbrancati, came out, took notes and pictures of our yard, and within a week, had computer generated renderings, which we were able to modify on the spot. Giuseppe and his son, Emanuele, did a phenomenal job at giving us exactly what we wanted, instead of trying to sell us on the expensive add-on features that we didn’t want. And what that enabled us to do was go bigger with our free-form design, one of the largest residential gunite pools they had done and at a very reasonable price. The only major hiccup was when their project manager had to be replaced, but once that hurdle was overcome, the newly assigned project manager, Tosh, made sure getting our pool, the gas lines, the electrical, the masonry, the sodding and landscaping were all completed in time for the opening of our pool in June, 2018. We are delighted and thrilled beyond measure at our resort style backyard. We would recommend Gappsi, a family-run business, to all!! Thanks for making our home the “destination stay-cation” of Coram, NY for our family and friends!! Everyone is in awe when they see it!
 Michael Nash Design, Build & Homes
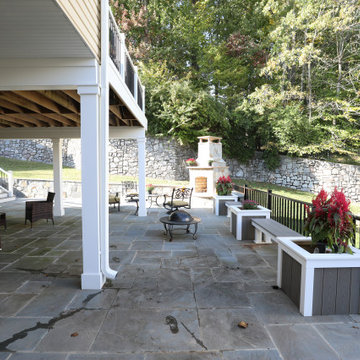
This couple desired to expand their horizon and maximize their outdoor living space. Their back yard was part of a big hill and a major amount of excavation needed to level up the ground for any kind of flat space use
• The homeowner’s goals where to have a big lower level patio to be able to walk out of their basement into stone patio
• Space for outdoor jacuzzi
• Space for outdoor wood burning fireplace and seating wall
• Outdoor lower bar
• Second floor large scale deck with a cooking bar
• A walkway ramp for wheelchair access (covered with roof)
• Lots of seating and entertainment space
Challenges:
The big backyard hill and big ground.
Big stone retaining walls needed.
Major excavation.
Run utilities, such as gas and water and sewer for bar area.
Resolve drainage.
The project started with breaking ground, and haul away major amount of dirt from back yard, implementing over 300 ft of retaining wall covered in stone to sunk in the patio
Cutting concrete walls in basement to create walk out into new patio
New flagstone patio over concrete slab was designed with outer radius to own a wood burning fireplace and seating walls. Right side was covered with tall stone wall and raining to adjacent neighbors
Under the deck area is a covered area for bar with stool seating wrapped with ledger stone and granite top and a secluded area for jacuzzi away from neighbors’ view
A double-sided staircase was built connecting lower patio to wrapped around upper deck,
The new Azak covered deck with listed rail system was equipped with cooking island, natural gas grill, sink and faucet, microwave and outdoor beverage center.
A covered walkway ramp has given an opportunity for elder mother in wheelchair to be able to visit them and spend time outdoor with them.
Beaded ceiling panels and hanging chandeliers has lid up this veranda.
This three-story addition into back of this dwelling stand tall in this community and now more than ever this family get to enjoy their backyard and outdoors with friends and family
The harmonizing choice of decking colors with ledger stone, granite tops, flagstone and veneer wall stones has given this outdoor project a standing ovation.
 Two Navy Lane
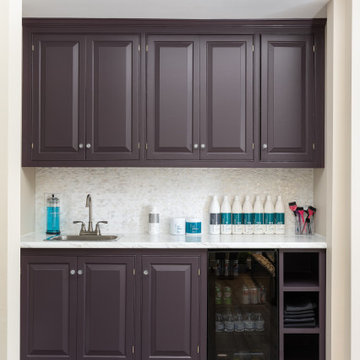
Stress melts away when you enter this hair salon. A commercial interior design project that gets almost as many compliments as the haircuts that walk out.
The owner of this salon in Culpeper, VA was ready to start a salon and go out on her own. She hired 2 Navy Lane to help her create the salon of her dreams. She wanted shabby chic and we paired it with a hip twist; it came out incredible!
There was a lot to do in a small space and we wanted to ensure it felt zen and relaxing from the moment clients walked in. We were thoughtful about placement, branding, and the overall look and feel of the salon with a focus on rich color, lighting, and gorgeous drapery to inspire a sense of letting your cares be whisked away the moment you step in the door. This salon is not “just” a hair salon, but an experience.
Waiting is Suddenly the Best Part of Your Day
The waiting room is small but impeccably designed to create a sense of relaxation right, even before you get to the salon chair. Velvet chairs invite you to take a moment to rest and enjoy a seasonal snack and sip of hot tea, apple cider, or coffee while listening to soft, instrumental music and a gorgeous stainless steel water fountain with colored rocks and clear glass.
Where the Magic Happens
In the Main Salon, guest chairs represent luxury and sophistication with their curved, tufted back and square arms. Between the guest chairs is a marble tabletop in rich, cream hues for a chic transitional look.
Each station has a hook to hang your purse, so you don’t have to place it on the ground, hot stones to hold during your shampoo, and a selection of essential oils you can have massaged into your temples. There is also a deco-inspired mirror at each station that adds a bit of posh, vintage charm.
The light fixture in the shampoo room adds a creative contemporary touch to this moody and relaxing space where the pampering begins! This hanging light fixture has hard iron branches and crystal leaves and gracefully refracts light from the four candelabra bulbs, enhancing its beauty.
When it comes to commercial interior design, we are second to none!
201