
Search results for "Strippers" in Home Design Ideas
 Tile Doctor Ltd
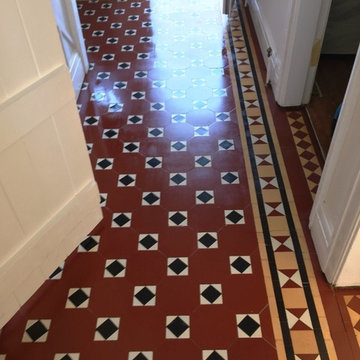
This Victorian tiled hallway was one of the most beautiful Victorian floors I have ever had the pleasure to work on. With the wide range of patterns and colours they are available in, it seems no two Victorian tiled floors are exactly the same, and this uniqueness is part of what makes them so appealing to property owners.
Unfortunately, this floor had been poorly maintained over the years, even suffering from a few loose and missing tiles. There was a thick coating of dust and dirt soiling its appearance, and the property owner was understandably keen to remedy the situation. Having realised that everyday household cleaners are not likely to achieve great results, she asked me to carry out a full professional restoration, including making some repairs where necessary. I was pleasantly surprised to find out that this property was situated in the town of Wyken, which is a few miles outside of Coventry city centre and in fact just down the road from where I live myself!
Before making a start on the cleaning process, it was first necessary to re-fix the small number of loose tiles and replace a single missing tile by the radiator. Fortunately, I’ve been working on these types of floors for some time and have built up a good collection of replacement Victorian tiles so I was able to find one that matched in nicely with the rest of the floor without too much problem.
To clean the tiles, I began by applying a layer of Tile Doctor Oxy-Gel directly into the floor with a small brush. This product is very similar to the popular Tile Doctor Pro Clean: both are strong alkaline cleaners, strippers and degreasers, with the main difference being that Oxy-Clean comes in a gel form, making it easier to control and therefore ideal for precise cleaning, or for application to vertical surfaces. Like Pro Clean and being an alkaline base it is suitable for use on all types of natural stone and tile. The Oxy-Gel was left to soak into the tiles for around ten minutes before being scrubbed in and then rinsed off carefully with water, I then used a wet vacuum to extract the now soiled cleaning solution off the floor.
The next step was to acid wash the floor using Tile Doctor Acid Gel; this served to break down alkaline mineral deposits inherent in the grout along with some excess grout that had been left on the untidily left on tile from installation. It is recommended not to use this product on acid-sensitive soon such as Marble and Limestone as it can cause irreparable etching but its fine on Victorian tiles as long as you don’t leave it on too long.
Finally, the floor was given a rinse with clean water to remove any trace of chemicals from the cleaning and to neutralise the area in preparation for sealing.
I left the floor for 48 hours to dry before returning to the property to seal the tiles. This allowed plenty of time for the floor to dry completely, which is important as any excess moisture can damage the ability of the sealer to protect against dirt and stains.
My choice of sealer for this floor was Tile Doctor High Shine; three coats in total were applied, providing – as the product name suggests – the high shine finish that the customer had requested. The sealer will provide durable surface protection going forward preventing dirt from becoming ingrained into the pores of the tile and ensuring it remains easy to clean and keeping its appearance for some time to come.
As a big fan of Victorian tiles, it was a great pleasure to restore this floor, and my customer was certainly pleased too. It’s amazing how far a little professional maintenance can go to improving the appearance of these fantastic types of floor.
Mick Gayton
Warwickshire Tile Doctor
 Tile Doctor Ltd
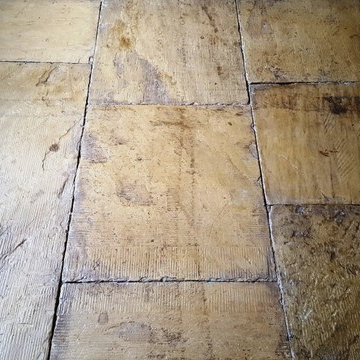
For this job, I had the pleasure of visiting the historic Salts Mill, a former textile mill turned art gallery, shopping centre, and restaurant complex near Bingley, West Yorkshire. It was built in 1853 by the famous manufacturer and philanthropist, Sir Titus Salt, and was at one point the largest industrial building in the world by total floor area.
As you can imagine, a lot of the rooms at Salts Mill are over a century and a half old. Most of them also contained stone flooring made from Yorkstone – a type of Sandstone unique to Yorkshire, and easily distinguishable due to its rich, natural yellow colouring. Unfortunately, one such floor in the Salts Mill was in quite a bad state. It has completely lost its vibrance – appearing more grey than yellow – and was evidentially in need of a very deep clean and fresh seal.
I started the Yorkstone tile restoration by soaking the floor in a strong dilution of our reliable alkaline-based tile cleaner, Tile Doctor Pro Clean, and scrubbing it in using a rotary machine fitted with a scrubbing pad. This quickly removed the initial layers of muck and, in the process, revealed oil-based paint and glue stains all over the floor.
To break down the oil and paint I applied Tile Doctor Remove & Go, which is our heavy duty stripper, remover and degreaser. This quickly ate through the paint and glue, and I followed by giving the floor another thorough clean with Pro Clean. Finally, I rinsed the floor with clean water before leaving it to dry for a full two days due to the amount of chemical cleaning product and water applied.
Upon my return to the Salts Mill two days later, I ran some quick damp tests to check for any excess moisture which could’ve prevented me from sealing the floor. Thankfully, the floor was dry and ready to be sealed, but it is always recommended, especially with older floors, to be aware of damp issues as these can be very troublesome.
My choice of sealer was Tile Doctor Seal and Go, a topical sealer which provides a robust, stain resistant seal and a durable low sheen finish all in one product. Multiple coats of Seal and Go were applied, bringing the life and character back to these classic tiles.
Nigel Stoker
North West Yorkshire Tile Doctor
 Tile Doctor Ltd
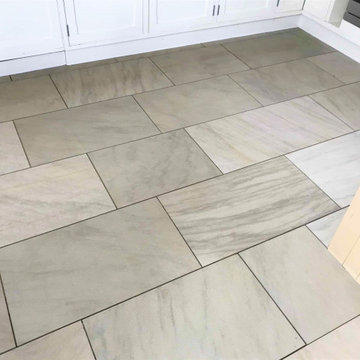
I received an enquiry from a property in Crowthorne to come and survey an unknown Flagstone Floor in a converted barn that was ready to be rented out. The owners where concerned the stone was letting the rest of the property down due to it being dirty and heavily stained, particularly around the kitchen and entrance areas. If your selling or renting out a property it really needs to look its best if you want to achieve a good price. Having spoken over the phone we agreed a date for me to pop over to complete a survey.
From further inspection I confirmed the stone was in fact a Sandstone, it was also clear that the sealer protecting the stone from ingrained dirt had worn away and was now allowing dirt and staining to ruin the appearance of the flagstones. It was a large floor so I measured up so I could work out the quantities of cleaning and sealing products needed and then walked the customer through the cleaning process. Later that day I sent over a detailed quotation which was accepted, and a date agreed for my return.
I should mention this work took place during the Covid restrictions, fortunately being a rental property, I was able to work in the property alone.
To deep clean the floor and remove the ingrained dirt and staining I used a strong dilution of Tile Doctor Pro-Clean. It is sprayed onto the floor and left to soak in for five minutes before agitating with a Black scrubbing pad fitted to a weighted buffing machine. The resultant slurry was then wet extracted away using a powerful high-pressure van mounted extracting system.
This action cleaned up most of the stone nicely however certain areas where heavily stained, particularly in the kitchen area where food and drink stains were more apparent. To tackle this, I applied a stronger cleaner/stripper product called Tile Doctor Remove and Go this time allowing ten minutes for it to soak in before scrubbing the surface with a very coarse 100-grit soft milling pad. This took quite a few attempts each time extracting the slurry away and then inspecting the floor to see if more work was needed.
Happy the stains have been removed, I then focused on renovating the surface Sandstone after the application of the coarse pad. This involves the application of several finer grit burnishing pads which close the pores and adds a subtle polish to the Sandstone. As I started with 100-grit pad it was necessary to gradually refine the surface with an incremental series of pads that included 200, 400 and finally 800-grit pads. Then to ensure a uniform finish across the floor I continued the 400 and 800 grit pads throughout the property. Water is used to lubricate the process and this turns into a fine slurry that is rinse extracted as before.
The cleaning process took up the whole of the first day and I am pleased to say the Sandstone floor looked very clean after I had finished.
The stone was then allowed dry off overnight with the aid of an industrial air mover and I returned later the next day to apply a new protective seal. In the meantime, my customer had been over to check out the floor and were over the moon with how it looked and wanted to keep the finish as natural as possible.
With this in mind, I applied Tile Doctor Ultra-Seal sealer to the Sandstone throughout, only two coats were needed. This is a premium sealer that is almost invisible and works by penetrating the stone thus preventing dirt from becoming ingrained. Once done the floor looked very clean and much brighter than before, it now had that wow factor which will help it attract a good yield in the rental market.
The trouble with rental properties of course is making sure the tenant uses the right product to maintain the floor and not a typical supermarket tile cleaner that are only designed for use on Ceramic and Porcelain tiles. In fact, these types of cleaning product can slowly strip the sealer off the floor so it’s always worth checking the label before purchasing. Fortunately Tile Doctor sells a product called Neutral Cleaner that is ideal for maintaining sealed stone floors, so I left them with a complimentary bottle and recommended they get some more to leave under the sink for the new tenant.
Dennis Buckland
Berkshire Tile Doctor
Find the right local pro for your project
 Tile Doctor Ltd
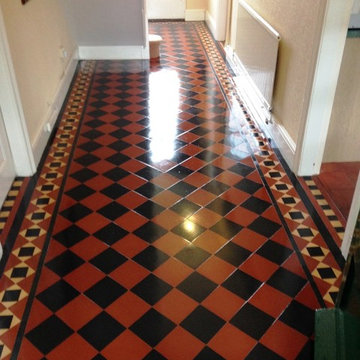
This black and red Victorian tiled hallway at a property in Newport, the third largest city in Wales, had a timeless charm about it, and a classic diamond pattern. Unfortunately, the tiles had lost their colour, leaving them looking dull and lifeless. It was clear to me, upon further inspection, that the existing sealer had failed, allowing dirt to become trapped in the pores of tile.
This can be a very difficult problem to rectify without the right professional assistance; everyday household cleaners are rarely suitable for sealed floors and acidic cleaners can actually male the problem worse. The tiles needed a deep clean with strong products, followed by a fresh, robust surface seal to prevent dirt from becoming trapped again in the future.
I started cleaning the tiles with a strong dilution of Tile Doctor Pro Clean, worked in to the stone as per usual by using a rotary machine fitted with a black scrubbing pad. Pro Clean is a reliable alkaline cleaner that works well on most kinds of natural stone, and while I could see it made a difference here, it was clear something stronger was required to remove what was left of the old sealer.
To remove this, I applied a dilution of Tile Doctor Remove and Go, which is a dedicated stripper that is safe to use on tile and stone for the purposes of breaking down old sealers, waxes, paints, and adhesives, and this proved effective in getting rid of all the old sealer.
Once the cleaning was complete, I rinsed the floor thoroughly to remove any trace of chemicals left over from the cleaning products, before leaving it to dry overnight.
I came back to the property the next day and, after checking the floor was completely dry, I proceeded to seal the floor using eight coats of Tile Doctor Seal and Go. This types of sealer is known as ‘topical’, which means that it builds up a solid layer of protection on the surface of the tile. Topical sealers tend to be more suitable to Victorian and Quarry tiles as they typically require a lot of sealer due to their porosity and these types of sealer are less costly. Seal and Go also adds a nice aesthetically pleasing low sheen finish.
As you can see from the second photo, this did wonders to the tiles and really brought this classic Victorian pattern back to life. Another satisfied client for the Monmouthshire Tile Doctor.
Paul Wales
Monmouthshire Tile Doctor
 Tile Doctor Ltd
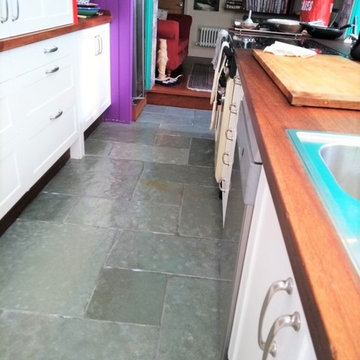
I recently helped a homeowner from my home town of Dursley who got in touch about her kitchen Flagstone floor. The problem revolved around an accident she had with raspberries which had stained the flagstones and the problem became compounded when a house hold clearing product was applied neat to clean up the mess. If you follow any of our Tile Doctor blogs, you will know that using strong household cleaning products can damage the sealer and, in this case, it had left white marks on the floor.
I called round to the property to survey the floor as was surprised to find out that the floor had been cleaned and sealed only four months prior by another company. I don’t like to comment on other people’s work, but I found the grout lines and flagstones were still badly ingrained with dirt, so it wasn’t a through job.
I completed by survey and demonstrated the process I would follow to resolve the issues on one of the flagstone tiles. She could not believe the difference I was able to make and booked me in straight away to restore the entire floor.
My first task was to protect the wooden kitchen units from splashing that can happen when cleaning the floor. Once that was done, I set about stripping the sealer from the floor and deep cleaning the tile and grout with a strong dilution of Tile Doctor Pro-Clean. Pro-Clean is a concentrated, multi-purpose high-alkaline cleaner, stripper and degreaser which is safe to use on all types of tile, stone and grout including natural stone.
Working in sections across the Kitchen and adjacent dining room I diluted one part Pro-Clean to two parts water and mopped it onto the flagstones and grout where I left it to soak in for roughly fifteen minutes. Then using a rotary floor buffer fitted with a black scrubbing pad I scrubbed the solution into the floor into the old sealer and trapped dirt came away turning the cleaning fluid black in the process. The soil was then rinsed off with water and then extracted with a powerful 3,000 watt wet and dry vacuum. This process was repeated until I was satisfied the floor was clean and I ran a stiff grout brush along the grout lines to ensure they also received a good scrub. After I was satisfied the section was clean it was rinsed thoroughly with water to neutralise the floor and remove any trace of product and then dried with the wet and dry vacuum.
The cleaning process took up the whole day, but the flagstones would need to be dry before sealing so after giving the owner an update I left the floor for two days, so it could dry out thoroughly.
On my return I tested the floor was dry in multiple places with a damp meter to ensure it was ready to be sealed. The readings showed that the wet and dry vacuum had done a good job in removing the moisture, so all was well. To seal I applied several coats of Tile Doctor Seal and Go allowing each coat to dry before applying the next however with such a large area to cover I was able to work in sections around the floor.
Seal and Go works really well on Flagstones and leaves a very appealing sheen finish, also being water based it doesn’t leave a smell as it dries.
The results were amazing, and the customer thanked me for making such a massive improvement on her floor. Before leaving I made sure to discuss after-care and to avoid the use of hash cleaning products.
Malcolm Crowther
Gloucester Tile Doctor
 Tile Doctor Ltd
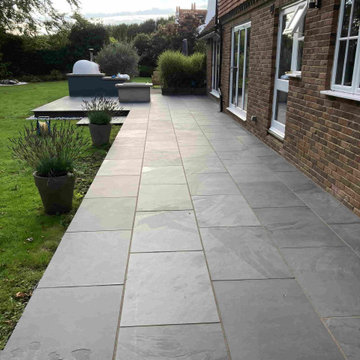
Our client in the villager of Pembury was feeling really deflated after having a Slate Patio laid adjacent to the full length of her house, however the builder had not applied the sealer correctly creating a mess which ruined the appearance of the stone.
Unfortunately, it is not that unusual to be contacted about this sort of situation, applying a sealer is not as easy as manufactures make out. There are lots of factors to consider, choosing the right sealer, is the stone damp, how do you know if you have applied too much, and it often catches tradesmen out. I was able to reassure them that with the right combination of products and equipment the problem could be rectified.
The first job was to strip off the old sealer which was done using a product called Tile Doctor Remove and Go. The name of this product pretty much says it all and once applied to the stone it is left to soak in for ten to twenty minutes before being scrubbed in with a rotary machine fitted with an abrasive burnishing pad.
Tile Doctor Remove and Go is a multi-purpose stripper which will remove most coatings and sealers, including epoxy grout haze which is another common problem we encounter when tradesmen have not cleaned up properly after grouting. It is also good for removing heavy build ups of grease. I used several burnishing pads of different grits going from coarse to smooth on this patio, rinsing and extracting the soil after each pad.
It was a large area, so this process took up most of the day on its own, fortunately I use a van mounted high pressure cleaning and extraction system to remove the soil which is very efficient and leaves the stone bright clean and reasonably dry afterwards. This ensures the process can be carried out with minimal mess.
It was a nice warm summers day and although cloudy we didn’t get any rain overnight, so after checking the forecast I was able to return the next day and apply a fresh sealer to the Slate.
My client wanted a natural look, so I used Tile Doctor Ultra Seal. This product is a no-sheen, natural-look, impregnating sealer which is formulated to provide maximum stain protection. These impregnating sealers work by penetrating the stone, occupying its pores, and thus preventing dirt from residing there.
The client was so happy and relieved to see the results on what a very expensive patio and commented she was eager to get the first barbecue of the season underway.
We recommended that a regular with the jet wash should keep the patio in good condition and in a few years time we could return to reapply the sealer for them.
Michael Conlon
South Kent Tile Doctor
 Tile Doctor Ltd
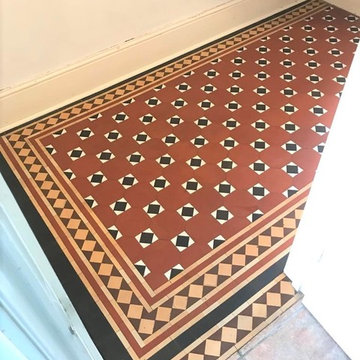
Our client had recently moved to a property in Newport, Gwent and when removing the carpet in the hallway she discovered this beautiful Victorian Tiled floor. The property had numerous period features and realising the value that the floor could add to the property she was keen to have it restored and so contacted Tile Doctor for help.
We popped round to survey the floor and except for a couple of broken tiles it had preserved well under the carpet. It was a shame the previous owner had covered the floor over but I was confident we could source some matching tiles to replace the broken ones and then restore the overall appearance. We gave the client a quote for the work which would take a couple of days. Pleased to hear that the floor could be restored and that it could soon be on show the quote was accepted and a date set to do the work.
We returned later the same month to renovate the floor and started by removing the broken tiles, cleaning out the old grout and adhesive and then relaying matching replacements. There are several specialist suppliers that can supply Victorian tiles so we can usually source reclaimed or reproduction tiles.
Some of the grout lines had dropped so as well as grouting around the replacement tiles more renovation work was needed to ensure the grout was level. We used quick setting products for this work, so I was able to move on to cleaning the floor later that afternoon.
To restore the appearance of the Victorian Tiles I used a strong dilution of Tile Doctor Pro-Clean combined with Tile Doctor Remove and Go which was left to soak in for ten minutes before being scrubbed into the tiles. This created a powerful cleaner/stripper cocktail which gets to work at removing dirt, grime and breaking down old sealers paint splashes.
After extracting the soil using a wet vacuum the floor was inspected. There were a few stubborn areas which were treated to a repeat clean and a wire brush to get the floor as clean as possible.
The floor was rinsed with water to remove any trace of cleaning products and then as much moisture as possible was extracted using a wet vacuum. The floor was left to dry off overnight and we arranged to return the next day to apply a sealer.
The following morning, we checked the floor was dry using a damp meter and this confirmed we were good to apply the sealer. The floor was sealed with Tile Doctor Colour Grow which is an impregnating sealer that protects the floor and enhances the beautiful colours in the tile. Three coats of the sealer were applied allowing each coat to dry before applying the next.
The client was very happy with the result and how beautiful the floor looked as you can see from the picture.
Paul Wales
Monmouthshire Tile Doctor
 Tile Doctor Ltd
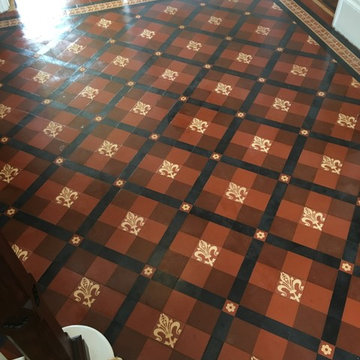
It’s always a great surprise to find old tiled flooring hidden underneath carpet or linoleum which appears especially common with 19th century properties where it’s not unusual for the owners to uncover fantastically patterned, original Victorian tiled floors and, naturally, they want to restore them to their former glory. If you have a property of this type you might want to look under the carpets.
The majority of the time, however, these tiles have been covered up for decades, allowing for thick layers of muck to build-up and are invariably damaged carpet grippers, surface glue and adhesive tape.
This was pretty much the case with this customer who lives in the town of Warminster and was keen to have her own newly discovered Victorian hallway brought back to life, and called me down to see what could be done. Upon arrival at the property, I determined that the tiles would definitely require a very deep clean, including the remove of numerous glue stains, followed by the application of a new seal.
Before I could begin the deep cleaning process, I needed to remove the carpet grippers and surface glue, attempting to remove as much as possible by hand using a scraper.
For the particularly stubborn areas, I applied Tile Doctor Remove & Go, a powerful stripper specially designed to break down adhesives and solvents, and left it to dwell for 20 minutes to eat through the glue deposits. I then attached a black pad to a rotary machine and scrubbed the area thoroughly to clean the affected areas, before removing the resulting slurry using a wet vacuum and rinsed with clean water.
Once I was satisfied that all of the glue had been removed, I proceeded to soak the floor using a solution of the high alkaline cleaner known as Tile Doctor Pro Clean. This is a versatile product that can be used on a wide range of natural stone floors to deal with heavy soil build-up.
I left the Pro-Clean to dwell for ten minutes, and then scrubbed it into the tiles to remove the ingrained dirt and also to break down any old and ineffectual seals. The floor was then once again rinsed thoroughly with clean water which was then extracted using a wet vacuum before being left to dry for a couple of days.
Upon our return to the property I immediately tested the floor for damp using a damp meter. This is an extremely important test to carry out before sealing any kind of tiled flooring, due to the fact that excess moisture left over from cleaning can cloud the sealer and damage its ability to protect against dirt and stains.
Thankfully, the damp test revealed no excess moisture, and I was able to proceed with sealing the tiles. My choice of sealer was Tile Doctor Seal and Go, a water-based topical sealer that simultaneously provides both a stain resistant surface seal and a durable and aesthetically pleasing low sheen finish, also being water based it doesn’t give off a smell as it dries.
This is a very cost effective product that is highly suitable for use on Victorian and Quarry tiles, I applied five costs to achieve the desired finish.
The customer was very pleased with the final results. It’s always satisfying to restore original Victorian tiled floors to looking their best once again – and this one was no exception.
Stuart Ford
Wiltshire Tile Doctor
 Tile Doctor Ltd
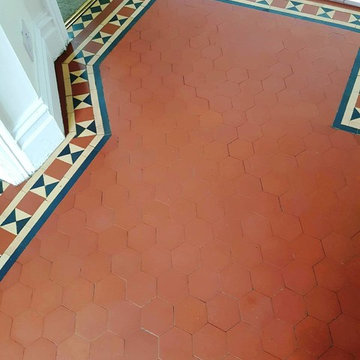
From The 1860s Victorian tiled floors started to appear in public buildings and by the 1890s they had become an essential feature in the most ordinary Victorian terraced houses. Although these floors fell out of fashion during the 1960s and ’70s, when many of them were covered over, they are now being rediscovered by their present owners and this is exactly what happened to my customer in the village of Littleover.
The customer had attempted to clean the floor by themselves but they couldn’t archive the result wanted, fortunately they discovered the Derbyshire Tile Doctor and after their call I went over and did a test for cleaning to make sure I can archive the needed results. They were happy with what they saw, so they booked me in to complete the work.
For cleaning the hallway I used a strong dilution of Tile Doctors Pro Clean which is strong multi-purpose high-alkaline cleaner. I left the Pro Clean to dwell for 10 minutes and then worked it in the tiles by using a strong black scrubbing pad fitted to my rotary machine. After scrubbing I rinsed the floor several times with clean water to remove any trace of cleaning product from the floor.
After successfully cleaning the hall I moved on to the porch which still had some old topical sealer on less walked areas. On these areas I had to use Tile Doctors own very effective stripper Remove and Go. Remove and Go has a long dwell time to remove any given sealer or wax so I left it to soak in for fifteen minutes followed by scrubbing it in with black pad fitted to rotary machine. The next step was to wash off the residue with water which was then removed using a wet vacuum.
Following this the tiles were given a rinse with Tile Doctor Grout Clean-up which is an acid based product that can remove grout smears and mineral deposits. Last step before sealing was to give the floor a thorough wash down with clean water to remove any cleaning product left on the tiles and then I left the floor to dry overnight.
Next day when I returned I used my damp tester to make sure that the floor is completely dry. Luckily for me floor was all dry and I started sealing. For sealing I used Tile Doctors Colour Grow Sealer which is colour enhancing breathable sealer. I applied 2 coats of the sealer and after every coat I polished off the excess with clean cotton cloths.
The result was really good and my customer was very happy with the work and said that now the floor looks transformed.
Tony Olmet
Derbyshire Tile Doctor
 Tile Doctor Ltd
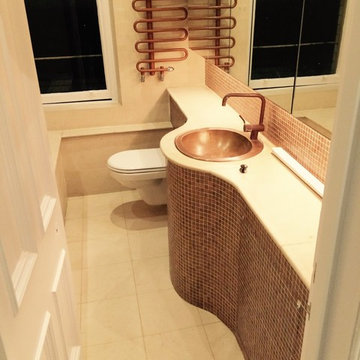
This was a substantial engagement at a luxury rental apartment in Brighton rejuvenating the Limestone tiles in two bathrooms and a hallway taking six days of hard work. In addition, I would be working around two decorators, making for even more testing work conditions.
I first set to work on the smallest bathroom, which featured limestone tiles from floor to ceiling, as well as a large bath, copper sink and a tiled surround. Limestone is a very popular choice for interior and exterior decoration, but the tiles in this bathroom were in need of some care to get them looking their best again. My initial task was to strip away any previous sealer by hand; this was done using a mixture of warm water and Tile Doctor Pro-Clean which, along with Limestone, is also suitable for use on other types of natural stone, such as Granite, Slate and Travertine. Pro-Clean serves both as an effective stripper and cleaner, meaning that once the sealer had been stripped away, the tiles also received a thorough clean. Once I had cleaned the tiles, I sucked up any excess water and residue using a Wet-Dry Vac machine.
Since the tiles would have to be left to dry for a couple of days, I offered to restore the copper sink for the customer, even though this was not actually part of my job description. After conducting some research into copper cleaning, I opted to use a combination of lemon juice, vinegar and salt. The research paid off as, once I began to apply the solution to the sink, the bright orange and brown colours of the copper quickly rose to the surface. Within the space of an hour, I had transformed what initially appeared to be a ruined sink into a lovely, shimmering copper feature for the bathroom. Both the decorators and I were truly amazed at the results – but all credit goes to Google!
The larger of the two bathrooms was a much stiffer test for the Tile Doctor products. It had not been left in great condition, as the shower area had clearly not been sealed correctly, and the tiles had been left in such a manner that soap scum from shampoos, soaps and shower gels had built up on the window sill. In fact, the damage was significant enough that I had to explain to the customer before starting the work that whilst I could greatly improve the appearance of the tiles, I would not be able to restore them to new. This is because many shampoo and body wash products are acidic and can cause permanent damage to stone work especially when left to dwell for a long time.
My choice of product was Tile Doctor Mould Away, a formula which, over time, seeps deeply into the pores of the stone, effectively lifting away the muck. In cases of particularly stubborn areas, it is necessary to apply another covering of Mould Away and leave it for an extended period of time. This is exactly what I did over the next few days, leaving the product overnight to work its magic. The change was certainly drastic, if not perfect.
As both bathrooms required extended periods of drying, I spent two days working on the hallway, which had been partially covered with a plastic sealing for the previous six months due to building work. Needless to say, the hallway was in need of a good clean. I set about cleaning the hallway with a solution of warm water and Tile Doctor Pro-Clean, before once again using a Wet-Dry Vac machine to remove any excess water to prepare the floor for sealing at a later point. It is very important to remove any residue of cleaning solution before sealing, as this may impact the performance of the sealer. Following this, I left the hallway to dry for two days, providing the builders with strict instructions to cover it with blankets for protection while they were working.
While the floor was drying, I sealed the bathrooms – both now fully dried – with Tile Doctor Colour Grow Sealer, a solvent-based sealer that was highly effective at enhancing the colour of the brown tiles around the sinks. The product will also provide durable surface protection. I spent the final of the six days sealing the hallway floor with Tile Doctor Seal & Go, which provides both a stain-resistant surface seal and a durable, low-sheen finish. This was an ideal choice of product, as the customer requested a hard-wearing, yet shiny finish.
The hard work really paid off, as both the customer and the decorators were very impressed with the final results in the two bathrooms and the hallway. I was extremely pleased that I was able to complete this big job to the highest possible standards.
 Tile Doctor Ltd
Slate is a popular choice for tiled kitchen floors and when properly maintained looks fantastic, however like all natural stone products without an effective cleaning plan dirt will become ingrained in the stone and will start to lose its appearance.
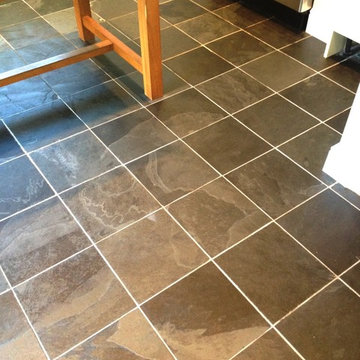
This was the case with this fantastic Slate tiled kitchen floor in Twickenham which had the potential to look really nice, but hadn’t received the proper maintenance for a long while, leaving it looking very tired. It now needed what was left of its old surface sealer stripped off, followed by a deep cleaning of the tile and grout before having a fresh seal applied.
To begin the restoration, I mixed a 50:50 solution of Tile Doctor Remove and Go and Tile Doctor Pro Clean. This was applied to the floor and allowed to dwell. Remove and Go functions as a stripper that breaks down the old sealer, while Pro Clean is a versatile, high alkaline cleaner that is safe to use on all types of natural stone flooring.
To use it to full effect, I machine scrubbed this solution into the floor to completely remove all dirt, stains, and old sealer. I also ran a stiff brush along the grout lines to remove the particularly stubborn dirt ingrained in the grout. The resulting cleaning slurry was then rinsed with water and extracted using a wet vacuum and the floor checked for stubborn marks which were retreated using the same process.
The floor was left to dry overnight and I came back the next day to apply a new seal. It’s important to leave a tiled floor to dry completely before sealing and at this time of year 24 hours is usually enough. This is necessary to ensures there is no excess moisture in the tile as this has the potential to cloud the sealer and affect its effectiveness.
The customer required a low sheen finish and a floor that was easy to maintain. I opted to use Seal & Go, which provides exactly that. It is a water-based with a high sheen blend of acrylic polymers that offers a both a stain resistant surface seal and a durable low sheen finish, also being water based it doesn’t leave a smell as it dries. Seal and Go is also a breathable sealer that will allow moisture to rise up through the tile and allow the floor to breathe.
As you can see from the pictures, the lustre has been completely restored to the Slate tiles and the sealer will allow for easy maintenance for the customer in the future.
Jonathan Oldham
South Middlesex Tile Doctor
 Tile Doctor Ltd
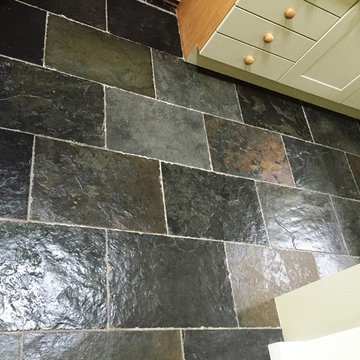
This small rough Chinese Slate floor in the kitchen of a house in the village of Cheadle near Stockport in Greater Manchester had not had any sealer put on it for many years and was very grubby (dishevelled as described by the customer) looking even after the customer had tried to clean it.
Sealers do take a lot of punishment, especially in a high traffic area such as a small kitchen and will wear off over time and once this happens the floor will start to lose its appearance as dirt becomes ingrained in the stone and it can no longer be cleaned effectively.
As we have to apply a liberal amount of water with this sort of work, the first step was to remove the Kicker boards at the bottom of the Kitchen units and silicone the Kitchen units that were fixed; this stops water seeping in and blowing the MDF allowing us to concentrate on cleaning the Slate without causing any damage.
I started the cleaning process by applying a strong dilution of Tile Doctor Pro-Clean to get rid of the built up dirt and any remaining sealer, leaving it to soak into the Slate before scrubbing the floor with a black scrub pad fitted to buffing machine running at slow speed. Tile Doctor Pro-Clean is a strong alkaline cleaner/stripper that is safe to use on natural stone, we do have stronger products available if required but in this case a strong dilution of Pro-Clean was sufficient to tackle any remaining sealer.
This process gave the Slate and grout lines a good deep clean and after rinsing the floor with water which was then extracted using a wet vacuum I repeated the process on stubborn areas until satisfied the floor was as clean and free of old sealer. Last stage of the cleaning process was to give the floor a final rinse and then get it as dry as possible using the wet vacuum to soak up the moisture.
The floor was quite small so I was able to leave the floor to dry off over lunch time and then on my return managed to get it fully dry with a little heat from a heat gun. The customer wanted a mat finish so once dry I applied Tile Doctor Colour Grow sealer which impregnates into the pores of the natural stone protecting it from within and enhancing the natural colours of the Slate at the same time.
For general cleaning of Sealed stone floors, we recommend the use of a PH Neutral Cleaner as anything with a strong PH will degrade the life of the sealer over time.
Steve Keary
Greater Manchester Tile Doctor
 Tile Doctor Ltd
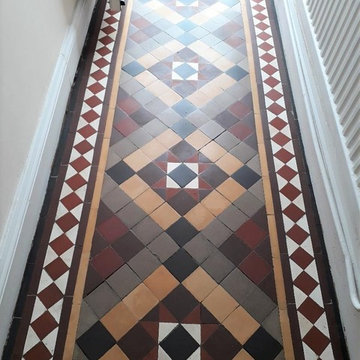
As is often the case in years past and for whatever reason many homeowners covered their decorative Victorian hallway tiles in a variety of products from carpet to laminate flooring. These days the trend has reversed and quite rightly many homeowners now realise the value a tiled floor can bring to a property and look to us to have it restored.
Our client had purchased a property in Norfolk seaport of Kings Lynn and, on lifting the dirty old carpet and decaying underlay in the hallway, discovered a beautiful tiled entrance hall. It was obvious that a previous owner had decided to lay carpet over the tiles as an easy way of hiding the result of careless renovation and decorating which had resulted in a thick coating of plaster, paint, carpet tape glue and various other contaminants which had become firmly stuck to the surface. There were also two small rectangular black and brown tiles missing behind the front door which had been damaged during the removal of some old lead pipes.
This was clearly a job which would need somewhat more than a scrubbing brush and a bottle of Flash!
Our first job was to remove as much of the solid contaminants as possible by hand with floor scrapers and a steamer which softened the more stubborn lumps. We then applied Tile Doctor Remove & Go which is a powerful alkaline stripper to the whole area, left it to dwell on the surface for twenty minutes and then scrubbed it in using a rotary machine fitted with a black scrubbing pad. The resulting slurry was then power rinsed and extracted away using our Ninja machine which is a high-power industrial vacuum. Any remaining patches where the carpet tape had been stuck down were spot treated using Tile Doctor Nanotech HBU which made short work of the hardened glue.
The result was a clean floor, but the surface still felt slightly rough and pitted, a problem which we resolved using the rotary machine fitted with a 200-grit diamond burnishing pad followed by a 400-grit pad with a little 400 grit honing powder which left the surface smooth, silky and ready for the application of a sealer.
Finally, we acid washed the whole area using Tile Doctor Acid Gel, a slow release product which would neutralise any remaining chemicals, improve new sealer adhesion and inhibit the future production of any efflorescence salts. We had used a fair amount of water during the cleaning process, so we left the floor to dry off thoroughly overnight with assistance from our commercial dehumidifier.
On our return the following day, we discussed the sealer options with the client and recommended using microporous Tile Doctor Colour Grow which is an impregnating sealer that seeps into the pores of the stone protecting it from within. It will provide an excellent fluid resistant seal whilst enhancing the natural colours in the stone, additionally it’s fully breathable thereby enabling any moisture trapped under the floor to rise through the floor and evaporate. This is important on old floors like this where no damp-proof membrane was installed. The sealer was applied with a paint pad in tow coats and allowed to dry for an hour before buffing the floor with a hog’s hair pad to give a rich natural-look sheen finish.
The Victorian tiles responded well to the treatments which were completed in two consecutive days. My client was extremely pleased with the results and left the following comment:
“My floor was in poor condition after being buried under carpet as well as many, many years of paint and muck. I enjoyed the time they spent at my home and wouldn’t hesitate to use (or recommend) the Tile Doctor service in the future.”
Nick White
Norfolk Tile Doctor
 Tile Doctor Ltd
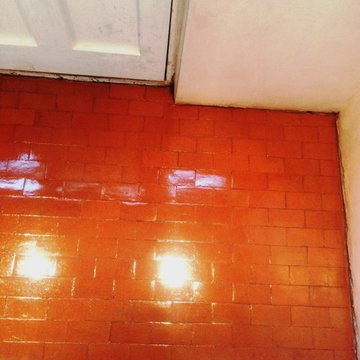
Here’s a quick job I completed in the coastal town of Eastbourne in East Sussex. While more commonly I am asked to work on entire floors, this customer was specifically interested in restoring a small doorway-like area with Quarry tiled flooring, the reason being that it had been covered for a long time by an old wardrobe and dog basket. As a result, the area had not been properly cared for, becoming very dusty and dirty. Also revealed were some unsightly splashes of white paint from previous decoration work.
The customer was keen to finally give this area of the floor the attention it needed, and so asked me to come in to provide a thorough clean and lay down some fresh sealer.
My first task was actually to relocate the old wardrobe and dog basket to the garage to get the area ready for cleaning. Then, to begin the cleaning process, I stripped away any old existing sealer and the white paint splashes by using Tile Doctor Remove & Go stripper in combination with a wire brush. Remove & Go is a versatile product that can also be used to break down glues and other adhesives.
I then washed the area down with water and promptly vacuumed up any moisture, before sitting down with a heat gun for an hour to dry the tiles. Usually a floor should be left for up to 48 hours to dry completely before sealing, but in this case the area was so small that I was able to dry it in the space of an hour.
Nonetheless, I opted to install a fan and leave the floor for an extra hour over lunch to ensure any excess moisture was removed. This is really important to do before sealing, as any remaining moisture can cloud the sealer and damage its performance.
To complete the restoration, I sealed the tiles using nine coats of the topical, water-based sealer Seal & Go, which is suitable for building up surface protection against dirt and stains on internal unsealed porous surfaces such as Victorian, Quarry and Sandstone tiles. The Quarry tiles were quite porous, which is not uncommon for Quarry Tiles and really soaked up the sealer.
As the photographs show, the results of the restoration were very good, with smiles all round – including from the slightly bemused family dog!
Rupert Mcleod
East Sussex Tile Doctor
 Tile Doctor Ltd
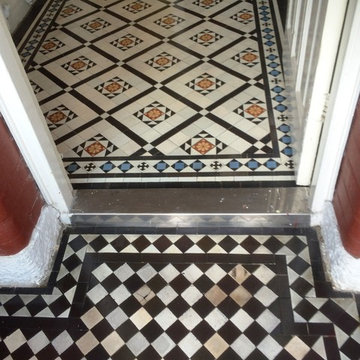
Recently I travelled down to the village of Prestwood in the Chiltern Hills of southern Buckinghamshire, to work on a Victorian tiled porch and hallway. Victorian tiles are commonly found in the entrance areas of older houses and unfortunately in this case the tiles had become heavily ingrained with dirt over time, and had suffered from additional paint and plaster spillages. The result was an unsightly mess; my client was considering covering the floor with lino after several unsuccessful attempts at cleaning it. I was called upon to provide a professional clean and seal, restoring these great Victorian tiles back to looking their best again.
On my first day at the house, I mixed up a solution of 50 per cent Tile Doctor Pro-Clean, a high alkaline cleaner, and NanoTech HBU (formerly known as Ultra Clean), which is a cleaning product that contains nano-sized abrasive particles that penetrate deep into the stone to lift ingrained dirt to the surface. This solution was worked into the tiles using abrasive scrubbing pads fitted to one of my commercial rotary machines.
The cleaning process left over a slurry of residue which I rinsed away with clean water and extracted with a wet vacuum. I was still left with the issue of stubborn paint spillages, so I applied a layer of Tile Doctor Remove & Go, a stripper with cleaning properties which is very effective at breaking down paint and adhesive stains.
Once the paint spillages had been dealt with I gave the area another rinse with clean water. I then left the house, allowing the floor enough time to dry overnight.
Upon my return the day I set about sealing the newly cleaned Victorian tiles. Before starting the sealing process I inspected the floor to check for any dampness, knowing that any excess moisture could potentially damage the performance of the sealer.
When I was satisfied that the tiles were fully dried, I applied Tile Doctor Seal & Go, a sealer which offers durable surface protection, along with an aesthetically pleasing, low-sheen finish which brings out the colour in the stone. This product can be used to seal internal, porous surfaces including Victorian, Slate, textured Quarry and Sandstone tiles.
The process made an amazing difference to the floor as you can see from the photographs; additionally the restoration of such an original feature adds a lot of value and looks so much better than lino!
Colin Ford
South Buckinghamshire Tile Doctor
 Tile Doctor Ltd
This ground floor flat in the City of Oxford had been converted from a shop which as you can imagine, was quite complex. One significant element involved in the conversation was the restoration of an old Quarry tiled floor which ran through the main hallway and had for many years been covered in a commercial linoleum covering.
When the linoleum covering was removed, the sheer amount of glue which had been used to affix it had completely ruined the appearance and condition of the Quarry tiles. There was also a lot of concrete in the bathroom, and our client was keen to have this removed in the hope that the tiles beneath were salvageable.
My first task at the property was to deal with the adhesive. I covered the entire floor area with Tile Doctor Remove and Go and then covered it with a plastic sheet and leaving it to soak into the glue and break it down overnight. Remove and Go is powerful stripper with a long-dwell time, formulated to break down adhesives and paint stains, amongst other coatings.
I returned the next day and, removing the plastic sheeting, I scrubbed the floor with a carbon brush attached to a rotary floor scrubber to remove the huge glue deposits. I worked in sections, rinsing each area of the floor with water after it had been scrubbed. Once I had finished the entire floor there was still some glue remaining, so I covered it again with a solution of Remove and Go combined with Tile Doctor HBU Nanotech, which utilises nano-sized particles to get underneath tough stains, dissolve them, and lift them out. I left this solution on the floor for about two hours to dwell and scrubbed it again.
During the next day of work, I used a very coarse 100 grit diamond burnishing pad to manually grind away the remaining stubborn bits of glue. Paying attention to the bathroom, I used a 50-grit coarse milling pad followed up with a 100-grit diamond burnishing pad to do the same to the area of concrete.
The next part of the process was to use Tile Doctor Grout Clean Up to acid wash the floor. This was successful in removing the last bits of cement and the remaining residue of the glue. To complete the cleaning process, I then rinsed the floor with plenty of water and vacuumed up any soiled solution.
I opted to leave the floor alone for a couple of days to fully dry off so that it could be sealed upon my return. This is crucial as any moisture or damp issues can damage the performance of the sealer and expose the floor to further ingrained dirt and staining.
To seal the floor, I used Tile Doctor Colour Grow. This is an impregnating sealer that also enhances the natural reddish shades in the Quarry. I applied two coats of the sealer, giving the floor the natural look matte finish the customer desired.
The customer was very impressed with the results of this thorough restoration. She even left the following feedback:
“I cannot recommend this service enough. The Oxford Tile Doctor (Barry) was a superstar: he cleaned up the tiles in my hallway, which were covered in a very thick layer of glue, and removed concrete from the tiles. They now look superb and I’m really happy with the outcome. Barry was always on time, considerate, and kept me up to date. The quote for the job was exactly right. I would not hesitate to recommend him.”
 Tile Doctor Ltd
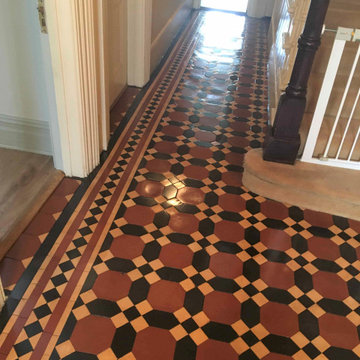
This Victorian tiled hallway floor at a property in Twickenham was in great physical condition considering its age but just hadn’t been cleaned or sealed in quite a few years. Over the years the protective sealer has worn away and dirt tracked in from outside had sunk deep into the pores of the tile. The floor looked dull, and my customer was finding it hard to clean and maintain effectively.
To remove the ground in dirt from within the pores of the tile I needed to apply a strong cleaning product that would breakdown the dirt and deal with any remaining sealer left on the floor. Usually, I find the sealer down the center of the hallway is worn away with use, but you still find traces towards the wall. To do the renovation effectively I would need to remove all the sealer during cleaning otherwise you risk an uneven appearance.
The best sealer stripper and cleaner for the job is a product called Tile Doctor Remove and Go so I mopped a strong dilution onto the floor and then left it to soak in for around fifteen minutes. To get the best from this product it’s advised to give it a long dwell time thereby allowing it to break down old sealer and dissolve the dirt and contaminants.
The floor was then scrubbed with a rotary floor machine to work the product into the pores of the tile and release the trapped dirt. After the first pass the floor was rinsed with a little water and the soil extracted using a machine. After inspecting the floor some areas were re-treated using the same process to ensure all the sealer and dirt had been removed.
After a final inspection I left the tiles to dry off overnight.
The following day I returned and started by taking moisture readings from different parts of the floor. Its not a good idea to apply a sealer to a damp tile and damp areas should be dried out with a heat gun first.
My client was keen to have a classic shiny appearance, so I chose Tile Doctor Seal and Go to add protection to the tiles. The sealer will prevent dirt becoming ingrained in the tile and protect the floor from staining caused by spillages whilst making it very easy for our customer to maintain in the future. As you can see from the pictures, it also gives a nice sheen finish to add lustre to the floor as requested by my customer.
Before leaving we had a quick chat about maintaining the floor and a warning about the use of strong floor cleaning products which can be over strong and prematurely strip the sealer away over time. For this floor I recommend Tile Doctor Neutral cleaner which is an effective cleaner but as its name suggests is pH neutral and mild enough not to harm the sealer.
Jonathan Oldham
South Middlesex Tile Doctor
 Tile Doctor Ltd
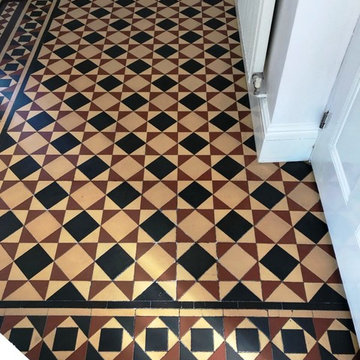
I was recently contacted by the owner of this Minton Victorian tiled floor in Kidderminster. The tiles had been covered over with carpet which I suspect was due to some the tiles being missing. Now uncovered it was stained with glue and carpet underlay was still stuck to the tiles in places. The owner was keen to have the floor fully restored including replacing damaged and missing tiles. We can replace missing or damaged tiles however the problem with old Victorian floors is finding matching replacements due to the unique patterns that many have. Fortunately, due to the popularity of Victorian tiles there are several suppliers who sell reproductions and occasionally you can find originals on ebay.
I went over to survey the floor an could see the tiles were certainly in need of some love and care. As part of the visit I carried out a test clean on a patch of the floor and the results were very satisfactory, so the owner asked me to go ahead.
On the day of arrival my first job was to spray the floor with neat Tile Doctor Remove and Go, this is a powerful cleaner/stripper which set to work on removing the glue and carpet underlay, this product will also remove any old sealer. I then left the solution to dwell and worked the chemical in with my buffer and a black pad removing the slurry with a wet and dry vacuum.
The tiles were then treated to an acid wash using Tile Doctor Acid Gel to further clean them and counter any potential efflorescence problem which is a problem with floors of this age that were installed without a damp-proof membrane. The product was scrubbed into the tile and grout, rinsed off with water and then extracted with the wet vacuum.
Once the floor was clean, I checked the colour of the tiles so I could cut and replace the missing section. I had managed to source some tiles that were a close match and set about cutting all the tiles to size and then fitted them using a flexible rapid set adhesive. The newly laid tiles needed to set, and the floor needed to dry out before we could apply the sealer.
The floor was left to dry overnight, on my return in the morning I tested the floor with a damp meter to check the moisture levels and ensure it was dry enough for sealing. I was satisfied it was dry so was able to proceed and seal the floor. Five coats of Tile Doctor Seal and Go Extra were applied which takes a lot of time as you need to wait for the previous coat to dry before applying the next. This product is a semi-gloss breathable sealer which gives a nice sheen to the tiles and fully protects them. It really allowed the colours and detail of the pattern to shine through and being breathable it will cope with any moisture rising though the floor.
The client was very happy with the overall finish and was really pleased that the Victorian tiles were now restored to their original appearance. It a fact that original features like these are in demand and add a lot of value to a property.
Mark Conway
Worcestershire Tile Doctor
 Tile Doctor Ltd
Another quick job here in Cheshire, this time in the town of Wilmslow. Much like Alderly Edge, where I recently completed another job, Wilmslow is an affluent area known for its upmarket lifestyle and as a popular option for residence amongst celebrities and famous figures. In fact it is currently, and has previously been, home to several Premier League footballers from the nearby clubs Manchester United and Manchester City.
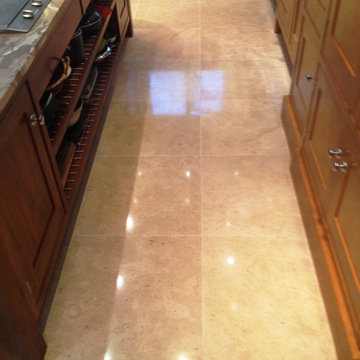
This job was another case of where a tiled floor had lost its shine due to the sealer wearing away over time. In this instance, my client had a Travertine tiled floor in her kitchen that she wanted to me to restore back to looking at its best.
Travertine is a fantastic natural stone which possesses unique features that no other stone can offer. It offers a particularly distinctive design style, making it a popular choice both for commercial and residential use. Many homeowners use Travertine tiles for kitchen flooring, bathroom walls and floors and for external floors, such as patios.
The process of stripping off old sealer can be done effectively and relatively quickly without using a liquid stripper. The best method is to use a series of fine diamond encrusted burnishing pads, which is exactly what I did in this case. The burnishing pads are applied in sequence from coarse, medium, fine and superfine to remove the old sealer without damaging the Travertine and then re-polish to a lovely polished shine.
One the floor had been burnished, rinsed and dried; I proceeded to re-seal the floor with Tile Doctor Colour Grow. Colour Grow is particularly effective when to seal porous natural stone surfaces such as Travertine and Limestone, whether internal or external. This is because the product is specially formulated to penetrate deep into the pores of the stone, providing durable surface protection from within.
The other key benefit of Colour Grow is that it intensifies the colours within the stone, as you can from the photos. This adds additional character and flair to already impressive household features like this Travertine floor.
The finished results were exactly what my client had hoped for. It goes to show that with the right methods and know-how such a big difference can be made to the appearance of tiled floors. I was very happy to help.
Steve Keary
North Cheshire Tile Doctor
 Tile Doctor Ltd
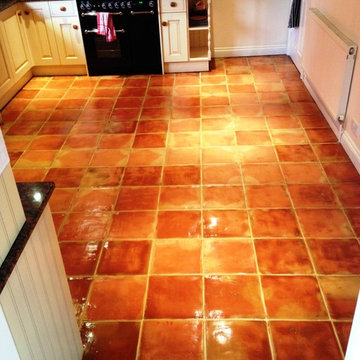
Terracotta may be one of the most aesthetically pleasing types of tiled floor, but as many of our customers will tell you can be particularly difficult to keep clean. This is due to the naturally high porosity of clay, which allows dirt to become very easily trapped. Quite commonly this situation is made worse by a lack of an adequate sealer to block the intrusion of muck. Of course, poor quality cleaning products also make it difficult for property owners to keep their Terracotta tiles clean, and a combination of the two problems can leave these floors looking a lot like this one, located in the kitchen of a house in the beautiful Forest of Dean.
The property owner was keen to have me restore some character to her dull Terracotta tiles. It was proving increasingly difficult for her to keep them clean due to the reasons described before, and the grout had also become very dirty. So, the customer turned to me for some professional assistance.
While these Terracotta tiles had been sealed previously it had, over time, lost its ability to protect the stone against ingrained dirt. To remove the old excess sealer my product of choice was the heavy duty soil remover and stripper, Tile Doctor Remove & Go, which I applied liberally across the surface and scrubbed in to the tile used a rotary machine fitted with a scrubbing pad. This also helped to remove the trapped dirt and left the stone looking fresher.
Once the old sealer was removed – to be replaced with a fresh sealer once cleaning was complete – I was free to focus on the troublesome grout lines with Tile Doctor Pro Clean, an alkaline cleaner that reliably breaks down dirt. When cleaning the grout, I opted to use a handheld grout brush that allowed for more precise, careful application of the product.
As per usual, the floor was given a good rinse and left to dry for 24 hours.
Upon returning to the property I checked the floor was completely dry, ready for sealing. My process for sealing actually involved the application of two different kinds of sealer; initially I applied a single coat of Tile Doctor Colour Grow which has soaks into the pores of the tile and has the added bonus of enhancing its natural colours.
Once this had dried I then applied ix coats of Tile Doctor Seal and Go, a product which forms a durable layer of protection of the surface of the tiles and at the same time provides a lovely sheen finish.
The combination of the two sealers will certainly offer a long-term solution to the ingrained dirt problem, and the appearance-enhancing properties in the products really helped to transform the tiles from dull and dirty to lively and eye-catching. Nonetheless, before departing the property, I also left my very pleased customer with some cleaning advice for the future.
Paul Wales
Monmouthshire Tile Doctor
7