
Search results for "Strippers" in Home Design Ideas
 John Gibbs
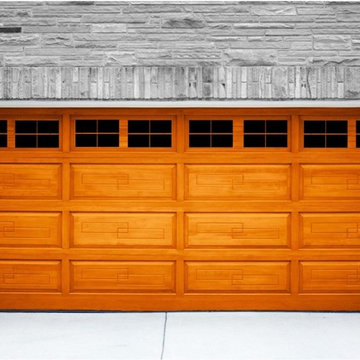
The garage door had been repainted 5 times prior with 3 different coats of primer. Had to have paint stripper applied and then a complete sanding job from 150 down to 220. Can't replace a wood door (PRICELESS)
 Karen's Company
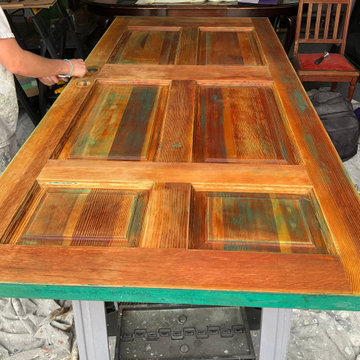
Our client had a painted wooden door at the entry of their home. Knowing that there was a quality wooden door beneath the fading paint lead her to ask us to help her strip the door and refinish the door back to its original wood grain. Our Team of Alyssa and Josh used a paint stripper and specialty stripping tools and techniques to remove the old paint. Here is a picture of the door during the stripping process.
For this project we used a Soy Gel containing product - Blue Bear Paint Stripper. Karen likes this product because it works well and its eco friendly "Non-Caustic, Biodegradable, No Toxic Fumes"
And once stained, clear-coated and rehung, it looked great!
 Karen's Company
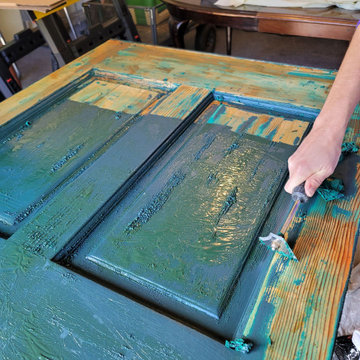
Our client had a painted wooden door at the entry of their home. Knowing that there was a quality wooden door beneath the fading paint lead her to ask us to help her strip the door and refinish the door back to its original wood grain. Our Team of Alyssa and Josh used a paint stripper and specialty stripping tools and techniques to remove the old paint. Here is a picture of the door during the stripping process.
For this project we used a Soy Gel containing product - Blue Bear Paint Stripper. Karen likes this product because it works well and its eco friendly "Non-Caustic, Biodegradable, No Toxic Fumes"
And once stained, clear-coated and rehung, it looked great!
Find the right local pro for your project
 Pierre Jean-Baptiste Interiors
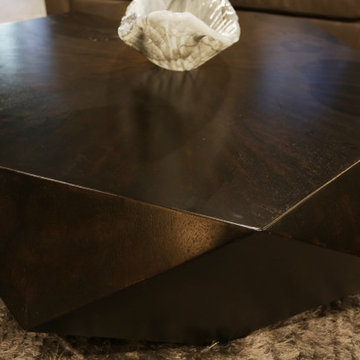
We took this plain loft space in this upper-level loft and made it the perfect adult lounge. The client had specific requests that included a projector movie area, bar, dancing space, as well as new flooring and tile. Some of the key features we included were a Control 4 home automation system, new LED lighting, a spinning dancing pole, as well as a brand-new bar and peninsula bar with all new furnishings. Be sure to check in soon for the video upload.
 Wallscapers Kitchen & Bath Innovations
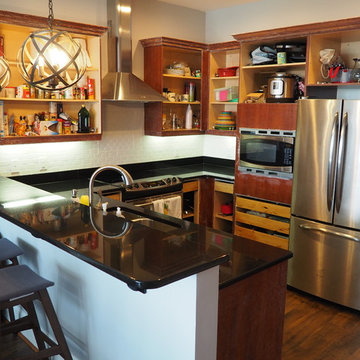
After a lot of work scraping down the cabinets and many coats of paint stripper we were back to the original finish.
Kitchen - small u-shaped kitchen idea in Raleigh with flat-panel cabinets, white cabinets and no island
Kitchen - small u-shaped kitchen idea in Raleigh with flat-panel cabinets, white cabinets and no island
 Pierre Jean-Baptiste Interiors
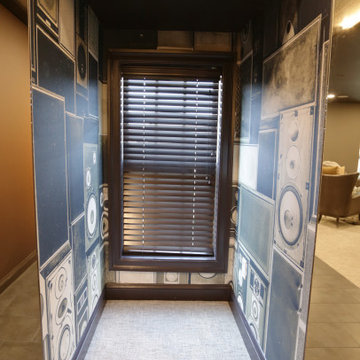
We took this plain loft space in this upper-level loft and made it the perfect adult lounge. The client had specific requests that included a projector movie area, bar, dancing space, as well as new flooring and tile. Some of the key features we included were a Control 4 home automation system, new LED lighting, a spinning dancing pole, as well as a brand-new bar and peninsula bar with all new furnishings. Be sure to check in soon for the video upload.
 Karen's Company
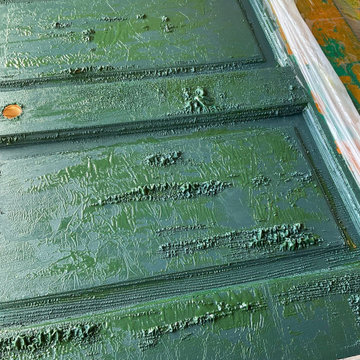
Our client had a painted wooden door at the entry of their home. Knowing that there was a quality wooden door beneath the fading paint lead her to ask us to help her strip the door and refinish the door back to its original wood grain. Our Team of Alyssa and Josh used a paint stripper and specialty stripping tools and techniques to remove the old paint. Here is a picture of the door during the stripping process.
For this project we used a Soy Gel containing product - Blue Bear Paint Stripper. Karen likes this product because it works well and its eco friendly "Non-Caustic, Biodegradable, No Toxic Fumes"
And once stained, clear-coated and rehung, it looked great!
 Pierre Jean-Baptiste Interiors
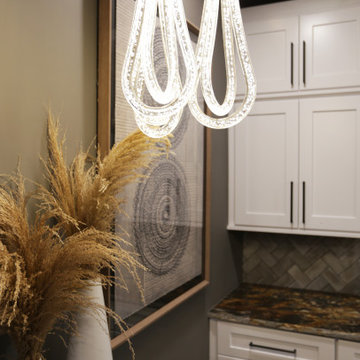
We took this plain loft space in this upper-level loft and made it the perfect adult lounge. The client had specific requests that included a projector movie area, bar, dancing space, as well as new flooring and tile. Some of the key features we included were a Control 4 home automation system, new LED lighting, a spinning dancing pole, as well as a brand-new bar and peninsula bar with all new furnishings. Be sure to check in soon for the video upload.
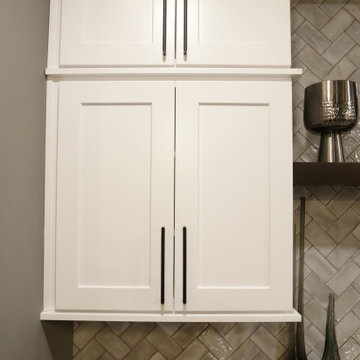 Pierre Jean-Baptiste Interiors
We took this plain loft space in this upper-level loft and made it the perfect adult lounge. The client had specific requests that included a projector movie area, bar, dancing space, as well as new flooring and tile. Some of the key features we included were a Control 4 home automation system, new LED lighting, a spinning dancing pole, as well as a brand-new bar and peninsula bar with all new furnishings. Be sure to check in soon for the video upload.
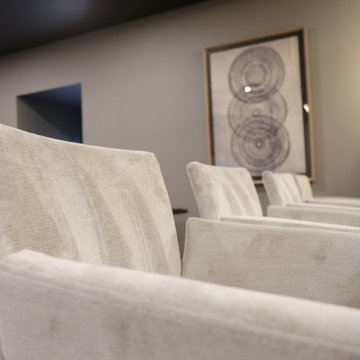 Pierre Jean-Baptiste Interiors
We took this plain loft space in this upper-level loft and made it the perfect adult lounge. The client had specific requests that included a projector movie area, bar, dancing space, as well as new flooring and tile. Some of the key features we included were a Control 4 home automation system, new LED lighting, a spinning dancing pole, as well as a brand-new bar and peninsula bar with all new furnishings. Be sure to check in soon for the video upload.
 Pierre Jean-Baptiste Interiors
We took this plain loft space in this upper-level loft and made it the perfect adult lounge. The client had specific requests that included a projector movie area, bar, dancing space, as well as new flooring and tile. Some of the key features we included were a Control 4 home automation system, new LED lighting, a spinning dancing pole, as well as a brand-new bar and peninsula bar with all new furnishings. Be sure to check in soon for the video upload.
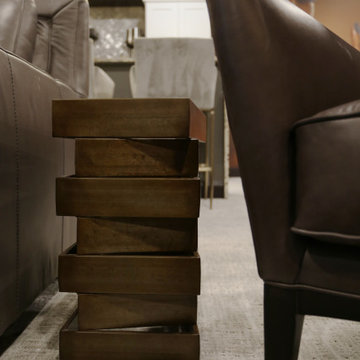 Pierre Jean-Baptiste Interiors
We took this plain loft space in this upper-level loft and made it the perfect adult lounge. The client had specific requests that included a projector movie area, bar, dancing space, as well as new flooring and tile. Some of the key features we included were a Control 4 home automation system, new LED lighting, a spinning dancing pole, as well as a brand-new bar and peninsula bar with all new furnishings. Be sure to check in soon for the video upload.
 Tile Doctor Ltd
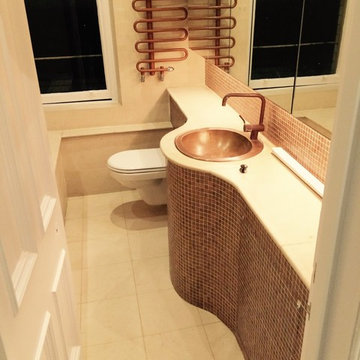
This was a substantial engagement at a luxury rental apartment in Brighton rejuvenating the Limestone tiles in two bathrooms and a hallway taking six days of hard work. In addition, I would be working around two decorators, making for even more testing work conditions.
I first set to work on the smallest bathroom, which featured limestone tiles from floor to ceiling, as well as a large bath, copper sink and a tiled surround. Limestone is a very popular choice for interior and exterior decoration, but the tiles in this bathroom were in need of some care to get them looking their best again. My initial task was to strip away any previous sealer by hand; this was done using a mixture of warm water and Tile Doctor Pro-Clean which, along with Limestone, is also suitable for use on other types of natural stone, such as Granite, Slate and Travertine. Pro-Clean serves both as an effective stripper and cleaner, meaning that once the sealer had been stripped away, the tiles also received a thorough clean. Once I had cleaned the tiles, I sucked up any excess water and residue using a Wet-Dry Vac machine.
Since the tiles would have to be left to dry for a couple of days, I offered to restore the copper sink for the customer, even though this was not actually part of my job description. After conducting some research into copper cleaning, I opted to use a combination of lemon juice, vinegar and salt. The research paid off as, once I began to apply the solution to the sink, the bright orange and brown colours of the copper quickly rose to the surface. Within the space of an hour, I had transformed what initially appeared to be a ruined sink into a lovely, shimmering copper feature for the bathroom. Both the decorators and I were truly amazed at the results – but all credit goes to Google!
The larger of the two bathrooms was a much stiffer test for the Tile Doctor products. It had not been left in great condition, as the shower area had clearly not been sealed correctly, and the tiles had been left in such a manner that soap scum from shampoos, soaps and shower gels had built up on the window sill. In fact, the damage was significant enough that I had to explain to the customer before starting the work that whilst I could greatly improve the appearance of the tiles, I would not be able to restore them to new. This is because many shampoo and body wash products are acidic and can cause permanent damage to stone work especially when left to dwell for a long time.
My choice of product was Tile Doctor Mould Away, a formula which, over time, seeps deeply into the pores of the stone, effectively lifting away the muck. In cases of particularly stubborn areas, it is necessary to apply another covering of Mould Away and leave it for an extended period of time. This is exactly what I did over the next few days, leaving the product overnight to work its magic. The change was certainly drastic, if not perfect.
As both bathrooms required extended periods of drying, I spent two days working on the hallway, which had been partially covered with a plastic sealing for the previous six months due to building work. Needless to say, the hallway was in need of a good clean. I set about cleaning the hallway with a solution of warm water and Tile Doctor Pro-Clean, before once again using a Wet-Dry Vac machine to remove any excess water to prepare the floor for sealing at a later point. It is very important to remove any residue of cleaning solution before sealing, as this may impact the performance of the sealer. Following this, I left the hallway to dry for two days, providing the builders with strict instructions to cover it with blankets for protection while they were working.
While the floor was drying, I sealed the bathrooms – both now fully dried – with Tile Doctor Colour Grow Sealer, a solvent-based sealer that was highly effective at enhancing the colour of the brown tiles around the sinks. The product will also provide durable surface protection. I spent the final of the six days sealing the hallway floor with Tile Doctor Seal & Go, which provides both a stain-resistant surface seal and a durable, low-sheen finish. This was an ideal choice of product, as the customer requested a hard-wearing, yet shiny finish.
The hard work really paid off, as both the customer and the decorators were very impressed with the final results in the two bathrooms and the hallway. I was extremely pleased that I was able to complete this big job to the highest possible standards.
 Tile Doctor Ltd
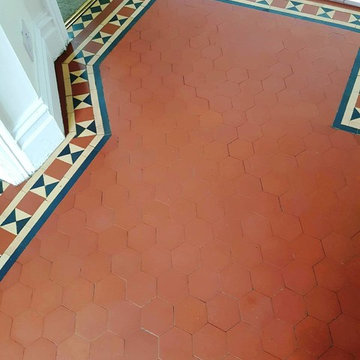
From The 1860s Victorian tiled floors started to appear in public buildings and by the 1890s they had become an essential feature in the most ordinary Victorian terraced houses. Although these floors fell out of fashion during the 1960s and ’70s, when many of them were covered over, they are now being rediscovered by their present owners and this is exactly what happened to my customer in the village of Littleover.
The customer had attempted to clean the floor by themselves but they couldn’t archive the result wanted, fortunately they discovered the Derbyshire Tile Doctor and after their call I went over and did a test for cleaning to make sure I can archive the needed results. They were happy with what they saw, so they booked me in to complete the work.
For cleaning the hallway I used a strong dilution of Tile Doctors Pro Clean which is strong multi-purpose high-alkaline cleaner. I left the Pro Clean to dwell for 10 minutes and then worked it in the tiles by using a strong black scrubbing pad fitted to my rotary machine. After scrubbing I rinsed the floor several times with clean water to remove any trace of cleaning product from the floor.
After successfully cleaning the hall I moved on to the porch which still had some old topical sealer on less walked areas. On these areas I had to use Tile Doctors own very effective stripper Remove and Go. Remove and Go has a long dwell time to remove any given sealer or wax so I left it to soak in for fifteen minutes followed by scrubbing it in with black pad fitted to rotary machine. The next step was to wash off the residue with water which was then removed using a wet vacuum.
Following this the tiles were given a rinse with Tile Doctor Grout Clean-up which is an acid based product that can remove grout smears and mineral deposits. Last step before sealing was to give the floor a thorough wash down with clean water to remove any cleaning product left on the tiles and then I left the floor to dry overnight.
Next day when I returned I used my damp tester to make sure that the floor is completely dry. Luckily for me floor was all dry and I started sealing. For sealing I used Tile Doctors Colour Grow Sealer which is colour enhancing breathable sealer. I applied 2 coats of the sealer and after every coat I polished off the excess with clean cotton cloths.
The result was really good and my customer was very happy with the work and said that now the floor looks transformed.
Tony Olmet
Derbyshire Tile Doctor
 Tile Doctor Ltd
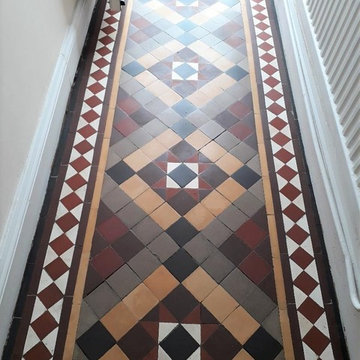
As is often the case in years past and for whatever reason many homeowners covered their decorative Victorian hallway tiles in a variety of products from carpet to laminate flooring. These days the trend has reversed and quite rightly many homeowners now realise the value a tiled floor can bring to a property and look to us to have it restored.
Our client had purchased a property in Norfolk seaport of Kings Lynn and, on lifting the dirty old carpet and decaying underlay in the hallway, discovered a beautiful tiled entrance hall. It was obvious that a previous owner had decided to lay carpet over the tiles as an easy way of hiding the result of careless renovation and decorating which had resulted in a thick coating of plaster, paint, carpet tape glue and various other contaminants which had become firmly stuck to the surface. There were also two small rectangular black and brown tiles missing behind the front door which had been damaged during the removal of some old lead pipes.
This was clearly a job which would need somewhat more than a scrubbing brush and a bottle of Flash!
Our first job was to remove as much of the solid contaminants as possible by hand with floor scrapers and a steamer which softened the more stubborn lumps. We then applied Tile Doctor Remove & Go which is a powerful alkaline stripper to the whole area, left it to dwell on the surface for twenty minutes and then scrubbed it in using a rotary machine fitted with a black scrubbing pad. The resulting slurry was then power rinsed and extracted away using our Ninja machine which is a high-power industrial vacuum. Any remaining patches where the carpet tape had been stuck down were spot treated using Tile Doctor Nanotech HBU which made short work of the hardened glue.
The result was a clean floor, but the surface still felt slightly rough and pitted, a problem which we resolved using the rotary machine fitted with a 200-grit diamond burnishing pad followed by a 400-grit pad with a little 400 grit honing powder which left the surface smooth, silky and ready for the application of a sealer.
Finally, we acid washed the whole area using Tile Doctor Acid Gel, a slow release product which would neutralise any remaining chemicals, improve new sealer adhesion and inhibit the future production of any efflorescence salts. We had used a fair amount of water during the cleaning process, so we left the floor to dry off thoroughly overnight with assistance from our commercial dehumidifier.
On our return the following day, we discussed the sealer options with the client and recommended using microporous Tile Doctor Colour Grow which is an impregnating sealer that seeps into the pores of the stone protecting it from within. It will provide an excellent fluid resistant seal whilst enhancing the natural colours in the stone, additionally it’s fully breathable thereby enabling any moisture trapped under the floor to rise through the floor and evaporate. This is important on old floors like this where no damp-proof membrane was installed. The sealer was applied with a paint pad in tow coats and allowed to dry for an hour before buffing the floor with a hog’s hair pad to give a rich natural-look sheen finish.
The Victorian tiles responded well to the treatments which were completed in two consecutive days. My client was extremely pleased with the results and left the following comment:
“My floor was in poor condition after being buried under carpet as well as many, many years of paint and muck. I enjoyed the time they spent at my home and wouldn’t hesitate to use (or recommend) the Tile Doctor service in the future.”
Nick White
Norfolk Tile Doctor
 Tile Doctor Ltd
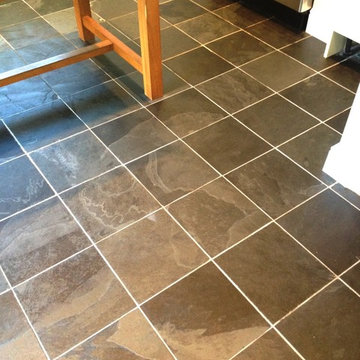
Slate is a popular choice for tiled kitchen floors and when properly maintained looks fantastic, however like all natural stone products without an effective cleaning plan dirt will become ingrained in the stone and will start to lose its appearance.
This was the case with this fantastic Slate tiled kitchen floor in Twickenham which had the potential to look really nice, but hadn’t received the proper maintenance for a long while, leaving it looking very tired. It now needed what was left of its old surface sealer stripped off, followed by a deep cleaning of the tile and grout before having a fresh seal applied.
To begin the restoration, I mixed a 50:50 solution of Tile Doctor Remove and Go and Tile Doctor Pro Clean. This was applied to the floor and allowed to dwell. Remove and Go functions as a stripper that breaks down the old sealer, while Pro Clean is a versatile, high alkaline cleaner that is safe to use on all types of natural stone flooring.
To use it to full effect, I machine scrubbed this solution into the floor to completely remove all dirt, stains, and old sealer. I also ran a stiff brush along the grout lines to remove the particularly stubborn dirt ingrained in the grout. The resulting cleaning slurry was then rinsed with water and extracted using a wet vacuum and the floor checked for stubborn marks which were retreated using the same process.
The floor was left to dry overnight and I came back the next day to apply a new seal. It’s important to leave a tiled floor to dry completely before sealing and at this time of year 24 hours is usually enough. This is necessary to ensures there is no excess moisture in the tile as this has the potential to cloud the sealer and affect its effectiveness.
The customer required a low sheen finish and a floor that was easy to maintain. I opted to use Seal & Go, which provides exactly that. It is a water-based with a high sheen blend of acrylic polymers that offers a both a stain resistant surface seal and a durable low sheen finish, also being water based it doesn’t leave a smell as it dries. Seal and Go is also a breathable sealer that will allow moisture to rise up through the tile and allow the floor to breathe.
As you can see from the pictures, the lustre has been completely restored to the Slate tiles and the sealer will allow for easy maintenance for the customer in the future.
Jonathan Oldham
South Middlesex Tile Doctor
 Tile Doctor Ltd
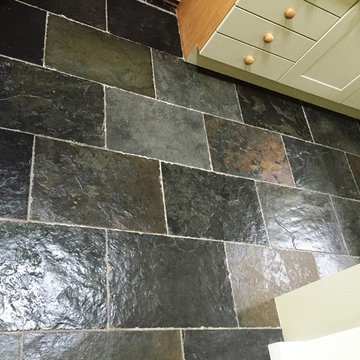
This small rough Chinese Slate floor in the kitchen of a house in the village of Cheadle near Stockport in Greater Manchester had not had any sealer put on it for many years and was very grubby (dishevelled as described by the customer) looking even after the customer had tried to clean it.
Sealers do take a lot of punishment, especially in a high traffic area such as a small kitchen and will wear off over time and once this happens the floor will start to lose its appearance as dirt becomes ingrained in the stone and it can no longer be cleaned effectively.
As we have to apply a liberal amount of water with this sort of work, the first step was to remove the Kicker boards at the bottom of the Kitchen units and silicone the Kitchen units that were fixed; this stops water seeping in and blowing the MDF allowing us to concentrate on cleaning the Slate without causing any damage.
I started the cleaning process by applying a strong dilution of Tile Doctor Pro-Clean to get rid of the built up dirt and any remaining sealer, leaving it to soak into the Slate before scrubbing the floor with a black scrub pad fitted to buffing machine running at slow speed. Tile Doctor Pro-Clean is a strong alkaline cleaner/stripper that is safe to use on natural stone, we do have stronger products available if required but in this case a strong dilution of Pro-Clean was sufficient to tackle any remaining sealer.
This process gave the Slate and grout lines a good deep clean and after rinsing the floor with water which was then extracted using a wet vacuum I repeated the process on stubborn areas until satisfied the floor was as clean and free of old sealer. Last stage of the cleaning process was to give the floor a final rinse and then get it as dry as possible using the wet vacuum to soak up the moisture.
The floor was quite small so I was able to leave the floor to dry off over lunch time and then on my return managed to get it fully dry with a little heat from a heat gun. The customer wanted a mat finish so once dry I applied Tile Doctor Colour Grow sealer which impregnates into the pores of the natural stone protecting it from within and enhancing the natural colours of the Slate at the same time.
For general cleaning of Sealed stone floors, we recommend the use of a PH Neutral Cleaner as anything with a strong PH will degrade the life of the sealer over time.
Steve Keary
Greater Manchester Tile Doctor
 Tile Doctor Ltd
This ground floor flat in the City of Oxford had been converted from a shop which as you can imagine, was quite complex. One significant element involved in the conversation was the restoration of an old Quarry tiled floor which ran through the main hallway and had for many years been covered in a commercial linoleum covering.
When the linoleum covering was removed, the sheer amount of glue which had been used to affix it had completely ruined the appearance and condition of the Quarry tiles. There was also a lot of concrete in the bathroom, and our client was keen to have this removed in the hope that the tiles beneath were salvageable.
My first task at the property was to deal with the adhesive. I covered the entire floor area with Tile Doctor Remove and Go and then covered it with a plastic sheet and leaving it to soak into the glue and break it down overnight. Remove and Go is powerful stripper with a long-dwell time, formulated to break down adhesives and paint stains, amongst other coatings.
I returned the next day and, removing the plastic sheeting, I scrubbed the floor with a carbon brush attached to a rotary floor scrubber to remove the huge glue deposits. I worked in sections, rinsing each area of the floor with water after it had been scrubbed. Once I had finished the entire floor there was still some glue remaining, so I covered it again with a solution of Remove and Go combined with Tile Doctor HBU Nanotech, which utilises nano-sized particles to get underneath tough stains, dissolve them, and lift them out. I left this solution on the floor for about two hours to dwell and scrubbed it again.
During the next day of work, I used a very coarse 100 grit diamond burnishing pad to manually grind away the remaining stubborn bits of glue. Paying attention to the bathroom, I used a 50-grit coarse milling pad followed up with a 100-grit diamond burnishing pad to do the same to the area of concrete.
The next part of the process was to use Tile Doctor Grout Clean Up to acid wash the floor. This was successful in removing the last bits of cement and the remaining residue of the glue. To complete the cleaning process, I then rinsed the floor with plenty of water and vacuumed up any soiled solution.
I opted to leave the floor alone for a couple of days to fully dry off so that it could be sealed upon my return. This is crucial as any moisture or damp issues can damage the performance of the sealer and expose the floor to further ingrained dirt and staining.
To seal the floor, I used Tile Doctor Colour Grow. This is an impregnating sealer that also enhances the natural reddish shades in the Quarry. I applied two coats of the sealer, giving the floor the natural look matte finish the customer desired.
The customer was very impressed with the results of this thorough restoration. She even left the following feedback:
“I cannot recommend this service enough. The Oxford Tile Doctor (Barry) was a superstar: he cleaned up the tiles in my hallway, which were covered in a very thick layer of glue, and removed concrete from the tiles. They now look superb and I’m really happy with the outcome. Barry was always on time, considerate, and kept me up to date. The quote for the job was exactly right. I would not hesitate to recommend him.”
 Tile Doctor Ltd
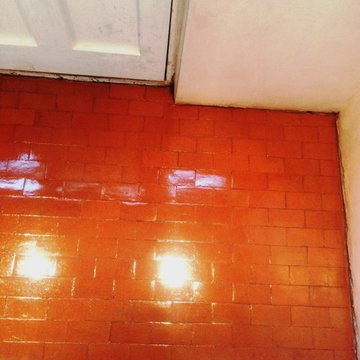
Here’s a quick job I completed in the coastal town of Eastbourne in East Sussex. While more commonly I am asked to work on entire floors, this customer was specifically interested in restoring a small doorway-like area with Quarry tiled flooring, the reason being that it had been covered for a long time by an old wardrobe and dog basket. As a result, the area had not been properly cared for, becoming very dusty and dirty. Also revealed were some unsightly splashes of white paint from previous decoration work.
The customer was keen to finally give this area of the floor the attention it needed, and so asked me to come in to provide a thorough clean and lay down some fresh sealer.
My first task was actually to relocate the old wardrobe and dog basket to the garage to get the area ready for cleaning. Then, to begin the cleaning process, I stripped away any old existing sealer and the white paint splashes by using Tile Doctor Remove & Go stripper in combination with a wire brush. Remove & Go is a versatile product that can also be used to break down glues and other adhesives.
I then washed the area down with water and promptly vacuumed up any moisture, before sitting down with a heat gun for an hour to dry the tiles. Usually a floor should be left for up to 48 hours to dry completely before sealing, but in this case the area was so small that I was able to dry it in the space of an hour.
Nonetheless, I opted to install a fan and leave the floor for an extra hour over lunch to ensure any excess moisture was removed. This is really important to do before sealing, as any remaining moisture can cloud the sealer and damage its performance.
To complete the restoration, I sealed the tiles using nine coats of the topical, water-based sealer Seal & Go, which is suitable for building up surface protection against dirt and stains on internal unsealed porous surfaces such as Victorian, Quarry and Sandstone tiles. The Quarry tiles were quite porous, which is not uncommon for Quarry Tiles and really soaked up the sealer.
As the photographs show, the results of the restoration were very good, with smiles all round – including from the slightly bemused family dog!
Rupert Mcleod
East Sussex Tile Doctor
 Tile Doctor Ltd
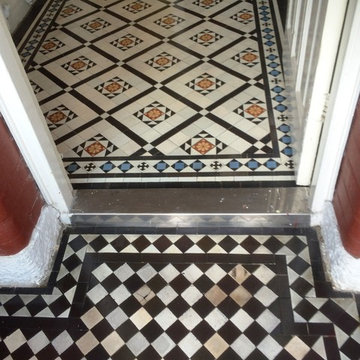
Recently I travelled down to the village of Prestwood in the Chiltern Hills of southern Buckinghamshire, to work on a Victorian tiled porch and hallway. Victorian tiles are commonly found in the entrance areas of older houses and unfortunately in this case the tiles had become heavily ingrained with dirt over time, and had suffered from additional paint and plaster spillages. The result was an unsightly mess; my client was considering covering the floor with lino after several unsuccessful attempts at cleaning it. I was called upon to provide a professional clean and seal, restoring these great Victorian tiles back to looking their best again.
On my first day at the house, I mixed up a solution of 50 per cent Tile Doctor Pro-Clean, a high alkaline cleaner, and NanoTech HBU (formerly known as Ultra Clean), which is a cleaning product that contains nano-sized abrasive particles that penetrate deep into the stone to lift ingrained dirt to the surface. This solution was worked into the tiles using abrasive scrubbing pads fitted to one of my commercial rotary machines.
The cleaning process left over a slurry of residue which I rinsed away with clean water and extracted with a wet vacuum. I was still left with the issue of stubborn paint spillages, so I applied a layer of Tile Doctor Remove & Go, a stripper with cleaning properties which is very effective at breaking down paint and adhesive stains.
Once the paint spillages had been dealt with I gave the area another rinse with clean water. I then left the house, allowing the floor enough time to dry overnight.
Upon my return the day I set about sealing the newly cleaned Victorian tiles. Before starting the sealing process I inspected the floor to check for any dampness, knowing that any excess moisture could potentially damage the performance of the sealer.
When I was satisfied that the tiles were fully dried, I applied Tile Doctor Seal & Go, a sealer which offers durable surface protection, along with an aesthetically pleasing, low-sheen finish which brings out the colour in the stone. This product can be used to seal internal, porous surfaces including Victorian, Slate, textured Quarry and Sandstone tiles.
The process made an amazing difference to the floor as you can see from the photographs; additionally the restoration of such an original feature adds a lot of value and looks so much better than lino!
Colin Ford
South Buckinghamshire Tile Doctor
6