
Search results for "Style problem" in Home Design Ideas

 R.S. Walsh Landscaping, Inc.
One feature palm was salvaged when this seven year old Mediterranean style residence on the Caloosahatchee River underwent a complete landscape and hardscape remodel in the beginning of 2015. The landscape had not been properly maintained for a few years prior to when the new owners purchased in 2014, was overgrown and unhealthy and therefore was in need of a complete evaluation and landscape overhall.
The original red brick concrete pavers were removed and replaced with a gold travertine blend with ivory travertine border for accent. The front entry stair was expanded and redesigned for a more significant and welcoming front door. The side yard had a significant slope from the foundation of the house to the seawall and had significant erosion damage. This space was re-graded, grading and drainage was repaired and re-routed and a 70 foot long retaining wall was installed. The retaining wall not only solved the stormwater washout problem, but also provided a level space for a private side yard tropical palm garden and pathway to access both the pool deck and the walk along the seawall. The stairs to the pool deck, dock and landing were all completely modified for ease of use.
Aside from the tropical and beautiful landscape that was installed, the most significant visual and aesthetic improvement to this property was the addition of three 9 foot tall by 5 foot wide natural stone water walls with stone basins that were designed to fit within the archways at the driveway entry and designed to complement the architecture of the residence. These water walls offer ambient noise, visual interest and have completely improved the use and entry experience for the homeowner and visitors. Tropical shade bromeliads, alocasias, cordylines and ferns dress up the new landscape beds at the entry and along the front foundation where previously red brick intersected the foundation walls for a mundane solution.
Other elements of interest include the cable wire espalier that was installed in front of the archway on both sides of the entry way for colorful bougainvillea trellis vine to climb and soften the tall walls and eventually connect over the arch. Confederate jasmine vine will soften the garage corner on the cable wire trellis installed and there is also a 4 foot wide by 18 foot tall cable wire espalier on a tall, once stark, wall on the pool deck. Three pool planters were reconfigured and planted with large triple princess palms and bold blue-tone pottery was selected to add interest and color to the pool deck. Micro-drip irrigation was connected to the pool planters and pottery for a low maintenance solution.
This project was a collaborative effort with an ideal client who was open to all design ideas, who worked closely with the design team, and was a great success for both the client and R.S. Walsh Landscaping.

 Paul Lopa Designs
See what our client say about Paul Lopa Designs:
It went as smooth as it possibly could go. The only bumps in the road was with what we found during demolition, you never know what your gonna run into when all the walls, floors and fixtures come out. Paul had explained to us that depending on what we found under all the out dated stuff it might take a little longer. Paul was there doing the work with his workers he showed up on time and finished on schedule. It was no problem being in touch with Paul because he answered his phone or got back to us in a timely fashion. He has an excellent sense of design he knows what goes well together and makes the house flow with comfort and usability.
Paul Lopa designs,inc

 River Valley Landscapes
This zealous gardener was tired of her pool taking up so much space in her landscape. She asked me for ideas. The answer was simple. Since her garden brings her so much joy, I proposed adding more garden rooms to experience. We removed the large expansive pool and replaced it with a small reflecting pond that doubles as the pool. This allowed us to create 4 new garden spaces. We replaced all concrete pavers with natural PA flagstone. The traditional square lawn provides elements of simplicity, elegance and classical style while creating a new play space for the grand kids. The pergola creates depth and a great focal point from the loggia. We illuminated all the walkways and garden rooms with Escort Lighting. One of the most fun transformations was converting the spa to a fish pond. The pond provides just enough sound to drain out all neighborhood activities. In the front, we created a new permeable brick paving parking area. The parking area was designed to keep visitors from venturing to the back parking. We chose the permeable brick pavers to collect runoff that is becoming more of a problem in the neighborhood. Our final piece to this property was to come up with a unique solution creating additional privacy while minimizing root damage to the existing plant material. Our client was looking for a permanent solution that required little to no maintenance. Masonry walls were out due to the necessary footers. We looked at fence options. Wood and plastics were out, so we created post out of steel “I” beams and setting concrete lintels in between the lintels. It was perfect. This has to be one of my favorite projects to design and implement of my 25 year experience.
Find the right local pro for your project

 Design Vision Studio
James Latta of Rancho Images -
MOVIE COLONY
When we met these wonderful Palm Springs clients, they were overwhelmed with the task of downsizing their vast collection of fine art, antiques, and sculptures. The problem was it was an amazing collection so the task was not easy. What do we keep? What do we let go? Design Vision Studio to the rescue! We realized that to really showcase these beautiful pieces, we needed to pick and choose the right ones and ensure they were showcased properly.
Lighting was improved throughout the home. We installed and updated recessed lights and cabinet lighting. Outdated ceiling fans and chandeliers were replaced. The walls were painted with a warm, soft ivory color and the moldings, door and windows also were given a complimentary fresh coat of paint. The overall impact was a clean bright room.
We replaced the outdated oak front doors with modern glass doors. The fireplace received a facelift with new tile, a custom mantle and crushed glass to replace the old fake logs. Custom draperies frame the views. The dining room was brought to life with recycled magazine grass cloth wallpaper on the ceiling, new red leather upholstery on the chairs, and a custom red paint treatment on the new chandelier to tie it all together. (The chandelier was actually powder-coated at an auto paint shop!)
Once crammed with too much, too little and no style, the Asian Modern Bedroom Suite is now a DREAM COME TRUE. We even incorporated their much loved (yet horribly out-of-date) small sofa by recovering it with teal velvet to give it new life.
Underutilized hall coat closets were removed and transformed with custom cabinetry to create art niches. We also designed a custom built-in media cabinet with "breathing room" to display more of their treasures. The new furniture was intentionally selected with modern lines to give the rooms layers and texture.
When we suggested a crystal ship chandelier to our clients, they wanted US to walk the plank. Luckily, after months of consideration, the tides turned and they gained the confidence to follow our suggestion. Now their powder room is one of their favorite spaces in their home.
Our clients (and all of their friends) are amazed at the total transformation of this home and with how well it "fits" them. We love the results too. This home now tells a story through their beautiful life-long collections. The design may have a gallery look but the feeling is all comfort and style.

 Robin's Nest Interiors
So this is one of my Guest Rooms. I love using twin beds in a Bedroom (although it can be pricey – two of everything!). I found these vintage iron bed frames from one of my favorite vendors. I wanted to lots of layers of bedding so I have two duvets – one on the bed and one at the foot of the bed – and a colorful throw and accent pillow. I repurposed the window treatment from my Master Bedroom. The balloon valance is the perfect style for this large scale floral fabric in vibrant blues and greens. The walls are painted one of my favorites – Sherwin Williams’ Anew Gray (SW7030). I love painted pieces – especially those with storage for a bedroom. The fun green chest with interesting shape fits nicely between the beds. The two shade lamp could not be more perfect for the twin beds. Every Bedroom needs seating, and I love a bench at the end of the bed. I had two problems – I did not have room for a full bench and I did not want to hide the bed frame. These small ottomans in rich blue velvet were the perfect solution. I added a gray wool rug for softness underfoot. On the wall opposite the beds, I used a painted blue dresser. To finish off the vignette, I selected a round mirror (because every Bedroom needs a mirror) with an oversized frame and unique accessories to support my color palette. Notice how nicely all of the different finishes – silver on the mirror, black iron on the bed and dresser and burnished brass on my little insect sculptures – work together. You can and should mix your metals – it makes every room more interesting! With the twin beds, the room was calling for symmetry so I dressed the walls with 6 botanical prints – 3 on each side.
This Bedroom makes me want to be a guest in my own home! Enjoy!
 River Valley Landscapes
This zealous gardener was tired of her pool taking up so much space in her landscape. She asked me for ideas. The answer was simple. Since her garden brings her so much joy, I proposed adding more garden rooms to experience. We removed the large expansive pool and replaced it with a small reflecting pond that doubles as the pool. This allowed us to create 4 new garden spaces. We replaced all concrete pavers with natural PA flagstone. The traditional square lawn provides elements of simplicity, elegance and classical style while creating a new play space for the grand kids. The pergola creates depth and a great focal point from the loggia. We illuminated all the walkways and garden rooms with Escort Lighting. One of the most fun transformations was converting the spa to a fish pond. The pond provides just enough sound to drain out all neighborhood activities. In the front, we created a new permeable brick paving parking area. The parking area was designed to keep visitors from venturing to the back parking. We chose the permeable brick pavers to collect runoff that is becoming more of a problem in the neighborhood. Our final piece to this property was to come up with a unique solution creating additional privacy while minimizing root damage to the existing plant material. Our client was looking for a permanent solution that required little to no maintenance. Masonry walls were out due to the necessary footers. We looked at fence options. Wood and plastics were out, so we created post out of steel “I” beams and setting concrete lintels in between the lintels. It was perfect. This has to be one of my favorite projects to design and implement of my 25 year experience.
 Robin's Nest Interiors
So this is one of my Guest Rooms. I love using twin beds in a Bedroom (although it can be pricey – two of everything!). I found these vintage iron bed frames from one of my favorite vendors. I wanted to lots of layers of bedding so I have two duvets – one on the bed and one at the foot of the bed – and a colorful throw and accent pillow. I repurposed the window treatment from my Master Bedroom. The balloon valance is the perfect style for this large scale floral fabric in vibrant blues and greens. The walls are painted one of my favorites – Sherwin Williams’ Anew Gray (SW7030). I love painted pieces – especially those with storage for a bedroom. The fun green chest with interesting shape fits nicely between the beds. The two shade lamp could not be more perfect for the twin beds. Every Bedroom needs seating, and I love a bench at the end of the bed. I had two problems – I did not have room for a full bench and I did not want to hide the bed frame. These small ottomans in rich blue velvet were the perfect solution. I added a gray wool rug for softness underfoot. On the wall opposite the beds, I used a painted blue dresser. To finish off the vignette, I selected a round mirror (because every Bedroom needs a mirror) with an oversized frame and unique accessories to support my color palette. Notice how nicely all of the different finishes – silver on the mirror, black iron on the bed and dresser and burnished brass on my little insect sculptures – work together. You can and should mix your metals – it makes every room more interesting! With the twin beds, the room was calling for symmetry so I dressed the walls with 6 botanical prints – 3 on each side.
This Bedroom makes me want to be a guest in my own home! Enjoy!
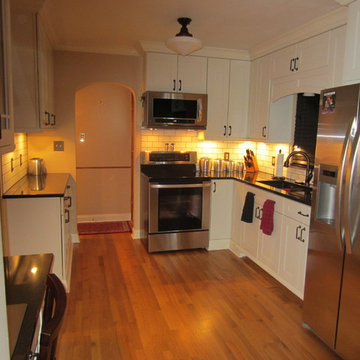


 AA Design Firm
We installed the 3D porcelain tile on the wall to create movement to space. And we added the distressed rug to tie in the wall with the rest of the furniture.

 Kustom Home Design
This amazing renovation focused on solving a series of problems that a previous kitchen expansion had created. By rearranging the appliance placement, updating the cabinetry, designing all new storage solutions and maximizing the amazing outdoor views; we cured the spit personality disorder plaguing the existing kitchen. The home now has a beautifully redesigned kitchen and living space perfect for entertaining, relaxing and enjoying the outside views. Vaulted ceilings with bright skylights, reflective glass wall tiles, sleek sophisticated Cambria quartz counter tops, fingerprint-free faucet, multi-functional Prolific kitchen sink by Kohler, stainless steel appliances, creative storage solutions, all new lighting and timeless shaker cabinets by Wellborn lend to the now bright, open, vivacious and flawless function of this newly renovated galley style kitchen. White base cabinets along the outside walls contrast perfectly with the dark grey island cabinets. Linear satin nickel door and drawer pulls coordinate with the stainless steel appliances and sink. An eclectic blend of vintage and modern furnishings, artwork and rugs create a comfortable balance that feels and looks timeless. Breathtaking backyard views are artfully framed by new Pella windows and doors with integral blinds between the glass. Calm, inviting neutral tones provide the perfect backdrop for this refined design.
Photos by: Kimberly Kerl

 DDLA Design Landscape Architecture
Located in the Uptown area of Dallas, this modern townhome features a new outdoor living area providing a private retreat for an owner retreat and entertaining. The space includes an outdoor cooking area, dining, fountain, built-in seating area and linear fire pit.

 CabinetGlass.com
An installed photo of the finished panel... maybe a bit too close.
Arched Cabinet Doors are no problem at all !!
In most situations, we do not even charge extra... it just takes a few more measurements on our clients part, much less expensive than sending templates.
For this project, there was only the one panel that measured - 10-1/16" x 24-5/8".
The colors and textures of the glass used was:
For the Leaves there was a random mix of three colors.
Spectrum Glass - 528-4W - Olive Green WaterGlass
Spectrum Glass - 518-1W - Bronze WaterGlass
Spectrum Glass - 111W - Dark Amber WaterGlass
The Outside Border was - Spectrum Glass - 319-02S - Pale, Amber White Wispy.
And the Inside Background Glass was - STJ-121 - Chinchilla - a fairly obscure glass.
Again we used our Dark Antique Tiffany Leading as this was an intricate design. We feel the results were spectacular, and our clients were very pleased.
.
 Kustom Home Design
This amazing renovation focused on solving a series of problems that a previous kitchen expansion had created. By rearranging the appliance placement, updating the cabinetry, designing all new storage solutions and maximizing the amazing outdoor views; we cured the spit personality disorder plaguing the existing kitchen. The home now has a beautifully redesigned kitchen and living space perfect for entertaining, relaxing and enjoying the outside views. Vaulted ceilings with bright skylights, reflective glass wall tiles, sleek sophisticated Cambria quartz counter tops, fingerprint-free faucet, multi-functional Prolific kitchen sink by Kohler, stainless steel appliances, creative storage solutions, all new lighting and timeless shaker cabinets by Wellborn lend to the now bright, open, vivacious and flawless function of this newly renovated galley style kitchen. White base cabinets along the outside walls contrast perfectly with the dark grey island cabinets. Linear satin nickel door and drawer pulls coordinate with the stainless steel appliances and sink. An eclectic blend of vintage and modern furnishings, artwork and rugs create a comfortable balance that feels and looks timeless. Breathtaking backyard views are artfully framed by new Pella windows and doors with integral blinds between the glass. Calm, inviting neutral tones provide the perfect backdrop for this refined design.
Photos by: Kimberly Kerl

 Catrina's Ranch Interiors
Just recently I had the pleasure of working on a remarkable ranch in the Texas Hill Country. The ranch belongs to John and Betty Martin, two extraordinary people with impeccable taste. The Martins live in the hustle and bustle of Katy, enjoying life with children and grandchildren. One thing that they share as a family is their appreciation of nature. In addition to raising trophy deer and exotic animals, they love to hunt and fish. They also take long nature walks in search of arrowheads, fossils and other treasures which they often incorporate into their own designs on walls, walkways and patios.
Having found this remote corner of God’s country, it would not be easy to find a builder who could be on site daily and truly listen to the specific directions, details and overall vision of how this “San Miguel de Allende” style ranchero was to be constructed. Would it prove to be impossible? Not with a little luck, and a whole lot of Girl Power! The amazing Betty Martin ended up with an equally amazing builder named Judy Ramsey. This woman rancher, who raises exotic animals and trophy deer, is involved in real estate, leases her ranch for hunting and builds high end “casas” for the most discerning clients! Heck, she builds great little cabins too!
When Catrina’s Ranch Interiors became involved with the ambitious project, and I first viewed the blue prints and renderings, I was speechless. The plans were for a 17,000 square foot home built around a central courtyard. The courtyard had a bell tower over the front entrance gate; a real one. The main house had an observation tower that overlooked the dammed up river and a picturesque view of Heaven on Earth. There was a magnificent outdoor kitchen off of an enormous porch. The plans showed a large, ornate, fountain in the middle of the central courtyard.
This home was to have all the bells and whistles, with unimaginable details, while sparing no expense. It would take two years to build and finish. Judy, Betty and I had many meetings over the next two years. We designed and built 58 chandeliers and sconces, indoors and out. We designed and built custom doors, custom cabinets, custom kitchens and candle holders.
“If you can dream it, we can build it” is Catrina’s Ranch Interiors’ motto and, as always, we delivered on this promise. I like to think of myself as a “Can Do” kind of girl, but this job tested my abilities on a regular basis. Antler chandeliers measuring 7 ft. by 7 ft. would be no problem! Hammered copper panels in the cabinet doors? Not a problem! I have much to tell you about this experience, but nothing says it better than the stunning color photographs taken by San Antonio’s most famous magazine photographer, for Urban Home Magazine’s next issue. See for yourself. When Urban Home Magazine owner Louis Doucette went with me to photograph the ranch, Louis told me that it was my best work and then corrected himself to tell me that it was the best work he had ever seen.
Take a close look at the details of the Martin Ranch project in the January 2014 issue and come see us at Catrina’s Ranch Interiors in Boerne. No job is too big or too small. No idea is too far outside the box when making dreams come true.
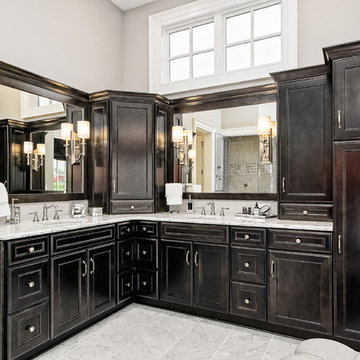
Sponsored
Sunbury, OH

J.Holderby - Renovations
Franklin County's Leading General Contractors - 2X Best of Houzz!
 Design Vision Studio
James Latta of Rancho Images -
MOVIE COLONY
When we met these wonderful Palm Springs clients, they were overwhelmed with the task of downsizing their vast collection of fine art, antiques, and sculptures. The problem was it was an amazing collection so the task was not easy. What do we keep? What do we let go? Design Vision Studio to the rescue! We realized that to really showcase these beautiful pieces, we needed to pick and choose the right ones and ensure they were showcased properly.
Lighting was improved throughout the home. We installed and updated recessed lights and cabinet lighting. Outdated ceiling fans and chandeliers were replaced. The walls were painted with a warm, soft ivory color and the moldings, door and windows also were given a complimentary fresh coat of paint. The overall impact was a clean bright room.
We replaced the outdated oak front doors with modern glass doors. The fireplace received a facelift with new tile, a custom mantle and crushed glass to replace the old fake logs. Custom draperies frame the views. The dining room was brought to life with recycled magazine grass cloth wallpaper on the ceiling, new red leather upholstery on the chairs, and a custom red paint treatment on the new chandelier to tie it all together. (The chandelier was actually powder-coated at an auto paint shop!)
Once crammed with too much, too little and no style, the Asian Modern Bedroom Suite is now a DREAM COME TRUE. We even incorporated their much loved (yet horribly out-of-date) small sofa by recovering it with teal velvet to give it new life.
Underutilized hall coat closets were removed and transformed with custom cabinetry to create art niches. We also designed a custom built-in media cabinet with "breathing room" to display more of their treasures. The new furniture was intentionally selected with modern lines to give the rooms layers and texture.
When we suggested a crystal ship chandelier to our clients, they wanted US to walk the plank. Luckily, after months of consideration, the tides turned and they gained the confidence to follow our suggestion. Now their powder room is one of their favorite spaces in their home.
Our clients (and all of their friends) are amazed at the total transformation of this home and with how well it "fits" them. We love the results too. This home now tells a story through their beautiful life-long collections. The design may have a gallery look but the feeling is all comfort and style.
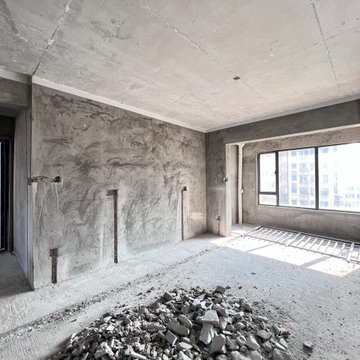
 MODIVO LIGHT
This is our first time decorating a house. Starting from knowing nothing at all to now having the hard decoration completed, we have experienced every emotion along the way—anxiety, doubt, tiredness, hesitation, joy, satisfaction, and touch. We learned and explored on our own, and bit by bit, we finished decorating our home. We’ve accumulated so much experience in this process, and now we want to share it, hoping it can be of a little help to all of you who are doing your own home decoration.
Preparations in Advance
1、Clarify your own ideas: Whether you are looking online, talking to designers, or copying ideas from friends' homes, you should have a clear vision of what your home should look like before designing—such as the style, color scheme, and elements to be used... It is crucial to avoid wanting to install everything that looks good in others' homes in your own. This way, you can clearly put forward your requirements during the design and decoration process, and also avoid frequent revisions to the plan, which may lead to unnecessary rework.
2、Understand your own needs: You need to first figure out the needs of your family, such as how many people live in the house permanently, how many rooms are needed, everyone's living habits, and daily preferences... A home is always for living in, so functionality is always the most important. It is best to list these needs and give priority to meeting them during the design and decoration. This way, you won't find out after decoration that many necessary things are missing, while a bunch of installed things are useless.
3、Determine your budget: There are ways to decorate with more money, and also ways to do it with less. No matter how much money you have, the decorated house can be both beautiful and practical. Therefore, it is essential to decide exactly how much you want to spend on decoration. In every link, such as designing the plan, making a budget table, selecting materials, and construction, you should act in accordance with your own budget.
4、Understand the advantages and disadvantages of your house: There is no perfect house in the world, and every house has its pros and cons. Your design plan should avoid its shortcomings and amplify its advantages. I once wrote an article about the drawbacks of my house ("My house is not perfect, but I still want to find ways to save it"), so we figured out solutions to these problems during the decoration.
5、Learn as much decoration knowledge as possible in advance: Although you can pick up this knowledge in the subsequent decoration process, it is better to learn more beforehand. This will make you much more calm when facing problems.
6、Know your strengths: Before decoration, you must be clear about what you are good at and what you are not. If you are good at design, do the design yourself; if you are skilled at bargaining, go buy building materials on your own; if you have strong hands-on ability, you can even do the decoration and repairs yourself... During the decoration process, you should focus on what you are good at, and leave what you are not good at to others.
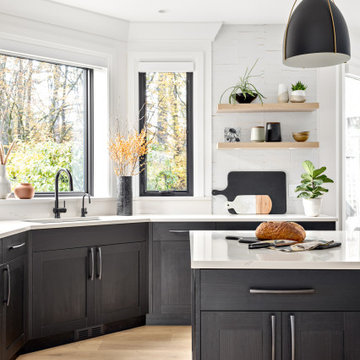
 Simply Home Decorating
This beautiful North Vancouver home belongs to a nature-loving and health-conscious couple, Emma and Vince (names changed), their two young children, and their dog, Jasper. When they contacted us about renovating and furnishing their kitchen and family room, we walked in and saw a world of potential waiting to be uncovered.
Before: Larkhall Crescent Home:
Like many original North Vancouver homes, the interior was definitely dated. We encountered late ‘80s finishes in powder pink and teal green, old carpet, and a kitchen that wasn’t maximized to suit this family’s modern-day lifestyle. However, the size of the rooms offered us a ton of space with which to get creative.
Knowing our clients’ love of cooking, need for work spaces (Emma and Vince both work remotely), and growing family, we developed a design concept that would increase usable space, optimize storage, and create intimacy in this large area. As for the style, we were inspired by their European roots, inventing a new and modern take on “Belgian Farmhouse” style. Now, the home is truly one-of-a-kind.
After: Warm & Cozy Family Room:
Fresh, bright, and comfortable, this living area has been transformed! We started with the fireplace as a focal point, selecting aged brick tiles for added texture and a crisp wood mantle. The taupe-coloured sectional infuses the room with visual warmth and serves the added purpose of separating the family room from the kitchen.
Emma and Vince were also keen on using non-toxic materials in their home, and we were happy to oblige. To meet their needs, we sourced natural wood elements and sought out Canadian-made products - that adhere to high health standards - whenever possible.
Look closer at the elements of this space, and you will find this stunning, honeycomb-patterned rug in earthy gold, beige, and charcoal tones. It’s plush to the touch and full of visual texture that brings this room’s colour palette together. We sourced these two-tone chairs with caning, petrified wood side table, black sconces, and botanical prints in greyscale from local artist, Heather Johnston.
We topped off the space with this dark wood and rattan console that offers storage facing the kitchen and presents an opportunity to display cherished items. The result is a cozy lounging space brimming with comfort and functionality. It’s perfect for enjoying quality family time, or Emma can simply slide the coffee table away to make room for her morning yoga practice.
Now, let’s turn around and give some attention to the kitchen. Do you remember what the original kitchen looked like? If not, scroll back up, because the transformation is shocking…
Moody & Welcoming Kitchen for Healthy Living:
This kitchen looks very different from how it started, right? Though we didn’t touch any walls, the kitchen has almost doubled in usable space! We created a long, extended island with storage, an outlet for small appliances, and seating for comfortable prep, after-school snacking, or mingling among friends.
On the other side of the island, the family has even more storage and an integrated dishwasher within easy reach of the sink, perfect for quick clean-up. From this angle, you can also see the expansive custom Shaker cabinetry in white and the integrated double ovens. These facilitate their cooking experience and gave us the opportunity to add an additional surprise…
A coffee garage station and more hidden storage! Keeping these items located along the perimeter allows them to be accessed by the family or their guests without someone getting under the cook’s feet. These are the little details that make everyday life easier and more enjoyable.
Moving deeper into the kitchen, the seamless induction cooktop topped with a freestanding concealed hood fan commands attention in a soft yet prominent way. The natural wood accent mirrors the fireplace mantle, and the choice of off-black wood-grain cabinets not only continues our black-and-white colour palette but adds a sense of depth and contrast. The corner sink is located to the right and perfectly positioned with a view of their thriving backyard.
To invite more of this family’s character into the space, we mixed metals for interest — matte black, dark pewter, and warm brass — and created open shelves in white oak for their plants and decor. You can also glimpse the tumbled edge of the backsplash tile, which echoes the rustic brick of the fireplace. It adds that farmhouse charm while still feeling timeless and sophisticated.
Last but not least, we designed this dining banquette in the bay window (with integrated bench storage, of course), where the family can share a meal together, the kids can do homework, or Emma and Vince can work and enjoy a change of scenery from their offices. Like the other spaces in the home, it was designed to be beautiful, multi-functional, and long-lasting.
Praise from Our Clients:
It is clear that we love this home, but what did our clients have to say?
“Lori is a visionary and masters execution to the finest detail all at the same time. When she first met us to know more about who we are and how we live, she could right away envision how we could use the space in our kitchen and living room…The results exceeded our expectations.
Lori and her team were also a delight to work with — coordination with all the trades, fast problem-solving, regular updates, professional and friendly attitude of her entire team — made it the dream team. Thank you SHD for making our space so beautiful!”
In turn, we are so grateful for this family’s trust, their open communication, and for being wonderful people with whom to work. (So, thank you!)

 Recliners.LA
 is a leading distributor of high quality motion, sleeping & reclining furniture and home entertainment furniture. Check out our Stressless by Ekornes Furniture Collection.
Come visit a showroom in Los Angeles and Orange County today or visit us online at https://goo.gl/7Pbnco. (Recliners.LA)
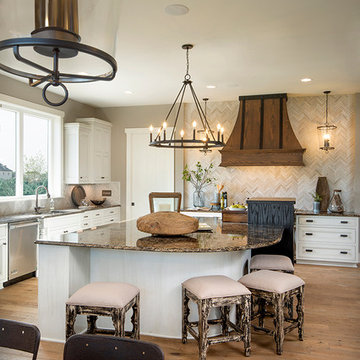

 Paul Lopa Designs
See what our client say about Paul Lopa Designs:
It went as smooth as it possibly could go. The only bumps in the road was with what we found during demolition, you never know what your gonna run into when all the walls, floors and fixtures come out. Paul had explained to us that depending on what we found under all the out dated stuff it might take a little longer. Paul was there doing the work with his workers he showed up on time and finished on schedule. It was no problem being in touch with Paul because he answered his phone or got back to us in a timely fashion. He has an excellent sense of design he knows what goes well together and makes the house flow with comfort and usability.
Paul Lopa designs,inc

 Total Fitouts | Australia
Our Gold Coast shopfitters created an outstanding cafe fitout for these small business owners. This being the second of two cafes, the owners of Kaffe Co. wanted something a little different to their original space, opening up the kitchen and front counter area to allow customers to see right into the kitchen and preparation spaces.
The client’s hope for the fitout was to have all the space well utilised to allow for a full kitchen while catering for plenty of dine-in customers. The cafe design was all about creating an inviting and relaxing space for customers to sit and enjoy a meal on a break from shopping.
Our Gold Coast shopfitters worked around many other builds happening in the new shopping centre at the time which called for a high level of organisation and some problem solving to ensure the smooth operation of the build.
The cafe offers a clean, minimalistic style with polished concrete floors, Hamptons inspired white timber walls and a beautiful timber bench top – all finished off with on-trend copper light fixtures creating a comfortable and pleasant eatery for shoppers in the midst of a busy arena. The cafe owners are now all set with a fresh new look – a space ready to be filled with coffee aromas, delicious foods and plenty of chatter!
Love this cafe fitout? Get in touch with our Hope Island shopfitters or call 1300 654 634 to find a Total Fitouts near you.
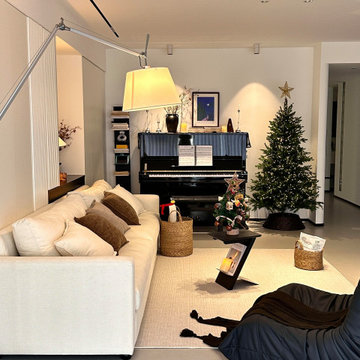 MODIVO LIGHT
This is our first time decorating a house. Starting from knowing nothing at all to now having the hard decoration completed, we have experienced every emotion along the way—anxiety, doubt, tiredness, hesitation, joy, satisfaction, and touch. We learned and explored on our own, and bit by bit, we finished decorating our home. We’ve accumulated so much experience in this process, and now we want to share it, hoping it can be of a little help to all of you who are doing your own home decoration.
Preparations in Advance
1、Clarify your own ideas: Whether you are looking online, talking to designers, or copying ideas from friends' homes, you should have a clear vision of what your home should look like before designing—such as the style, color scheme, and elements to be used... It is crucial to avoid wanting to install everything that looks good in others' homes in your own. This way, you can clearly put forward your requirements during the design and decoration process, and also avoid frequent revisions to the plan, which may lead to unnecessary rework.
2、Understand your own needs: You need to first figure out the needs of your family, such as how many people live in the house permanently, how many rooms are needed, everyone's living habits, and daily preferences... A home is always for living in, so functionality is always the most important. It is best to list these needs and give priority to meeting them during the design and decoration. This way, you won't find out after decoration that many necessary things are missing, while a bunch of installed things are useless.
3、Determine your budget: There are ways to decorate with more money, and also ways to do it with less. No matter how much money you have, the decorated house can be both beautiful and practical. Therefore, it is essential to decide exactly how much you want to spend on decoration. In every link, such as designing the plan, making a budget table, selecting materials, and construction, you should act in accordance with your own budget.
4、Understand the advantages and disadvantages of your house: There is no perfect house in the world, and every house has its pros and cons. Your design plan should avoid its shortcomings and amplify its advantages. I once wrote an article about the drawbacks of my house ("My house is not perfect, but I still want to find ways to save it"), so we figured out solutions to these problems during the decoration.
5、Learn as much decoration knowledge as possible in advance: Although you can pick up this knowledge in the subsequent decoration process, it is better to learn more beforehand. This will make you much more calm when facing problems.
6、Know your strengths: Before decoration, you must be clear about what you are good at and what you are not. If you are good at design, do the design yourself; if you are skilled at bargaining, go buy building materials on your own; if you have strong hands-on ability, you can even do the decoration and repairs yourself... During the decoration process, you should focus on what you are good at, and leave what you are not good at to others.
119