
Search results for "T interfere" in Home Design Ideas
 Drury Design
The objectives were:
Make better use of the dining room – create a space ideal for informal gatherings
Create a display space that is Marvel Spectacular-worthy
Create a wow-worthy focal point that is visible as guests walk in the front door
Incorporate a sink into the bar
Plenty of storage
Incorporate the client’s custom “barrel” secret mini bar into the design
Design challenges we solved for:
Make the two areas feel as one
Provide enough support for the bar’s thick wood-top so that it would not need legs that would interfere with the seating area
Find a way to incorporate as much bar seating as possible
Make the room’s finishes flow with the rest of the house
THE RENEWED SPACE
Design solutions:
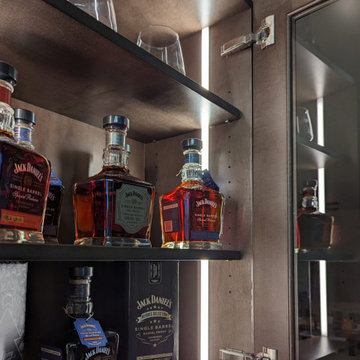
Add open cabinets on the back bar wall with lights and display sections – this ties the bar area to the open display cabinets
Back bar wall base cabinets provide lots of storage
U-shaped island allows for more seating
Custom shelving adjustable to accommodate a wide range of collectibles
Finishes that tie into the secret barrel bar integrate nicely with the rest of the house
Transforming the former dining room area into a bar with lots of display shelving gives the clients a new, functional gathering place that reflects their personal style. It feels more fun and modern, and it feels more like “them.” After all, this is their own special area in their own home and it’s a perfect place for hanging out with friends.
 Burlock Interiors
Meredith Heuer
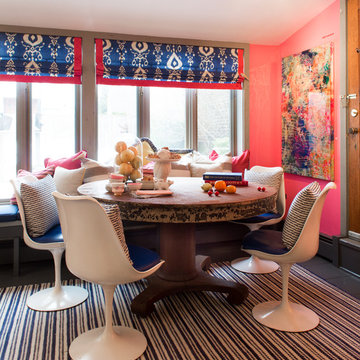
Enclosed dining room - mid-sized eclectic enclosed dining room idea in New York with multicolored walls
Enclosed dining room - mid-sized eclectic enclosed dining room idea in New York with multicolored walls
 Lori Manning Designs
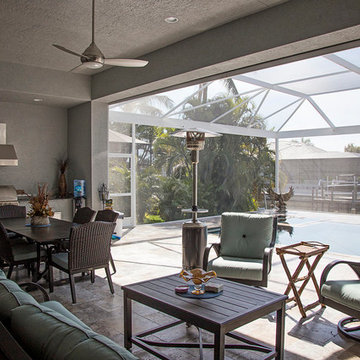
The canal view to this gorgeous home is unbeatable! The open pool cage allows zero interference between you and the view due to lack of aluminum at the front! The beautiful patio furniture and summer kitchen will make this the favorite spot of the house!
Find the right local pro for your project
 closetsdotcom
Designed by Greg Cetera of Closet Works
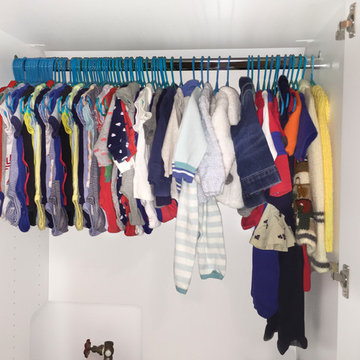
We built a system with backing that was 22 7/8” deep, maximizing the potential amount of storage space for all of baby's clothes within the alcove. The height of the hanging rod leaves easy access to the valve pipe, guaranteeing no interference between the clothes and the gas pipe.
 Nemo Tile + Stone
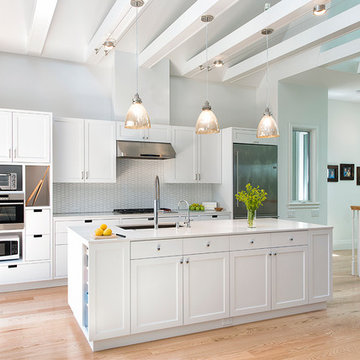
The kitchen backsplash was done in NEMO’s 4×16 Metro White Gloss Subway Tile with a dark grout to match the kitchen trim and to not interfere with the other textures in the kitchen. Metro Wall Tile is NEMO’s classic ceramic tile and is available in a multitude of contemporary sizes and colors.
Photos by: Megan Lawrence
 Red Dot Studio
Brian McCloud
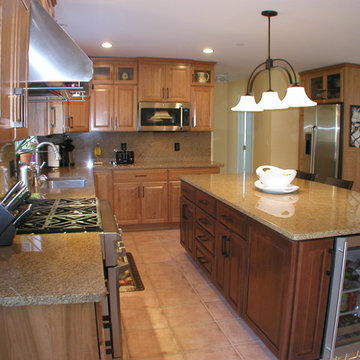
Example of a mid-sized transitional l-shaped light wood floor kitchen pantry design in San Francisco with a drop-in sink, recessed-panel cabinets, white cabinets, stainless steel appliances and an island
Example of a mid-sized transitional l-shaped light wood floor kitchen pantry design in San Francisco with a drop-in sink, recessed-panel cabinets, white cabinets, stainless steel appliances and an island
 Dreamwork Kitchens
From builder standard to designer upgrade.
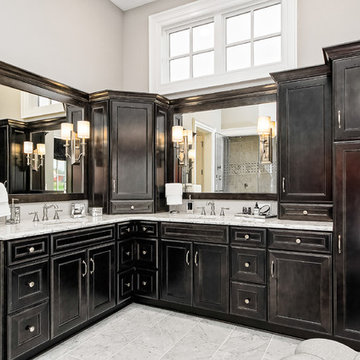
A recent project of ours in Harrison NY had us taking an adequate builder designed kitchen to something much more special. The original layout led to traffic jams while entertaining and valuable storage was lost due to the fact that the cabinets did not go to the ceiling.
The new design moves the refrigerator out of the traffic pattern that often lead to gridlock
in previous years as well as providing ample storage for trays and baking sheets in the slim pantry. Grillwork doors allow for airflow from the air-conditioning vents, while still allowing for cabinets to the ceiling.
A professional grade range replaces the old smaller model, with a heavy-duty hood to assure complete ventilation no matter what the cook creates. The microwave moves farther down the work triangle to assure that the heating of a cup of coffee or bag of popcorn need never interfere with the chef again. Equally of value is the island mini-frig not just to chill the occasional bottle of wine, but to keep the kids sodas out the main refrigerator.
And then there is the desk/ command central area. The formerly blank wall where no piece of furniture seemed to fit, because of the radiator, has become an efficient home office.
With room for two people to work, grown-ups can search Food Network for recipes while the kids do their homework – problem area solved!
Sponsored
Sunbury, OH

J.Holderby - Renovations
Franklin County's Leading General Contractors - 2X Best of Houzz!
 Drury Design
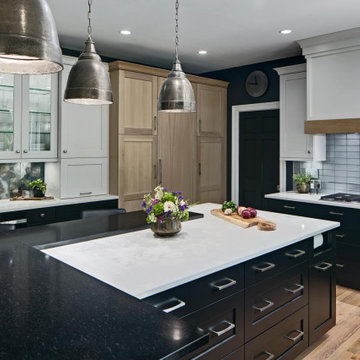
The original intent of this project was to replace the island, hood, countertops, and a few appliances. A primary bath remodel was the main priority. But once the couple realized certain features would enhance the functionality of the kitchen – not to mention completely change the aesthetic – they put the master bath on hold and decided to remodel the entire kitchen first.
Design objectives:
-Omit separate table, plan for a larger island that would seat 7 people
-Simple, clean lines – no rounded corners or weird angles
-Nothing trendy – use modern classic details
-Uncluttered countertops
-Better pantry storage for food & small appliances
-Integrated major appliances
-Coffee bar
-Avoid “1 color on perimeter with second color on island”
-Integrate a harmonious variety of finishes
-Integrate black & handmade metals
Design challenges:
-Island shape to fit within confines of existing half wall between kitchen & family room & bay window/door to backyard
-Narrow kitchen with major walkway
-Planning for 7 seats at the island
-Keep guest social area away from the cook’s zone
-Place appliances according to use
-Point-of-use storage for an avid cook within a relatively small space
-Integrate colors without looking too busy
THE NEW KITCHEN
-While the island is mostly rectangular, the seating area utilizes the bay extension without interfering with the exterior door
-All seating is placed on the outside perimeter of the island, giving the cook dedicated prep space
-The L-shaped seating area & adjacent coffee bar encourage guests to gather on the outside edge of the kitchen where they can still interact with the cook
-Island prep space includes 5 feet of versatile drawer storage, double waste basket and an open paper towel dispenser
-One pantry designated for food; the other for small appliances & bulk storage; creates visual armoire look
-Microwave drawer in island faces refrigerator for easy access & less interference with cook’s zone
-Appliance garages avoid clutter on the countertops
-Off-white upper cabinets make the kitchen look larger while the black bases offer contrast without closing in the space
Once the client committed to remodeling her entire kitchen, she had a good idea of the direction she wanted the space to take. Even so, there were many details that remained open to explore & contemplate. The end result is modern, clean and ultimately transitional – a creative vision anchored in functionality and artistry!
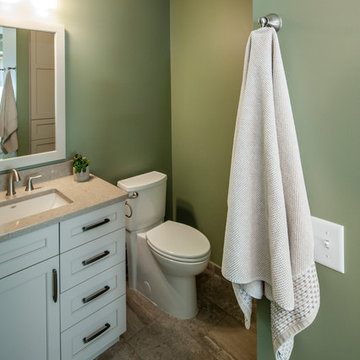
A powder room remodel was added to the project that beautifully compliments the kitchen aesthetic. The entire staircase, all trim & doors were painted in the same tones as the kitchen, transforming the entire first floor into a cohesive & welcoming space. It was a great collaborative partnership!
 Nemo Tile + Stone
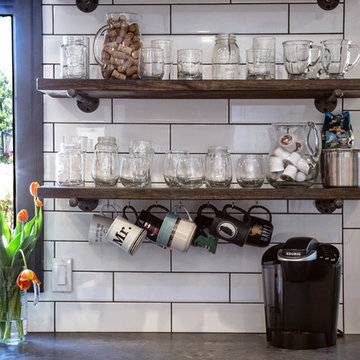
The kitchen backsplash was done in NEMO’s 4×16 Metro White Gloss Subway Tile with a dark grout to match the kitchen trim and to not interfere with the other textures in the kitchen. Metro Wall Tile is NEMO’s classic ceramic tile and is available in a multitude of contemporary sizes and colors.
Photos by: Megan Lawrence
 Crystal Kitchen + Bath
Our clients wanted to increase the size of their shower, omit their whirlpool tub and make better use of the open floor space in their master bathroom. Designer Barbara Bircher, CKD, moved and removed walls to open up the master bath and enlarge the master closet. Pocket doors were used to eliminate door interference with storage accessibility.
Barbara created two separate vanity stations for him and her. Rotating the toilet created a more spacious water closet concept while maintaining privacy. The shower was relocated and enlarged to include a bench, which continues under the window and houses individual hampers drawers. This new design included a linen closet tucked in nicely behind the shower. For those of you who are on the fence about removing a whirlpool tub, Steve and Mindy both agree they do not miss their whirlpool tub in any way!!
 Ambiance Design
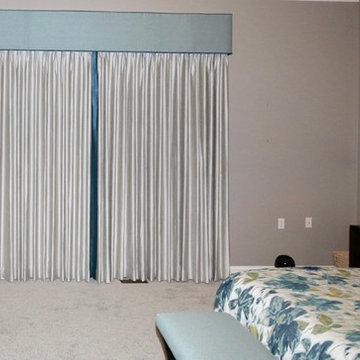
The closed custom drapery in covering french doors. They are easily moved into two separate stacks from the center of the doors to each end to allow you to open the doors without any interference from the drapery. The top hardware is covered by the coordinating fabric on a cornice with dark blue welting to finish the look.
 Irene Designs
Home Remodeling Project Overview
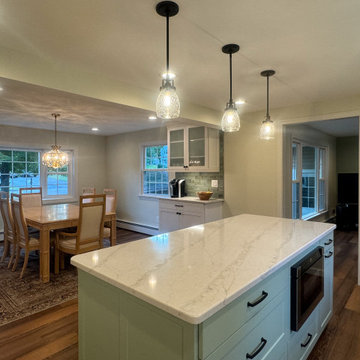
This extensive home remodeling project transformed a dated and inefficient layout into a functional, open, and aesthetically cohesive living space. The original layout had several challenges:
• A kitchen with limited storage, no cabinets on the window side, a sink facing the wall, and a range crammed into the corner. The pantry closet was too deep and impractical.
• A living room that couldn’t accommodate furniture without interfering with traffic flow.
• A front foyer with wasted space.
• A claustrophobic hallway toilet room without a sink, located near the laundry room.
The Remodeling Concept
The scope of this project extended well beyond the kitchen. We proposed several layout options to address issues in all adjacent spaces, ultimately implementing a plan that:
• Removed two walls and moved doorways.
• Replaced the kitchen window.
• Converted the hallway toilet room into a storage space.
• Installed pocket doors to separate the laundry hallway from the living room.
Kitchen Transformation
• Open Concept: By removing the wall between the kitchen and dining room, the two spaces became a seamless open area.
• New Layout: Cabinets were relocated to the window side for more storage and natural light. A central island with storage and seating was added, and a coffee bar was installed in the dining room.
• Updated Pantry: The deep pantry closet was converted into a pullout pantry with a cabinet front for better accessibility.
• Design Details: Off-white kitchen cabinets pair beautifully with a light green island. Warm white quartz counters and an artisan tile backsplash complete the look.
Dining Room
• Expanded Space: Most of the wall separating the dining room and foyer was removed, creating a more spacious area while still accommodating all furniture thanks to careful measurements.
Living Room Improvements
• Optimized Layout: Moving doorways and installing pocket doors allowed for better furniture placement, including a sofa that doesn’t interfere with traffic flow.
• Fireplace Upgrade: The brick fireplace was updated with a three-dimensional staggered stone veneer in a color matching the kitchen cabinets, creating a cohesive look. A TV was installed above the fireplace at a comfortable viewing angle.
Additional Updates
• New Flooring: All remodeled rooms now feature updated flooring.
• Ceilings: Popcorn ceilings were replaced with smooth, flat finishes, complemented by recessed lighting.
• Walls: Fresh paint throughout the space, with an accent wall in the living room matching the light green of the kitchen island.
• Lighting: Stylish sconces were added for a touch of elegance.
The Result
The homeowners are thrilled with the transformation, marveling at how their once cramped and inefficient home now feels spacious, functional, and beautifully cohesive. They can’t believe their house could ever look like this!
 Drury Design
THE SETUP
This remodeling project transformed a catchall room into a cinema-style theater designed for family entertainment and relaxation. The original space, which housed a small TV, older furniture, and various children’s toys, was reimagined to create a sophisticated, adult-friendly home theater with ample seating and modern amenities.
Design Objectives:
Create a Dark Theater Space: Ensure the room mimics a traditional movie theater environment.
Provide Comfortable Theater Seating: Include enough seating for the family and guests.
Integrate a Dry Bar Area: Include a space for snacks and drinks.
Optimize Space Utilization: Maintain an open area for additional activities.
Design Challenges:
Natural light: The room was too bright for a theater setting.
Seating: Accommodating six theater seats without obstructing views.
Lighting: Ensuring the lighting does not interfere with the viewing experience.
AV: Finding a clutter-free solution for AV equipment.
Dry Bar: Incorporating a dry bar area without overcrowding the space.
Viewing: Ensuring the TV placement allows for comfortable, optimized viewing.
THE RENEWED SPACE
Design Solutions:
Natural Light Control: Installed blackout remote shades on the back window and painted the walls dark charcoal to reduce natural light infiltration.
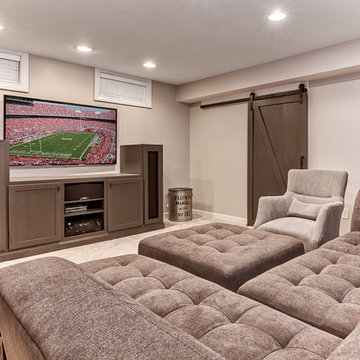
Seating Arrangement: Built a second level for the back row of seating to ensure unobstructed views for all movie watchers.
Lighting Design: Installed sconces on either side of the window that shine from the sides (to avoid interfering with the viewing experience).
AV Equipment Storage: Utilized existing recess areas with custom shelves matching the cabinetry and concealed cables using a PVC pipe system.
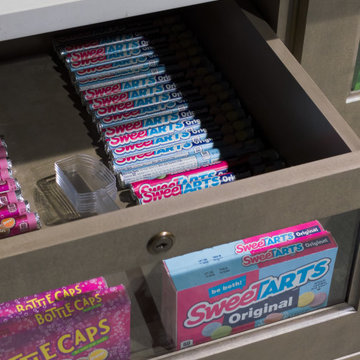
Dry Bar Integration: Created a dry bar area on the back wall with a refrigerator, candy storage, and a small counter space for a popcorn machine and ice maker, with locked drawers to prevent unsupervised access.
Optimal Viewing Distance: Evaluated multiple floor plans and placed the TV on the most suitable wall to ensure optimal viewing and comfortable reclined seating.
Final Thoughts:
The completed home theater has been a resounding success, providing a versatile space for the entire family. The thoughtful design and meticulous attention to detail have created a functional and enjoyable home theater that meets diverse needs, from watching movies and playing video games to relaxing and reading. The areas to the sides of the theater seats can accommodate spillover seating or activity zones. The area housing the AV equipment also includes extra shelves for storing snuggle-grade movie viewing blankets. This theater space has become a favorite hangout spot, offering comfort and entertainment for everyone.
This view shows the dual level theater seating, bean bags, open AV shelving on the right to tuck the cables which our installers ran behind the TV with PVC piping.
Sponsored
Columbus, OH

Hope Restoration & General Contracting
Columbus Design-Build, Kitchen & Bath Remodeling, Historic Renovations
 Maria Aureli
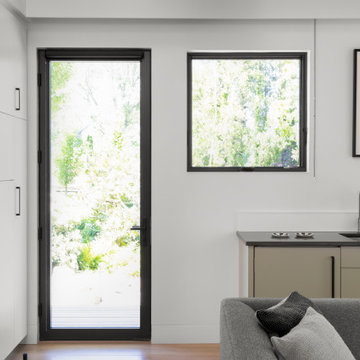
The challenge was to create a modern, minimalist structure that did not interfere with the natural setting but rather seemed nestled in and part of the landscape while blurring the lines between interior and exterior spaces.
Special Features and Details:
• wood floor, ceiling and exterior deck all run in the same direction drawing the eye toward the water view below
• valence encompassing the living space aligns with the face of the loft floor and conceals window shades and uplighting.
• pocket doors are flush with the ceiling adding to the feeling of one room flowing into the other when the doors are open
• ample storage tucks into the walls unobtrusively
• baseboards are set in, flush with the walls separated by a channel detail.
• deck appears to float, creating a sense of weightlessness. This detail repeats at the bedside tables and bathroom vanity
• obscured glass window in shower provides light and privacy
 JDD Wine Cellars, LLC
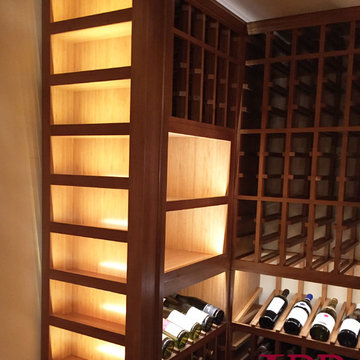
Custom wine room designed, fabricated and installed with clients rustic tones in mind. Knotty alder, full glass entry with a viewing window from the adjacent room immediately details a stone, cave-like entry into the wine room. Individual bottles, display, bulk storage and presentation shelves adorn this inviting space. Displays are all accented with LED lights on a dimmable transformer. Unique ceiling and wall sconce light fixtures provide just enough light to easily identify all labels. A wine cellar cooling system is hidden in a dead corner of the racking so as not to interfere with the décor or capacity. The used wine barrel offer the perfect surface to set a glass down and enjoy the space.
 RAZVAN BARSAN + PARTNERS
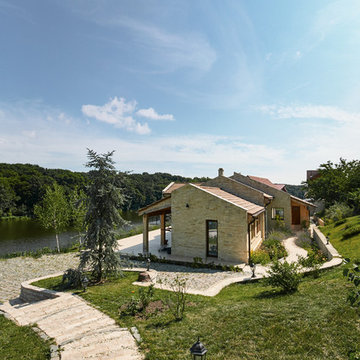
Coming up with new ideas is always challenging, but the challenge seems even more difficult to overcome when the starting point is quite limiting. In the case of this residential project, the starting point was an existing foundation, that needed to be used for the future building. Therefore, the footprint of the house needed to remain the same, however, the functions needed adjustments since the requirements and priorities of the owners changed in the previous years.
Another aspect that involved limitations but in a totally different sense was the setting - a beautiful place near a lake, surrounded by wild vegetation - and our challenge was to integrate the house while emphasizing the view.
We managed to do so by using large glass areas towards the lake, by laying the house properly on the sloped ground and by the use of materials. Because we didn't want to interfere with the all-natural vibe of the surroundings, we preferred using all-natural materials: wood as a structural material as well as an interior and exterior wall finishing, natural stone on both façades and pavements, ceramic roofing.
The result now peacefully lays near the lake, a discrete presence, while hosting the life of a family and all the peace of mind one can get.
 RAZVAN BARSAN + PARTNERS
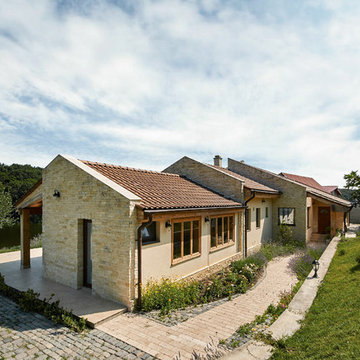
Coming up with new ideas is always challenging, but the challenge seems even more difficult to overcome when the starting point is quite limiting. In the case of this residential project, the starting point was an existing foundation, that needed to be used for the future building. Therefore, the footprint of the house needed to remain the same, however, the functions needed adjustments since the requirements and priorities of the owners changed in the previous years.
Another aspect that involved limitations but in a totally different sense was the setting - a beautiful place near a lake, surrounded by wild vegetation - and our challenge was to integrate the house while emphasizing the view.
We managed to do so by using large glass areas towards the lake, by laying the house properly on the sloped ground and by the use of materials. Because we didn't want to interfere with the all-natural vibe of the surroundings, we preferred using all-natural materials: wood as a structural material as well as an interior and exterior wall finishing, natural stone on both façades and pavements, ceramic roofing.
The result now peacefully lays near the lake, a discrete presence, while hosting the life of a family and all the peace of mind one can get.

 Project Guru
Fly By Nite Studios
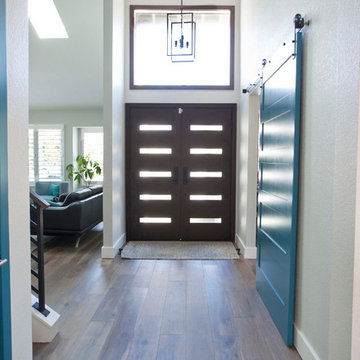
Mid-sized minimalist medium tone wood floor entryway photo in San Francisco with gray walls and a dark wood front door
Mid-sized minimalist medium tone wood floor entryway photo in San Francisco with gray walls and a dark wood front door

 Lighthouse Outdoor Lighting of Indianapolis
Landscape lighting was added to illuminate the blue spruce trees and crabapple on the side of this yard. Lights were placed below grade so that they would not interfere with routine lawn maintenance procedures.
 Drury Design
THE SETUP
This remodeling project transformed a catchall room into a cinema-style theater designed for family entertainment and relaxation. The original space, which housed a small TV, older furniture, and various children’s toys, was reimagined to create a sophisticated, adult-friendly home theater with ample seating and modern amenities.
Design Objectives:
Create a Dark Theater Space: Ensure the room mimics a traditional movie theater environment.
Provide Comfortable Theater Seating: Include enough seating for the family and guests.
Integrate a Dry Bar Area: Include a space for snacks and drinks.
Optimize Space Utilization: Maintain an open area for additional activities.
Design Challenges:
Natural light: The room was too bright for a theater setting.
Seating: Accommodating six theater seats without obstructing views.
Lighting: Ensuring the lighting does not interfere with the viewing experience.
AV: Finding a clutter-free solution for AV equipment.
Dry Bar: Incorporating a dry bar area without overcrowding the space.
Viewing: Ensuring the TV placement allows for comfortable, optimized viewing.
THE RENEWED SPACE
Design Solutions:
Natural Light Control: Installed blackout remote shades on the back window and painted the walls dark charcoal to reduce natural light infiltration.
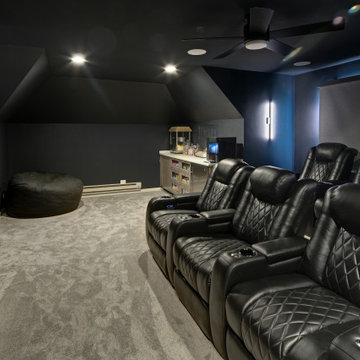
Seating Arrangement: Built a second level for the back row of seating to ensure unobstructed views for all movie watchers.
Lighting Design: Installed sconces on either side of the window that shine from the sides (to avoid interfering with the viewing experience).
AV Equipment Storage: Utilized existing recess areas with custom shelves matching the cabinetry and concealed cables using a PVC pipe system.
Dry Bar Integration: Created a dry bar area on the back wall with a refrigerator, candy storage, and a small counter space for a popcorn machine and ice maker, with locked drawers to prevent unsupervised access.
Optimal Viewing Distance: Evaluated multiple floor plans and placed the TV on the most suitable wall to ensure optimal viewing and comfortable reclined seating.
Final Thoughts:
The completed home theater has been a resounding success, providing a versatile space for the entire family. The thoughtful design and meticulous attention to detail have created a functional and enjoyable home theater that meets diverse needs, from watching movies and playing video games to relaxing and reading. The areas to the sides of the theater seats can accommodate spillover seating or activity zones. The area housing the AV equipment also includes extra shelves for storing snuggle-grade movie viewing blankets. This theater space has become a favorite hangout spot, offering comfort and entertainment for everyone.
This view shows the dual level theater seating, bean bags, open AV shelving on the right to tuck the cables which our installers ran behind the TV with PVC piping.
31