
Search results for "Terms compared" in Home Design Ideas
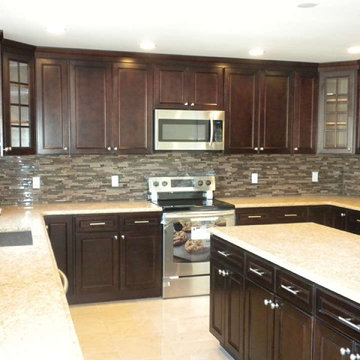
 Cavalier Homes Inc
Do you believe that when someone looks at your kitchen, they should exclaim “WOW”? It is quite possible with our kitchen remodeling service. Cavalier Homes Inc. believes that the kitchen is the powerhouse of your family. Therefore, top-quality products combined with our impeccable craftsmanship have resulted in some of the most stunning kitchens in West Islip, Long Island, New York since 1985.
The kitchen of your dreams is well within your budget. If you’ve been envisioning something unique in terms of design, we can bring it to life. Kitchen remodeling is not always as simple as it appears. The upgrades must be finished, depending on the size of your kitchen. All you need is a team of experts to guide you through the entire kitchen remodeling process, from design to completion.
From project planning and design to sourcing materials and installation, Cavalier Homes is equipped to undertake every aspect of your kitchen remodel. We take on all of the responsibilities required to complete the kitchen remodeling work on time. Our home remodeling team is dedicated to making your kitchen as spectacular as you have imagined.
Important factors to consider before remodeling your kitchen:
As previously stated, a kitchen renovation can appear to be a massive undertaking. When you choose Cavalier Homes, you’ll be working with a Long Island home remodeling company that has been in business for nearly 40 years. Not only do we have four decades of design and craftsmanship experience, but we also have a professional team that will guide you through the entire kitchen remodeling process.
Here are some crucial factors to take into account in order to maximize the value of your kitchen remodeling service:
#1 Budget:
This is quite an important factor as every home renovation project starts here. Think about the aspects that are important to you before deciding on the overall remodeling budget. If it’s flooring, you should probably spend more money there and perhaps spend less on appliances and lighting.
#2 Design:
Keeping the existing design of your kitchen definitely keeps your budget low, but it may not be possible to realize what you have envisioned. However, walking through our ideas will yield the best results.
Take some time to consider your workflow when remodeling your kitchen. What would work best for your cooking style? Is it easy to move around your kitchen? What happens if your family grows?
#3 Appliances:
Upgrading their current appliances is one of the main reasons homeowners think about remodeling their kitchens. The adjustments that may be necessary to make room for the new appliances must possibly be taken into consideration. We will assist you in preparing the extra wiring, plumbing, and cabinetry.
#4 Countertops and Cabinets:
For a more elegant appearance, choose countertops made of wood, marble, or granite. Wooden surfaces add character and charm while not costing a lot. Solid wood cabinets and slabs of granite, marble, or quartz are classic choices that will never go out of style.
#5 Lighting and Flooring:
These elements can make a significant difference in your kitchen’s appearance, giving it a stunning and unique look.
In addition to the above, you’ll have to compare the costs and benefits of upgrading to current trends versus classic designs. Kitchen renovations remain one of the most popular home improvement projects among the majority of homeowners. Contact us to discuss the design of your new kitchen and how we can assist you in providing the best kitchen remodeling service possible.
 Green Gorge Construction
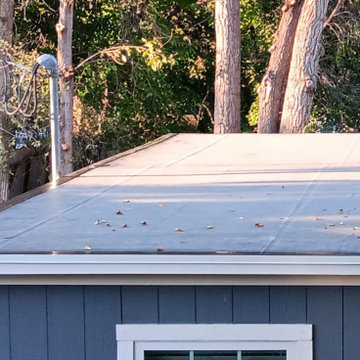
Due to its deteriorating condition, the asphalt roll roofing on this ADU required replacement before the Fall rains. Asphalt roll roofing generally lasts only 5-10 years, leading to ongoing maintenance challenges. The original 1×10 sheathing showed significant sagging in several spots, resulting in standing water not suitable for asphalt. Additionally, there was a complete absence of ventilation after improper installation of R-21 fiberglass insulation, leaving no air gap between the sheathing and insulation. A noticeable hump along the center of the roof indicated that the load-bearing wall had been supporting that section since construction, contributing to light sagging between the walls.
The old roof was completely removed down to the joists, revealing a solid base for the new installation. The central hump was eliminated by shaving the high point along that line. 2×6 beams were ripped in half then nailed on top of the existing joists, creating a 1.5″ gap for insulation and providing strong attachment points for the OSB sheathing, which was secured with screws to prevent any potential issues with nail heads popping through over the roof’s expected lifespan of over 50 years. The EPDM membrane was then adhered using glue and contact cement along the edges of each sheet, with the ends folded over the roof edges and secured with termination bars. Drip edge flashing was added and taped to ensure a water-tight seal, and EPDM-safe caulking was applied over the seams for additional protection. Finally, all exposed wood was primed and painted.
The new roof features a 60mil commercial-grade EPDM rubber membrane, offering a lifespan exceeding 50 years, in stark contrast to the 5-10 year lifespan of asphalt roll roofing.
Using two sheets of EPDM for installation streamlined the process, resulting in one single seam across the entire roof, compared to the asphalt roll’s dimensions of 3 feet wide by 33 feet long, which created 8 vertical seams and 9 horizontal seams—significantly increasing the risk of leakage and failure. Wrapping the rubber over the edge of the roof effectively addressed concerns about water infiltration at the edges, an issue prevalent with the asphalt and drip edge interface.
Another benefit to removing the splitting 1×10 decking and replacing it with OSB sheathing is the increase in structural integrity, moisture resistance, longevity and consistency.
The project successfully transformed the ADU’s roof from a maintenance-prone asphalt roll system to a highly durable 60mil EPDM rubber membrane. By addressing critical structural issues, including sagging sheathing and inadequate ventilation, the team ensured that the new roof not only offers superior water resistance and longevity but also meets higher performance standards for insulation and durability. The replacement process eliminated common weak points, such as numerous seams and poor edge sealing, which were vulnerabilities in the old roofing system. The result is a streamlined, secure installation that provides peace of mind and long-term value, with a lifespan extending well beyond the original roof.

 Ky-Kan Coatings
Concrete can be made to look like any substance. Tile, stone, wood, brick, etc. With unlimited color options, Ky-Kan Coatings can transform any room in your home or business using lightweight, beautiful concrete.
Find the right local pro for your project

 Zelaya Properties LLC
We used: Custom cherry cabinetry in Arts & Crafts Shaker style by Kabinart in Boulder and Espresso stains. Liberty Hardware Venetian bronze 1-1/2" cabinet knobs. KitchenAid Architect II Series 22 CF counter-depth French door refrigerator. KitchenAid Architect Series II 27" convection single wall oven. KitchenAid 36" 6-burner dual fuel freestanding commercial-style range. KitchenAid Architect II Series 24" dishwasher. Sharp Insight Pro Series 24" built-in microwave drawer (Model #KB6524PS). Crystorama Solaris 12" wide pendant lights in English bronze. Granite countertops in Brown Fantasy. 3"x6" polished marble backsplash.
Paint colors:
Walls: Glidden Silver Cloud 30YY 63/024
Ceilings/Trims/Doors: Glidden Swan White GLC23
Robert B. Narod Photography


 Moss Yaw Design studio
Engineered cedar siding creates beautiful gray-blue tones at the exterior of the home, while adding a textural element to activate the simple exterior design.

 highland
Free credit before you deposit a cent sounds like an easy win, until you read what is attached to it. Some offers hand over cash the moment you register, others take a few extra steps, and almost all of them come with rules that decide whether anything is actually withdrawable. We pulled apart five sites Australian players ask about most, looking past the advertised number to what each no deposit bonus casino offer really involves.
Quick Comparison Table
Casino
No Deposit Reward
Activation
SpeedAU
AUD 28 credit, tiers to $200
Automatic after verification
SpinAUD
$10 free credit
Automatic after verification
MrPokies
AUD 18 + 50 free spins
Automatic after verification
AUDPlay
$75 free chip
Automatic after verification
AUDGaming
$300 signup credit
Automatic after verification
Every offer in this comparison activates automatically once verification is complete, no promo code, no extra step, which removes one of the more common points of confusion players run into elsewhere in the market.
What Counts as a Genuine No Deposit Bonus Casino
A no deposit bonus casino credits new players with free spins or bonus funds without asking for a deposit first. That sounds simple, but the offers on the market vary a lot once you look at how they are actually delivered. Some land automatically the second registration is verified, others require a bonus code entered at the right step, and a few are tiered so the amount you receive depends on which promotion you activate.
What separates a genuinely useful no deposit bonus casino Australia offer from one that only looks good in a banner ad comes down to a handful of details rather than the headline figure. Is the wagering requirement applied to the bonus alone or to the bonus plus anything you win from it? Which games can the credit or spins actually be used on? Is there a cap on how much can eventually be withdrawn? Two offers that look identical on paper can behave completely differently once you try to cash out, so it is worth treating every promotion as a full package rather than a single number.
The five sites in this comparison were picked because each one publishes those details somewhere accessible rather than burying them behind a support ticket. That does not make every offer equally generous, a $10 credit is obviously smaller than a $300 one, but it does mean you can actually compare them on equal footing, which is not always true across the wider market.
Full Reviews of Each No Deposit Bonus Casino
SpeedAU
SpeedAU does not lead with a single number. New players are credited AUD 28 automatically once their account is verified, and separately, the site runs tiered no deposit chips from $10 up to $200, the top tier bundling in 200 free spins. Layered on top of both is a five tier Weekly VIP Target, paying out guaranteed amounts every week to players who stay active, topping out at AUD 120 for the highest tier.
Offer summary:
● Reward: AUD 28 credit, with separate $10 to $200 tiers available
● Activation: automatic once verification is complete
● Extra: weekly VIP payouts up to AUD 120
The volume of promotions is SpeedAU's biggest strength and its main complication. New players get more total value here than almost anywhere else in this comparison, but it takes a few minutes in the Promotions tab to work out which offer is which.
SpinAUD
SpinAUD's free credit sits at $10, smaller than most of the others here, but the terms are published plainly rather than scattered across pages. Wagering runs 30 to 35 times the credit, roughly $350 in qualifying bets, with a $100 cap on what can be withdrawn and a week to clear it. Fund a first deposit afterward and SpinAUD adds a 100 percent match up to $500 on top.
Offer summary:
● Reward: $10 free credit
● Activation: automatic after registration and verification
● Extra: 100% deposit match up to $500 on first funding
What makes SpinAUD worth including despite the modest headline number is how fast the resulting winnings actually clear once wagering is done, which counts for more than a bigger number once you try to withdraw.
MrPokies
MrPokies opens with an AUD 18 no deposit credit, paired with 50 free spins on eligible BNG titles as one tier of a three tier spins structure. From there the promotions keep coming: a daily check in ladder rising from AUD 10 on Monday to AUD 50 on Sunday, a Lucky Jackpot pool worth up to $666, and a separate pool of six more claimable offers.
Offer summary:
● Reward: AUD 18 credit + 50 free spins
● Activation: automatic after verification
● Extra: daily check in ladder, jackpot pool, loss rebates
This is the busiest no deposit bonus casino in the comparison by a clear margin. That suits a player who wants a reason to log in every day, but it does mean reading the terms rather than assuming every offer stacks with every other one, since MrPokies explicitly states that most do not.
AUDPlay
AUDPlay keeps its offer to one thing: a $75 free chip, credited without needing a deposit first. Every payment method available runs natively in Australian dollars, so the free credit is not quietly reduced by a conversion step before it ever reaches your balance, a detail worth knowing given how many no deposit bonus casino Australia 2026 real money offers still route through USD on the back end.
Offer summary:
● Reward: $75 free chip
● Activation: automatic after verification
● Extra: fully AUD native banking, no conversion fees
Players can also browse the entire game library in demo

 KINGDOM WOODWORKS
Collaboration with Canonbury Homes and Frank Neely Design Associates.
Inspiration for a timeless open concept kitchen remodel in Atlanta with beaded inset cabinets and two islands
Inspiration for a timeless open concept kitchen remodel in Atlanta with beaded inset cabinets and two islands



 julianhardacre
Top Tips for Selling a Home in 2016
Want to sell your house in 2016? It’s a great year to sell your home and if you go about it the right way you’ll get what it’s worth and maybe more.
Now I could write this post and do the usual “do this, “do that” type stuff but I wouldn’t be doing you any favors. Because unless you know your numbers and the value of your home, you could wind up leaving money on the table or even losing it.
So here you go.
If you want tips for selling your house in 2016, listen to me - a guy who has bought and sold hundreds of properties as a full-time professional Real Estate Investor. Before you repair anything or call a real estate agent…
...you have to know your numbers.
Tip #1: Know the After Repair Value (ARV) of Your Home
If you’re going to get the right amount of money for your house, you have to know the After Repair Value (ARV). Essentially this means that you should know what your home can sell for after it’s is 100% rehabbed.
If you have a house that you can sell for $120,000, you need to know that. If it will sell for $350,000, you need to know what you need to do to your house to get it there. At the same time, you don’t want to overdo it.
If you have a house that’s currently worth $100,000 as is and it can sell for $115,000 when it’s all fixed up, you may or may not want to put the money into a rehab job. If you put $10,000 in just to make an extra $5,000, it might not be worth the hassle.
So whatever you do, know what it’s worth now (as -is) and know what it’ll sell for afterward. If you want to find out how much your house is worth, there are plenty of agents out there who will give you comps (Comps is a term that is short for “Comparisons” that lets you determine an appraisal value for your home by comparing it to recently sold homes in your area that are similar to yours) or advice for free, so ask them.
So don’t over do it, but don’t be hesitant to put money into your house if it’ll yield a big payoff when you sell it.
TIP #2: Make Your Agent Work For You
After you determine your ARV and enlist a good agent to help you sell your home, It might be worthwhile to hop in their Escalade to drive around town and look at some high end houses in your area to see what kind of upgrades they have. And when you see a common theme, you’ll have a good idea as to what kind of upgrades you might want to do to be able to sell your house.
Granite? Concrete? Tile? Carpet? Wood floors?
It depends.
I don’t know your area or market so you have to do the research, ask your agent questions, and exercise wisdom. Every market is different and you don’t want to put money into an upgrade or rehab if it’s not the type of thing people in your area are looking for.
So talk to a competent agent, and even offer to pay them a bit more in commissions if they can sell your home for a higher price.
This is not a waste of money.
A good agent with a proven track record is worth every penny because they know exactly what needs to be done to sell your home for the most money.
Tip #3: Interior Improvements
So once you have an idea about what your home is worth, have a good agent, and have toured homes in your area to see what kind of upgrades homes in your area typically have, it's time to look at your interior to decide what you should and shouldn’t do to sell your house in 2016.
No matter what you do, you need to be wise about it. Maybe you live in non-traditional or funky house. That’s fine. Just go through 2 or 3 times with a notepad, write down the frustrations you have with it, and do what you need to do to make it functional, warm, beautiful, and inviting.
Interior must-haves:
1. Make sure your kitchen is functional.
2. Always have (or add) a 2nd bathroom: If you don’t have a second bathroom, build one. Sure it could cost you $5-$6k, but it could net you an additional $20k when you sell. No matter what you do, make sure there is a second bathroom. It’s a must.
1. Open floor plans are huge in 2016: If you don’t have one, first- make sure it’s right for your area, and if it is, create one. This might mean building or breaking down a wall, but it’ll pay off in the end.
2. Stage your house: Just do it. Staging your home means that you hire a home stager and/or an interior design consultant (like the lady on Love It or List It) to set up your home in the most inviting way possible and tell you everything you need to do to make it sell. You’ll pay some cash up front but staged homes are shown to sell for 6% to 10% higher according to realtor.org.
Tip #4: Exterior Improvements
Just like the interior, you have to make sure the exterior of your house looks appealing if you want to get the most value of your house in 2016.
Exterior must haves:
1. Add curb appeal: When people pull up to your house, most won’t even want to go inside or look at it unless it looks good from the curb. So make sure it looks gorgeous. Rake the leaves, plant some flowers, mow the lawn - make it inviting.
2. Make sure the picture on the MLS listing matches what your house currently looks like: People don’t want to look at a picture and pull up to your house, only to be disappointed.
3. Hire a professional photographer: This is crucial. It could mean the difference between someone viewing your house, or someone skipping it because the pictures look like a child took them. Hire a pro - it’s worth it. Ask me how I know.
4. Don’t paint your house diarrhea green or brown: This is just common sense. If you’re going to paint, use a neutral color. You don’t want to make your house unsellable because you chose an odd color or made a bad decision elsewhere.
Tip #5: Common Sense, Common Sense, Common Sense
No matter what you do or do not do, don’t make any hasty decisions. Ask your agent questions, look around, be observant, and don't do anything extreme. If you need to fix up your house to see a big profit, do it. If you have a modest budget and improvements won’t raise the value or your house (the ARV) anyways, don’t go crazy.
2016 is a great year to sell your house.
Do it right and do it wisely.
Cheers,
Nate
---
Nate Pyles is a long term Real Estate Investor who made it through the crash in 2008 and spends his week buying and selling houses for profit in the Boise, ID area. He runs House Flip Mentor, has 4 kids, a gorgeous wife, loves to fly, and even built his own Irish pub on his property.
 SabaRehman Abdulrehman
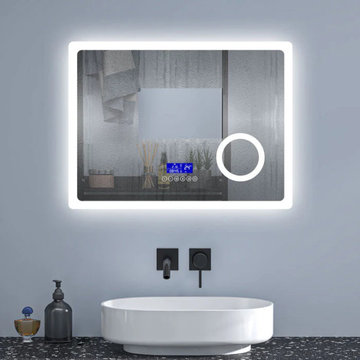
In today’s world of smart interiors and luxury-inspired home décor, LED Mirror backlit designs have become a defining trend. From elegant bathrooms to sophisticated dressing areas and premium commercial spaces, LED Mirrors are now more than just reflective surfaces—they are statement pieces that combine technology, style, and functionality.
Whether you are renovating your home, upgrading a salon, designing a hotel, or creating a modern workspace, investing in a high-quality LED mirror can instantly elevate the atmosphere. The perfect balance of illumination and aesthetics makes these mirrors one of the most sought-after interior additions in contemporary architecture.
This blog explores everything you need to know about LED Mirror backlit solutions, their benefits, applications, features, and why they are becoming essential in modern living spaces.
What Is an LED Mirror Backlit Design?
An LED Mirror backlit system refers to a mirror equipped with LED lighting installed behind the mirror surface. Instead of visible front-facing bulbs, the light gently radiates from the rear edges, producing a soft halo effect around the mirror.
This indirect illumination creates a luxurious and ambient glow while providing practical lighting for everyday tasks such as grooming, makeup application, shaving, and skincare routines.
Unlike traditional mirrors, LED Mirrors offer:
- Energy-efficient illumination
- Elegant visual appeal
- Better light distribution
- Enhanced functionality
- Modern smart features
- Bathrooms
- Bedrooms
- Dressing rooms
- Salons
- Hotels
- Restaurants
- Retail stores
- Reduces harsh shadows
- Improves visibility
- Enhances facial clarity
- Creates a comfortable lighting experience
- Reduce energy bills
- Lower electricity usage
- Support eco-friendly living
- Increase long-term savings
- Turn lights on/off
- Adjust brightness
- Change color temperature
- Bright white light for makeup application
- Warm soft light for relaxation
- Neutral lighting for everyday grooming
- Bluetooth speakers
- Digital clocks
- Temperature displays
- Voice control
- Motion sensors
- Better lighting for shaving and makeup
- Enhanced bathroom aesthetics
- Increased property value
- Luxurious visual appeal
- Salons
- Spas
- Hotels
- Restaurants
- Retail stores
- Compact rectangular mirrors work best
- Oversized backlit mirrors create a dramatic statement
- Rectangular
- Oval
- Round
- Square
- Custom geometric designs
- Warm White (cozy ambiance)
- Cool White (bright and crisp)
- Natural White (balanced daylight effect)
- Improve visual appeal
- Increase perceived luxury
- Enhance property value
- Small bathrooms
- Compact apartments
- Narrow dressing areas

 Regenesis Ecological Design
Clematis armandii 'Evergreen Clematis' (foreground) arches over a custom-built cedar arbor, modeled to accentuate the home's Craftsman-style architecture. Welded mild-steel panel fills create a scaffold for Akebia quinata 'Five-leaf Akebia Vine' (background), lending seasonal privacy and afternoon shade along this narrow sideyard access walkway.

 Jack Calderone
This bedroom and full bathroom are part of an adventuresome project my wife and I embarked upon to create a complete apartment in the basement of our townhouse. We designed a floor plan that creatively and efficiently used all of the 385-square-foot-space, without sacrificing beauty, comfort or function – and all without breaking the bank! To maximize our budget, we did the work ourselves and added everything from thrift store finds to DIY wall art to bring it all together.
A partial double closet bar adds a little extra space while still leaving room for longer hanging clothes.

 Benson Designs LLC
Jane Benson
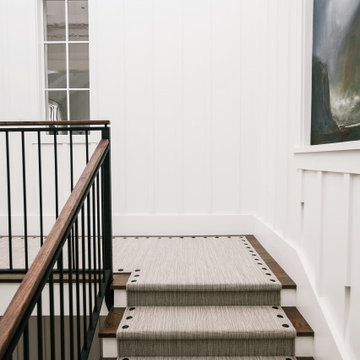
Example of a large mountain style wooden l-shaped staircase design with wooden risers
Example of a large mountain style wooden l-shaped staircase design with wooden risers



 Village Home Stores
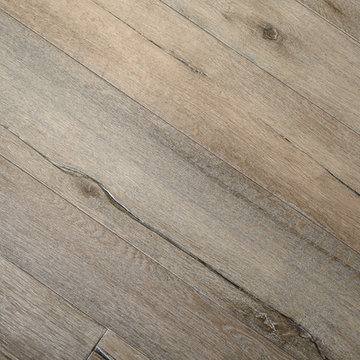
Full-overlay Rustic Beech cabinets in the "Charleston" door style and "Briarwood" finish.
Village Home Stores
Example of a large mountain style kitchen design in Chicago
Example of a large mountain style kitchen design in Chicago
 Bellwether Windows, Siding & Doors
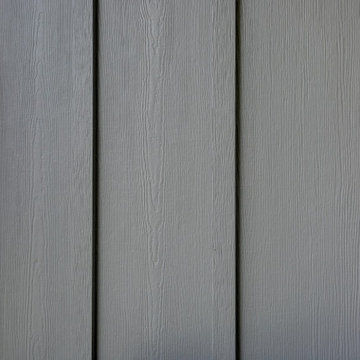
This 1970s ranch home in South East Denver was roasting in the summer and freezing in the winter. It was also time to replace the wood composite siding throughout the home. Since Colorado Siding Repair was planning to remove and replace all the siding, we proposed that we install OSB underlayment and insulation under the new siding to improve it’s heating and cooling throughout the year.
After we addressed the insulation of their home, we installed James Hardie ColorPlus® fiber cement siding in Grey Slate with Arctic White trim. James Hardie offers ColorPlus® Board & Batten. We installed Board & Batten in the front of the home and Cedarmill HardiPlank® in the back of the home. Fiber cement siding also helps improve the insulative value of any home because of the quality of the product and how durable it is against Colorado’s harsh climate.
We also installed James Hardie beaded porch panel for the ceiling above the front porch to complete this home exterior make over. We think that this 1970s ranch home looks like a dream now with the full exterior remodel. What do you think?
 Windy City Painters
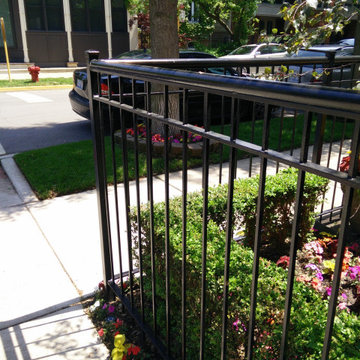
Ever notice how your iron fence looks worse every spring after Chicago winters? That steady seasonal decline is not inevitable - it is a preparation and coating problem that Windy City Painters solves with systematic metal restoration.
PROJECT OVERVIEW
Iron fence painting in Chicago requires more than a fresh coat of paint. Chicago's freeze-thaw cycles, road salt exposure, and high seasonal humidity create conditions that destroy inadequately prepared metal coatings within a year or two. Windy City Painters approaches every iron fence project as a corrosion control job first and a painting job second. The result is a finish that holds up through multiple Chicago winters without peeling, bubbling, or allowing rust to spread beneath the surface.
MAterials AND PRODUCTS
Windy City Painters selects products specifically rated for ferrous metal in high-corrosion environments. For rust conversion, we use Ospho phosphoric acid treatment or Corroseal water-based rust converter, both of which chemically transform active rust into a stable iron phosphate compound. For priming and finish coats, Rust-Oleum DTM and Sherwin-Williams DTM rust-inhibitive direct-to-metal coatings provide excellent adhesion, flexibility, and moisture resistance. These products are formulated to expand and contract with metal through temperature swings without cracking.
THE PROCESS
Step 1 - Mechanical Surface Preparation: Wire wheel grinding and needle gun descaling remove all loose rust, failing paint, and mill scale. This step is non-negotiable. No rust-inhibitive coating performs correctly over contaminated or loosely adhered substrate. Windy City Painters treats this phase as the foundation of the entire project.
Step 2 - Rust Conversion Treatment: Ospho or Corroseal is applied to any remaining rust after mechanical prep. These products do not simply cover rust - they react with iron oxide to create iron phosphate, a chemically stable surface that accepts primer without ongoing corrosion underneath. Contact time and full surface saturation are critical.
Step 3 - Rust-Inhibitive Priming: Rust-Oleum DTM or Sherwin-Williams DTM rust-inhibitive primer is applied by brush to ensure full penetration into ornamental details, crevices, and rail joints where moisture collects. Spray application alone misses critical contact points on older Chicago ironwork.
Step 4 - Finish Coat Application: Two finish coats of Rust-Oleum DTM or Sherwin-Williams DTM topcoat deliver color saturation, UV stability, and a hard film that resists chipping from foot traffic, landscaping equipment, and seasonal debris impact common to Chicago urban properties.
CHICAGO-SPECIFIC CHALLENGES
Chicago iron fences face a combination of stressors that accelerates failure compared to milder climates. Road salt spray migrates well beyond the street surface and deposits chlorides on fence metal throughout winter. Freeze-thaw cycles - sometimes occurring multiple times in a single week - expand and contract metal enough to crack coatings that lack flexibility. Older ornamental iron on greystones, Victorian brownstones, two-flats, and courtyard buildings often has decades of paint buildup that must be addressed before any restoration coating will perform correctly.
WHAT TO EXPECT LONG-TERM
A properly prepared and coated iron fence painted by Windy City Painters typically performs five to seven years before requiring recoating in Chicago conditions. Annual spring inspection for salt residue, minor touch-up of any chips within the first season, and a light rinse to remove winter road chemicals all extend coating life. Structural rust that has compromised rail integrity should be addressed by a welder before painting - Windy City Painters identifies these conditions during initial assessment.
PRO TIPS
Tip 1: Never paint over rust without a conversion treatment first. Paint applied over active rust creates a sealed environment where corrosion accelerates invisibly until the coating fails completely.
Tip 2: Budget for welded repairs on iron fences older than twenty-five years. Ornamental iron on Chicago historic properties often has pitting or section loss that painting alone cannot address structurally.
Tip 3: Time your iron fence painting project for late spring or early fall when temperatures stay consistently above fifty degrees overnight. DTM coatings need adequate cure time before the first freeze to achieve full hardness.
Call Windy City Painters to schedule your iron fence assessment at windypainters.com.
FAQ
Q: What is the cost of iron fence painting in Chicago?
A: Iron fence painting cost in Chicago varies by linear footage, rust severity, and ornamental complexity. Windy City Painters provides free on-site estimates so you receive an accurate number before any commitment is made.
Q: Do you need to remove all old paint before repainting an iron fence?
A: Not always. Windy City Painters assesses existing coating adhesion. Sound paint in good condition can remain. Peeling, bubbling, or paint over active rust must be removed for the new coating to perform correctly.
Q: Can structural rust on an iron fence be repaired without replacing the fence?
A: Depends on severity. Surface and moderate rust responds well to conversion treatment and DTM coatings. If rust has caused section loss or structural weakness, Windy City Painters recommends a welder address those areas before painting.
Q: How long does iron fence painting take?
A: Most residential iron fence projects take one to three days including prep, rust conversion, priming, and two finish coats. Windy City Painters sequences cure time between coats to ensure full adhesion at every stage.
Q: What is the best paint for iron fences in Chicago?
A: Rust-Oleum DTM and Sherwin-Williams DTM rust-inhibitive coatings are among the best options for Chicago iron fences due to their flexibility, moisture resistance, and ability to handle freeze-thaw temperature swings without cracking.
Q: Is it worth painting an old iron fence or should I replace it?
A: Painting is almost always more cost-effective than replacement for structurally sound iron. Windy City Painters assesses every fence honestly and only recommends replacement when restoration would not deliver a durable result.
Q: How do I find a reliable iron fence painting contractor near me in Chicago?
A: Look for contractors who specify rust conversion products by name, explain their mechanical prep process, and provide references from similar Chicago properties. Windy City Painters documents every step and warranties our work.
 Windy City Painters
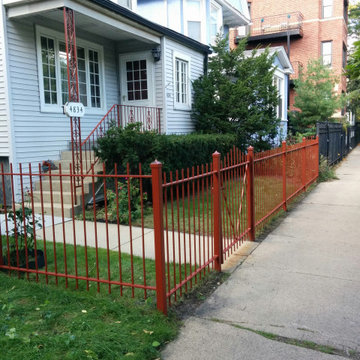
ver look at your iron fence and wonder how rust crept up so fast? For homeowners across Chicago's North Side and Near West Side, that moment of recognition often comes too late. Windy City Painters built this project guide to help you understand exactly what a professional iron fence restoration involves, what products matter, and what Chicago's climate demands from every coat of paint applied to exposed metal.
PROJECT OVERVIEW
This iron fence restoration involved a multi-unit property featuring an ornamental iron perimeter fence typical of Chicago's greystone and courtyard building streetscape. The fence presented moderate-to-severe surface rust, multiple areas of paint delamination, and two sections with deep pitting requiring needle gun descaling before any coating could be applied. The goal was full rust remediation and a durable topcoat finish built for Chicago's demanding climate. Windy City Painters completed the project in two days with zero damage to surrounding hardscape.
MATERIALS AND PRODUCTS
Ospho Rust Converter - A phosphoric acid-based treatment that chemically transforms iron oxide into iron phosphate, halting active corrosion before primer is applied. Essential on Chicago iron exposed to decades of salt air and freeze-thaw cycling.
Corroseal Rust-Inhibitive Primer - A water-based latex primer with built-in rust inhibitors, applied over converted surfaces to seal and prepare metal for topcoating.
Sherwin-Williams DTM Acrylic Coating - Direct-to-Metal formulation delivering exceptional adhesion, flexibility, and corrosion resistance. Available in satin and semi-gloss, ideal for ornamental iron fence painting across Chicago properties.
THE PROCESS
Step 1 - Mechanical Surface Preparation: Wire wheel grinding with angle grinder attachments removed all loose rust scale, failing paint, and surface contamination. Heavily pitted sections received needle gun descaling to expose clean stable metal beneath. This step determines everything. No primer or topcoat performs correctly over compromised metal, regardless of product quality. Windy City Painters treats prep as the primary investment on every iron fence project.
Step 2 - Rust Conversion: Ospho was applied liberally to all areas showing active rust. The phosphoric acid reaction was allowed to complete fully before any priming began. On severely oxidized sections, a second Ospho application ensured complete conversion. This step is non-negotiable in Chicago where freeze-thaw cycles push moisture into every surface irregularity.
Step 3 - Priming with Corroseal: Full coverage Corroseal primer coat sealed the converted surface and established adhesion for the finish coats. Corroseal's rust-inhibitive chemistry adds a secondary barrier against moisture penetration, extending the effective life of the topcoat by years in Chicago's humid lakefront environment.
Step 4 - DTM Topcoat Application: Two coats of Sherwin-Williams DTM acrylic in satin black were applied by brush to ensure full penetration into ornamental detail. DTM's flexibility accommodates the metal expansion and contraction Chicago temperatures demand, from minus-15 winters to 95-degree July afternoons. Final coverage was uniform and true to color.
CHICAGO-SPECIFIC CHALLENGES
Chicago iron faces challenges most other markets do not. Lake Michigan humidity accelerates surface oxidation year-round. Road salt from winter de-icing migrates to fence bases and lower rails. Freeze-thaw cycling cracks poorly adhered coatings within a single winter. Greystones, two-flats, and Victorian brownstones often feature original ornamental ironwork with decades of layered paint that must be assessed before any new coating is added. Windy City Painters factors all of these conditions into every iron fence estimate and material selection.
WHAT TO EXPECT LONG-TERM
A properly prepared and coated iron fence using the Ospho, Corroseal, and Sherwin-Williams DTM system should deliver 5-8 years of performance in Chicago conditions. Annual visual inspection for chips or scratches, followed by prompt spot priming, extends that timeline significantly. Full refinishing cycles become less frequent when the initial prep work is done correctly.
PRO TIPS
Tip 1 - Never skip the rust converter. Painting over active rust with even the best topcoat guarantees early failure. Ospho or a comparable phosphoric acid treatment must precede any primer on iron showing orange or brown oxidation.
Tip 2 - Assess for weld repairs before scheduling painting. If rust has eaten through the metal creating structural voids or broken sections, a welder must address those areas before painting begins. Windy City Painters identifies weld repair needs during the free estimate.
Tip 3 - Choose satin or semi-gloss finish on iron. Flat finishes on metal hold moisture and show wear faster. Satin DTM provides enough sheen to shed water while maintaining the traditional look Chicago ornamental iron demands.
Ready to restore your iron fence the right way? Visit windypainters.com to schedule your free estimate with Windy City Painters.
FAQ
Q: What does iron fence painting cost in Chicago?
A: Most residential iron fence projects range from $500 to $1,800 depending on linear footage, rust severity, and prep requirements. Windy City Painters provides free detailed on-site estimates for accurate iron fence painting cost in Chicago.
Q: How do I know if my fence needs rust conversion or just repainting?
A: Any visible orange or brown rust requires chemical conversion before priming. Windy City Painters evaluates every fence during the estimate to determine whether Ospho, mechanical prep, or weld repair is needed before coating begins.
Q: Can you paint iron in cold Chicago weather?
A: DTM coatings have lower application temperature thresholds than standard exterior paint, but we avoid application below 35 degrees Fahrenheit. Windy City Painters schedules iron fence projects for appropriate weather windows throughout the season.
Q: How long does iron fence paint last in Chicago?
A: With complete rust conversion, Corroseal priming, and Sherwin-Williams DTM topcoat, iron fence painting in Chicago lasts 5-8 years. Annual inspections and prompt touch-ups of chips extend that timeline further.
Q: Do I need a welder before an iron fence can be painted?
A: Only if rust has created structural voids or breaks in the metal. Windy City Painters assesses this during the free estimate and can coordinate with welders when needed before our painting crew begins.
Q: What is the difference between Ospho and Corroseal?
A: Ospho is a rust converter applied directly to active rust to chemically neutralize it. Corroseal is a rust-inhibitive primer applied over converted or clean metal. Windy City Painters often uses both in sequence for maximum protection on Chicago iron.
Q: How often should Chicago iron fences be inspected?
A: Annual inspection is recommended, ideally in early spring after winter salt and freeze-thaw exposure. Catching small chips and bare spots early allows simple touch-up rather than full iron fence repainting, saving significant cost.
7