
Search results for "Tools elevation" in Home Design Ideas

 HAUS | Architecture For Modern Lifestyles
Living space with curved clear cedar ceilings, built-in media and storage walls, custom artwork and custom furniture - Interior Architecture: HAUS | Architecture + LEVEL Interiors - Photography: Ryan Kurtz
 highland
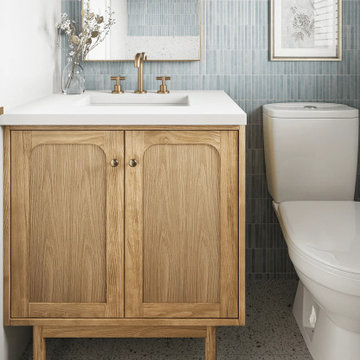
Renovating a bathroom is one of the most rewarding home improvement projects you can undertake. It adds immediate value to your property and elevates your daily routine. However, designing the perfect space requires balancing aesthetics with practical utility. At the heart of this balance is the vanity — it is the functional hub where you get ready each morning, a vital storage unit, and the visual centerpiece of the room.
To ensure you make the right investment, here is an in-depth look at choosing a bathroom vanity that blends style, longevity, and everyday functionality.
1. Assessing the Layout and Space Constraints
Before you fall in love with a specific design or finish, you must determine what your bathroom can physically handle. Scale is everything. A vanity that is too large disrupts traffic flow, while one that is too small gets lost visually and lacks adequate storage.
The next major step is determining the scale of your plumbing fixtures. Understanding how to choose a bathroom sink and vanity setup comes down to a simple choice: single or double sinks. Your choice will depend on who uses the bathroom and the overall footprint of the space.
Single Sink Vanities
Typically ranging from 20 to 48 inches (50–120 cm) in width, single vanities are the ideal choice for powder rooms, guest bathrooms, or small master suites. For very compact spaces, you can find narrower options starting around 16 inches (40 cm). The major advantage of a single-sink layout is that it provides more usable countertop space for cosmetics, toiletries, and decorative items. If you want to skip the guesswork and invest in a premium, beautifully handcrafted fixture, explore the luxury collections at Willow Bath and Vanity. From elegant single vanities to spacious double setups, their masterfully built furniture combines solid wood construction with elite styling to transform any bathroom into a spa-like retreat.
Double Sink Vanities
Usually starting at 48 inches (120 cm) and extending up to 72 inches (180 cm) or more, double vanities are a lifesaver for shared master bathrooms. They allow two people to get ready simultaneously without fighting for sink space. Keep in mind that a double vanity naturally reduces both cabinet storage space and countertop real estate since a second sink basin and plumbing lines take up substantial interior room.
Sink Types to Consider
The countertop is the workhorse of the bathroom. It regularly comes into contact with running water, toothpaste, soapy residue, and high-heat styling tools. Knowing how to choose a bathroom vanity top requires evaluating how much maintenance you are willing to perform against the look you want to achieve. Material Pros Cons Maintenance Level Quartz Highly durable, non-porous, stain and scratch-resistant. Offers the look of stone without the hassle. Premium pricing; can show seams on very large custom layouts. Low (No sealing required) Marble Timeless, elegant, and luxurious. Every slab features a completely unique veining pattern. Porous; prone to scratching, etching from acids, and water stains. Requires careful daily use. High (Requires regular sealing) Granite Naturally strong, heat-resistant, and chemically stable. Unique earthy patterns. Porous; can chip if subjected to heavy impacts. Medium (Requires occasional sealing) When coordinating your countertop, ensure it complements your bathroom’s floor tiles, shower surround, and plumbing hardware to maintain visual harmony.
4. Selecting the Core Vanity Style and Finish
Once the functional components are locked in, you can focus on the architectural style of the vanity base. The base dictates the design theme of the entire room.
Conclusion
Choosing the perfect vanity is a step-by-step process that combines precise measurements with your personal design taste. By taking careful measurements, choosing between a single- or double-sink setup, and picking a durable counter material like quartz or granite, you can transform your bathroom into a beautiful, organized retreat. Prioritize high-quality materials and smart craftsmanship, and your new vanity will look spectacular and serve your household reliably for years to come.
1. Assessing the Layout and Space Constraints
Before you fall in love with a specific design or finish, you must determine what your bathroom can physically handle. Scale is everything. A vanity that is too large disrupts traffic flow, while one that is too small gets lost visually and lacks adequate storage.
- Take Precise Measurements: measure the available width, depth, and height. Remember to account for surrounding fixtures.
- Check Clearance Zones: ensure there is enough clearance for the bathroom door to swing open, for shower glass doors to clear the vanity, and for drawers and cabinet doors to extend fully without hitting the toilet or walls.
-
Locate Existing Plumbing: moving pipes can significantly increase renovation costs. If you want a seamless installation, look for a vanity configuration that aligns easily with your current plumbing setup.
The next major step is determining the scale of your plumbing fixtures. Understanding how to choose a bathroom sink and vanity setup comes down to a simple choice: single or double sinks. Your choice will depend on who uses the bathroom and the overall footprint of the space.
Single Sink Vanities
Typically ranging from 20 to 48 inches (50–120 cm) in width, single vanities are the ideal choice for powder rooms, guest bathrooms, or small master suites. For very compact spaces, you can find narrower options starting around 16 inches (40 cm). The major advantage of a single-sink layout is that it provides more usable countertop space for cosmetics, toiletries, and decorative items. If you want to skip the guesswork and invest in a premium, beautifully handcrafted fixture, explore the luxury collections at Willow Bath and Vanity. From elegant single vanities to spacious double setups, their masterfully built furniture combines solid wood construction with elite styling to transform any bathroom into a spa-like retreat.
Double Sink Vanities
Usually starting at 48 inches (120 cm) and extending up to 72 inches (180 cm) or more, double vanities are a lifesaver for shared master bathrooms. They allow two people to get ready simultaneously without fighting for sink space. Keep in mind that a double vanity naturally reduces both cabinet storage space and countertop real estate since a second sink basin and plumbing lines take up substantial interior room.
Sink Types to Consider
- Undermount: installed beneath the counter for a smooth, seamless surface that is incredibly easy to wipe down.
- Vessel: sits atop the counter like a decorative bowl. It makes a bold style statement but raises the overall height of the counter surface.
- Drop-In: features a lip that rests on the counter cutout. It is easier to install, but its edges can catch dirt.
-
The countertop is the workhorse of the bathroom. It regularly comes into contact with running water, toothpaste, soapy residue, and high-heat styling tools. Knowing how to choose a bathroom vanity top requires evaluating how much maintenance you are willing to perform against the look you want to achieve. Material Pros Cons Maintenance Level Quartz Highly durable, non-porous, stain and scratch-resistant. Offers the look of stone without the hassle. Premium pricing; can show seams on very large custom layouts. Low (No sealing required) Marble Timeless, elegant, and luxurious. Every slab features a completely unique veining pattern. Porous; prone to scratching, etching from acids, and water stains. Requires careful daily use. High (Requires regular sealing) Granite Naturally strong, heat-resistant, and chemically stable. Unique earthy patterns. Porous; can chip if subjected to heavy impacts. Medium (Requires occasional sealing) When coordinating your countertop, ensure it complements your bathroom’s floor tiles, shower surround, and plumbing hardware to maintain visual harmony.
4. Selecting the Core Vanity Style and Finish
Once the functional components are locked in, you can focus on the architectural style of the vanity base. The base dictates the design theme of the entire room.
- Freestanding vanities: sit directly on the floor, supported by legs or a solid kickboard base. This is a traditional, stable configuration that offers the maximum hidden cabinet and drawer storage space.
- Wall-Mounted (Floating) vanities: anchored directly onto the wall studs, leaving the floor underneath completely clear. Floating vanities are staples of modern, minimalist design. They create an illusion of space, making small rooms look larger, and make cleaning the bathroom floor incredibly easy.
- Console vanities: feature an open shelving design supported by a metal or wood frame. It offers a light, airy look reminiscent of a boutique hotel, though it sacrifices hidden storage.
Conclusion
Choosing the perfect vanity is a step-by-step process that combines precise measurements with your personal design taste. By taking careful measurements, choosing between a single- or double-sink setup, and picking a durable counter material like quartz or granite, you can transform your bathroom into a beautiful, organized retreat. Prioritize high-quality materials and smart craftsmanship, and your new vanity will look spectacular and serve your household reliably for years to come.

 360 Yardware
Because the double doors were the showpiece of the courtyard entry, the homeowners chose a different latch and lock for their side yard gate. They chose the Nero Contemporary Lever Latch and Square Modern Style Deadbolt in black.
This photo shows the interior of the gate, latching against a fence panel.
Photos by 360 Yardware
Find the right local pro for your project


 Stephenson Design Collective
Andrew Pogue Photography
Large trendy black three-story stucco flat roof photo in Seattle
Large trendy black three-story stucco flat roof photo in Seattle

 CJ Paone AIA | Archipelago Workshop
Detail of charred wood plank. We used the ancient Japanese method of shou-sugi-ban, which rendered the reclaimed cedar (traditionally Japanese cypress) fire, rot and pest resistant while imparting a striking black, slightly iridescent finish that’s both modern and low maintenance.
images | gretchen claire garnett
Sponsored
Delaware, OH

Buckeye Basements, Inc.
Central Ohio's Basement Finishing ExpertsBest Of Houzz '13-'21


 Millz House
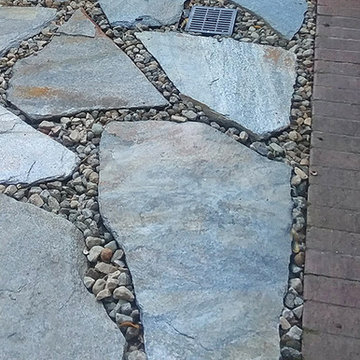
Check out this beautiful garage floor coating on display in the Fall Parade of Homes, 2842 Deer Hill Road in Medina. Now is a great time to consider updating your garage with a beautiful, functional floor coating.
 Windy City Painters
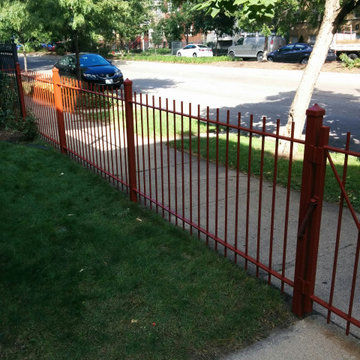
Ever notice how your iron fence looks worse every spring after another Chicago winter? That slow deterioration is not cosmetic - it is active metal failure that compounds every freeze-thaw cycle until replacement becomes the only option. Windy City Painters works with homeowners across the Chicago North Side and Near West Side to restore original iron fencing on greystones, two-flats, Victorian brownstones, and coach houses before that point is reached.
PROJECT OVERVIEW
This iron fence restoration involved a classic Chicago residential property with original wrought iron fencing showing surface rust across the majority of pickets, flaking previous paint coats, and localized deep pitting near the base rails. A structural check identified two loose pickets requiring welding before any surface preparation or coating began. Total linear footage fell in the mid-range for a standard Chicago residential lot.
MATERIALS AND PRODUCTS
Windy City Painters selected Ospho rust converter for chemically neutralizing active iron oxide before priming. Ospho reacts with rust to form a stable phosphate compound that stops corrosion progression rather than simply sealing over it. Sherwin-Williams DTM rust-inhibitive primer was applied to all bare and converted surfaces, followed by two finish coats of Rust-Oleum DTM in satin black. DTM - direct to metal - formulas provide corrosion inhibitors built into the coating matrix, which matters significantly in Chicago's climate.
THE PROCESS
Step 1 - Structural Assessment and Welding Coordination. Before any surface preparation begins, Windy City Painters inspects every picket and rail connection for structural integrity. Loose or cracked iron must be welded before coating. Paint applied over a compromised joint will fail within one season as movement continues to break the bond. On this project, two pickets were tack-welded by a coordinating welder before prep started.
Step 2 - Wire Wheel Grinding and Needle Gun Descaling. All rusted sections were ground to bare or near-bare metal using wire wheel attachments and needle gun descaling tools. This step removes loose scale, flaking previous coatings, and surface contamination that would prevent primer adhesion. Skipping mechanical prep is the single most common reason iron fence paint fails prematurely on Chicago properties.
Step 3 - Ospho Rust Converter Application. Ospho was brushed into all pitted and converted areas and allowed to cure fully. The phosphoric acid chemistry converts iron oxide into iron phosphate, arresting active rust and creating a surface that accepts primer more effectively than bare metal alone. Corroseal is an equivalent alternative used on projects with heavier pitting.
Step 4 - DTM Primer and Finish Coat Application. Sherwin-Williams DTM rust-inhibitive primer was applied across all prepared surfaces. Two topcoats of Rust-Oleum DTM in satin black followed after full primer cure. DTM finish coats add a second corrosion-inhibiting layer and provide the UV and weather resistance needed for Chicago exterior iron work.
CHICAGO-SPECIFIC CHALLENGES
Chicago iron fencing faces conditions that accelerate corrosion faster than most US markets. Lake humidity keeps metal surface moisture elevated through much of the year. Road salt splash from winter maintenance reaches fencing along parkways and sidewalk edges, introducing chlorides that aggressively attack iron. Freeze-thaw cycles expand any rust pocket that has formed under paint, lifting coatings from the inside and creating the classic bubbled-paint appearance homeowners notice every spring.
WHAT TO EXPECT LONG-TERM
With Ospho conversion, DTM primer, and two DTM finish coats properly applied over mechanically prepared surfaces, most Chicago residential iron fences hold 5-8 years before needing significant touch-up. Annual visual inspection for any chips or bare spots, with immediate touch-up using Rust-Oleum DTM, extends that window considerably.
PRO TIPS
Tip 1 - Address any bare metal spot the same season you notice it. A pinhole of exposed iron becomes a rust bubble within one Chicago winter and a flaking section by the following spring.
Tip 2 - Never paint over active rust without a converter step. Ospho or Corroseal is inexpensive insurance against a complete repaint two years early.
Tip 3 - Check picket bases at grade level every spring. Ground contact accelerates corrosion at the base faster than anywhere else on the fence. Catching it early keeps welding out of the equation.
Contact Windy City Painters at windypainters.com for a project estimate.
FAQ
Q: What does iron fence painting cost in Chicago? A: Residential iron fence painting with proper rust prep typically runs $300-$900 for standard lot footage. Windy City Painters provides itemized estimates based on linear footage, rust severity, and whether structural welding is required before surface preparation begins.
Q: Do you paint over rust or remove it first? A: Windy City Painters always addresses active rust before priming. Ospho or Corroseal rust converter chemically neutralizes iron oxide, and wire wheel grinding removes loose scale - coating over unaddressed rust guarantees early failure on Chicago iron fences.
Q: When does an iron fence need welding before painting? A: Loose pickets, cracked rails, or connections with visible movement require welding before any coating work begins. Paint cannot stabilize a structural joint - Windy City Painters coordinates with welders when this condition is identified during initial assessment.
Q: How long does iron fence paint last in Chicago? A: With mechanical prep, Ospho conversion, and Sherwin-Williams or Rust-Oleum DTM coatings, properly restored iron fencing holds 5-8 years in Chicago's freeze-thaw climate before needing significant maintenance.
Q: Is Ospho better than Corroseal for Chicago iron fences? A: Both are effective rust converters. Ospho is a liquid phosphoric acid treatment suited for moderate rust and pitting. Corroseal is a latex-based converter-primer hybrid better suited to heavier rust profiles. Windy City Painters selects based on site conditions.
Q: What finish sheen works best on iron fencing? A: Satin or semi-gloss black is the traditional and most durable choice for Chicago greystone and brownstone properties. Satin hides minor surface imperfections better than gloss while still providing adequate UV and moisture resistance.
Q: Can iron fence painting be done in spring or fall in Chicago? A: Yes. Windy City Painters schedules iron fence work in temperatures above 50 degrees Fahrenheit with low ambient humidity - spring and early fall are often ideal windows that avoid both winter cold and peak summer humidity.


Sponsored
Delaware, OH
Buckeye Basements, Inc.
Central Ohio's Basement Finishing ExpertsBest Of Houzz '13-'21

 Solar Wind Designs
Open shelves- industrial pipe shelf brackets, 2" thick wormy maple shelves with custom-made "live edge."
White kitchen cabinets with custom-made shelving. Custom art- Cat etched a mountain scene (requested by clients) on aluminum insets created for pantry doors. Customized art work- Aluminum island "kick" with hand etched longitude and latitude coordinates (etched by Cat). Kitchen island with extended 16" overhang for eating area. Hidden support brackets holdup the extension. American Walnut butcherblock island countertop. White enamel apron front sink. Chef style kitchen faucet. Stainless steel appliances.


 Joslyn Fine Metalwork Inc
Enclosed kitchen - mid-sized rustic medium tone wood floor enclosed kitchen idea with an undermount sink, raised-panel cabinets, medium tone wood cabinets, granite countertops, multicolored backsplash, stone slab backsplash, stainless steel appliances and an island

 Siding & Windows Group Ltd
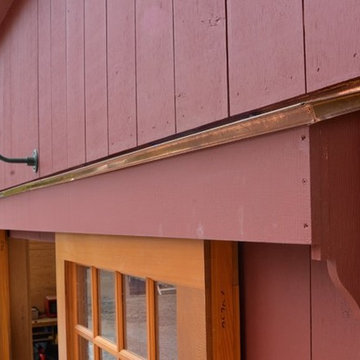
Beautiful Modern Home Remodel, Siding done by Siding & Windows Group Ltd. We installed HardiePanel Vertical 4x8 Smooth Boards in ColorPlus Technology Color Cobble Stone on the sides of the home and Custom Metal trim.


 Iron Mountain Construction
Kyle Bryant - Speeds Photo
Example of a mountain style staircase design in Portland
Example of a mountain style staircase design in Portland

 Keuka Studios, Inc
Floating staircase with steel mono-stringer and white oak treads as seen from below. The wood top rail seamlessly flows up the multi level staircase.
Stairs and railings by Keuka Studios
Photography by Dave Noonan
 THE Remodel Group
Returning home after more than a decade living and working in Taiwan, our client envisioned something entirely different from the French Colonial aesthetic of his early-1990s Beaverton home. Through a comprehensive design-build renovation, this Portland metro whole-house remodel transformed a conventional suburban residence into a richly layered retreat inspired by global travel, natural materials, and timeless craftsmanship. The result is a warm, sophisticated home designed to showcase treasured artifacts and collectibles gathered from years abroad while providing modern functionality for everyday living.
From the moment you enter, the home's new character unfolds through a carefully curated palette of wood, stone, and metal. Rich ebony-stained knotty alder millwork draws the eye through the entry, where a newly created mudroom replaces the former office space. Beyond a set of dramatic barn doors, a striking stone fireplace becomes the focal point of the living room, anchored by a reclaimed wood mantel and rustic ceiling beams that add warmth and architectural depth. Nearby, the sunroom was completely refreshed through thoughtful window modifications and custom trim detailing, creating a seamless connection between the interior and the surrounding landscape.
The kitchen serves as the heart of the renovation, blending rustic elegance with refined craftsmanship. Custom alder cabinetry is paired with layered metal finishes, allowing subtle copper and bronze undertones to emerge from creamy quartz countertops. A textured slate backsplash echoes the flagstone-inspired flooring, while a newly created butler's pantry provides both beauty and functionality. Each material was selected to evoke the authenticity of old-world craftsmanship while supporting the practical needs of modern living.
One of the home's most dramatic architectural transformations is the custom floating staircase. Designed as both a sculptural centerpiece and a solution to circulation challenges, the staircase opens previously constricted pathways and enhances the home's flow. Hand-tooled hickory wraps each tread while weathered metal accents provide subtle industrial character. Upstairs, creative space planning allowed for the addition of a discreet laundry nook within an underutilized hallway area, improving convenience without sacrificing valuable living space.
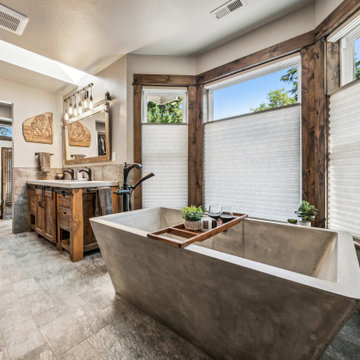
The primary suite continues the home's story of understated luxury and global influence. Rustic ceiling beams mirror those seen throughout the main level, creating visual continuity and warmth. An antique carved door serves as a distinctive feature within the reconfigured closet layout, while the primary bathroom embraces a calming combination of stone, concrete, and matte black finishes. Large-format tile arranged in a custom Versailles-inspired pattern guides the eye through the spa-like retreat, where natural textures and abundant daylight create a serene atmosphere.
While the main and upper levels celebrate warmth and global influence, the basement renovation introduces an entirely different layer of the home's personality. To create the ultimate entertainment destination, the basement footprint was extended approximately seven feet beyond the original foundation, transforming previously underutilized space into a seamless indoor-outdoor gathering environment. Inspired by cultured industrial design, the newly expanded lower level was envisioned as a place where family and friends could relax, connect, and enjoy the home's resort-like backyard amenities.
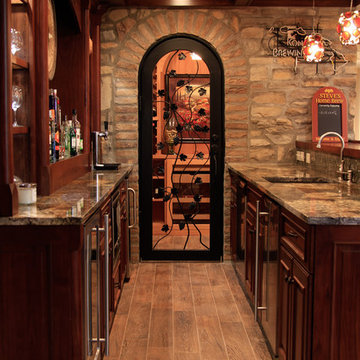
At the heart of the basement renovation is a custom entertainment bar featuring reclaimed rustic cabinetry and chiseled-edge granite countertops that emphasize the natural character of the materials. Accordion-style serving windows create a direct connection between the interior bar and the outdoor living spaces, allowing drinks, food, and conversation to flow effortlessly between the entertainment room and the backyard pool, hot tub, and professionally landscaped grounds. The result is a true indoor-outdoor living experience designed for year-round enjoyment.
The expansive recreation area accommodates a variety of activities while maintaining a cohesive design aesthetic. A shuffleboard table, billiards area, and casual bar dining space provide multiple destinations for gathering, all unified by a sophisticated palette of brick, concrete, wood, and metal. Slim-profile brick walls introduce texture and authenticity, while custom decorative painting techniques create the appearance of cast concrete accent walls, reinforcing the basement's refined industrial character without overwhelming the space.
Supporting spaces throughout the lower level were equally transformed. An outdated bathroom was fully renovated to reflect the home's dark and moody aesthetic, incorporating a curbless shower, rustic vanity, and layered finishes that balance comfort with style. Two underutilized bedrooms were thoughtfully reconfigured to better support the homeowner's lifestyle, with one becoming a dedicated home office and the other opening into a flexible music room designed for creativity and relaxation. Additional unfinished crawlspace and storage areas were reclaimed to create a private home gym, maximizing every square foot of the home's footprint.
The renovation extended beyond the interior walls of the home. A newly rebuilt two-story deck strengthens the connection between indoor and outdoor spaces while providing multiple vantage points overlooking the backyard retreat. On the upper level, adjacent to the primary suite, a new enclosed sunroom addition creates a peaceful sanctuary elevated among the trees. Together, these exterior improvements complement the home's interior transformation, enhancing both livability and year-round enjoyment while creating a true extension of the living space outdoors.
Behind the finished spaces, this Beaverton full home remodel required significant structural and technical expertise. Replacing the original staircase involved extensive modifications to the upper-floor framing system, including the installation of concealed supports for the floating treads and the creation of a new landing structure. Throughout the home, natural materials presented unique installation challenges. The dimensional variation of the slate backsplash required each stone to be precisely shaped around electrical devices and surrounding elements, while reclaimed wood beams demanded extensive preparation before they could be securely installed. Careful coordination among multiple trades ensured every custom detail performed as beautifully as it appeared.
Because the homeowner remained in Taiwan for much of the renovation, collaboration relied on a highly organized design-build process and frequent communication across a fourteen-hour time difference. Detailed design presentations, material selections, and construction updates allowed key decisions to be made efficiently, even from across the globe. This partnership enabled the project team to successfully execute a highly customized vision despite logistical complexities and construction delays outside of the project's control.
Strategic planning also played a crucial role in maintaining the project budget. While the homeowner initially envisioned reclaimed wood flooring and natural flagstone throughout the home, carefully selected engineered hardwood and porcelain tile provided a similar aesthetic with improved performance and cost efficiency. Authenticity was preserved through the use of genuine stone at key focal points, including the fireplace surround and kitchen backsplash, as well as reclaimed wood incorporated into architectural beam details. Existing high-quality windows were retained and transformed through selective replacement, custom trim work, and thoughtful refinishing, delivering the desired look while avoiding unnecessary expense. Additional savings came from a creative exterior repair solution that replicated the home's original stucco detailing without requiring a complete façade replacement.
This luxury Beaverton whole-house renovation demonstrates how thoughtful design-build remodeling can completely reimagine an existing home. Through strategic space planning, custom craftsmanship, and budget-conscious decision making, a dated suburban residence was transformed into a distinctive rustic contemporary retreat that reflects its owner's global experiences, personal story, and vision for home.
19