
Search results for "Toothbrush" in Home Design Ideas
 Story Homes
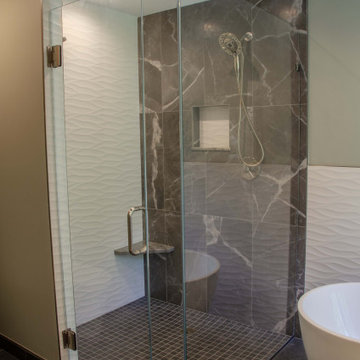
This beautifully designed home is located on secluded property with multiple private views of a nature preserve, yet only a short commute to downtown Minneapolis. The owners hired Jacobson Construction to update their master bathroom and the result is amazing.
The design called for a bright, warm and comfortable space, so we began with a heated floor for those cold Minnesota nights using 12” X 24” gray porcelain bath tile and neutral grout. The custom built-in walnut vanity has a satin finish with brushed nickel hardware and a green-and-gray toned granite countertop.
The vanity includes two undermounted sinks with brushed nickel Kohler faucets. Each sink has two matching sconce lights and a large mirror. One feature the owners really enjoy is the in-cabinet and in-drawer electrical outlets – perfect for keeping the counter free of things like electric toothbrushes and hair dryers. They also love the custom two-level jewelry-organizing drawer.
The bath’s centerpiece may be the white Kohler freestanding soaking tub with brushed nickel faucet, situated in front of a large window overlooking the nature preserve.
A 4’ x 4’ walk-in glass shower features dark gray 2” X 2” porcelain floor tile with neutral grout, 12” X 24” porcelain tile on the back wall, a granite corner seat to match the countertops, and brushed nickel Kohler showerhead.
The bath's walls are painted light green, with an additional white textured tile in a horizontal wave pattern that begins in the shower and extends to the wall behind the tub.
Recessed can, undercabinet toe-kick and sconce lights—all on dimmers--bring this room to life. The undercabinet lighting is wired with a motion sensor switch to function as a night light.
“Our only regret is that we didn’t take pictures of the bathroom before the remodel. It’s that much of an improvement!” The owners shared: “We're really enjoying the refreshed room. So far we’ve added a bright, colorful runner on the floor, and are in search of the perfect artwork to complement the wavy tile wall behind the tub.”
 Jessica Koltun Home
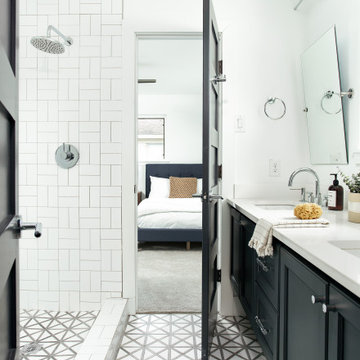
Modern farmhouse designs by Jessica Koltun in Dallas, TX. Light oak floors, navy cabinets, blue cabinets, chrome fixtures, gold mirrors, subway tile, zellige square tile, black vertical fireplace tile, black wall sconces, gold chandeliers, gold hardware, navy blue wall tile, marble hex tile, marble geometric tile, modern style, contemporary, modern tile, interior design, real estate, for sale, luxury listing, dark shaker doors, blue shaker cabinets, white subway shower
 Hansgrohe USA
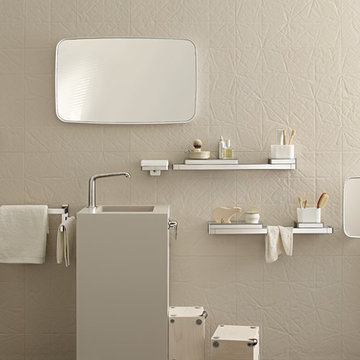
Sophisticated washbasin solutions guarantee that adults and children can both be comfortable in the bathroom. Children can enjoy their own accessories, making them feel on par with the adults. Shelves, mirror, and hooks, for example, can be placed where they are easy to reach. If needed, the accessories can be rearranged or even supplemented by other elements. Not only is this arragement practical, it also has considerable aesthetic appeal.
Find the right local pro for your project
 Threetrees Interiors LLC
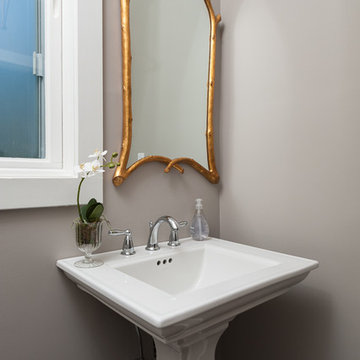
A Guildmaster Gothic Twig Mirror in gilded gold accents the warm gray walls of the Powder Bath.
Inspiration for a small eclectic 3/4 porcelain tile bathroom remodel in New York with a pedestal sink, a two-piece toilet and gray walls
Inspiration for a small eclectic 3/4 porcelain tile bathroom remodel in New York with a pedestal sink, a two-piece toilet and gray walls
 Nicolette Interiors, LLC.
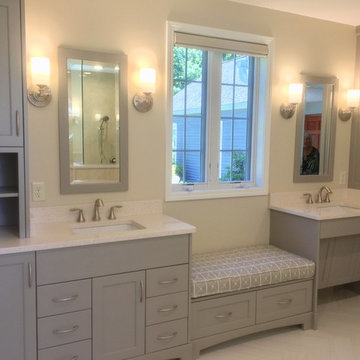
-Custom Millwork: Vanities, Linen Cabinets, Bench, and Mirrors- For this master suite Aging-In-Place addition, the goal was to create an ADA accessible bathroom that was ease the daily morning tasks. This included the need to create an ADA custom vanity, installing decorative grab bars, designing a curbless walk-in shower, and procuring a walk-in tub.
 Quality Edge
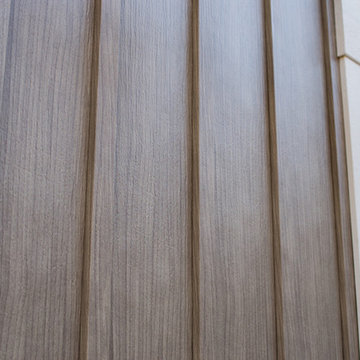
TruCedar Steel Siding shown in 10" Board & Batten in Napa Vine.
Beige two-story metal exterior home idea in Grand Rapids
Beige two-story metal exterior home idea in Grand Rapids


 Best Plumbing Tile & Stone
Fisher Hart Photography
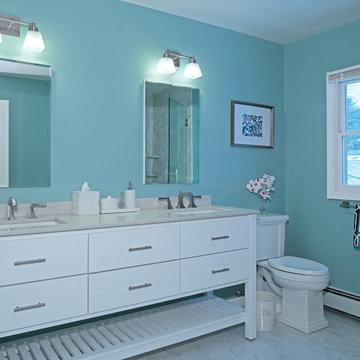
Example of a mid-sized transitional master gray tile alcove shower design in New York with an undermount sink, white cabinets, a two-piece toilet, blue walls and flat-panel cabinets
Example of a mid-sized transitional master gray tile alcove shower design in New York with an undermount sink, white cabinets, a two-piece toilet, blue walls and flat-panel cabinets
 Vanities for Bathrooms
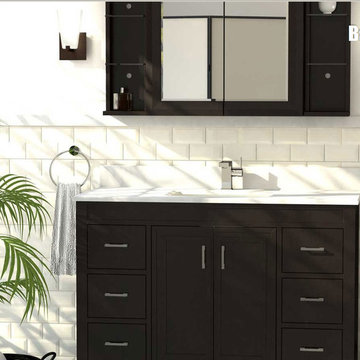
Around of these were good-looking and even Quality Bathroom Vanities, and it's a style many folks still choose in the present day. But, manufacturers are now as well present more modern and contemporary takes on a quality bathroom vanity in addition to the more old-fashioned styles. Folks are finding all brands of ways to make their bathrooms appearance less like the useful spaces they were factually created to be. With charming styles of Quality Bathroom Vanities, mirrors, and other bath fixtures, your bathroom can expression just as good as any other fragment of any home.
 Tile Doctor Ltd
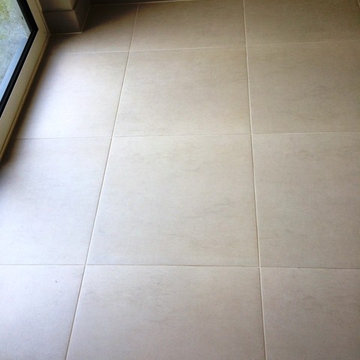
Recently, I was called to a work on a Limestone tiled floor in a house near Hove Park. Hove Park is a popular park in Hove, East Sussex, which was once opposite to the Goldstone Ground, the traditional home of Brighton and Hove Albion football club until the ground was demolished. My client informed me that the house was used a meeting place every Friday, and the high traffic of people was taking its toll on the floor.
The floor was clearly in need of a good clean, especially the grout. You do need to take care when cleaning Limestone as it can be affected by the acidic substances you get in some cleaning products which can break down the surface of the Limestone and cause further damage. The results of my test clean showed the Limestone tiles responded well to the cleaning, but I was concerned about the grout, which was not cleaning very easily. I suspected that the grout had, in fact, been discoloured by a bleach-based cleaner, turning it grey. Bleach contains strong chemicals, so there is a good chance that any bleach-based cleaners used on tiled floors will discolour the grout over time. After discussing this issue with my client, I quoted separately for a possible grout recolour.
On the first day of working on the floor, I started the cleaning process using a black buffing pad attached to a floor buffer machine, in combination with a solution of Tile Doctor Pro-Clean, which I applied to the floor. This combination really helped to remove the heavily built up grime and dirt. Although the tiles looked great after the clean, I still wasn’t convinced by the state of the grout. After drying a test area with a heat gun, I confirmed that the grout was not continuous in colour and would need a recolour to get it back to looking its best again.
I left the rest of the floor to dry for a period of two days, allowing any residual moisture to evaporate, before returning to recolour the grout with a white Grout Colourant which was applied using a good old fashioned toothbrush and baby wipes to remove any excess. I was careful to apply thin, even coats in order to prevent the possibility of the Colourant staining the tile.
After several hours of knee-breaking work, the recolouring was complete, and I was extremely pleased to be able to show my client the finished product. She was very happy to be able to show off the floor to her friends, which was now white all the way through, without the dark lines caused by the discoloured grout.
Another satisfied client.
 Lori Ramsay Design
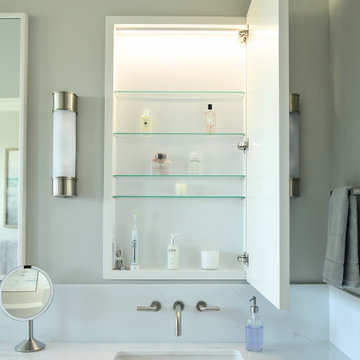
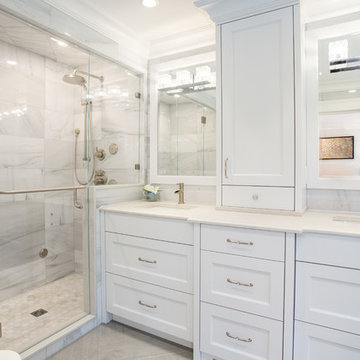
A transitional primary bath in warm gray and white is inviting bright. Spa like touches add to the elegance and built in fully customized medicine cabinet mirrors keep counters clean. Ceramic floor tile with non slip surface set in a herringbone pattern is timeless. Natural marble wall tile is sophisticated and bright. Counter height vanity creates a clean line and more modern look.
 Residential Interiors
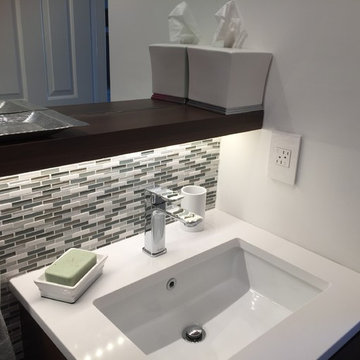
This small bathroom was updated to provide better functionality - more storage, ease of access with roll-out drawers, safety and comfort features such as grab bar, thermostatic valve for shower/bath, comfort height toilet, night lighting, timer ventilation fan, non-slip flooring.
Repetition of mosaic marble/glass backsplash on tub face and wall behind toilet and vanity adds interest to otherwise neutral fixed elements of marble floor and white quartz countertop, and bevilled white large format subway tile in tub/shower enclosure. Patterned floral wallpaper on single wall adds impact.
 Tile Doctor Ltd
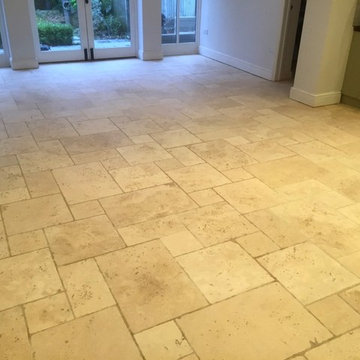
Recently I visited a client in the town of Maidenhead, Berkshire who needed assistance restoring a very dirty pitted Limestone tiled floor which had suffered over the years due to poor maintenance choices. The pressures of a busy family life had, understandably, prevented my client from undertaking regular cleaning and the products and methods used for cleaning were by and large unsuitable for this type of natural stone. In addition, the pits in the tiles had been filled with grout; however, they were not flush to the tile and therefore a large amount of soil had collected in the pockets. The result was a Limestone tiled floor in considerably poor condition that was increasingly difficult to keep clean.
My client had tried and tried to get the floor clean, using methods such as scrubbing with toothbrushes, steam cleaners, and mopping – but they weren’t getting anywhere! I explained to my client that steaming is, in fact, one of the worst cleaning systems to use on natural stone floors. Steam not only damages sealers, it also thins out greasy soils. Some of these soils are absorbed onto the domestic microfiber pads, however a lot of the soil becomes thinner allowing it to penetrate deeper into the pours of the stone and grout. This in itself starts the vicious circle to rapidly soiled and dirty tiles and grout. This happens because the grease soils magnetise dirt!
My first task in the cleaning process was to mix a strong solution of Tile Doctor Pro-Clean, which is a high alkaline cleaner. This solution was applied liberally across the entire Limestone tiled floor and grout. It was allowed to dwell for 30-40 minutes, giving it time to seep into the stone to get underneath and lift the ingrained dirt to the surface. During this time, I scrubbed the grout lines using a specialist stiff grout brush. The Limestone tiles were then scrubbed with heavy mechanical rotary agitation machine.
I then gave the floor a thorough rinse using the latest in cleaning and capture technology, which involves firing hot water at high pressure in a spinning motion across the floor, in effect blasting away the ingrained soils from the grout and pitting in the limestone. The high pressure is delivered from a system mounted inside my van which also contains waste tanks to capture the extracted soiled water.
After being allowed to dry thoroughly for 24 hours, I returned to seal the floor with Tile Doctor Colour Grow which would have brought out the deep colours in the stone, however after discussing the options with the client it became clear that they wanted to keep the floor looking as light as possible so Tile Doctor Ultra Seal was applied. Ultra Seal is a natural look impregnating sealer that soaks into the pores of the stone and protects it from within.
The floor now looks fantastic and the sealer should ensure it remains looking that way for some time to come and before leaving I made sure to provide my client with some professional maintenance advice.
Tim Colenutt
Berkshire Tile Doctor
 Goldcon Construction
Beautiful Three Bedroom, Three Bath North Vancouver Home Renovation To The Studs And Top Floor Addition Project Featuring An Open Concept Living And Kitchen Area, Beautiful Entertainment Area On The Lower Floor, And A Fully Landscape Back Yard Including A Spacious Hot Tub. The Finishes Include High End Custom Cabinetry & Millwork, Stone Surround Fireplaces, Marble Tile In The Kitchen & Bathrooms, Cambrian Black Leather Granite Counter-tops, Hand Scraped Engineered Oak Hardwood Through Out, LED Lighting, and Fresh Custom Designer Paint Through Out. North Vancouver Home Builder Goldcon Construction.
 Tile Doctor Ltd
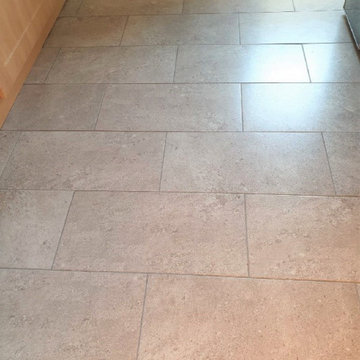
The owners of this house in Adwick Le Street, which is North of Doncaster, were fed up with the appearance of the Grout in their Ceramic tiled kitchen floor. They had not been able to keep the grout clean and it was now patchy, discoloured, darker and consequently always looked dirty.
I visited the property, to survey the floor and could see the Ceramic tiles and where in good condition, but the grout lines were really letting the kitchen down. I discussed with my client the option of re-colouring the grout, which they agreed was sensible, anything to keep the impossible grout clean. The alternative of scraping out the grout and replacing would be a messy and time-consuming option which we both agreed was not the choice they wanted to go for. I gave them a price to complete the work which they were happy to go ahead with.
Before any grout colouring could be done the grout first needed to be prepared, this was done using Tile Doctors Grout Colourant Pre-Treater which is an acid-based cleaner specially made for the job. This product cleans and prepares the grout for the colourant to ensure a better contact with the colourant later. It’s very simple to apply and is simply sprayed onto the grout lines, left to dwell for five minutes and then scrubbed into the grout by hand. Once done the soiled pre-treater is rinsed off with water and removed with a wet vacuum.
Once the grout lines are dry, they are ready to be coloured, unfortunately this is a manual process which take a lot of attention to detail and can be quite tedious. The best way of doing it I have found is go get down on your hands and knees with a toothbrush and gently scrub the colourant into each grout line, any colourant that seeps over onto the tiles needs to be quicky wiped away before it dries. The one upside however is observing the highly satisfying transformation of the grout as the result is instant and you can see the improvement as you go along.
There are ten grout colours of Tile Doctor Grout Colourant to choose from and in this case the owners had chosen Natural Grey. If you want to save a few points they also sell a Grout Colourant kit that contains both the colourant and the pre-treater. The grout colourant is epoxy based so it remains water and stain proof and will last for years.
I’m not sure the pictures I took do the transformation justice, but my client was over the moon with the difference it had made to the floor. The patchy grout was gone and then whole room seemed brighter.
For regular cleaning I recommended the use of Tile Doctor Neutral Tile Cleaner which will keep the floor looking good but is gentle enough to use every day and won’t compromise the colourant.
Matthew Lovett
South Yorkshire Tile Doctor
 Tile Doctor Ltd
Shower and bathroom mould and soap scum growth are probably the most common, annoying and frustrating tile-related problems. Wet and high humidity areas with poor ventilation provide the perfect breeding ground for mould and stains. Soap residue and body oils also create a food source for soap scum, mould to grow.
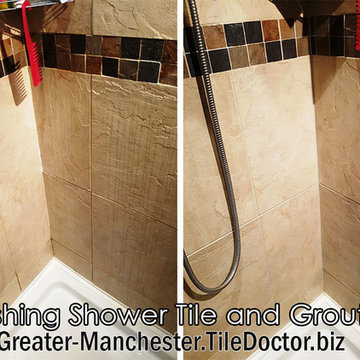
My customer in Dane Bank had the exact problem with dirty and mouldy grout lines in her shower cubicle. She had tried scrubbing the grout lines herself with a toothbrush and standard supermarket cleaners but never got the result she wanted.
Fortunately she was lucky to find Tile Doctor from the internet and I was asked to pop over and take a look to see what could be done. I was confident we could make a big difference so I went through the options with her and give her price for the job. She was happy with the price and we agreed a date for me to return and complete the work.
For grout lines cleaning I used Tile Doctor Grout Colorant Pre-Treat Cleaner, which successfully removes dirt, soil, soap scum and hard water deposits from grout joints. The product was sprayed on to the grout and left to dwell and seep into the pores for approximately five minutes to break down the soap scum and dirt before being scrubbed in using a stiff grout brush. The cleaning was successful but there were still few mouldy spots left. On these spots I used Tile Doctor Mould Away Spray that is meant for quick removal of mould from grout and silicone. One again product got sprayed on grout lines and left to dwell for five minutes and then scrubbed with stiff grout brush and then rinsed with clean water. After I had finished cleaning I express dried the tile and grout using high power heat gun.
With the area nice and dry, I had to choose the matching colour for the existing grout. There are ten colours to choose from the Tile Doctor range of Grout Colourant and on this occasion we chose Limestone as the best colour to match the tile.
The colourant is easily applied directly to the grout and in this case I applied two coats. The product is epoxy based and completely seals and rejuvenates the appearance of the grout, which not only drastically improves appearance it also makes it much easier to clean in the future. After applying the re-colourant I buffed all grout colorant excess off the tiles and the shower cubicle was ready.
My customer was very satisfied with the work and left the following comment on the Tile Doctor Feedback system
“Really, really happy with the service Tony provided and the recommendations he suggested. The work was carried out in a highly professional manner, to a high standard. I have already recommended him to friends. Thank you”
Tony Olmet
Greater Manchester Tile Doctor
 Christopher's Kitchen & Bath
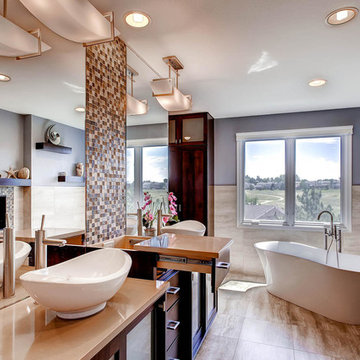
A large, less restrictive space can sometimes be a challenge to remodel as the possibilities are truly unlimited. The goal was to create a functional and warm space that still felt open, clean and utilized the large space well.
Custom glass panel cabinetry with sliding doors and a central drawer bank features ample storage and even multiple standard outlets inside. Vessel sinks sit atop the custom quartz counters that compliment the stone resin free standing bath.
On the back side of the central wall is a walk in, from both sides, his and hers shower. Custom tile through out ties both sides of this large bath together. The shower features multiple niches.
 Tile Doctor Ltd
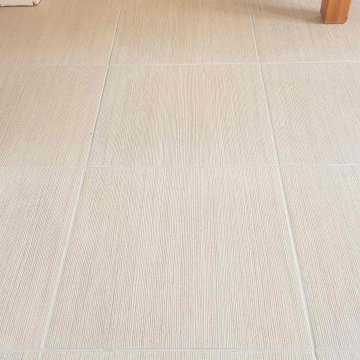
Recently it seems I am getting called out to an increasing number of new builds to sort out patchy grout issues. The reason why there have been so many issues arising is a bit of a mystery, but I put it down to a combination of things like poor quality grout, rushed installations, wet subfloors and the use of different batches.
This recently built house in the village of Darton is a great example and in this case, I suspect two different batches of the same grout had been applied. Darton by the way is a small village in the Borough of Barnsley.
Invariably these problems are picked up by the new owner on their snagging list, with the tiler long gone and the builder keen to get their final payment it is always a tricky situation to resolve. I find the best solution is to apply a Tile Doctor Grout Colourant, it’s a much quicker process than removing the old grout and replacing with new. Most new homeowners would not appreciate us ripping up their brand-new rooms and generating lots of dust in the process! Also, by using the Tile Doctor Grout Colourant it adds a barrier of the grout preventing dirt from discolouring it further down the line.
Even though the house was brand new, the Porcelain Tiled floor was not looking great. The client was happy for me to go ahead and would take up the bill with the housebuilder. I first pre-treated it with Tile Doctors Grout Colourant Pre-Treatment. This removes any contamination from the grout which might affect the adhesion of the colourant and being an acid, it also etches the surface of the grout to ensure a superior bond with the colourant.
The client chose our Light Grey colour which is one of 10 colours we offer. Once the pre-treatment had been applied, scrubbed, rinsed, and vacuumed away the floor was left to dry. Once dry we started applying the colourant, this is done with a small brush (a toothbrush is ideal) carefully scrubbing colourant into each grout joint and wiping off any excess that gets on the tiles before it is able to dry.
Once complete the newly coloured grout lines totally transformed the floor and because the grout colorant is epoxy based the grout lines will stay stain free and never get dirty.
The porcelain tiles were factory sealed so there is no need to apply a seal to the floor.
I recommended the use of Tile Doctor Neutral Tile Cleaner to keep the floor in the best condition. It is pH neutral so is far less harsh on the surface than the everyday household cleaners available. It has a minty fragrance and is mild enough to use daily. They were very happy that the floor now looked as it should have from the start and was the finishing touch to their beautiful new home.
Matthew Lovett
South Yorkshire Tile Doctor
 Christopher's Kitchen & Bath
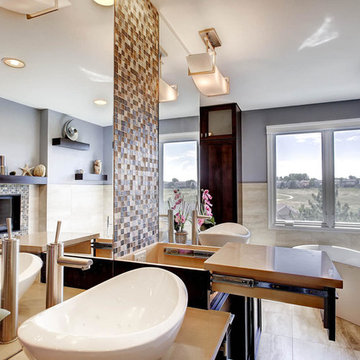
A large, less restrictive space can sometimes be a challenge to remodel as the possibilities are truly unlimited. The goal was to create a functional and warm space that still felt open, clean and utilized the large space well.
Custom glass panel cabinetry with sliding doors and a central drawer bank features ample storage and even multiple standard outlets inside. Vessel sinks sit atop the custom quartz counters that compliment the stone resin free standing bath.
On the back side of the central wall is a walk in, from both sides, his and hers shower. Custom tile through out ties both sides of this large bath together. The shower features multiple niches.
 Woodmaster Kitchens
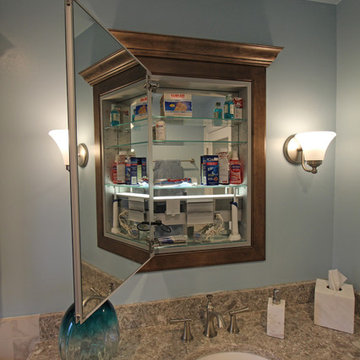
The white stone tile in this traditional bathroom design is beautifully offset by the warm wood tones of the cabinetry. Recessed cabinetry ensures maximum use of available space in this room, including a recessed medicine cabinet, partially recessed toilet topper cabinet, and recessed linen cabinet. The medicine cabinet is custom framed to match the vanity. The large shower offers luxurious bathing with rainfall and slide bar showerheads, a fold-down wooden shower seat, and built in storage niche including a mosaic tile detail. The floor includes a tile rug pattern and underfloor heating.
47