
Search results for "Typically refers" in Home Design Ideas

 cobykane
Water Treatment and Wastewater Recycling Plant in Oil and Gas Production
WATERMAN ENGINEERS AUSTRALIA
Introduction
Water is a critical component in oil and gas processing, playing a crucial role in various stages of exploration, production, and refining. However, water handling in such processes poses serious challenges, mainly in connection with treating high TDS and salinity water. The situation is even more serious in oilfield sites, gas field sites, and exploratory sites where the need for water recycling and treatment is always necessary to minimize the impact on the environment and to keep operational costs at a minimum.
The oil and gas industry has seen a growing concern toward water treatment and recycling. These processes underline the sustainability of operations, license to operate, and low environmental footprint. This paper discusses the roles water treatment plants can play in mitigating the problems of high TDS and salinity during oil and gas production by recycling and reusing water to minimize waste and environmental harm.
The Water Challenges in Oil and Gas Production
Water finds its application on a large scale in the oil and gas industry for several purposes, such as in drilling, hydraulic fracturing, cooling, and hydrocarbon processing. The water used in these aforementioned processes frequently comes into contact with a wide array of contaminants, among which are hydrocarbons, heavy metals, several various chemicals, and high concentrations of dissolved salts. This contaminated water, often referred to as produced water, produces a great environmental risk if not properly treated.
Produced water typically contains high TDS concentrations, including salts, minerals, and other dissolved solids. Reservoir location and depth can make the salinity of this water vary widely. For many produced waters, these TDS values are very high and not suitable for direct discharge or reuse without treatment. The presence of salts and other dissolved solids can result in scaling, corrosion, and other operational problems of equipment, pipelines, and storage vessels.
For details visit: https://watermanaustralia.com/water-treatment-and-wastewater-recycling-plant-in-oil-and-gas-production/

 Zelaya Properties LLC
We used: Custom cherry cabinetry in Arts & Crafts Shaker style by Kabinart in Boulder and Espresso stains. Liberty Hardware Venetian bronze 1-1/2" cabinet knobs. KitchenAid Architect II Series 22 CF counter-depth French door refrigerator. KitchenAid Architect Series II 27" convection single wall oven. KitchenAid 36" 6-burner dual fuel freestanding commercial-style range. KitchenAid Architect II Series 24" dishwasher. Sharp Insight Pro Series 24" built-in microwave drawer (Model #KB6524PS). Crystorama Solaris 12" wide pendant lights in English bronze. Granite countertops in Brown Fantasy. 3"x6" polished marble backsplash.
Paint colors:
Walls: Glidden Silver Cloud 30YY 63/024
Ceilings/Trims/Doors: Glidden Swan White GLC23
Robert B. Narod Photography

 Gallery KBNY
This brownstone renovation was a full gut project in every sense of the word. On top of installing new floors, a kitchen and bath renovation, and all the typical restoration and refinishing involved in a brownstone built in 1899, we also completely updated the exterior, constructed a balcony that was not originally there, and converted the space from a single-family home into an an owner’s triplex. A newly separated studio rental on the garden level offers the opportunity for supplemental income, an uncommon and welcome addition to a New York brownstone.
A TRANSITIONAL GEM
The result is a two-family brownstone that perfectly combines classic townhouse living with today’s modern needs, including SmartHome technology that we installed to control Bluetooth speakers, Nest thermostats, and the security system.
The overall aesthetic goal was to pay homage to the historical periods the brownstone has lived through in a cohesive way that is the hallmark of modern transitional style.
In the kitchen, white Shaker-style cabinetry, a subway tile backsplash, and marble rather than quartz countertops bring a classically upscale sensibility. To modernize the space further, we opened up the back wall to create floor-to-ceiling windows that are also doors, opening up into the newly built balcony.
TIMELY TOUCHES
This brownstone renovation included many quintessential elements, such as millwork like the ceiling medallions. We restored some and custom built others, perfectly recreating their original appearance.
The heated master bathroom is now serene, with a walk-in shower featuring a subtly modern linear drain. A herringbone Carrera marble tiled floor and marble slab sink complete the scene. In the powder room, we embraced a contemporary look by pairing dark hexagonal floors with light chevron tiles, accented with dramatic navy blue wallpaper. With its clear-cut 1920s-style, we selected the wall sconce to reference one of the brownstone’s earlier eras.
DESIGN DETAILS
Natural oak herringbone floors we installed throughout the entire home bring a modern yet warm touch. We restored the wood-burning marble fireplace, which is fully functioning. An elegant staircase with a custom-crafted black wooden banister and white balusters winds up and down alongside a real brick interior wall that we restored and refinished.
In this brownstone renovation, we were also able to create ceiling height, an unexpected yet aesthetically pleasing side benefit. When working on the joists and beams to level out the floors (a common issue in pre-war renovations) we added ceiling height in the main parlor floor by taking the second floor and raising the ceiling an entire foot. The end result is a main floor with stunning 9-foot ceilings.
SOME HIGHLIGHTS
- Solid natural oak herringbone floors throughout
- A fully restored, refinished, and functioning wood burning fireplace with a marble mantle
- Complete exterior renovation of the facade, cornices, windows, mouldings, and even the ironwork, including the railings leading up to the stoop and those facing the street
- A brand new central air and heating system with uniquely modern vents – look above the couch in the living room with the fuzzy rug and large painting
Considering a brownstone renovation? Contact us today! We specialize in brownstone renovations in New York as well as all pre-war apartments. When you work with a design-and-build firm like Gallery to renovate your brownstone, you get the full range of our expertise in working with all the finest details and pre-war architectural elements of these classic New York spaces. We also handle every step of the process, from filing permits and organizing schedules to sourcing custom pieces and building entirely new rooms (or even balconies). Call us for a free initial consultation when you’re ready.
Find the right local pro for your project

 Moderne Builders
Gorgeous master bath with dramatic retro "wave" tile. Peak Photography
Example of a 1950s bathroom design in Los Angeles
Example of a 1950s bathroom design in Los Angeles

 Lemon Remodeling & Services
Lemon Remodeling Earns Diamond Certified®!
Scores Highest in Quality in Local Service Company Customer Satisfaction Study
Lemon Remodeling a design and build construction business in the bay area, has been awarded the prestigious Diamond Certified symbol after being rated highest in quality in ongoing customer satisfaction ratings performed by American Ratings Corporation.
In order to earn Diamond Certified, a local service company must apply to be rated by American Ratings Corporation (ARC) and pass each step of its twelve-step rating and certification process. ARC actually pulls a random sample of past customers from the applicant company’s files and surveys typically 100 customers by telephone. Not only do the customers rate the applicant company on a 1 to 10 scale for quality, but also they indicate their willingness to return or refer other consumers to the company. Most companies can’t pass the rating because a customer satisfaction survey score of greater than 90 on a 100 scale is required. In addition, ARC verifies liability and workers’ compensation insurance, state license status, complaint status, business practices, financial stability and legal judgment status. Additionally, ongoing customer satisfaction surveys are conducted to ensure the Diamond Certified Company is maintaining its high customer satisfaction.
“Our entire team at Lemon Remodeling is pleased to earn this prestigious award. And, it is especially gratifying because it’s based on our customers’ perception of our quality,” said the owner of Lemon Remodeling and Services.
“Personally, I’ve been focused on rating local service companies for the past 20 years and I’m always impressed at how certain organizations are so focused on satisfying their customers. Your Company Name is one of those special companies,” said the Founder and CEO of American Ratings Corporation.
About American Ratings Corporation
American Ratings Corporation’s mission is to define excellence and to identify for consumers the highest quality local companies. It rates local service companies in Northern California and awards the Diamond Certified symbol to companies rated highest in quality. It backs these companies for consumers by providing, when necessary, Diamond Certified mediation services and a money-back guarantee. For more information, visit www.diamondcertified.org or call 800-738-1138.
 Talon Construction Inc.
An open floor plan kitchen renovation essentially merges your kitchen area with another living space, typically the dining room or living room, creating a more spacious and interconnected feel.
Opening Up the Space and Removing walls:
This is the key step, taking down non-load-bearing walls that separate the kitchen from the living or dining area. You'll want to consult a structural engineer to ensure any remaining walls can support the weight of the house.
Considering beams or columns:
Depending on the layout and size of the opening, you might need exposed beams or support columns to maintain structural integrity. These can be incorporated into the design as a stylish feature.
Kitchen Repositioning and Functionality:
Rethinking the work triangle: The work triangle refers to the refrigerator, sink, and stove - the most used areas in a kitchen. In an open plan, you'll want to ensure these elements remain close together for an efficient workflow. This might involve rearranging cabinetry or appliances.
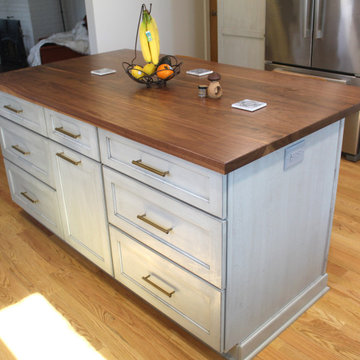
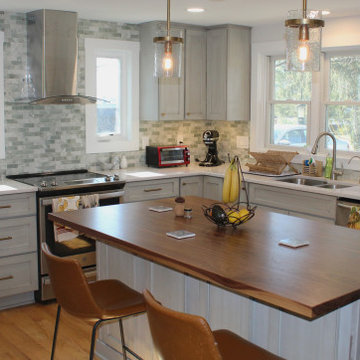
Creating a focal point: An island is a popular choice in open concept kitchens. It can house the sink, cooktop, provide additional storage and counter space, and even offer seating for guests to chat while you cook. Peninsula counters can also be used for a similar effect.
Unifying Design Elements: Use consistent flooring throughout the open area to create a cohesive flow. You can also extend the same color scheme or material accents (like backsplash tile) from the kitchen into the adjoining space.
Letting in Light: Maximize natural light by incorporating large windows or skylights. This will brighten the entire open area and make it feel even more spacious.
Storage Solutions: With an open plan, you might lose some wall space for cabinets. Consider built-in storage solutions like pantry cabinets or creative mudroom cabinetry to ensure you have enough storage for your kitchenware.
An open floor plan kitchen renovation can be a transformative project, creating a light-filled and social space in your home. By carefully planning the layout, incorporating design elements that unify the space, and addressing practical considerations with lighting and storage, you can achieve a beautiful and functional open concept kitchen.
 Talon Construction Inc.
An open floor plan kitchen renovation essentially merges your kitchen area with another living space, typically the dining room or living room, creating a more spacious and interconnected feel.
Opening Up the Space and Removing walls:
This is the key step, taking down non-load-bearing walls that separate the kitchen from the living or dining area. You'll want to consult a structural engineer to ensure any remaining walls can support the weight of the house.
Considering beams or columns:
Depending on the layout and size of the opening, you might need exposed beams or support columns to maintain structural integrity. These can be incorporated into the design as a stylish feature.
Kitchen Repositioning and Functionality:
Rethinking the work triangle: The work triangle refers to the refrigerator, sink, and stove - the most used areas in a kitchen. In an open plan, you'll want to ensure these elements remain close together for an efficient workflow. This might involve rearranging cabinetry or appliances.
Creating a focal point: An island is a popular choice in open concept kitchens. It can house the sink, cooktop, provide additional storage and counter space, and even offer seating for guests to chat while you cook. Peninsula counters can also be used for a similar effect.
Unifying Design Elements: Use consistent flooring throughout the open area to create a cohesive flow. You can also extend the same color scheme or material accents (like backsplash tile) from the kitchen into the adjoining space.
Letting in Light: Maximize natural light by incorporating large windows or skylights. This will brighten the entire open area and make it feel even more spacious.
Storage Solutions: With an open plan, you might lose some wall space for cabinets. Consider built-in storage solutions like pantry cabinets or creative mudroom cabinetry to ensure you have enough storage for your kitchenware.
An open floor plan kitchen renovation can be a transformative project, creating a light-filled and social space in your home. By carefully planning the layout, incorporating design elements that unify the space, and addressing practical considerations with lighting and storage, you can achieve a beautiful and functional open concept kitchen.
Sponsored
Columbus, OH

Hope Restoration & General Contracting
Columbus Design-Build, Kitchen & Bath Remodeling, Historic Renovations
 Talon Construction Inc.
An open floor plan kitchen renovation essentially merges your kitchen area with another living space, typically the dining room or living room, creating a more spacious and interconnected feel.
Opening Up the Space and Removing walls:
This is the key step, taking down non-load-bearing walls that separate the kitchen from the living or dining area. You'll want to consult a structural engineer to ensure any remaining walls can support the weight of the house.
Considering beams or columns:
Depending on the layout and size of the opening, you might need exposed beams or support columns to maintain structural integrity. These can be incorporated into the design as a stylish feature.
Kitchen Repositioning and Functionality:
Rethinking the work triangle: The work triangle refers to the refrigerator, sink, and stove - the most used areas in a kitchen. In an open plan, you'll want to ensure these elements remain close together for an efficient workflow. This might involve rearranging cabinetry or appliances.
Creating a focal point: An island is a popular choice in open concept kitchens. It can house the sink, cooktop, provide additional storage and counter space, and even offer seating for guests to chat while you cook. Peninsula counters can also be used for a similar effect.
Unifying Design Elements: Use consistent flooring throughout the open area to create a cohesive flow. You can also extend the same color scheme or material accents (like backsplash tile) from the kitchen into the adjoining space.
Letting in Light: Maximize natural light by incorporating large windows or skylights. This will brighten the entire open area and make it feel even more spacious.
Storage Solutions: With an open plan, you might lose some wall space for cabinets. Consider built-in storage solutions like pantry cabinets or creative mudroom cabinetry to ensure you have enough storage for your kitchenware.
An open floor plan kitchen renovation can be a transformative project, creating a light-filled and social space in your home. By carefully planning the layout, incorporating design elements that unify the space, and addressing practical considerations with lighting and storage, you can achieve a beautiful and functional open concept kitchen.
 Talon Construction Inc.
An open floor plan kitchen renovation essentially merges your kitchen area with another living space, typically the dining room or living room, creating a more spacious and interconnected feel.
Opening Up the Space and Removing walls:
This is the key step, taking down non-load-bearing walls that separate the kitchen from the living or dining area. You'll want to consult a structural engineer to ensure any remaining walls can support the weight of the house.
Considering beams or columns:
Depending on the layout and size of the opening, you might need exposed beams or support columns to maintain structural integrity. These can be incorporated into the design as a stylish feature.
Kitchen Repositioning and Functionality:
Rethinking the work triangle: The work triangle refers to the refrigerator, sink, and stove - the most used areas in a kitchen. In an open plan, you'll want to ensure these elements remain close together for an efficient workflow. This might involve rearranging cabinetry or appliances.
Creating a focal point: An island is a popular choice in open concept kitchens. It can house the sink, cooktop, provide additional storage and counter space, and even offer seating for guests to chat while you cook. Peninsula counters can also be used for a similar effect.
Unifying Design Elements: Use consistent flooring throughout the open area to create a cohesive flow. You can also extend the same color scheme or material accents (like backsplash tile) from the kitchen into the adjoining space.
Letting in Light: Maximize natural light by incorporating large windows or skylights. This will brighten the entire open area and make it feel even more spacious.
Storage Solutions: With an open plan, you might lose some wall space for cabinets. Consider built-in storage solutions like pantry cabinets or creative mudroom cabinetry to ensure you have enough storage for your kitchenware.
An open floor plan kitchen renovation can be a transformative project, creating a light-filled and social space in your home. By carefully planning the layout, incorporating design elements that unify the space, and addressing practical considerations with lighting and storage, you can achieve a beautiful and functional open concept kitchen.
 Talon Construction Inc.
An open floor plan kitchen renovation essentially merges your kitchen area with another living space, typically the dining room or living room, creating a more spacious and interconnected feel.
Opening Up the Space and Removing walls:
This is the key step, taking down non-load-bearing walls that separate the kitchen from the living or dining area. You'll want to consult a structural engineer to ensure any remaining walls can support the weight of the house.
Considering beams or columns:
Depending on the layout and size of the opening, you might need exposed beams or support columns to maintain structural integrity. These can be incorporated into the design as a stylish feature.
Kitchen Repositioning and Functionality:
Rethinking the work triangle: The work triangle refers to the refrigerator, sink, and stove - the most used areas in a kitchen. In an open plan, you'll want to ensure these elements remain close together for an efficient workflow. This might involve rearranging cabinetry or appliances.
Creating a focal point: An island is a popular choice in open concept kitchens. It can house the sink, cooktop, provide additional storage and counter space, and even offer seating for guests to chat while you cook. Peninsula counters can also be used for a similar effect.
Unifying Design Elements: Use consistent flooring throughout the open area to create a cohesive flow. You can also extend the same color scheme or material accents (like backsplash tile) from the kitchen into the adjoining space.
Letting in Light: Maximize natural light by incorporating large windows or skylights. This will brighten the entire open area and make it feel even more spacious.
Storage Solutions: With an open plan, you might lose some wall space for cabinets. Consider built-in storage solutions like pantry cabinets or creative mudroom cabinetry to ensure you have enough storage for your kitchenware.
An open floor plan kitchen renovation can be a transformative project, creating a light-filled and social space in your home. By carefully planning the layout, incorporating design elements that unify the space, and addressing practical considerations with lighting and storage, you can achieve a beautiful and functional open concept kitchen.
 AVI Windows & Doors
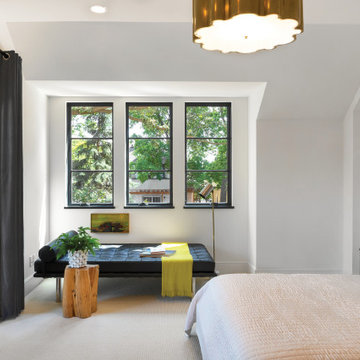
Modern design with narrow, black frame crank open casement windows from Marvin Elevate. Rich wood interior with a strong, durable fiberglass exterior. AVI Windows and Doors supplies and installs your windows.

 Curtis Adams
Shrubby St. John's wort early in blooming period. Location is in west central Maryland. Photo by Curtis Adams, July, 2015.
Photo of a rustic landscaping in DC Metro.
Photo of a rustic landscaping in DC Metro.

 B Smart Builders
Photos by Norman & Young, Design selections by Stacy Buky with WestFort Home
Example of a farmhouse home bar design in Dallas
Example of a farmhouse home bar design in Dallas
Sponsored
Columbus, OH
Hope Restoration & General Contracting
Columbus Design-Build, Kitchen & Bath Remodeling, Historic Renovations

 Ellie Lillstrom Photography
Photo: A Darling Felicity Photography © 2015 Houzz
Example of a mid-sized country porcelain tile mudroom design in Seattle with green walls
Example of a mid-sized country porcelain tile mudroom design in Seattle with green walls

 Advance Design Studio, Ltd.
Jennifer and Dan have lived in their Deer Park Illinois home for 15 years, slowly making minor fixes like painting and decorating; but they had a new plan for their kitchen the entire time. An awkwardly placed garage door, and an island cooktop with a terrible downdraft made a full-scale kitchen remodel an absolute must. Jennifer had many ideas in mind and wanted to work with a company that could provide high-end work, while partnering with a designer that would tailor the kitchen to her ideas.
She was intrigued by the phrase “Common Sense Remodeling” in Advance Design’s feature she discovered while perusing an issue of the community’s Quintessential Barrington Magazine. Doing further research on the company’s website, as she looked through project profiles and read about Advance Design’s “Common Sense Remodeling” philosophy, she promptly scheduled an appointment to see if the people and ideas she read about were truly who they said they were. The more she read, the more she knew that the “Common Sense” approach to remodeling they described was exactly the type of company she was looking for.
The partnership was sealed after an initial consultation with Owner Todd Jurs and Project Designer Michelle Lecinski. They displayed a combination of friendliness, professionalism and respect that was unmatched by any of the other companies Jennifer talked to. She knew that with Advance Design, she would be able to retain the vision that she had in mind with high-quality craftsmanship.
“I reached out to Advance Design because of the ‘Common Sense Remodeling’ tagline,” Jennifer said. “That’s what lingered for me”. “Advance Design was the most respectful- of the house and of my design ideas, and the most professional of the handful of companies that looked at my project”.
Soon after the meeting Jennifer began working with Michelle on the project design. They quickly developed chemistry. Jennifer loved how Michelle researched and located every detail that Jennifer wanted for the kitchen. Between the two of them, every concept and idea was worked through and perfected. “Jennifer had definite ideas about what she wanted the new kitchen to look like, she just didn’t know how to bring it all together. We worked together really well to make her ideas into the practical reality necessary for a well-functioning kitchen, with the look and feel that she had envisioned”, says Michelle.
“Michelle was wonderful in using the CAD system she would show me new drawings every time we changed the layout while working through the design,” Jennifer said. “She was a really wonderful partner in execution, she made sure everything happened quickly and easily.”
The finished design drew out elements of Jennifer’s style and personality. The pair call the look “sophisticated farmhouse” to describe the kitchen renovation to family and friends. The result was a beautifully crafted, authentic-feeling space that satisfied Jennifer’s dreams 15 years in the making. The whole project consisted of a kitchen remodel, mudroom upgrade with powder room, and garage entry relocation. “The projects I personally like the best, are the ones that put the client’s dreams on display,” Project Designer Michelle said. “And this is one of those projects.”
The main focal point of the kitchen is custom zinc and brass ventilation hood with a vintage sheen, which was hand made to order by a small company in Indiana named Vogler Metalworking. “It’s like sculpture, a true work of art”, says Jennifer. Your eye is immediately drawn towards this elegant yet practical hood that eliminated the home’s downdraft problem and added a striking conversation piece at the same time. The carpenters had to use special gloves when transporting and installing it, so they didn’t smudge it with fingerprints. The beautiful hood centers proudly over the stunning black enamel and brass LaCornue Range. “I had a friend who had a LaCornue range and after learning how easy it was to cook perfect meals, I was convinced I wanted to have one”, says Jennifer. This unique, breathtaking combination anchors the entire kitchen and is apparent immediately as you walk into the great room the surrounds the space.
DuraSupreme Crestwood cabinets with a Kendall Panel add function and sophistication. A custom gray paint color paired with a storm blue was developed so that the new kitchen looked like it belonged to the existing space. Unlacquered brass faucets and hardware were important to Jennifer because she wanted the living finishes to age over time. Remarkable brass diamond mesh cabinet door inserts imported from the UK continue to add this one-of-a-kind kitchen renovation; giving it a “you won’t see this everywhere” quality. The use of old railcar flooring for the coffee bar countertop and reclaimed oak for the open shelving gives an authenticity to the space uncommon in kitchens today.
Jennifer and Michelle fell in love with the Limestone Grey Stone while they were investigating unique island countertop ideas. They liked the fact that the limestone as a living finish will age and change over time. Calcutta Miel Quartz countertops made for an excellent pairing around the perimeter, as it’s durable and perfect for cooking preparations. A textured white subway tile backsplash that runs to the ceiling keeps your eye moving towards the open shelving, and to the main focal point of the stunning range hood combination.
“The kitchen functions beautifully, and it’s gorgeous,” beams Jennifer as she gestures with both hands while smiling ear to ear. “The most important thing was I wanted a kitchen that had a wonderful flow, cooked beautiful meals and was a great gathering place for family and friends, and this space does that perfectly! Beauty wise, it turned out exactly how I had envisioned. I felt the function part was the hardest part, and that was nailed”!
Relocating the garage entry to the new mudroom was a huge priority and has finally separated the family’s arriving home functions from their kitchen. Now coats and shoes and bags have their own area for dropping once members arrive home. Matching gray DuraSupreme cabinetry helped create gorgeous, purposeful lockers for the family. A reclaimed vintage sink and custom wall paper were added to the tiny powder room to beautify the once previously only functional space. Advance Design was even able to create a custom space for their dog to sleep while the family is away.
“It was unbelievable that a project of this size was completed in such a short time, and I think that’s because of the large amount of planning and preparation that went into it,” Jennifer marveled, “When we started, we were ready, and everything was prepared”.
When it came to execution, Project Manager Justin Davis and his crew were quick, accessible, and organized. Projects like this kitchen are typically completed in as little as 8-10 weeks. Jennifer’s kitchen however despite the relocation of some challenging HVAC in a soffit and moving of an exterior door was completed remarkably fast in part because the team was working with an existing tile floor that ran throughout the first floor that the client really loved.
“You get to know these people really well because they’re living in your house while you’re living in your house. They were so fast and really good, it didn’t take as long as even planned” reported Jennifer. “I would text Justin and he always responded almost immediately. I got to know all the guys who were working in our house and they were all wonderful people”.
Details in a customized kitchen like this one require skill and care from the people who install it. “All the guys on the job were skilled at what the did. I wanted small details like little feet to look like furniture, that is where their carpentry skill came in to make these all perfect”, said Jennifer. “The tile guys were wonderful. They even let me determine how I wanted the texture with the grout to appear for a salt and pepper look; now that is a very skilled trade person making it custom”.
In Jennifer’s interview, she continued to reference Advance Design’s “Common Sense Remodeling”, so I took a minute to ask her exactly what that phrase meant to her and how it played out in her experience with her project and the Advance Design team. Here is what she said: “I was intrigued about Common Sense Remodeling and in my head that there would be clear costs and prices, great communication between the design team, the execution team and me”, said Jennifer. They did deliver on that, it was so clear about the cost breakdown, what I could expect from everyone who came to my house, and everything that we had ordered. That to me is the Common Sense”!
It’s great to see a client take literally our assertion that a well-planned remodeling project is simply “Common Sense”! She anticipated each step of the way would be clear, concise, and predictable, all the while protecting the outcome due to the careful upfront planning. “Advance Design delivered on their ‘Common Sense Remodeling’ promise,” Jennifer said. “From the design team, to the execution team - everything was straight forward like I imagined. The project turned out exactly how I envisioned, I enjoyed this process and absolutely would recommend Advance Design Studio to anyone.”
 Architect
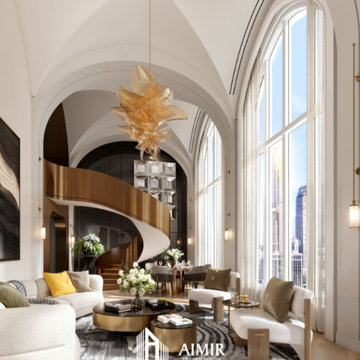
Not all architectural imagery is created equal. Some renderings look obviously computer-generated, with flat lighting and plastic-looking materials that fail to convince viewers. Others are so precise that they are indistinguishable from photographs. That second category, realistic architectural visualization rendering, has become the standard expectation for architects, developers, and marketers who need imagery capable of withstanding close scrutiny from investors, buyers, and planning authorities. As audiences grow more visually literate, the tolerance for obviously artificial, video-game-like imagery in professional presentations continues to shrink.
What Sets Realistic Visualization Apart
Realistic architectural visualization goes beyond simply modeling a building in three dimensions. It requires physically accurate lighting simulation, true-to-life material properties, and careful attention to the small imperfections that make real-world photography convincing, such as subtle reflections, ambient occlusion in corners, and natural depth of field. The goal is an image that a viewer would believe was captured by a camera on-site rather than generated by software. Achieving that level of believability typically means dozens of small adjustments layered on top of one another rather than any single dramatic setting.
Realistic Versus Stylized Rendering Approaches
Stylized or conceptual renderings still have their place, particularly in early design phases when a looser, more artistic representation helps convey mood without locking in every detail. But once a project moves toward marketing, investment, or permitting, stakeholders need to see exactly what they are getting. Realistic visualization removes ambiguity, showing true material colors, accurate proportions, and honest lighting conditions rather than idealized abstractions. Understanding which approach a project actually needs at each stage helps clients avoid paying for a level of polish that a given milestone does not yet require.
Why Realism Builds Client and Buyer Confidence
Buyers and investors are understandably skeptical of overly polished or unrealistic marketing images. When a rendering looks convincingly real, it builds trust rather than raising doubts about what the finished project will actually look like. This is especially important in real estate presales, where buyers are committing significant sums based largely on visual material rather than a finished physical space. A rendering that later turns out to have misrepresented the finished product can also create legal and reputational exposure for developers, making accuracy a genuine business risk rather than just an aesthetic preference.
The Technical Pillars Behind Every Realistic Scene
Achieving true realism depends on several technical disciplines working together: physically based rendering engines that simulate how light actually behaves, high-resolution texture libraries that replicate real materials like stone, wood, and glass, and careful camera work that mimics real photographic lenses and exposure. Post-production adds a final layer of color grading and atmospheric effects that ties everything together into a cohesive, believable image. Each of these pillars depends on the others; even flawless material work can be undermined by lighting that behaves in a physically implausible way.
Applications Across Residential, Commercial, and Institutional Projects
Realistic visualization serves a wide range of building types, from single-family homes and luxury condominiums to office towers, hotels, schools, and healthcare facilities. Each typology has its own material palette and lighting expectations, and an experienced studio adjusts its approach accordingly, whether that means warm, inviting tones for a residential lobby or crisp, professional lighting for a corporate headquarters. Institutional clients such as universities and hospitals often have additional requirements around accessibility signage and wayfinding, which need to be represented accurately alongside the architecture itself.
How AIMIR CG Delivers Photorealistic Accuracy
Our studio specializes in realistic architectural visualization rendering that holds up under close inspection. Every project moves through a disciplined pipeline of modeling, texturing, lighting, and post-production review, with artists cross-checking material references and lighting studies against real-world photography. This attention to detail is why clients consistently describe our end product as impressive and our process as easy to work with. A dedicated quality review stage before delivery catches inconsistencies that might otherwise slip through a faster, less structured pipeline.
Common Challenges in Achieving True Realism
Realistic rendering is technically demanding. Common obstacles include accurately simulating how light bounces between surfaces, matching material reflectivity to real product specifications, and avoiding the uncanny, slightly artificial look that comes from over-processed images. Overcoming these challenges requires experienced artists who understand both the science of light and the craft of photography, not just software proficiency. Rushed production schedules are often the real culprit behind unconvincing renderings, since realism typically requires several iterative passes rather than a single render.
What to Look for in a Realism-Focused Rendering Studio
When evaluating a rendering partner, review their portfolio critically. Do the images include convincing shadow detail and material variation, or do surfaces look uniformly smooth and artificial? Ask about their revision process and how closely they work with architects to source accurate material and lighting references, since realism is ultimately the product of disciplined collaboration, not a single software setting. It also helps to ask for examples of past projects in a similar building type, since a studio's strengths can vary across typologies.
Ready for Renderings That Look Real
If your project deserves imagery that can stand up to the scrutiny of investors, buyers, and planning boards, AIMIR CG is ready to help. Our team combines technical precision with artistic judgment to deliver visualization that looks and feels genuinely real. Contact us to discuss how photorealistic rendering can strengthen your next presentation or marketing campaign, and let us show you examples from projects similar to your own.
 Mohammad Khan
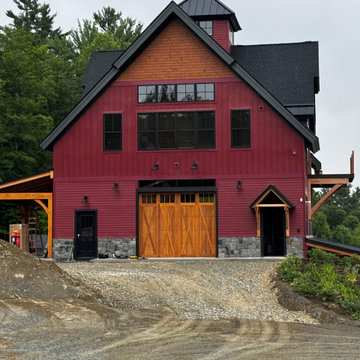
This custom modern farmhouse and timber frame barndominium build showcases the craftsmanship and detail of a high-end custom home builder specializing in farmhouse architecture and barn-style homes. Designed to blend rustic charm with modern functionality, the project features a striking red board-and-batten barn exterior, natural wood accents, exposed timber trusses, and expansive windows that capture scenic outdoor views.
Exterior Construction & Structural Work
The home’s exterior was constructed using durable board-and-batten siding, finished in a deep barn red tone to reflect traditional agricultural architecture while maintaining a modern farmhouse aesthetic. Black trim, metal roofing elements, and custom wood garage doors create a bold contrast that enhances the structure’s visual impact.
The lower portion of the structure includes a natural stone veneer foundation, providing both durability and architectural grounding to the barn-style design. Custom barn-style garage doors and timber porch structures reinforce the authentic farmhouse appearance while maintaining contemporary performance standards.
A post-and-beam structural system was incorporated to support the upper living spaces and open interior spans, allowing for large window openings and vaulted interior ceilings.
Exterior Highlights
Custom board and batten farmhouse siding
Stone veneer foundation façade
Handcrafted wood barn garage doors
Black metal roof accents and trim
Large farmhouse windows for natural light
Covered outdoor living space with timber posts
Site preparation, grading, and driveway installation
Interior Construction & Architectural Features
Inside the home, the design centers around a dramatic vaulted timber frame ceiling constructed with exposed wood trusses and tongue-and-groove wood planking. This architectural feature creates a warm, open environment typical of luxury modern farmhouse interiors.
Large windows line the exterior walls to bring natural light into the space while framing views of the surrounding landscape. Natural hardwood flooring runs throughout the living spaces, adding warmth and durability.
The master bedroom suite highlights the timber craftsmanship with a cathedral ceiling supported by exposed wood beams, complemented by large picture windows and transom windows to maximize daylight.
Interior Highlights
Custom timber frame trusses
Tongue and groove wood ceiling panels
Vaulted cathedral farmhouse ceilings
Oversized farmhouse windows
Natural hardwood flooring
Open concept farmhouse layout
Custom trim and wood finishes
Architectural Design & Style
The design reflects a blend of modern farmhouse architecture and classic barn construction, often referred to as a luxury barndominium style home. The combination of bold barn colors, exposed structural wood, and natural materials creates a timeless rural aesthetic with modern comfort.
This project demonstrates the capabilities of a custom farmhouse builder specializing in timber frame homes, barndominiums, and luxury rural residences.
 Gallery KBNY
This brownstone renovation was a full gut project in every sense of the word. On top of installing new floors, a kitchen and bath renovation, and all the typical restoration and refinishing involved in a brownstone built in 1899, we also completely updated the exterior, constructed a balcony that was not originally there, and converted the space from a single-family home into an an owner’s triplex. A newly separated studio rental on the garden level offers the opportunity for supplemental income, an uncommon and welcome addition to a New York brownstone.
A TRANSITIONAL GEM
The result is a two-family brownstone that perfectly combines classic townhouse living with today’s modern needs, including SmartHome technology that we installed to control Bluetooth speakers, Nest thermostats, and the security system.
The overall aesthetic goal was to pay homage to the historical periods the brownstone has lived through in a cohesive way that is the hallmark of modern transitional style.
In the kitchen, white Shaker-style cabinetry, a subway tile backsplash, and marble rather than quartz countertops bring a classically upscale sensibility. To modernize the space further, we opened up the back wall to create floor-to-ceiling windows that are also doors, opening up into the newly built balcony.
TIMELY TOUCHES
This brownstone renovation included many quintessential elements, such as millwork like the ceiling medallions. We restored some and custom built others, perfectly recreating their original appearance.
The heated master bathroom is now serene, with a walk-in shower featuring a subtly modern linear drain. A herringbone Carrera marble tiled floor and marble slab sink complete the scene. In the powder room, we embraced a contemporary look by pairing dark hexagonal floors with light chevron tiles, accented with dramatic navy blue wallpaper. With its clear-cut 1920s-style, we selected the wall sconce to reference one of the brownstone’s earlier eras.
DESIGN DETAILS
Natural oak herringbone floors we installed throughout the entire home bring a modern yet warm touch. We restored the wood-burning marble fireplace, which is fully functioning. An elegant staircase with a custom-crafted black wooden banister and white balusters winds up and down alongside a real brick interior wall that we restored and refinished.
In this brownstone renovation, we were also able to create ceiling height, an unexpected yet aesthetically pleasing side benefit. When working on the joists and beams to level out the floors (a common issue in pre-war renovations) we added ceiling height in the main parlor floor by taking the second floor and raising the ceiling an entire foot. The end result is a main floor with stunning 9-foot ceilings.
SOME HIGHLIGHTS
- Solid natural oak herringbone floors throughout
- A fully restored, refinished, and functioning wood burning fireplace with a marble mantle
- Complete exterior renovation of the facade, cornices, windows, mouldings, and even the ironwork, including the railings leading up to the stoop and those facing the street
- A brand new central air and heating system with uniquely modern vents – look above the couch in the living room with the fuzzy rug and large painting
Considering a brownstone renovation? Contact us today! We specialize in brownstone renovations in New York as well as all pre-war apartments. When you work with a design-and-build firm like Gallery to renovate your brownstone, you get the full range of our expertise in working with all the finest details and pre-war architectural elements of these classic New York spaces. We also handle every step of the process, from filing permits and organizing schedules to sourcing custom pieces and building entirely new rooms (or even balconies). Call us for a free initial consultation when you’re ready.

 Custom Surface Solutions
 (www.css-tile.com) - Owner Craig Thompson (512) 430-1215. This project shows new 12 x 24 tile installed vertically with offset layout pattern on wall and floor. Includes shower box with linear glass accent tile back and vertical glass accent band. Tile edges are finished with Schluter Jolly satin aluminum profile edge trim.
 Gallery KBNY
This brownstone renovation was a full gut project in every sense of the word. On top of installing new floors, a kitchen and bath renovation, and all the typical restoration and refinishing involved in a brownstone built in 1899, we also completely updated the exterior, constructed a balcony that was not originally there, and converted the space from a single-family home into an an owner’s triplex. A newly separated studio rental on the garden level offers the opportunity for supplemental income, an uncommon and welcome addition to a New York brownstone.
A TRANSITIONAL GEM
The result is a two-family brownstone that perfectly combines classic townhouse living with today’s modern needs, including SmartHome technology that we installed to control Bluetooth speakers, Nest thermostats, and the security system.
The overall aesthetic goal was to pay homage to the historical periods the brownstone has lived through in a cohesive way that is the hallmark of modern transitional style.
In the kitchen, white Shaker-style cabinetry, a subway tile backsplash, and marble rather than quartz countertops bring a classically upscale sensibility. To modernize the space further, we opened up the back wall to create floor-to-ceiling windows that are also doors, opening up into the newly built balcony.
TIMELY TOUCHES
This brownstone renovation included many quintessential elements, such as millwork like the ceiling medallions. We restored some and custom built others, perfectly recreating their original appearance.
The heated master bathroom is now serene, with a walk-in shower featuring a subtly modern linear drain. A herringbone Carrera marble tiled floor and marble slab sink complete the scene. In the powder room, we embraced a contemporary look by pairing dark hexagonal floors with light chevron tiles, accented with dramatic navy blue wallpaper. With its clear-cut 1920s-style, we selected the wall sconce to reference one of the brownstone’s earlier eras.
DESIGN DETAILS
Natural oak herringbone floors we installed throughout the entire home bring a modern yet warm touch. We restored the wood-burning marble fireplace, which is fully functioning. An elegant staircase with a custom-crafted black wooden banister and white balusters winds up and down alongside a real brick interior wall that we restored and refinished.
In this brownstone renovation, we were also able to create ceiling height, an unexpected yet aesthetically pleasing side benefit. When working on the joists and beams to level out the floors (a common issue in pre-war renovations) we added ceiling height in the main parlor floor by taking the second floor and raising the ceiling an entire foot. The end result is a main floor with stunning 9-foot ceilings.
SOME HIGHLIGHTS
- Solid natural oak herringbone floors throughout
- A fully restored, refinished, and functioning wood burning fireplace with a marble mantle
- Complete exterior renovation of the facade, cornices, windows, mouldings, and even the ironwork, including the railings leading up to the stoop and those facing the street
- A brand new central air and heating system with uniquely modern vents – look above the couch in the living room with the fuzzy rug and large painting
Considering a brownstone renovation? Contact us today! We specialize in brownstone renovations in New York as well as all pre-war apartments. When you work with a design-and-build firm like Gallery to renovate your brownstone, you get the full range of our expertise in working with all the finest details and pre-war architectural elements of these classic New York spaces. We also handle every step of the process, from filing permits and organizing schedules to sourcing custom pieces and building entirely new rooms (or even balconies). Call us for a free initial consultation when you’re ready.
16