
Search results for "Uncovered" in Home Design Ideas
 Nanette Wong
Photo: Nanette Wong © 2014 Houzz
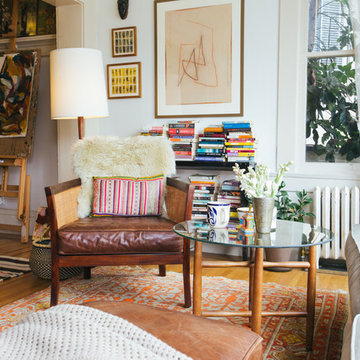
Inspiration for an eclectic living room remodel in San Francisco
Inspiration for an eclectic living room remodel in San Francisco


Find the right local pro for your project
 Scott D. Koch Architect L.L.C.
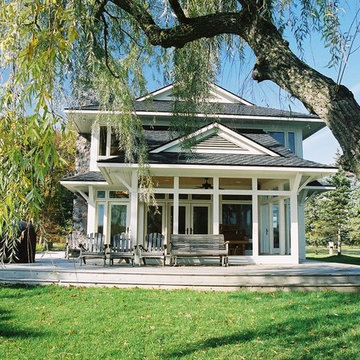
Peaceful and serene where one can enjoy the summer lake breezes, the warmth of the sun and the view of the clear blue water. The sharp lines of the crisp architectural style add vitality and a fresh look to a lakeside cottage.
 Uncover U Interior Design
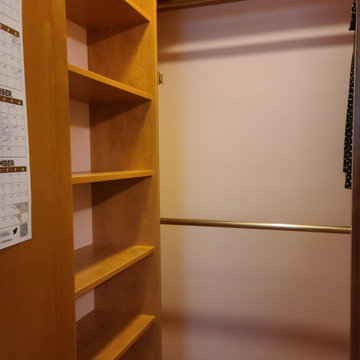
Small 4' x 4' closet. Client wanted better use of the space. This project included removing existing wooden frame and clothes bar, drywall mudding, and painting.
 Uncover U Interior Design
Client wanted to combine two 6' x 4' closets to one 12' x 4' closet. The wall separating the closets was demolished; walls were mudded and painted; shelves and clothes bars were installed.
 Uncover U Interior Design
Client wanted to combine two 6' x 4' closets to one 12' x 4' closet. The wall separating the closets was demolished; walls were mudded and painted; shelves and clothes bars were installed.
 Uncover U Interior Design
Client wanted to combine two 6' x 4' closets to one 12' x 4' closet. The wall separating the closets was demolished; walls were mudded and painted; shelves and clothes bars were installed.
 Uncover U Interior Design
Client wanted to combine two 6' x 4' closets to one 12' x 4' closet. The wall separating the closets was demolished; walls were mudded and painted; shelves and clothes bars were installed.
 Uncover U Interior Design
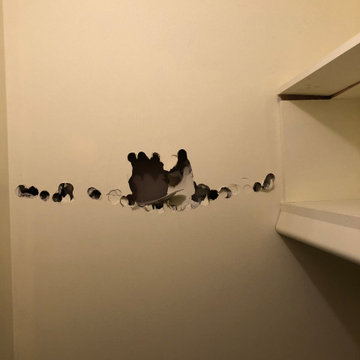
Client wanted to combine two 6' x 4' closets to one 12' x 4' closet. The wall separating the closets was demolished; walls were mudded and painted; shelves and clothes bars were installed.
 Uncover U Interior Design
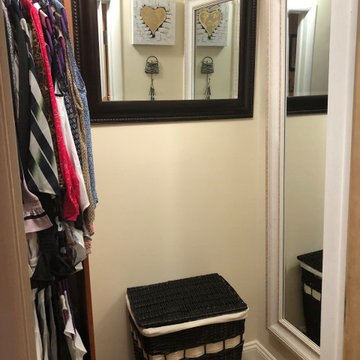
Client wanted to combine two 6' x 4' closets to one 12' x 4' closet. The wall separating the closets was demolished; walls were mudded and painted; shelves and clothes bars were installed.
 Uncover U Interior Design
Client wanted to combine two 6' x 4' closets to one 12' x 4' closet. The wall separating the closets was demolished; walls were mudded and painted; shelves and clothes bars were installed.
 Uncover U Interior Design
Client wanted to combine two 6' x 4' closets to one 12' x 4' closet. The wall separating the closets was demolished; walls were mudded and painted; shelves and clothes bars were installed.
 Uncover U Interior Design
Client wanted to combine two 6' x 4' closets to one 12' x 4' closet. The wall separating the closets was demolished; walls were mudded and painted; shelves and clothes bars were installed.

 Housetrends Magazine
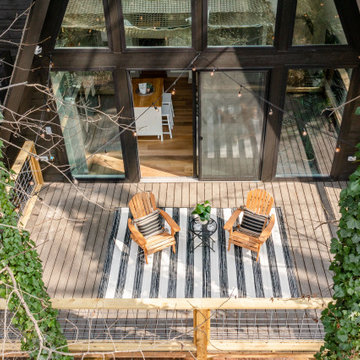
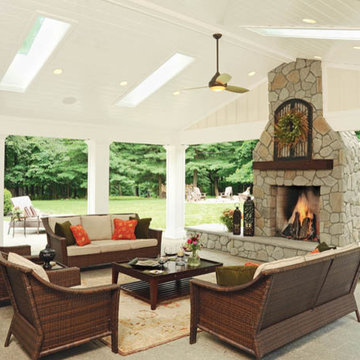
When you open the back doors of the home of Nancy and Jeremy Campbell in Granville, you don’t just step out onto a patio. You enter an extension of a modern living space that just happens to be outdoors. Their patio’s unique design and setting provides the comfort and style of indoors while enjoying the natural beauty and fresh air of outdoors.
It all started with a rather desolate back yard. “It was completely blank, there was nothing back there,” Nancy remembers of the patio space of this 1972 split-level house they bought five years ago. With a blank slate to work with, the Campbells knew the key elements of what they wanted for their new outdoor space when they sat down with Travis Ketron of Ketron Custom Builders to design it. “We knew we wanted something covered so we could use it in the rain, and in the winter, and we knew we wanted a stone fireplace,” Nancy recalls.
Travis translated the Campbells’ vision into a design to satisfy outdoor entertaining and relaxing desires in all seasons. The new outdoor space is reminiscent of a vast, rustic great room complete with a stone fireplace, a vaulted ceiling, skylights, and ceiling fans, yet no walls. The space is completely open to the elements without any glass or doors on any of the sides, except from the house. Furnished like a great room, with a built-in music system as well, it’s truly an extension of indoor living and entertaining space, and one that is unaffected by rain. Jeremy comments, “We haven’t had to cover the furniture yet. It would have to be a pretty strong wind to get wet.” Just outside the covered patio is a quartet of outdoor chairs adorned with plush cushions and colorful pillows, positioned perfectly for users to bask in the sun.
In the design process, the fireplace emerged as the anchor of the space and set the stage for the outdoor space both aesthetically and functionally. “We didn’t want it to block the view. Then designing the space with Travis, the fireplace became the center,” remembers Jeremy. Placed directly across from the two sets of French doors leading out from the house, a Rumford fireplace and extended hearth of stone in neutral earth tones is the focal point of this outdoor living room. Seating for entertaining and lounging falls easily into place around it providing optimal viewing of the private, wooded back yard. When temperatures cool off, the fireplace provides ample warmth and a cozy setting to experience the change of seasons. “It’s a great fireplace for the space,” Jeremy says of the unique design of a Rumford style fireplace. “The way you stack the wood in the fireplace is different so as to get more heat. It has a shallower box, burns hotter and puts off more heat. Wood is placed in it vertically, not stacked.” Just in case the fireplace doesn’t provide enough light for late-night soirees, there is additional outdoor lighting mounted from the ceiling to make sure the party always goes on.
Travis brought the idea of the Rumford outdoor fireplace to the Campbells. “I learned about it a few years back from some masons, and I was intrigued by the idea then,” he says. “We like to do stuff that’s out of the norm, and this fireplace fits the space and function very well.” Travis adds, “People want unique things that are designed for them. That’s our style to do that for them.”
The patio also extends out to an uncovered area set up with patio tables for grilling and dining. Gray pavers flow throughout from the covered space to the open-air area. Their continuous flow mimics the feel of flooring that extends from a living room into a dining room inside a home. Also, the earth tone colors throughout the space on the pavers, fireplace and furnishings help the entire space mesh nicely with its natural surroundings.
A little ways off from both the covered and uncovered patio area is a stone fire pit ring. Removed by just the right distance, it provides a separate place for young adults to gather and enjoy the night.
Adirondack chairs and matching tables surround the outdoor fire pit, offering seating for anyone who doesn’t wish to stand and a place to set down ingredients for yummy fireside treats like s’mores.
Padded chairs outside the reach of the pavilion and the nearby umbrella the perfect place to kick back and relax in the sun. The colorful throw pillows and outdoor furniture cushions add some needed color and a touch of personality.
Enjoying the comforts of indoors while being outdoors is exactly what the Campbells are doing now, particularly when lounging on the comfortable wicker furniture that dominate most of the area. “My favorite part of the whole thing is the fireplace,” Nancy says.
Jeremy concludes, “There is no television, it would destroy the ambiance out there. We just enjoy listening to music and watching the fire.”
 Uncover U Interior Design
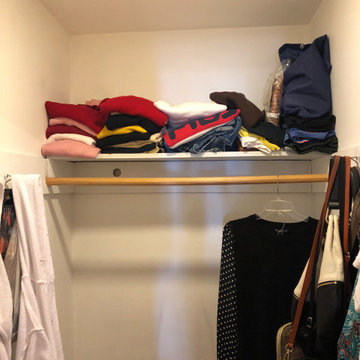
Small 4' x 4' closet. Client wanted better use of the space. This project included removing existing wooden frame and clothes bar, drywall mudding, and painting.

 Infinite Possibilities Landscape & Design
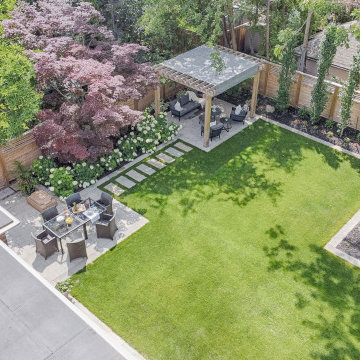
Inspiration for a large transitional full sun backyard stone and wood fence walkway in Toronto for summer.
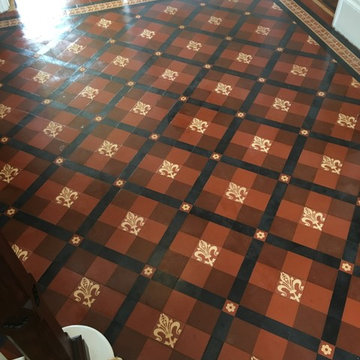
 Tile Doctor Ltd
It’s always a great surprise to find old tiled flooring hidden underneath carpet or linoleum which appears especially common with 19th century properties where it’s not unusual for the owners to uncover fantastically patterned, original Victorian tiled floors and, naturally, they want to restore them to their former glory. If you have a property of this type you might want to look under the carpets.
The majority of the time, however, these tiles have been covered up for decades, allowing for thick layers of muck to build-up and are invariably damaged carpet grippers, surface glue and adhesive tape.
This was pretty much the case with this customer who lives in the town of Warminster and was keen to have her own newly discovered Victorian hallway brought back to life, and called me down to see what could be done. Upon arrival at the property, I determined that the tiles would definitely require a very deep clean, including the remove of numerous glue stains, followed by the application of a new seal.
Before I could begin the deep cleaning process, I needed to remove the carpet grippers and surface glue, attempting to remove as much as possible by hand using a scraper.
For the particularly stubborn areas, I applied Tile Doctor Remove & Go, a powerful stripper specially designed to break down adhesives and solvents, and left it to dwell for 20 minutes to eat through the glue deposits. I then attached a black pad to a rotary machine and scrubbed the area thoroughly to clean the affected areas, before removing the resulting slurry using a wet vacuum and rinsed with clean water.
Once I was satisfied that all of the glue had been removed, I proceeded to soak the floor using a solution of the high alkaline cleaner known as Tile Doctor Pro Clean. This is a versatile product that can be used on a wide range of natural stone floors to deal with heavy soil build-up.
I left the Pro-Clean to dwell for ten minutes, and then scrubbed it into the tiles to remove the ingrained dirt and also to break down any old and ineffectual seals. The floor was then once again rinsed thoroughly with clean water which was then extracted using a wet vacuum before being left to dry for a couple of days.
Upon our return to the property I immediately tested the floor for damp using a damp meter. This is an extremely important test to carry out before sealing any kind of tiled flooring, due to the fact that excess moisture left over from cleaning can cloud the sealer and damage its ability to protect against dirt and stains.
Thankfully, the damp test revealed no excess moisture, and I was able to proceed with sealing the tiles. My choice of sealer was Tile Doctor Seal and Go, a water-based topical sealer that simultaneously provides both a stain resistant surface seal and a durable and aesthetically pleasing low sheen finish, also being water based it doesn’t give off a smell as it dries.
This is a very cost effective product that is highly suitable for use on Victorian and Quarry tiles, I applied five costs to achieve the desired finish.
The customer was very pleased with the final results. It’s always satisfying to restore original Victorian tiled floors to looking their best once again – and this one was no exception.
Stuart Ford
Wiltshire Tile Doctor
5