
Search results for "Videos future" in Home Design Ideas

 C.E. Pontz Sons
This Backyard Waterfall project included installation of a pondless waterfall approximately 15' in length on a sloped bank at the area next to the existing pool. The backyard waterfall cascades down the existing embankment. There is still retaining wall work in progress as of this video and pictures being shot. Future landscaping will be installed once surrounding hardscaping has been complete. Rocks and Boulders for this project were chosen and supplied by home owner. This pondless waterfall project was installed in Mohnton (Berks County), PA.
Pondless Waterfalls are simply a re-circulating waterfall and/or stream without the presence of a pond. You can enjoy the sight and sound of running water without the maintenance of a pond.
The waterfall is undoubtedly the most beautiful and favored feature in a water garden. If space is lacking in your yard or you have safety concerns with a pond, go Pondless! The name basically explains it all. It’s a waterfall and stream, without the pond. So why would you want a waterfall without a pond? The truth is that a Pondless Waterfall isn’t for everyone, but it can be a great alternative for someone who isn’t quite sure if a pond is right for their family.
Because there is no pool of water, a Pondless Waterfall is a great option if you are concerned about safety issues associated with a traditional pond.
Cost can be a big factor when considering the type of pond you want to build. In most cases, the price of a Pondless waterfall will be less than a pond, because there is less labor involved, as well as less rock and materials. Operating costs are also less. Because you’re not dealing with an established ecosystem, it’s not necessary to run the pump 24/7.
The small size of the Pondless Waterfall means you can build and enjoy a beautiful waterfall anywhere in you yard. Taking care of your Pondless Waterfall is easy. Filling the reservoir every few weeks to compensate for water loss because of evaporation is all that’s required.
Perhaps the best part of the Pondless Waterfall is the possibility for the future. If you change your mind later, wishing you’d build a pond, that’s ok! If you leave enough room around the base of the waterfall, it’s easy to add a pond onto a Pondless Waterfall.
A Pondless Waterfall works much like a regular pond. The hole, deeper than a normal pond, is dug then lined with rock and gravel, and filled with water. The water is then circulated from beneath the rocks and gravel by a pump that sits on the bottom, inside a Snorkel™ Vault and Centipede™ Module. A pipe runs from there up to a BioFalls Filter and into an overflowing waterfall, where it falls back into the reservoir. Since the water level never pools above the level of the rock and gravel fill, it give the appearance of a waterfall without a pond, when in fact, the “pond” is there but not visible.
The Pondless Waterfall has made many water-lovers who were previously unable to indulge in the sweet sounds of falling water, very happy. It’s a great alternative for those who are trying to get their feet wet, or looking to fit a little bit of paradise into their own backyard. In other words, when all else fails … go Pondless!

 Sound Design
 Marks 20 Years with ELAN-Centered Showroom
By RS Staff March 12,2013
Marking 20 years of success and growth in Texas as a custom installation firm, Sound Design is opening a new state-of-the-art home technology showroom in the resort community of Horseshoe Bay, TX on April 1.
Sound Design showroom
The new 4,500 square foot showroom puts the ELAN g! Entertainment and Control System on the main stage, according to owner Chris Bean, who wants to make sure that it is the first thing clients experience when they walk into the entrance living room.
“What better way to celebrate our 20th year as Texas’ premier custom installation firm than to open a beautiful new showroom with all the latest home technologies?” Bean said. “We’ve learned a lot over the years, and our experience helped us design the new showroom in a way that presents a relaxing, luxurious ambience that appeals to our local clientele. We used the best-of-the-best in every category, from the Runco 63-inch plasma TV framed and hidden by a VisionArt motorized art print to the ultra-high-end CAT MBX Sequoia speakers and of course the ELAN g! System.
"We have another showroom in Lakeway, TX where we’ve been showing off ELAN g! since the system debuted in 2010. When we first got into custom home installation, multi-room audio and video systems were the biggest client request. Today, we are increasingly finding that homeowners and homebuyers are as interested in complete home control as they are in their TVs and music, if not more so. Expandable, easy to use control systems that utilize mobile devices and simplify home living are going to be major sales drivers of the future for both the CI industry and the home building industry.
ELAN g! System
The showroom offers a tour of top-of-the-line home electronics, starting with the entrance living room that features AV and lighting control from an ELAN TS10 10-inch in-wall touchscreen, an ELAN TS2 in-wall touchscreen and an ELAN HR2 handheld remote. The system distributes audio and video content to a system consisting of a Runco V63 63-inch plasma display, a Planar 2x3 Matrix Wall with six 46-inch panels, a Planar Mosaic wall with four 46-inch panels and four 15-inch square panels, a two-channel audio system that uses two 7-foot-tall CAT MBX Sequoia’s, and a surround system that includes an Integra DTR 50.4 receiver, Newport speakers and two Sunfire HRS-12 subwoofers.
“Many of our clients are tech-savvy homeowners who have become mobile tech enthusiasts through their everyday interactions with iPhones and tablets, and they want that same instant satisfaction to apply to their household media and home functions. We’re using the ELAN g! System to show them that home control can be just as easy as using an iPhone,” Bean said. “Just a few years ago, the most common client request was for an amazing home theater to enjoy the newest DVDs or Blu-Rays. Consumer culture is now moving beyond just high-quality audio and video and our clients are demanding easy, fast, total control of everything in the home from their touch panels, smartphone or tablet. ELAN g! does it in spades, and for many clients it’s simply the best choice out there.”
The most unique part of the new showroom is the 640 square foot Simulation Room. Featuring AboutGolf’s newest three-projector continuous curve screen golf simulator, a LaserShot shooting simulator with five-channel surround and 30 competitive games for two players, and a VRX iMotion triple-LCD display driving & flight simulator, this room is literally a virtual playground. Bean wanted to show that he’s an outside-the-box thinker, and that, in this resort community, there is a custom installation professional that can bring dreams to life.
“The Simulation Room is a step forward for CI showroom design and for our company, and it allows us to open the imagination of our clients to show them that anything is possible. Homeowners in Horseshoe Bay are all about recreation and a luxury lifestyle so we wanted to show the unique ways people could enhance their home’s fun factor. From controlling lighting, heating and surveillance cameras on an iPhone to a hyper-realistic golf simulator that makes you feel like you’re really teeing off on the course, our Horseshoe Bay showroom is as state-of-the-art as it can be.”
Sound Design also built a commercial quality home theater that uses a Display Development HD3 projector, a 184-inch Stewart Filmscreen Luxus Delux screen, A Kaleidescape M300 player connected to a Kaleidescape CinemaOne server in the lobby, a Theta Casablanca III preamp/processor, Theta Compli-blu Blu-ray player, a PrimaCinema server, and a bevy of California Audio Technology speakers, subwoofers and amplifiers.

 INSPIRED KITCHEN DESIGN
While Teresa did countless hours of research on design Web sites such as Pinterest, she also wanted to get the kitchen done quickly.
That meant taking some risks, she says.
“I wanted to renovate the kitchen immediately after moving into the new house. This required me to take measurements, pictures and video all in one visit. So, my measurements were a little off,” she explains. Luckily IKD’s design team provided her with a detailed inventory list [as part of its design process and helped out with specific custom looks, she notes.
“With IKD’s design guidance I actually over ordered versus under ordered and simply had to return a few cabinets and pieces [rather than make a return trip to IKEA],” she concludes.
With her project now complete, Teresa says she is ready to move onto greener pastures.
But first, there are some specific tips she wanted to share for any future IKEA kitchen remodeler.
“I would say to do your research, and remember that no detail is too small. Also, be sure to visit an IKEA no matter where you live at least once to be able to see the kitchens in person. And, definitely use IKD but be sure to have a clear kitchen idea to convey!” she says.
With that said, Teresa was able to complete her IKEA kitchen in a timely manner and in a budget friendly way as well.
“I would say our budget was mid-level [for this project]. Since we did most of the work ourselves we saved a ton of money. We really have a glowing pride in accomplishing this project and it turned out to be not as difficult as we thought!” she concludes.
Find the right local pro for your project

 Regenesis Ecological Design
Clematis armandii 'Evergreen Clematis' (foreground) arches over a custom-built cedar arbor, modeled to accentuate the home's Craftsman-style architecture. Welded mild-steel panel fills create a scaffold for Akebia quinata 'Five-leaf Akebia Vine' (background), lending seasonal privacy and afternoon shade along this narrow sideyard access walkway.

 Alair Homes Plano
Our clients house was built in 2012, so it was not that outdated, it was just dark. The clients wanted to lighten the kitchen and create something that was their own, using more unique products. The master bath needed to be updated and they wanted the upstairs game room to be more functional for their family.
The original kitchen was very dark and all brown. The cabinets were stained dark brown, the countertops were a dark brown and black granite, with a beige backsplash. We kept the dark cabinets but lightened everything else. A new translucent frosted glass pantry door was installed to soften the feel of the kitchen. The main architecture in the kitchen stayed the same but the clients wanted to change the coffee bar into a wine bar, so we removed the upper cabinet door above a small cabinet and installed two X-style wine storage shelves instead. An undermount farm sink was installed with a 23” tall main faucet for more functionality. We replaced the chandelier over the island with a beautiful Arhaus Poppy large antique brass chandelier. Two new pendants were installed over the sink from West Elm with a much more modern feel than before, not to mention much brighter. The once dark backsplash was now a bright ocean honed marble mosaic 2”x4” a top the QM Calacatta Miel quartz countertops. We installed undercabinet lighting and added over-cabinet LED tape strip lighting to add even more light into the kitchen.
We basically gutted the Master bathroom and started from scratch. We demoed the shower walls, ceiling over tub/shower, demoed the countertops, plumbing fixtures, shutters over the tub and the wall tile and flooring. We reframed the vaulted ceiling over the shower and added an access panel in the water closet for a digital shower valve. A raised platform was added under the tub/shower for a shower slope to existing drain. The shower floor was Carrara Herringbone tile, accented with Bianco Venatino Honed marble and Metro White glossy ceramic 4”x16” tile on the walls. We then added a bench and a Kohler 8” rain showerhead to finish off the shower. The walk-in shower was sectioned off with a frameless clear anti-spot treated glass. The tub was not important to the clients, although they wanted to keep one for resale value. A Japanese soaker tub was installed, which the kids love! To finish off the master bath, the walls were painted with SW Agreeable Gray and the existing cabinets were painted SW Mega Greige for an updated look. Four Pottery Barn Mercer wall sconces were added between the new beautiful Distressed Silver leaf mirrors instead of the three existing over-mirror vanity bars that were originally there. QM Calacatta Miel countertops were installed which definitely brightened up the room!
Originally, the upstairs game room had nothing but a built-in bar in one corner. The clients wanted this to be more of a media room but still wanted to have a kitchenette upstairs. We had to remove the original plumbing and electrical and move it to where the new cabinets were. We installed 16’ of cabinets between the windows on one wall. Plank and Mill reclaimed barn wood plank veneers were used on the accent wall in between the cabinets as a backing for the wall mounted TV above the QM Calacatta Miel countertops. A kitchenette was installed to one end, housing a sink and a beverage fridge, so the clients can still have the best of both worlds. LED tape lighting was added above the cabinets for additional lighting. The clients love their updated rooms and feel that house really works for their family now.
Design/Remodel by Hatfield Builders & Remodelers | Photography by Versatile Imaging

 InnovationLand
This Houston bathroom remodel has it all - from its contemporary, en suite design to its Carrara marble to its luxury spa shower and his-and-her closets!
It's just one example of Outdoor Homescapes of Houston's bathroom remodeling projects - known for their meticulous attention to beauty and perfection.
Like what you see and want your own Houston bathroom remodeled? Just contact us!
Check out the images for more project shots and details.
"You'll notice a lot of differences between the original renderings and the final project," notes Wayne Franks, owner of Outdoor Homescapes of Houston. "That's why our realistic, detailed 3D graphic renderings and virtual video tours are so useful to clients who can't visualize the end result in their heads. With us, they can preview the project from every angle and make sure they get exactly what they want."
Check out the new, 10-foot-long by 4-feet-deep closet for her. It was built along the wall of the new addition, as you can see in the 3D graphic created for the client below.
The first door on the left leads to this closet. The next two doors down lead to the original, 6-foot-long by 4-feet-long by 4-feet-deep closet shared by the couple, but now reserved for him.
As you can see in the graphic, a small, private commode was added onto the back of the new shower. Recessed lighting was also added for more ambient light, along with brushed nickel lighting fixtures.
The closeup of the new shower and dressing suite, meanwhile, shows the black-and-grey border and accents in the shower. The border and accents are a stone-and-glass tile mix from Floor & Décor. The shower floor - a flat mosaic marble pebble - is also from Floor & Décor.
Also notice the view of the Houston bath remodel, looking toward the back yard from the master bedroom. On the right, after the towel hooks and before the French doors, a flat-screen TV has been added for viewing from the shower and dressing area.
This Houston bathroom remodel sprung out of a bachelor's engagement. The original, 300-square-foot master bathroom - still in the 80s with brass fixtures and wallpaper - desperately needed a redesign that could accommodate his future bride.
So Outdoor Homescapes gutted the original bathroom and doubled the size with a 300-square-foot addition off the back of the house.
Check out the full-on view of the project. (This is where our 3D graphic renderings, which allow clients to preview their project from every angle and make changes, come in handy. As you can see, the client went with white instead of dark-wood vanity cabinets, ditched the glass shower surround and scrapped the second vanity area).
 InnovationLand
This Houston bathroom remodel has it all - from its contemporary, en suite design to its Carrara marble to its luxury spa shower and his-and-her closets!
It's just one example of Outdoor Homescapes of Houston's bathroom remodeling projects - known for their meticulous attention to beauty and perfection.
Like what you see and want your own Houston bathroom remodeled? Just contact us!
Check out the images for more project shots and details.
"You'll notice a lot of differences between the original renderings and the final project," notes Wayne Franks, owner of Outdoor Homescapes of Houston. "That's why our realistic, detailed 3D graphic renderings and virtual video tours are so useful to clients who can't visualize the end result in their heads. With us, they can preview the project from every angle and make sure they get exactly what they want."
Check out the new, 10-foot-long by 4-feet-deep closet for her. It was built along the wall of the new addition, as you can see in the 3D graphic created for the client below.
The first door on the left leads to this closet. The next two doors down lead to the original, 6-foot-long by 4-feet-long by 4-feet-deep closet shared by the couple, but now reserved for him.
As you can see in the graphic, a small, private commode was added onto the back of the new shower. Recessed lighting was also added for more ambient light, along with brushed nickel lighting fixtures.
The closeup of the new shower and dressing suite, meanwhile, shows the black-and-grey border and accents in the shower. The border and accents are a stone-and-glass tile mix from Floor & Décor. The shower floor - a flat mosaic marble pebble - is also from Floor & Décor.
Also notice the view of the Houston bath remodel, looking toward the back yard from the master bedroom. On the right, after the towel hooks and before the French doors, a flat-screen TV has been added for viewing from the shower and dressing area.
This Houston bathroom remodel sprung out of a bachelor's engagement. The original, 300-square-foot master bathroom - still in the 80s with brass fixtures and wallpaper - desperately needed a redesign that could accommodate his future bride.
So Outdoor Homescapes gutted the original bathroom and doubled the size with a 300-square-foot addition off the back of the house.
Check out the full-on view of the project. (This is where our 3D graphic renderings, which allow clients to preview their project from every angle and make changes, come in handy. As you can see, the client went with white instead of dark-wood vanity cabinets, ditched the glass shower surround and scrapped the second vanity area).
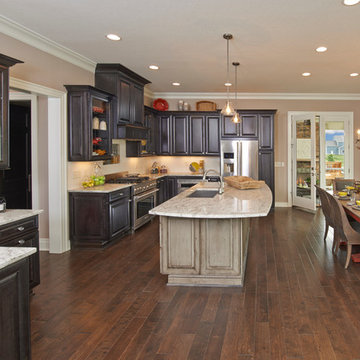


 Village Home Stores
Full-overlay Rustic Beech cabinets in the "Charleston" door style and "Briarwood" finish.
Village Home Stores
Example of a large mountain style kitchen design in Chicago
Example of a large mountain style kitchen design in Chicago
 INSPIRED KITCHEN DESIGN
The pantry area features some glass- fronted BODBYN upper cabinetry which holds dishes and display items, which is next to the IKEA NUTID refrigerator and convection oven, as well as additional tall cabinetry on the opposite side.
After agreeing on a white kitchen design theme, William claims the hardest part of the install was getting the kitchen itself structurally ready for cabinet installation.
In particular, the age of the house was a unique challenge. So, since the house was originally constructed in 1915, the walls were not exactly plumb or square, he says. Therefore, they needed to move gas and water lines, and run new electrical. He adds that they removed some very old vinyl flooring, added drywall to walls which had severe plaster damage, and added light fixtures to the ceiling.
“The IKEA cabinets themselves were rather easy to install, it was just challenging to get the filler panels to fit our walls, floors, and ceilings!” he notes.
Complementing the white cabinetry is Atlantic Salt KASKER quartz countertops from IKEA.
“We liked the look of the quartz better than granite, and IKEA actually had the countertops on sale when we purchased the kitchen” he says.
The quartz countertops are seen on the end run by the sink as well as throughout the peninsula island that features the five-burner stove and ample space for dishes while cooking. Notably, a small peninsula area was included, providing even more storage options. William also points out that he used IKEA’s cabinet lighting system for above the countertops and a row of glass front cabinets as well.
“I’m very pleased with the install and the ease of controlling the lights with the remote control” he notes.
For William, there is some sound advice he wants to share with future IKEA remodelers.
“The first thing is to join IKEA’s Family Program — and keep all your receipts! Our kitchen install had over 250 boxes, so even after checking upon delivery, we had some damaged items. Our IKEA store gladly exchanged these items with the receipts. We also utilized IKEA’s 90-day Price Protection Program through the IKEA Family Program” he says.
And, he quickly adds, to keep your eyes out for the next IKEA sales event.
“We had a feeling that a kitchen sale was up coming, but made our purchases before one was actually announced. However, when the sale was announced about a month later, we took our receipts back in, and were refunded almost $3,000 for items that had been put on sale after we bought them!” William says.
He adds: “I also recommend that you try to understand the installation process for an IKEA kitchen, even if you aren’t installing the kitchen yourself. A great resource is YouTube, where there are many videos from contractors walking through IKEA kitchen installations.”
These approaches will save you time, money and stress – and repeated trips to IKEA as well, he concludes.

 Elegant Hardwood Floors
maple hardwood floor, water-popped, and stained with 50% rosewood and 50% neutral stains.
Inspiration for a timeless medium tone wood floor living room remodel in Salt Lake City
Inspiration for a timeless medium tone wood floor living room remodel in Salt Lake City
 InnovationLand
This Houston bathroom remodel has it all - from its contemporary, en suite design to its Carrara marble to its luxury spa shower and his-and-her closets!
It's just one example of Outdoor Homescapes of Houston's bathroom remodeling projects - known for their meticulous attention to beauty and perfection.
Like what you see and want your own Houston bathroom remodeled? Just contact us!
Check out the images for more project shots and details.
"You'll notice a lot of differences between the original renderings and the final project," notes Wayne Franks, owner of Outdoor Homescapes of Houston. "That's why our realistic, detailed 3D graphic renderings and virtual video tours are so useful to clients who can't visualize the end result in their heads. With us, they can preview the project from every angle and make sure they get exactly what they want."
Check out the new, 10-foot-long by 4-feet-deep closet for her. It was built along the wall of the new addition, as you can see in the 3D graphic created for the client below.
The first door on the left leads to this closet. The next two doors down lead to the original, 6-foot-long by 4-feet-long by 4-feet-deep closet shared by the couple, but now reserved for him.
As you can see in the graphic, a small, private commode was added onto the back of the new shower. Recessed lighting was also added for more ambient light, along with brushed nickel lighting fixtures.
The closeup of the new shower and dressing suite, meanwhile, shows the black-and-grey border and accents in the shower. The border and accents are a stone-and-glass tile mix from Floor & Décor. The shower floor - a flat mosaic marble pebble - is also from Floor & Décor.
Also notice the view of the Houston bath remodel, looking toward the back yard from the master bedroom. On the right, after the towel hooks and before the French doors, a flat-screen TV has been added for viewing from the shower and dressing area.
This Houston bathroom remodel sprung out of a bachelor's engagement. The original, 300-square-foot master bathroom - still in the 80s with brass fixtures and wallpaper - desperately needed a redesign that could accommodate his future bride.
So Outdoor Homescapes gutted the original bathroom and doubled the size with a 300-square-foot addition off the back of the house.
Check out the full-on view of the project. (This is where our 3D graphic renderings, which allow clients to preview their project from every angle and make changes, come in handy. As you can see, the client went with white instead of dark-wood vanity cabinets, ditched the glass shower surround and scrapped the second vanity area).
 InnovationLand
This Houston bathroom remodel has it all - from its contemporary, en suite design to its Carrara marble to its luxury spa shower and his-and-her closets!
It's just one example of Outdoor Homescapes of Houston's bathroom remodeling projects - known for their meticulous attention to beauty and perfection.
Like what you see and want your own Houston bathroom remodeled? Just contact us!
Check out the images for more project shots and details.
"You'll notice a lot of differences between the original renderings and the final project," notes Wayne Franks, owner of Outdoor Homescapes of Houston. "That's why our realistic, detailed 3D graphic renderings and virtual video tours are so useful to clients who can't visualize the end result in their heads. With us, they can preview the project from every angle and make sure they get exactly what they want."
Check out the new, 10-foot-long by 4-feet-deep closet for her. It was built along the wall of the new addition, as you can see in the 3D graphic created for the client below.
The first door on the left leads to this closet. The next two doors down lead to the original, 6-foot-long by 4-feet-long by 4-feet-deep closet shared by the couple, but now reserved for him.
As you can see in the graphic, a small, private commode was added onto the back of the new shower. Recessed lighting was also added for more ambient light, along with brushed nickel lighting fixtures.
The closeup of the new shower and dressing suite, meanwhile, shows the black-and-grey border and accents in the shower. The border and accents are a stone-and-glass tile mix from Floor & Décor. The shower floor - a flat mosaic marble pebble - is also from Floor & Décor.
Also notice the view of the Houston bath remodel, looking toward the back yard from the master bedroom. On the right, after the towel hooks and before the French doors, a flat-screen TV has been added for viewing from the shower and dressing area.
This Houston bathroom remodel sprung out of a bachelor's engagement. The original, 300-square-foot master bathroom - still in the 80s with brass fixtures and wallpaper - desperately needed a redesign that could accommodate his future bride.
So Outdoor Homescapes gutted the original bathroom and doubled the size with a 300-square-foot addition off the back of the house.
Check out the full-on view of the project. (This is where our 3D graphic renderings, which allow clients to preview their project from every angle and make changes, come in handy. As you can see, the client went with white instead of dark-wood vanity cabinets, ditched the glass shower surround and scrapped the second vanity area).

 Dura Supreme Cabinetry
This contemporary kitchen features the NEW Stainless Steel Drawers and Roll-Out Shelves from Dura Supreme Cabinetry. The Bria (frameless) cabinets in Dura Supreme's "White" and Wired-Foil cabinets in Dura Supreme's "Wired-Mercury" are a great combination of cabinetry for creating the clean sleek look of this modern two-tone kitchen design.
Dura Supreme Cabinetry is excited to introduce NEW Stainless Steel Drawers and Roll-Out Shelves for their Bria Cabinetry (Frameless / Full-Access product line). For a limited time, this new metal drawer system is available exclusively from Dura Supreme as they partnered with Blum to be the first American manufacturer to bring it to market.
Dura Supreme’s Stainless Steel Drawers and Roll-Out Shelves are an attractive option for any kitchen design. Sleek, double-wall, stainless steel sides are only ½” thick and work with many of Dura Supreme’s wood drawer accessories, as well as the coordinating gray metal accessories designed specifically for Stainless Steel drawers. Concealed, undermount glides are integrated into the sides and are self-closing with a soft-close feature.
Our new Stainless Steel drawer option provides a contemporary alternative to our classic Maple dovetailed drawer. For homeowners that favor Transitional or Contemporary styling, this sleek, high-performance drawer system will be ideal!
Request a FREE Dura Supreme Brochure:
http://www.durasupreme.com/request-brochure
Find a Dura Supreme Showroom in your area:
http://www.durasupreme.com/dealer-locator
Want to become a Dura Supreme Dealer? Go to:
http://www.durasupreme.com/new-dealer-inquiry
To view a video and more info about this product go to: http://www.durasupreme.com/storage-solutions/stainless-steel-drawers-roll-outs
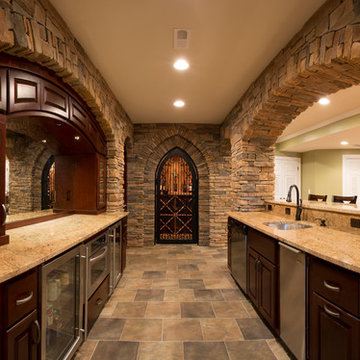
Sponsored
Delaware, OH

Buckeye Basements, Inc.
Central Ohio's Basement Finishing ExpertsBest Of Houzz '13-'21


 Mayita Dinos Garden Design
mayitadinosphotography.com
Design ideas for a tropical landscaping in Los Angeles.
Design ideas for a tropical landscaping in Los Angeles.


 Ehrlich Yanai Rhee Chaney Architects
The ground floor volumes wrapped in an elongated hand-fired brick, emphasizing the horizontality of the architecture that lays solidly on the land.
(Photography by: Matthew Millman)
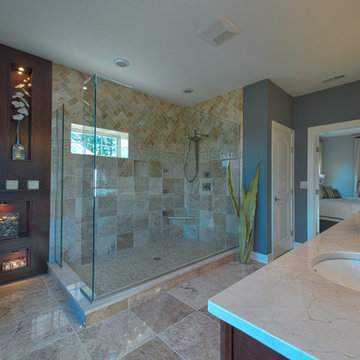


 Lori Ramsay Design
Blue and white ocean inspired bath with New Ravenna blue glass tile and glass mosaic shower pan. White all drawer vanity with Drawer Doc electrical outlets maximize storage and functionality.

 T.A. French - Custom Builder
Example of a mid-sized transitional dark wood floor and brown floor double front door design in Austin with gray walls and a black front door
16