
Search results for "Videos proper" in Home Design Ideas
 Peter Q Brown Innovative Design
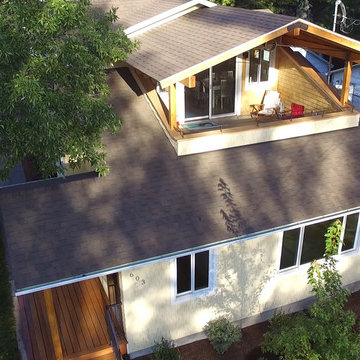
This North Bozeman remodeling project showcases an outdoor room addition in the form of a covered second story deck.
To see the videos about this project:
Part 1: https://youtu.be/NGjuhX6dUzQ
Part 2: https://youtu.be/CRC-BjNdnzM
This deck addition allows the enjoyment of early morning sun, as well as utilizing the resulting afternoon shade during those hot Bozeman summers.
The owners took advantage of the three dimensional modeling of the building to visualize the changes they had in mind. The ability to see multiple visual perspectives of this outdoor room addition, as well as the entire project was a great advantage. The modeling worked to the contractor’s advantage as well, in that the structural components that needed to come together in the creation of this outdoor room addition were clearly illustrated. This covered outdoor room addition presented design challenges as well as opportunity. The challenge was supporting the roof yet not impacting the views. The solution was using a clear span steel truss. This truss design allows unimpeded views to the neighborhood below and sturdy support for the roof structure above. We took this occasion to incorporate a circular steel ring into the truss, giving it an artistic flair. The outdoor room addition ceiling is quite noticeable from the street. With that in mind, as a visual feature we exposed the roof structure. The oversized ridge and beams are visible from all directions below. In reconfiguring the lower level entry, we duplicated the roof structure and truss design, visually tying the upper and lower levels together. This property sits on a highly visible corner lot. The outdoor room addition, the new front entry, and extensive landscaping give this building the proper curb appeal and is a nice addition to the neighborhood.
 Tile Doctor Ltd
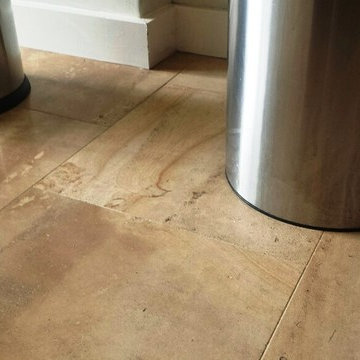
The following post is follows on from the Limestone tiled kitchen floor restoration I recently completed in Cardiff. You may recall that the floor had not been maintained properly since it was first installed in 2008 and one of the key problems I had to deal with during that particular restoration was a number of dark stains left on the tiles by the kitchen dustbin. Here’s a detailed account of how I tacked the staining.
To deal with the stains, I suggested to the client that I experiment with a Tile Doctor product called Reduxa, which is formulated to remove certain stains, including red wine stains, from natural stone. It is suitable on Limestone, Marble and Travertine tiles, amongst others. Nonetheless, I did have to advise the client that unfortunately some stains are unavoidably permanent and that there was no guarantee that the product would be able to remove these particular stains. Had the sealer been maintained on this floor, then the problem would have been much easier to tackle. However, in this case the sealer had worn off over the years.
I began treating the problem area by applying the Reduxa solution, before heating up the tile with a heat gun to lift out the stains. This process of spraying and heating was repeated around eight times.
To cut a long story short, the process worked very well, and both myself and the client were amazed at the results the Reduxa stain removal solution had on the floor. This product really does what it says on the label!
If you would like more information on the product, check out the video on the Reduxa page on the Tile Doctor website.
Julian Iancono
SE Wales Tile Doctor
 Peter Q Brown Innovative Design
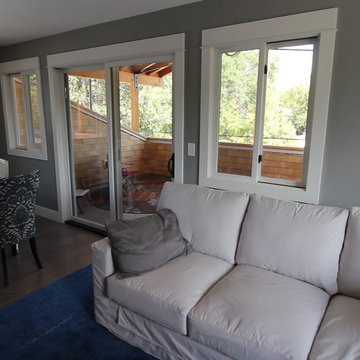
This North Bozeman remodeling project showcases an outdoor room addition in the form of a covered second story deck.
To see the videos about this project:
Part 1: https://youtu.be/NGjuhX6dUzQ
Part 2: https://youtu.be/CRC-BjNdnzM
This deck addition allows the enjoyment of early morning sun, as well as utilizing the resulting afternoon shade during those hot Bozeman summers.
The owners took advantage of the three dimensional modeling of the building to visualize the changes they had in mind. The ability to see multiple visual perspectives of this outdoor room addition, as well as the entire project was a great advantage. The modeling worked to the contractor’s advantage as well, in that the structural components that needed to come together in the creation of this outdoor room addition were clearly illustrated. This covered outdoor room addition presented design challenges as well as opportunity. The challenge was supporting the roof yet not impacting the views. The solution was using a clear span steel truss. This truss design allows unimpeded views to the neighborhood below and sturdy support for the roof structure above. We took this occasion to incorporate a circular steel ring into the truss, giving it an artistic flair. The outdoor room addition ceiling is quite noticeable from the street. With that in mind, as a visual feature we exposed the roof structure. The oversized ridge and beams are visible from all directions below. In reconfiguring the lower level entry, we duplicated the roof structure and truss design, visually tying the upper and lower levels together. This property sits on a highly visible corner lot. The outdoor room addition, the new front entry, and extensive landscaping give this building the proper curb appeal and is a nice addition to the neighborhood.
Find the right local pro for your project
 Peter Q Brown Innovative Design
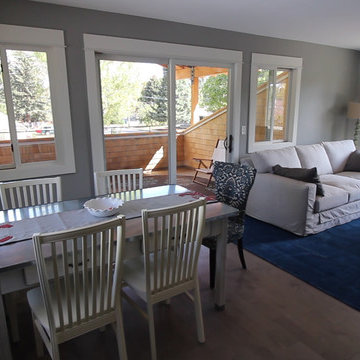
This North Bozeman remodeling project showcases an outdoor room addition in the form of a covered second story deck.
To see the videos about this project:
Part 1: https://youtu.be/NGjuhX6dUzQ
Part 2: https://youtu.be/CRC-BjNdnzM
This deck addition allows the enjoyment of early morning sun, as well as utilizing the resulting afternoon shade during those hot Bozeman summers.
The owners took advantage of the three dimensional modeling of the building to visualize the changes they had in mind. The ability to see multiple visual perspectives of this outdoor room addition, as well as the entire project was a great advantage. The modeling worked to the contractor’s advantage as well, in that the structural components that needed to come together in the creation of this outdoor room addition were clearly illustrated. This covered outdoor room addition presented design challenges as well as opportunity. The challenge was supporting the roof yet not impacting the views. The solution was using a clear span steel truss. This truss design allows unimpeded views to the neighborhood below and sturdy support for the roof structure above. We took this occasion to incorporate a circular steel ring into the truss, giving it an artistic flair. The outdoor room addition ceiling is quite noticeable from the street. With that in mind, as a visual feature we exposed the roof structure. The oversized ridge and beams are visible from all directions below. In reconfiguring the lower level entry, we duplicated the roof structure and truss design, visually tying the upper and lower levels together. This property sits on a highly visible corner lot. The outdoor room addition, the new front entry, and extensive landscaping give this building the proper curb appeal and is a nice addition to the neighborhood.
 Goodall Custom Cabinetry
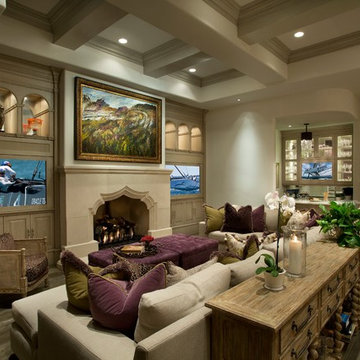
Living room - traditional formal dark wood floor living room idea in Phoenix with beige walls, a standard fireplace and a media wall
 INSPIRED KITCHEN DESIGN
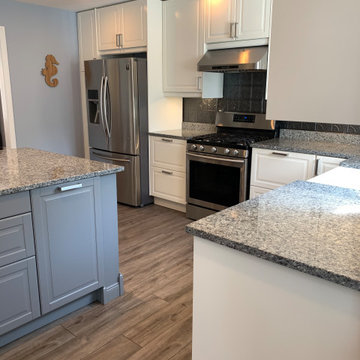
One of the most impressive parts of the kitchen is that Adam installed it himself – even though he admits that initially the idea was daunting.
“When we found that IKEA cabinets might be a fit for our project, we took a trip to our closest IKEA to look at their cabinets. We found the choices both amazing and overwhelming,” he says.“We also felt that we could not renovate our kitchen by just using the IKEA design tool.We were looking to get some help on optimizing the space. A Google search brought IKD up as the option that best fit what our needs were – so we started working with IKD.”
Calling the design process with IKD “a breeze” Adam decided to take the next several months to research how to install the kitchen.
“We visited IKEA again to better understand how the cabinets were put together. I’m glad that I really focused on the IKEA kitchen installation guide at the beginning of the installation to help get my rails installed properly and to really speed up putting the cabinets onto the wall,” he adds.
He also points out that he got lucky as the BODBYN cabinet fronts were on sale when he was ready to purchase – making the cabinetry a cost effective choice as well.
He concludes: “We were really attracted to that fact that we could reduce our kitchen’s cost by installing it ourselves. Doing this required watching a number of YouTube videos and reading numerous articles on how to do it as well as having smaller scale home improvement projects to have the skillset necessary to do the work.”
 Cachet Wine Cellars
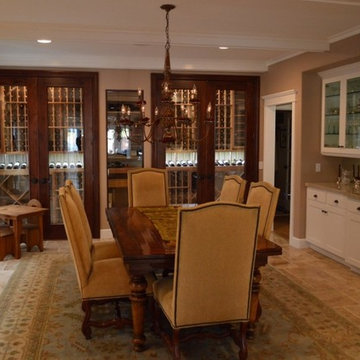
These wine cabinets are sealed off by Barolo style wine cellar doors with dual pane glass. We installed it with Q-Lon to maintain an airtight seal around the door. We stained the doors with a Chestnut finish. We added a fixed glass window between the doors.
We illuminated the high-reveal display rows with LED display lighting. The recessed LED lighting illuminates the wine racks from the top.
Inside, premium redwood wine racks accommodate up to 840 wine bottles securely. We incorporated various racking styles to add character and functionality go the wine cellar. A ductless split refrigeration system from Arctic Metalworks Inc maintains the wine cabinets at the ideal climate conditions.
Take a video tour of this project: https://www.youtube.com/watch?v=jf8dhH8hdNQ
Coastal Custom Wine Cellars
8 Waltham Rd.
Ladera Ranch, CA 92694
+1 (949) 200-8134
contactus@coastalcustomwinecellars.com
Learn more about this project:
https://www.winecellarsbycoastal.com/custom-cellar-style-wine-cabinet-manhattan-beach-los-angeles.aspx

 Cochrane Floors & More
Cochrane Floors & More
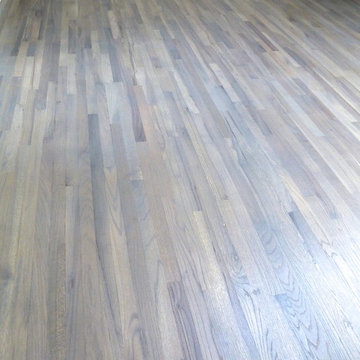
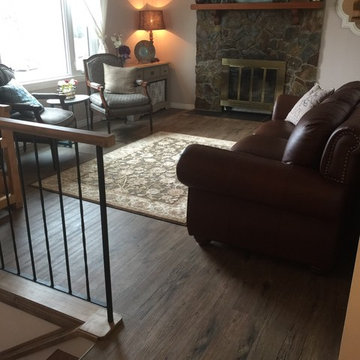
A fun advantage to vinyl plank is that we can run the pattern in any direction. Here we opted to run the length of the room and pull your attention towards the feature fireplace.
 Wiler Fence Company
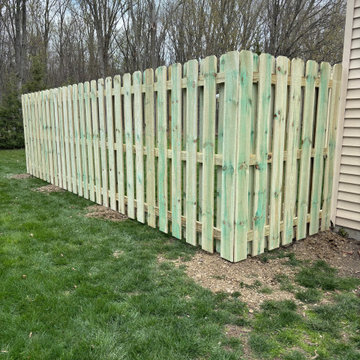
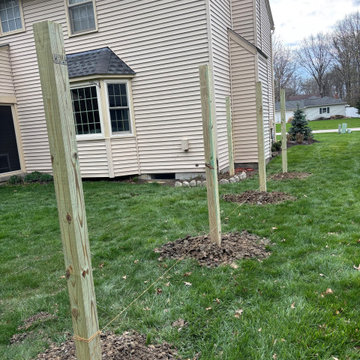
Building a Shadowbox Wood Privacy Fence in Avon Lake, Ohio | Step-by-Step Installation | Wiler Fence CompanyWatch us build a classic shadowbox style wood privacy fence from start to finish in beautiful Avon Lake, Ohio (Lorain County).This 6-foot tall privacy fence provides excellent screening while allowing gentle airflow, making it a perfect choice for Northeast Ohio backyards. In this time-lapse and step-by-step video, you’ll see the entire professional installation process: Phase 1: Installing the 4x4 Posts
We begin by carefully laying out the fence line, digging precise post holes, and setting heavy-duty 4x4 pressure-treated posts in concrete. Each post is plumbed and braced to ensure a rock-solid foundation that will stand up to Ohio’s freeze-thaw cycles for years to come. Phase 2: Installing the 2x4 Framing
Once the posts are set and cured, we attach the top and bottom 2x4 rails, followed by the middle rail. This strong framing system creates the backbone of the fence and ensures the structure stays straight and sturdy. Phase 3: Installing the Shadowbox Pickets
The final step is attaching the privacy pickets in the classic shadowbox pattern — alternating boards on the front and back sides of the rails. This design gives you near-complete privacy from both sides while still allowing air circulation to reduce wind load and prevent warping.The result is a beautiful, durable wood privacy fence that blends naturally with the neighborhood and gives the homeowners the private backyard they’ve been wanting.Project Location: Avon Lake, Ohio – Lorain County
Fence Style: 6ft Shadowbox Wood Privacy Fence
Materials: Pressure-treated pine with protective stainAt Wiler Fence Company, we take pride in every detail — from proper post depth and concrete setting to clean, professional picket installation.Ready for your own wood privacy fence in Avon Lake, Lorain County, or anywhere in Northeast Ohio?
Call us for a free estimate: (216) 714-3337
wiler.org
 Alexanian Carpet & Flooring
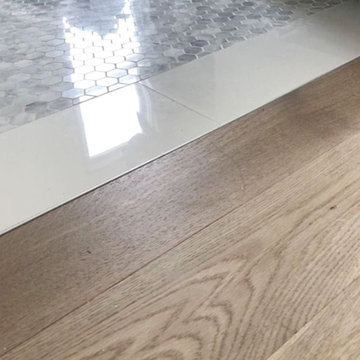
Transitions ... Cynthia Mclaughlin Design of London, ON beautifully executed this transition from “Signature by Shelley” wide plank, white oak hardwood to marble hexagon mosaic tile floor. Gorgeous work Cynthia and sales rep Crystal at our London location.
 Wiler Fence Company
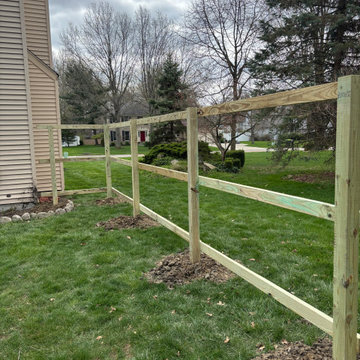
Building a Shadowbox Wood Privacy Fence in Avon Lake, Ohio | Step-by-Step Installation | Wiler Fence CompanyWatch us build a classic shadowbox style wood privacy fence from start to finish in beautiful Avon Lake, Ohio (Lorain County).This 6-foot tall privacy fence provides excellent screening while allowing gentle airflow, making it a perfect choice for Northeast Ohio backyards. In this time-lapse and step-by-step video, you’ll see the entire professional installation process: Phase 1: Installing the 4x4 Posts
We begin by carefully laying out the fence line, digging precise post holes, and setting heavy-duty 4x4 pressure-treated posts in concrete. Each post is plumbed and braced to ensure a rock-solid foundation that will stand up to Ohio’s freeze-thaw cycles for years to come. Phase 2: Installing the 2x4 Framing
Once the posts are set and cured, we attach the top and bottom 2x4 rails, followed by the middle rail. This strong framing system creates the backbone of the fence and ensures the structure stays straight and sturdy. Phase 3: Installing the Shadowbox Pickets
The final step is attaching the privacy pickets in the classic shadowbox pattern — alternating boards on the front and back sides of the rails. This design gives you near-complete privacy from both sides while still allowing air circulation to reduce wind load and prevent warping.The result is a beautiful, durable wood privacy fence that blends naturally with the neighborhood and gives the homeowners the private backyard they’ve been wanting.Project Location: Avon Lake, Ohio – Lorain County
Fence Style: 6ft Shadowbox Wood Privacy Fence
Materials: Pressure-treated pine with protective stainAt Wiler Fence Company, we take pride in every detail — from proper post depth and concrete setting to clean, professional picket installation.Ready for your own wood privacy fence in Avon Lake, Lorain County, or anywhere in Northeast Ohio?
Call us for a free estimate: (216) 714-3337
wiler.org
 Wiler Fence Company
Building a Shadowbox Wood Privacy Fence in Avon Lake, Ohio | Step-by-Step Installation | Wiler Fence CompanyWatch us build a classic shadowbox style wood privacy fence from start to finish in beautiful Avon Lake, Ohio (Lorain County).This 6-foot tall privacy fence provides excellent screening while allowing gentle airflow, making it a perfect choice for Northeast Ohio backyards. In this time-lapse and step-by-step video, you’ll see the entire professional installation process: Phase 1: Installing the 4x4 Posts
We begin by carefully laying out the fence line, digging precise post holes, and setting heavy-duty 4x4 pressure-treated posts in concrete. Each post is plumbed and braced to ensure a rock-solid foundation that will stand up to Ohio’s freeze-thaw cycles for years to come. Phase 2: Installing the 2x4 Framing
Once the posts are set and cured, we attach the top and bottom 2x4 rails, followed by the middle rail. This strong framing system creates the backbone of the fence and ensures the structure stays straight and sturdy. Phase 3: Installing the Shadowbox Pickets
The final step is attaching the privacy pickets in the classic shadowbox pattern — alternating boards on the front and back sides of the rails. This design gives you near-complete privacy from both sides while still allowing air circulation to reduce wind load and prevent warping.The result is a beautiful, durable wood privacy fence that blends naturally with the neighborhood and gives the homeowners the private backyard they’ve been wanting.Project Location: Avon Lake, Ohio – Lorain County
Fence Style: 6ft Shadowbox Wood Privacy Fence
Materials: Pressure-treated pine with protective stainAt Wiler Fence Company, we take pride in every detail — from proper post depth and concrete setting to clean, professional picket installation.Ready for your own wood privacy fence in Avon Lake, Lorain County, or anywhere in Northeast Ohio?
Call us for a free estimate: (216) 714-3337
wiler.org
 Complete Flooring
Chris Golden
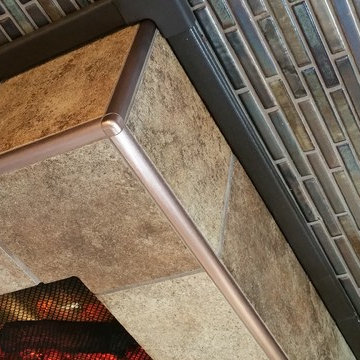
Inspiration for a transitional carpeted living room remodel in Phoenix with beige walls, a standard fireplace and a tile fireplace
Inspiration for a transitional carpeted living room remodel in Phoenix with beige walls, a standard fireplace and a tile fireplace
 Kathy Henry Exterior Design
Carlsbad new construction; spanish courtyard and edible garden.
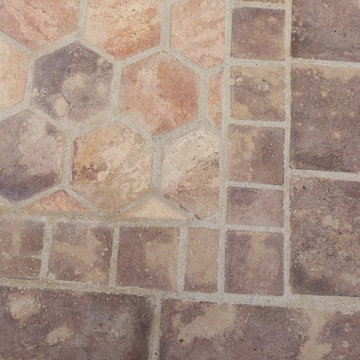
Design ideas for a mediterranean courtyard concrete paver landscaping in San Diego.
Design ideas for a mediterranean courtyard concrete paver landscaping in San Diego.
 Jack Calderone
This bedroom and full bathroom are part of an adventuresome project my wife and I embarked upon to create a complete apartment in the basement of our townhouse. We designed a floor plan that creatively and efficiently used all of the 385-square-foot-space, without sacrificing beauty, comfort or function – and all without breaking the bank! To maximize our budget, we did the work ourselves and added everything from thrift store finds to DIY wall art to bring it all together.
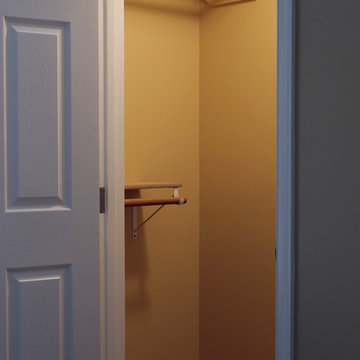
A partial double closet bar adds a little extra space while still leaving room for longer hanging clothes.
 Woodstock Flooring & Design Center
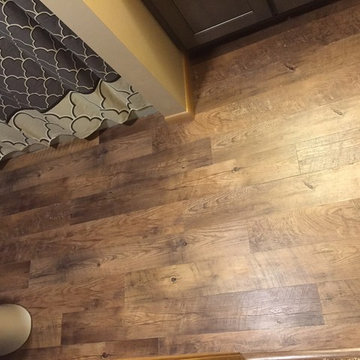
Mannington Luxury Vinyl Plank LockSolid Flooring.
Example of a small minimalist kids' vinyl floor home design design with an undermount sink, flat-panel cabinets, gray cabinets, granite countertops and beige walls
Example of a small minimalist kids' vinyl floor home design design with an undermount sink, flat-panel cabinets, gray cabinets, granite countertops and beige walls



 Budget Blinds of Cedar Falls / Waterloo, IA
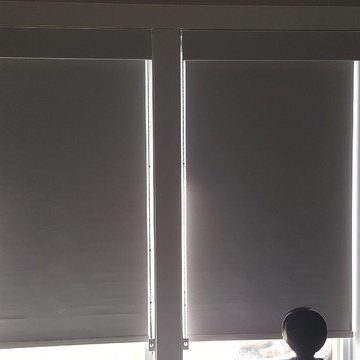
Budget Blinds blackout roller shades, photo credit installer Adam Brannick
Example of a mid-sized transitional guest bedroom design in Cedar Rapids with gray walls and no fireplace
Example of a mid-sized transitional guest bedroom design in Cedar Rapids with gray walls and no fireplace
5