Software
Houzz Logo Print
torbee

Redwood guardrail post questions

10 years ago
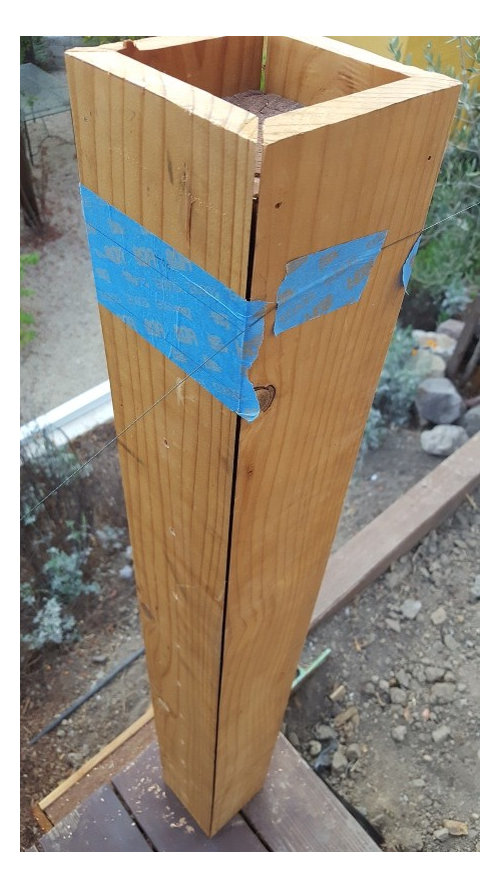
I have redwood planks covering treated 4x4 wood posts. My issue is they were not perfectly cut and most need filler/sanding to give them a proper finish before applying a coat of Cabot 19205 Pacific Redwood wood toned deck and siding stain (says translucent oil stain on the can). I want to make sure the filler isn't visible once the stain is applied but I have no idea which is the most appropriate filler to use for this...help!

Comments (20)

  • 10 years ago

    Filler is not a good long term option because UV exposure will probably cause the wood and the filler to age differently.


    The better option is to remove the wrap and make the wrap joints tight. Then , plane the post so the assembled wrap slides over the post.

    Vic B thanked User
  • 10 years ago

    Great feedback, thank you. May not be easy at this point to remove the wraps (15 posts) but I will definitely skip fillers and use gel epoxy instead. Do I seal first, then apply a matching epoxy tint, or apply a translucent epoxy and then seal? Will the sealer stick to the epoxy? Again, much appreciated.

  • 10 years ago

    This is probably not what you want to hear, but I would redo the wraps as Sombreuil recommended. Make the inside opening 1/4" larger because posts are not perfect and will twist over time. Coat all surfaces before assembly with a penetrating epoxy/spar urethane (or Cabot since that's what you have) and use biscuits and exterior glue at the miters with clamps. Redwood is a great exterior wood, but sealing everything including endgrain will help keeping the moisture content low. No filler needed.

    Vic B thanked carlos229
  • 10 years ago

    You guys are killing me... I've got to wrap my head around removing the wraps off all these posts, having a more experienced woodworker redo them properly and add several hundred dollars to an already expensive project. I also stopped by a shipyard shop here in Oakland and could see in the manager's eyes that epoxy wasn't going to work if the goal is to get a nice clean finish. Wraps off! and thank you again for your voices of reason.

  • 10 years ago

    I just saw in your photo you have what looks like holes for a rail wire? Does that do through the PT post?

    Can you live with making the 4x4 posts smaller just enough to fix the miters on the redwood? I'm not sure how the bottom is attached. Aesthetically, it might look better, since I think they might look a bit too "squat-ty" as is. They are roughly 5"x5" overall? 36" high?

    Say you shave 3/4" from the PTs (with a band saw) to recut the miters and get to keep the redwood material? That will take some skill.

    A 2x2 or 3x3 steel square post is another option, but again, I'm not sure how the connections at the bottom would be made.

  • 10 years ago

    Where to begain ????????? In principle,I agree with what has been said up to this point. If you paid for redwood,you should let someone examine a piece because that looks like fir,possibly pine,both of which sell sell for about 25% or less than redwood. If someone charged you labor ,you are due a refund. If you did this yourself maybe you should stay the course and finish the job if you injoy woodworking. Goodness knows none of us can make you an expert but between the bunch we can show you how we fool people into thinking we are experts. If you decide to go this route,let's see what everyone thinks of this spin on Casey"s reccomendation. Remove the 4 sides and temporarly tack shims to 4 sides of post to memic the void between post and sleeve when assembled. Clamp cover in place then snug 2 pieces at one corner and other 2 pieces at oppisite diagonal corner. Measure gap at open corners. Rip keys,shims or what you prefer calling them from scraps if you still have them to fit open slots. Keys need not be precision because we will have the gap repersented by shims tacked to post earlier. Keys will protrude from corner after glue up but a flush trim router bit will trim them perfectly flush. You might try one to see how it looks,you could be pleasantly suprised. I reccomend standing each finished assembly in about 1" of protectant in a pan so that end grain is totally saturated. What say you fellow woodpeckers? Can you handle it Vic?

  • 10 years ago

    "If you paid for redwood,you should let someone examine a piece because that looks like fir,possibly pine,both of which sell sell for about 25% or less than redwood."


    My first thought as well klem, that sure doesn't look like redwood to me either, wrong grain, wrong color.

  • 10 years ago

    Other than FG,I'm not sure one can even find 1x redwood now days. I salvaged 1x8 redwood from interior walls of an old home and sold it for $8 bf. A boat builder drove from Galveston to North Tx for some and was tickeled to find it.. All this might be totally irelavant to op but might inform lurkers you can't always rely on what you are told regarding wood species. I hired my house re-roofed and specced yellow pine for nessary facia replacement. Contractor was a member of BBB and all the trade associations but tried telling me the material he brought to site was yellow pine despite ever piece of it haveing a tag attached that read "mixed wood".

  • 10 years ago

    Looks more like a common or #2 WR Cedar the more I look at it. Look at the knot structure. Looks like WRC about to fall out.

  • 10 years ago

    Ok, branching in different directions... This is redwood, or, more exactly it's a mixed redwood/cedar sold in CA as redwood. Definitely not higher quality timber. As for the fix, the guys working on this have taken one apart and will follow your directions. Will determine how difficult it is to then reassemble properly. If it takes too long I will have them start from scratch and with better wood.

  • 10 years ago

    As wood go's,that looks to be nice straight wood suited to what you are doing. I didn't intend to imply the material is sub-standard,just not redwood. I would have never brought it up had you not stated that was the case. Coupled with the fit up issue I thought you might be getting the short shift both coming and going.

  • 10 years ago

    Update: At his expense, my contractor is redoing it all with new redwood, following the process you all have outlined. So thank you for your insight and expertise. I took a picture of the planks but they appear yellow while I can assure you they are the typical salmon/pink redwood color. I will take picture once the project if completed. It involves lots of stainless too!

  • 9 years ago

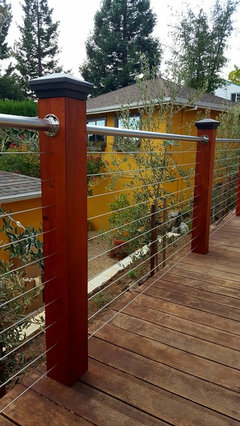
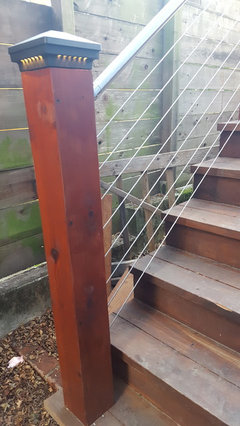
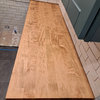
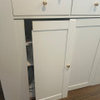
    I promised I would come back with a pic of the final project. While I'm not entirely done, I can still show what I was aiming to do. As before, feedback is always welcome and thank you again for your help in getting there.

  • 9 years ago

    That looks great,I'm sure you are quite proud of the completed project after all the involvement it required of you. Kudos on the contractor and congatulations on getting what you paid for,we hear of so many that don't.

    Vic B thanked klem1
  • 9 years ago

    Thank you. This certainly was a bigger undertaking than I expected, with plenty of research, errors and redos along the way. Do to the minutia (16 posts, 10 wires per, 2 sets of stairs, lighting) it would have been way too costly to have my contractor with his 2 guys do the job. Instead I ended up doing much of the work myself with him providing the bigger tools and fixing my many mistakes. For info, I sourced all the parts on the internet as direct as I could to avoid middle men mark-ups. Everything is in SS 316 (except post caps). I satin finished 80 ft of tubing and sourced as far as Australia some of the polished brackets and flanges. Once totally completed I will add additional pics to show the details.

  • 9 years ago

    Next project is to refinish the deck in the same stain as the posts!

  • 9 years ago

    We Looove pictures and and look foward to any you want to share. Wouldn't be surprised if someone decide's to steal some of your ideas.

  • 9 years ago

    It is said that imitation is the sincerest form of flattery. Good thing I don't make a living off my ideas!

  • 9 years ago
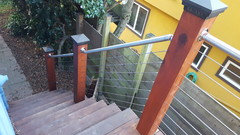
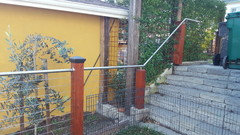
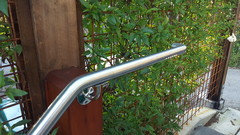
    As promised, here are pics with details of this guardrail.