Software
Houzz Logo Print
kitchenchemist

1905 kitchen brought into 2016: Before and After

9 years ago
I've lurked and searched all through these pages and benefited so much from people's pictures, experiences and discussions. I thought it was time to contribute a bit more now that our kitchen gut-job is no longer so gut-wrenching. I hope someone along the way finds this useful.

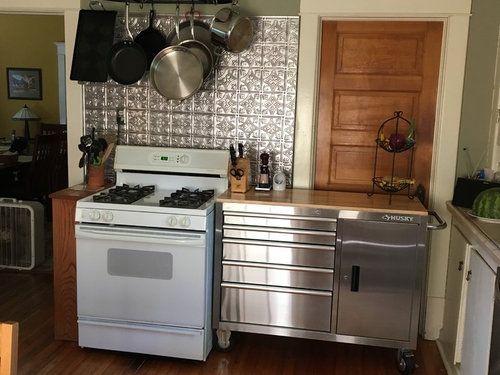
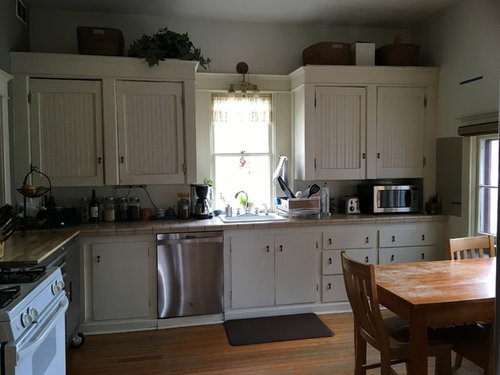
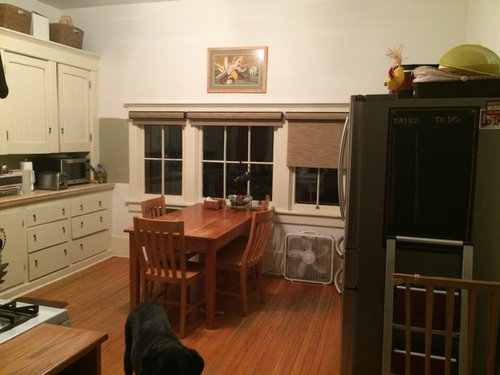
Our 1905 Simple Victorian still had remnants of the original cabinets, although someone took a Sawzall to them at some point, rendering them pretty dysfunctional and messed up. The layout meant the work triangle was the entire room (yep, the ENTIRE room) with a door to the bathroom right next to the stove. We had unusual pocket windows that went up in wall, meaning we could not insulate and there was no great way to lock them. That, and the largest one was painted shut and the other two only opened partway. So for years, I sketched, drooled over so many pictures here, planned and FINALLY, 2016 would be the year of the big kitchen remodel! Oh, and throw in replacing the 111 year old hardwoods that were giving up the ghost from the front door, through the living room, dining room and into the kitchen. Here's what the old kitchen looked like:

Note how low the pocket windows were, which meant my very tall DH could really only see out the windows when sitting at the table. Pretty weird.

Yep, that's a door into the bathroom. As my teenagers would sum up, "Awkward." My best work space was the top of a rolling tool cart and the drawers and organization were life savers...and my only landing pad next to the range.

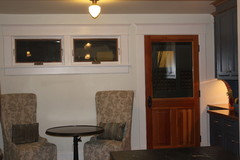
Looking in from the mud room. Soon to become the breakfast nook!

As these pictures show, the work triangle was situated on three different walls (the refrigerator is just to the right in this picture). Ugh.

On to the renovation:

After consulting with a historic window expert, the three low pocket windows were judged unsalvageable. We replaced them with Kolbe awning windows of the same size and full muntins (it's a historic house, so things like windows have to be approved). The historic preservation committee allowed us to move the windows up about 9", which was crucial to being able to reconfigure cabinetry and counter tops.

We opened up the wall between the kitchen and what was the mud room, now converted to a breakfast nook. Then it was time to take it back to the studs. If you're interested in the demolition and reconstruction process, I'm happy to add to this post, but there's likely a few of you wondering how it all came out, if you've read this far!

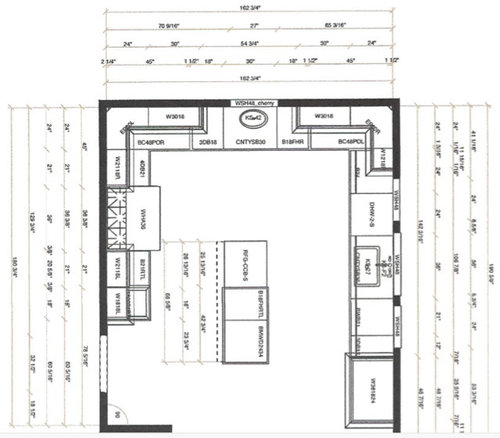
The article on Ice-Water-Stone-Fire for work flow was a huge contribution to my ultimate design. It gave me the final breakthrough on my layout: refrigerator drawers in the island near the prep sink and range. The placement of the island changed a little over time, but this is pretty much what we ended up with:

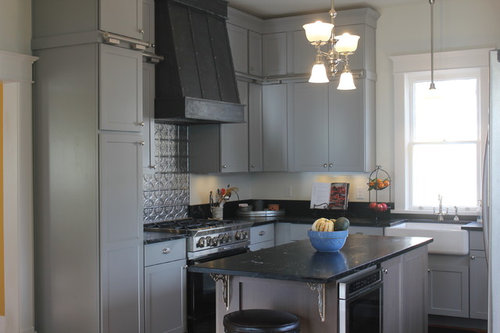
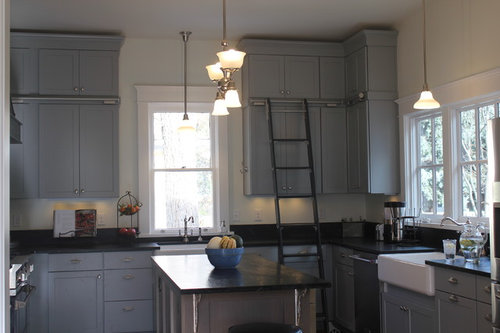
Here's where we are now!

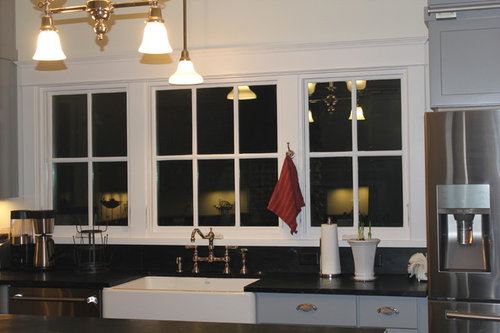
We installed Kemper Cabinetry, Soapstone Counters, Kohler 30" and 36" Whitehaven cast iron farmhouse sinks, Rohl Faucets. Bosch Microwave Drawer is in the island (only unforeseen complication is our Lab's nose prints when he watches what's being heated up in there!).

The rolling ladder has a home on a wall when not in use. We assembled a kit from Rockler for the rail system and ladder.

We love the new windows and their new placement! Lighting is from Rejuvenation: Council Crest over the island (cool detail: we found the original gas lines in the attic for the original gasolier lights) and Rose City fixtures over both sinks. Samsung Counter-Depth Refrigerator and KitchenAid Dishwasher are also along this wall.


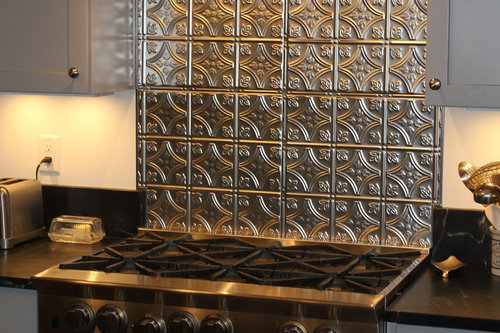
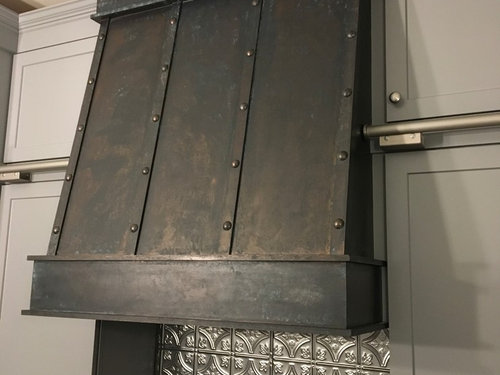
I feel like I went from a VW Bug to a Ferrari with my 36" Bluestar Platinum Range. I couldn't be happier with it. We installed a 36" Monsoon Zephyr Vent Hood with make-up air. The vent hood cover is a custom wooden design that DH and I painted with a Metallic Masters Aged Bronze paint kit. And yes, after doing a painting project together, we are still happily married! The backsplash is from American Tin Ceilings. We haven't had any issues with discoloration or heat-related issues that I've heard some worry about. But hey, Thanksgiving is this week, so I may have just messed up my ju-ju.

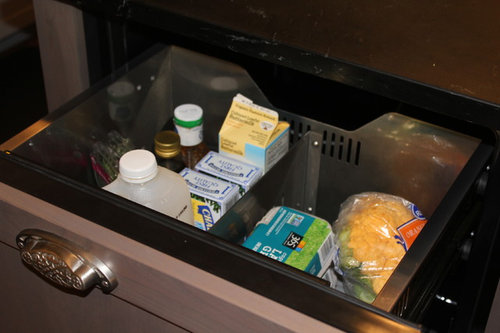
The KitchenAid Refrigerator Drawers mean that all my refrigerated ingredients for cooking are just under my main workspace in the island, right by my prep sink and the range. This is off-limits to everyone but the cook, which means I no longer find that the bacon was I was planning on using in a recipe disappeared after school! It was also the key piece to designing a tight work zone since the fridge is on the other side of the room from the range. A few weeks ago I cranked out 8 pizzas in a couple of hours while everyone hung out in the kitchen. And I didn't have to ask anyone to move even once! Pardon me while I wipe away this little tear of joy in my eye.

Comments (36)

  • 9 years ago

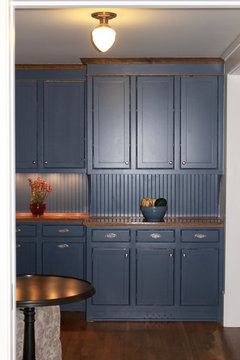
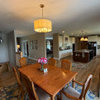
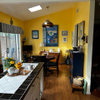
    Here are a couple pictures of the breakfast nook (not quite finished):

  • 9 years ago

    So lovely! Even the pulls are extra pretty!

    kitchenchemist thanked jhmarie
  • 9 years ago

    Wow! It is simply gorgeous. Yes you really did pay attention to a lot of the strange details that have come up over the years. Very impressive!

    kitchenchemist thanked practigal
  • 9 years ago
    last modified: 9 years ago

    Oh my gosh, that is absolutely fantastic! The ladder, the refrigerator drawers, and so much more--it's all so well thought out. And your range hood is perfect; what did you use for the round rivets? Also, how do you like the Zephyr Monsoon? We used one in our remodel and find it uncomfortably loud.

    When you mentioned pocket windows, my first thought was "how cool," but I guess it's one of those situations where the reality doesn't quite measure up to the initial assumption. Your solution looks wonderful and is certainly true to the former look and feel of the room.

    kitchenchemist thanked AvatarWalt
  • 9 years ago
    Thanks for all the kind words. I feel like I should give credits to so many on this forum. So many good ideas and experiences to steal from! LOL.

    The buttons on the range hood were inexpensive nail head buttons from Hobby Lobby. I scuffed them up, then used the primer, the bronze paint, then the aging solution before nailing them to the hood. We did make pilot holes so they didn't require much force to attach (I don't think they would take real hammering).
  • 9 years ago
    The Zephyr Monsoon isn't too bad. I don't have to run it on its highest setting much, which helps. But none of the others in the price range we had seemed any quieter and some were louder. Guess it's the price for avoiding a visit from our local firefighters. :)
  • 9 years ago
    jhmarie, the bin pulls are "Eastlake Gothic" from House of Antique Hardware.
  • 9 years ago

    How lovely. and very much in keeping! Great job.

    I really hope you at least kept the bathroom door. I'd kill to have that! :)

    You've done a beautiful job. I hope you really enjoy spending time in there!

    kitchenchemist thanked CEFreeman_GW DC/MD Burbs 7b/8a
  • 9 years ago

    Gorgeous!

    kitchenchemist thanked Wendy
  • 9 years ago

    Wow! It looks awesome! Did you move the door to the bathroom to the opposite side?

    kitchenchemist thanked mgmum
  • 9 years ago

    Not only is it a beautiful kitchen, but so thoughtfully designed for form AND function, like the gorgeous hood, the cook-only fridge drawer, the ladder rail with a home for the ladder, the island pendants providing both down AND up light (can you turn on just one direction, too?). Well done!

    kitchenchemist thanked bpath
  • 9 years ago

    I absolutely love it all. What color are your cabinets? Gorgeous. The whole aesthetic is beautiful and charming.

    kitchenchemist thanked Patti
  • 9 years ago

    So gorgeous! What type of soapstone did you go with on your counters?

    kitchenchemist thanked bailey183913
  • 9 years ago

    Amazing. Congratulations!

    kitchenchemist thanked aprilneverends
  • 9 years ago
    last modified: 9 years ago

    Yes, gorgeous! I love vintage kitchens--when I saw the before pic I was hoping that you'd kept the cabinets, but the finished kitchen is perfect. I share your joy!

    kitchenchemist thanked mama goose_gw zn6OH
  • 9 years ago

    Lovely! I'd have tears of joy, too. Great job!

    kitchenchemist thanked lindsaymarie79
  • 9 years ago

    and by the way, I actually love the shop cart as a kitchen cart. Great shallow storage!

    kitchenchemist thanked bpath
  • 9 years ago

    CEFreeman_GW DC/MD Burbs 7b/8a and mgmum: we left what we now call the "Door to Nowhere" in place on the bathroom side. There is a funny poster inside for those who want to open it. My kids are getting DH a full size cut-out of Spock for Christmas to put in there. ;) We may eventually try to turn that space into some shallow shelving in the bathroom. But the door will stay with the house for sure. ;)

  • 9 years ago

    pattisue72: The cabinet color in the kitchen is called "Juniper" and the island cabinets are "Seal Gray" (Kemper). In the breakfast nook, we used Benjamin Moore "Van Deusen Blue." Glad you liked it!

  • 9 years ago

    bailey183913: We went with Noire Soapstone from Dorado Soapstone. It's gorgeous!

  • 9 years ago

    Goodness, you have a ladder with rail in your kitchen! Swoon!!! 8 pizzas?-- pls. save me one, I'm on my way!!! Great job!

    kitchenchemist thanked lapsangtea
  • 9 years ago

    What a what an amazing transformation. I love everything!

    kitchenchemist thanked Melissa Kroger
  • 9 years ago

    This is exactly how one should renovate a kitchen in a period house. As an old house lover, thank you. Sensitively done, and just stunning. I can see why you're so happy in that kitchen. How could you not be?

    kitchenchemist thanked cpartist
  • 9 years ago

    Just beautiful! (Was Juniper the Ben Moore Juniper? Just curious, I love your cabinet color but on my monitor they look much grayer than I think of Ben Moore Juniper as being?)

    I laughed out loud at your description of your lab watching the microwave food. Thanks so much for posting your reveal.

    kitchenchemist thanked barncatz
  • 9 years ago

    barncatz: No, not Ben Moore. The Juniper is Kemper Cabinet's paint color. It is gray, with some blue undertones.

    Glad the lab story gave you a chuckle. I try to laugh every time I have to clean his nose prints off. I'll have to try to get a picture of it. It is funny.

  • 9 years ago

    Be sure and post them if you manage. :)

  • 9 years ago

    Wonderful transformation ... and yes, please post a picture of your lab watching the microwave ... I could see my dogs doing that also!

    kitchenchemist thanked pamghatten
  • 9 years ago

    It looks great. You should be very proud. I love when a vintage home can be brought modern without loosing character.

    kitchenchemist thanked 1929Spanish-GW
  • 9 years ago

    I love it. I'm so glad that you were able to update and yet keep the vintage character of your home. Your hood cover is a masterpiece.

    kitchenchemist thanked Bunny
  • 9 years ago

    I forgot one other photo. I had seen magnetic spice jars somewhere on the interwebs. I loved the idea and found references to using magnetic primer. Started down that direction until I walked into the house with a galvanized tray and had that little, "A ha!" moment. Instead of doing many coats of the magnetic primer, I had my HVAC guy cut two panels of galvanized to fit inside the doors of the cabinets. It works a treat!

  • 9 years ago

    Very nice looking kitchen! And the improved functionality must make you happy every day!

    kitchenchemist thanked cat_mom
  • 9 years ago

    Love, love, love your kitchen. What a beautiful space and functional, too! Being able to cook 8 pizzas with people in the kitchen with you and not having to ask anyone to move is remarkable and truly a testament to how well you designed the kitchen's workflow.

    I wish I'd have seen your idea of having the HVAC guy cut two panels of galvanized for inside your cupboard doors before I ordered a magnetic board for my command center. I have a feeling that people will be referring to your idea for a long time for their own uses. :)

    kitchenchemist thanked Cheryl Hewitt
  • 9 years ago

    This is spectacular! The cabinetry is gorgeous and rich, I love your color and molding choices, that you kept a tin backsplash, and am still trying to figure out what you did to make your vent hood cover look so good. Congratulations and a very happy Thanksgiving in the new kitchen!

    kitchenchemist thanked oldbat2be
  • 9 years ago

    I looked at your before pics and was worried. I really love the charm of your old kitchen. Then scrolled down to the after and wow!!! You certainly put a lot of thought into every single detail and it shows. What a charming kitchen. One of the best transformations I've seen on here. Well done!!! Stunning

    kitchenchemist thanked smm5525
  • 9 years ago
    oldbat2be: there are a few posts and tutorials on painting wooden vent hoods. We used Modern Masters kit for aged bronze. There's a primer, the bronze paint, and then the blue aging solution. We found that using a rag to blot on the solution and then gently rub over it gave the best effect for us. Thanks for you kind words!