Software
Houzz Logo Print
mdpalter

Evergreen shrub browning

9 years ago
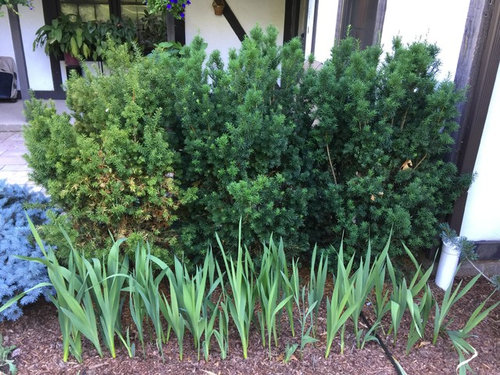
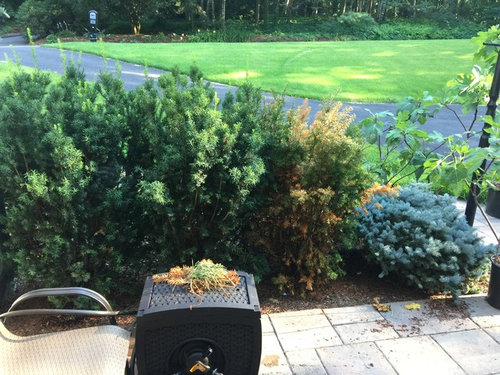
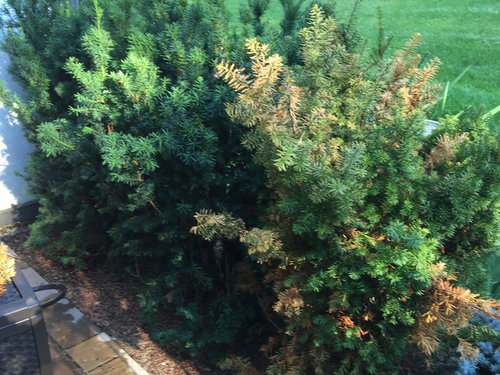
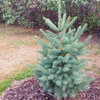
We have three evergreen shrubs that we're planted last fall after some landscaping. I fertilized them with hollytone in the spring but one of them remained lighter green and started to brown (it is the one on the left in the first picture which is from may). Over the next couple months more branches turned brown and it did not grow. I have tried watering it and fertilizing it with miracle grow for acid plants and also some irontone. I have given the same amount of water and fertilizer to all three shrubs. The other two grew and are now dark green and appear healthy (2nd and 3rd pictures). The one shrub continues to develop more brown branches and has not shown any growth. It actually has more brown than can be appreciated from the picture.

Thanks for any suggestions.


early spring


More recent

Comments (14)

  • 9 years ago

    its stressed ... it was never hungry ... just stop with the fert on any conifer ... any time ... its simply not a remedy for any problem ... unless a soil test indicsates something is missing from your soil ... and its rarely food that is missing ...besides... within a year or so.. the roots will be under the fertd lawn ...


    consider it dead.. and replace it in fall .. if you insist ...


    you are severely overplanted.. you dont even need a 3rd plant there .. you are not siting your plants to the potential they have.. rather than the small plant you are bringing home to plant ...


    when you dig it up.. you will find out.. why it failed ... let us know ...


    remember.. your trees and conifers are rarely.. if ever hungry ... they are trees.. not children ...


    ken

    mpalter thanked ken_adrian Adrian MI cold Z5
  • 9 years ago

    Thanks for the feedback. I didn't think it would survive. I just wasn't sure what to do so that the same thing doesn't happen to the other two. So after I remove it - it sounds like I should move the one next to it a little farther over instead of replacing it with another one.

    How far apart should they be? Should I also move the small one at the end to another location. We had to do some relandscaping because of some persistent water collecting over by our driveway (but not here). The landscaper put them all in that close to make it look nice right away.

  • 9 years ago
    last modified: 9 years ago

    If there is a problem with the spot where the one failed presumably moving another there will endanger it also. In fact if there is a water mold or other pathenogenic infestation in the browning one it may be in the process of or about to start moving its way through the hedge-like grouping.

    If this wasn't supposed to become a short clipped hedge then all three of them are too close to the concrete pad, with the current survivors needing much larger planting sites.

    mpalter thanked Embothrium
  • 9 years ago

    check water. unlike above, I don't think lack of water was the problem.

    i'll assume you planted the number you did because you wanted immediate coverage. they're yews. it's what people do. if you are diligent with the clippers, it's fine. do you need three? not even sure you need more than one.

    mpalter thanked waynedanielson
  • 9 years ago

    Your are correct about trying to get immediate coverage. The hope was that this would become a 5 foot tall hedge to provide some privacy for the area behind them in the first picture(a small patio area in front of the house). I hadn't trimmed them because I was waiting for them to fill in and grow a little taller. Before the re-landscaping was done there had actually been 4 similar bushes in the same space. They were replaced because they were much taller with green at the top and most of the shrub very woody with no green. I guess I'll have to dig around the root area to see if I can find something.

  • 9 years ago
    last modified: 9 years ago

    Failures of recently planted stock due to drying out are common. However since yews are particularly prone to root rot this is also a strong possibility in this instance. Affected specimen could even have come from the supplier previously infested due to exposure to puddles or splashing.

    ESTABLISHMENT OF CONTAINER GROWN PLANTS –
    THE IMPORTANCE OF WATER

    ...once a soilless mix is removed from a container it goes from holding adequate to
    excessive water in the container, abruptly, to holding very little water. Water is pulled away from
    the container growth medium and into the surrounding soil very rapidly due to the greater
    capillary attraction of the small pores in the soil compared to the large pores in the container
    growth medium. A thorough soaking / watering by hand to assure contact between the soilless
    mix and the surrounding soil is a must....

    Contrary to the much publicized recommendation to NOT fertilize landscape plants at time
    of planting or for the first year, my research has consistently shown that fertilizing at
    planting is VERY beneficial to root growth and establishment....


    https://rootmaker.com/sites/default/files/pdf/establishment.pdf

    mpalter thanked Embothrium
  • 9 years ago
    last modified: 9 years ago

    I haven't dug down yet (not till the weekend since I don't get home early enough to start digging) but if anything we would have overwatered last fall when they were planted. We were watering every other day. They did get fertilized once about a month after they were planted last year and a bunch since the spring. I guess I was puzzled about why only one is effected and not all three. Thanks again to you all for your comments. My local garden center didn't have much to say other than try some miracle grow (which I did with no effect).

  • 9 years ago

    When dryness may be a possibility applications of additional fertilizer salts are a bad idea.

  • 9 years ago

    the moist inexplicable answers are always when one in a row is affected. without doing some poking and prodding, it's impossible to expect someone to look at a picture and say anything beyond the most wild of wild guesses.

    I have a neighbor who had some yews look exactly the way yours does. the problem in that case was excessive water...often similar symptoms, but solving the issue can be different. Indeed, there are a number of site specific factors that could determine cause...you just gotta go through them and hope you can find a smoking gun. otherwise, it can be tedious to eliminate possibilities.

    Keep up with the pruning. You want the bottom to be wider than the top, and you want to allow a little growth at any given time. Sounds complicated...not that hard once you start.

  • 9 years ago

    How wide is the bed? It is hard to see in the picture. But if you want a 5 foot tall clipped yew hedge I fear there isn't sufficient width there for the base.

  • 9 years ago

    The bed is curved in the front so it varies from three to four feet wide although these are planted towards the back of the bed. The gladiolas in the first picture are the only thing planted in front of them. The rest is just mulch. It's a new bed we haven't planted much in yet.

  • 9 years ago

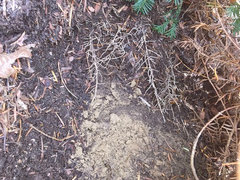
    I did start to dig out around the base of the shrub and here is I see so far

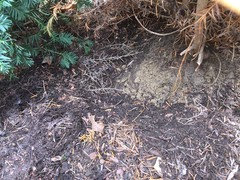
    On the left is a healthy shrub. On the right is the one that is browning. In the middle you can see roots that are growing from the plane on the left. No roots that I can find from the plant on the right.

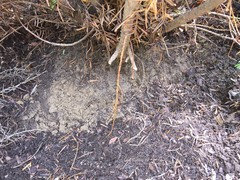
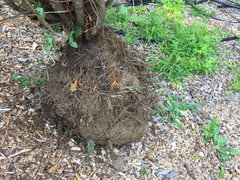
    Here is a close-up of the base of the plant. Below the normal appearing garden soil the root ball seems to be very dense clay (the lighter grayish stuff). That would have been what the plant came growing in since it is around the base of the plant? I plan to keep digging around the base of the plant but had to take a break because it was getting too hot.

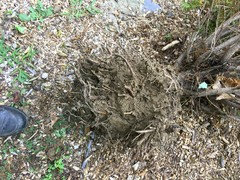
    One more shot looking towards the heathy plant with its roots coming towards the camera. Since I'm not seeing any roots from the plant with the grayish soil I'm not surprised it's turning brown. All three were from the same nursery and the landscaper planted them at the same time so I'm still not sure why this one is different than the others. It does seem solidly in there.


  • 9 years ago

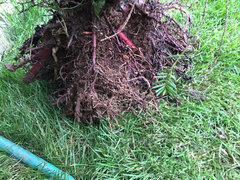
    One push and it came loose since there were no roots coming out of the original root ball. The soil around the root ball was more like cement. There were some big roots that had been cut - I guess when it was dug up from the nursery.

    After the jet from the hose

    I'm still not sure I understand why this one failed but the other two look ok.