Software
Houzz Logo Print
troutguy5

Art too big in DR?

6 years ago
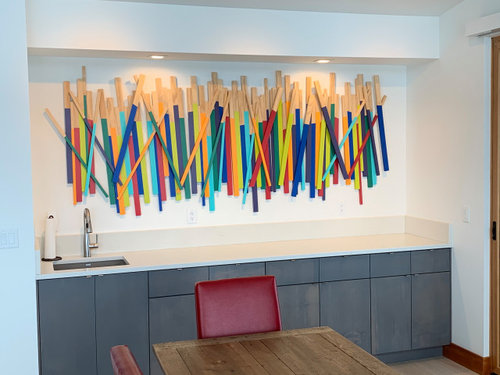
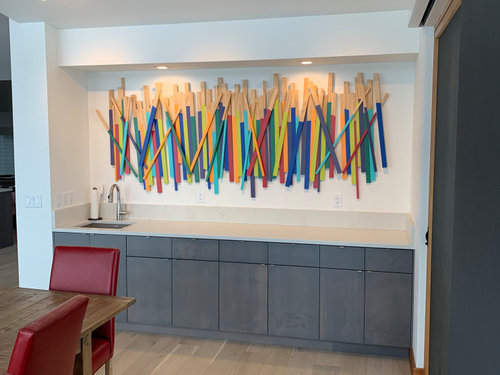
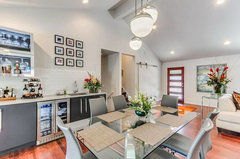
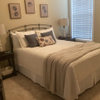
Wondering if I should move this art to another (bigger) wall? Is this modern art too squeezed into this wall above counter in dining room? My wife thinks I made it too big for this wall?


Comments (41)

  • 6 years ago

    Thanks for opinion. Yes, I made it...clear pine and a bit of manual labor...copied idea from elsewhere.

  • 6 years ago

    It's perfect.

    Jeff Smith thanked apple_pie_order
  • 6 years ago

    I love it, but I think it looks cramped. I would put it in a larger space, or if you can, shorten it by about a foot.

    Jeff Smith thanked daisiesandbutterflies
  • 6 years ago

    Love it. Post pictures of the other walls just so we can see if it is better suited to a different wall

    Jeff Smith thanked jck910
  • 6 years ago

    I think it looks fantastic! Love it and love the colors.

    Jeff Smith thanked ilikefriday
  • 6 years ago

    I think if fills the space perfectly.

    Jeff Smith thanked arcy_gw
  • 6 years ago

    It's the bar sink that detracts from it. Another wall would allow it to be the sole focus.

    Jeff Smith thanked decoenthusiaste
  • 6 years ago

    I like it just the way it is. Great piece!

    Jeff Smith thanked sushipup1
  • 6 years ago

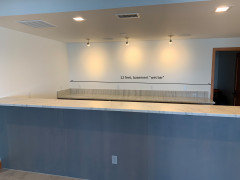
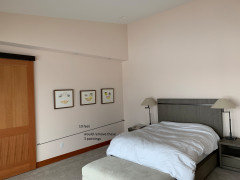
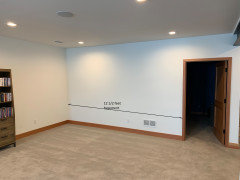
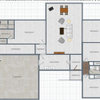
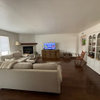
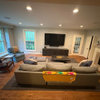
    jck910, here are 3 other walls that might work. The art is about 9 feet long.


  • 6 years ago

    Yep, it's perfectly sized for that space.

  • 6 years ago

    Beautiful. Love it. Perfect where it is!

  • 6 years ago

    Perfect where it is.

  • 6 years ago

    What a talent! It looks great just like you have it.

  • 6 years ago

    If you enjoy wine or liquor, you might upgrade that bar to be the real deal.

  • 6 years ago

    Wow, nice deco. We've got the wine refrigerator (can't see it) and it's filled with sodas, ha, ha. I like those metal shelves, though for glasses.

  • 6 years ago

    Terrifically creative idea! Love it where it is.

    Jeff Smith thanked User
  • 6 years ago

    I'd leave it where it is, framed and lit :-)

    Jeff Smith thanked hollybar
  • 6 years ago
    last modified: 6 years ago

    I'd really like to hear more about how you made this. Although it looks fairly uncomplicated, I'll bet it was a time-consuming labor of love. It's very cool.

    Jeff Smith thanked User
  • 6 years ago

    That is one of the nicer "I made this art" that I've seen. I also think it looks great where it is! So simple but so fun. Sign it by Duchamp--"Dinner flying across the room?"

    Jeff Smith thanked lisaam
  • 6 years ago

    I like it but I do think it’s a tad crowded. The alternate location would be my vote.

    Jeff Smith thanked thinkdesignlive
  • 6 years ago

    the wet bar would be my vote.

    Jeff Smith thanked thinkdesignlive
  • 6 years ago

    I vote for leaving it where it is. It looks like you made it for the space. Use it as intended. I love the colors you chose and your design.

    Jeff Smith thanked 22feetover
  • 6 years ago

    IdaClaire, here's now to build:


    a. get 3/4" select (knotless) pine from lumber yard or Lowe's/Home Depot

    b. rip with rip saw to be square (3/4" x 3/4")

    c. cut to desired lengths..I made semi-random within a range of lengths

    d. sand front and both sides

    e. apply painter's tape at an angle on 3 sides...this gives "dipped" look

    f. prime with quality indoor primer (2 coats) , use small roller for speed

    g. paint various colors after picking a palette of 5 or 6 colors

    h. in shop: attach into cluster of 12 or so pieces with hot glue and quality wood glue combo (the hot glue holds the wood glue so it can dry)

    i. on back of each cluster attach picture frame wires to eyes threaded into wood

    j. carry each cluster to target room in house

    k. place drywall anchor in wall

    l. insert a screw into drywall anchor with head protruding about 3/8"

    m. hang clusters, one-by-one on wall so they are close enough to swing to their neighbor, they will swing randomly around - this is ok because you're sticking them together in step "n"

    n. push clusters together so 2 adjacent pieces touch...glue and clamp overnight

    o. after all clusters hung and stuck together: take a few random pieces and place them on top of hung clusters, applied at different angles (hot glue & wood glue combo, no clamping should be needed)


    That's about all!


    Materials & Cost Estimate:

    a. 3/4" select pine or other wood depending on your taste. Amount is based on wall size ($120).

    b. 5 or 6 (or however many) paints: interior gloss wall paint (latex). Get quality paint, not cheap stuff (quarts...$120)

    c. picture hanging wire (multi-stranded) ($5.)

    d. eyes to screw in back of clusters, about 10 or 12 depending on needs ($2.)

    e. quality wood glue ($6.)

    f. hot glue - get better kind from Lowe's/Home Depot...don't use cheap craft type ($8)

    g. drywall anchors 10 or 12, depending on need ($3)

    h. 10 or 12 screws, the size of diameter of drywall anchors ($2.)

    i. interior later primer (white) , Kilz will work ($35)


    Tools:

    a. screw driver or electric impact driver/drill

    b. electric drill, drill bit for drywall anchors

    c. paint roller (small)

    d. table saw or bench saw for ripping (cutting with grain)

    e. chop saw or hand saw for crosscutting

    f. sandpaper, 60 grit, 80 grit and 120 grit

    g. smaller woodworking clamps (about 6)


    Note: The most technical part is step "b", cutting the wood. You may be able to use "furring strips" or similar pre-ripped wood that is already the correct width. Then all that will be needed is simple "cross cuts" across the grain and the wood will be ready to prime, paint, etc.


  • 6 years ago

    I like it Steve. great job. Love the colors and the size of it.

    can I just say my OCD wants to lower the right side a bit?? it just seems a bit higher on that end.

    Jeff Smith thanked Beth H. :
  • PRO
    6 years ago

    Very creative and Love the look. I can't be sure if it is "right" for the dining room. I sure am not in love with the "wet bar sink". I think the "wet bar" location you posted as an alternative is a better location, but not if there is a sink on that countertop. It's the sink that "sinks" it. Sorry. But great work and implementation and very generous of you to reveal the tricks of the trade in terms of how to make it.

    Jeff Smith thanked Flo Mangan
  • 6 years ago

    Flo,


    In basement web par there's a sink on near side of picture...the faucet top may JUST be visible in center of picture.


    Glad you like the art piece, I "borrowed" the concept from somebody and needed some quick, big art for new house, ha ha.

  • PRO
    6 years ago

    You are talented and generous. I know you will select best location. Moving it could cause undesirable breakage so if that risk is too much leave it. I like oversized pieces. Nice work.

  • 6 years ago

    Gorgeous! I love it and think it looks great there. You could put some vases or something on the right to visually balance the facet but overall, good place for it!

  • 6 years ago

    Fabulous! Thank yoyou you SO much for sharing how to construct this awesome art installation. Very interesting process and I'll bet it was a lot of fun to put together! I love it when people do such creative stuff, and I'm so glad you shared this with us!

    Jeff Smith thanked User
  • 6 years ago

    I like it better for the bar area

    Jeff Smith thanked jck910
  • 6 years ago

    Awesome. Looks great and really ingenious.

    Jeff Smith thanked Sam Potter
  • PRO
    6 years ago

    What did you decide? Just curious.

    Jeff Smith thanked Flo Mangan
  • PRO
    6 years ago

    I'm interested in know what you decided also. I think it fits quite well and is a fantastic piece of art!

    Jeff Smith thanked Norwood Architects
  • 6 years ago


    I decided to keep painted "stick art" where it is, in the DR. Most houzzies say they liked it best where it is. As I create more pieces of art I might shuffle the art around on the various large walls.


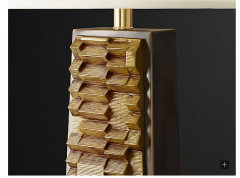
    My next conquest, after a few mundane items, may be a wall plaque sort of deal in the Brutalism style. I lifted this idea from a Restoration Hardware lamp and think I might make wall art with a similar pattern..

  • 6 years ago

    Wow. It’s a beautiful, and very creative piece. I love where you put it. It think it would be great on it’s own on an over sized wall, however, it’s also just as nice, to see it pop on a smaller wall space. Cudos!

  • 6 years ago

    Would love to see any and all of your wonderful art! Please do share.

  • 6 years ago

    following

  • 6 years ago

    i love it!

  • 6 years ago

    Beautiful, happy and creative!

  • 6 years ago

    Very creative! It's the perfect size for the area, IMHO. That's something you and your wife need to agree on, however.