Software
Houzz Logo Print
ellen_fasano

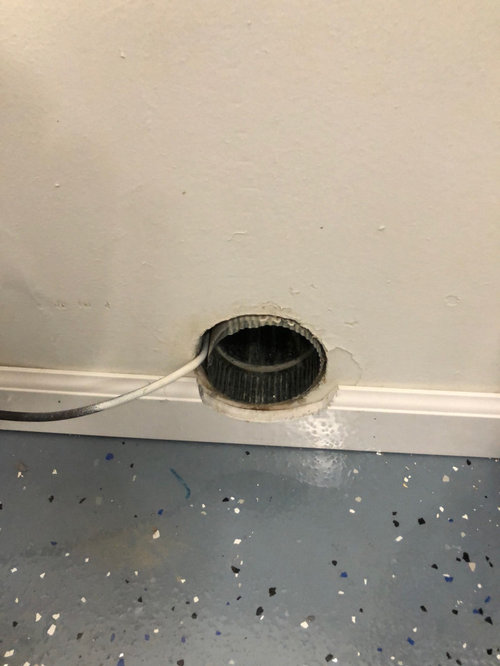
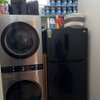
please help — How do I attach dryer vent hose to this opening?

5 years ago
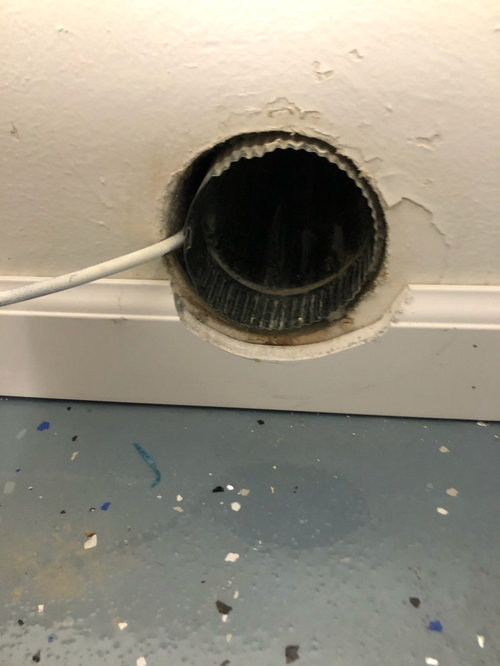
I need to connect my dryer to the vent in the wall and can’t do it because the vent doesn’t protrude far enough to get the hose around it and clamp it.
Thanks in advance; I desperately need to get some laundry done!

Comments (20)

  • 5 years ago

    i am assuming that is a power cord of some sort next to the vent. Dangerous since the wire will rub up against the metal and fray. Probably not code in most towns


    Before i did anything I would fix that

  • 5 years ago

    Are you comfortable cutting into the wall?

  • 5 years ago

    Defray, it is a coax cable. The person who owned this house before me has them poking out everywhere! The cable technician assured me it is not live. In fact, he said I could just cut it off and tuck it back into the wall.

  • 5 years ago

    Sammy — I, personally, am not comfortable cutting into the wall, but I’m comfortable having the wall cut. I’ll see if I can find someone to help with that option.

  • 5 years ago

    Jim, I didn’t know an extension was an option. When I went to the hardware store, the man in plumbing told me attaching the hose would be difficult and wished me luck. But he also sold me foil vent hose, which I’ve since learned on here is not necessarily safe. On to a different hardware store this morning!

  • 5 years ago

    It's a subpar way for the vent pipe to have been installed, as the corrugated edges will be protruding into the flow path and be prone to trapping lint. The book I used when I installed our ducting showed the corrugated end should always be pointing downstream to minimize sharp edges exposed to airflow.

  • 5 years ago
    last modified: 5 years ago

    It looks like a nice kit, but the video shows it fitting inside the duct piping along the straight (non-corrugated) full diameter entry. With the corrugated end of the duct showing, not the straight end, it will take significant massaging of the duct to get that plastic piece inside it.

    Crappy workmanship by the original builder or prior owner, who probably just slipped a duct extension or flex tube over it and pressed it in hoping for a seal...leaking moisture into the wall space the whole time. Really leaves the poster here with limited options. Have a carpenter open up the wall and correct it properly, or improvise.

    If the Everbilt piece posted by Stax above can be made to fit inside the existing duct, that would be my preferred improvised approach.

    If not, another improvisation option might be to slip an extension and 4" clamp over it and apply the clamp right up against the wall, hoping to create a seal along the ~1/4" of the existing duct protruding outward from the wall...and understanding the risk that it might leak moisture & lint into the wall space which would facilitate mold growth.

    https://www.lowes.com/pd/Lambro-4-in-Dia-Aluminum-Dryer-Vent-Extender/3239945

    edit: depending on the distance between dryer and wall, a 90deg elbow such as the one linked below might be an option, noting that it has slits pre-cut into the end which should facilitate clamping onto the in-wall stub. Still less than optimum.

    https://www.lowes.com/pd/Whirlpool-6-in-x-5-in-Galvanized-Steel-Round-Duct-Elbow/1002860720

  • 5 years ago

    Thank you all so much! I feel like I have some good options to look into now. I picked up an extender today and was able to make it work, but I’m not confident it’s a solid solution. I’ve got some more work to do. What type of professional would I call for help with this? I think it’s getting beyond my abilities.

  • 5 years ago

    What type of extension did you use? For the permanent fix, I'd post the job on HomeAdvisor or AngiesList and get quotes. There are two specialties involved: duct installation, and drywall/carpentry (might be 3?).


    For the connection from your dryer to the new wall fixture, stick with semi-rigid ducting...not flex hose in either plastic or foil. Fire hazard, and lint magnets.


    I gained efficiency when I replaced the flex hose on my dryer with a kit such as the one linked below. My Maytag Neptune dryer displays the elapsed drying time at the end of each load, and whereas previously I was seeing times in the mid-high 50 minute range I'm seeing times in the mid-high 40 minute range since the upgrade. I can also get the dryer closer to the wall thanks to the 90deg elbows in the kit. And the semi-rigid ducting is safer and less of a lint magnet than flex hose. A win all around. Also the periscope connector posted by Stax previously is a great option, just not as easy to slide the dryer in/out of position as it has no flex.


    https://www.bestbuy.com/site/smart-choice-semi-rigid-dryer-vent-kit-required-for-hook-up-silver/9282812.p?skuId=9282812


  • 5 years ago

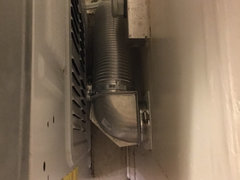
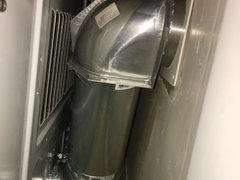
    Here is a pic of my installation. The through-wall duct has the straight non-corrugated end exposed, so the corrugated end of the 90 degree elbow fits inside. Another productive COVID project.


  • 5 years ago
    last modified: 5 years ago

    All this talk about dryer vents (and miserable weather outside) got me motivated to eliminate the unnecessarily long semi-rigid duct. I measured the distance at the elbows, and cut a section of galvanized steel 4” duct scrap to fit. It’s clamped in for test fitting, no leaks. Extra difficult sliding the dryer into place and fitting the elbow, but it wiggled in and clamped down without issue.


  • 5 years ago

    We used a MagVent in our new laundry room and love it. It uses powerful magnets for a solid connection. My laundry room is much cleaner now. If you are new to your area, try Nextdoor to find a local handyman that can help you.

    https://www.magvent-dryervent.com/

  • 5 years ago

    I did the same thing yesterday, removing the outside part of the system because it was plastic and crumbling. While you are doing this, you may want to check the outside and possible replace that as well.


    The MagVent looks very interesting, Wilson. I have never understood how people using the solid pipes manage to pull the dryer out to clean and find random missing socks.

  • 5 years ago

    Yeah, I'm not looking forward to having to move the dryer at some point as it will now require disconnection of the vent with this new solid duct I fabricated.


    I was seeing drying times with the semi-rigid tubing in the mid-40 minute range consistently for our regular clothing, and if the solid duct doesn't improve that significantly it'll come off and the semi-rigid tubing will go back on. There has to be some value to offset the extra PITA.

  • 5 years ago

    When I cleaned up my dryer venting situation, my dry times went from a bit over an hour to around 40 minutes. I'm still amazed at the difference it made. That is with 3 90 degree bends and using a periscope even. I have just a bit of semi-rigid flex vent and the rest of the run is solid tubing.

  • 5 years ago
    last modified: 5 years ago

    Just dried a load of 5 big bath towels and a few hand towels in 49 minutes with the new straight rigid duct, on my 15 year old Maytag Neptune dryer. Same load with the semi-rigid flex duct was 52 minutes. Minor improvement but worth the trouble.

  • 5 years ago

    Talk about stealing an entire thread.

  • 5 years ago

    That's some improvement and you had a short run to outdoors to start with. Probably will see a bit more with 'normal' mixed loads. Looks much cleaner & will be lots easier to clean.

    I replaced about 4' of semi-rigid flex with solid, changed the louvered vent outside with a ball seal (Lambro Vent Seal) and got the vent actually connected to the outside vent opening. DH had installed it originally; the tubing was not even connected to the tailpiece of the exhaust on the outside of the house! And no tape. Was a bit of a nightmare getting it connected because it exists thru the rim joist. So I had to work back in the recess over the foundation with floor joists over my head. Got it connected & taped up now. The space was so limited that I had to use 4-6" long pieces of tape to seal the joint. Combination of about everything that could be wrong was wrong. The periscope gained me about 2" of floor space, too. Which was huge given how tiny the laundry area is. Looks much more tidy and the reward was a big reduction in dry times.

  • 5 years ago

    Thanks. The duct is 9' of rigid galvanized steel from the thru-wall elbow to the exterior hood, which is an Imperial steel hood shown in the pic. I used 3" of semi-rigid pipe to connect it inside the garage, probably unnecessary but I was thinking about easy disconnection for cleaning.