Software
Houzz Logo Print
worthyfromgardenweb

It's July 2025. How's your build going?

last year
last modified: last year
Mysterious glitches at Houzz that spared you my monthly grousing just as mysteriously solved. (Thanks Houzz technical!)

(I do keep in mind that it's all piddling twaddle compared to recent natural disasters and ongoing wars.)

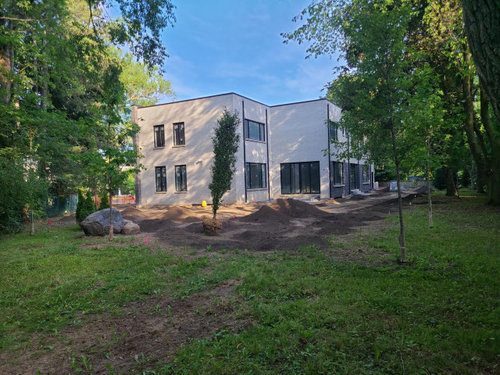
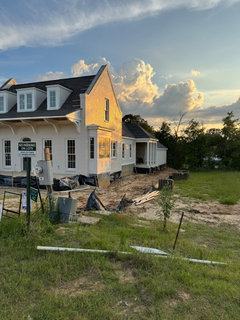
Now aiming for a Sept. closing.

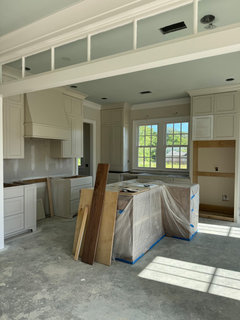
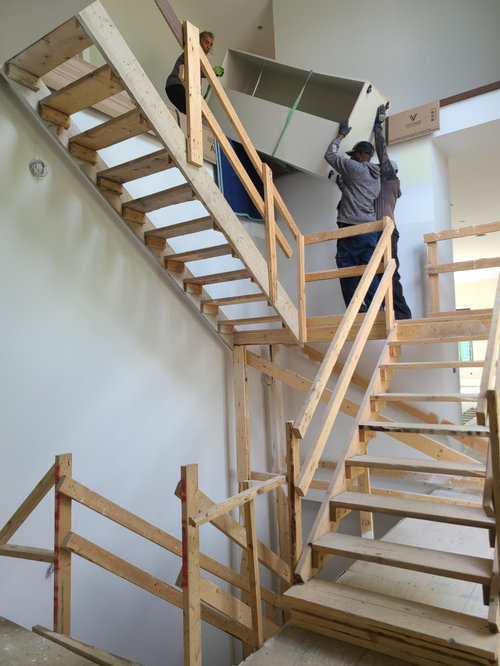
One of a dozen closet boxes making its way to the primary walk-in.


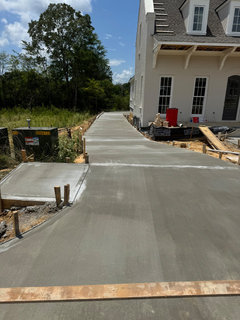
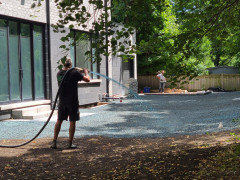
Heaps of triple-mix ready to spread prior to hydro-spraying grass seed. Sprinklers are in.

About half the back yard will be left natural with a large addition of native wildflowers and plants. At least, that's the idea.

Comments (37)

  • last year
    last modified: last year
    That is looking lovely, Worthy.

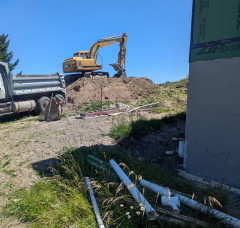
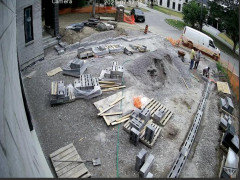
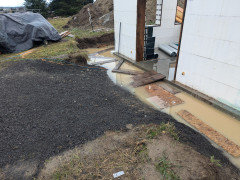
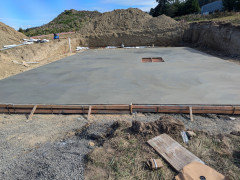
    I moved the big excavator up for some of the last big earthmoving events.

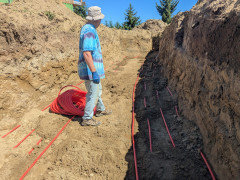
    My brother and I got the last ground loop in for the heat pump.


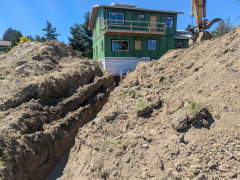
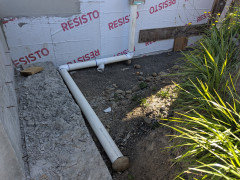
    Then I moved this mountain of dirt for the umpteenth and last time, benching down so I could bring the side sewer out from the house and finally backfill against it.


    I had left a 10' wide slot between ground loops for this and I jumped down on the bench and brought it out to the pump location,


    I was going to get a gravity sewer connection from the development next door, but they have set their schedule back another year for that phase, Now I am back to pumping it up to a nearby main.

    I twisted a knee in and out of the ditches and my nephew came to the rescue. He gets to do it all with my supervision and does new things every time he comes out.


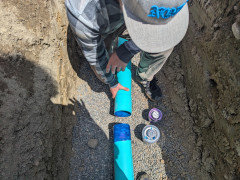
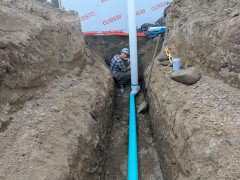
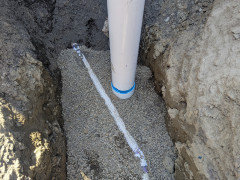
    He learned how to grade with the laser and pea gravel. I called the inspector with a question. I had scheduled the inspection for the next day, biut he sent a guy out that afternoon and we got it installed and inspected the same day. Then we graded above it for the vent pipe.


    Pump systems need a vent to operate properly.

    Nephew is coming out tonight and we will number and pull all the ground loops back out of the wall, install plywood inside and then send them back in with ferncos and finally get that grade brought up for the next series of retaining walls.


    worthy thanked Kelly M
  • last year
    Just shows what can be done--if you're a diyer with a 22 ton dozer!

  • last year
    Worthy, you have come a long way from that muddy hole in the ground you showed many months ago!

    When do you get your real staircase?

    worthy thanked chispa
  • last year
    last modified: last year


    Funny you should ask.

    I confirmed this afternoon that delivery starts this Friday, right after powder coating the stringers. Fingers crossed!

    Closing in on 26 months since demo. Our previous personal build was nine months demo to moving in. And it was no small deal either.


  • last year
    last modified: last year

    Installed and inspected in one day! that's impressive @Kelly M!

    Our land man is scheduling us for next week. Installing a culvert at the gate and sacrificing few beautiful oaks with the mesquites and cedars to cut electrical easement and clear building pad.
    Anxious to see how the pond is holding after Texas Floods. I am grateful we couldn't afford those beautiful plots on the Guadalupe and that our friends there are safe. Still praying for those missing campers.

  • last year
    last modified: last year

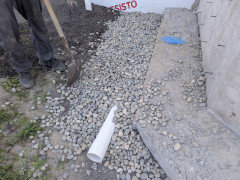
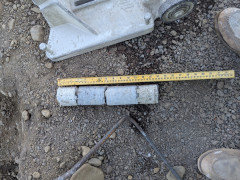
    @kathleen MK please consider spending some extra $$ for a sleeve by the culvert. It can be thinwall D2729 4" x 10' PVC drain pipe. If put in with care it will be fine.

    It is $26 a stick and priceless if you want to cross the driveway with:

    1) lighting

    2) gate control

    3) irrigation

    4)any thing you can imagine!

    3 sticks and it is priceless to not have to dig up the driveway for any of the above.

    I happen to have a bunch of SCH 80 that I toss in here or there. Use one and it pays off completely

    Put it in about 18" down and mark each end with a stick or make an as-built drawing.

    You can push conduit or whatever you desire through it.


    Anybody else reading, do this at sidewalk approaches, that stranded island of landscaping behind the walk, across the front of the garage opening from grass to grass. Do it while the machine and guy is there.

  • last year

    Are you talking about running a conduit parallel or perpendicular to the steel pipe?

    I know Coop water line runs parallel and there are phone lines along the road as well. We saw them in the erosian. Both are away from where the culvert will go. I will probably use native stone instead precast concrete at the ends of the culvert and add bars to block debris. Electric will be over head once the easement is clear for poles.

    Great idea to bury conduit before building.


  • last year

    Just put a sleeve across the driveway on your property. I put in a few and if I use only one it is still worth not tearing up the driveway.

  • last year
    last modified: last year

    Finally we are starting our build! Four years after approving the architectural plans, the building envelope has been cleared and the builder just sent me pictures of the Helicore foundation piers "screws", which will act as the support for the house.


    worthy thanked AC M
  • last year

    What local soil conditions suggest Helicore?

  • last year

    That's some fine sand. Either go that way or massive footings, depending on the seismic zone classification.

  • last year
    last modified: last year

    We previously built on sand--the 10,000-13,000 year old beach front of Lake Iroquois, essentially a larger Lake Ontario. Our soils engineer speced wider than usual footings and advised taking care that the sand was undisturbed. And, as it was a termite area, we were required to have a licenced pesticide company apply termiticide before pouring the footings.

  • last year

    We’re making excellent progress. Foundation was poured mid Feb. We’ve just finished paint, tile is starting next week.


    We got walks, courtyard, and driveways puored last week.


    worthy thanked jackson2348
  • last year
    last modified: last year

    The soils are loamy fine sand and soils formed from marine sediment. We could have chosen wood pilings, but the cost was fairly close, and the helicores allowed us fewer piers under the house, so more open areas for storage etc.

    There is a slight chance of seismic activity as it's located in the coastal plain of S.C.

    worthy thanked AC M
  • last year

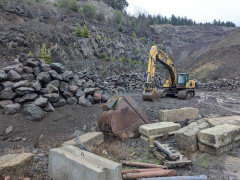
    I am now planning the rock walls. Once I install the sewer pump and line I can run with that. I estimate about 500SF of wall and get ~10 SF per ton using 2~3 man rock. The quarry is very close and gave me a price of $35 per ton. I'll need a ground spotter with artistic vision.

    I'm willing to give it a go with that.

    The rock in the foreground is 4 man plus sized. It would be from those back stacks. I may fit some big ones in but they get less coverage per ton.


    worthy thanked Kelly M
  • last year

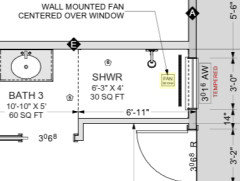
    I need some help my style conscious friends. Our house is built with I-joists and vaaulted ceilings to 12' at the ridge. I look at this shower and it feels just wrong to me. That wall line marked E is the ridge. I can block that space down with a horizontal lid and want to do so, but at what level? I know a certain steam effect of a long shower will be hard to maintain with a doorless shower, but with that huge volume above it seems impossible.


    I was thinking bringing it down to as low as 8'. it would have a vertical face at that short wall line and would not need an access hatch per code.

    That's one!

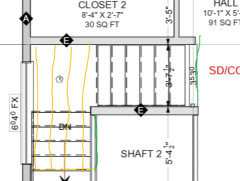
    The other big one is at the top of the stairs.


    That one I am limited to ~30" by code unless I want to put in a hatch.

    This is a structural improvement to the shaft wall as well as a cosmetic thing,

    It will serve to tie those two walls together. I would take the framing out over those descending stairs from the landing as shown in yellow, and it would create two vertical surfaces depicted in green.

    So the ceiling would come down to 9.5' at the top of the stairs and would still be quite high over the stairs as you descended. It seems to me that would be an improvement.

    I await your welcome comments.

  • last year
    last modified: last year

    I'm loving high ceilings and hating steam showers. So no help here!


    *****

    Jackson2348


    Incredible fast build!


    *******


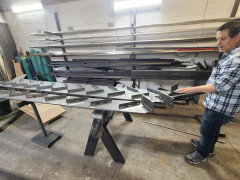
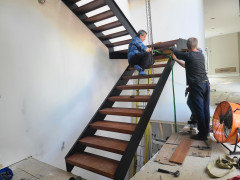
    Staircase being assembled.


    (But I'm missing the temporary stairs for which no care had to be taken to avoid damage!)

  • last year

    Kelly M - ask the framers to add collar ties across at the height you prefer either at 8' or 9'.

  • last year

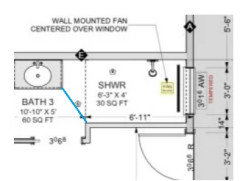
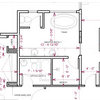
    @Kelly M What is the distance between the corner of the sink and the corner of the wall (blue line marked below)? Looks like a bit of a hip bruiser to me, especially if the floor is wet. Maybe round the corners of the vanity counter?


    Also, where do you plan to hang towels or place a bath mat while in the shower? Is the whole room a wet room?


  • last year

    @chicagoans that drawing does not reflect the new reality.

    I moved the toilet from the other end of that double vanity to the space adjacent to the shower now. There is about 40" to cruise through with a wheelchair now. I am also making the first sink next to that toilet an ADA sink, with no undercabinet.

    My sister is an amputee and her late husband was in a wheelchair most of his adult life, some 47 years. He was a firefighter injured on the job.

    I have created and invented adaptations for him over the decades, including a pool lift that he could use without assistance that used the power of a garden hose to lift him.

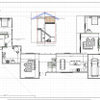
    This has influenced my design decisions and I have a roll in shower like that on both main floors, and that is an elevator shaft in the second image.

    The three ground level doorways are zero entries. There are no steps to hinder access anywhere that have not been addressed by the platform lift that is going in the shaft.

    All doorways are 3'.

    The half bath/powder room is going to be ADA also. Why not?


  • last year

    "is the whole room a wet room?"

    The dashed line is where the 1/4" per foot slope starts. A bathmat would go to the left of that.

  • last year

    @Kelly M I've been impressed with your building skills, and now I'm wowed by how you are taking care of family and planning for whatever may come in the future!

  • last year

    Thank you @chicagoans for the kind words. My framer friend is on the job getting those showers ready for the flood test.

    I was mistaken about the area over the elevator shaft. I can lid that all the way over to the sunroom wall and stay under the maximum 30" that would require a hatch access. That will be neater, methinks. The ceiling would be 9'6" if I did that. Not exactly low!

    That would do nicely over the descending stairs and landing.

  • last year
    last modified: last year


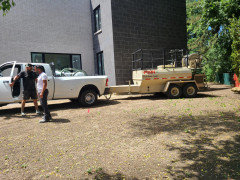
    Hydro seeding equipment


    And bluegrass for you.


    Aw Gee guys! 12 hours in the hot sun is enough!

    (Want work done? Get sexagenarians!)

  • last year

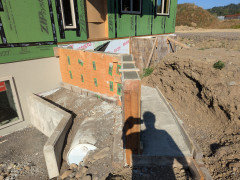
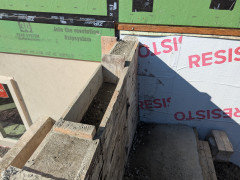
    we poured the last retaining walls and window well today.

    The doors are becoming approachable.


    these ones get clad in stone for the water feature.

    This notch is the waterfall spillway.


    worthy thanked Kelly M
  • last year
    last modified: last year

    Sure hope you're not creating Fallingwater West!

  • last year
    last modified: last year

    are you referring to the leak or the scary low parapets?

    I have the leaks well covered by drainage and waterproofing. The footing drain is below the footing grade and daylights away from the house.

    I have risers up off the drain, one in that window well for example. It has a required drain that also serves as a cleanout and a way for me to check for any water moving down there.

    When I excavated the clay soils it was fall and then I had it open for the winter, and no water is moving at that depth. If any shows up in the footing drain I will know something is up.

    example:

    Rain event November 20


    Footing drains going in November 27!


    That pipe behind my brother is at the north retaining walls area.

    Behind wall 1

    That riser is now behind wall 2 we just poured for a repeat drain at that level.


    On the south where the water feature is going


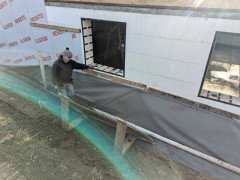
    For the water feature itself, we are running an EPDM pond liner down the stream, right through the notch in the wall, down the wall behind the stone cladding, into a the receptor below and back up above grade for layer 1. All in one piece 5' wide.

    I will set the waterfall ledge on top of that liner.

    It will be continuous all the way to the pump chamber.

    Layer 2 will be bedded in sand above that liner and land on the back edge of the waterfall ledge stone.

    That will be the upper working liner.

    I expect no water in the layer 1 but there it is.

    We will decorate the stream bed above layer 2, and it is intended to be easily replaceable.

    If I see any water in that drain in the window well I will know something is up.

    The neat thing is all of it is under the cantilever balcony, A water feature with a roof over it.

    worthy thanked Kelly M
  • last year

    Last week was archaeology week. In September I had set everything just below grade to get a good finish from the concrete crew. It is pretty flat.

    Now that I have all the hydronics run, I don't need to run scaffold all over. Time to dig it all up.


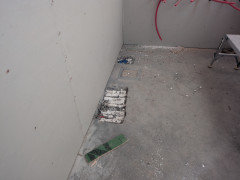
    This is the basement full bath group, plus W/D

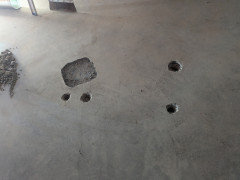
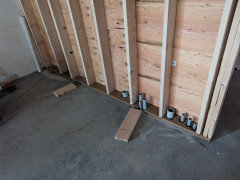
    The tub box was obvious. Once I opened that up with the sledge I nailed all those pipe locations with the sledgehammer. Each spot is a coupling ready to be extended up.


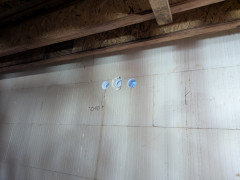
    I'm a geek. I have lots of communication conduits and whatnot in the equipment room wall along with power conduits that I do not get to use.

    I hammered them out, extended them up, patched the concrete and the framer built the wall.

    I will go ahead and drop a humble brag here. I had a string line up to the perimeter. The ICF wall is 13.5" thick.

    I left a spot for each stud in this wall, and I nailed it!

    The one odd gap is for the Ufer ground. I screwed up when I straightened it up out of it's nest.


    The hydronic PEX tubing was hiding under the concrete too. I drilled 2x2 styrofoam cubes in the end, slipped them over the pex and wired them down below the pour. Now that the equipment room wall is up, I can lay them against the wall and pour back those two holes.

    That is a floor sink between them. They are a commercial thing and very handy for water heater pan drains, T&P valves, and whatever you may spill while working. The finisher gently blended a slope into it.


    I rotohammered holes to the north for some things and today we core drilled the main power, CATV, and a spare or two going under the carport to the east. This is my holdup.


    Graphic of the ICF wall section.


  • last year

    Smart to drill more holes than you need. Conduit, wires, water, etc - EVERYTHING takes about 3x more space than you think. We have not had to core drill any more holes, but I suspect we will at some point.


    Excellent job on laying out all the plumbing - it's not easy on a slab and having them land exactly where you want is a big win.


    Love your zero threshold / stairs apprach. We did the same - mostly to support our geriatric and blind dog(s) - but realized it worked for our aging as well. The large doorways, showed, overall framing is a welcome way to move through the house - as is the no stairs. We're flat pretty much from the driveway entrance through the backyard to the retaining wall. Bliss - was bliss moving in with dollies and furniture!!!!

  • last year
    last modified: last year

    Thank you:)

    was it a recent build, do you have pictures to share?

    We can live on floor 1 and not go to the others, but there is a lift for that.

  • last year


    Five years in the making we are pinching ourselves everyday that we finally get to build our house, designed just for us. We are in New England on a 4 acre private (narrow but long), house is just over 2600 sq. ft., 3 bedrooms, 3.5 baths, bonus room above garage that could be a 4th bedroom. Selling our current house has been more stressful than this new build, but now that the existing house is sold and we can stay until the new house is complete we can focus on the future.

    worthy thanked Devonfield29
  • last year

    Wow Janni!

    Where are you at? I have not seen a tilt up residence, and I am guessing outsulation on the pandeck above the lid?

    Cool stuff. Sink is fun.

  • last year
    last modified: last year

    What a great idiosyncratic hard-edged industrial build!

    Curious, how the exterior concrete is insulated? Thermomass?

    Artificial sod, I take it.

    Devonfield29

    An idyllic house in the woods. Hmm....

  • last year

    Thanks for the kind words.

    Construction is fabricated and craned in place concrete sandwich panels - 3/4/3 (concrete / insulation / concrete) thermally isolated with carbon fiber ties between the wythes. Passive solar as we're facing due south with overhangs sized to control sun getting into the house in summer. The mass SHOULD make it stable - right now we're dealing with some HVAC issues as they are not really designed for this S-L-O-W responding environment. Roof is metal standing seam insulated panels (Kingspan) 6" insulation and they lower face of metal cut where they meet the insulation in the sandwich panels for continuity of insulation. 6+ inches of insulation below slab (no radiant)


    We are in Raleigh - mild winters - HOT sumemrs and humidity is a major concern.


    STARTING to enjoy things that we worked so hard on - flat exterior. Can easily wash my car in the shade. No muddy dog footprints - so nice - GSD still sheds an entire dog daily, so there's that on the while floor... Shower is great - we isolated the HVAC there through an ERV so it's not dumping humidity into the house. It is EASY to squeegee and clean every surface. Still filling the pantry. IKEA closet system is great - that room is calming. The Big Ass Fans provide good airflow. The cheap HALO LED color switchable cans are surprisingly nice and take well to dimming. Highly recommended and like $25/each! One fab item was the Grohe Blu water chiller and carbonator. I am WELL HYDRATED and the dogs like it too. Use it ALL THE TIME. Overall the appliances are great - induction great, Subzero great, steam oven great - although most meals are cooktop or salads at the point in the summer... Oh and the dogwash tub by Flying Pig - makes bathing dog(s) really simple and so much easier on my back.


    I'll take pic of the screened porch - once it's a little cooler we'll spend a lot more time out there - the company could do large panels and they are also rated to be fall preventative (not that it mattered for us) but it really helped keep the clear views and fit the look. Outdoor furniture on order and I need to hang the TV. (all the TVs actually, but trying to find perfect heights since I don't want lots of random holes in the wall.) . And need to do some glass frosting on the doors to the master bathroom and guest shower area.


    And need to get the art up - more color is needed on my walls - using a rail hanging system to help make that easier.

    worthy thanked just_janni
  • last year

    pretty nifty construction, that would be a fun project to stand up for a crane operator. I happen to have that card in my wallet.

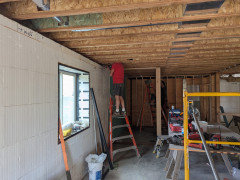
    I have a plumber in the house getting started, along with a framer doing odds and ends so my day is a lot of keeping materials in front of them. Fortunately supply houses are nearby.


    I got a design and Bill Of Materials for the DC lighting system today. It included 5 Carro ceiling fans and 5 bathroom vent fans.

    121 can lights, 4 fancy vanity lights, 1092 watts of LED lighting. 60 smart and dumb switches, etc.

    Just a shade over $8000

    This is all the lighting for 4300 SF plus the 600 SF carport and other cantilevers.

    It is powered out of a Leviton multimedia cabinet that is powered by ((((1)))) 20 amp circuit that is backed up by the inverter and battery in case of an outage.

    How does that sound for price/value? I really have little to go on. Having all the smart features is worth a great deal to me.

    worthy thanked Kelly M
  • last year

    That DC lighting system sounds great. If we spend less than C$60K for lighting and hydro (400 AMP service) I'd be amazed! Click here for August 2025.