Software
Houzz Logo Print
jnkhan82

HELPPP! Stained Furniture project gone wrong?!?

12 years ago
last modified: 12 years ago
Hey Everyone! Any way to save this project?

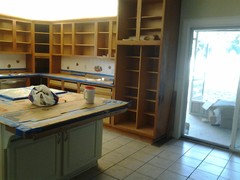
In bit of a situation, so me and my wife decided to attempt our first DIY project by staining the wood vanity...well as you can see from the picture something has gone totally wrong. We used Polyshade MiniWax from home depot, 220 grit sand paper and a sponge brush and so far have only done 1 coat on the drawers—you can see the original color on the frame. From the picture, one door is much darker, brush strokes everywhere etc...looks a mess. Any idea what we can do to save this? any help is much appreciated.

Comments (93)

  • 11 years ago
    Nothing wrong! We used this on several pieces and the darker shades take 3 coats, and yes sand and use a tack cloth to keep it smooth and dust free between coats. Good luck!
  • PRO
    11 years ago

    @Deb Linn-Zajac:

    When stripping I do it a minimum of two two times with chemical stripper. Lesser strength strippers may take more. The first strip is removed with a sharp putty knife. The second with a stiff synthetic bristle brush. Scrape and brush with the grain. Wipe down with the appropriate solvent (read the can). Sand beginning with something like 100 or 120, then 150 and 180 not skipping any grits in between. Use a sanding block. Be careful not to sand through the veneer. Sealer is only required on certain woods. Yours looks like birch so a sealer may be needed to prevent blotching. Get rid of the gel and polyshades, both are junk. Stay away from all MinWax products, junk too. I like Sherwin-Williams, Zar, Old Masters stains, in that order. Top coat with a compatible finish. Stick with the same manufacturer as the stain and you will be fine.


    Do not sand between stain coats. Sand between top coats with 320 grit.

  • 11 years ago

    Al, looks like you need an ask Al thread, lol! You are the man! :)

  • PRO
    11 years ago
    last modified: 11 years ago

    And he has the patience of a Saint!

    Al F.

    You should just "copy" that info to a Word File... and paste it when needed!

    Which is apparently quite often. haha

  • PRO
    11 years ago

    For removing the screws.

    First of all use the right size screwdriver. The blade should fit snugly in the screw slot, and equal the screw head width. Clean the slot out if it is full of gunk.

    If that doesn't work, try heating the wood around the screw with a hair dryer set on high. Then try to remove it.

    If you have a drill with a impact setting on it try that, again using the correct size bit.

    Life will be a lot easier if you get those doors down, and you will get a better finish in the end,


  • PRO
    11 years ago
    last modified: 11 years ago

    Sorry but no. No matter what it says on the can, the stained wood filler and real wood will never match unless you get artistic. I would leave them as the are unless that is the veneer that has worn through.

    I can't tell from the picture but whatever has been put over the handles and hinges should not be keeping the screws from coming out.

    Using the right size screwdriver, in a clean slot, push very hard into the screw while turning.

    The wood behind those handles looks like pine. So you will need a sealer prior to staining.

  • PRO
    11 years ago
    last modified: 11 years ago

    Artistic = fine brushes, paint, stains, dyes, toners, whatever it takes until it matches. Usually easier once the finish is on because the finish will change the colors and then it won't match again.

  • PRO
    11 years ago

    Still think the doors are birch.


  • PRO
    11 years ago

    There are many products and they all have a specific use. Minwax in general is not a bad product.

    Polyshades is a quick fix product sold to the do it yourself crowd. It could work on very small projects were you want an all in one quick fix.

    Gel stains are not all the same and are not Polyshades. Gel stains to simplify are thicker quicker covering stains that are used when going to a dark color quickly. Since they have such concentrated color they can go over even painted surfaces and produce a dark stained look. If you are looking to cover grain when using cheaper woods this is your product. Many of the darker espresso or java colors that are so popular today are gel stains. They give that brown paint look that everyone on here seams to want to achieve.


    Stains are used on real wood where you want to accent the woods color not change it. You can put as much java stain on birch and it will never produce the even dark color you want or that a gel stain will produce.

    Staining or finishing wood is as much work as building the piece. Soft woods require a sealer or blotch preventer when using stain. Again gel stain is a quick fix for this as the dark color covers just about anything.


    General Finishes have great products that are user friendly. You have to know what you are working with and what desired result you are looking for. If you have a fine piece of walnut use just clear or a stain. If you have a piece of poplar use a sealer and gel stain.


    Good luck

  • PRO
    11 years ago

    @wannabath; Stains are just that stains, they soak into the wood and highlight the grain patterns. Gel stains are not stains. You are not staining anything if you are going over an existing finish. There is no soaking in and they are not highlighting anything. Might as well use paint, same result. You get fake grain called streaking. There is no quick fix for any quality finishing. Polyshades are even worse. The are streaky and cloudy. Again hiding the beauty of the wood.

    If all you want is a "quick fix" to keep up with the trends (expresso/java), fine, but it's not a quality finish and those products are not quality products.

    Anything worth doing is worth doing right and polyshades and/or gel stains are not right. You won't find any quick fixes in my shop.

  • PRO
    11 years ago

    There is only one quick "addition" I'd make to your comment Al F.

    "Any job worth doing... is worth doing twice" when it comes to the quick/easy fix!

  • PRO
    11 years ago

    Isn't that exactly what I said? The pic above is a low grade wood being stained a dark color it has nothing to do with something you would find in a pro shop.

    Well actually that is wrong and one look at all the positive reviews of cheap wood stained or almost painted brown demonstrates that is todays trends like it or not.

    Reread my post, again I have no idea what you are challenging or correcting? This is not a high quality piece where you would want to accentuate the grain or wood and is the reason it is being gel stained. That is the appropriate product for that job and has zero reflection on what I like or do. Matter of fact 90% of my posts on here tell people to do the opposite but budgets are budgets and that is wanted here.

    Try and apply a quality stain and tell me if it achieves the look? then apply a gel stain and you will see the difference. This isn't a piece of African Mahogany being refinished in a pro shop.


    A novice will not achieve the look you get in your shop so why misdirect them for the sake of being right?


    Good luck I ave no argument here just trying to get OP to desired finish even if not my taste.

  • 11 years ago

    You kinda have to start with something that is worth all the effort in the first place. The ROI just isn't there.

  • PRO
    11 years ago

    Deb for sealer use Zinseer Seal Coat and sand lightly after.


  • PRO
    11 years ago
    last modified: 11 years ago

    @wannabath and Sophie;
    The most recent posts here are an add on to the original and a completely different subject. I think you need to read the whole thing. I'm trying to help someone who wants to fix up their kitchen cabinets, Nothing was ever said about dark (java) colors.

    It should have been a separate post.

    Wannabath, I'll say it again gel stains and Polyshades (whoever makes them) are junk, might as well use paint. And to use Houzz as the worlds expert on trends and colors is way off base. It's nothing more than trendies following the flock. And by the way African Mahogany is not high end wood, in fact most of sold as "mahogany" is not even Mahogany.

    Sophie, I usually agree with your comments, but this poster just wants to repair the finish on their cabinets and doesn't have 20k for a new kitchen. I''m just trying to help do that.

    What a way to start the day :)

  • PRO
    11 years ago

    ROI = return on investment. Not an issue here.


  • 11 years ago

    Results vs. Time Invested. It's not all about money. Time is a precious commodity too.

  • PRO
    11 years ago
    last modified: 11 years ago

    @ Deb Linn-Zajac,

    I'm going to stop all email notifications of this thread to me, it's too old to continue adding to and creating confusion. If you have any further questions, contact me through the "contact me" button on my page.

    I'll keep the notification on until l know you have seen this.

    Al

  • PRO
    11 years ago

    So much bad advice and bickering. A few of you know what you're talking about. First of all, there is nothing wrong with polyshades. If used correctly it finishes fine. It is a tinted polyurethane, so it does little actual staining, and you don't wipe it off. Even thin coats and let dry. First coat will look like garbage, second will be better, third might be finish level. Light sanding between coats. Bare surface doesn't have to sanded to virgin wood, but it does need to be fairly uniform in appearance. Good for a quick, cheap fresh look or color change. Treat it like paint more than stain.

  • 11 years ago

    Al, first of all im a newbie here so forgive me if im pisying in the wrongnplace. I had an issue with my kitchen table which I absolutely loved. Took the leaf to Sherwin Williams to match the color and it ended up not anywhere near the original color. But, I was going to use it anyway... So I did. I stripped... I sanded... I used a wood conditioner. Then I stained and wiped it off with a lint free cloth... Only to wake up this morning with a few little gray patches on the top. What went wrong? And I want my rich honey color back that was originally on it :(


  • PRO
    11 years ago

    @dimples1863, please start a new dilemma, this one is almost 2 years old and full of misinformation on various subjects.


  • 11 years ago
    I would if I could figure out where and how to post a new issue.
  • PRO
    11 years ago

    OK, I no longer get notifications to this thread. I coincidentally saw yours. So if I don't answer it's because I don't know there is a response, and the way Houzz works, I'm not going to sort through hundreds of posts. Like said, this is an old thread and needs to be put to bed.

    Now, for your problem. From your picture, I really don't see anything wrong, so I'm only guessing.

    First, my guess is that you didn't get all of the old finish off before re-staining or the previous step wasn't completely dry before applying the next, or some moisture got trapped in the seal coat. Second, if the wood type doesn't require a conditioner, a conditioner will cause the wood to not take the stain as much as if there was not conditioner. Not all woods need a conditioner. Third, matching a stain to a completely finished piece of wood will not result in a matching finish on the new or refinished piece, once the top coats of finish are applied.

    So, based on what you have told me, I would recommend starting over. Strip, with a chemical stripper. Sand with 120, 150, 180 with the grain. Then apply your stain and finish.

    Please remember I am not being notified of new postings on this thread. If you like you can contact me directly through my Houzz home page or my website (www.alfortunato.com).


  • 11 years ago

    1. I wonder if you're staining "real" wood or composite type material.

    2. Preparation is key. So I've learned. I believe you should have sealed the wood first.

    3. I've used those stain poly combinations and they do not turn out well. Stain should be applied first then the Poly.

    4. Gradually use a finer grade sand paper.

    5. Let each coat dry thoroughly. Outdoor humidity can affect this.

    6.. I have found that steel wool works better than sand paper for the final sanding. OOO works best for a smoother finish.

    If you really want to save this, I would have it professionally stripped and start over.


  • 11 years ago

    OK I am having a similar issue with a water based General Finishes stain. But I am starting a new thread, thanks.

  • 11 years ago

    It looks as though you were not stripped down to the wood.

    Take drawers and doors off and do those on a flat surface.

    Don't use poly/stain combos unless it's something unimportant. I recently used it on outdoor benches.

    These are the instructions I have saved.

    Med 150 grit


  • 11 years ago

    (Sorry hit the submit.)

    Med 150 grit

    Sand lightly

    wipe w/ tack cloth

    Conditioner before staining , give an even cover

    foam or bristle brush is fine

    wait 15 minutes before putting on stain

    wipe off stain in direction of grain

    wait 8 hours to dry

    Finish w/poly. W/ foam or bristle brush in thin coats.

    I got these instructions from a wood working show on PBS.

    I believe there is a wood "conditioner" that is being talked about. Not sure the brand.


  • 11 years ago

    Rancherchicks...it was a table not a dresser and yes, it was stripped down to bare wood. It is SOLID wood...all the steps you mentioned I did... I ended up stripping all the way back down... The only thing I changed was my stain color and it turned out fantastic!!!! Thank you for your input and help :)

  • 11 years ago

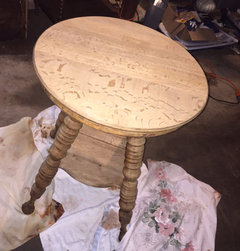
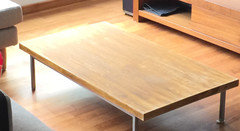
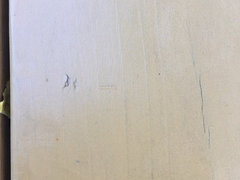
    HELP! I have no idea what these marks are on the top of this table...it looks like it could be varnish left there but I stripped it several times and have been sanding forever and they are not going away. Now I am wondering if it's actually the wood or can varnish sink in so deep that you can never get it out???? what should I do?

  • 11 years ago

    @ Dimples1863 , glad to hear it. We work so hard and then to have it not turn out good is frustrating.

    @nitasecret, I suspect they are natural to the wood and would look good when finished.

    Kind of like "Tiger" maple or "Fire" "Flame maple. google "Flame maple and you'll find images of what I mean.

  • 11 years ago

    That is fantastic news!!! Thank you! Thank you! Thank you!

  • 10 years ago
    Did you strip it with stripper and sand it down before you tried staining it? Or did you just put stain over the old stain?
  • 10 years ago

    Ummm of course... stripped.... Sanded to bare wood...used wood conditioner... I ended up stripping and sanding it all the way back down... Repeated all the steps and only thing I changed was the color of finish and it is GORGEOUS...

  • 10 years ago
    Yay!!!! Sorry, I didn't mean to sound patronizing, just didn't know. :)
  • 10 years ago

    Someone please help me I'm trying to stain my oak cabinets a dark color and it's coming out terrible I feel like I just screwed my kitchen!!!

  • 10 years ago

    @vickie - start a new thread with exactly what you have done so far to your cabinet and what you are using. You will get more replies with a new thread - maybe in the morning as its bedtime here:)


  • 10 years ago


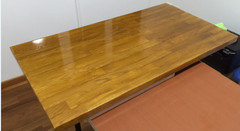
    I applied those 2 in 1 poly + stain finish for my coffee table top. Regretted using 2-1 products as it does not give me an even finish.


    This table top is made of MDF board plus 3.5mm of oak. I have sanded using 100 grit to remove the finish however Im not too sure how far should i sand it. Im scared that i will sand through the wood into the MDF board. From the side it still shows alot of oak left. Should i sand back to the original oak colour? I will be applying separate wood stain and finish with poly instead of the 2-1.

  • 10 years ago

    I am in the processing of sanding a Mid Century Modern solid walnut coffee table that has dovetailed inserts. The exterior edges and dovetails are sanding very nicely and are a light blonde. One area of the darker walnut began to 'blonde up' where a liquid stain once was. It is approx. 12" x 10". Feels smooth like the rest of the wood but looks terrible. Is there anything I can or should do before I apply a finishing oil to it? I am using 150 grain sandpaper.

  • 10 years ago

    If i were you try using A laquer thinner or even pure acetone to see if it takes most of it off, I use acetone to strip everything and its never failed me just make sure you are in a well ventilated area and wear gloves and a mask so you dont inhale fumes. Wait till your for sure that all the acetone or thinner is completely dissolved then, if there is still any stain on there use a medium to light grit sandpaper to take the rest off making sure to not put scratches in the wood. Then before refinishing make sure you use a pre stain wood conditioner to eliminate blotches and paint brush marks, brush a thin coat on and wipe off with a cotton rag or old shirt or w/e you have available. wait about 5-15 minutes and you should be safe to try restaining your cabinets, make sure you dont go overboard with the stain, use even brush strokes and always wipe the excess stain off. Now depending on the darkness of the shade you want depends on how long you let the stain set before wiping off but dont go longer than 5 minutes, Just remember stain is to penetrate and paint is to cover. hope this helps

  • 10 years ago

    oh and when sanding just remember not to go too smooth because then the stain has no way of penetrating into the wood


  • 9 years ago
    last modified: 9 years ago

    I'm having problems with brush stokes with gel stain on kitchen cabinets

    How can I fix? Polyurethane was put on before I got there to ck on.

  • 9 years ago

    Are you putting gel stain on cabinets that already had a finish on them? I know this is done, but I strip off the old finish before I apply stain and I apply it with a cloth and wipe off the excess. Gel stain can take up to 24 hours to dry - be sure poly is not put on till the gel stain has dried. If the brush marks are from the stain and has been covered by poly, you can't do anything about it unless you remove the poly.

  • 9 years ago
    before will post after shortly. sanded down, added gel stain, poly put brysh marks in stain gel.
  • 9 years ago

    I have only used gel stain as a stain on wood totally stripped of the previous finish, and I use a cloth to apply it, wiping off excess like one does with traditional stain. If you have totally sanded off the previous finish, use a soft cloth to apply the stain and wipe off excess after a few minutes.

    I know some use gel stain as a "paint" over a lightly sanded former finish. I have not used this approach. I've seen it on the internet, but I tend to be old school as to refinishing:)

    Anything that is under the poly cannot be removed without removing the poly first. If there are brush marks after applying the stain, they will not go away by themselves. You will need to find a better application method - perhaps a different brush. Try asking a reputable paint store how best to apply gel stain over an older finish.

  • 9 years ago
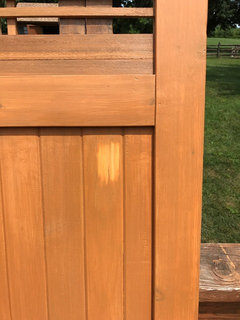
    Hi! I stained this gate ...got a big drip... tried to rub it off...really messed it up with this mark ! Anyone know a way to fix this ?
  • 8 years ago

    Had our deck stained with semi transparent and got much less transparent results than expected. The person who we hired did it right after a night of heavy rain. Is this how semi transparent should look on redwood?

  • 8 years ago
    Polyshades is not a stain. It's basically a tinted polyurethane. It is advertised as stain and poly in one. It's tough to work with, but you can go over polyurethane. To stain you must go to completely bare wood. Stain is absorbed. Polyshades sits on the surface. Polyshades works best if all brushstrokes go the same direction, 2 or three light, gentle coats with a good brush and a day of dry time, don't shake the can, and in an area of light use because it is not as durable as regular poly over stain
  • 6 years ago
    last modified: 6 years ago

    I made fortunate error many years ago. I didn't understand the difference between stain or even how polyurethane, varnish, etc., we're even used for SO I purchased a can of Polyshades to go over cheapo furniture I purchased from Value City that was coated in cheap varnish of some weird sort that peeled like nail polish. I didn't know what I was purchasing and the directions on the can were WAY too tiny to read SO I dug out a book (this was pre internet popularity of being able to look things up) and looked up stain. I sanded off the ugly varnish and used a staining sponge. It came out BEAUTIFULLY and exists to this day, at least 20 years later.

    I WILL say that I encountered Polyshades again recently and there's clearly something weird about the formula. It gets very streaky if one tries to apply it with a brush or foam brush AND it lacks the overbearing smell AND it takes forever to dry AND it can get lumpy, the latter occuring ONLY when using brushes of any kind.

    It's just too viscous to use with a brush.

    Personally, I like the product even though it IS a bit of a PITA because of the fact that if one decides to change the color it can be stripped. Not so if your wood is traditionally stained.

    The trick of application, and I'm doing my kitchen and bathrooms in Bombay Monogamy right now (from what I've named "Ugly Condo Contractor Grade Is That Oak?") right now and using applicator pads, lightly buff sanding with 220 grit pad in-between is ONLY way to get it on right. If it runs or blotches before you get to it and is dry, use mineral spirits and 120 sand paper LIGHTLY in the dripped or overdone are (,you can knock down drips with razor blade too but have to smudge it a bit afterward ( Polyshades sits on TOP of wood, it is NOT a stain).


    Minwax, IMO, gives extremely poor instructions.


    There are other "poly + stain" products on the market but they are over the top UGLY! I've tried them.

    If you use an aplucator pad OR old t-shirt (even better if your project is vertical) and pretend it's stain and use very light coats it will come out fine.


    Don't even ATTEMPT to use a brush, roller, or foam applicator, it will START OUT well and part way through you'll have disaster on your hands.

  • 4 years ago
    last modified: 4 years ago

    I only read the first couple of comments here and they are wrong. Polyshades is not a stain. It is a combination product that often yields very uneven and very unpredictable results. You cannot wipe it back, as some suggest, like a stain. It is NOT a stain.

    I dealt with the Polyshades nightmare in my kitchen when redoing all of the cabinets and it was, indeed, a nightmare from hell! It took me MONTHS but I finally fixed it so that it's at least presentable.

    In my experience, I've found that the only way to really make a project come out properly is to completely strip it and sand it to bare wood.

    There are way too many products on the market now that swear up and down that you can apply them over existing finishes. They do not work. I should say they do not work WELL.


    I then graduated to another product that claimed that it, a water based stain, could be used over existing finishes. HA! Yet another bunch of lies!


    Seems the industry is running rampant with companies catering to DIYers with false promises. There are just are absolutely no shortcuts, period.


    A jug of Citristrip is a good start to getting a good, clean base to accept a finish.


    If you are trying to go over something that's actually attached to a house that you might be selling please spare yourself as many buyers will simply turn and walk away if they see cabinets or built-ins that have been painted over or finished in such a manner that they're going to have to pay thousands of dollars to have to undo.


    I'm in the market to buy a new home and I will walk away from one that has painted cabinets, period. It's way too expensive and way too much of a headache to undo.

  • 4 years ago

    Why did you again resurrect a 7 yr old thread?