
Search results for "Floor tile layout idea" in Home Design Ideas
 User
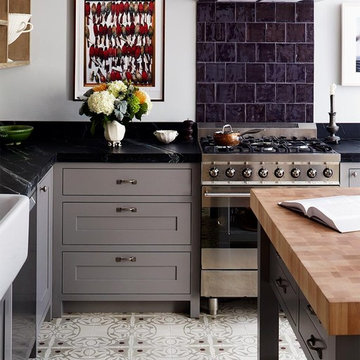
UserA transformed Kitchen. With custom shaker cabinets, encaustic tile floors, soapstone counters, and a butcher block island.
Architectural photography by Bob Martus
 Blythe Interiors
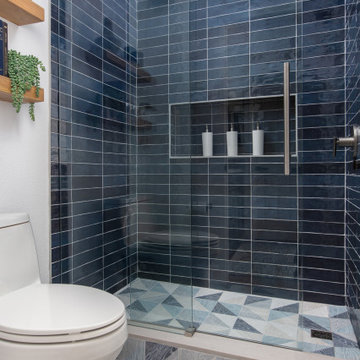
This bathroom got a punch of personality with this modern, monochromatic design. Hand molded wall tiles and these playful, porcelain floor tiles add the perfect amount of movement and style to this newly remodeled space.
Rug: Abstract in blue and charcoal, Safavieh
Wallpaper: Barnaby Indigo faux grasscloth by A-Street Prints
Vanity hardware: Mergence in matte black and satin nickel, Amerock
Shower enclosure: Enigma-XO, DreamLine
Shower wall tiles: Flash series in cobalt, 3 by 12 inches, Arizona Tile
Floor tile: Taco Melange Blue, SomerTile
 Metropolis Drafting and Construction Inc
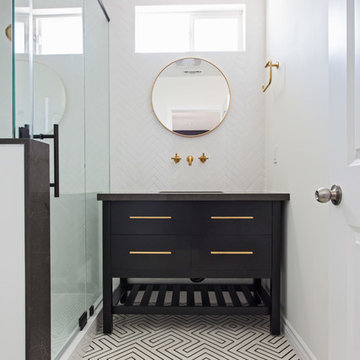
This bathroom is part of a new Master suite construction for a traditional house in the city of Burbank.
The space of this lovely bath is only 7.5' by 7.5'
Going for the minimalistic look and a linear pattern for the concept.
The floor tiles are 8"x8" concrete tiles with repetitive pattern imbedded in the, this pattern allows you to play with the placement of the tile and thus creating your own "Labyrinth" pattern.
The two main bathroom walls are covered with 2"x8" white subway tile layout in a Traditional herringbone pattern.
The toilet is wall mounted and has a hidden tank, the hidden tank required a small frame work that created a nice shelve to place decorative items above the toilet.
You can see a nice dark strip of quartz material running on top of the shelve and the pony wall then it continues to run down all the way to the floor, this is the same quartz material as the counter top that is sitting on top of the vanity thus connecting the two elements together.
For the final touch for this style we have used brushed brass plumbing fixtures and accessories.
Find the right local pro for your project
 Michael Menn Ltd.
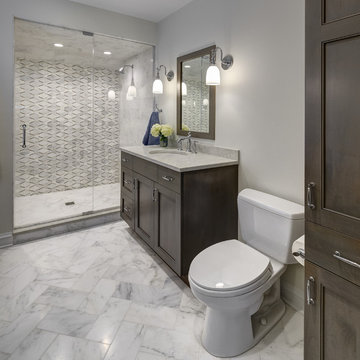
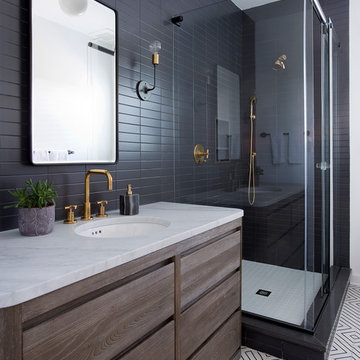
This view of the bathroom shows off the beautiful tile of the shower as well as the built in cabinet. The brown cabinets are a beautiful contrast to the light colored floor and countertops.
 threshold interiors
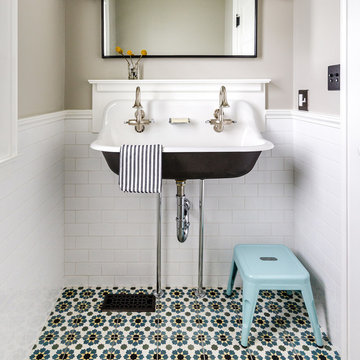
This cute cottage, one block from the beach, had not been updated in over 20 years. The homeowners finally decided that it was time to renovate after scrapping the idea of tearing the home down and starting over. Amazingly, they were able to give this house a fresh start with our input. We completed a full kitchen renovation and addition and updated 4 of their bathrooms. We added all new light fixtures, furniture, wallpaper, flooring, window treatments and tile. The mix of metals and wood brings a fresh vibe to the home. We loved working on this project and are so happy with the outcome!
Photographed by: James Salomon
 Amy Storm & Company
This is a SMALL bathroom with a lot of punch! The double sink was painted black on the base to tie into the black accents on the floor. The subway tile was added to protect the space and make it super kid proof, since this is the bathroom closest to the pool!
Joe Kwon Photography
 DiGiacomo Homes & Renovation
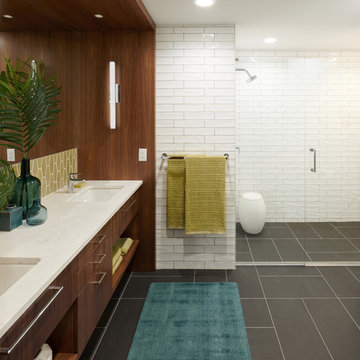
With no windows or natural light, we used a combination of artificial light, open space, and white walls to brighten this master bath remodel. Over the white, we layered a sophisticated palette of finishes that embrace color, pattern, and texture: 1) long hex accent tile in “lemongrass” gold from Walker Zanger (mounted vertically for a new take on mid-century aesthetics); 2) large format slate gray floor tile to ground the room; 3) textured 2X10 glossy white shower field tile (can’t resist touching it); 4) rich walnut wraps with heavy graining to define task areas; and 5) dirty blue accessories to provide contrast and interest.
Photographer: Markert Photo, Inc.
Sponsored
Fredericksburg, OH

High Point Cabinets
Columbus' Experienced Custom Cabinet Builder | 4x Best of Houzz Winner
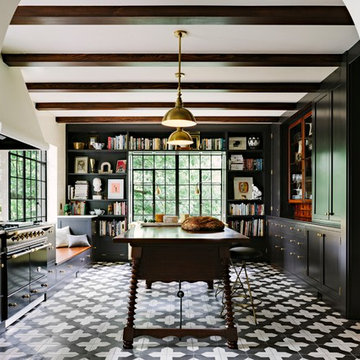
 Granada Tile
Inside a classic Portland, Oregon, condo building, Em Shephard, the project manager for Jessica Helgerson Interior Design chose our Badajoz cement tile to cover several floor spaces, including the kitchen, creating a chic, unified and graphic look. Interior Design: Jessica Helgerson Interior Design / Photograph: Lincoln Barbour / Cement Tiles: Granada Tile
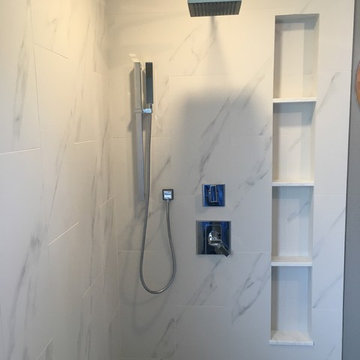
 Custom Surface Solutions
Custom Surface Solutions (www.css-tile.com) - Owner Craig Thompson (512) 430-1215. This project shows a master bathroom remodel with porcelain 12 x 24 white and gray veined marble on walls and floors, custom multi-shelf shower niche with marble shelves. and gray hexagon penny tile shower floor.
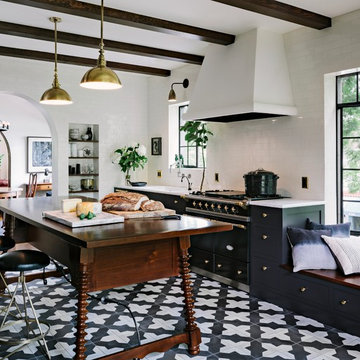 Granada Tile
nside a classic Portland, Oregon, condo building, Em Shephard, the project manager for Jessica Helgerson Interior Design chose our Badajoz cement tile to cover several floor spaces, including the kitchen, creating a chic, unified and graphic look. Interior Design: Jessica Helgerson Interior Design / Photograph: Lincoln Barbour / Cement Tiles: Granada Tile
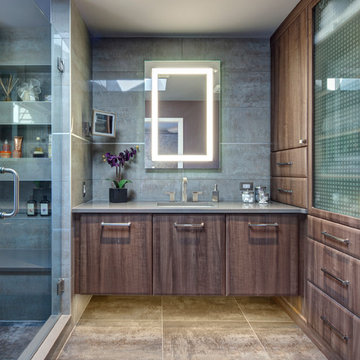
 Drury Design
The homeowner was looking for a lot more space in a very small bathroom. In order to overcome the room’s lack of any kind of storage the oversized tub was replaced with a shower bench and multiple niches for shampoos.
Additional cabinetry storage was created by wrapping the vanity cabinets around a wall and creating tall linen cabinets in an area that had not been used before. Floating vanity under cabinet lights and a special wall lit mirror helped to open up the small space.
Large format Porcelenosa Ston-ker Ferroker floor tiles and field tiles in the color Aluminio were used on the floors and vanity wall. Special attention was paid to the geometric layout of the horizontal lines of the entire layout – walnut vertical grained cabinetry, wall and floor tiles to create visual space to the room. A Nu-heat heated floor added to the comfort of the room.
 Custom Surface Solutions
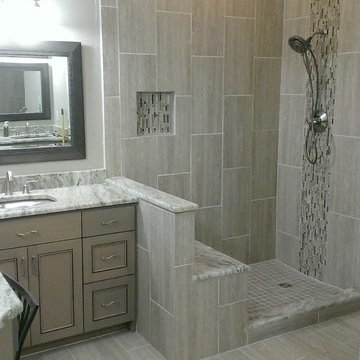
Custom Surface Solutions - Owner Craig Thompson (512) 430-1215. This project shows a remodeled master bathroom with 12" x 24" tile on a vertical offset pattern used on the walls and floors. Includes glass mosaic accent band and shower box, and Fantasy Brown marble knee wall top and seat surface.
 Housetrends Magazine
Old fixer-uppers often require two competing levels of priorities from their new homeowners. First and foremost is the need to immediately attend to those repairs that ensure the continued functioning and general well being of the house’s structure. By nature, these usually demand “house on fire!” status, especially when compared to other types of remodeling work that simply enhances aesthetics and general comfort.
In the case of a Delaware couple, a structural issue with the front of their 125 year old Victorian (it was sinking!), along with some other more pressing challenges, put a 13 year long hold on getting the bathroom for which they had long dreamed.
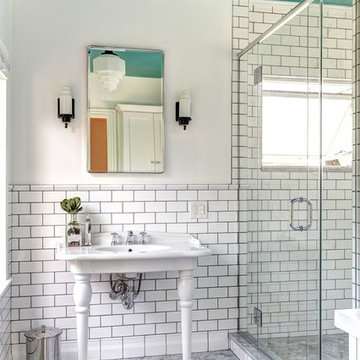
The shower enclosure features a base of hexagon patterned tile, bordered by marble subway tiles.
The shower enclosure features a base of hexagon patterned tile, bordered by marble subway tiles.
By the time Dave Fox Design Build Remodelers was hired to handle the construction, the couple certainly had put plenty of thought into converting a spare second-floor bedroom into the master bath. Courtney Burnett, Fox’s Interior Design Manager on the project, credits the owners for “having great creative minds, with lots of ideas to contribute.” By the time it came to put a formal design plan into place, the client “drove the look while we devised how the space would function.”
It’s worth noting that there are drawbacks in being given too much time for advance planning. Owners’ tastes in design may change, while a steady stream of new fixtures and building products always demand consideration up to the last minute. “We had been collecting ideas for a while…pictures of what we liked, but as it turned out, when it came time to select fixtures, tile, etc., we used little from those pictures,” the owners admit.
A framed herringbone pattern of subway tiles provides a perfect focal point for the shower.
A framed herringbone pattern of subway tiles provides a perfect focal point for the shower.
The finished bath exudes an art deco spirit that isn’t true to the home’s Victorian origins, which Burnett attributes to being more of a reflection of the homeowners’ preferences than the actual era of the structure. Despite that incongruity, everyone feels that they have remained true to the house by selecting vintage style elements, including subway tiles for the walls, hexagonal tile for the floors, and a pedestal sink that served as the focal point for the entire room.
But as with all dreams, once one is achieved, a new one soon beckons. With the bathroom’s strikingly beautiful turquoise paint barely dry, the completion of that long-awaited project has served to kick-start plans for finishing off the remainder of the Victorian’s second floor.
Sponsored
Fredericksburg, OH
High Point Cabinets
Columbus' Experienced Custom Cabinet Builder | 4x Best of Houzz Winner
 309design
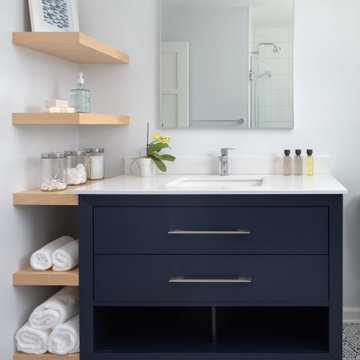
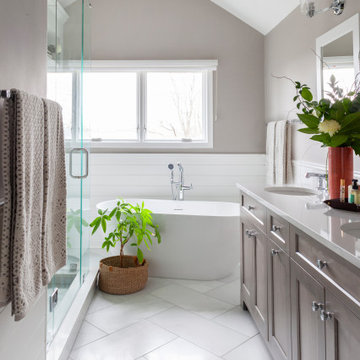
This beautiful, functional bathroom for the family's two daughters is a light, bright and modern space. The patterned tile floor speaks to a european influence, while the clean lined vanity mirrors the hue. The custom floating maple shelves give a clean, modern and functional storage component in a beautiful way. The frameless shower enclosure features white oversized tile with white penny rounds on the floor and the shampoo niche. A soothing space for a busy family.
 TKS Design Group
Free ebook, Creating the Ideal Kitchen. DOWNLOAD NOW
This client came to us wanting some help with updating the master bath in their home. Their primary goals were to increase the size of the shower, add a rain head, add a freestanding tub and overall freshen the feel of the space.
The existing layout of the bath worked well, so we left the basic footprint the same, but increased the size of the shower and added a freestanding tub on a bit of an angle which allowed for some additional storage.
One of the most important things on the wish list was adding a rainhead in the shower, but this was not an easy task with the angled ceiling. We came up with the solution of using an extra long wall-mounted shower arm that was reinforced with a meal bracket attached the ceiling. This did the trick, and no extra framing or insulation was required to make it work.
The materials selected for the space are classic and fresh. Large format white oriental marble is used throughout the bath, on the floor in a herrinbone pattern and in a staggered brick pattern on the walls. Alder cabinets with a gray stain contrast nicely with the white marble, while shiplap detail helps unify the space and gives it a casual and cozy vibe. Storage solutions include an area for towels and other necessities at the foot of the tub, roll out shelves and out storage in the vanities and a custom niche and shaving ledge in the shower. We love how just a few simple changes can make such a great impact!
Designed by: Susan Klimala, CKBD
Photography by: LOMA Studios
For more information on kitchen and bath design ideas go to: www.kitchenstudio-ge.com
 Lorain Design Associates
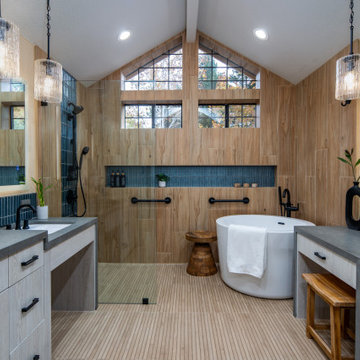
With our design expertise and experienced project management, Lorain Design remodeled all 3 Bathrooms and the Laundry Room for these clients with large format patterned wood grain tile and light textured laminate cabinets that we fell in love with.
The warm look of wood-tone tile is one of our current favorites for creating an inviting spa-like ambiance for bathrooms.
The Primary Bath was made with an eye for aging in place and it's gorgeous! One sink is lower with knee space for a wheelchair if needed and the shower access has no curb or shower door to get in the way.
 Hull Forest Products - Wide Plank Floors
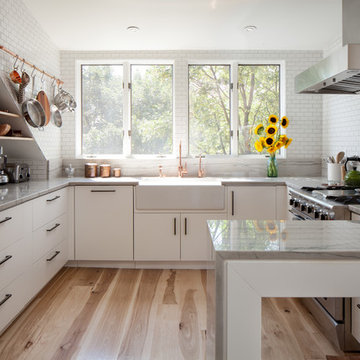
Locally grown American Hickory floors with natural color and grain variation sawn in the USA and available mill-direct from Hull Forest Products. Nationwide shipping 1-800-928-9602. https://www.hullforest.com.
Photo by Matt Delphenich.

Sponsored
Columbus, OH

Hope Restoration & General Contracting
Columbus Design-Build, Kitchen & Bath Remodeling, Historic Renovations
 Associate Interiors
Main Floor Photography
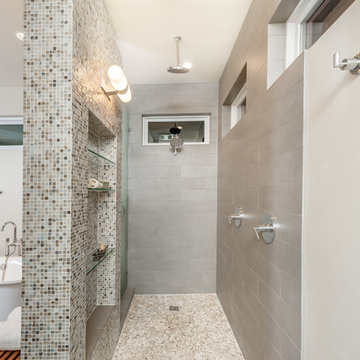
Example of a mid-sized transitional gray tile and porcelain tile pebble tile floor bathroom design in Other with an undermount sink and beige walls
Example of a mid-sized transitional gray tile and porcelain tile pebble tile floor bathroom design in Other with an undermount sink and beige walls
 The Artisans Group, Inc.
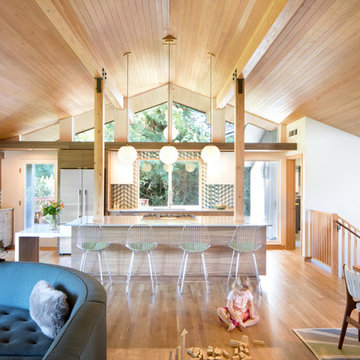
Winner of the 2018 Tour of Homes Best Remodel, this whole house re-design of a 1963 Bennet & Johnson mid-century raised ranch home is a beautiful example of the magic we can weave through the application of more sustainable modern design principles to existing spaces.
We worked closely with our client on extensive updates to create a modernized MCM gem.
Extensive alterations include:
- a completely redesigned floor plan to promote a more intuitive flow throughout
- vaulted the ceilings over the great room to create an amazing entrance and feeling of inspired openness
- redesigned entry and driveway to be more inviting and welcoming as well as to experientially set the mid-century modern stage
- the removal of a visually disruptive load bearing central wall and chimney system that formerly partitioned the homes’ entry, dining, kitchen and living rooms from each other
- added clerestory windows above the new kitchen to accentuate the new vaulted ceiling line and create a greater visual continuation of indoor to outdoor space
- drastically increased the access to natural light by increasing window sizes and opening up the floor plan
- placed natural wood elements throughout to provide a calming palette and cohesive Pacific Northwest feel
- incorporated Universal Design principles to make the home Aging In Place ready with wide hallways and accessible spaces, including single-floor living if needed
- moved and completely redesigned the stairway to work for the home’s occupants and be a part of the cohesive design aesthetic
- mixed custom tile layouts with more traditional tiling to create fun and playful visual experiences
- custom designed and sourced MCM specific elements such as the entry screen, cabinetry and lighting
- development of the downstairs for potential future use by an assisted living caretaker
- energy efficiency upgrades seamlessly woven in with much improved insulation, ductless mini splits and solar gain
 Drury Design
THE SETUP
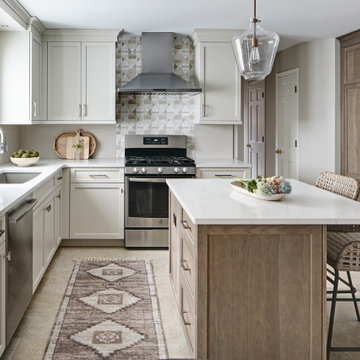
Client Background: Our clients, a couple who have transitioned into the empty nest phase, have cherished their home for over three decades without undergoing any significant renovations. With a newfound desire to adapt their living space to better suit their current lifestyle, they’ve embarked on a journey to reimagine their kitchen — the heart of their home. Their aspiration is to cultivate a serene, neutral-toned sanctuary on the first floor that seamlessly merges with their family room, ensuring a harmonious and inviting environment.
Design Inspiration: The renovation is inspired by the couple’s penchant for soft, calming neutrals, using their cherished family room and the kitchen’s existing tile flooring as the cornerstone for the color scheme. This approach aims to foster a sense of warmth and tranquility throughout.
Design Objectives:
Harmonize the kitchen with the family room by adopting a soothing, neutral color scheme, ensuring a seamless flow across the first floor.
Enhance kitchen functionality with thoughtfully designed cabinetry, providing a designated place for every item and maximizing storage efficiency.
Cultivate an inviting and comfortable atmosphere that reflects the homeowners’ desire for a calm and relaxing space.
Design Challenges:
The homeowners wish to retain the existing kitchen tile flooring and integrate it into a refreshed, modern design.
Accommodating a dining area spacious enough for family visits without compromising the kitchen’s open feel or functional layout.
Despite liking the current placement of plumbing and appliances, the homeowners aspire for a more open floor plan to facilitate better movement and interaction.
The need to amplify natural light in the kitchen, especially around the sink area, where existing lighting is insufficient.
Preserving the half-wall between the kitchen and family room, a feature the homeowners want to keep, while ensuring it complements the new design.
THE RENEWED SPACE
Design Solutions:
By choosing a neutral color palette that complements the existing tile, the design unifies the kitchen with the adjacent spaces. The tile’s grout was cleaned and restored, enhancing the floor’s appearance and integrating it seamlessly with the new kitchen aesthetic.
The inclusion of a larger island with seating for two, alongside maintaining a substantial dining table, was achieved by optimizing the spatial layout. This allowed for a sociable yet functional kitchen, accommodating large family gatherings without feeling crowded.
Minor adjustments to the kitchen’s layout maintained the preferred locations for plumbing and appliances while introducing an ‘open’ design concept. Strategic modifications, such as angling the pantry wall, improved the flow and accessibility within the space.
Replacing the garden window with a broader, standard window significantly increased natural light, transforming the sink area into a bright, welcoming space with enhanced views of the outdoors.
The decision to keep the half-wall was ingeniously leveraged to define the dining area while maintaining an open connection to the family room. This feature not only serves as a visual separator but also ties the two spaces together through the shared color scheme and design elements.
The homeowners are thrilled with their newly remodeled kitchen, which has become a hub of warmth and hospitality. Hosting a wedding shower and a birthday party, they have shared their renewed space with friends and family, who have been equally enamored. This remodel has not only met their functional and aesthetic desires but has also enriched their home with a fresh sense of serenity and joy.
The upstairs part of the home is shaping up nicely. Here’s their newly remodeled primary bathroom.
1