
Search results for "Adequately" in Home Design Ideas
 Gramophone
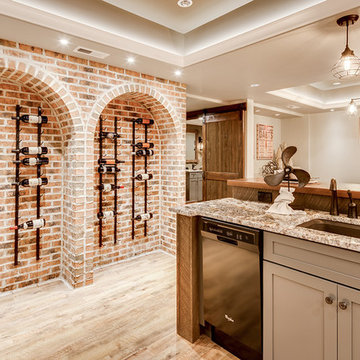
The client had a finished basement space that was not functioning for the entire family. He spent a lot of time in his gym, which was not large enough to accommodate all his equipment and did not offer adequate space for aerobic activities. To appeal to the client's entertaining habits, a bar, gaming area, and proper theater screen needed to be added. There were some ceiling and lolly column restraints that would play a significant role in the layout of our new design, but the Gramophone Team was able to create a space in which every detail appeared to be there from the beginning. Rustic wood columns and rafters, weathered brick, and an exposed metal support beam all add to this design effect becoming real.
Maryland Photography Inc.
 Uccello Fine Homes, LLC
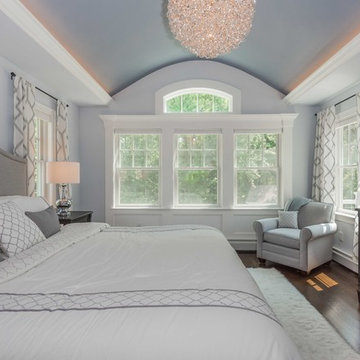
The transitional style of the interior of this remodeled shingle style home in Connecticut hits all of the right buttons for todays busy family. The sleek white and gray kitchen is the centerpiece of The open concept great room which is the perfect size for large family gatherings, but just cozy enough for a family of four to enjoy every day. The kids have their own space in addition to their small but adequate bedrooms whch have been upgraded with built ins for additional storage. The master suite is luxurious with its marble bath and vaulted ceiling with a sparkling modern light fixture and its in its own wing for additional privacy. There are 2 and a half baths in addition to the master bath, and an exercise room and family room in the finished walk out lower level.
 Kimberlee Marie Interiors
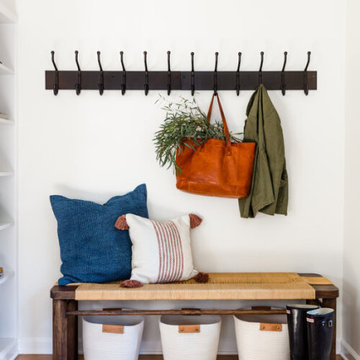
Set in the charming neighborhood of Wedgwood, this Cape Cod-style home needed a major update to satisfy our client's lifestyle needs. The living room, dining room, and kitchen were all separated, making it hard for our clients to carry out day-to-day life with small kids or adequately entertain. Our client also loved to cook for her family, so having a large open concept kitchen where she could cook, keep tabs on the kids, and entertain simultaneously was very important. To accommodate those needs, we bumped out the back and side of the house and eliminated all the walls in the home's communal areas. Adding on to the back of the house also created space in the basement where they could add a separate entrance and mudroom.
We wanted to make sure to blend the character of this home with the client's love for color, modern flare, and updated finishes. So we decided to keep the original fireplace and give it a fresh look with tile, add new hardwood in a lighter stain to match the existing and bring in pops of color through the kitchen cabinets and furnishings. New windows, siding, and a fresh coat of paint were added to give this home the curbside appeal it deserved.
In the second phase of this remodel, we transformed the basement bathroom and storage room into a primary suite. With the addition of baby number three, our clients wanted to create a retreat they could call their own. Bringing in soft, muted tones made their bedroom feel calm and collected, a relaxing place to land after a busy day. With our client’s love of patterned tile, we decided to go a little bolder in the bathroom with the flooring and vanity wall. Adding the marble in the shower and on the countertop helped balance the bold tile choices and keep both spaces feeling cohesive.
Find the right local pro for your project
 Ben Quie & Sons
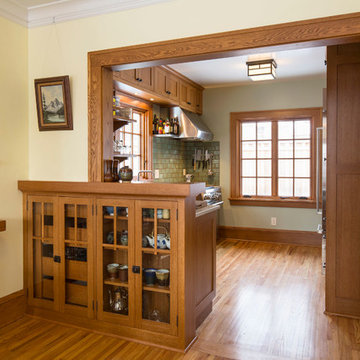
In their third remodel with us, this young family wanted to update their craftsman bungalow kitchen. The existing kitchen already opened up into the dining room from one of our previous renovations. However, the kitchen still lacked adequate counter space and attractive, functional storage.
This project started with an aesthetic compromise– he wanted a stainless steel kitchen, she wanted a more traditional style. The final result has modern lines and smooth surfaces, combined with natural variation and texture.
Handmade ceramic tiles from North Prairie Tile add a touch of rustic warmth. The rift-sawn white-oak has a more subdued pattern than the usual plain sawn oak.
Before the renovation, a free standing island added storage and counter space to the kitchen. This design added a built-in version of this makeshift solution. The new transitional cabinet is custom built to match the existing buffet in the dining room, and keeps dishes and tools out of sight.
A continuous London Grey granite counter top provides enough work space to make cooking and entertaining easy. Custom stainless steel shelves near the range are easy to clean and keep messy oils within reach. Photography by Troy Thies
Design: Joseph Metzler / SALA Architects
 Renovisions
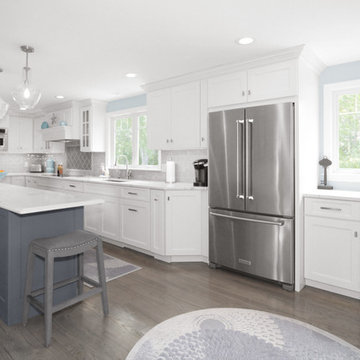
The kitchen is where you spend most of your time, shouldn’t it be the most inviting room in the house? That was the logic behind this South Shore of Boston Renovision. The owners entertained frequently but struggled with lack of organized storage space and poor flow for traffic in and out of their kitchen.
Renovisions totally reorganized the way the kitchen worked. The wall between the family room and kitchen was re-built to accommodate bar stools and added countertop space. Considerations were given to the design layout for a separate beverage/wine refrigeration station, while making sure additional prep space was adequate. A better flow in the kitchen was created, eliminating the annoyance of the typical ‘bottle-neck’.
Fine shaker cabinetry in a white painted finish with contrasting dark blue-grey island cabinets which boast large, deep drawers set the stage. A full gamut of appliances was provided including a 36” induction cooktop, convection microwave, double wall ovens, full size refrigerator and a bar refrigerator. The matching paneled dishwasher ensured an integrated look. The custom wood hood along with the unique shaped arabesque glass tile design frames a stunning focal point when entering this kitchen. Glass mullion doors flanking the hood with clear seeded glass created an upscale look and coordinated with the seeded glass shades of the island pendants.
Renovisions custom fit red oak wood flooring to match the existing floor and then re-finished with a grey stain and 3 coats of poly to add durability while also providing a beautiful new look throughout the house.
Good lighting is key especially when spending so much time in a space. LED under-cabinet lights, recessed ceiling lights and three separate pendant fixtures which all operate on dimmer switches created options for mood lighting, work lighting and everything in between. New double-hung windows with 6/1 grid configurations were added in just the right places – adding more essential natural light.
In addition to the kitchen ‘Renovision’, two corner cabinets in a white painted finish were installed in the dining room to not only accommodate the clients fine china and glassware, but also to provide a more custom built-in look to the space with the interior of the cabinets matching the wall.
Overall, our client could not have been happier with the completed project. Family, friends and guests were impressed with the design and fit and finish of every detail provided by Renovisions.
 Gramophone
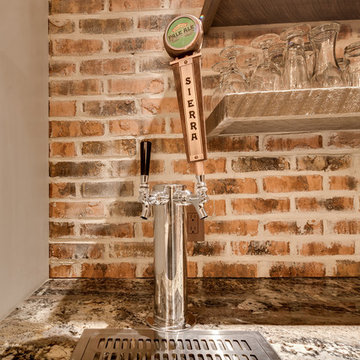
The client had a finished basement space that was not functioning for the entire family. He spent a lot of time in his gym, which was not large enough to accommodate all his equipment and did not offer adequate space for aerobic activities. To appeal to the client's entertaining habits, a bar, gaming area, and proper theater screen needed to be added. There were some ceiling and lolly column restraints that would play a significant role in the layout of our new design, but the Gramophone Team was able to create a space in which every detail appeared to be there from the beginning. Rustic wood columns and rafters, weathered brick, and an exposed metal support beam all add to this design effect becoming real.
Maryland Photography Inc.
 Leslie Klinck - Closet Factory
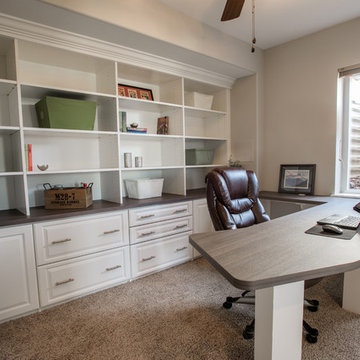
When my clients recently purchased this home, this room in the basement was a playroom for the previous owner's children. Marc works from home frequently and needed a functional, organized, and quiet space to work. In addition, he and his wife, Michele wanted to be able to store a collection of photo albums. The project had a few challenges, including the height of the window, a door that swings into the room, and a water valve access panel that needed to be moved. Marc took care of the water valve acces, and we did the rest. File storage, office supply storage, adjustable shelves, adequate counter space, crown moulding, and raised panel doors and drawers, make this room both stylish and functional.
Photographs by Libbie Martin
 RAJ Kitchen and Bath, LLC
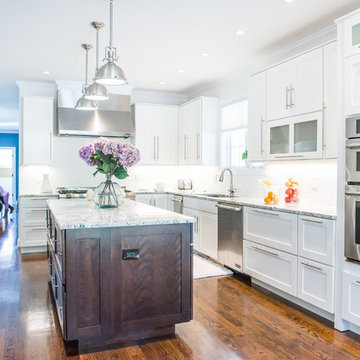
Ever think about cooking in style and comfort? then look no further. This transitional Kitchen design is not only modern but is also practical. This home was built from the ground up, so we were fortunate to design this kitchen from a blank slate. Features of the kitchen includes: White paint grade Maple wood Cabinet, Island from Maple wood with espresso finish, big Island with tons of space and outlet on side panel, airy with natural lighting, adequate counter space, huge built-in Pantry, kitchen nook, stainless steel built-in appliances, plenty of overhead and bottom storage, stainless steel handles, built-in wine cooler.
 R&J Painting LLC
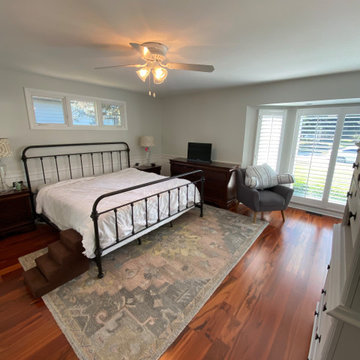
Adequately and sufficiently prepared ahead of services
All cracks, nail holes, dents and dings patched, sanded and spot primed
All Trim and Base boarding primed and painted
Walls and Ceiling Painted
 Asbacher Architecture, AIA
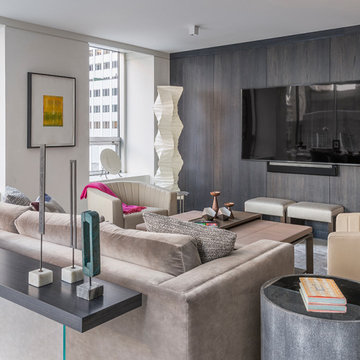
Originally owned by the renowned American architect Philip Johnson, this midtown Manhattan apartment comes with an impressive pedigree and an enviable view of the MoMa Sculpture Garden, one of New York City’s most beloved green spaces. The challenge of this complete renovation was maximizing every inch of the 1,100 square foot space to not only create efficient living spaces but also adequate storage, a client must-have.
Drawing inspiration from the clean lines and minimalism of early 20th century modernism, the complete renovation features a striking contrast of sleek dark and white paneled walls, soft wire-brushed limestone floors, and contemporary lacquered cabinetry. Floor to ceiling windows frame sweeping city views and the calming color palette throughout completes the elegant space.
 PARCEL Interior Design
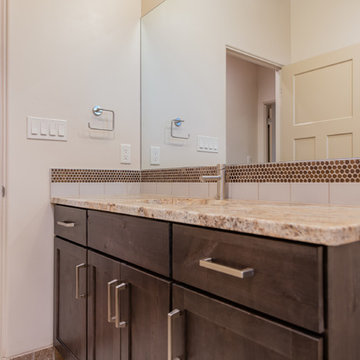
The master bathroom provided the mountain views from the raised height window but also provided adequate storage
Example of a trendy bathroom design in Albuquerque
Example of a trendy bathroom design in Albuquerque
 Tile Doctor Ltd
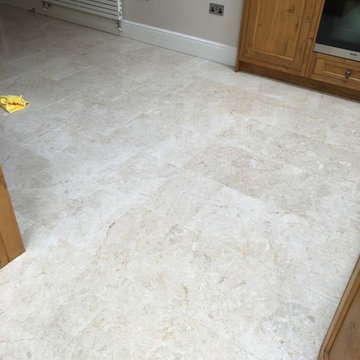
Marble tiles can be tumbled in large drums to achieve an aged and softened effect, and this can look very nice providing that the stone is adequately maintained.
In the case of this floor at a property in Twickenham South West London, the Marble tiles that had been laid over five years ago, and in that time the sealer had worn down offering the floor little protection. Dirt had now become ingrained in the pores of the stone and grout, and a deep clean and fresh seal were required to restore the stone’s original colour and lustre. The property owner asked me to complete the job and I was more than happy to oblige.
To begin the restoration, I applied both Tile Doctor Pro-Clean, which is a high alkaline cleaner, and Tile Doctor Remove and Go, which a heavy-duty stripper and remover, to the floor and scrubbed the products in using a scrubbing pad fitted to a professional rotary machine.
The chemical solvents in the Remove and Go helped to break down any old sealer that remained inside the stone, allowing the Pro Clean to then work its magic on the stubborn ingrained dirt the customer had struggled to remove previously. Some of the deeper veins and grout lines I chose to scrub by hand to ensure the fullest and most meticulous clean possible.
The resulting soiled cleaning solution was then pressure rinsed with water and the soil extracted with a wet-vacuum, leaving a completely clean floor that was now ready to be sealed using a new sealant.
I returned to the property the following day after allowing the Marble tiles to dry fully. Drying the tiles is a crucial part of the restoration process, since even a small quantity of excess moisture can cloud the sealer and prevent it from working to its fullest capabilities.
I applied two coats of our solvent-based impregnating sealer known as Tile Doctor Colour Grow. As the name of the product suggests, Colour Grow not only protects the tiles against ingrained soil, it also thoroughly lifts and enhances the natural colours in the stone.
The new seal will make it easy for our customer to maintain the floor, making daily cleaning easier. It will also protect the stone against the nasty spillages that are common in kitchens and living rooms.
The customer was thrilled with the much-improved appearance of the Marble tiles and is very reassured that they will now stay in great condition for a long time. Another satisfied client!
Jonathan Oldham
South Middlesex Tile Doctor
 Two Paddles
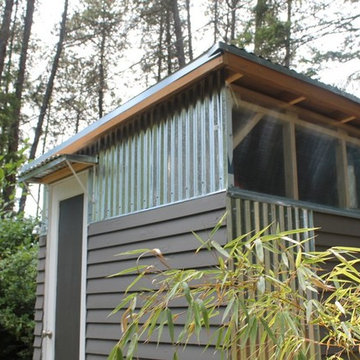
Eclectic siding patterns on the shed offer a creative use of reclaimed materials that sometimes come in smaller or odd shapes and sizes. A small solar setup grants adequate lighting along with a sturdy greenhouse window on the southern exposure.
Two Paddles LLC
 Renovisions
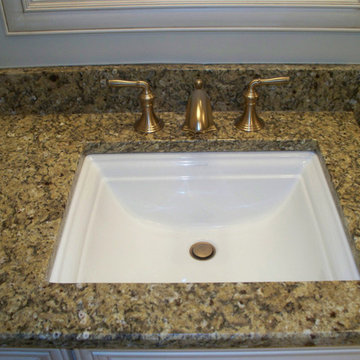
For this Full Bath, space was adequate but uninspiring. The homeowners realized this space was in need of a Renovision to make it suitable for their two Young adults in the home. Keeping the two sinks was necessary and mounted under ‘New Venetian Gold’ Granite. Ample Cabinetry finished in a white painted finish with espresso glaze and two large mirrors in matching painted finish set the tone to reflect the sumptuous materials. We worked with the homeowners to create a simple, yet unique tile design for the tub/shower walls and to show it off, we recommended a 2-door Frameless Glass Shower Enclosure. This French Door Glass Shower enclosure is convenient, yet provided an elegant look and made a positive impression on the young adults in the family.
 Advance Design Studio, Ltd.
Chris and Sofia of Arlington Heights knew when they purchased their home that they would finish the basement. They needed a space for the kids to hang out, for family and friends to stay, and to have a better space for hosting holidays and parties. The dark unfinished space went mostly unused for three years, but once their kids reached the ideal age for use of a well-built basement, they moved ahead with their plan.
“The old basement was dark and cold, and the kids came down and played, but they didn’t like it. The new space is like a whole other house, so we have this space for family game nights and for watching games or Super Bowl parties,” Chris said.
The couple found Advance Design Studio through a friend who had their entire home renovated by the remodeling company. After the initial meeting and visiting the showroom, Chris and Sofia were positive that Advance Design was the company that could best turn their unfinished basement into a family friendly space for everyone to enjoy.
“We really liked the showroom, we liked being able to choose all of those finishes and meet with them in one place,” Chris said.
A Custom Space for a Family with Multiple Needs
The project began with a fireplace focal point complete with an amazing entertainment wall, a fantastic full kitchen complete with every amenity, and a brand new full bath. The new basement truly has a space for everyone. If the kids want to watch a movie and hang out on the couch they can, if family wants to play games and have a pizza party on the large island they can, and if guests want to stay over night on the pull-out sofa they can enjoy the entire private “suite” complete with a full bath. It is the true definition of a multifunctional basement.
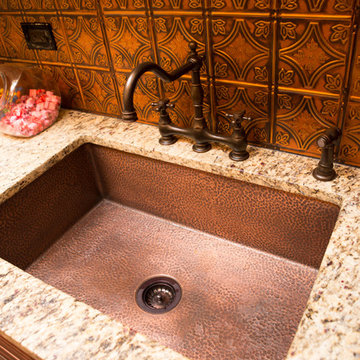
The stunning, full kitchen is the highlight of this now bright and airy basement. You walk down the stairs and are immediately impressed with the detailed metal tile work on the ceiling, bringing to mind the classic feel of a comfortable old pub. Cherry Merlot cabinets provide a rich contrast against the soft neutral walls and the contrasting copper tin ceiling tile and backsplash. Rich Santa Cecelia granite countertops pair nicely with timeless stonework on the outer walls.
The island is large enough to provide a more than adequate entertaining space, and provides plenty of both seating and storage. The well-appointed kitchen houses a regular size refrigerator, a full size oven for pizza parties and cookie baking anytime, a microwave oven as well as complete sink and trash set up. One could easily do without a home kitchen forever in this generously designed secondary space!
The fireplace and buffet wall seating area is the ideal place to watch movies or sporting events. The coordinating stonework on the fireplace flows throughout the basement, and a burnt orange accent wall brings color and warmth to otherwise ordinary basement space. The Elite Merlot media buffet compliments the kitchen as well as provides storage and a unique functional display option, giving this part of the basement a sophisticated, yet functional feel.
The full bath is complete with a unique furniture style cherry DuraSupreme vanity and matching custom designed mirror. The weathered look to the cabinets and mirror give the bathroom some earthy texture as does the stone floor in the walk-in shower. Soft blue makes the space a spa-like mini retreat, and the handsome wall to wall tile and granite speak luxury at every corner.
Advance Design added clever custom storage spaces to take advantage of otherwise wasted corners. They built a custom mudroom for the kids to house their sports equipment and a handy built in bench area with basket pull outs for a custom home gym. “They were able to custom fit this second mudroom with the lockers and the bench, they were able to custom build that, so the kids could store all of their equipment down here for the sports that they are in,” Chris said.
They Got The Amazing Space They Had Envisioned for Years!
The basement Chris and Sofia had envisioned had come to life in a few short months of planning, design and construction, just a perfect fit in the summer months. Advance Design Studio was able to design and build a custom, multifunctional space that the whole family can enjoy. “I would recommend Advance Design because of the showroom, because of the cleanliness on the jobsite and the professionalism, combined with Christine’s design side as well as Todd’s builder’s side - it’s nice to have it all together,” reminisced Chris after the project was complete.
 Cabinet Style Studio Ltd.
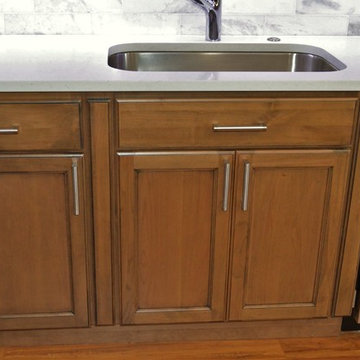
Client started a new fresh attitude lifestyle in a River Forest condo. Space was opened up; soffits were removed allowing cabinetry and crown detail to be taken all the way to the ceiling. All the walls and the water heater closet were removed. WE have an issue with the water heater closet which was inside the kitchen. To keep adequate hot water available, we had to retain a certain size. We put this inside of a pantry microwave cabinet, customizing the fit.
We added glass to two of the wall cabinetry to add some extra charm to this now open concept entertaining space. All of the appliances were updated. The Zephyr hood added great style and function. Client actually cooks and entertains. Having the larger, corner shaped island has become a center for quests as well as cooking work space.
The entire floor was redone, windows, and doors replaced. All new lighting added among many other details were updated.
This is now a delightful transitional living space perfect for living to the fullest.
 French Creek Designs Kitchen & Bath Design Center
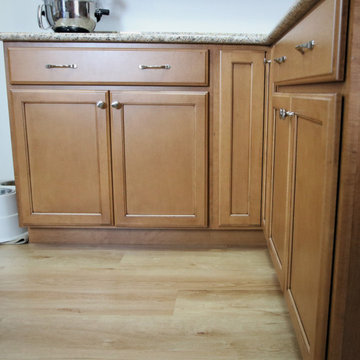
Client Kitchen Remodel 125 with stained maple cabinets and new countertops. This kitchen refresh is a great demonstration of taking a messy and underutilized corner of the kitchen and creating a beautiful useful space. They started by taking a pony wall and modifying it for the addition of cabinets and an updated island peninsula. Perfect for creating adequate storage and prep area. As well as doubling for a serving area. No more clutter and now a place that is streamlined as well as holds beautiful decor.

 King West Design & Build Corporation
The original house was built in 1960s. The entire space was separated into several rooms by partition walls. Clients would like to have open spaces. Therefore, we went through all the structural changes to bring the inspiration to life. The island size is 10ft long, which leaves adequate storage space.
 El Interior Designers Ltd
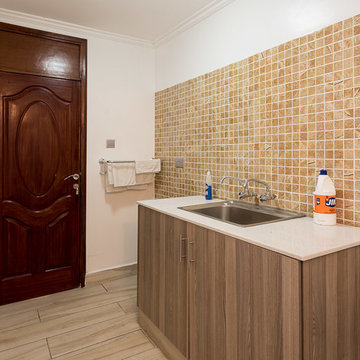
Alternative view of the laundry area showing the mahogany door that encloses the space. The colour combination work effectively to create a feel of spaciousness and adequate lighting.
 Tile Doctor Ltd
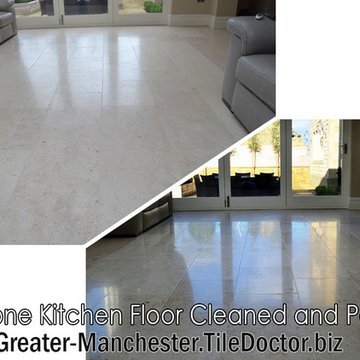
This beautiful Limestone kitchen tiled floor at a property in Peel Green was only a year old and, while it wasn’t in too bad of a state, the customer told me the floor had not been sealed properly due to issues with retaining moisture. The lack of an adequate sealer had allowed the Limestone to become duller over time after exposure to dirt and muck. It also had some more obvious marks and stains in some place and needed some grouting to be done around the corners and edges of the room.
I travelled to the property in Peel Green, which is within the Greater City of Salford in Greater Manchester, to see what could be done to restore the condition of the tiles.
Upon closer inspection of the tiles, I recommended to the customer that we proceed with the process known as burnishing, which we use primarily on Limestone, Marble, and Travertine. Burnishing, which involves the application of diamond encrusted burnishing pads, breaks down old sealers, gets rid of marks, stains and ingrained dirt, and gradually builds and evens out the polish on the tiles.
I started burnishing the Limestone kitchen tiles straight away when I arrived at the property as it was a big area and would require lots of hard work to achieve the desired results within the space of a day.
Our burnishing system consists of four diamond encrusted pads: Coarse, Medium, a Fine and Very Fine. Each pad was applied to the Limestone in sequence in tandem with a small amount of water to act as lubrication, gradually smoothing and polishing the surface of the tiles. After every pad, I also used my wet vac machine to remove any dirty water left on the floor and, after the Fine pad I rinsed the floor thoroughly to remove any dirt left on floor. I then left it to dry.
When I was satisfied that the floor was completely dry, it was time to seal the Limestone tiles. However, I first went over the floor with Very Fine grit pad to provide a final polish before sealing.
My choice of sealer was the impregnating Tile Doctor Colour Grow, a product which enhances the natural colours in the stone whilst also offering robust protection against dirt and stains. Remembering that the tiles had never been properly sealed, I applied plenty of sealer and left it to dry for 10 minutes. Following this, I carefully removed any excess sealer left on the surface with a dry cotton cloth. After sealing I went over the floor once final time with the Very Fine pad, just to smoothen things down and leave an exceptionally neat finish.
When the job was finished, I gave the owner some tips and recommendations on the cleaning of the floor going forward and a complimentary bottle of neutral cleaner to get them started.
The customer was very pleased with the finish, so much so that she opted and take up the Tile Doctor Maintenance Plan to keep the floor looking good for years to come! This involves popping round every 6-12 months to top up the sealer and give the floor a quick polish.
Tony Olmet
Greater Manchester Tile Doctor
43